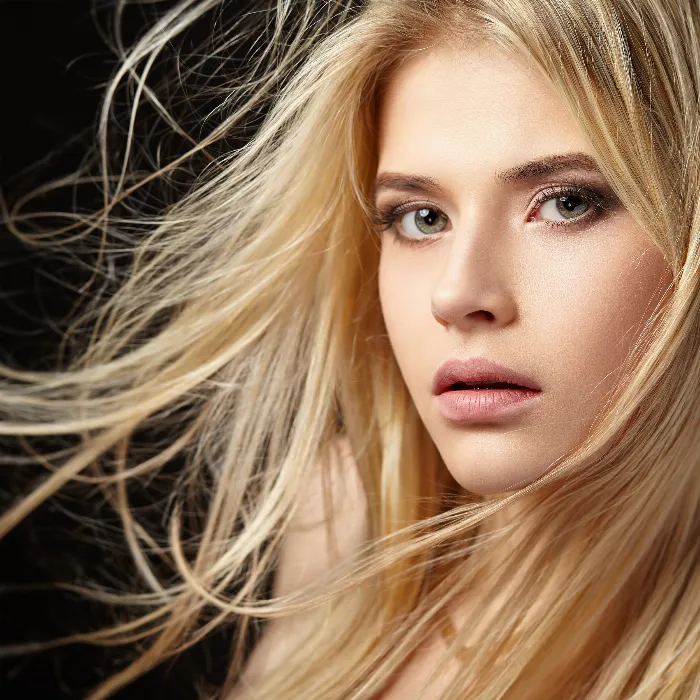
Extract is a filter for cropping that can be used to solve certain hairy issues such as curls, animal fur or the plumage of a bird.
First of all, I'll give you some tips on how the optional add-on module, which was standard in Photoshop CS3, is integrated in CS4.
In the first example, I will show how the filter and its tools work using a cockatoo crop.
In a second example, I'll get down to the nitty-gritty: here I'll show you how to crop a woman with a curly wig. The selected image material is not optimal for a higher learning effect - and as is often the case in practice due to one-sided focusing in the subject - i.e. one side is in focus, the other contains depth of field. The out-of-focus side is then worked on separately with a few tricks in order to achieve a decent and sharp result there too.
The Extract filter
With the update from Photoshop CS3 to CS4, the Extract filter no longer appears under the Filter menu in Photoshop.
The Extract technique was used in particular to remove hair from people and animal fur and has proven its worth up to this point.
For all those who still like to use the Extract filter despite quick selection tools, path tools and other clipping options, there is a way to use this filter for version CS4 as well.
The Extract filter is now an optional plug-in that is not installed automatically, but must be set up manually.
You can find the filter on the installation DVD under "Extras/Optional additional applications". Or, if you still have Photoshop CS3 installed on your computer, look in the PS CS3 filter directory and copy the Extract filter file. It has the name: ExtractPlus.8bf and can be found under Adobe Photoshop CS3/Add-on modules/Filters. Simply copy this file and paste it into the corresponding folder structure for version CS4. The Extract filter will then reappear in the Photoshop filter menu.
The disadvantages of this filter are as follows:
The Extract filter is not available in 16-bit mode. The clipping is destructive. The foreground is cut out of the background. The background is simply deleted from the corresponding layer. You should therefore always duplicate the layer before using it.
Despite the disadvantages and also more precise and non-destructive options for clipping, Extract is still suitable for clipping fine, undefined edges such as curls and fur.
Clipping the cockatoo's plumage
First, I duplicate the background layer(Ctrl+J) because the Extract technique is a destructive, i.e. pixel-destroying method. I select Filter>Extract from the menu. The Extract dialog box opens.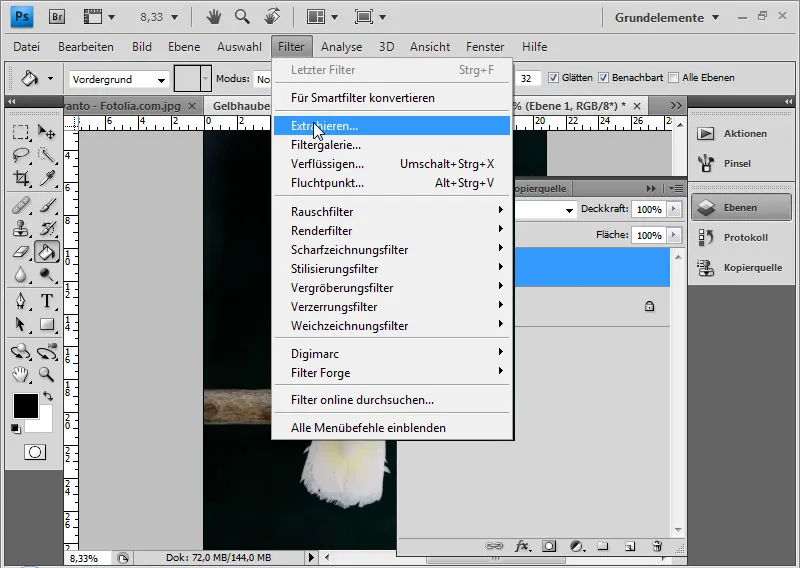
There are some tool icons on the left and some setting options on the right.
Image source cockatoo: archaeopteryx-stocks.deviantart.com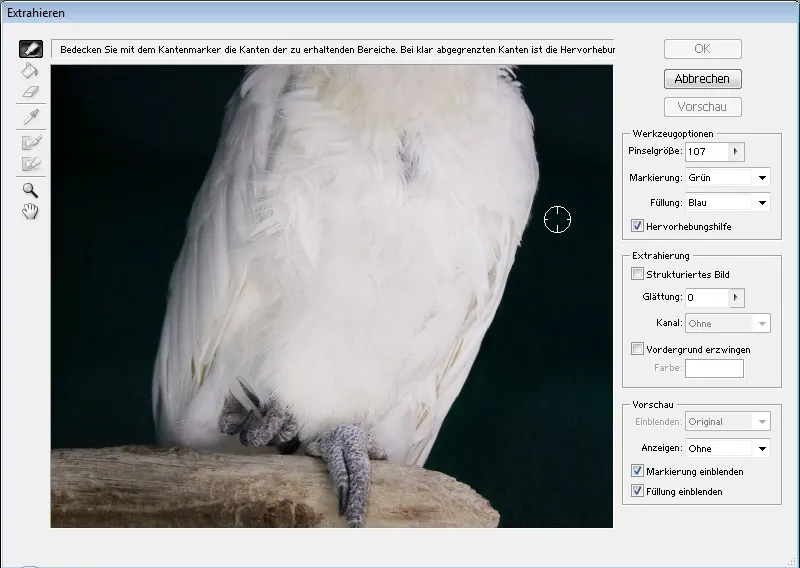
The edge marker is activated at the top left. I use this to trace the edges of the object to be cropped. I choose a small brush size for sharp edges. It is also advisable to activate the highlighting aid here. The highlighting aid automatically assigns the brush size for a clear edge. This is then just big enough to avoid unnecessary foreground areas being extracted. The highlighting aid also has a somewhat magnetic effect and it is easier to mark the edges.
The highlighting is preset as a green color. It is advisable to zoom into the image. I can do this with the zoom tool (Z) or with Ctrl+plus sign (+). I can move the view with the hand tool (H) or space bar.
I have selected a small brush size with the highlighting tool activated and will highlight all sharp edges.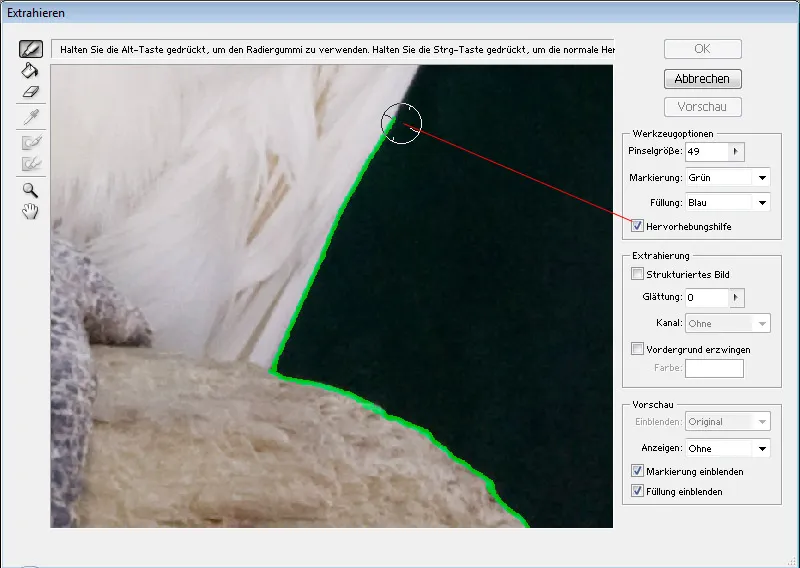
If I make a mistake when marking the edges, I can use the eraser to undo the markings.
For the more complex edges, I select a larger brush and deactivate the highlighting aid.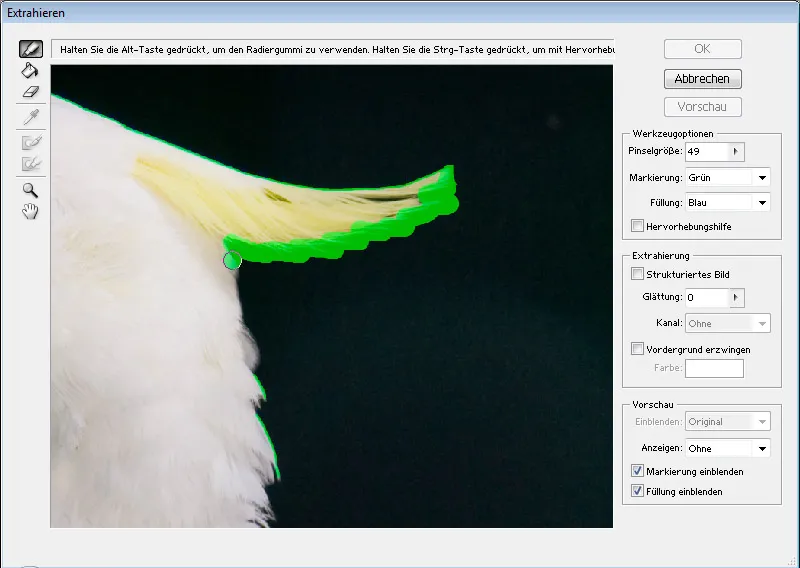
Once the edges of the image are completely marked, I select the fill tool and click to fill the inner area.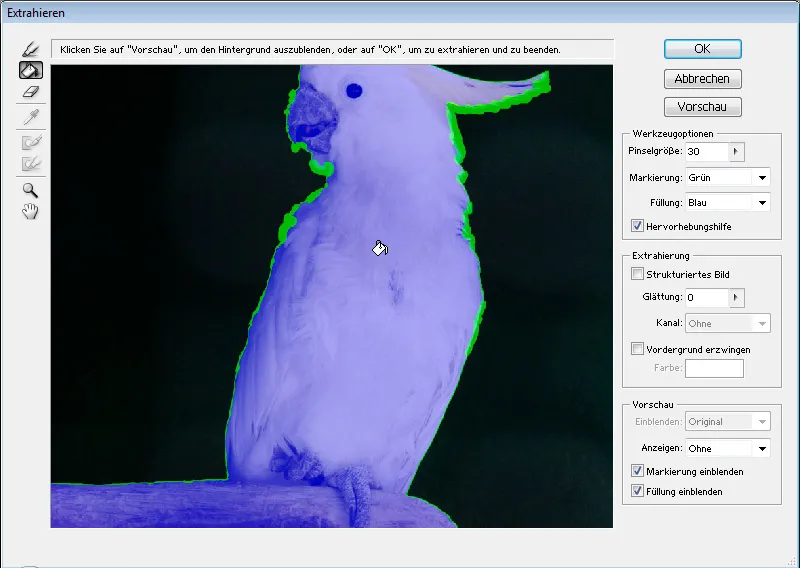
If the entire image is filled with blue color, then the edges have not been marked correctly and there is a gap in the marking.
Now I select Preview. It is advisable to assign a background in the preview at the bottom right under Show, depending on the image motif black, white or another color assigned via the color picker. With different colors, I can also better judge the accuracy of the cropping.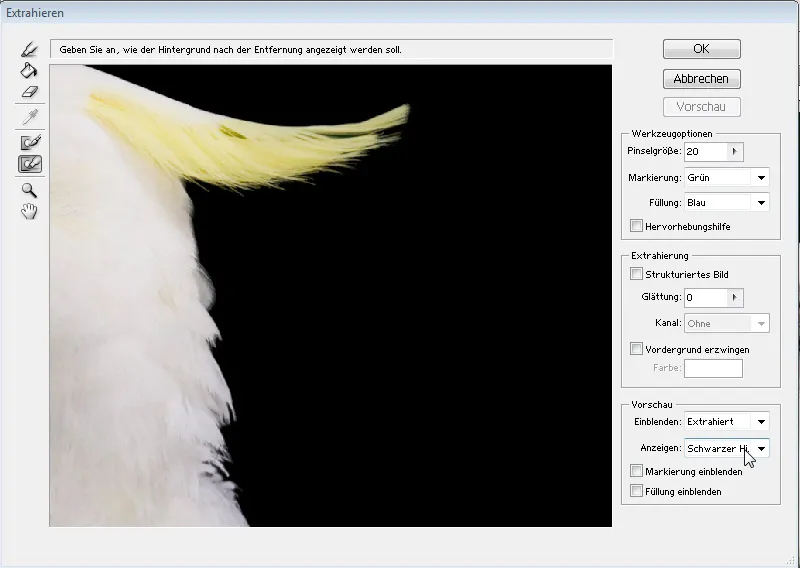
Now I can see what the result will look like.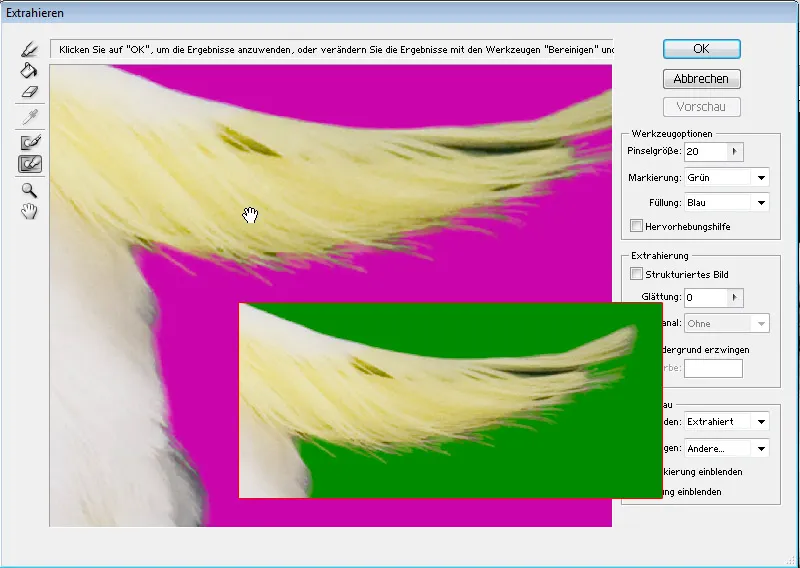
If I have unclean edges, I can either remove them with the edge refiner or sharpen them by holding down the Alt key.
If too many areas have been removed, I can get them back with the clean-up tool by pressing the Alt key. For remnants that still need to be removed, I use the tool as normal. The application is similar to a layer mask with the colors black and white.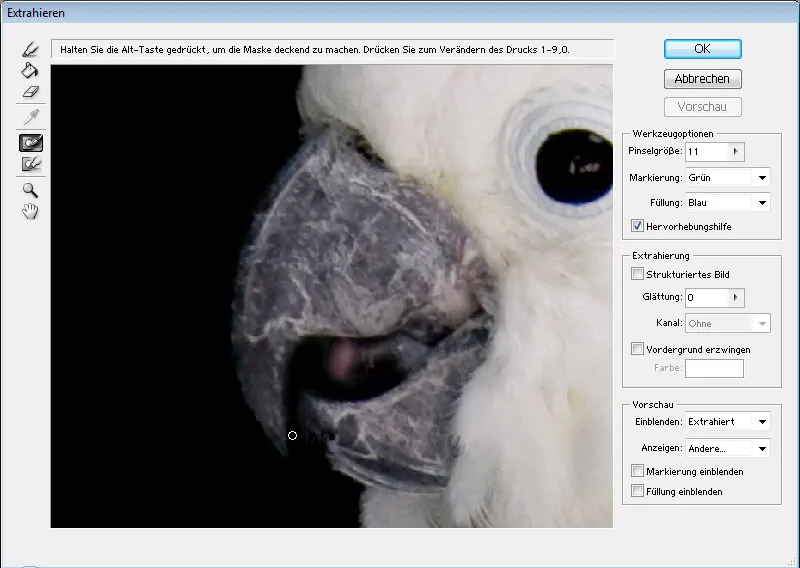
If the result is satisfactory, I confirm with OK.
I now have my cropped motif, under which I have placed a black layer for a better view.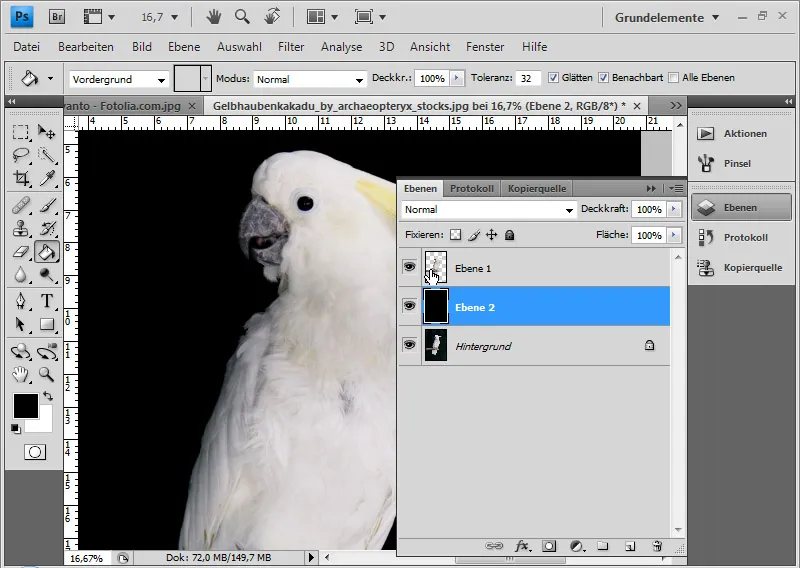
There is a way to use the result for further non-destructive processing. First, I duplicate the background layer again. I then Ctrl-click orright-click>Select pixels on the layer thumbnail of the layer with the clipping. Now I activate the previously duplicated layer and add a layer mask to it. If necessary, I can improve the edge of the selection beforehand.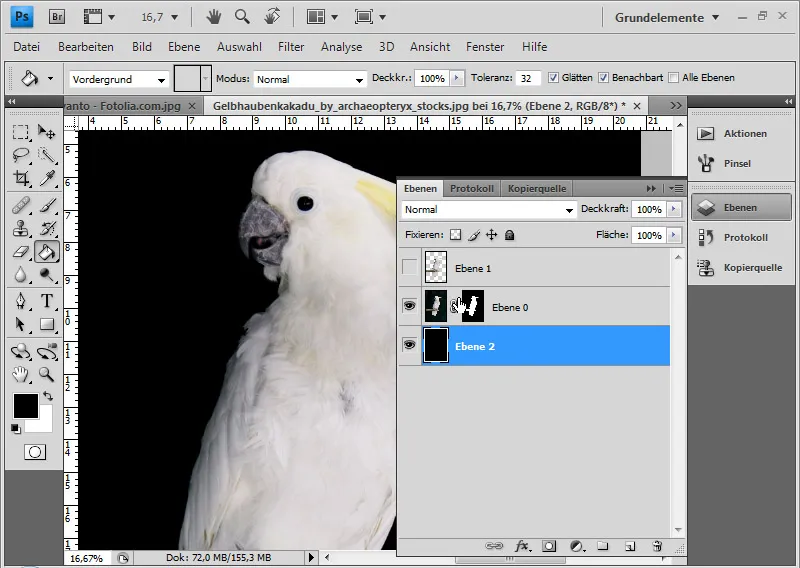
If there are still unclean edges, I can save them with the protocol brush. To do this, I open the log and set the source one step before the extraction process. Now I can paint along the edge with the protocol brush to bring it back to its original state.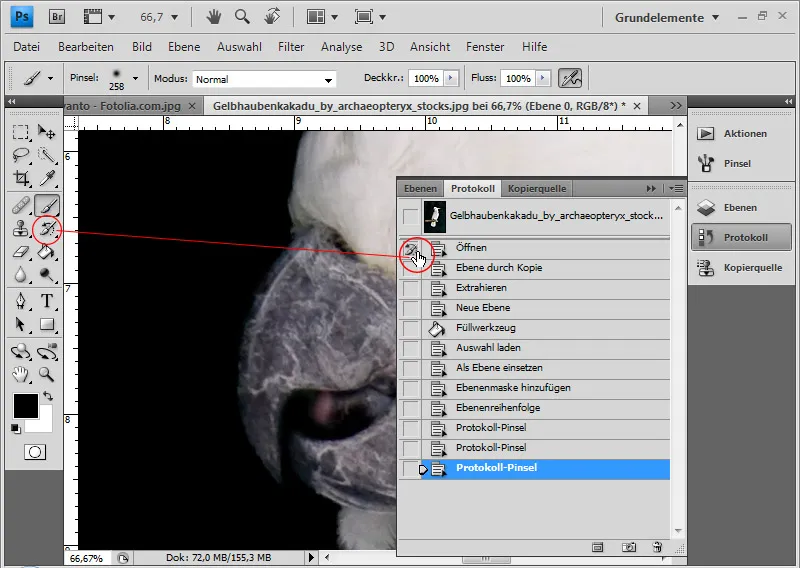
The cockatoo is now perfectly cropped.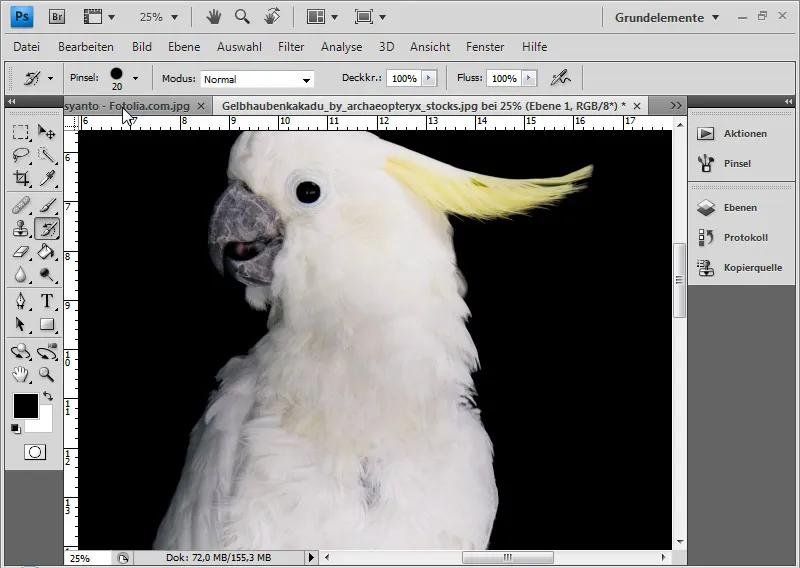
Cut out curly hair
In this example, I would like to show some useful techniques on how to further optimize an extracted image.
Image source: Paulus Rusyanto - Fotolia.com
I will repeat the steps just described with this subject.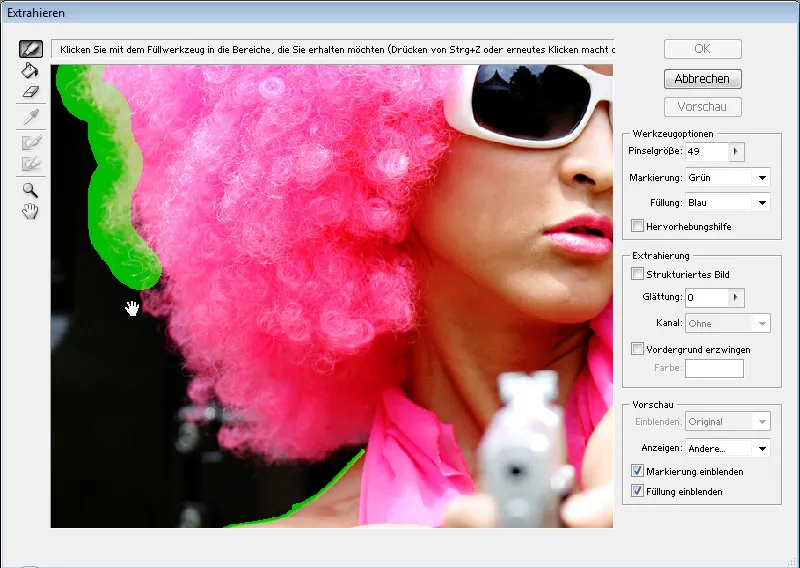
Extraction is particularly useful for curls, because cropping with channels is often made much more difficult by irregular backgrounds. The right-hand side of the motif is somewhat blurred due to the photography. I will use the copy stamp to place parts of the left side of the hair there so that the curls stand out sharply from the background.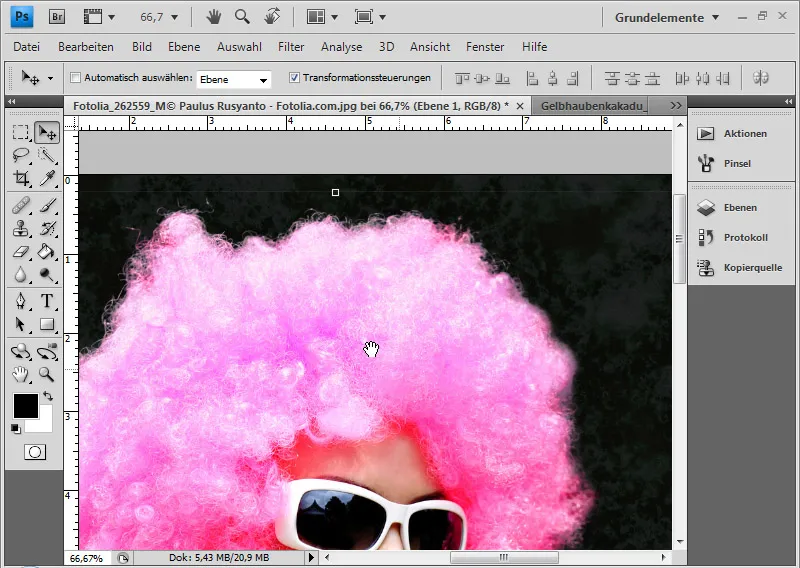
I open the Copy source window. Now I press the Alt key and left mouse button in the source area. It is important that the check mark next to Aligned in the menu bar is removed. This keeps the source area fixed and prevents it from moving.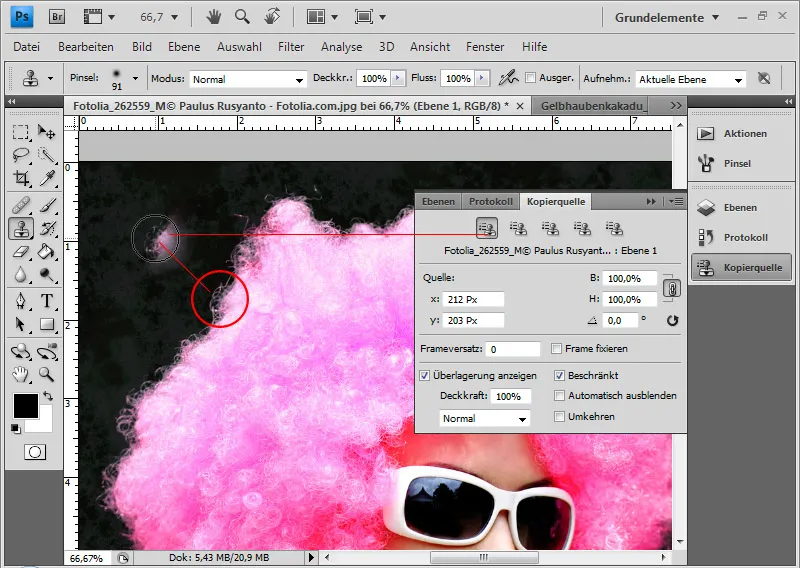
I can rotate the tool tip in the copy source. If I have clicked in the number field, I can also use the mouse wheel to further determine the inclination. In normal mode, this is in 0.1 increments. If I hold down the Shift key, I can determine the inclination in 1.0 steps.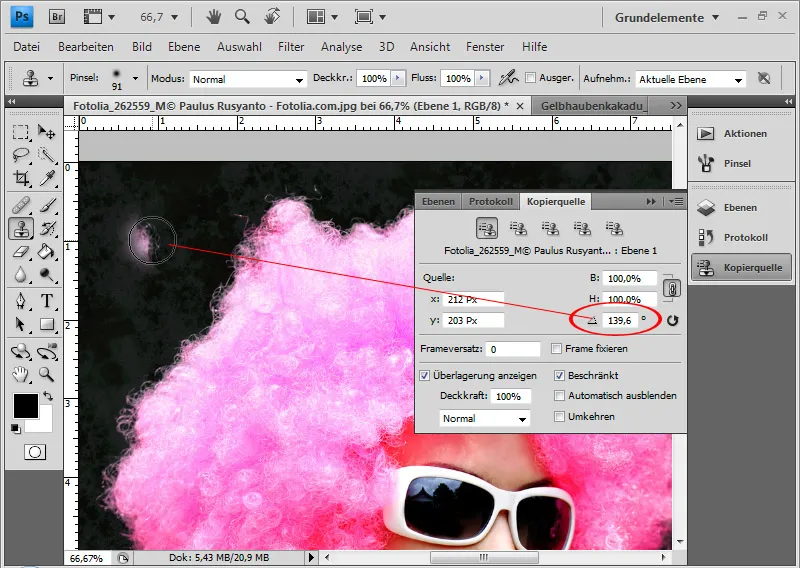
Now I can improve the right-hand side bit by bit with copies of the left-hand side. It makes sense to create several source areas that are slightly different from each other in terms of color and structure. These only need to be rotated accordingly and can then be stored in the five copy source presets in the Copy source window. I can then use the individual rotated source presets to stamp my right-hand blurred page with the sharp copies of the left-hand page.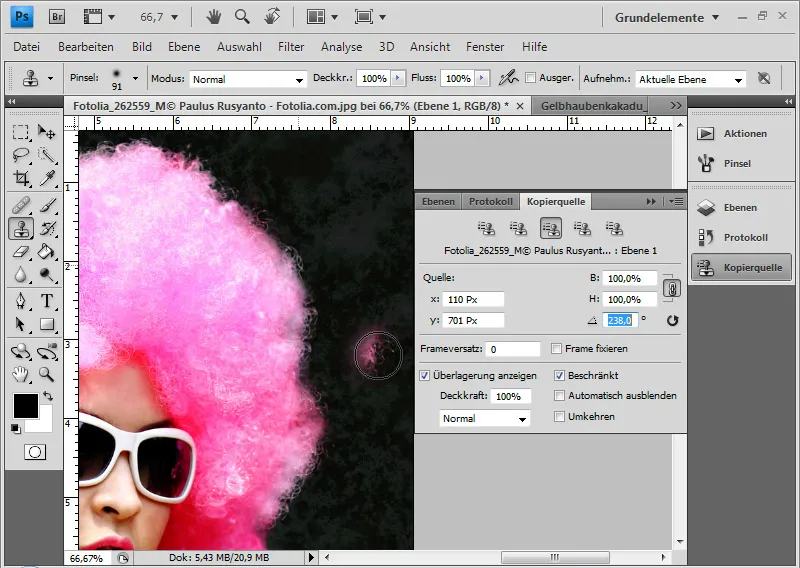
Tip: Due to the transparency at the hairline, it is always a good idea to duplicate the finished clipped layer and apply a different blending mode to the lower of the two. In my example, I have chosen Negative multiply. This gives the hairline better contrast.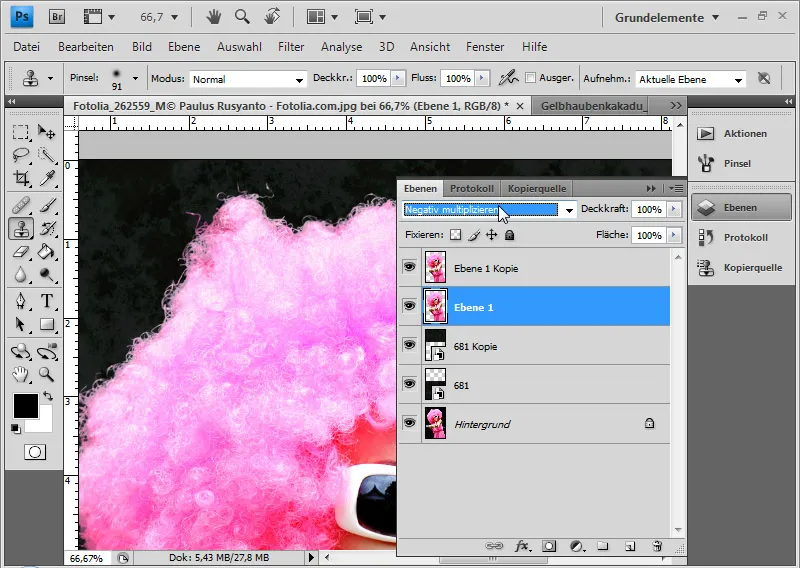
The edited clipping is finished.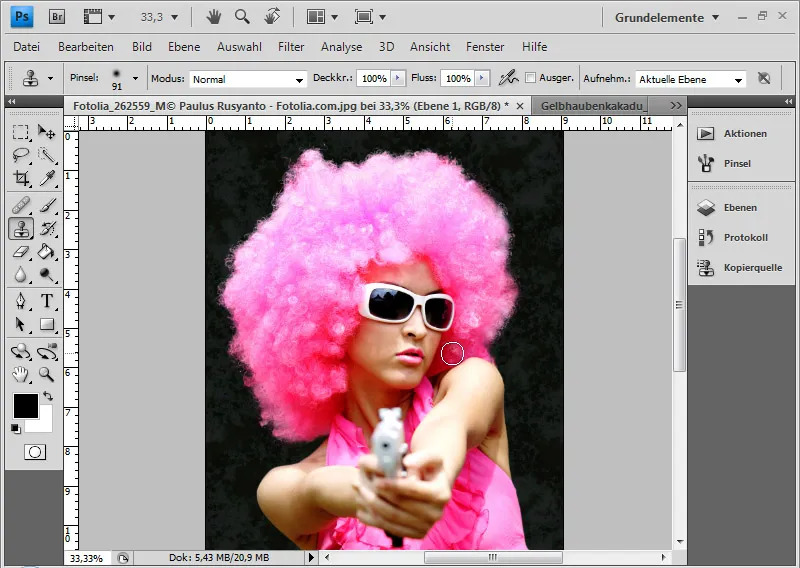
Tip: The copy stamp technique is explained in another example in the seventh part of the compendium for clipping errors and transparencies in images.
