Do you want to set up your own OpenVPN server? That's a great decision to secure your connection and protect your privacy. This tutorial will guide you through the installation of OpenVPN as well as the creation of a CA directory with example data. Let's get started.
Key takeaways
- You install OpenVPN using the Easy-RSA package.
- Creating a CA directory is crucial for certificate management.
- Basic commands and steps for configuration are explained.
Step 1: Install OpenVPN
Start by installing OpenVPN on your server. It is important that your server is already preconfigured and the firewall is enabled.
Run the following command in your terminal:
sudo apt-get install openvpn easy-rsa
The system will begin the installation. Make sure no errors occur during this process.

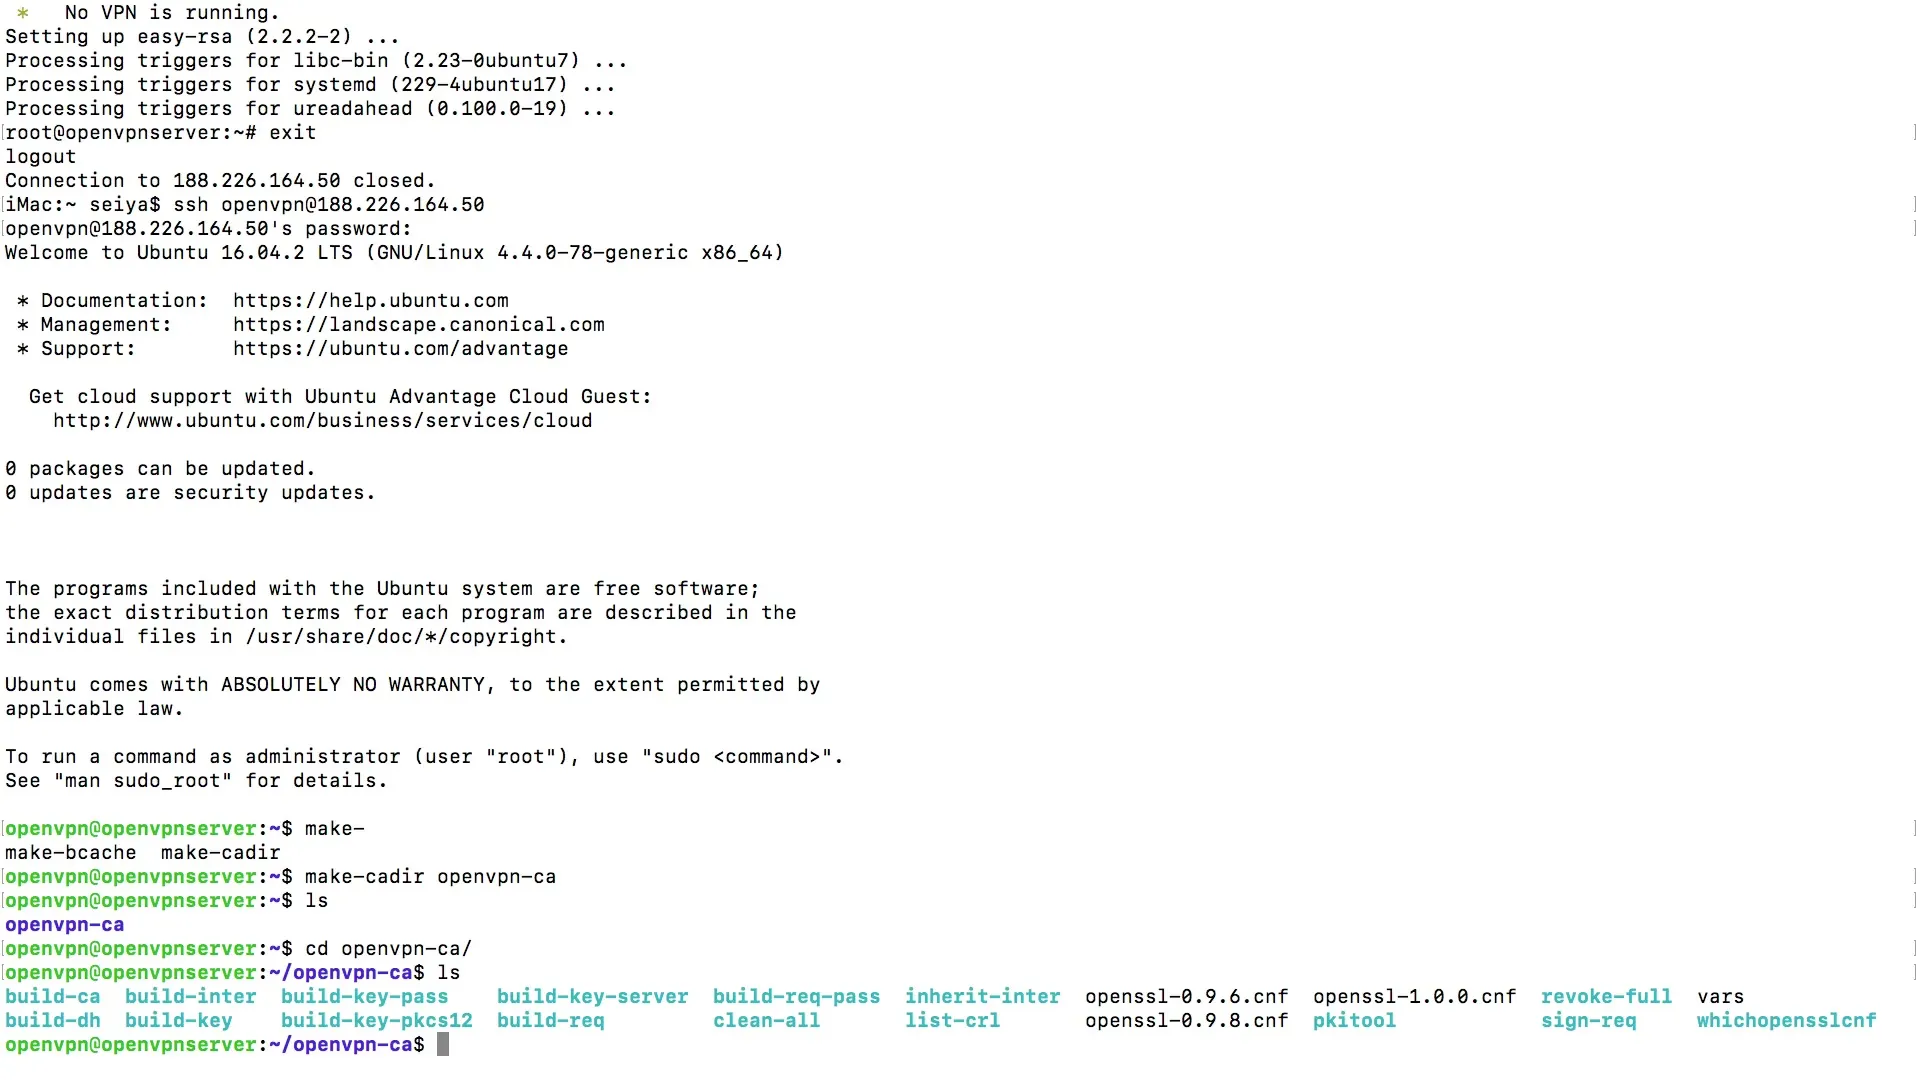
Once the installation is complete, you can log in as an OpenVPN user. Reconnect to ensure that the installation was successful. You can do this by reconnecting with your terminal client, like PuTTY.

Step 2: Verify the Installation
Once you are logged in, test if OpenVPN is functioning. Just type openvpn in your command line and see if the application runs without issues.

If everything is set up correctly, there should be no error messages.
Step 3: Create the CA Directory
The next step is to create the CA directory. This is crucial for managing your certificates. You will create the directory in the home folder.
Navigate to your home directory:
cd ~
Now you can create the CA directory:
make-cadir ~/openvpn-ca
If you list the contents of the directory, you should see the openvpn-ca directory:
ls ~/openvpn-ca

Step 4: Verify the CA Directory
Take a look at the contents of your new CA directory. You should find numerous files and folders necessary for certificate creation.
Navigate to the directory:
cd ~/openvpn-ca
Here you can list all the contents using ls. It is essential that the necessary scripts and data are present.

Step 5: Edit the Necessary Files
Now comes the next important part – editing some of these files. These files are crucial for further configuring your OpenVPN server.
First, open the vars file in your preferred text editor. Here you can adjust the default values, such as country and organization names.
Examples of relevant entries in the vars file are:
- export KEY_COUNTRY
- export KEY_PROVINCE
- export KEY_CITY
- export KEY_ORG
Make sure to adjust the values to match your actual information.
Summary – Effectively Installing and Configuring OpenVPN
You have now learned the basic steps for installing and configuring OpenVPN. By installing OpenVPN and creating the CA directory, you lay the foundation for a secure network. Make sure to carry out the necessary file changes properly to ensure the functionality of your VPN server.
Frequently Asked Questions
How do I install OpenVPN?Install OpenVPN using the command sudo apt-get install openvpn easy-rsa.
Do I need to enable the firewall?Yes, the firewall should be enabled before installing OpenVPN.
What is a CA directory?The CA directory contains certificates and is important for managing the security of your VPN.
How do I edit the vars file?Open the vars file in a text editor and adjust the required values.
Can I use OpenVPN without Easy-RSA?Yes, but Easy-RSA significantly simplifies certificate management.


