Creating a Certificate Authority (CA) is an essential step in setting up OpenVPN. In this guide, you will learn how to effectively generate your own root certificate. The steps will help you to create and manage security certificates for your network connections.
Key takeaways
- Creating your own certificate authority is fundamental for certificate creation.
- The variables must be loaded correctly into the environment before you can start creating your root certificate.
- After completing the process, you will receive a CA certificate and a private key, both of which are important for secure communication in the network.
Step 1: Preparing the OpenVPN Server
First, you need to ensure that you are in the correct directory for the OpenVPN installation. Go to the home level of your OpenVPN server in the terminal.
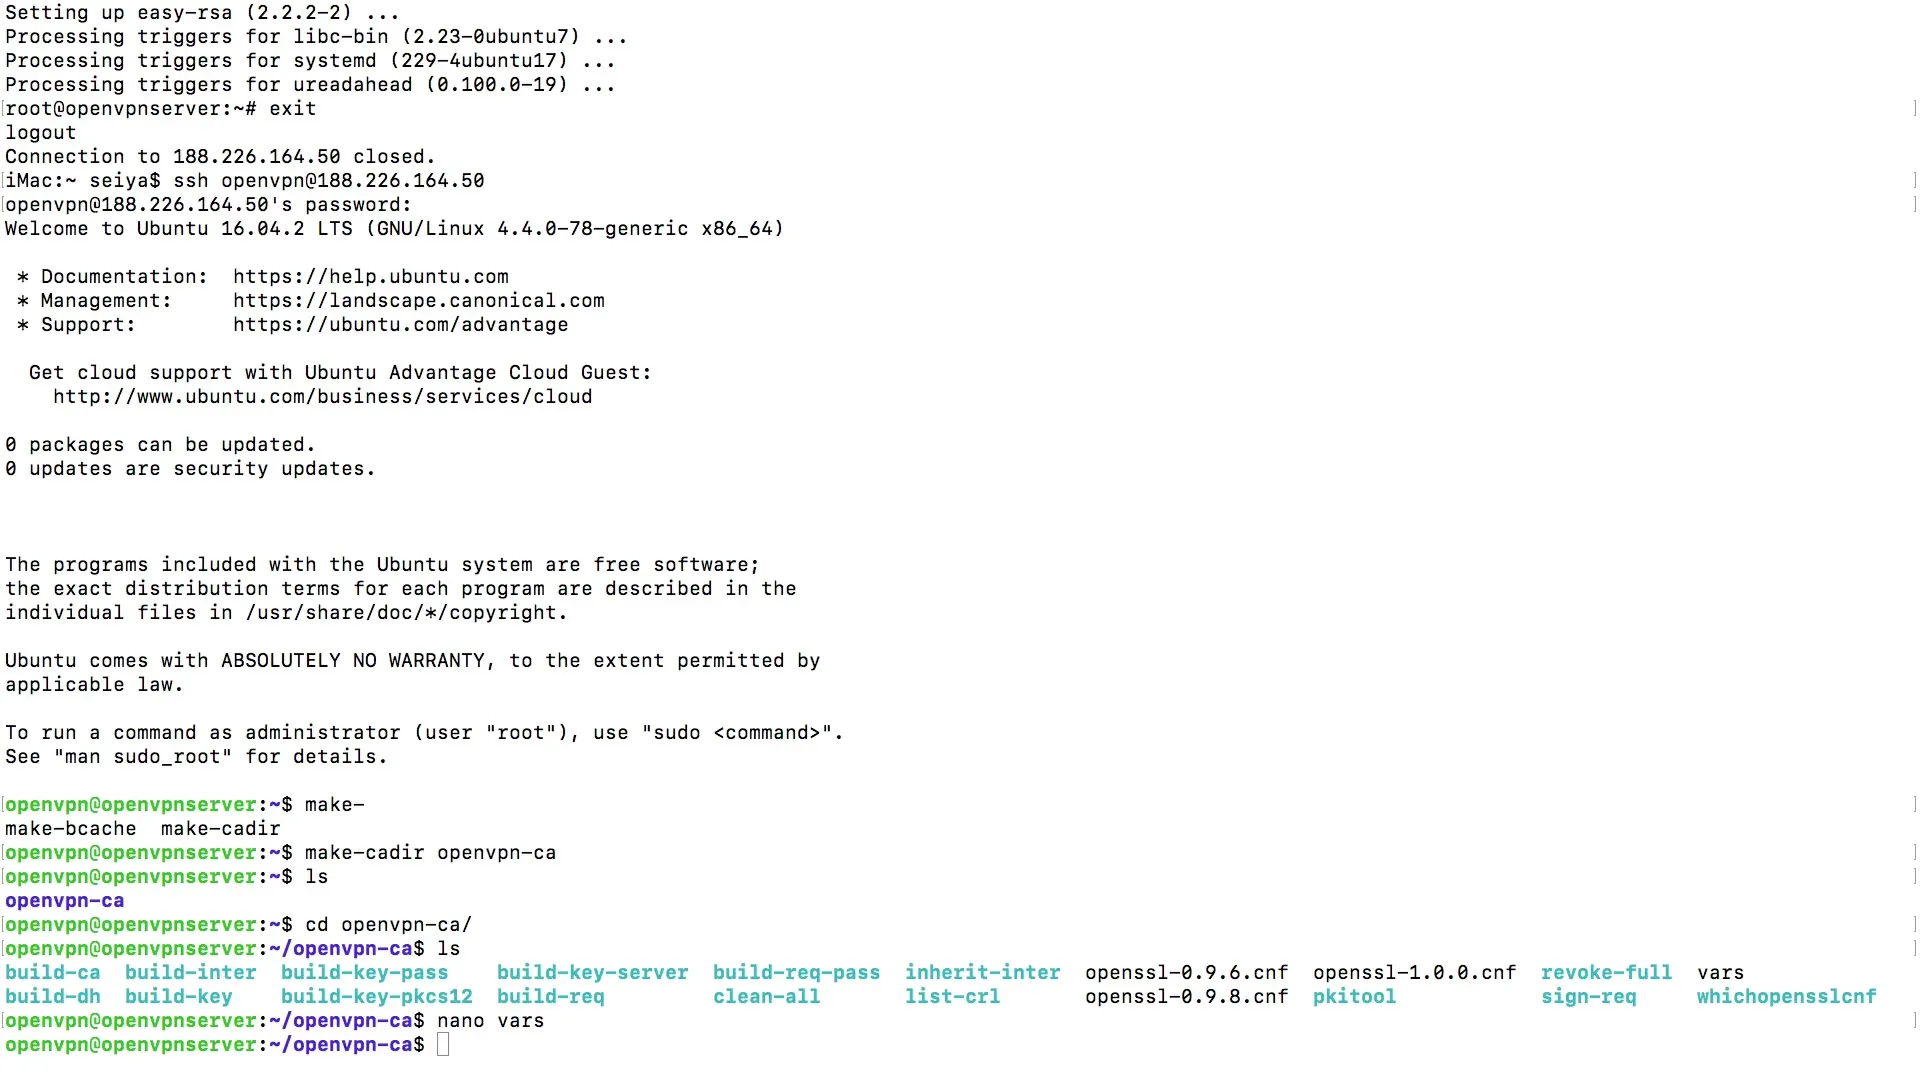
Here, you should have the opportunity to see the files needed for the OpenVPN server. This is important to ensure that all necessary scripts and variables are available.
Step 2: Loading Variables
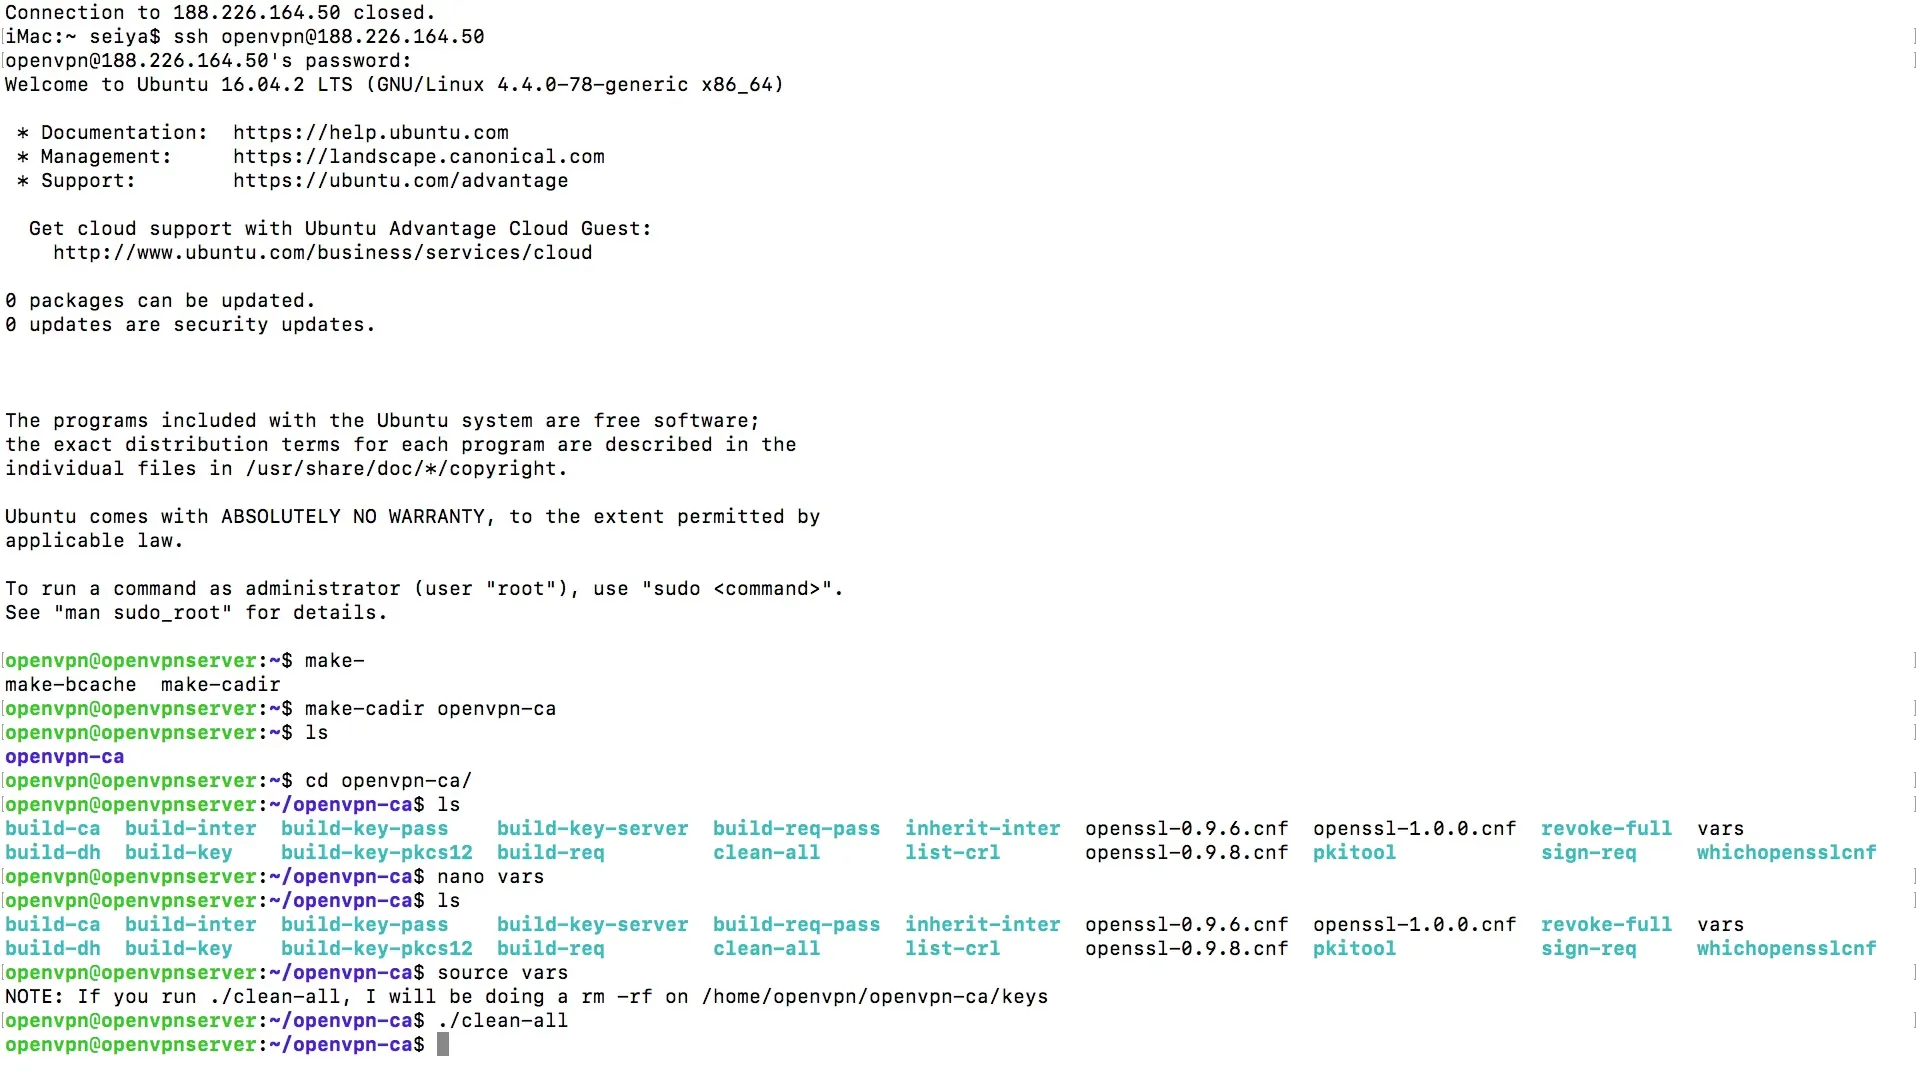
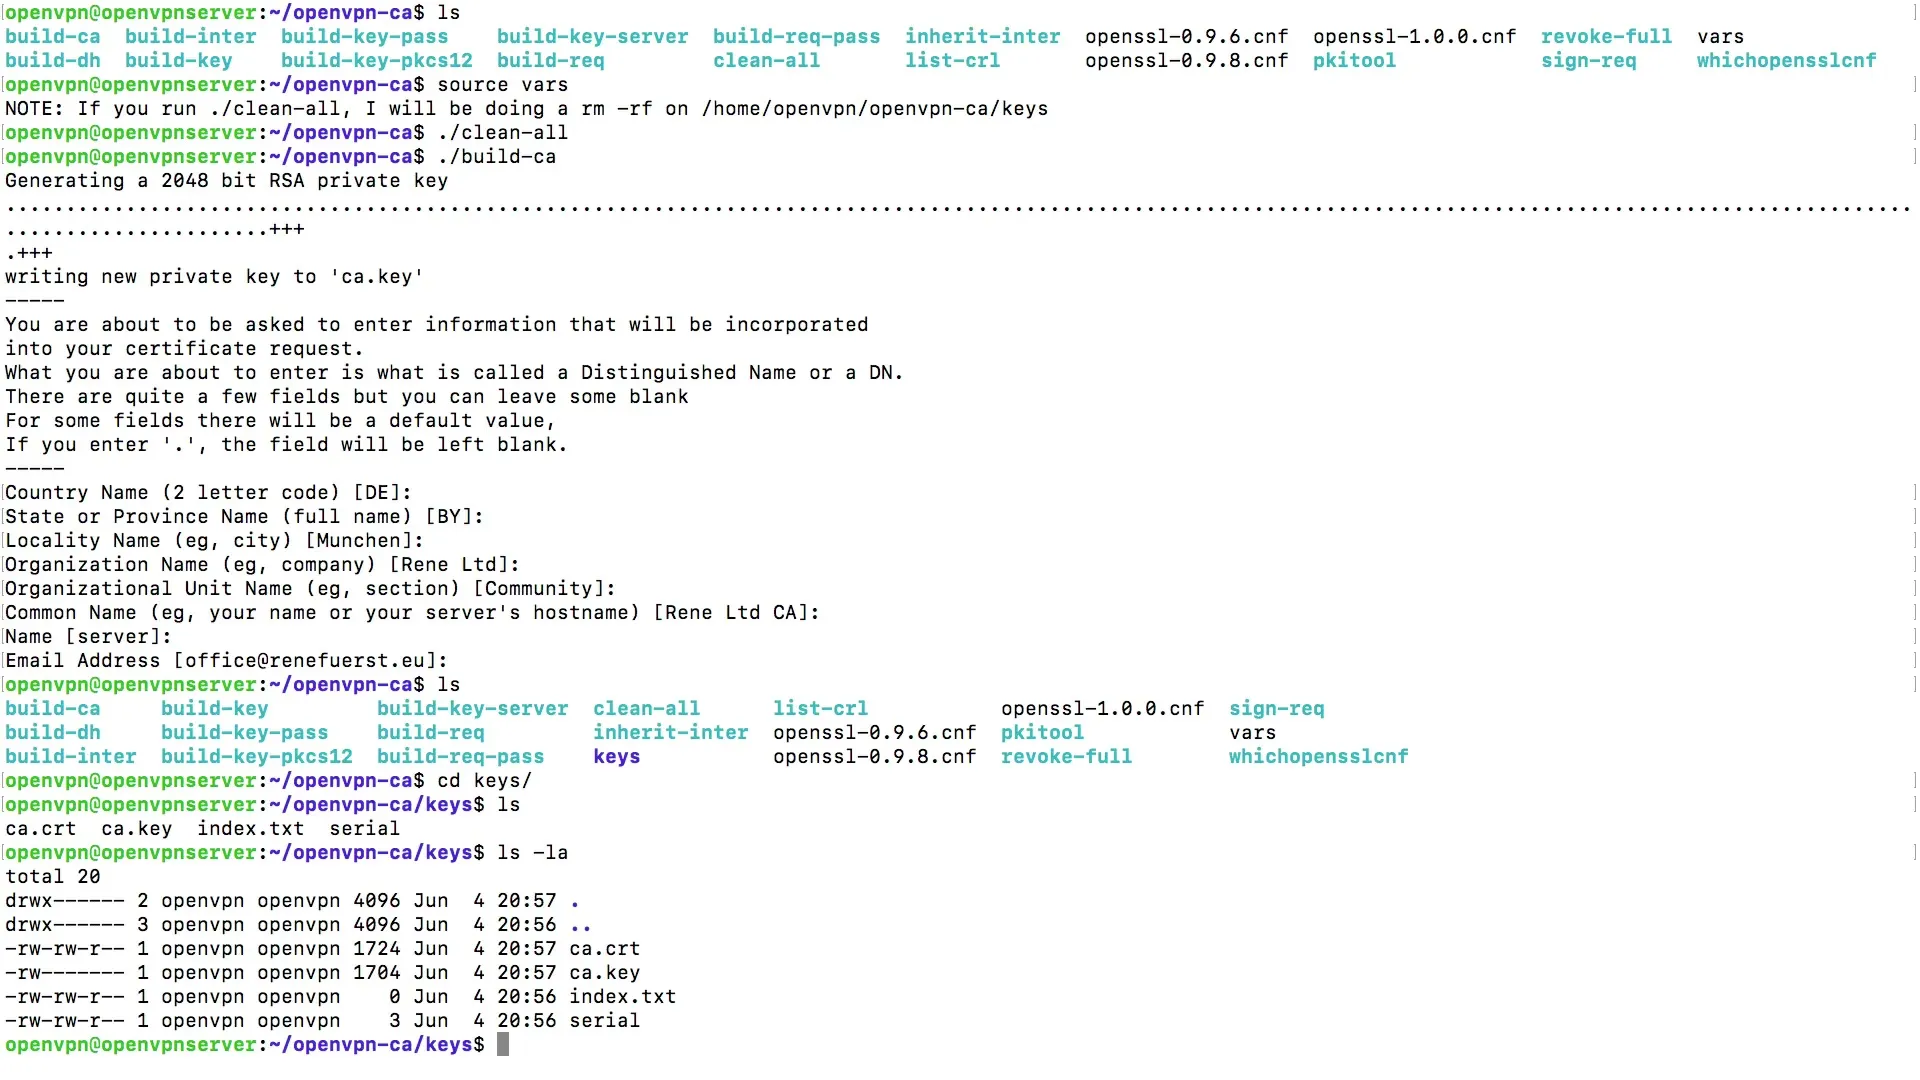
To load the required variables for the certification process, you need to enter the command source vars. This loads the previously defined environment variables that you need for creating the root certificate.
Additionally, you should use the command clean-all to delete any previous keys in the key folder to ensure you start with a clean environment.
Step 3: Starting Root Certificate
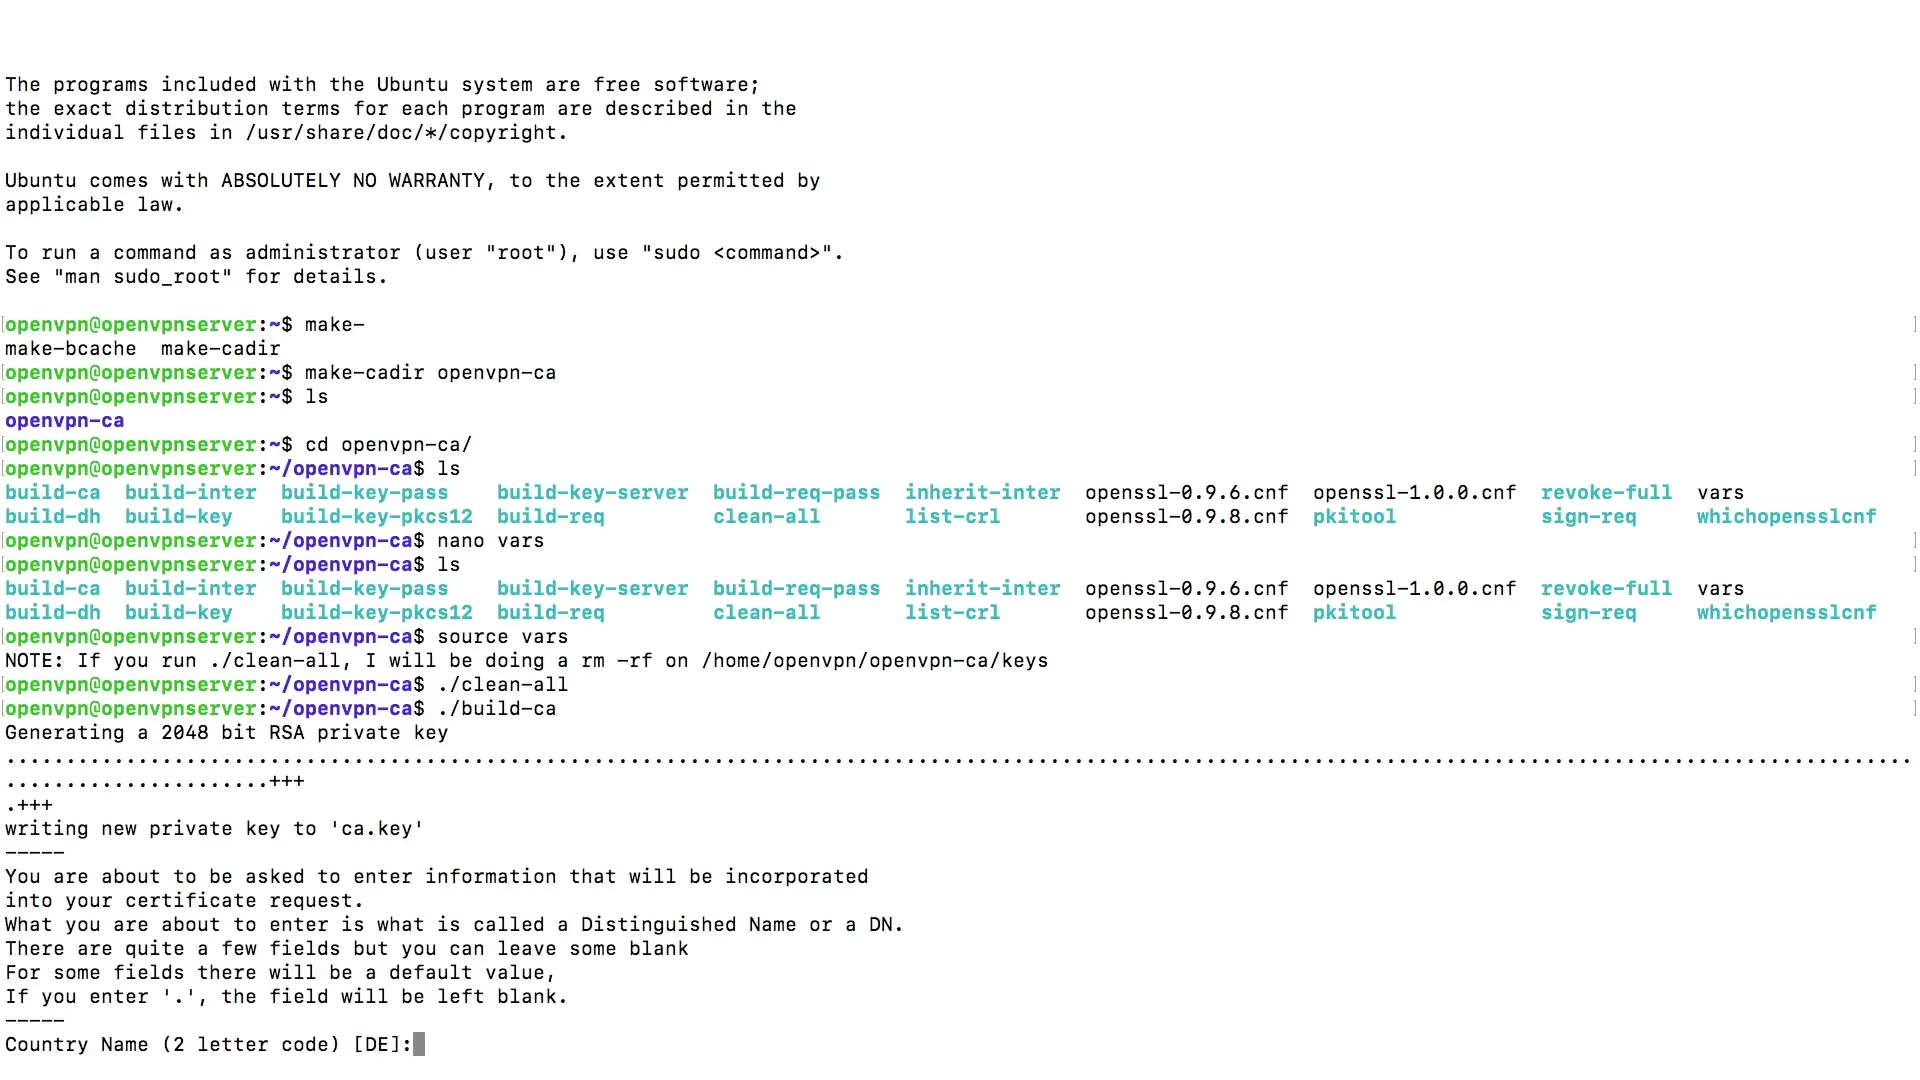
Now begin the process of creating your root certificate by entering the command./build-ca. This command will perform all necessary steps to initialize the certificate.
During this process, a private key (Private Key) will be generated and written to a specific directory. It is important to keep this key secret as it forms the basis for your secure communication.
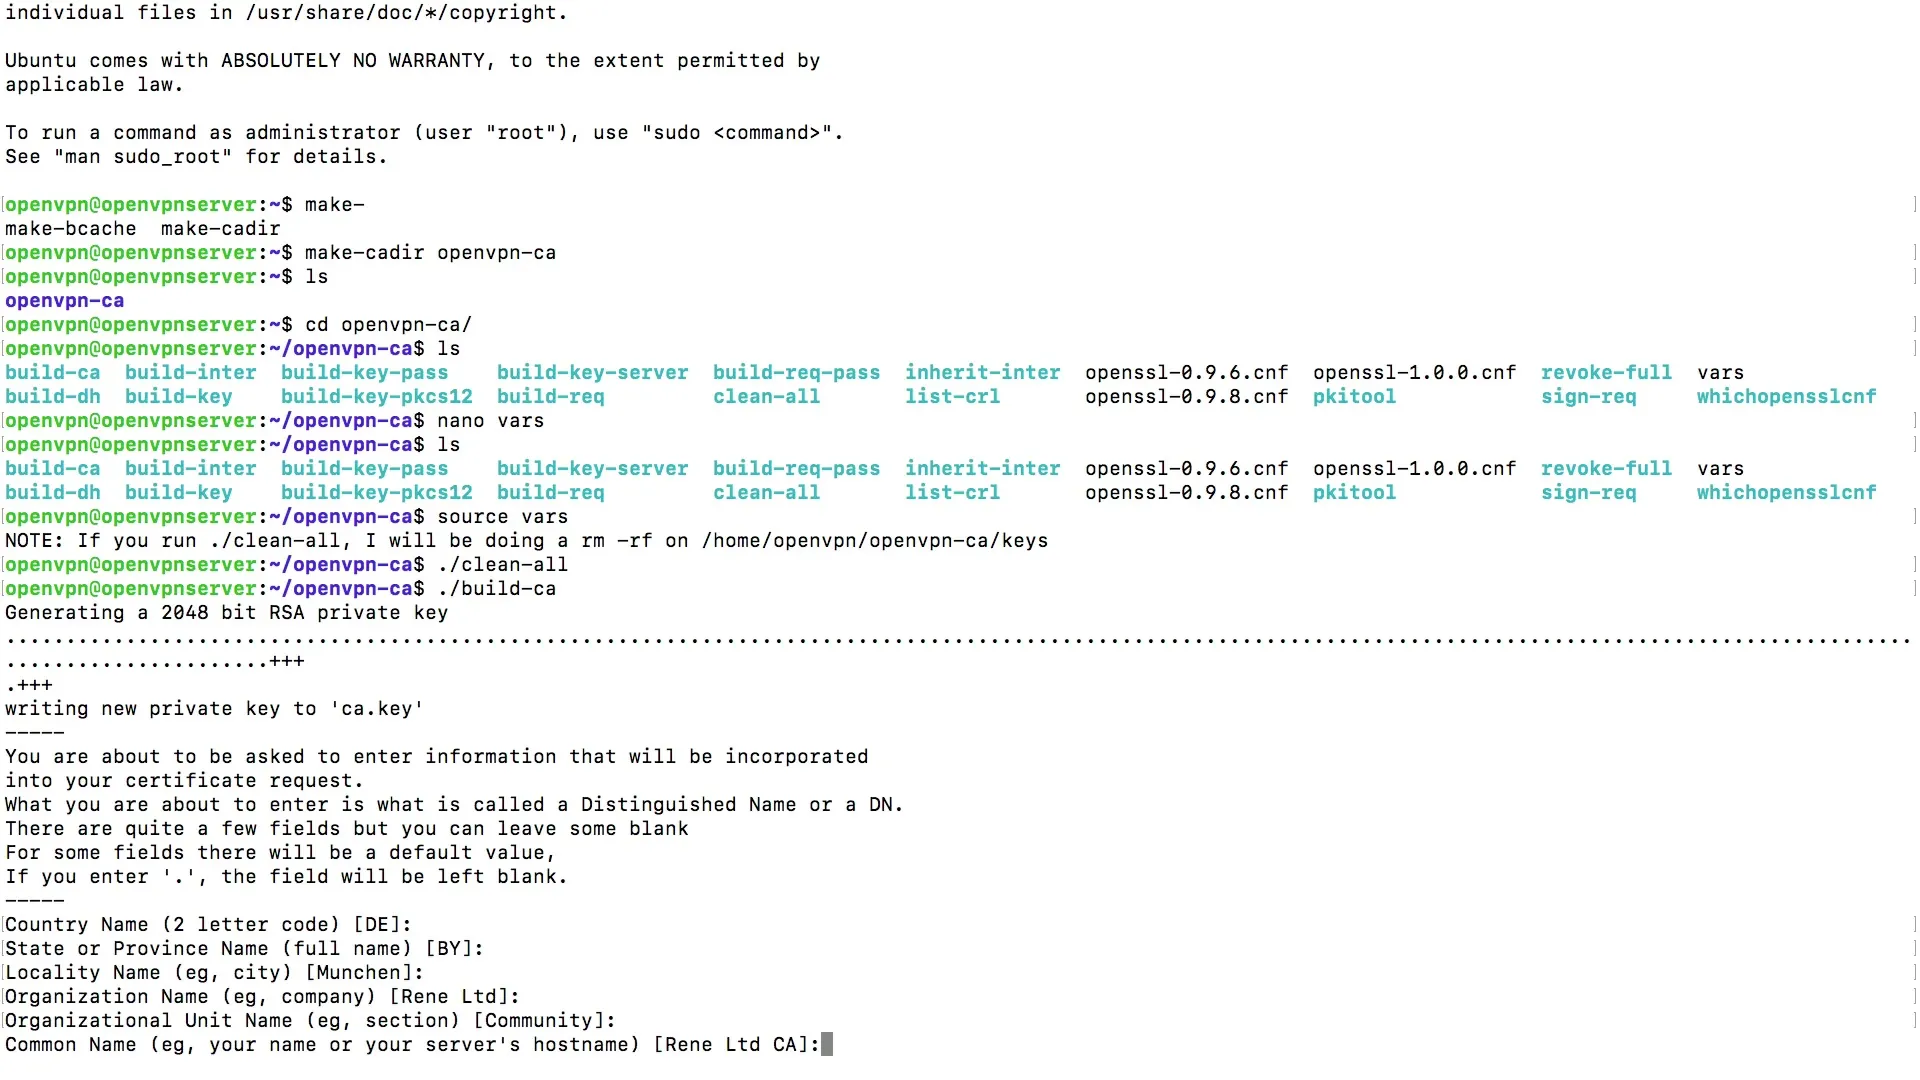
Step 4: Entering Variables
To complete the process, you will be prompted to enter some variables. As you have already adapted the variables file (vars), some fields will be automatically filled in. Just press the Enter key to accept the default values.
In this step, you can enter additional information such as your company's name and email address. This data is helpful for identifying the certificates and traceability.
Step 5: Verifying the Certificate
After the process is successfully completed, you can verify whether the certificate has been created correctly. Go to the "Keys" directory and ensure that the files ca.crt and ca.key are present there.
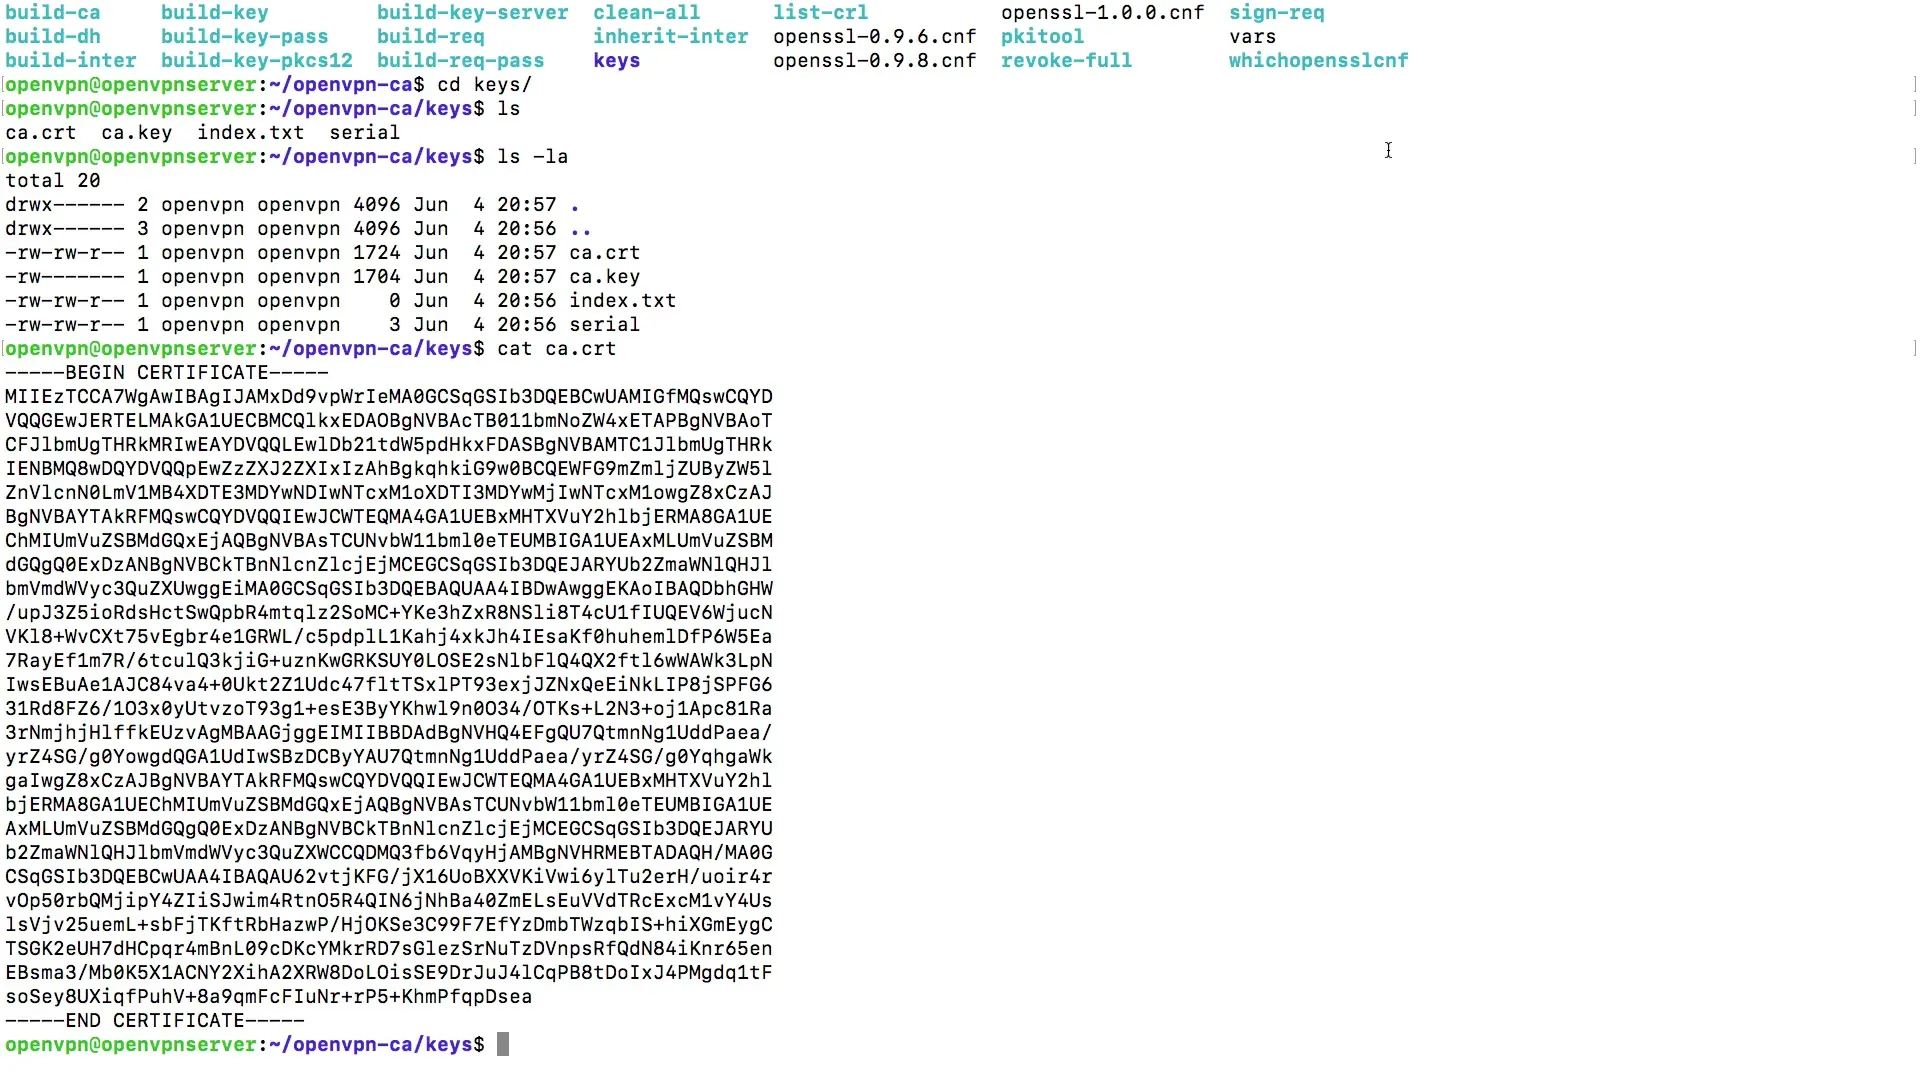
You can check the contents of the created certificate files with the command cat to ensure that everything looks correct.
Step 6: Completing the Process
After verification, return to the OpenVPN directory to take the next necessary steps. At this moment, you are ready for the next part of your OpenVPN project.
Summary
In this guide, you have learned how to set up your own certificate authority for OpenVPN. The entire process includes preparing the server, loading the variables, generating the root certificate, and verifying the generated files. You are now ready to enhance your network security by using your own certificates.
Frequently Asked Questions
What is a certificate authority?A certificate authority (CA) is an organization that issues and manages digital certificates.
Why do I need a root certificate?A root certificate serves to validate other certificates in a network and allows for secure communication.
How do I protect my private key?The private key should be kept secure and never shared with third parties.
What happens when I execute the clean-all command?The clean-all command deletes all existing keys and certificates in the key folder, facilitating the creation of new certificates.


