The configuration of an OpenVPN server and the associated network and firewall settings are crucial for the security and functionality of your VPN. In this guide, I will show you step by step how to make the necessary settings to successfully set up your OpenVPN service.
Key Insights
- Activation of IP forwarding for traffic over the VPN.
- Configuration of firewall rules to allow VPN traffic.
- Masking of IP packets to protect the identity of internal clients.
Step 1: Enable IP Forwarding
First, you need to enable IP forwarding on your server. This is necessary to route traffic over the VPN. To do this, open the file sysctl.conf.

Enter the command in the terminal to open the file with the Nano editor:
Within this file, look for the line that activates IP forwarding. It looks like this:
Remove the comment character in front of the 1 so that the line looks like this. Save the file with Ctrl + O and exit the editor with Ctrl + X.
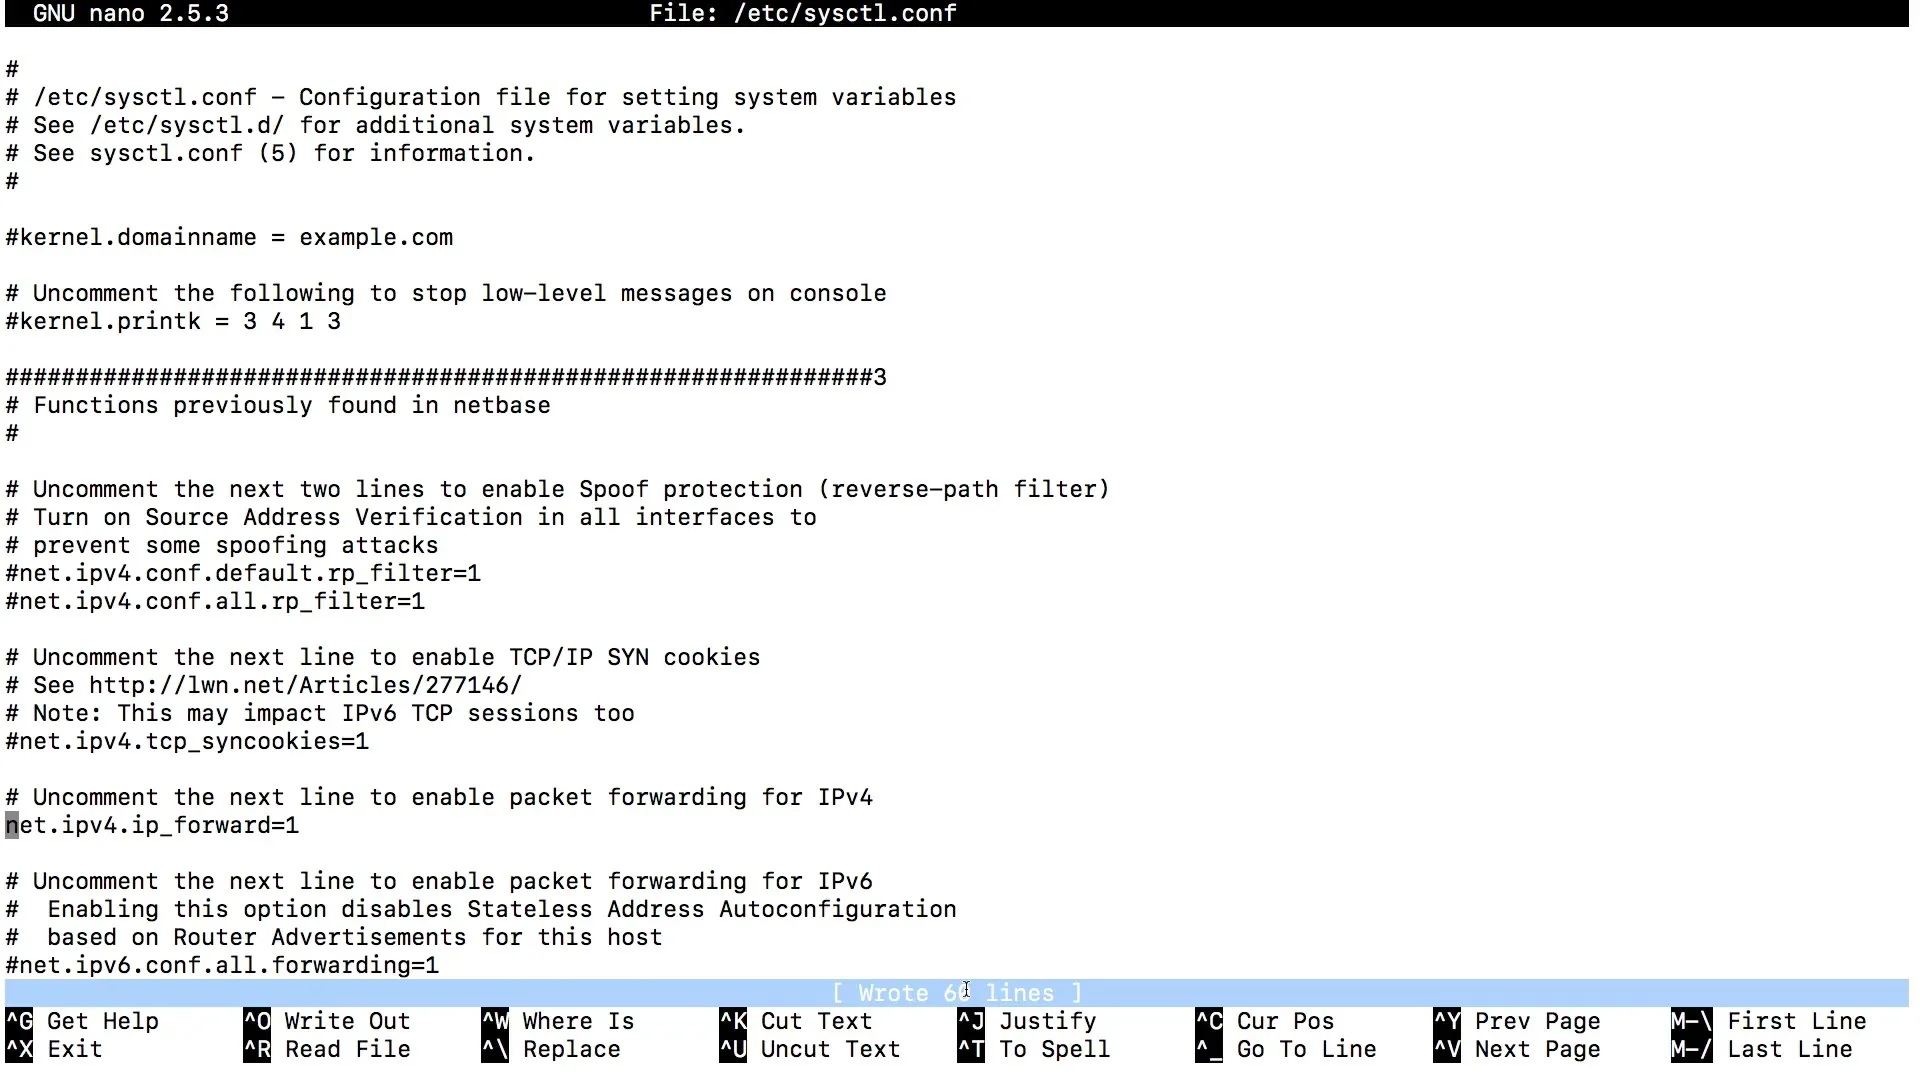
Load the new settings by entering the following command:

Step 2: Firewall Configuration
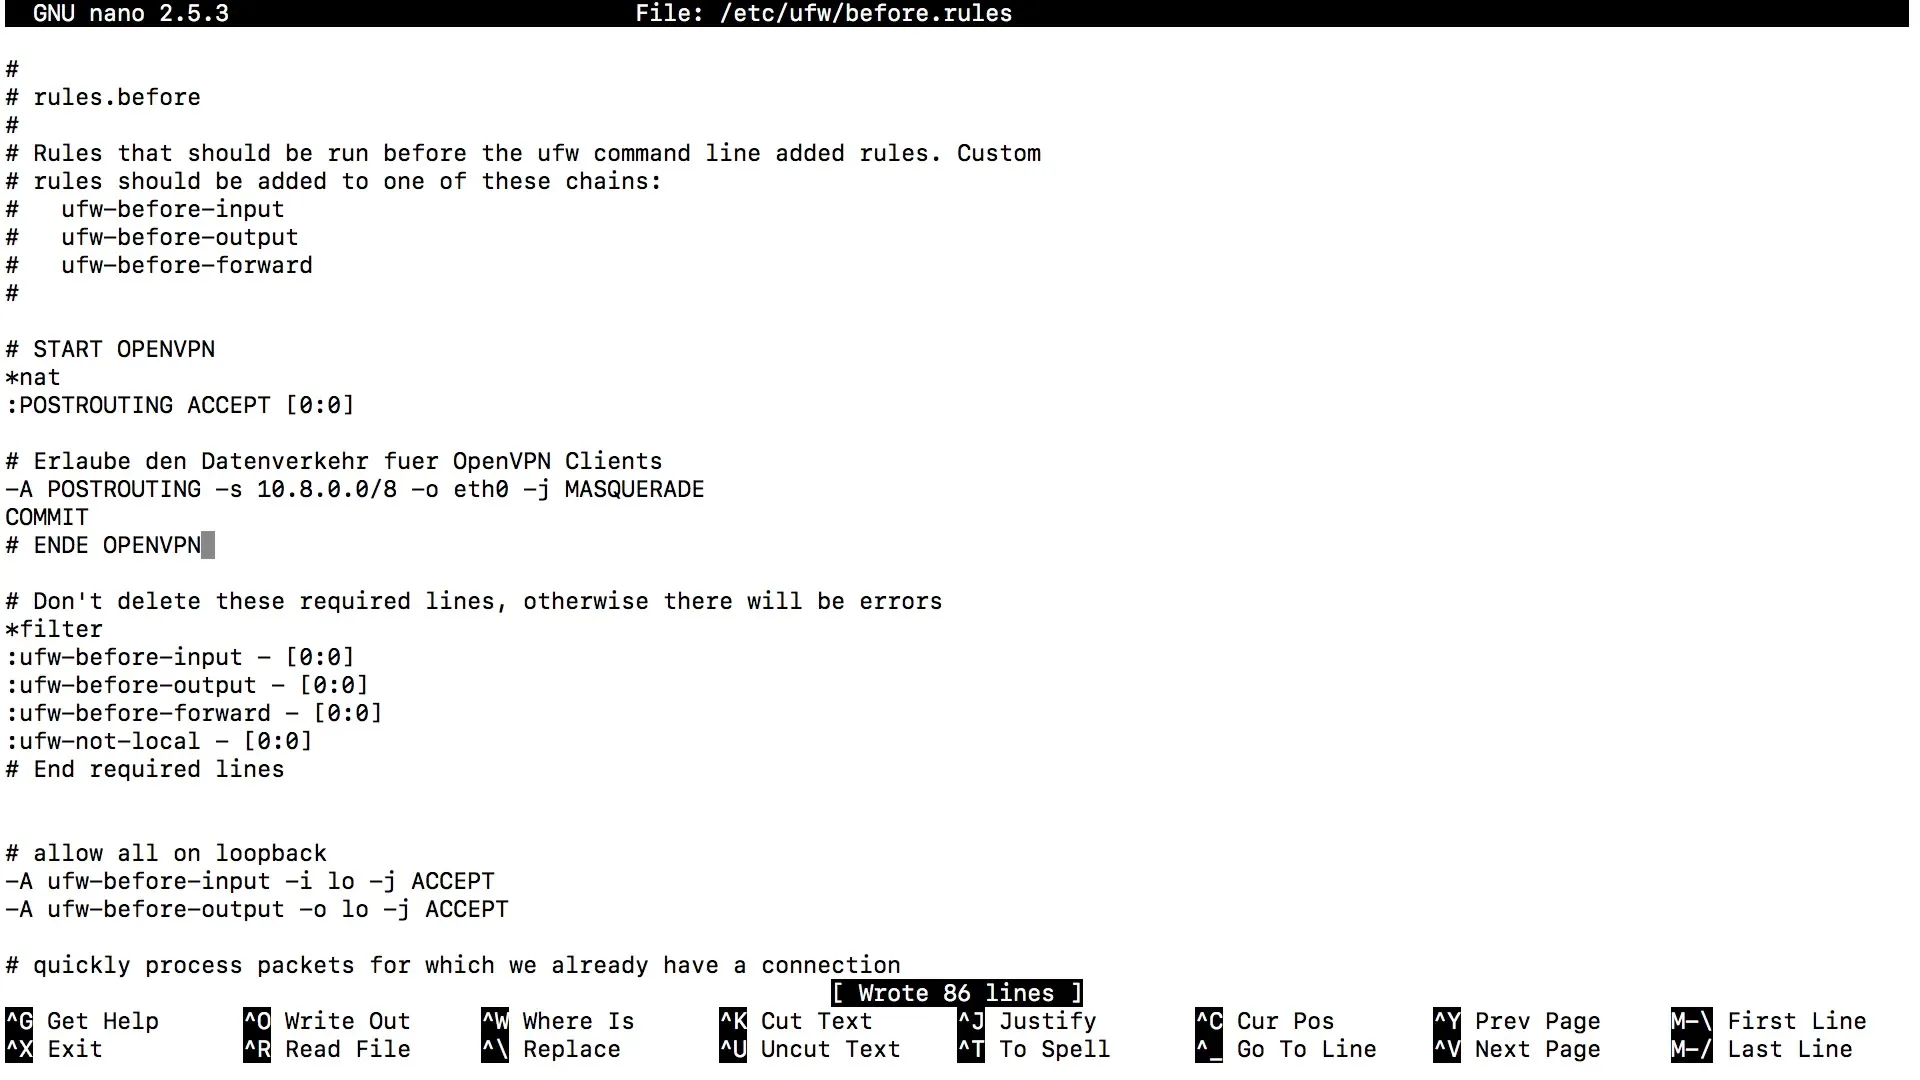
Now, we will address the firewall settings. You need to ensure that the firewall allows traffic for clients connected via the VPN. You achieve this by creating a new rule in the UFW (Uncomplicated Firewall).
First, check the routing information to identify the correct default route for your server:
Be sure to note the default route, which is typically shown as default via. Remember the network device that is being used (usually eth0 or similar).

Now open the UFW rules:
Replace eth0 with the device you noted earlier. Save the file with Ctrl + O and exit with Ctrl + X.
Step 3: Adjust Firewall Settings
Now you need to adjust the default firewall policies. Open the UFW configuration file:
Look for the line with the default policy for forwarding. This should be set to DROP. Change this to ACCEPT.

Save the file again with Ctrl + O and exit with Ctrl + X.
Step 4: Open Port for OpenVPN
Check the OpenVPN server configuration file to ensure that port 1194 is set correctly. Open the following file:
Make sure that the line proto udp or proto tcp is enabled, depending on your usage.

Ensure to allow the SSH connection as well, if it hasn't been done yet:
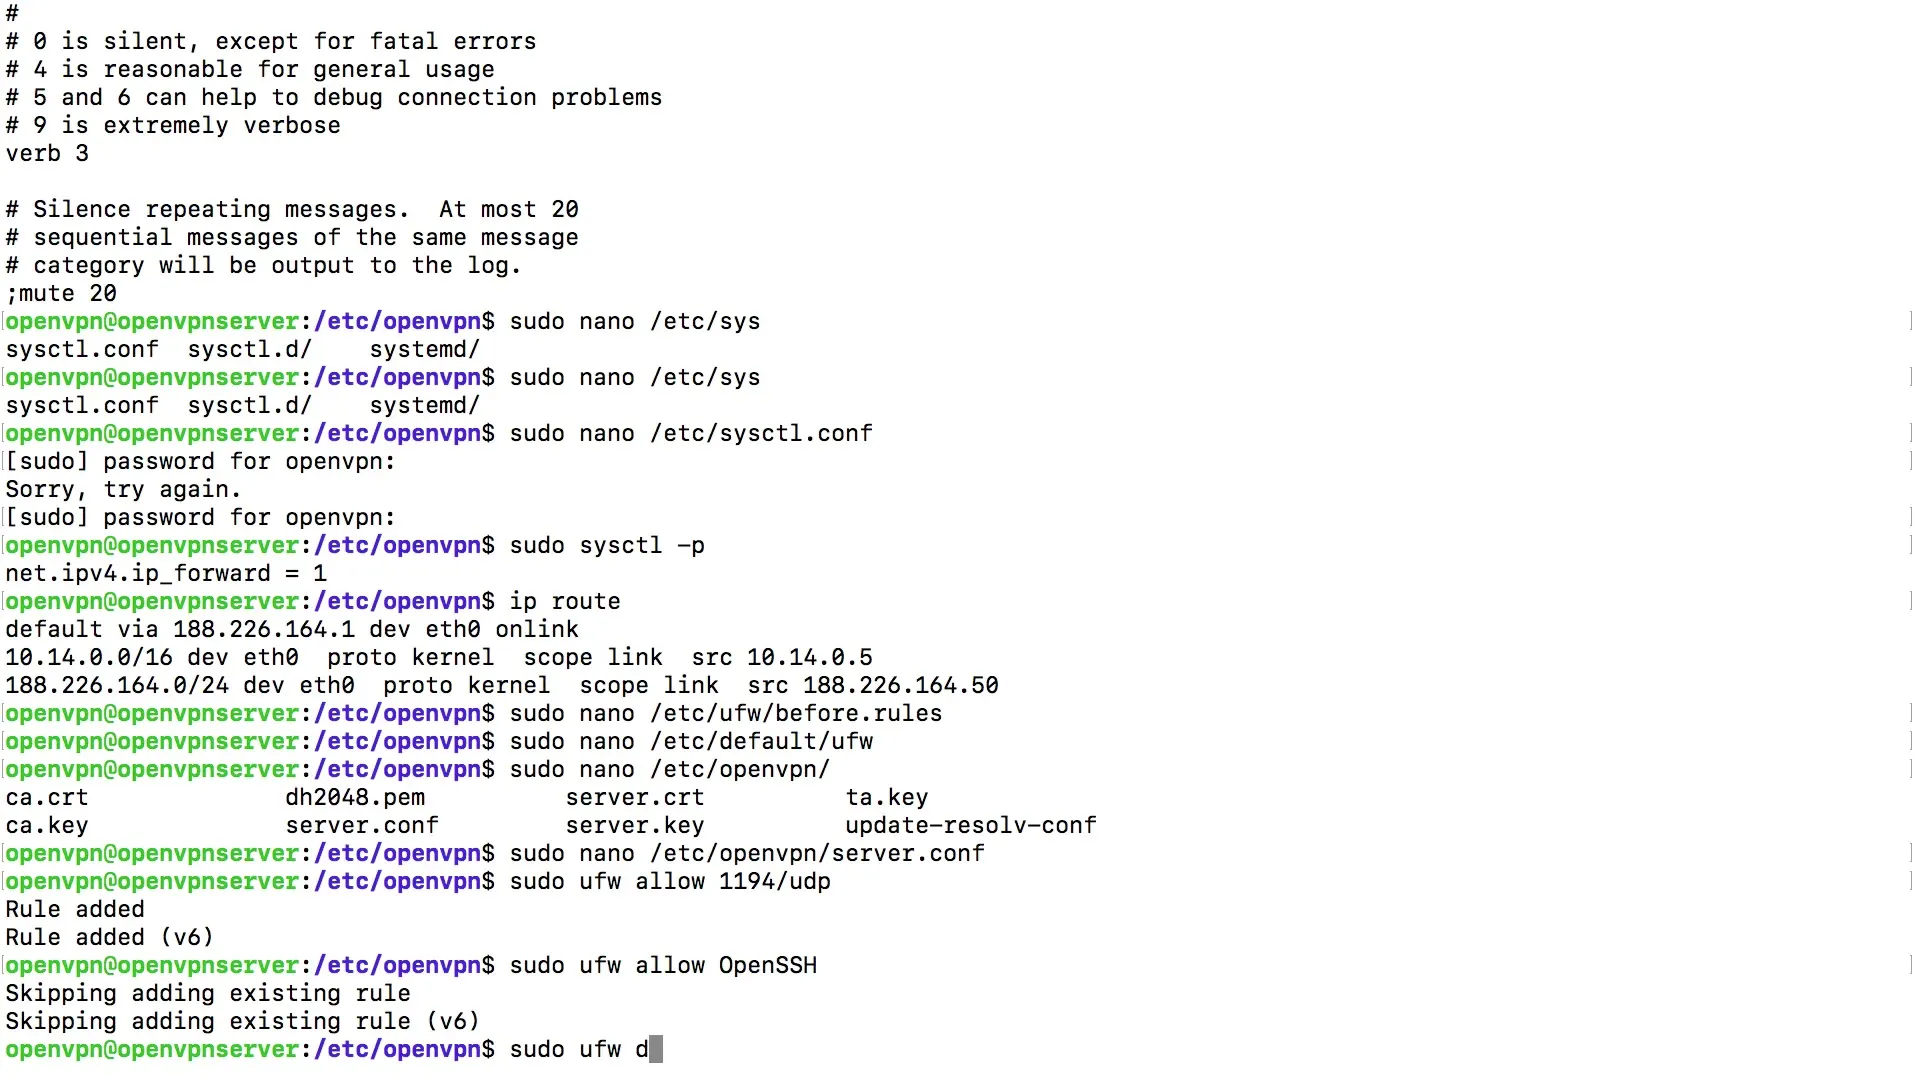
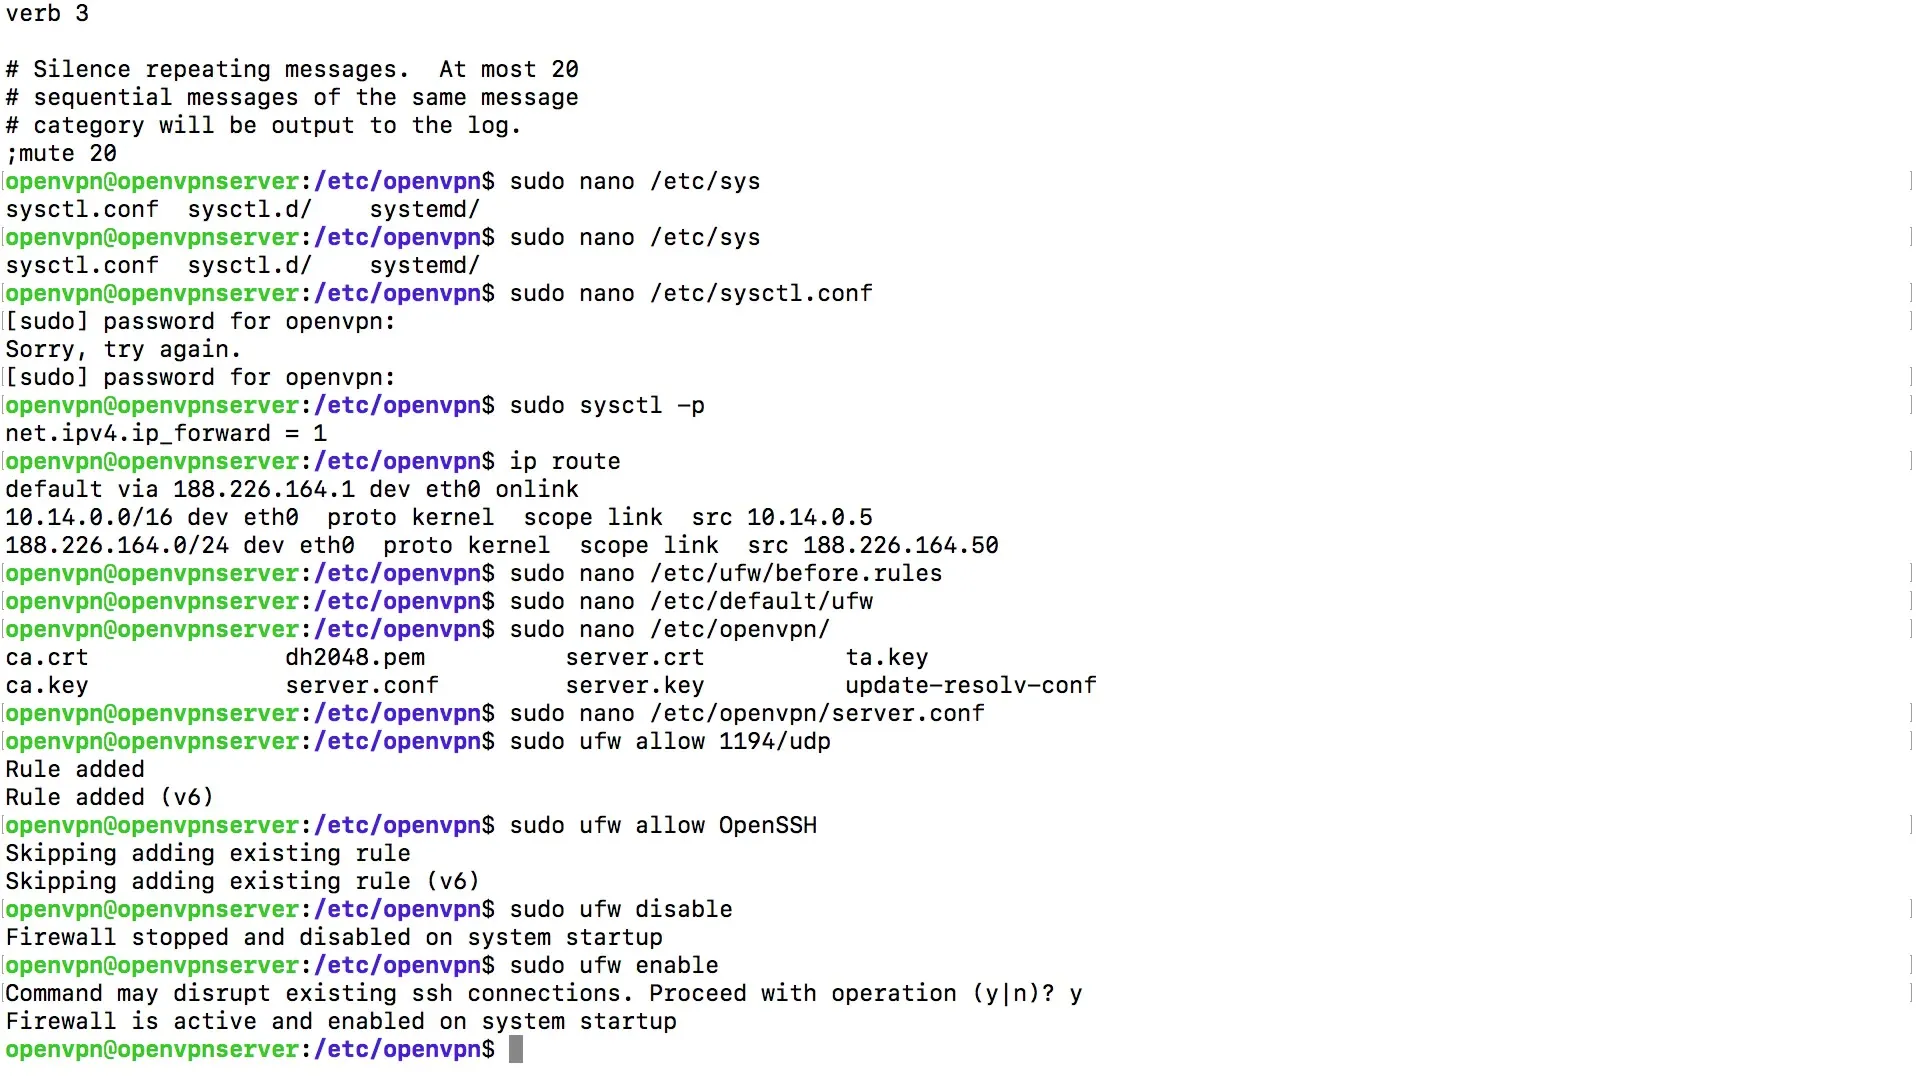
Disable and then re-enable the UFW to apply the last changes:
Summary
The correct setup of IP forwarding and firewall rules is essential for the operation of your OpenVPN server. By following the steps in this guide, you have made the necessary configurations to ensure that traffic over your VPN is secure and efficient.
Frequently Asked Questions
How do I enable IP forwarding?Use the command sudo nano /etc/sysctl.conf, remove the comment character in front of the line net.ipv4.ip_forward = 1 and save the file.
What do I do if the firewall is too restrictive?Ensure that the default policy for forwarding is set to ACCEPT. Also, check the specific rules for OpenVPN in the UFW.
How can I ensure that the VPN traffic is functioning correctly?Check if the OpenVPN port 1194 is open and that the packets are being masked over the correct network route.


