You have successfully completed the configuration for your OpenVPN server. Now comes the decisive phase: start the OpenVPN service and check if everything is set up correctly. In this guide, you will be led step by step through the process to ensure that your VPN server is running properly.
Key insights
- The service must be started correctly to ensure a functioning connection.
- Checking the status is important to ensure that there are no error messages.
- To activate the OpenVPN service automatically at system startup, it is necessary to create a symbolic link.
Step-by-step guide
1. Start OpenVPN service
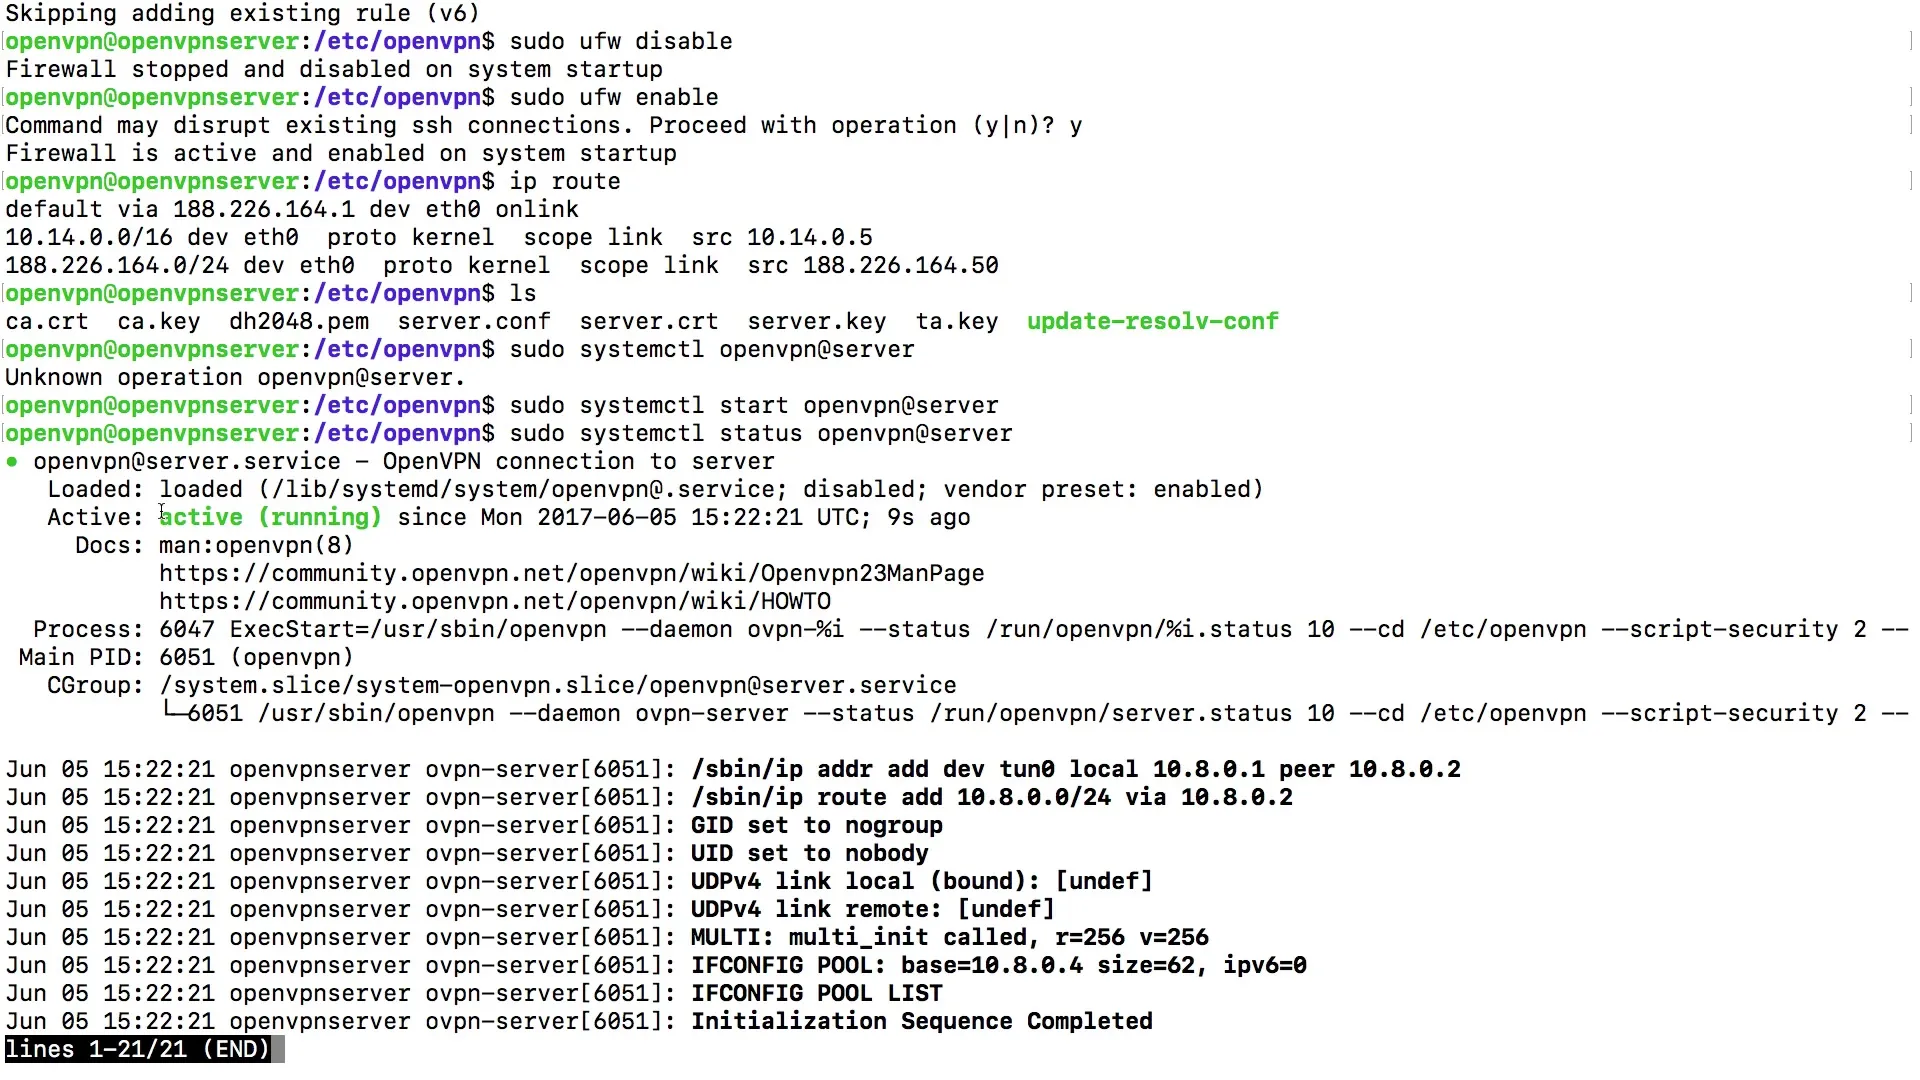
First, you need to enable the OpenVPN service. Caution is required here, as the name of the server can play a significant role. You use the command systemctl start openvpn@server, replacing "server" with the name you chose. If you have set a different name for your server, you must use that here.

2. Retrieve status of the OpenVPN service
After you have started the service, it is essential for troubleshooting to check the status of the OpenVPN service. You can retrieve the status with the same command you used to start it, i.e. systemctl status openvpn@server. You can use the up arrow key to quickly re-enter the last command.

3. Check connection
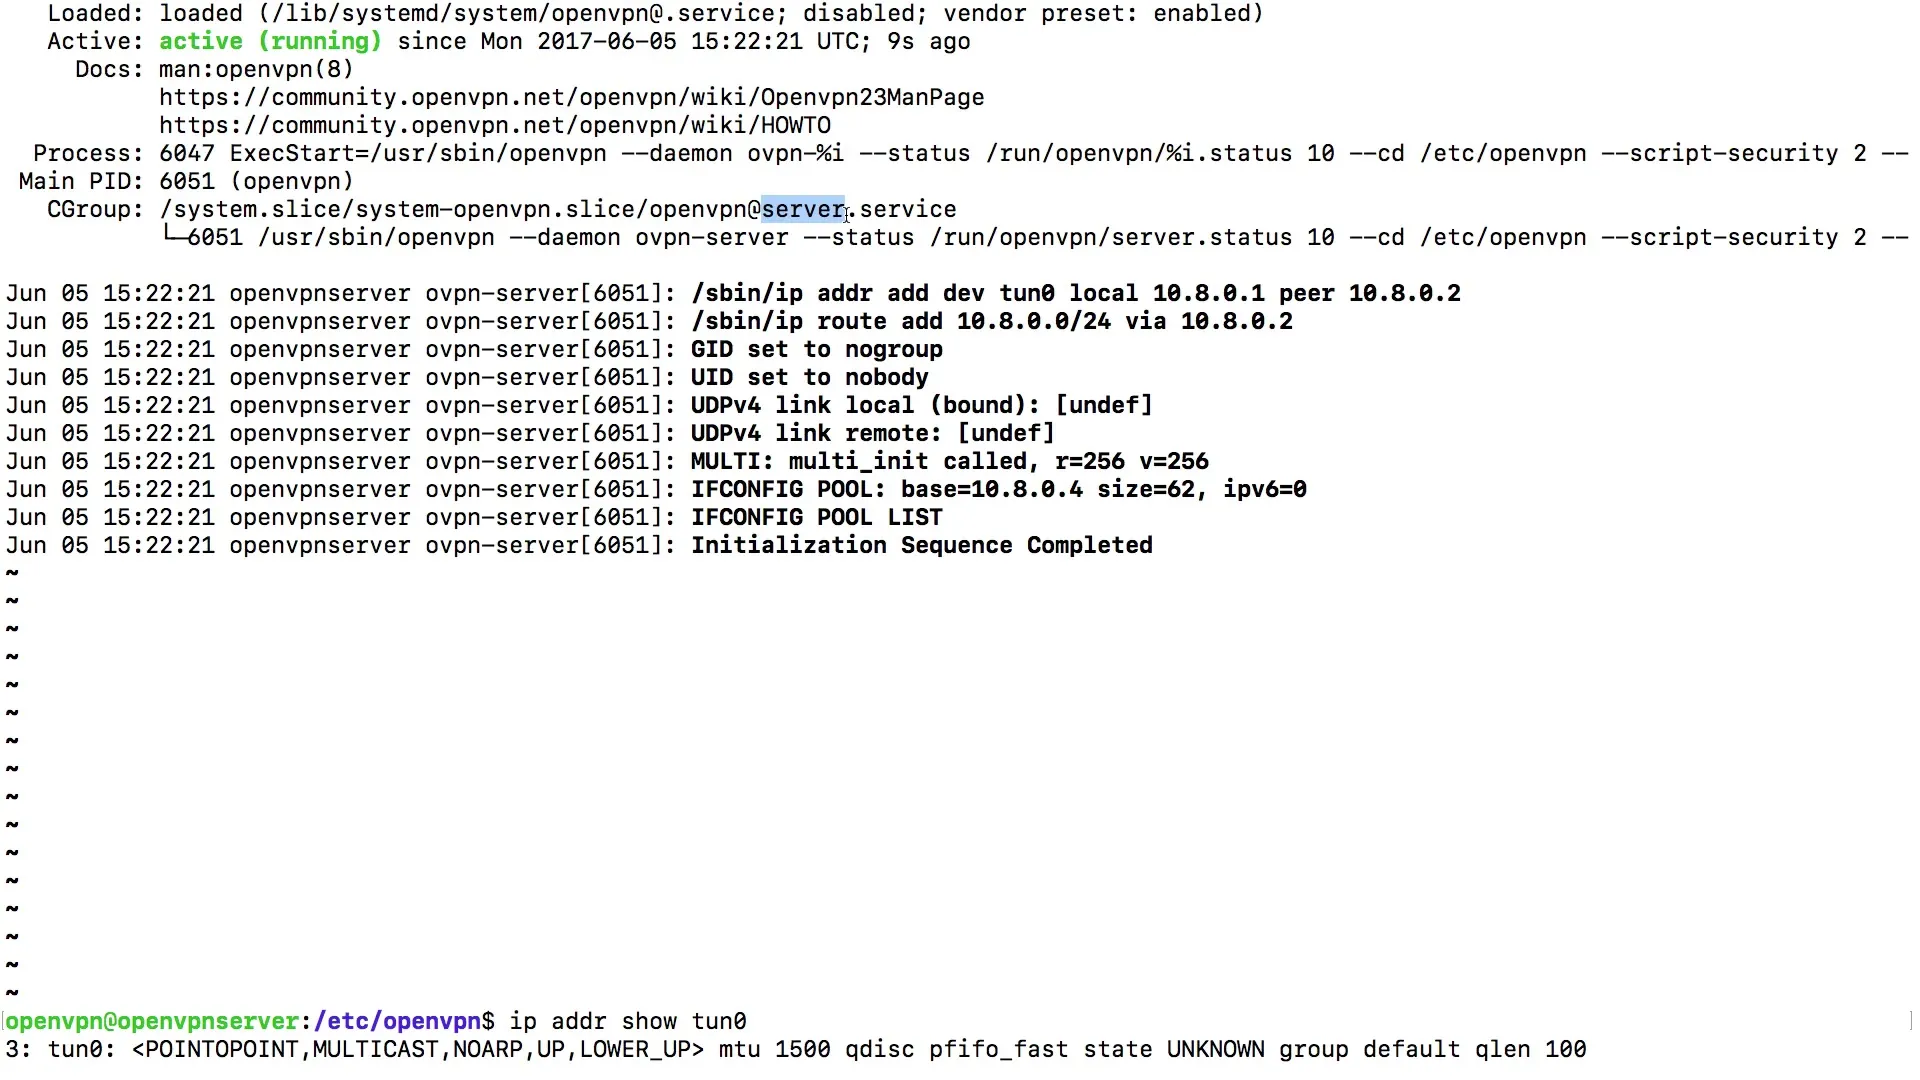
Once you have retrieved the status of the OpenVPN service, pay attention to whether the service is displayed as "active." Even if the display is not green, it is crucial that "active" appears in the status output. This indicates that the service is running properly and there are no error messages.
4. Perform further diagnostics
You can obtain additional information about the running process and its configuration. Use the command to display the process ID and other relevant data. This can provide you with valuable insights into the functionality of your OpenVPN server, including the network interfaces that are connected.
5. Check network configuration
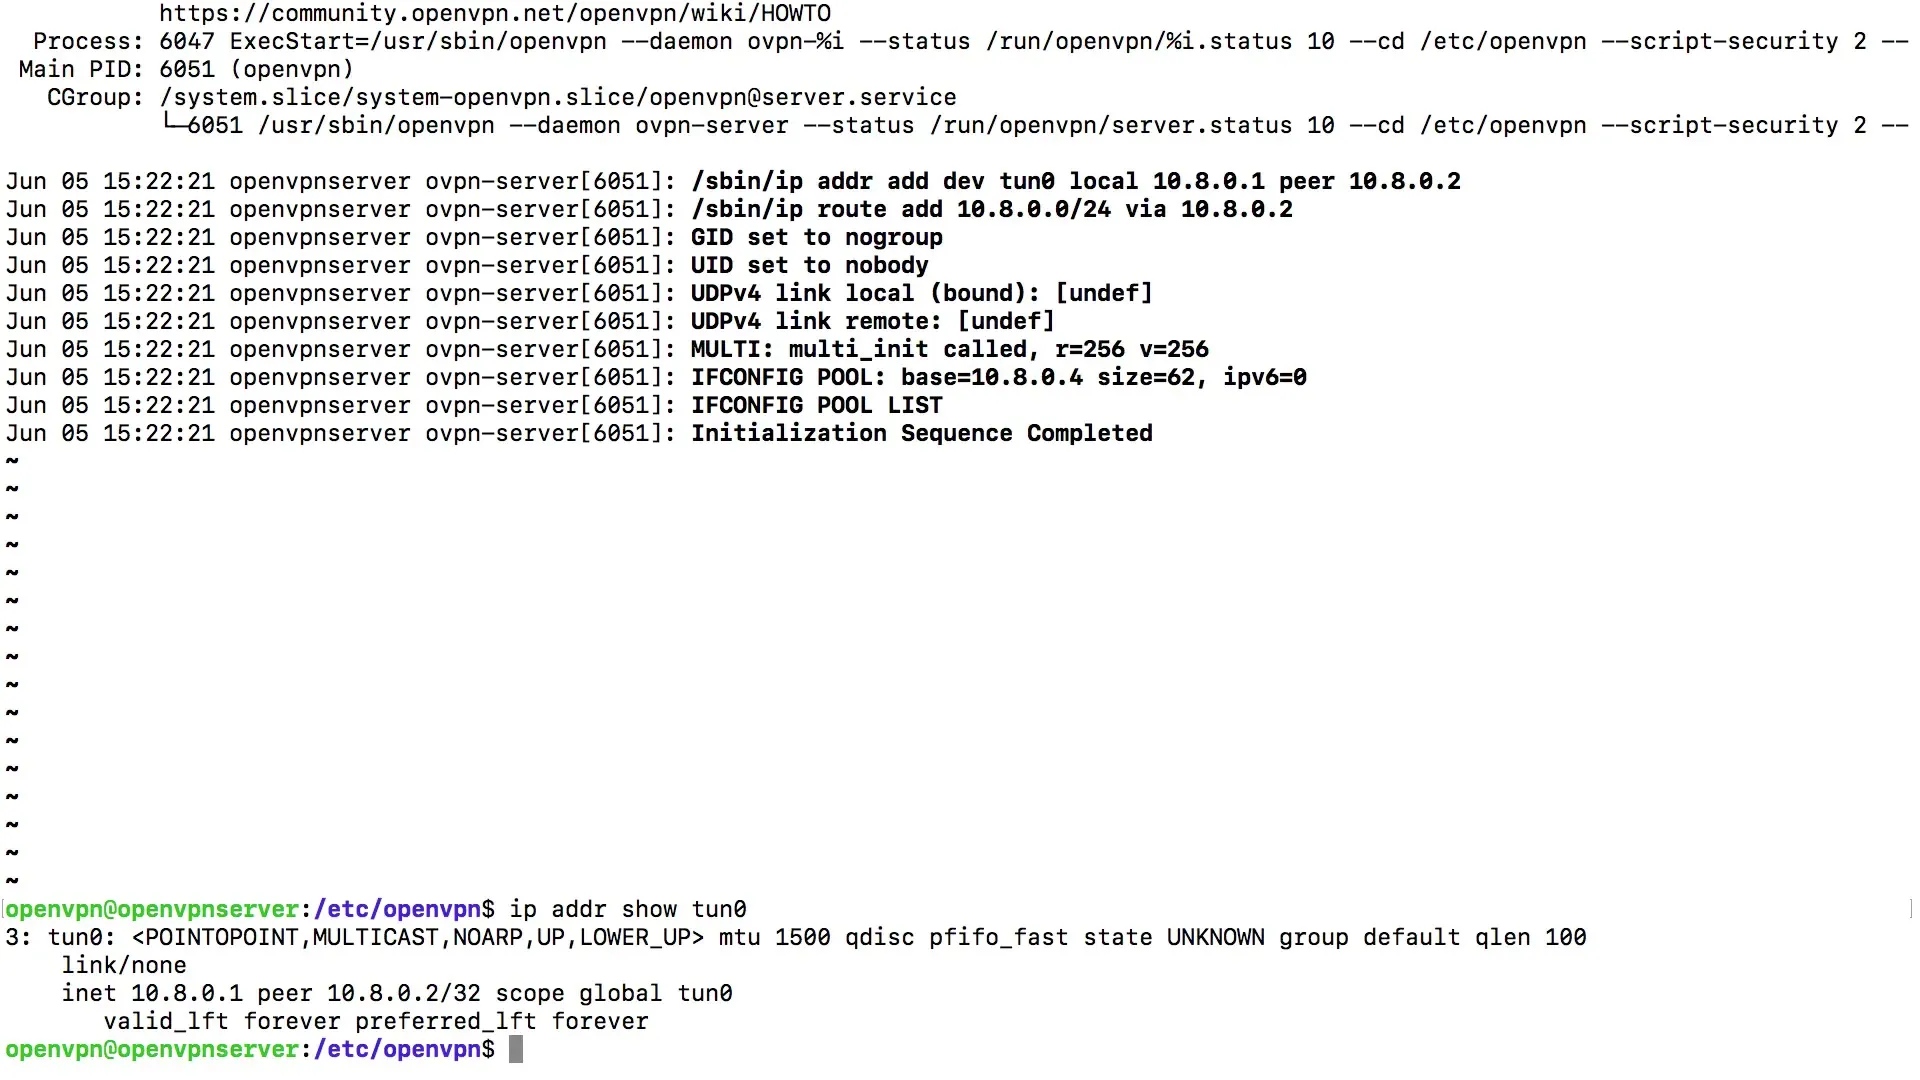
A check of the network configuration is also necessary. Use the command ip addr to see the status of your network interfaces. Look for the line that describes your virtual tunnel connection. Make sure that the IP addresses are displayed correctly.
6. Enable OpenVPN service at startup
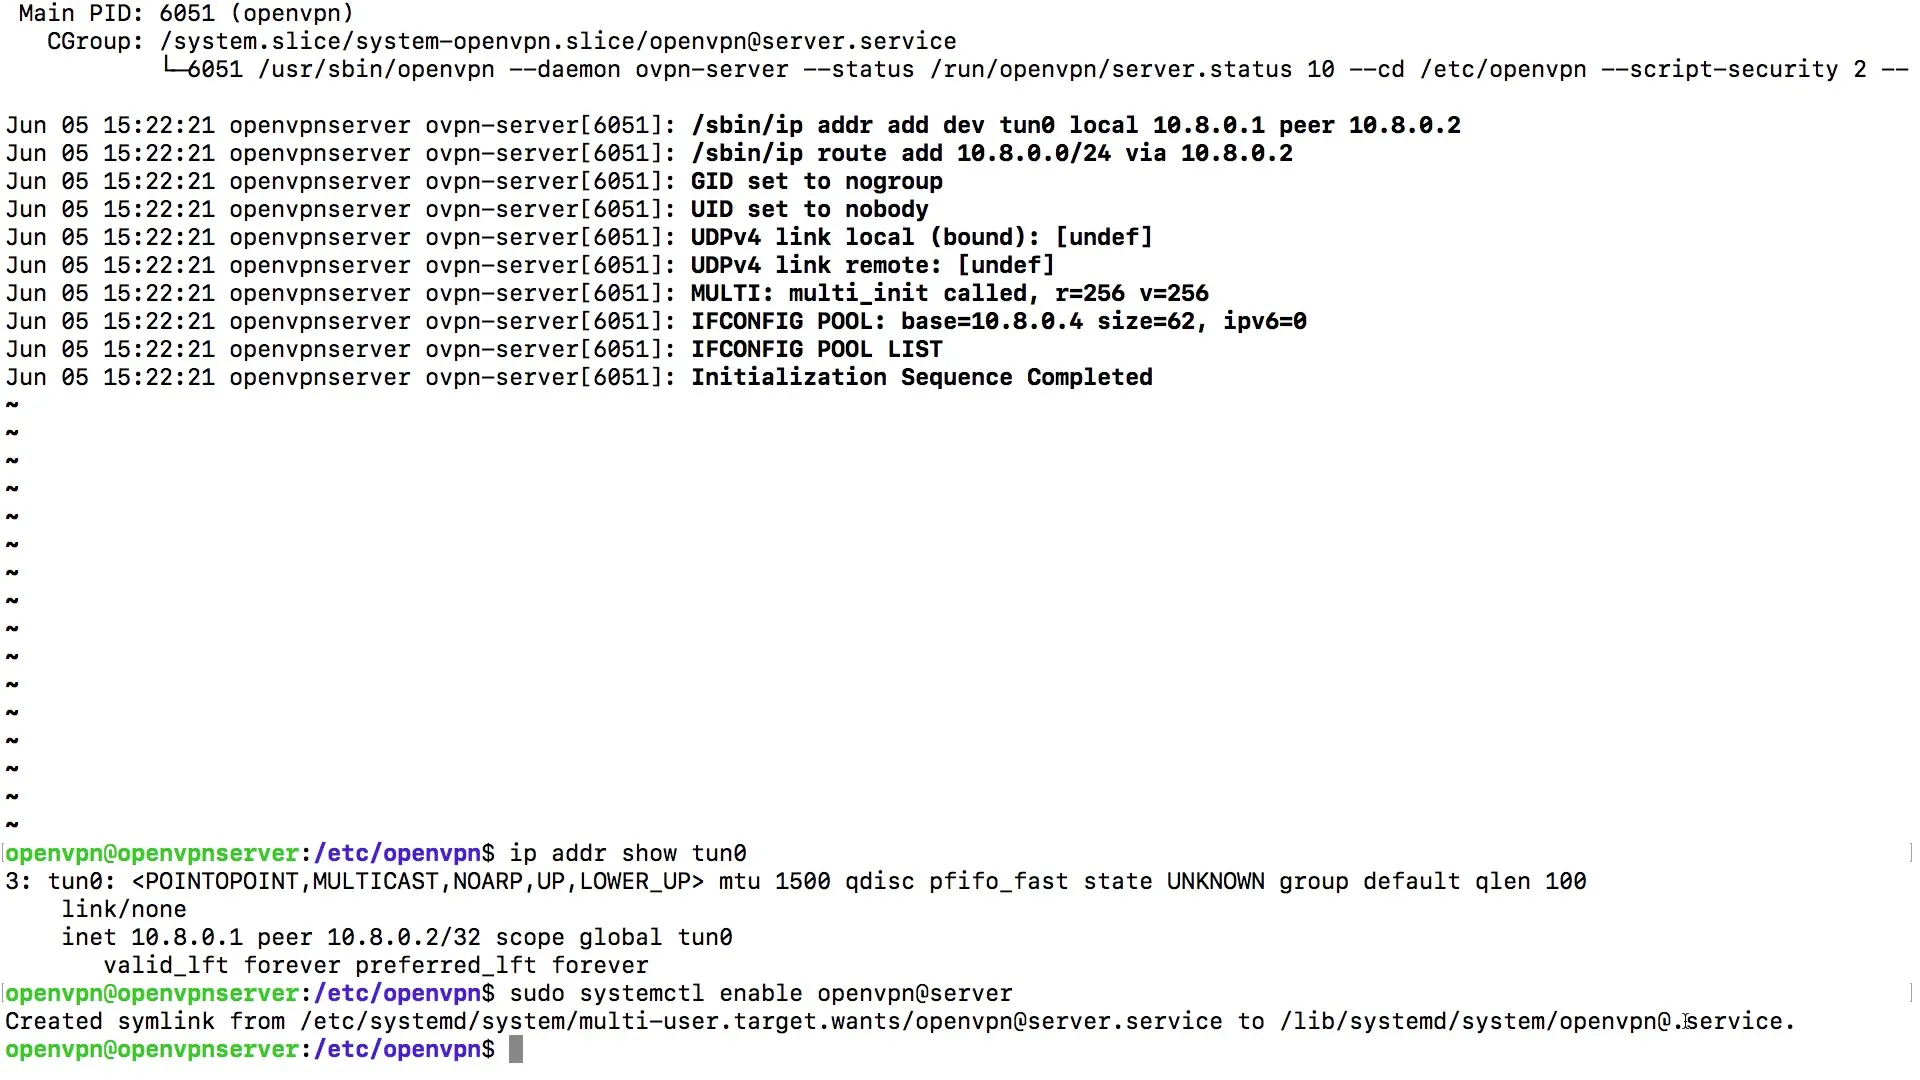
To ensure that the OpenVPN service is automatically started when the system restarts, you need to create a symbolic link to the startup scripts. For this, use the command systemctl enable openvpn@server. This step is critical to ensure that your VPN server remains active automatically after a system restart.
7. Troubleshooting and problem solving
If you encounter problems, it is essential to review the previous configurations carefully. Check if you named the server correctly and if there are any errors in the firewall configurations. Often, an incorrect input at the network interface, such as eth0, can lead to difficulties.
Summary – Start and check the OpenVPN service
Starting the OpenVPN service and then checking the status is essential to ensure that your VPN connection works reliably. Make sure to use the correct commands and regularly check the status of the service to quickly identify and resolve any potential errors.
Frequently asked questions
What should I do if the OpenVPN service does not start?Check if the name of the server has been entered correctly and if all configuration files are present.
How can I check the status of the OpenVPN service?Use the command systemctl status openvpn@server to retrieve the current status.
Do I need to do something to ensure that the OpenVPN service starts automatically on reboot?Yes, you must run the command systemctl enable openvpn@server() to enable the service at system startup.


