Using VPNs is a proven method to protect traffic and maintain privacy on the internet. OpenVPN provides a flexible and secure way to implement virtual private networks. In this guide, you will learn how to create a client configuration file (OVPN-file) to establish a secure connection to your VPN server.
Main findings
- OpenVPN enables the creation of a simple and effective client configuration file.
- You will need various key files for authentication.
- The OVPN file contains all necessary configuration settings and keys.
- The transfer of the OVPN file should be done securely.
Step-by-Step Guide
Step 1: Preparing the Client Configuration
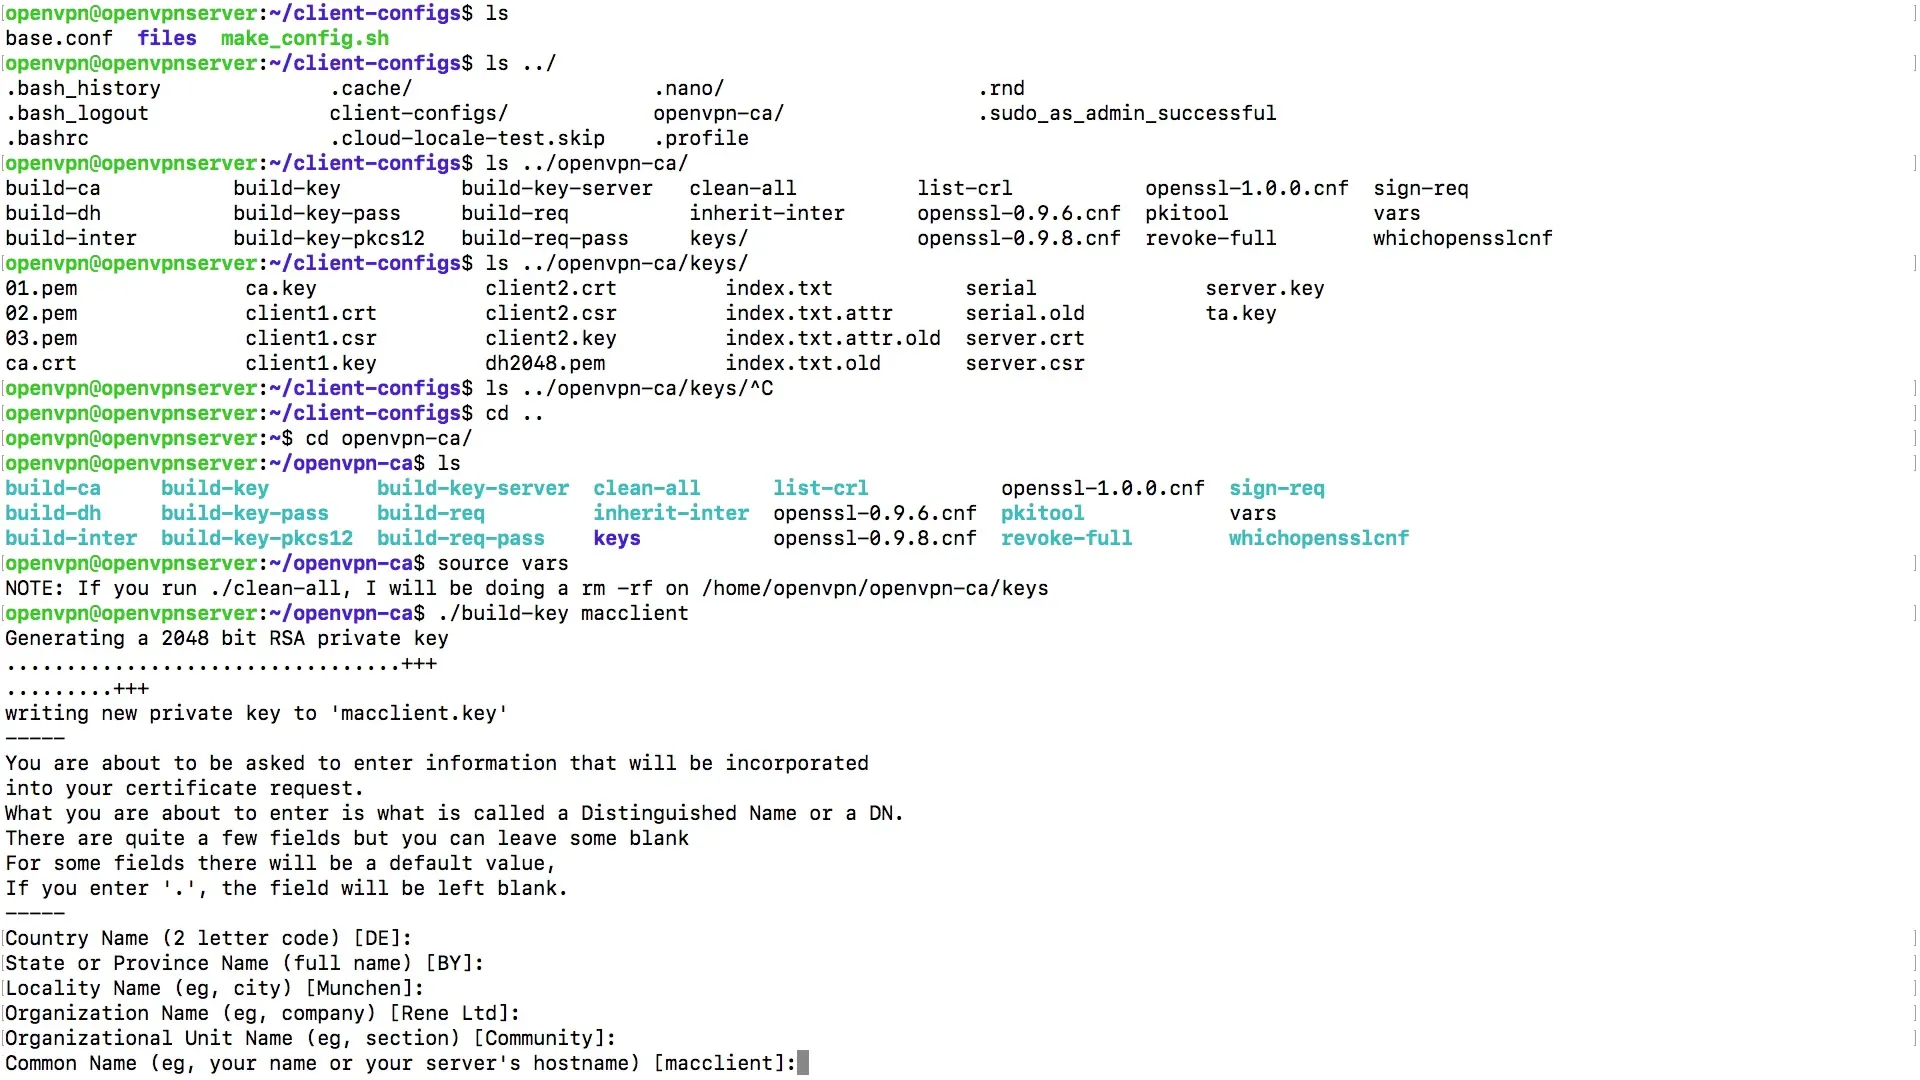
To get started, you need to ensure that the necessary key files and the client configuration you want to create are ready. These files are required to establish a secure connection to your OpenVPN server. Go to the OpenVPN folder on your server and navigate to Client Configs.
Step 2: Creating a New Key Pair
If you have not yet created a key for your client, you can do so now. Go to the OpenVPN-CA directory and run the command source vars to load the settings. Be careful not to execute the clean-all command, as it deletes all keys. Instead, use build-key to generate a new key. You can specify the name of the client, e.g., "Mac Client".
Step 3: Confirming the Parameters
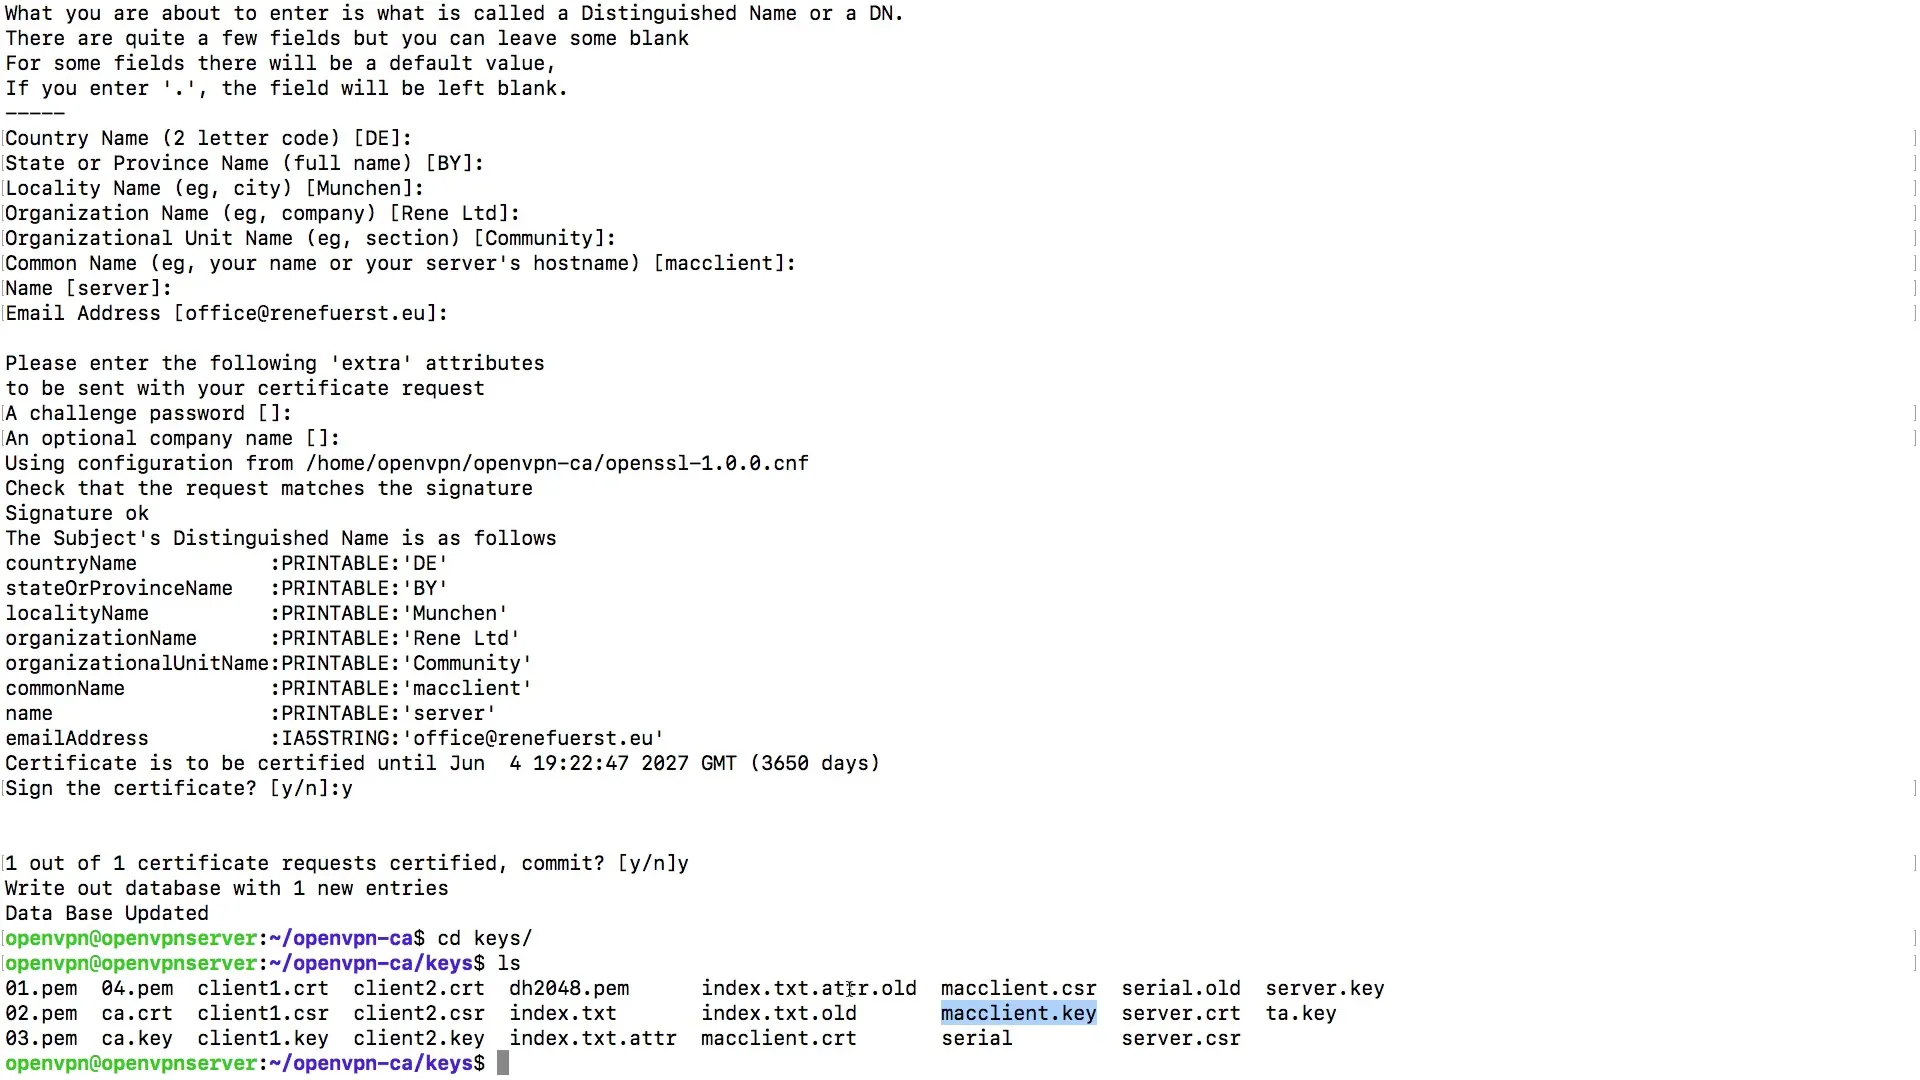
When you execute the command, you will be guided through some prompts. Most of the time, you can simply press Enter to accept the defaults. Make sure not to set a password for the keys so that authentication occurs automatically.

Step 4: Verifying Key Creation
After you have generated the key, check the directory for the client keys. You should now see files like maccilient.key, the certificate file, and the private key. These files are important for creating your OVPN file.

Step 5: Creating the OVPN File
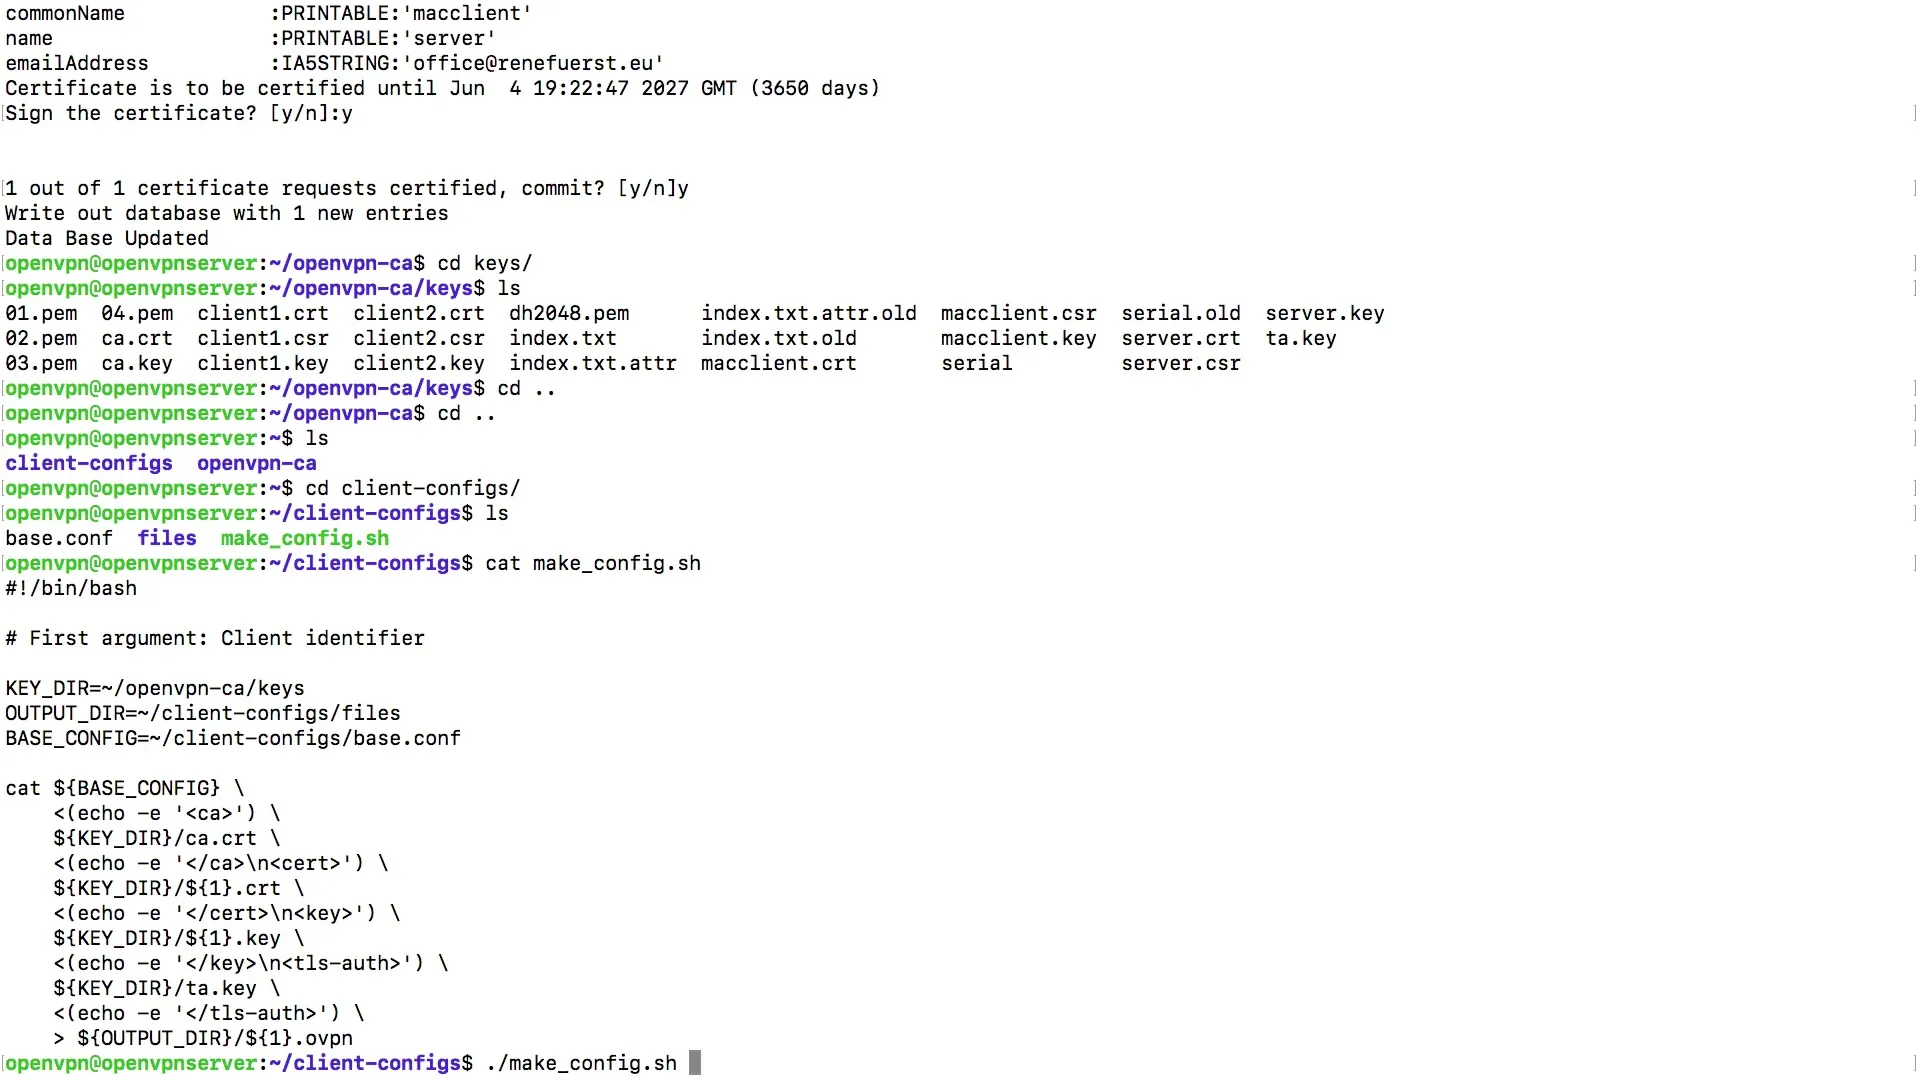
Go back to the Client Configs folder and open the script makeConfig.sh to create the OVPN file. Enter the name of your client, such as "Mac Client", and run the script. The configuration will now be assembled and written to the corresponding file.

Step 6: Verifying the Created OVPN File
Once the script is complete, you should find the new OVPN file in the directory, e.g., maccilient.ovpn. Open this file to view the configuration. It contains information about the VPN server, the type of connection (TCP/UDP), as well as the necessary certificates and keys.
Step 7: Securely Transferring the OVPN File
To transfer the OVPN file to your device, choose a secure method. The recommended approach is to transfer the file using a secure protocol like SCP (Secure Copy Protocol). Alternatively, you can also save the file on a USB stick and transfer it securely.

Step 8: Installing the OpenVPN App
Download the OpenVPN app to your target device, whether it is a Windows PC, Mac, iOS, or Android device. Install the app and import the previously created OVPN file. Make sure to grant all necessary access permissions to successfully establish the connection.
Step 9: Connecting to the VPN Server
After importing the OVPN file, you should have the option in the app to connect to the VPN server. Select the configured connection and click "Connect". The app should indicate that the connection has been successfully established.
Summary – Guide to Creating a Client Configuration File for OpenVPN
In this guide, you have learned the steps to create an OVPN file for OpenVPN. From generating the keys to securely transferring the configuration file, everything has been covered. You are now ready to use your VPN effectively.
Frequently Asked Questions
How do I create an OVPN file?You first need to generate a key for your client and then execute the script makeConfig.sh.
Can I send the OVPN file via email?Yes, make sure the connection is secured before sending the file.
What programs do I need for the connection?You need the OpenVPN app on your target device.
Do I need to keep the key data secure?Yes, the keys are essential for the security of the connection and should not be publicly accessible.


