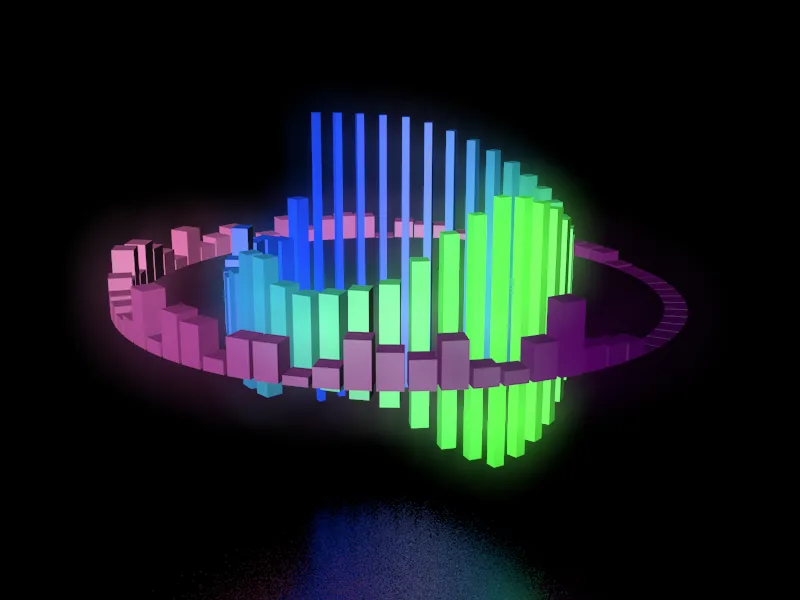
You can view the rendered and dubbed final result of this tutorial at this link. In the accompanying materials for this tutorial you will find the initial project file "PSD_C4D_R19_SoundEffector_start.c4d" as well as the final version "PSD_C4D_R19_SoundEffector_final.c4d".
The sound material used in this tutorial (at this point "Thank you!" to my son Manuel) is also included in two file formats, of course you can also include your own sound file (.aif, .wav, .aac, .m4a etc.) instead.
Let's first take a look at the elements of the original scene. The scene has a floor object with a reflective metal material with a rough surface so that the objects animated by sound are softly reflected on a background. The camera integrated in the scene is only a suggestion for the later render perspective.
The upper parametric cube in the object managerserves as a clone for an inner circle of cubes, which should react to the middle frequencies of the sound file.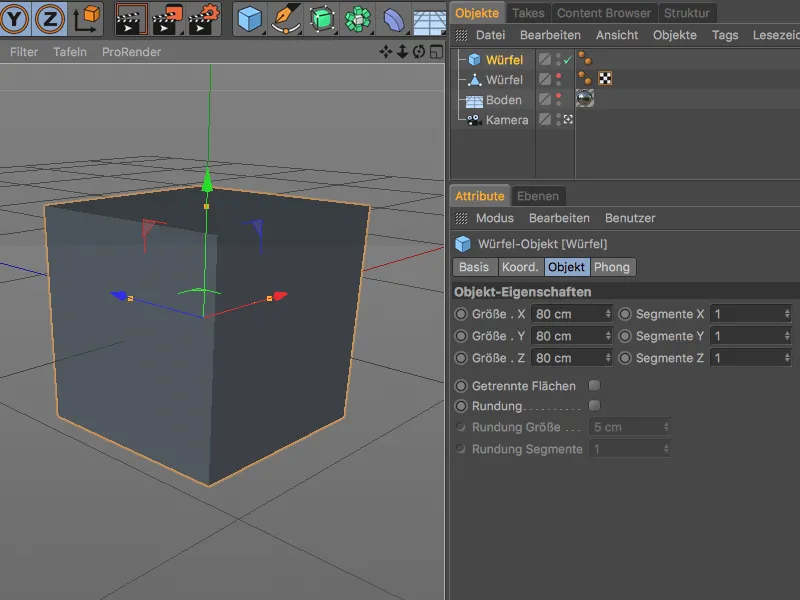
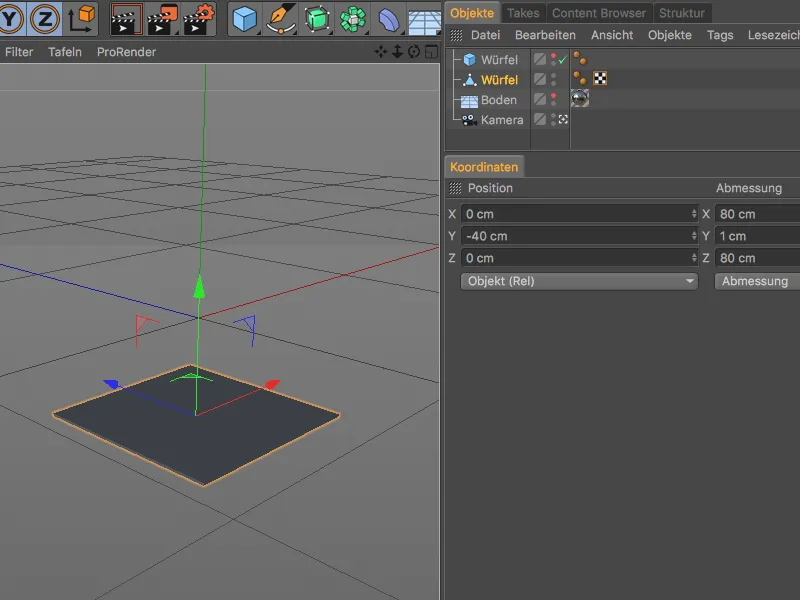
The second cube, which was converted into a polygon object, was scaled to an extremely flat cuboid. Its axis center is located on the bottom side of the cube so that the transformations applied to the cube can only act upwards.
Creating and setting up the clone object for the inner circle
Let's start with the first clone object, which is to multiply the parametric cube and arrange it in a circle. To do this, we select the parametric cube in the 3D view or in the Object Managerand call up the MoGraph menu. We create the clone objectlocated there by holding down the Alt key.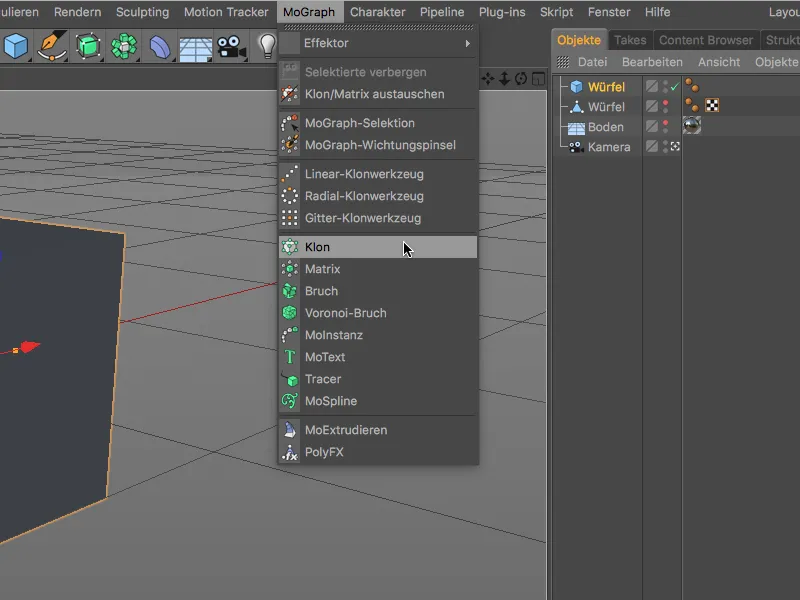
The addition of the Alt keyhas caused the cube intended as a clone to be subordinated to the clone objectas desired. So that we cannot confuse the clone objects, we quickly rename the first clone objectafter double-clicking on its name in the Object Manager.
In the corresponding settings dialog of the clone object, we open the object page and set the clone mode to Radial. A number of 40 clones ensures that the cubes are very close together with a radius of 600 cm. To arrange the clones on the horizontal plane, we select XZ as the plane.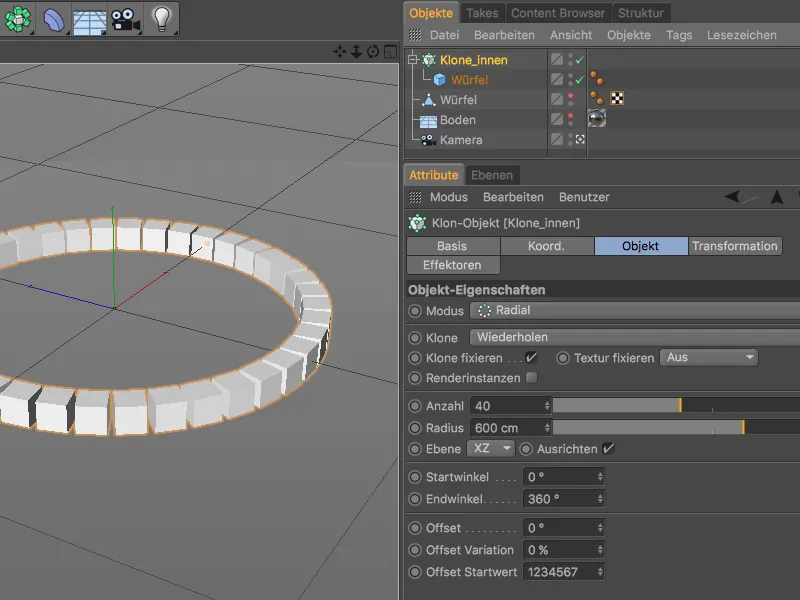
Create and set up the clone object for the outer circle
We create a clone objectfor the outer circle in the same way. This second clone objectis assigned the polygonal cube as a clone. In the settings dialog of the clone object, we use a larger radius of 1000 cm this time, and we also increase the number of clones accordingly to 70 so that the clones are close together again.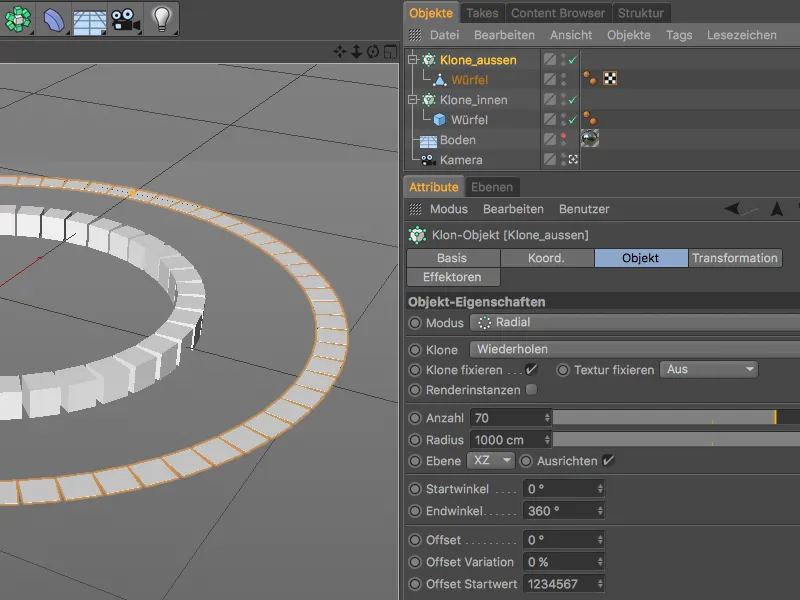
The two clone objectsare now perfectly prepared to be transformed or animated in the next steps using the new sound effectors.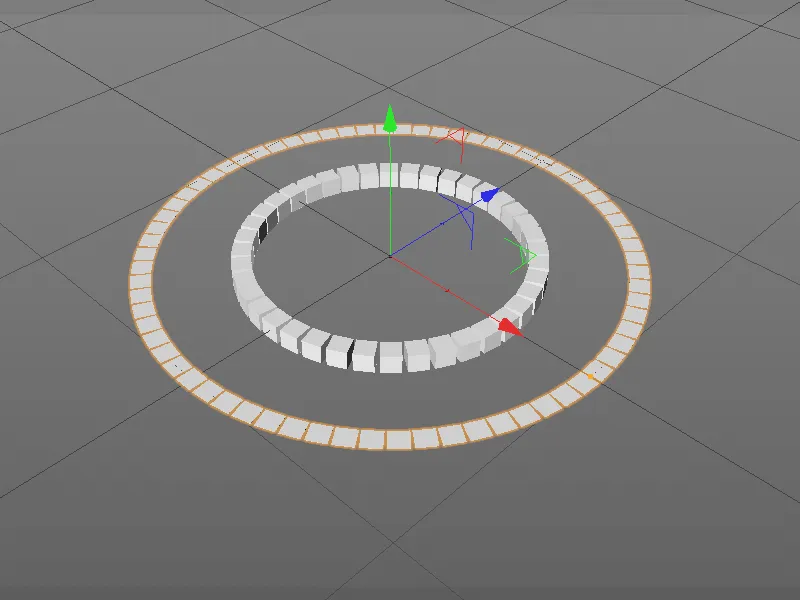
Create and set up the first sound effector
Let's start with the outer circle of clones. To ensure that the effector is immediately assigned to the correct clone object, we select the clone objectfor the outer circle and create the desired sound effector via the MoGraph>Effector menu.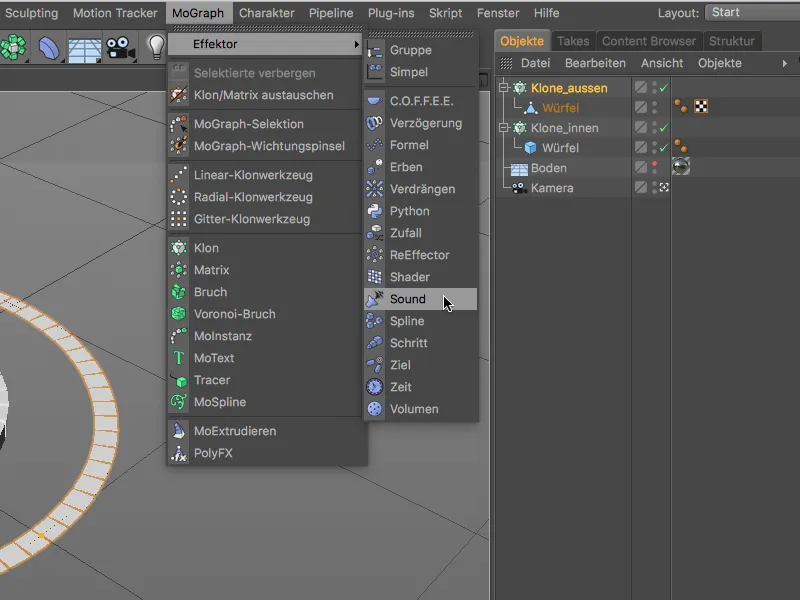
The sound effector we have just created is at the top level of the hierarchy in the Object Manager, but if we open the settings dialog for the clone objecton the effectors page, we will find the sound effector as an entry. For the sake of clarity, we also rename the associated sound effector appropriately after double-clicking on its name in the Object Manager.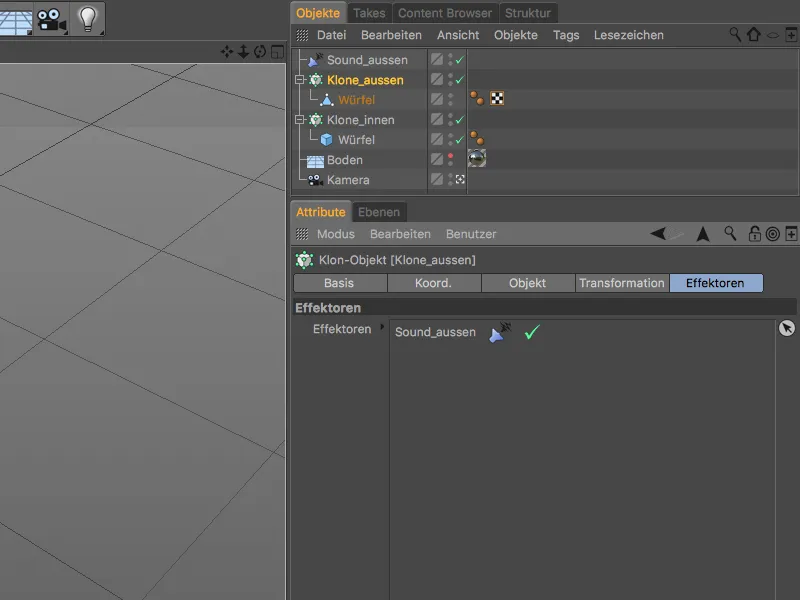
In order for the sound effector to do its work, we need to specify a sound file. In the settings dialog of the sound effector, we find the entry Sound track with the arrow button Load sound on the effector page.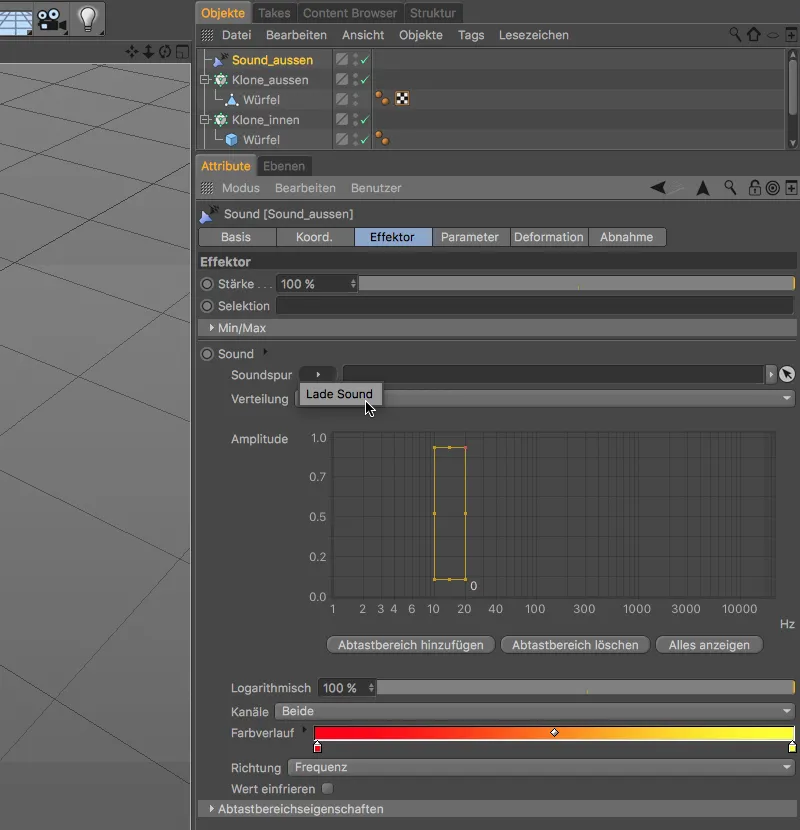
In the selection dialog that opens, we navigate either to the directory with the accompanying materials for this tutorial or to any other sound file that is to be used for the sound effector and load it into the sound effector using the Open button.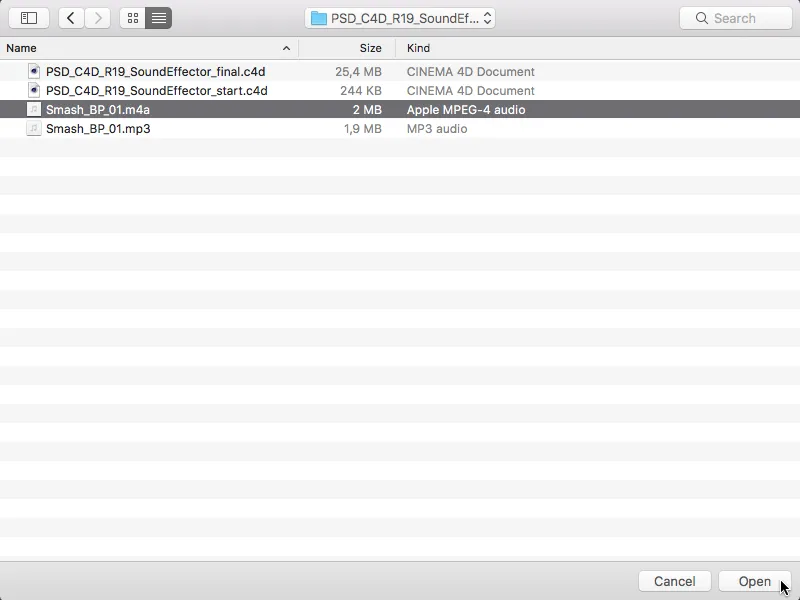
After this step, the sound is already active so that we can play it using the play button in the animation area. The first - albeit still rather rudimentary - movements of the clones are already recognizable. The document length of 1150 images (frames) stored in the C4D project file corresponds to the length of the supplied sound file. If you use shorter or longer sounds, you should adjust the length if necessary.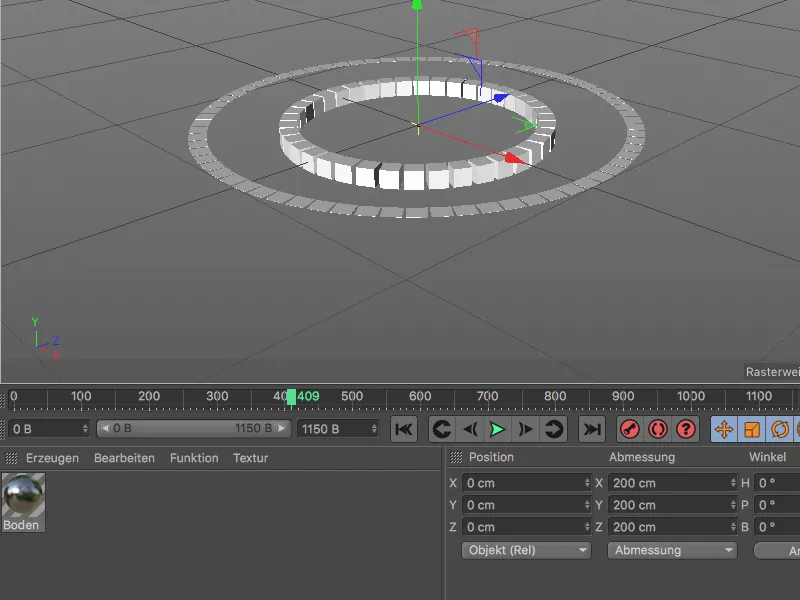
Back in the settings dialog of the sound effector, we see the animated frequencies of the sound file displayed in the Amplitude graph. The sound effector for the outer circle should take care of the frequency range from approx. 3000 Hz. We therefore stop the animation or the sound at a point where the graph extends over all ranges and move the sampling range drawn as a frame to this point. The height or width of the sampling area can be changed using the small grippers.
The sound effector now only reacts to frequencies in the framed area. At the moment, a color gradient running from red to yellow is stored for the entire frequency range.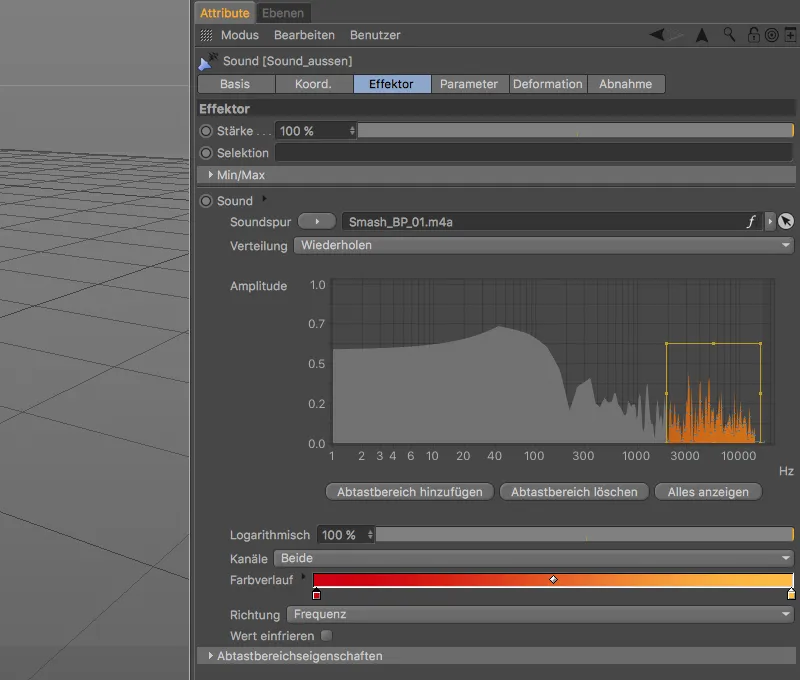
However, we can adjust the gradient to our liking by opening the Color gradient entry via the small arrow and redesigning the gradient. I have opted for violet and pink, with violet at both ends to avoid a color jump.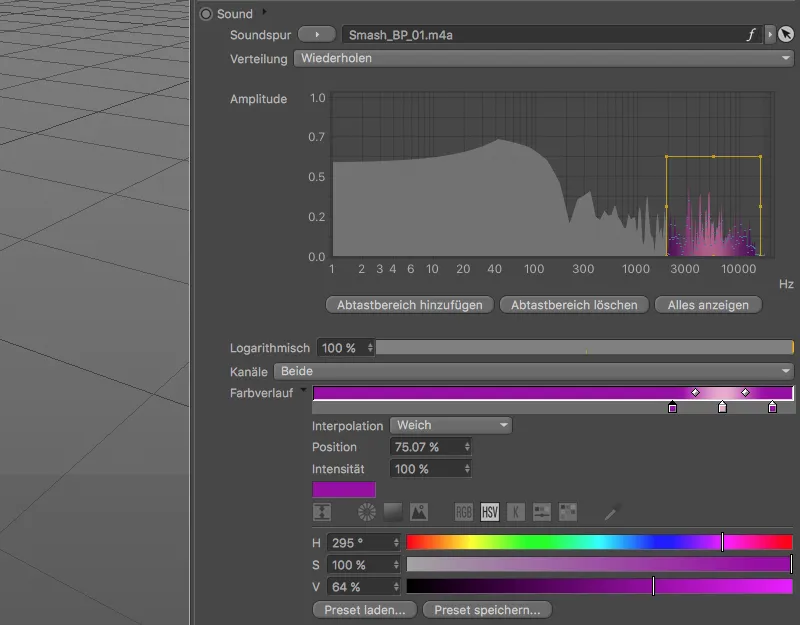
So far, all clones react together to the applied amplitude, this is due to the Peak setting for sampling. To transfer the curve captured by the sampling area to the existing clones, we switch to Shape in the Sampling menu.
We also take this opportunity to set the Decay value to 50% in order to introduce a visible delay in the animation of the clones.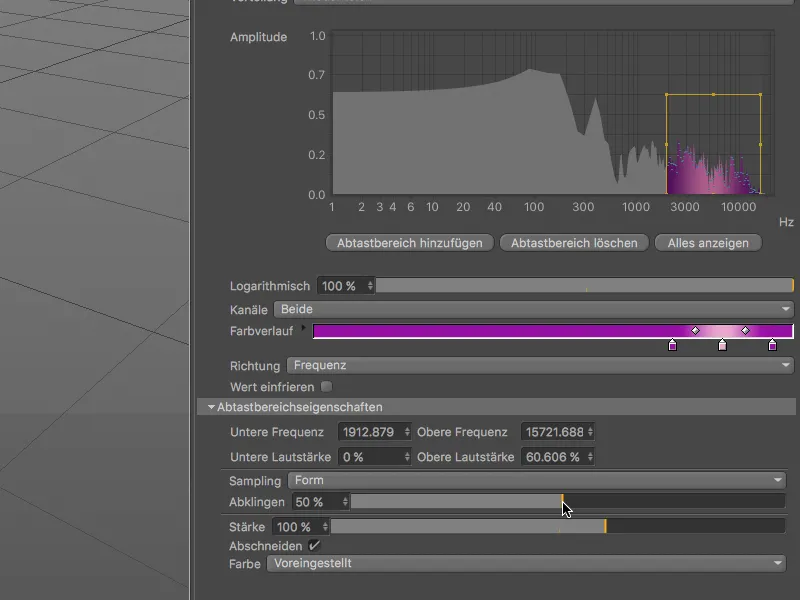
Now the sound effector receives the data and prepares it so that we only have to tell it what exactly should happen to the affected clones. To do this, we switch to the parameter page of thesettings dialog.
The flat cuboid cubes should grow upwards in amplitude, which is why we deactivate the modification of the position in the Transform area and activate the scaling instead. As the cuboids should only grow upwards, we only enter a value of 400 for the size in the Y direction (G.Y) .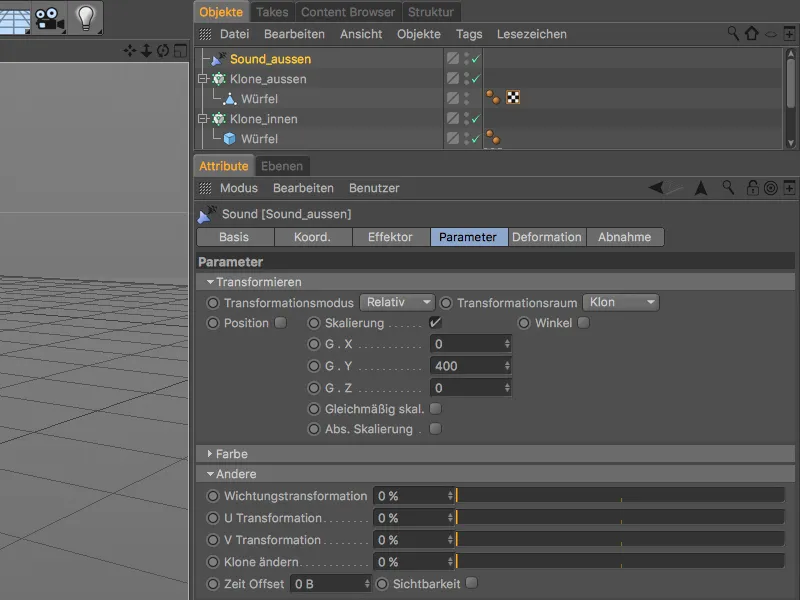
To ensure that the color gradient we have created is actually noticeable on the clones, we open the Color section and switch the color mode to On.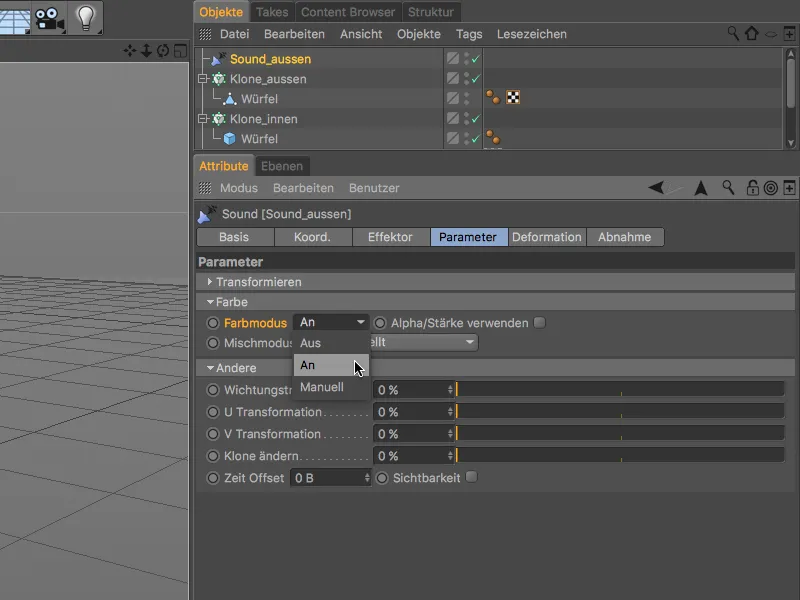
Now the sound effect for the outer clone circle is ready, so it's worth clicking on the play button again. As desired, the small cuboids grow upwards according to the amplitude in the selected frequency range of the sound file.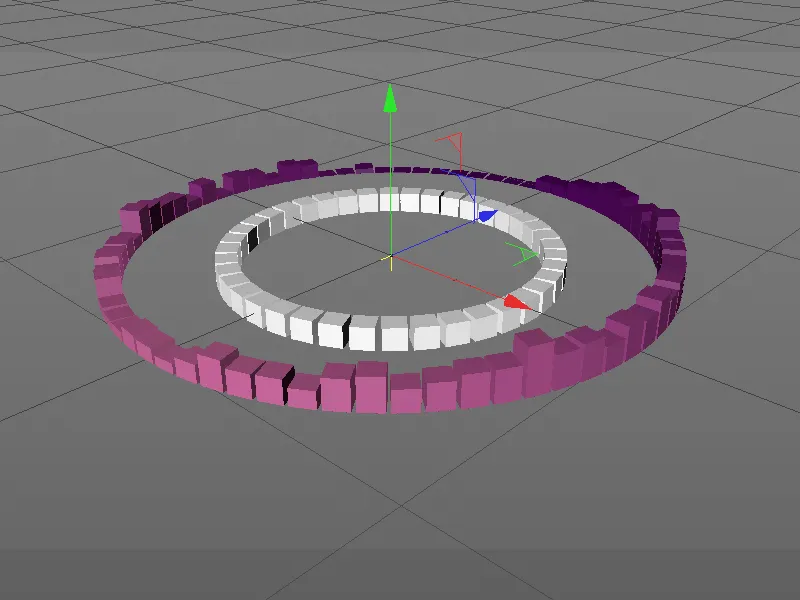
Creating and setting up the second sound effector for the inner clone ring
To avoid having to create and set up the second sound effector for the inner clone ring from scratch, we simply create a copy of the first sound effector in the Object Managerby holding down the Ctrl keywhile dragging it.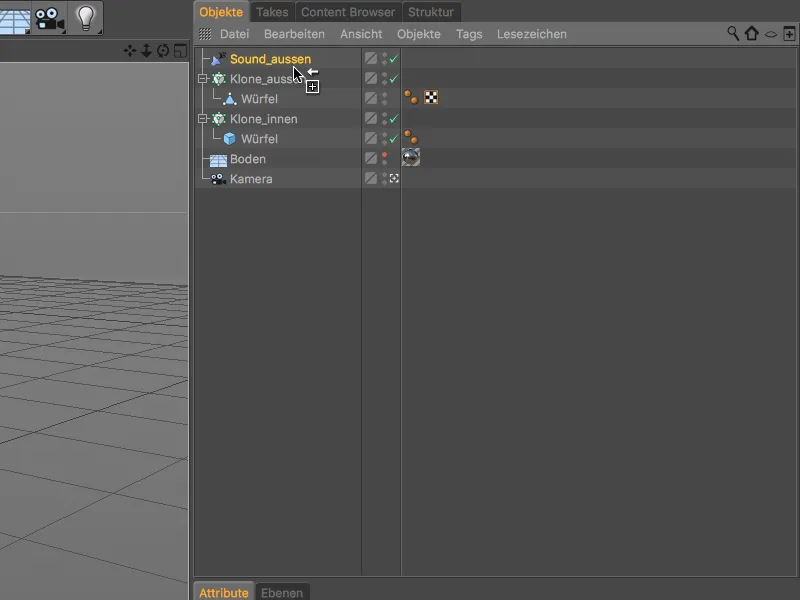
For the sake of clarity, we rename the duplicated sound effector accordingly. Thanks to our copy, the sound is already included in the settings dialog on the effector page, so we can go straight to the desired frequency range and the colors in the associated color gradient.
I opted for the range between 70 Hz and 1500 Hz and adjusted the sampling range accordingly. I chose bright blues and greens as the colors.
To prevent the animation of the clones from becoming too sluggish for this very active range, we reduce the value for decay to 5% in the sampling range properties, so that only a slight delay can be seen.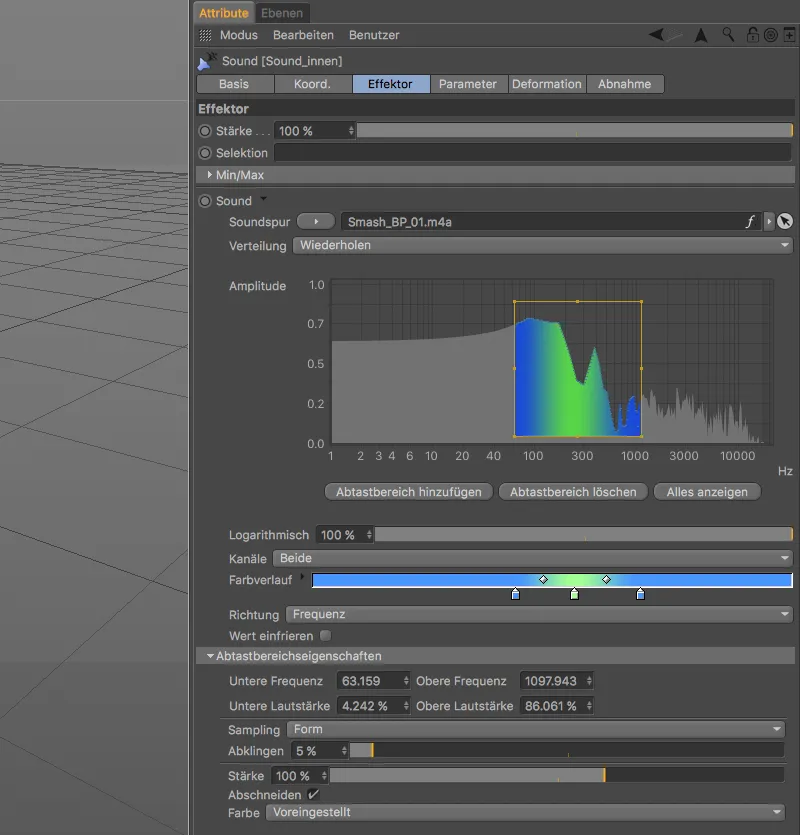
On the parameter pageof the settings dialog, we select the Absolute setting for the transformation mode in order to be able to calculate with absolute values for the scaling. In the X and Z directions, the cube should reduce to a tenth of its size (value 0.1), while in the Y direction it should increase twentyfold (value 20).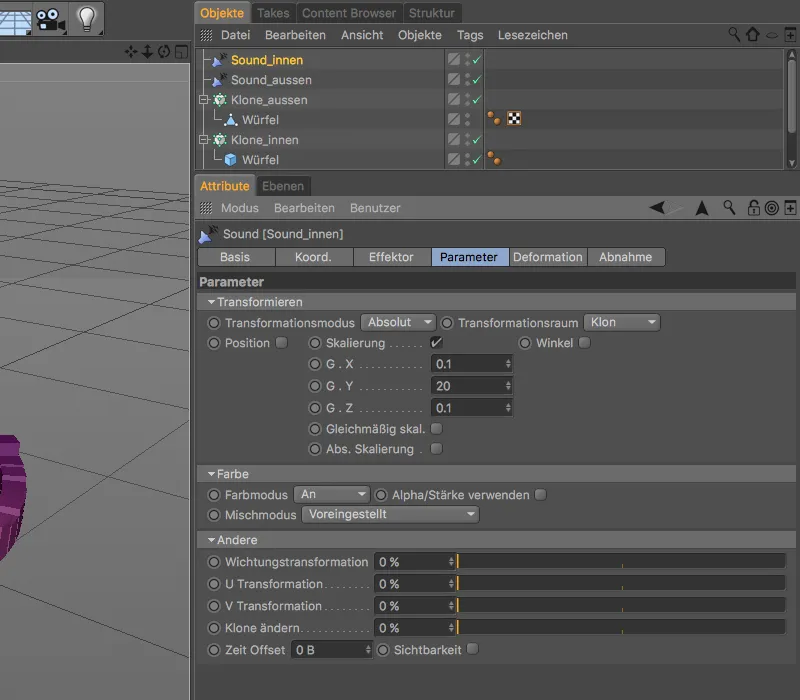
Now we just need to assign this second sound effector to the correct clone object. To do this, open the settings dialog of the clone objectfor the inner clone ring on the effectors pageand drag the sound effector for this clone ring from the object managerinto the effectors field.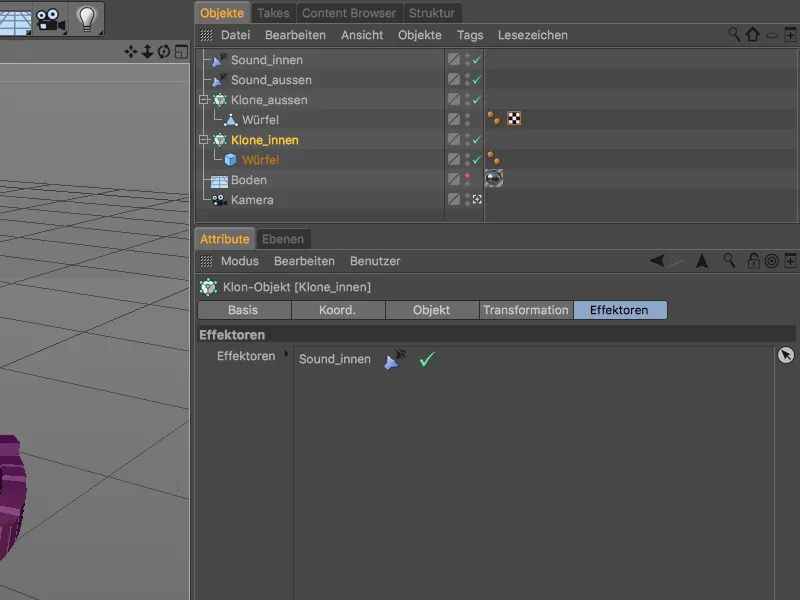
Our work on the sound effectors is now complete. By clicking on the play button, we can now admire the clones of both clone rings animated with the sound effectors.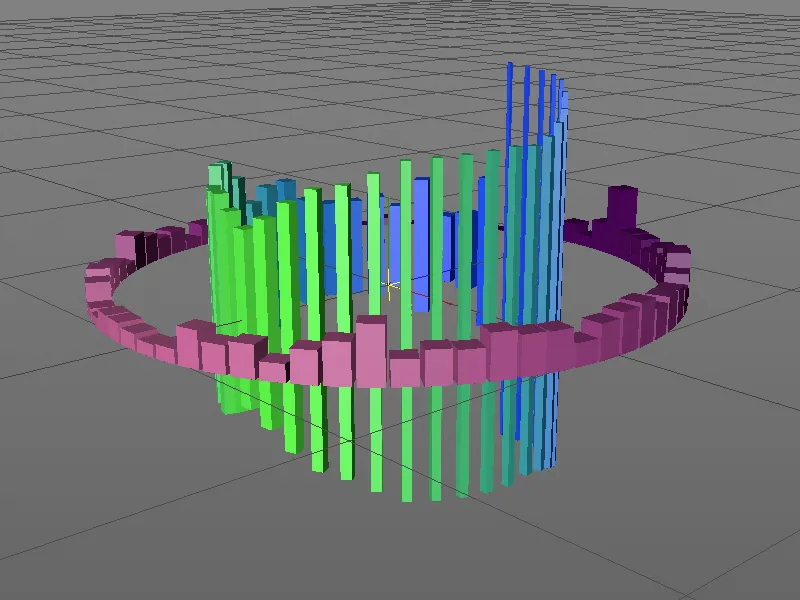
Rotation of the clone rings via XPresso
As we all know, after the duty comes the freestyle, which is why we don't stop here, but give the clone rings a little more pizzazz by rotating them in opposite directions. To animate this rotation independently of the length of the sound and without keyframes, we implement the rotation using a small XPresso expression.
We start with the XPresso expressionfor the outer clone ring and assign an XPresso tagto this clone objectvia the context menu of the right mouse button from the CINEMA 4D tags.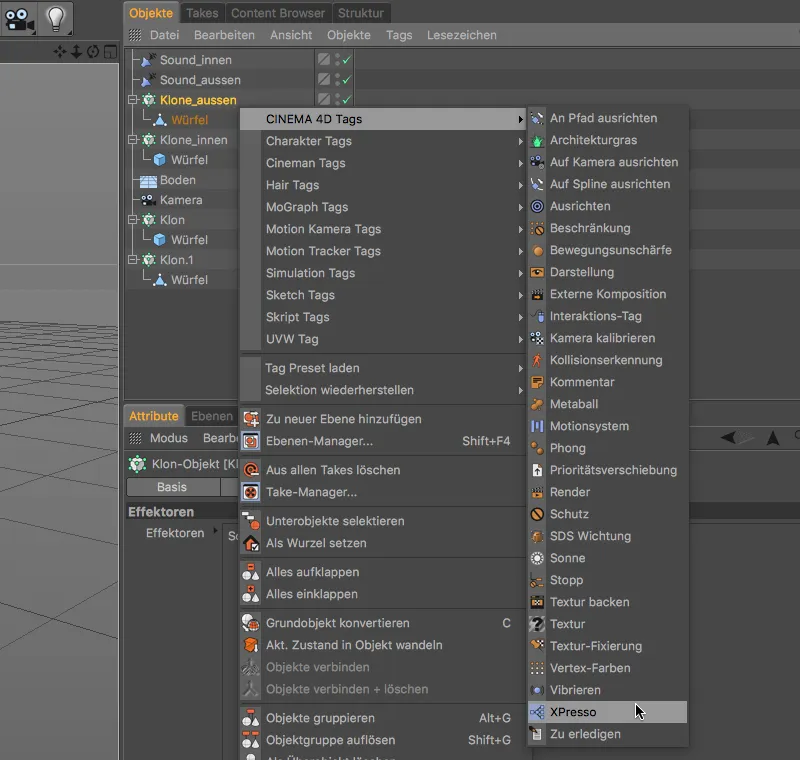
Double-click on the tag symbol in the Object Managerto open the XPresso Editor and drag the clone objectof the outer clone ring from the Object Managerinto the XPresso Editor as the first node block.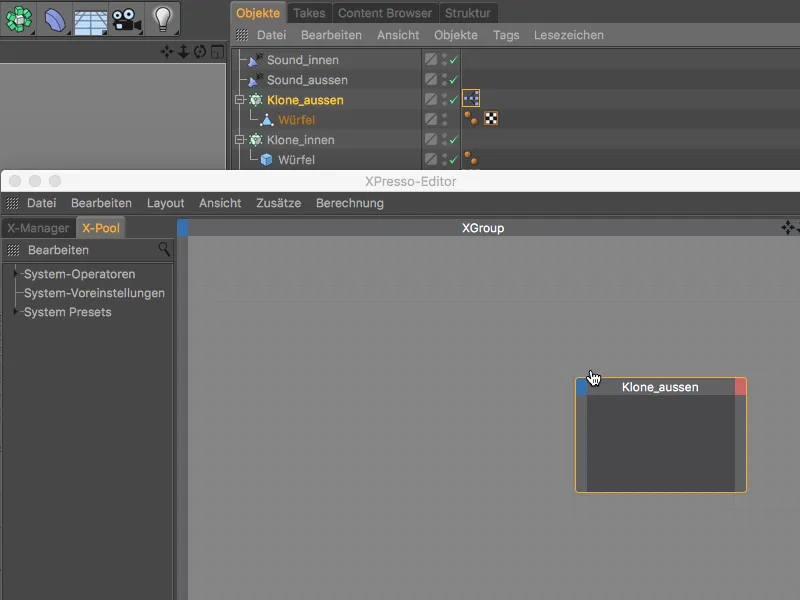
With our XPresso expression, we want to animate the global heading angle (Global angle.H) of the clone ring, which is why we make this port available at its input after clicking on the blue port button of the node.
The rotation of the clone ring should be controlled depending on the time or the current image. This information is provided by the time node, which we can find in the context menu of the right mouse button under New Node>XPresso>General.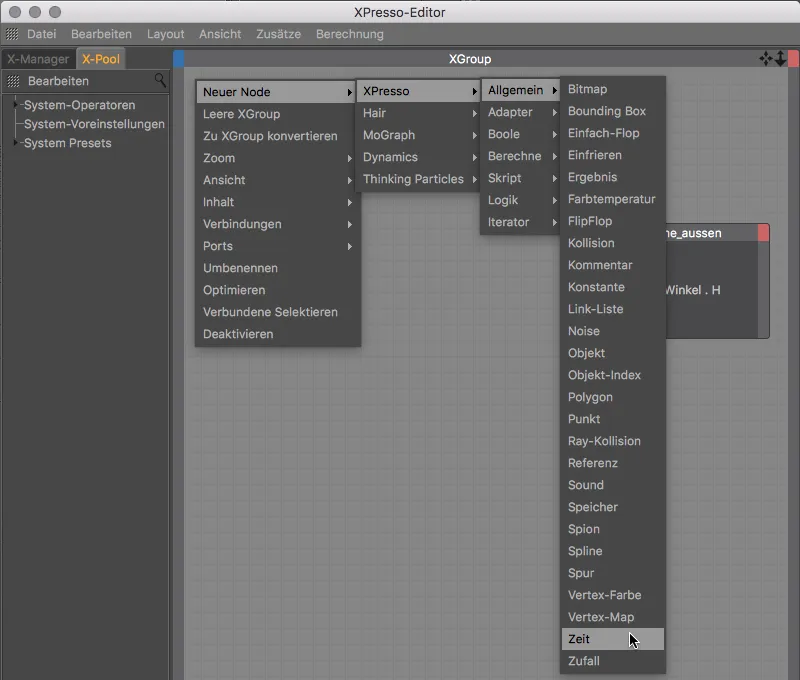
To be able to access the current image as information from the node, we click on the red port button of the time nodeand make the image portavailable at the output of the node.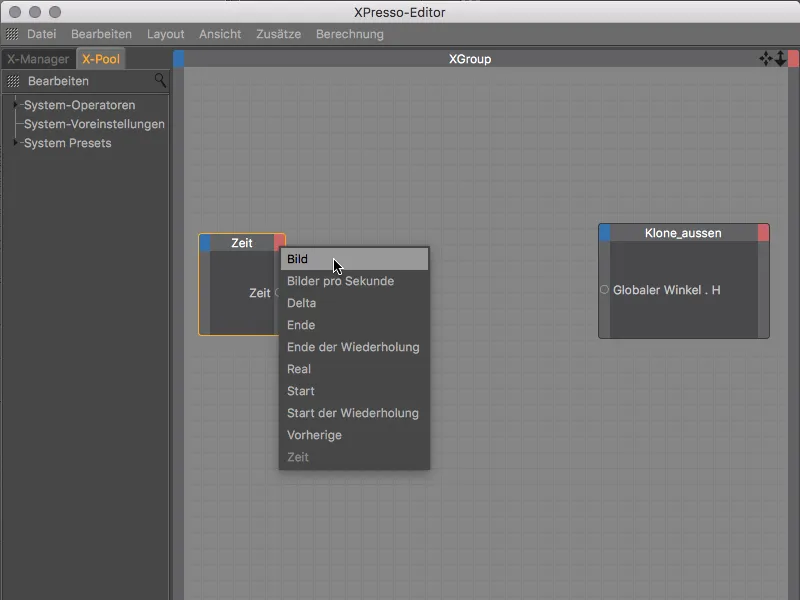
If we were to connect the two nodes via the ports provided by us, the clone ring would directly adopt the current image as the angle information for the clone ring. A full rotation would therefore be achieved after just 360 frames, which at 25 frames per second is a pretty fast affair - too fast to be able to properly perceive the clones animated by the sound effector.
To slow down the rotation a little, we add a math nodebetween the two nodes. We can find it in the context menu of the right mouse button under New Node>XPresso>Calculate.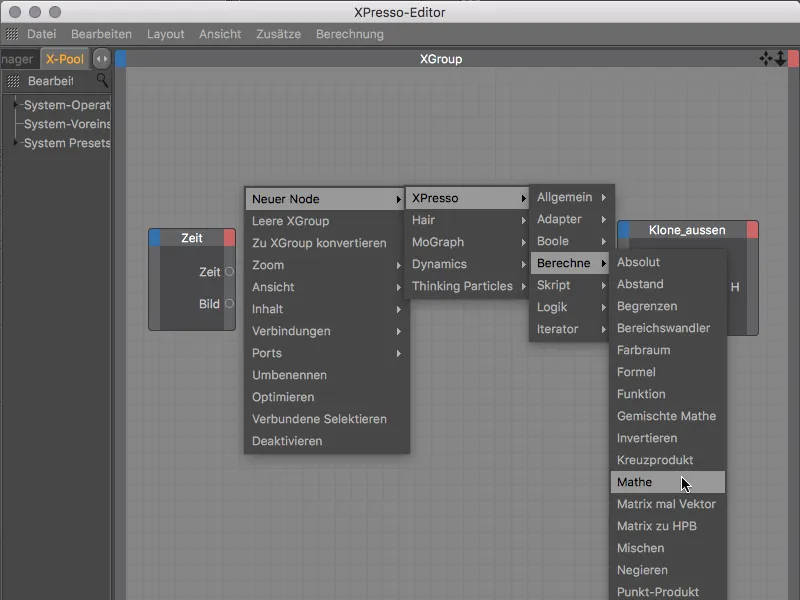
By selecting the math nodein the XPresso Editor, we can display its settings in the Attribute Manager. To slow down the rotation speed, we use the Divide function to divide the value at the first input by the constant of 5 that we specified at the second input.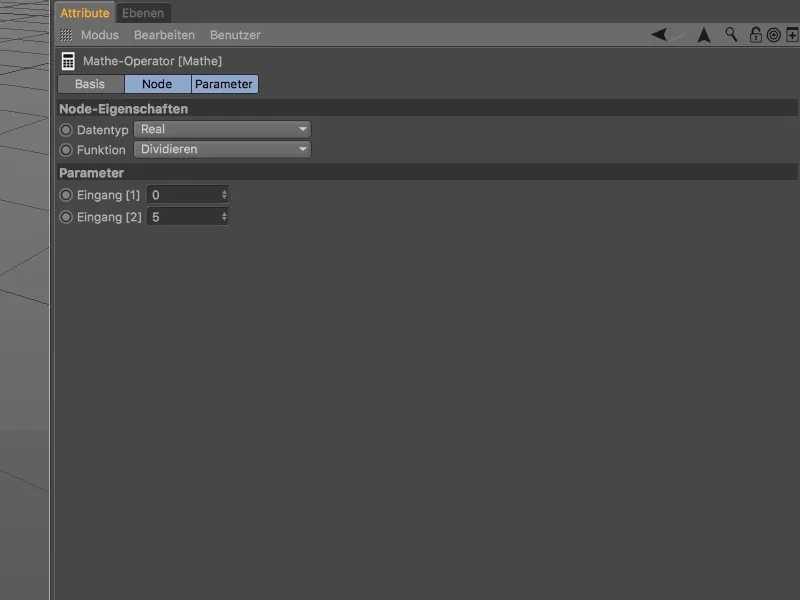
Now we just have to connect the three nodes in the XPresso editor by dragging them from port to port while holding down the mouse button.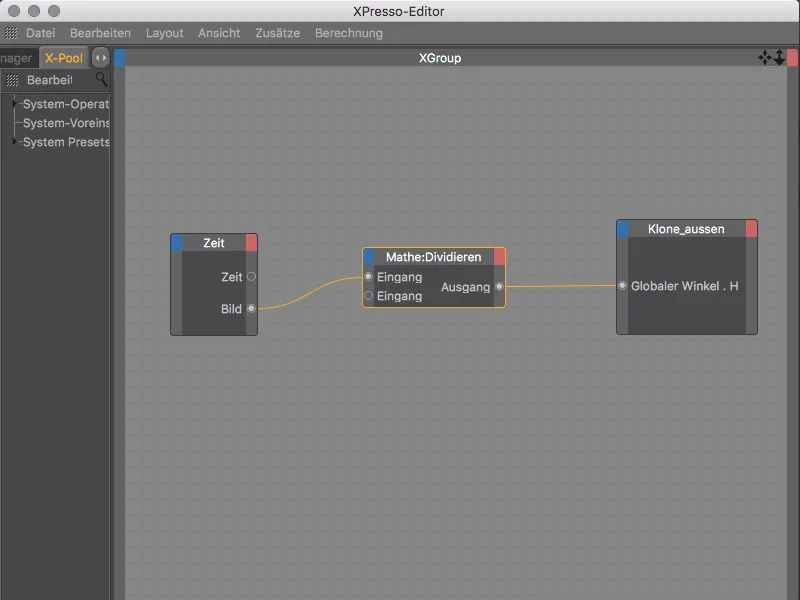
So much for the XPresso expressionfor the outer clone ring. To use the structure of this expression as the basis for the animation of the inner clone ring, we copy the XPresso tagto the clone object of the inner clone ring by holding down the Ctrl keyand dragging it in the Object Manager.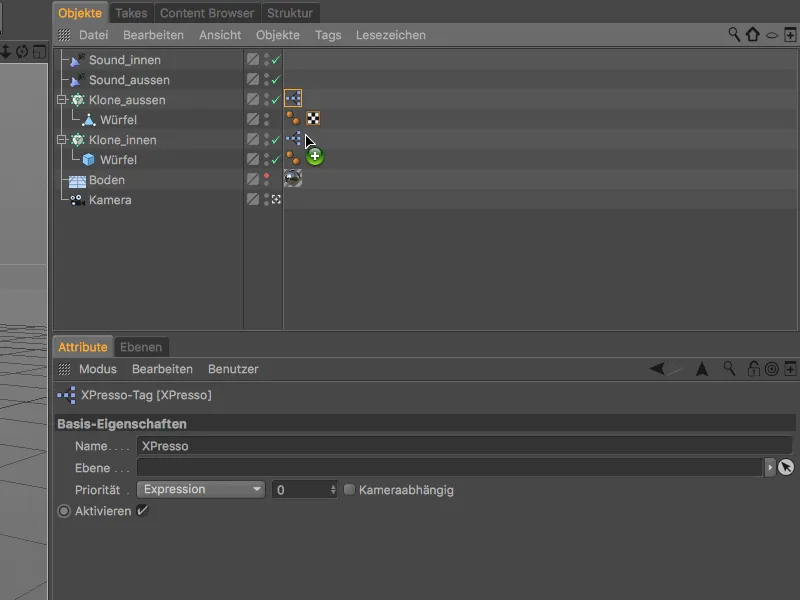
We open the XPresso editor again by double-clicking on the XPresso tag to make the necessary changes for the inner clone ring. We replace the node of the outer clone ring with a newly created node for the inner clone ring, again with the global heading angle as the input port.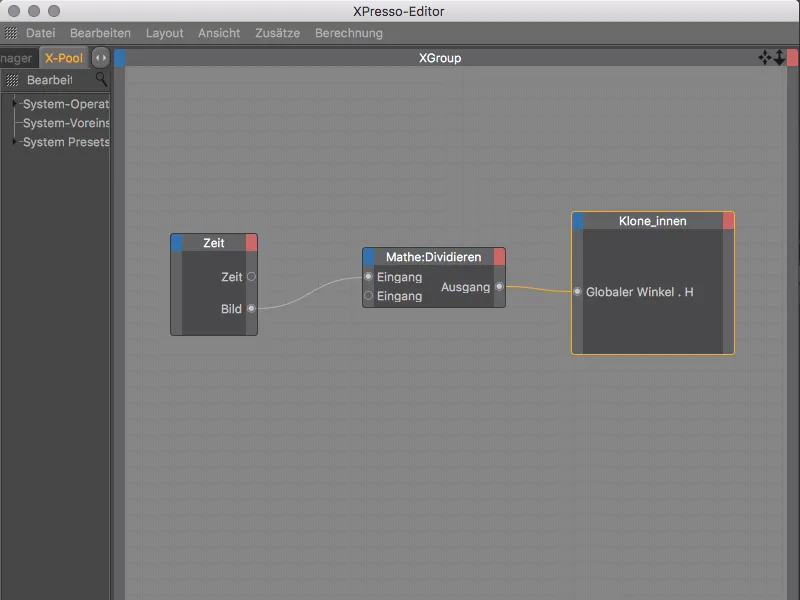
As the inner clone ring has a much smaller radius than the outer clone ring, we also change the constant in the math node. To slow down the rotation even further, we specify the value -50. The negative value causes the inner clone ring to rotate in the opposite direction to the outer clone ring.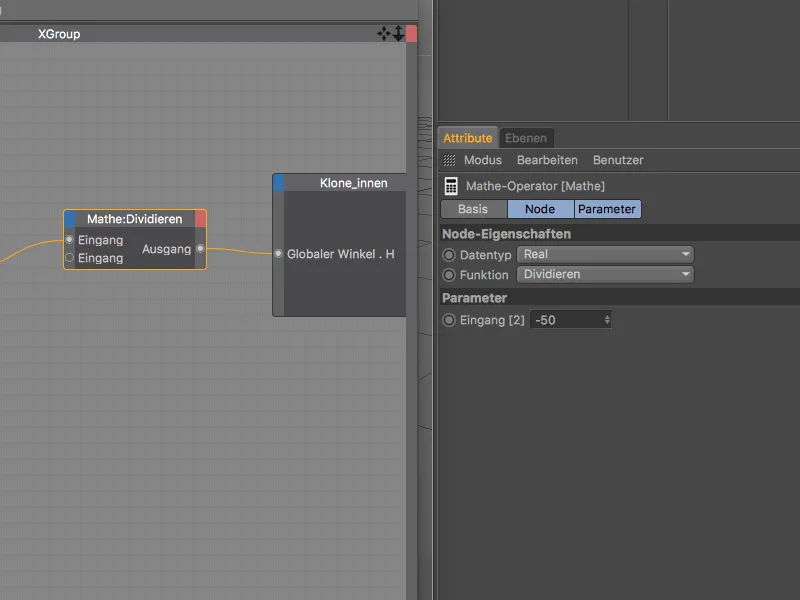
Now we can view the finished animation after clicking on the play button and also create a first rendering. Although the clones do not yet have any material of their own, they adopt the color gradients as color thanks to our specifications in the sound effector.
Our animation could look even more interesting if we were to give the clone a glowing shimmer in material color.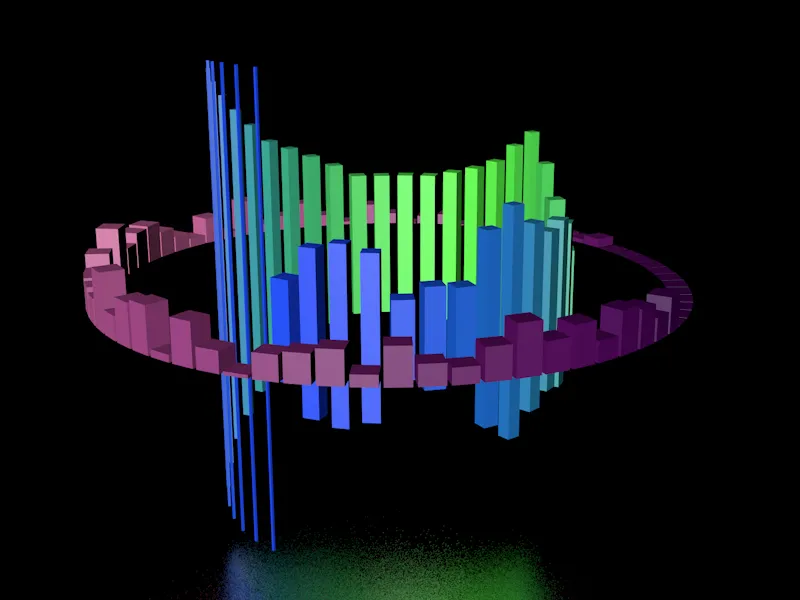
Materials for the glow effect
We can easily give the clones this glowing shimmer using a material with a glow effect. To do this, we create an initial material for the glow of the clones of the inner clone ring by double-clicking on a free space in the Material Manager.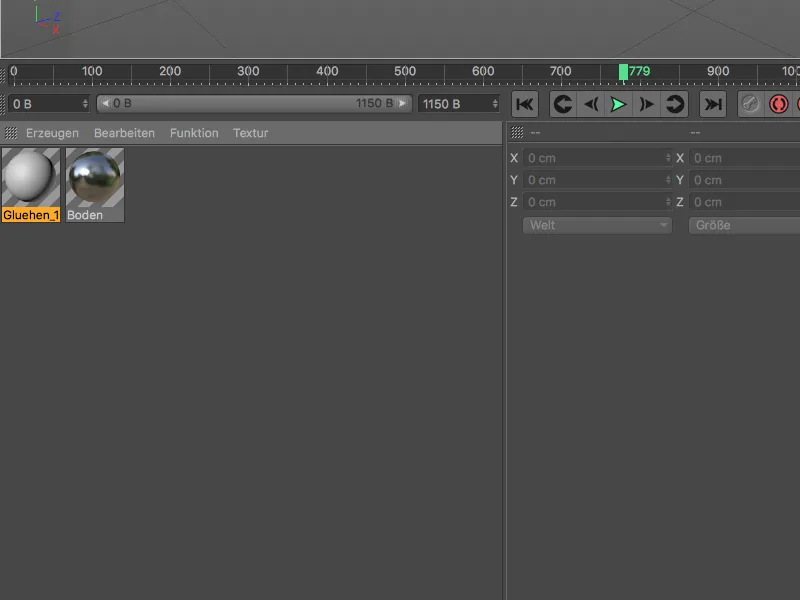
In the settings dialog for the material in the Attribute Manager, we first open the basic pageand activate the glow channelthere. This step also activates the glow effectin the render settings.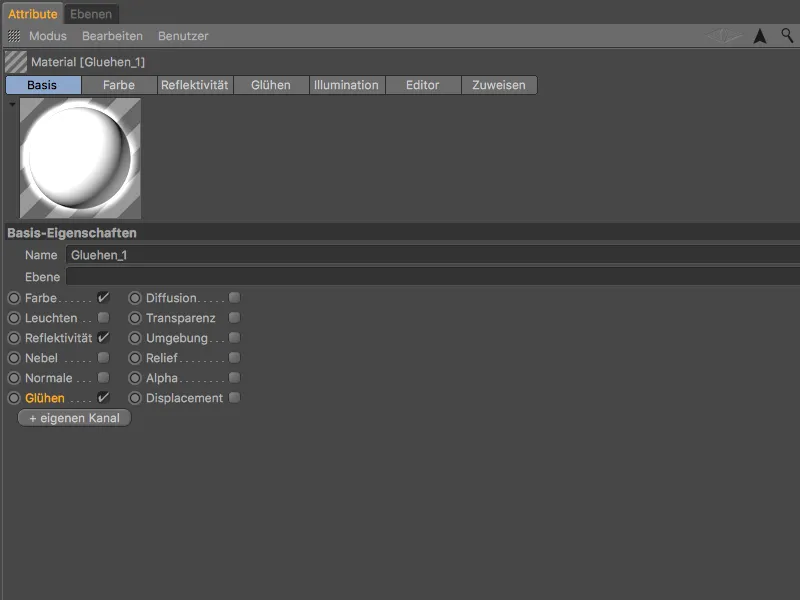
Before we turn our attention to the glow, we jump to the color pageof the material. In order to be able to use the color information specified by the sound effector as a color in the color channel, we need the MoGraph color shader. To do this, we click on the arrow button of the texture and use the MoGraph submenu to define the color shader as a texture.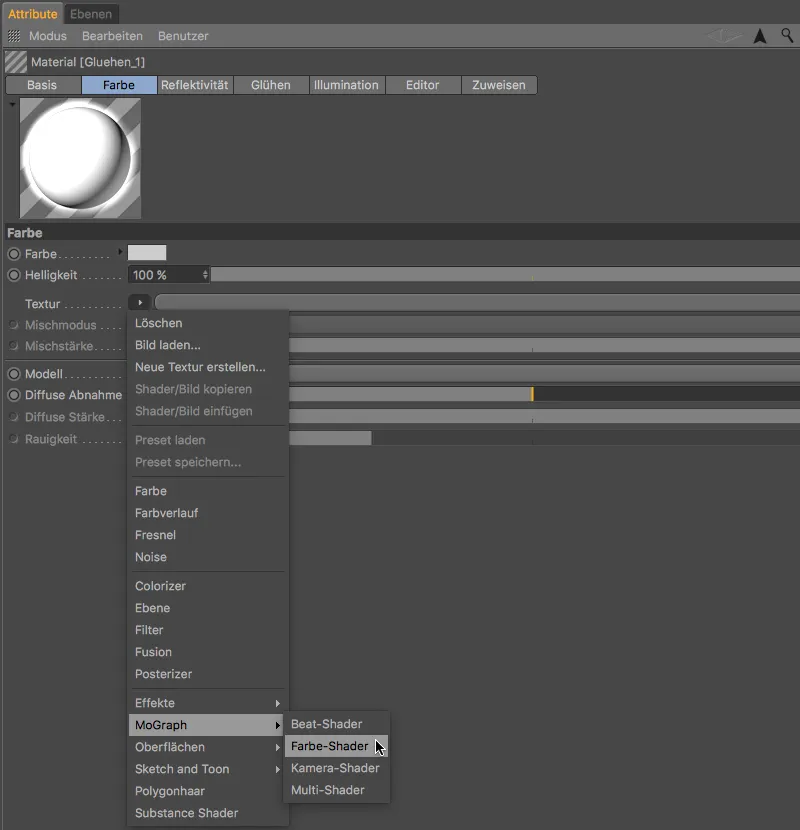
On the glow sideof the material, we reduce the inner strength to 50% and the outer strength to 120% so that enough of the clones remain visible. Instead, we increase the radius to 150 cm and the random valueto 100 % to make the glow in the animation come alive.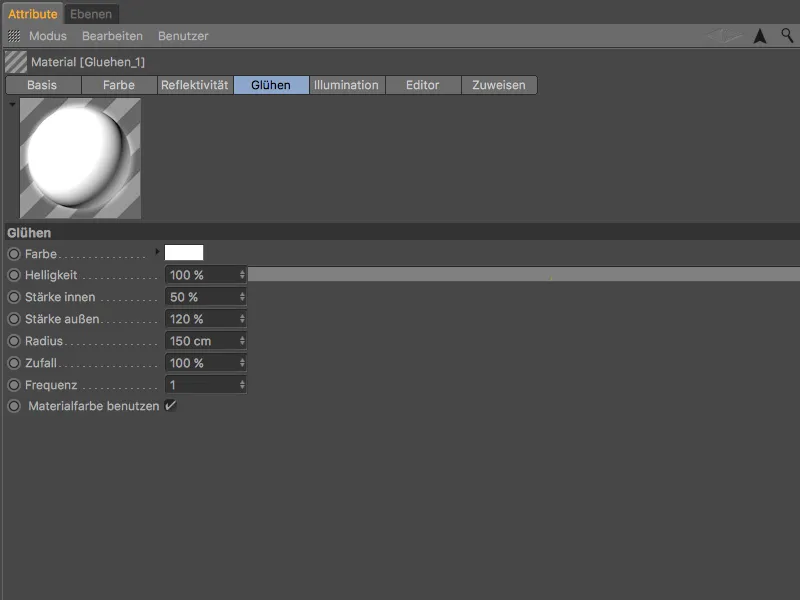
For the glow of the outer clone ring, I created a second material with a radius of 200 cm. This compensates for the slightly darker clone color compared to the inner clone ring.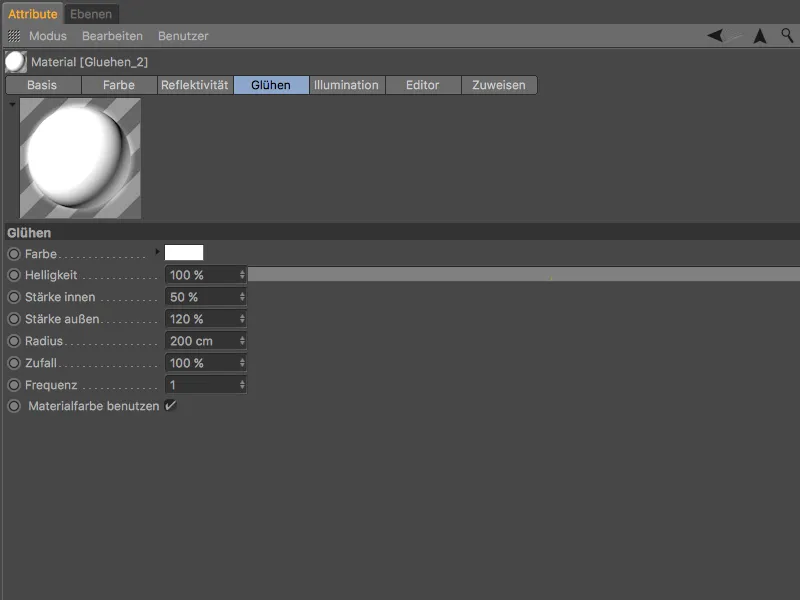
Now we just have to assign the two materials to the clones by dragging and dropping them from the Material Managerinto the Object Manager. The cube of the inner clone objectgets the material with the slightly smaller annealing radius, the cuboid of the outer clone objectgets the material with the larger annealing radius.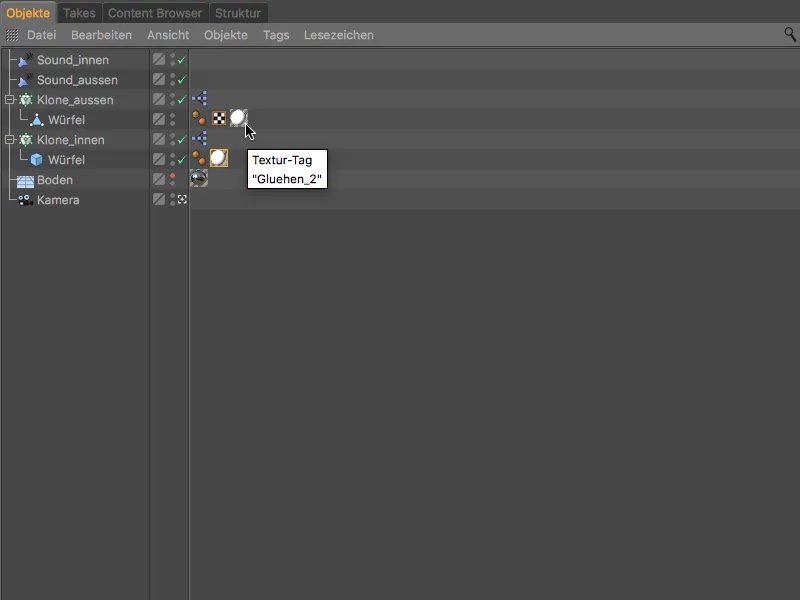
After this step, our MoGraph animation with the sound effect is complete. If you render the animation as a finished movie, the sound will also be included in the output file.