If you want to control photographic effects specifically in Photoshop CC 2014, selecting certain areas of the image is crucial. In particular, the new tools for selecting focus areas give you the ability to effectively distinguish and highlight sharp and blurry areas. In this guide, I will show you step-by-step how to handle this and simplify your image editing.
Key insights
- The new focus area option in Photoshop allows you to select image areas that are sharp.
- Using sliders, you can effectively control the sharpness and background details.
- Adjustments are possible with brushes to achieve precise results.
Step-by-step guide
To utilize the new features for selecting focus areas, follow these steps:
Step 1: Accessing the focus area
After opening your image, go to the selection menu and choose the "Focus Area" option. This option is located directly beneath the familiar color range and allows you to select not by color but by sharpness.
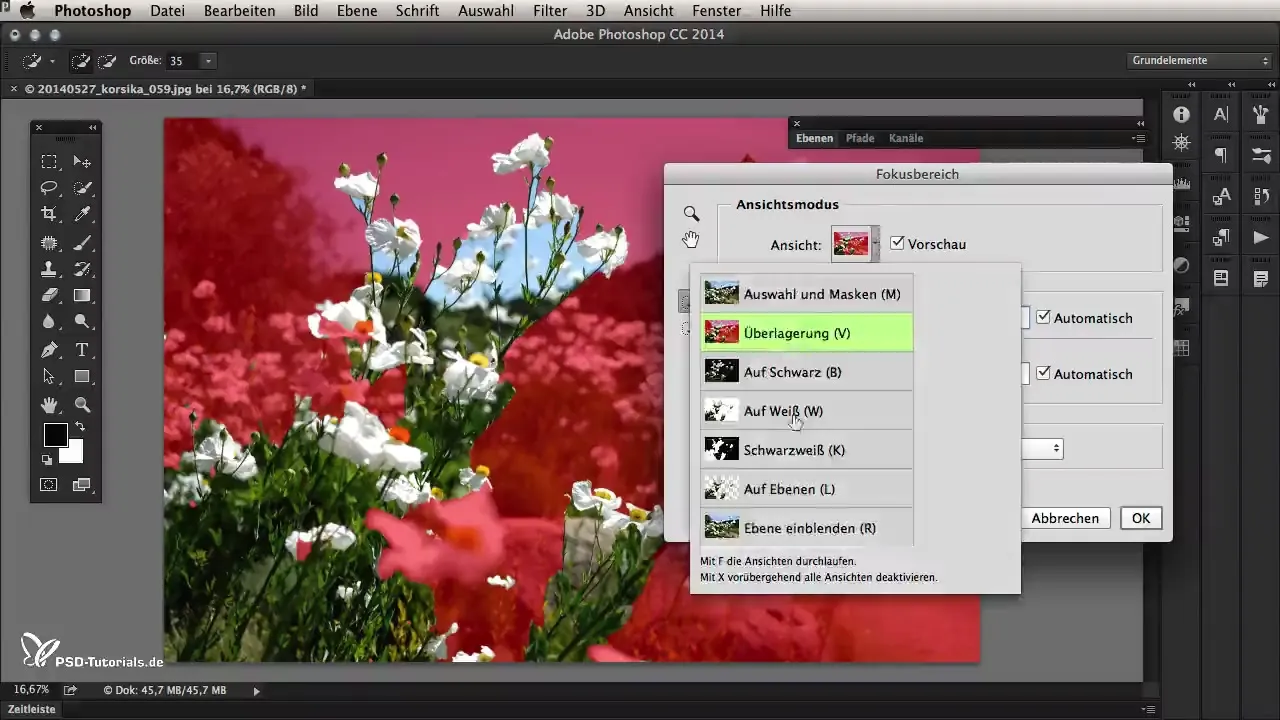
Step 2: Selecting the view mode
Once you are in the focus area dialog, you can adjust the view mode. I recommend selecting the overlay representation to better recognize contrasts. This way, you can see in real-time which areas are selected and which are not.
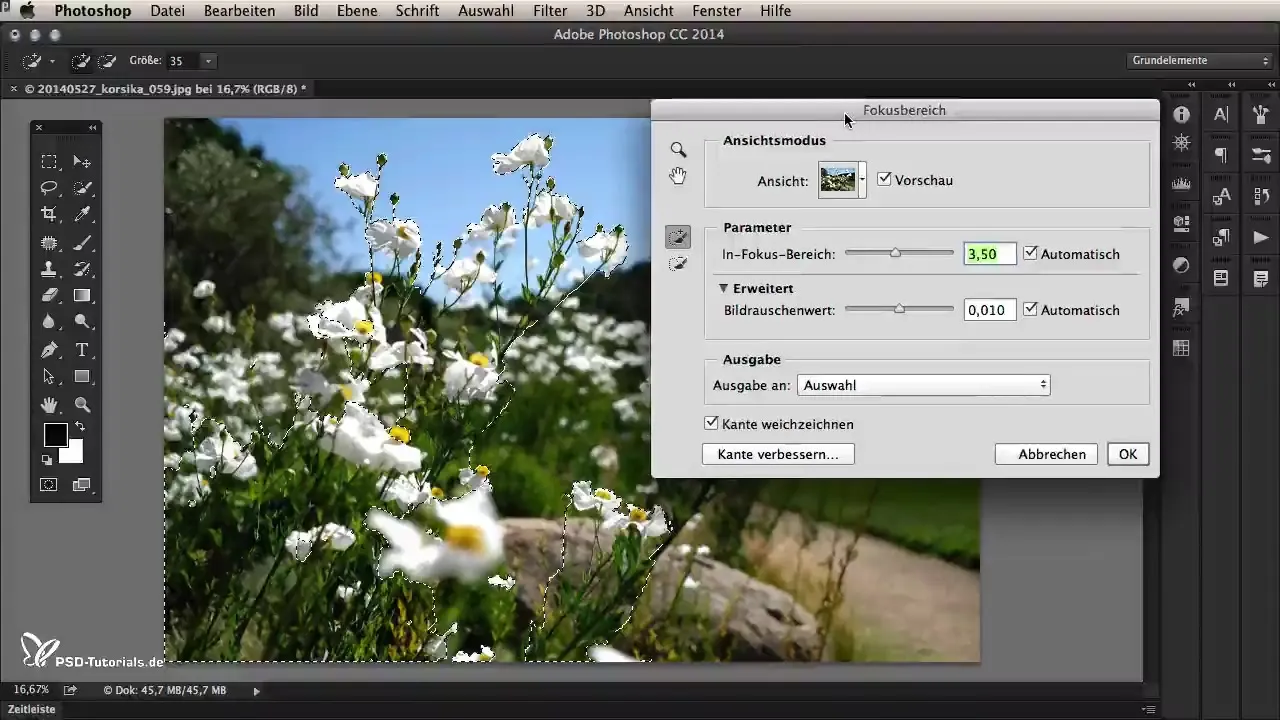
Step 3: Adjusting the sharpness values
This step is crucial. You will see a slider that defines the sharpness. By moving the slider left or right, you can adjust which areas of the image are recognized by Photoshop as sharp. Moving the slider to the right increases the selection and vice versa.
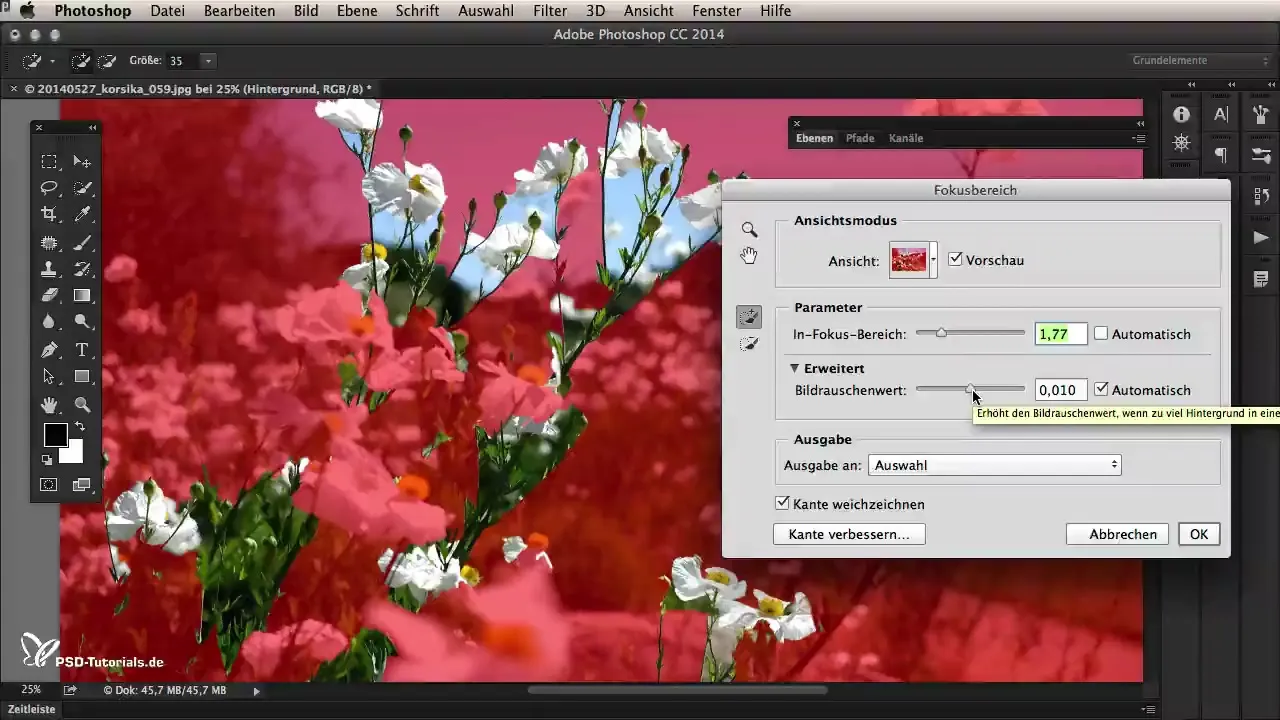
Step 4: Considering image noise
Another important slider is for image noise. Increasing the value means that Photoshop tries to include less noise as part of the sharp areas. Make sure to adjust this value to exclude blurry areas.
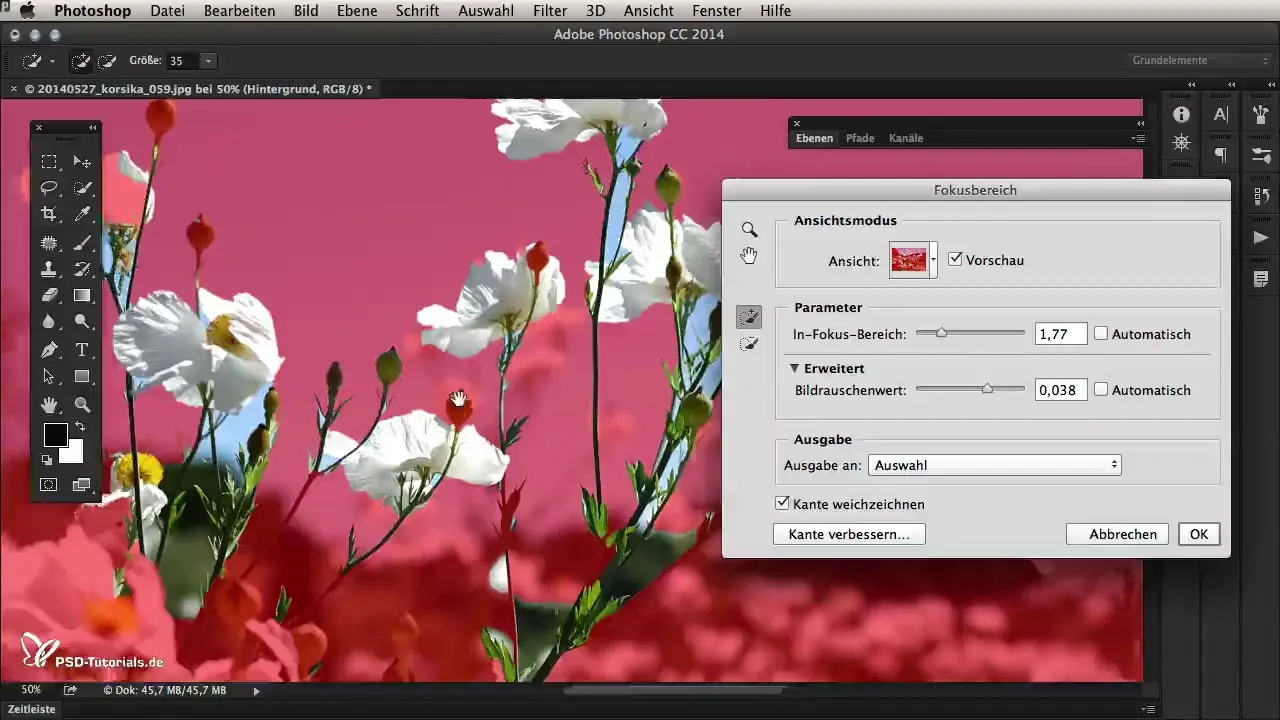
Step 5: Refining the selection with brushes
Use the plus and minus brushes to further refine your selection. The plus brush allows you to add additional sharp areas to the selection. The minus brush is helpful for removing unwanted elements from the selection.
Step 6: Improving the edges
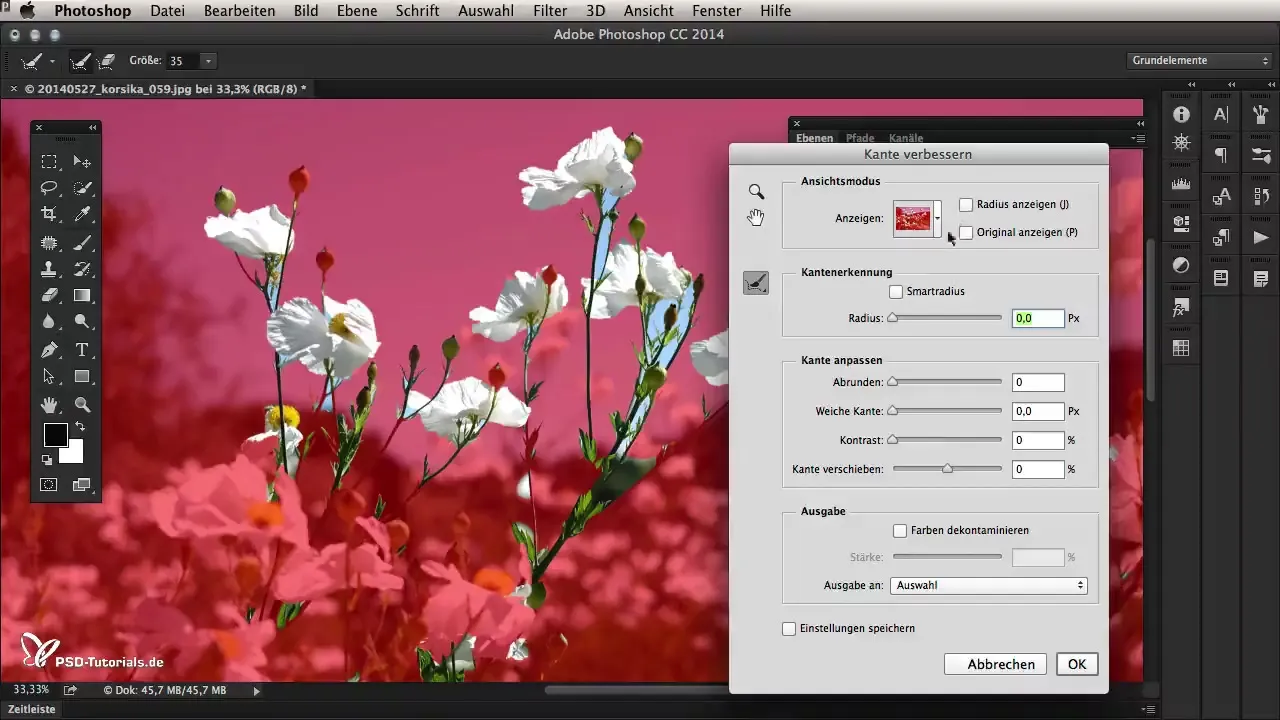
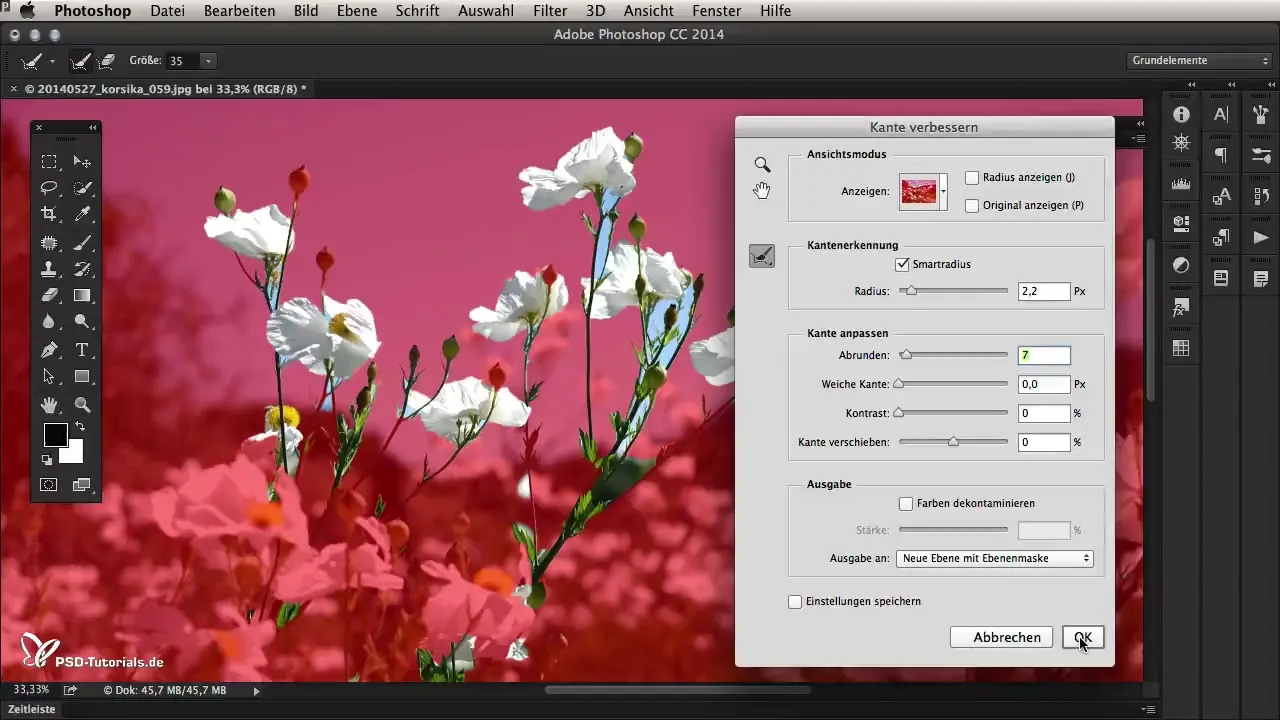
After optimizing your selection, go to the "Refine Edge" menu. Here, you can round the edges of your selection to ensure a harmonious overall image.
Step 7: Creating a new layer with a mask
If everything looks as you wish, click on "New Layer with Mask." This will create a new layer that only masks the sharp areas of your image.
Step 8: Making color corrections
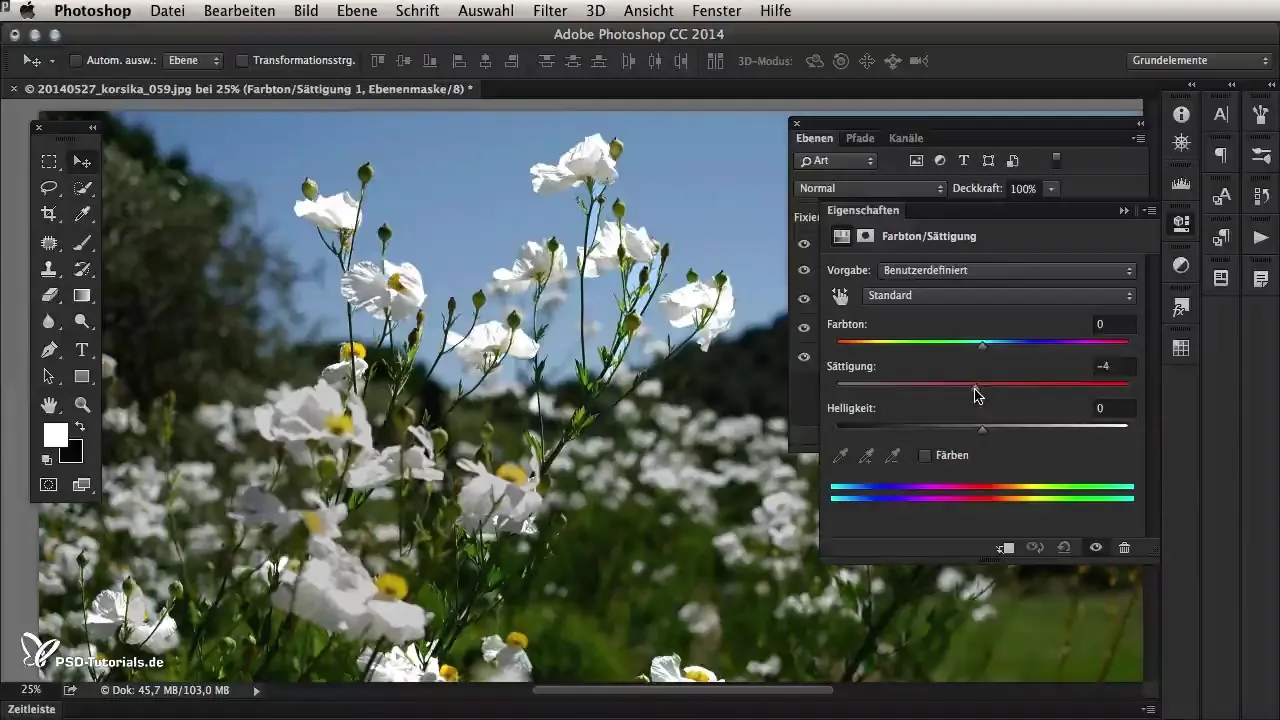
Now you can make color corrections. Slightly decrease the exposure to darken the background while making the flowers stand out. Use the "Hue/Saturation" settings to reduce the color vibrancy of the background.
Step 9: Thumbnail editing
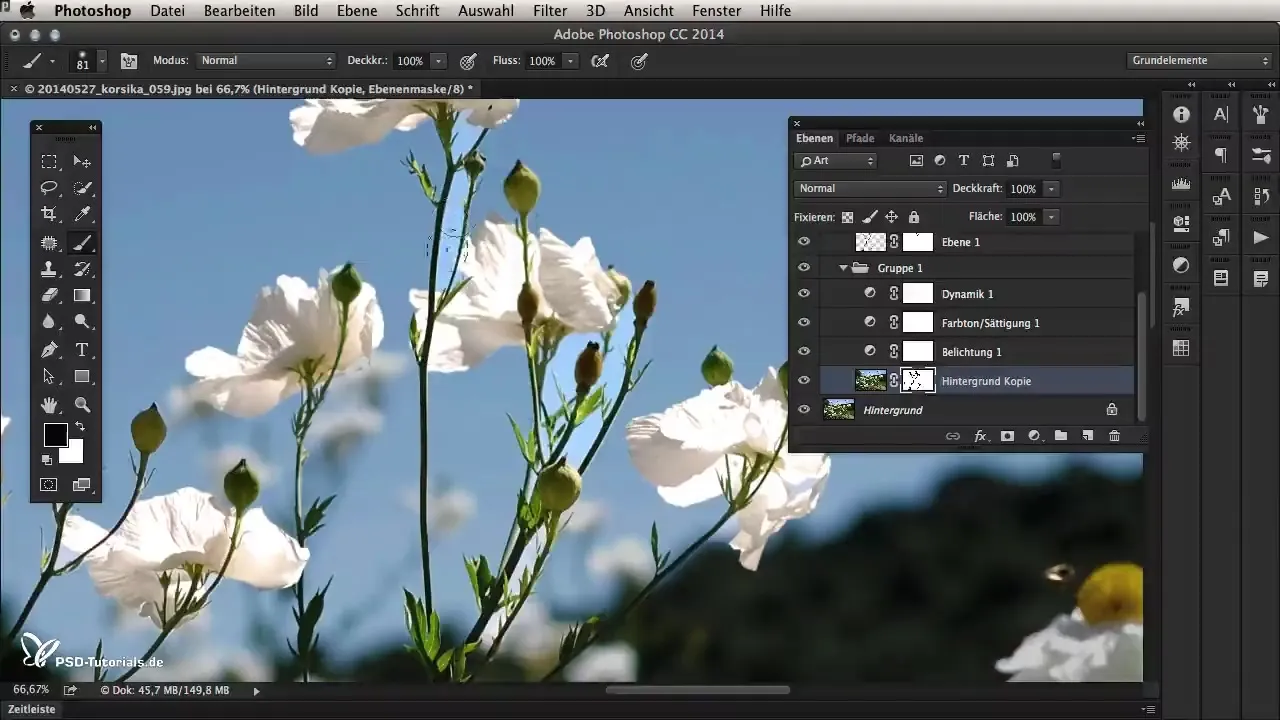
To optimize the transitions, briefly hide the background layer. Make some adjustments to the edges of the selection to avoid harsh transitions.
Step 10: Final adjustments
You can now adjust the opacity of the group to perfect the final look. Keep experimenting until the result looks natural and the flowers are subtly highlighted.
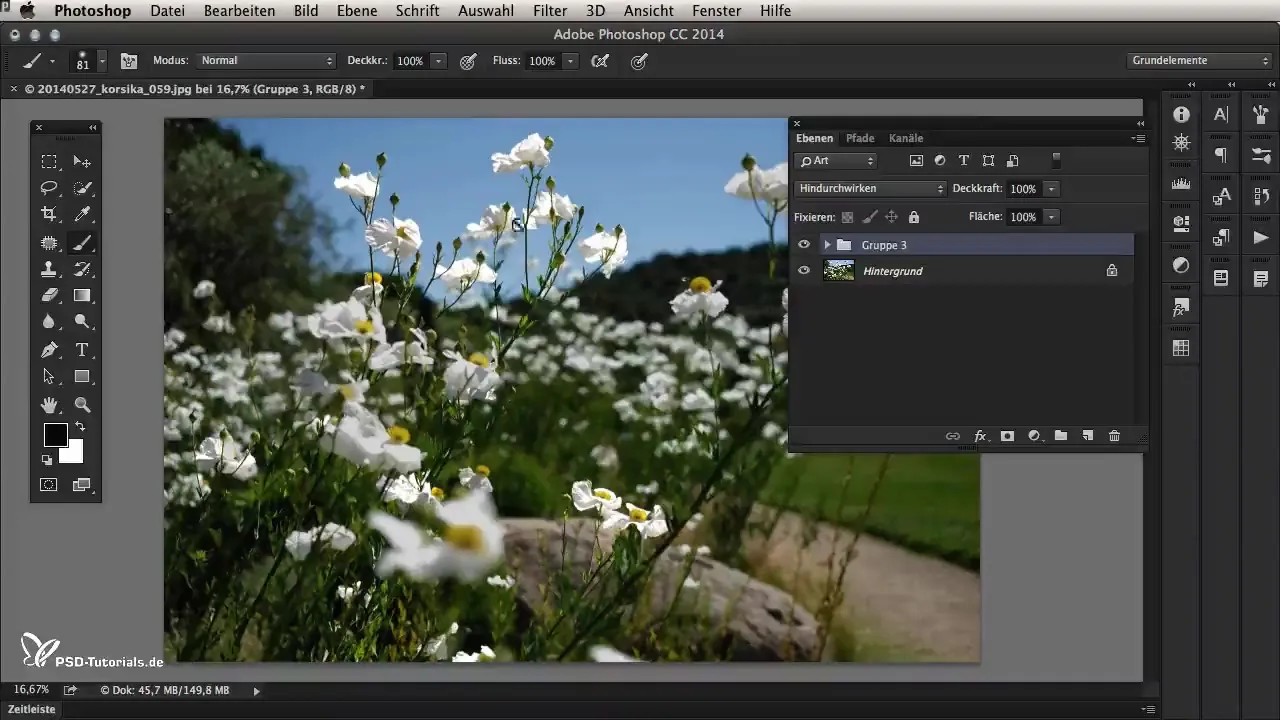
Summary - Selecting sharp image areas in Photoshop CC 2014
With the new selection option in Photoshop CC 2014, you can adjust your image without much effort. The ability to select and adjust areas based on their sharpness opens up new creative possibilities to enhance image quality and focus on what matters.
Frequently asked questions
Which view mode is best in the focus area?The overlay is a good choice for checking contrasts.
How does the sharpness value adjustment work?Move the slider to the right for more sharpness in the selection, to the left for less.
What should I consider with the image noise slider?Increase the value to include less noise in the selection.
How can I remove unwanted areas from my selection?Use the minus brush to specifically deselect those areas.
What are the reasons for using edge refinement?To smooth the edges of your selection and ensure harmonious interplay.


