The radial blur in Photoshop CC 2014 offers you an innovative approach to motion blur effects. With this feature, you can blur specific areas deliberately, creating a dynamic sense of movement in your images. In this guide, you will learn how to effectively use this new feature to achieve impressive results.
Key takeaways
- The radial blur replaces the older, cumbersome blur filter.
- A new, user-friendly interface makes adjustments to the blur simpler.
- You can intuitively control the size and radius of the blur area to achieve precise results.
Step-by-step guide
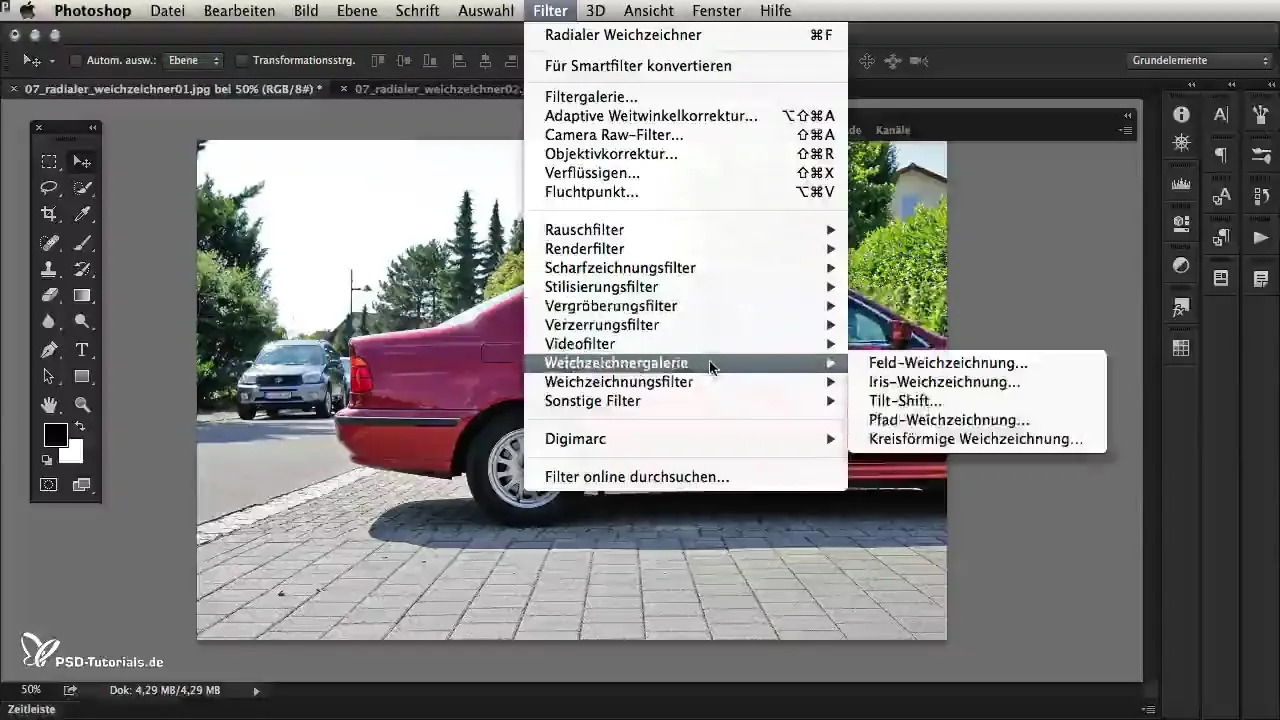
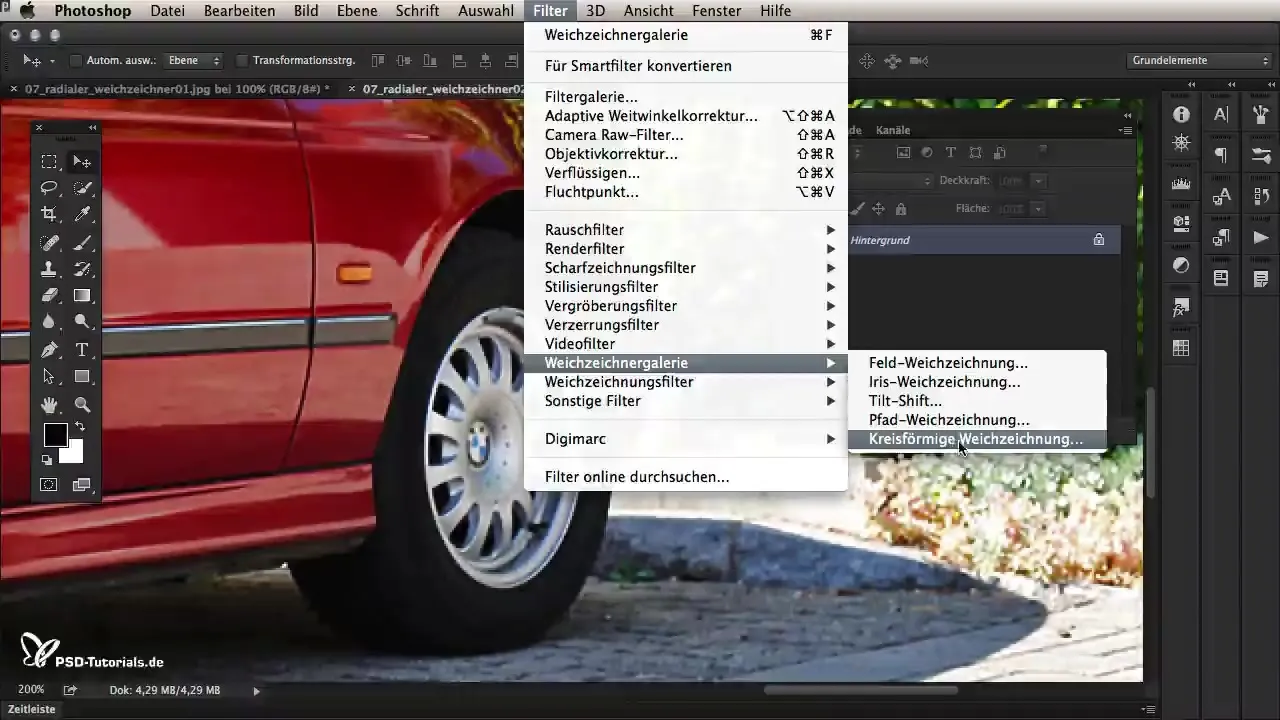
First, you can activate the radial blur function. To do this, go to the Filter menu and select Blur Gallery. There you will find the new options of the filter. With this gallery, you get a preview of the blur you are applying and can control what you are doing.
Once the gallery is open, you will see the new blur tool. Unlike the old radial blur tool, this view shows you a transparent overlay that helps you define the area that should be blurred. Zoom into your image to see a clear example of applying the radial blur.
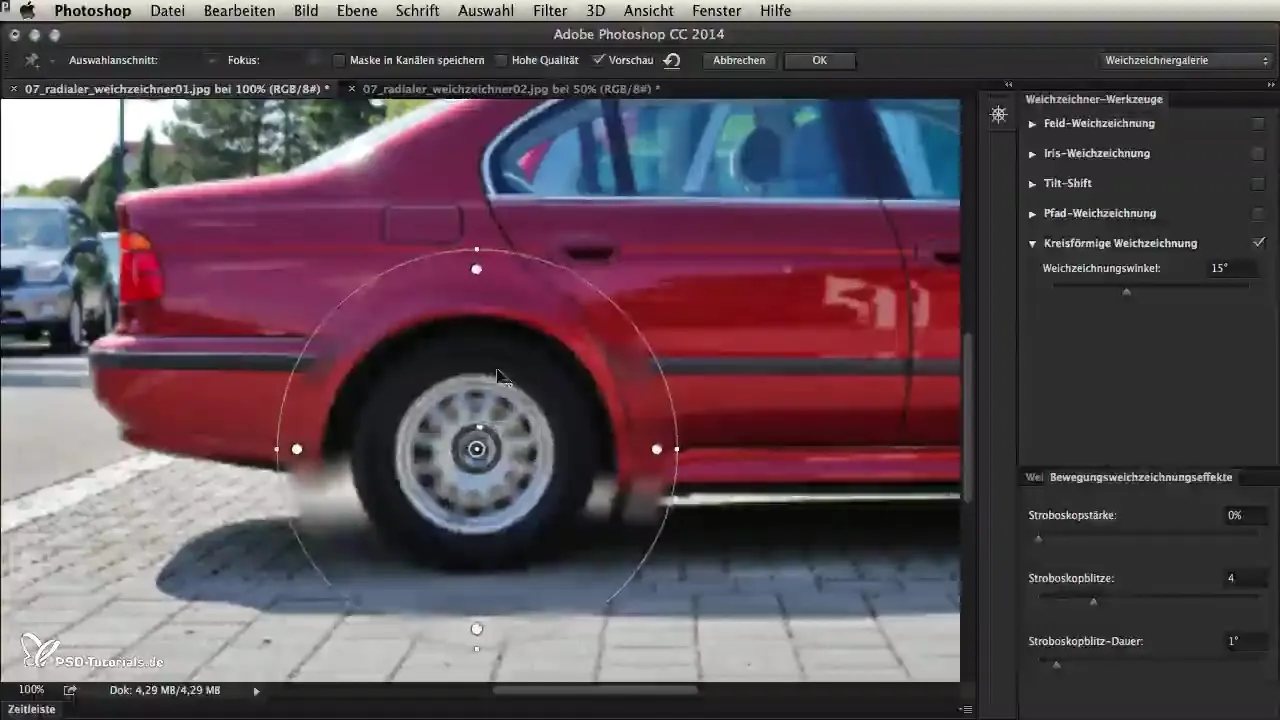
To illustrate the principle, look at a car tire. Position the overlay so that it represents the center of motion. You should place the overlay on the tire to make it look credible. This helps to realistically simulate motion blur.
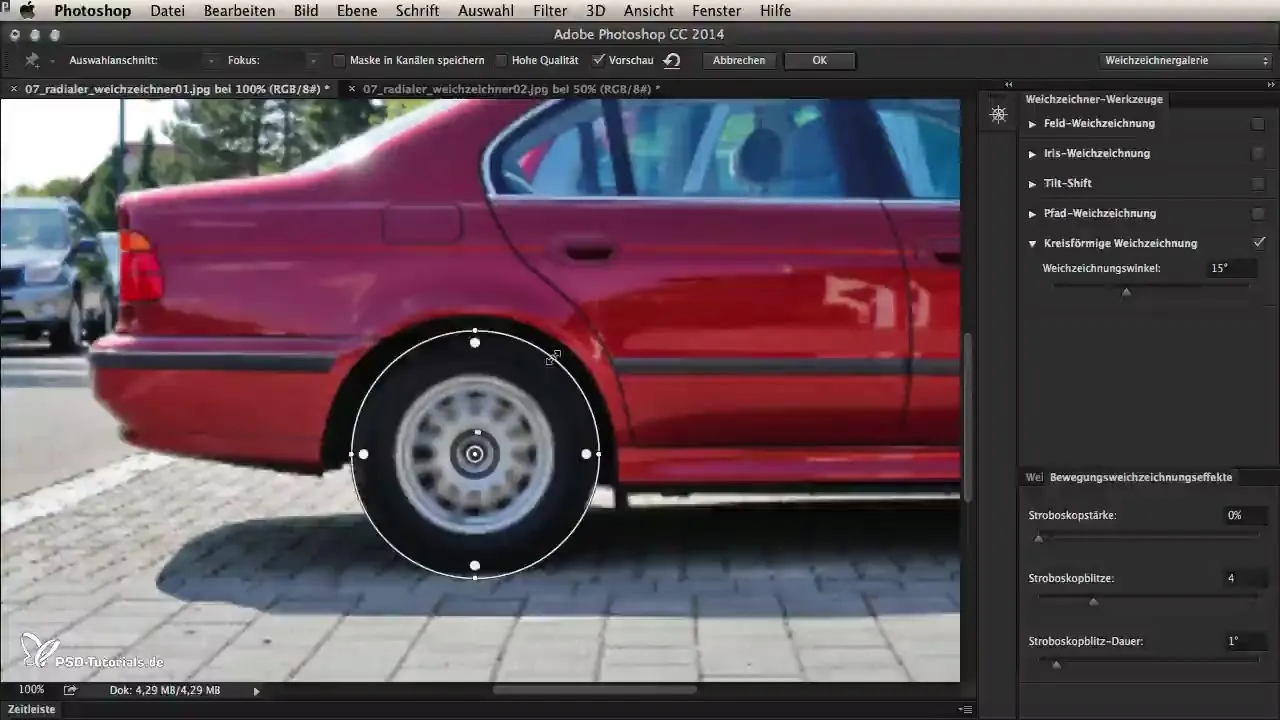
Next, you need to adjust the size of the area that will be blurred. You can simply drag the overlay over the edge to ensure that the blur completely covers the tire. Be sure to slightly go over the edge to avoid ugly edges.
An important aspect of the radial blur is the ability to adjust the strength of the blur. You can use the small white point at the top of the window for this. By dragging this point, you can regulate the intensity of the blur – this determines how strongly the movement is represented.
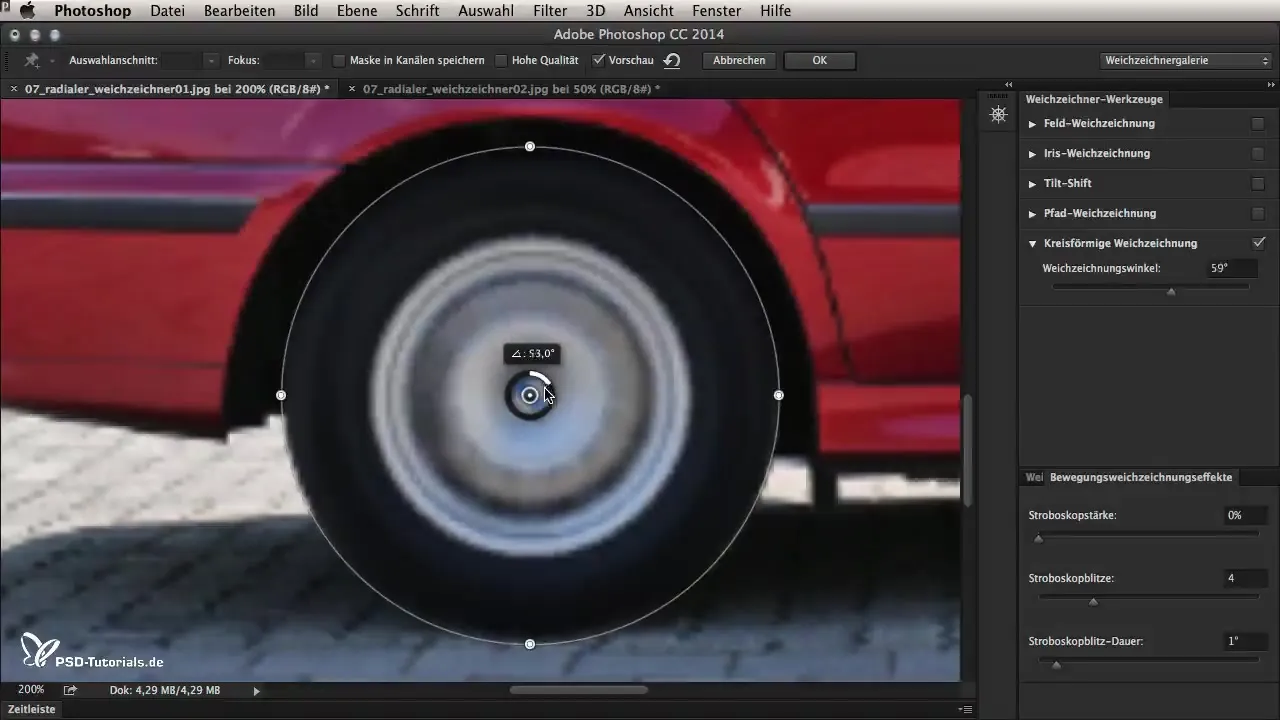
Alternatively, you can also use the slider for the blur angle. Whether you drag with the mouse or adjust the slider, the result remains the same. This gives you flexibility in applying and controlling the blur.
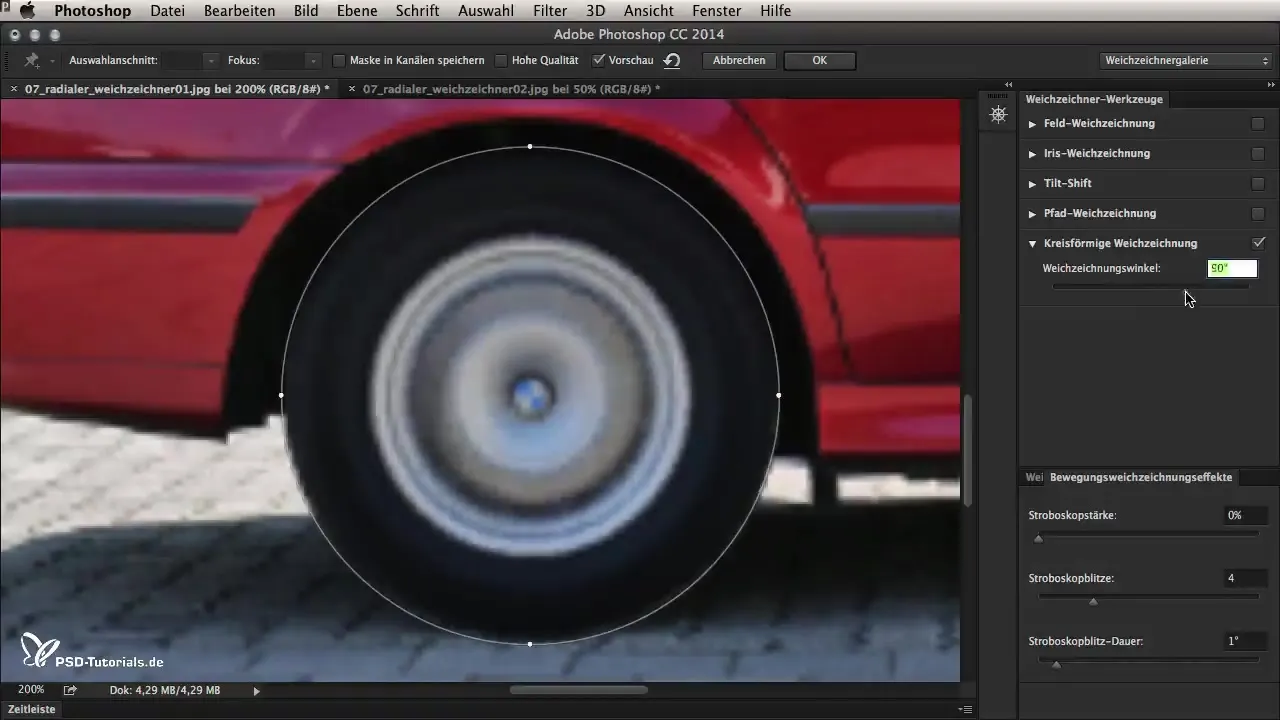
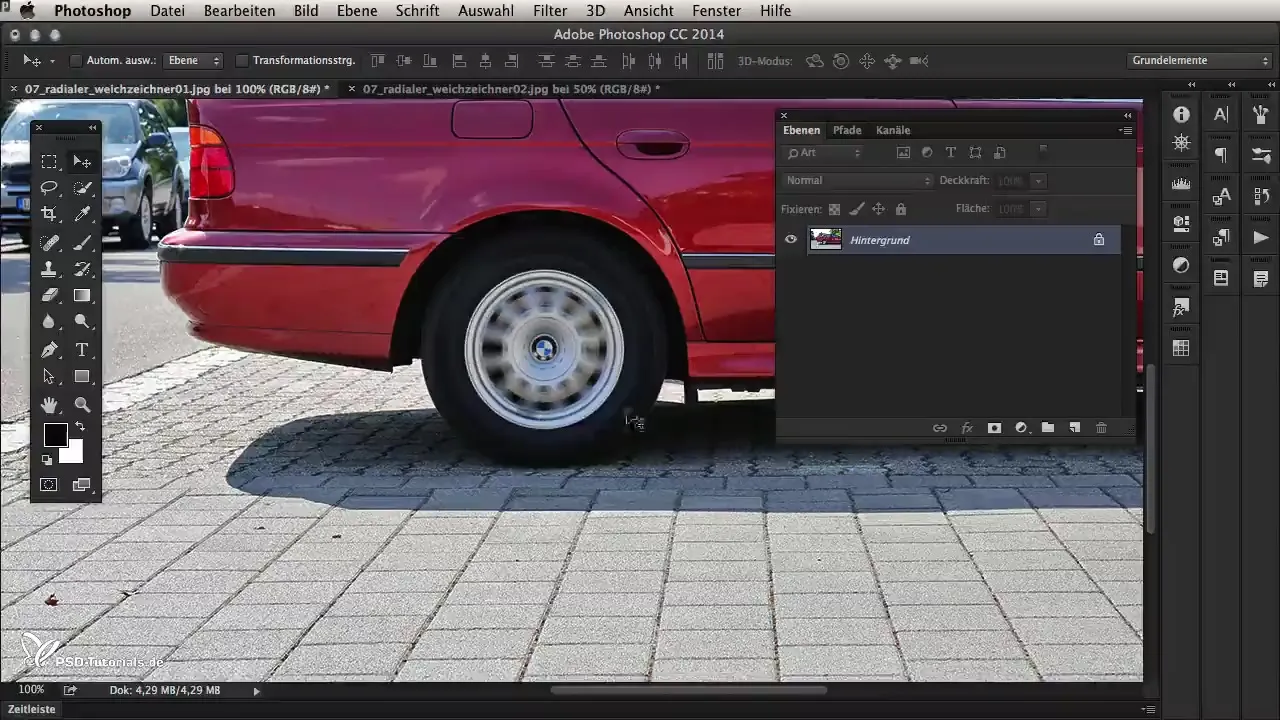
To edit colors and backgrounds alongside the blur, it's best to make a copy of your original layer. After the blur, it's wise to create a mask to make fine adjustments without affecting the original image.
If you have a perspective distortion, it's important to consider this when applying the filter. If the shape of the object, such as a tire, appears tilted, you can adjust the shape of the blur using the white points in the gallery.
With these points, you can adjust the shape to be oval or round and match the blur to the perspective of the object. Make sure that the blur always fits the image cut to achieve a realistic result.
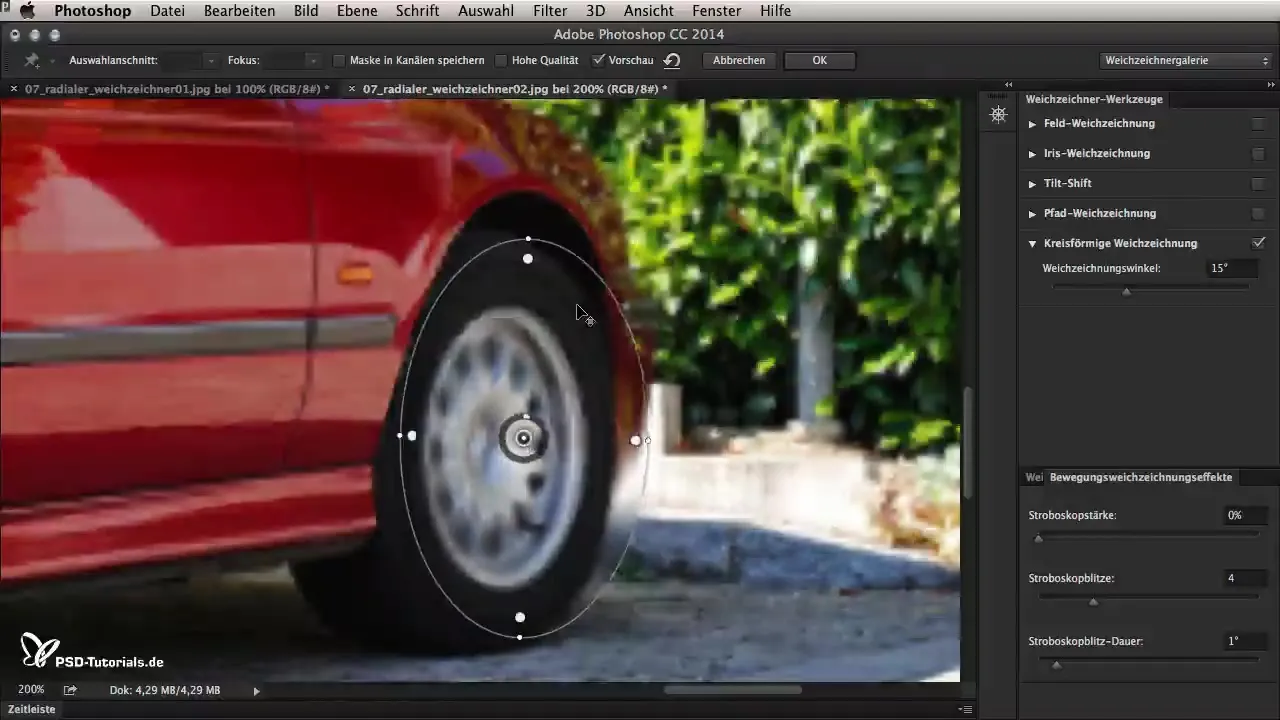
After you have correctly positioned the center of the overlay and appropriately set the shape, confirm your settings with “OK”. The image now shows a realistic movement that looks as if the vehicle is actually in motion.
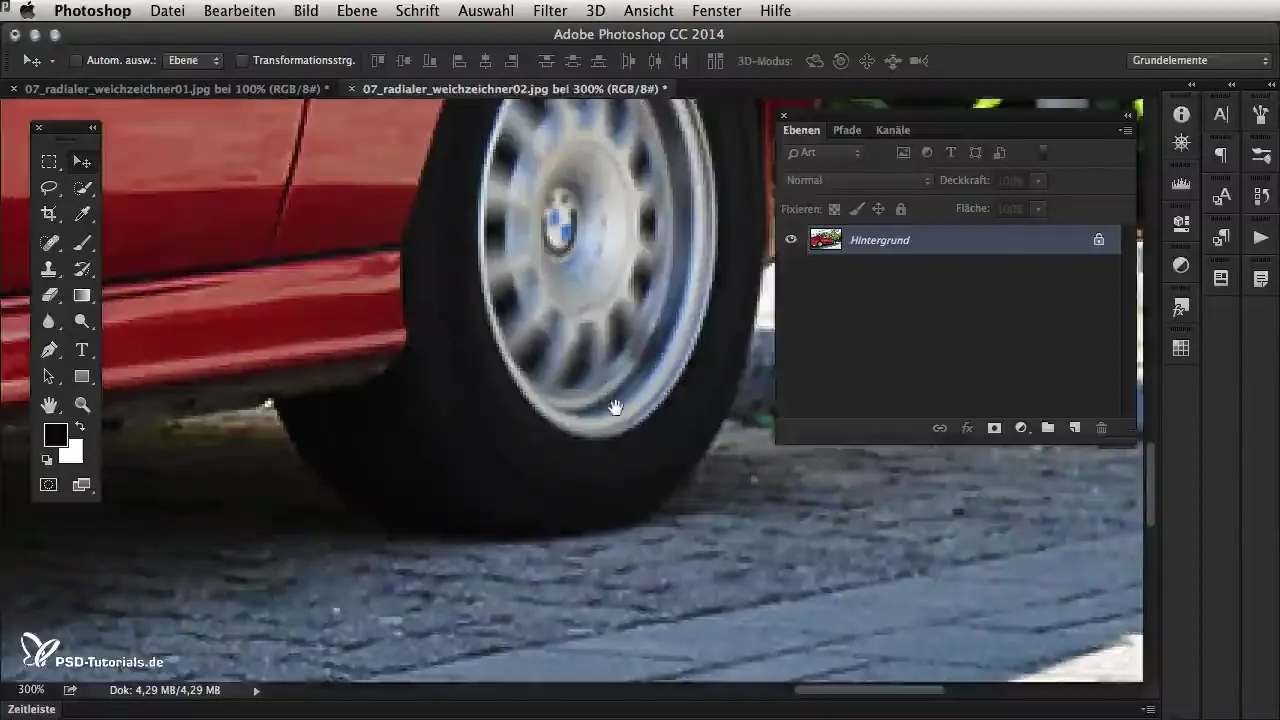
To complete the image, you should retouch the edges if necessary. Here, the layer mask helps you to integrate the blur cleanly while preserving the sharpness of the rest of the image.
Summary – Radial Blur in Photoshop CC 2014: Step-by-step Guide
The radial blur in Photoshop CC 2014 allows you to creatively design motion blurs. With a user-friendly interface and the ability to precisely control the blurring, you gain control over the visual effects in your images. With a little practice and the steps described here, you will be able to create impressive, dynamic images.
Frequently Asked Questions
How do I activate the radial blur in Photoshop CC 2014?Open the Filter menu and select Blur Gallery to activate the function.
Can I adjust the blur area?Yes, you can drag the overlay to adjust the area to be blurred.
How do I set the strength of the blur?Use the small white point or the slider for the blur angle.
Is it advisable to work with layers?Yes, it is wise to create a copy of the original layer for subsequent corrections.
How can I adjust the blur to perspectives?Use the white points to adjust the shape of the blur to oval or round and reposition the center.

