Are you looking for a way to make your musical ideas more creative and dynamic in FL Studio? Automation Clips offer you the perfect opportunity to change various parameters over time and give your track more expression. In this guide, I will explain to you what Automation Clips are and how you can effectively use them in your music production process.
Main Insights
- Automation Clips allow you to change parameters in FL Studio based on time.
- A thoughtful placement of the clips in the playlist increases clarity.
- Flexibility in shaping curves contributes to creative freedom.
Step-by-Step Guide
To get the most out of automation clips, we will go through the process step by step. You will develop a lead sound and integrate it into your track.
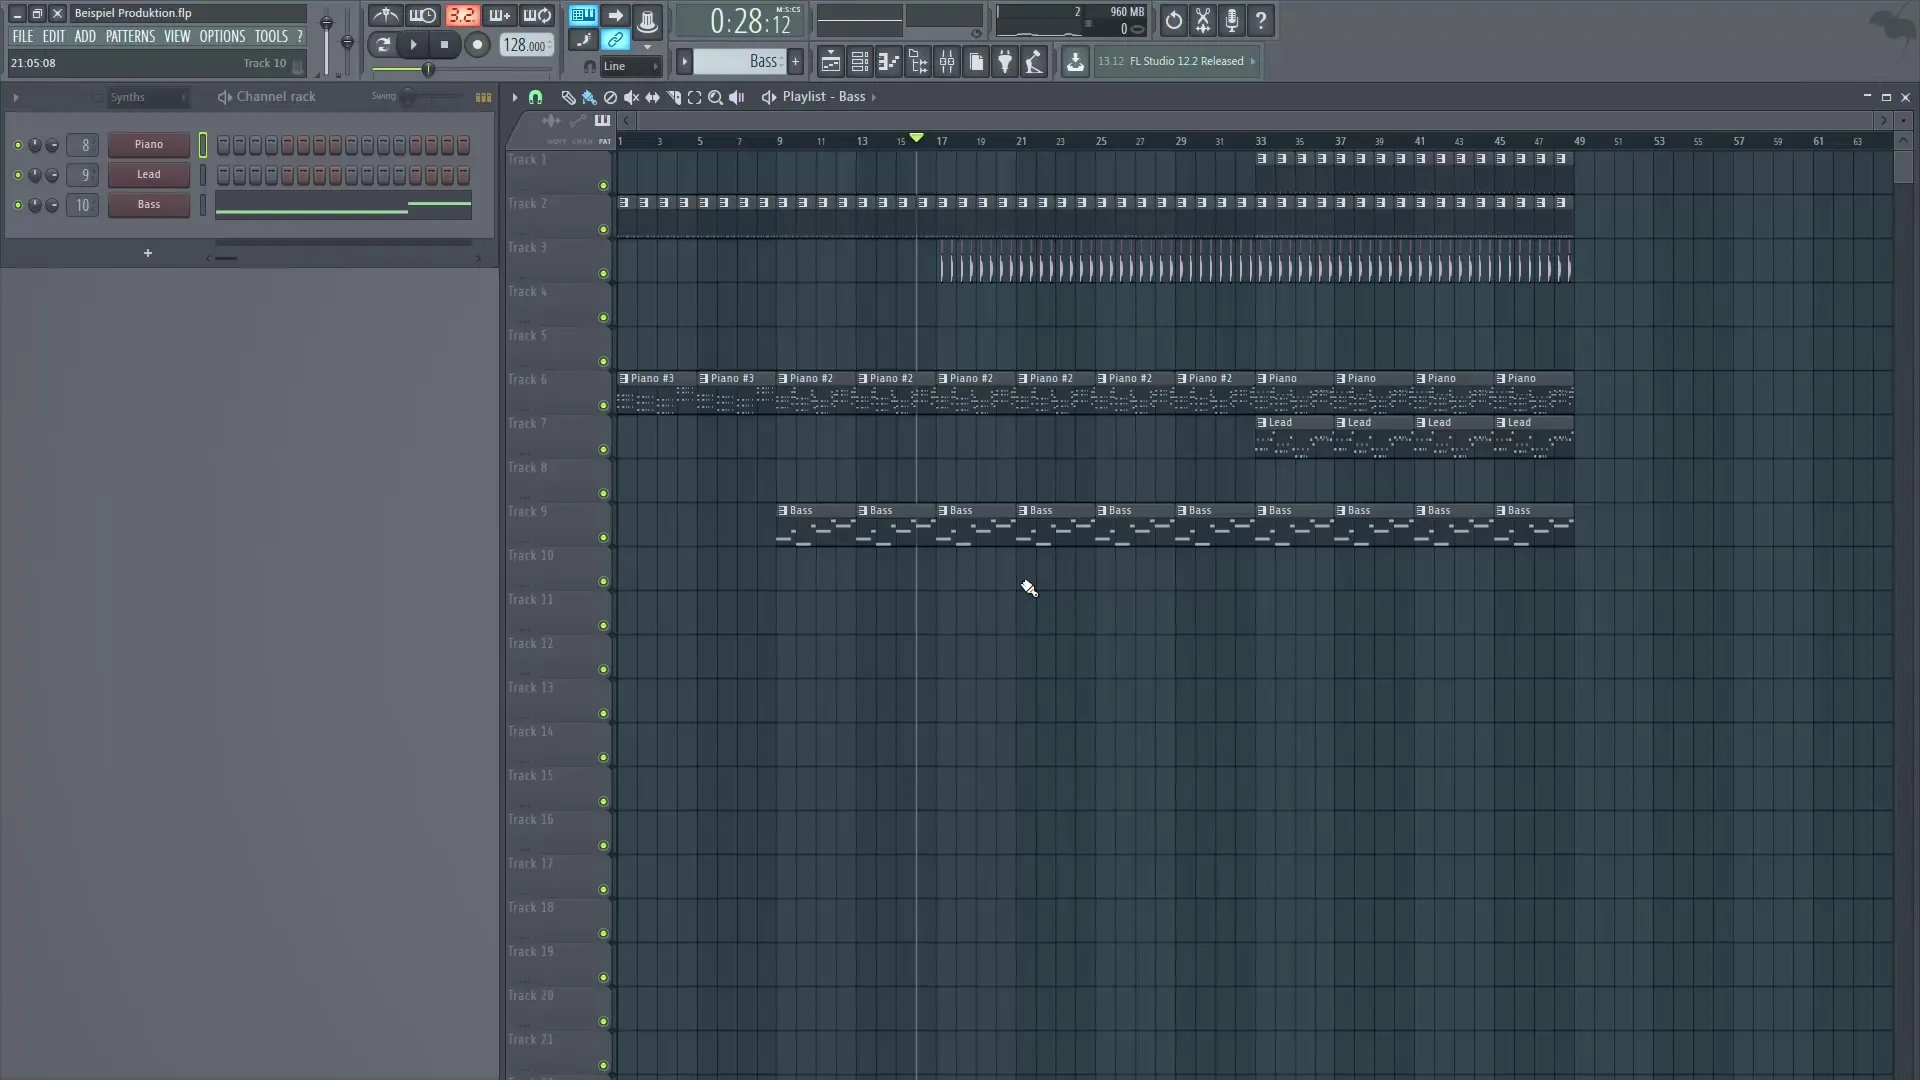
1. Sound Selection and Preparations First, it’s important to think about which sound should be incorporated into your track. Ideally, you choose a lead sound that you want to introduce gradually. Consider at what point in the track the element should appear.
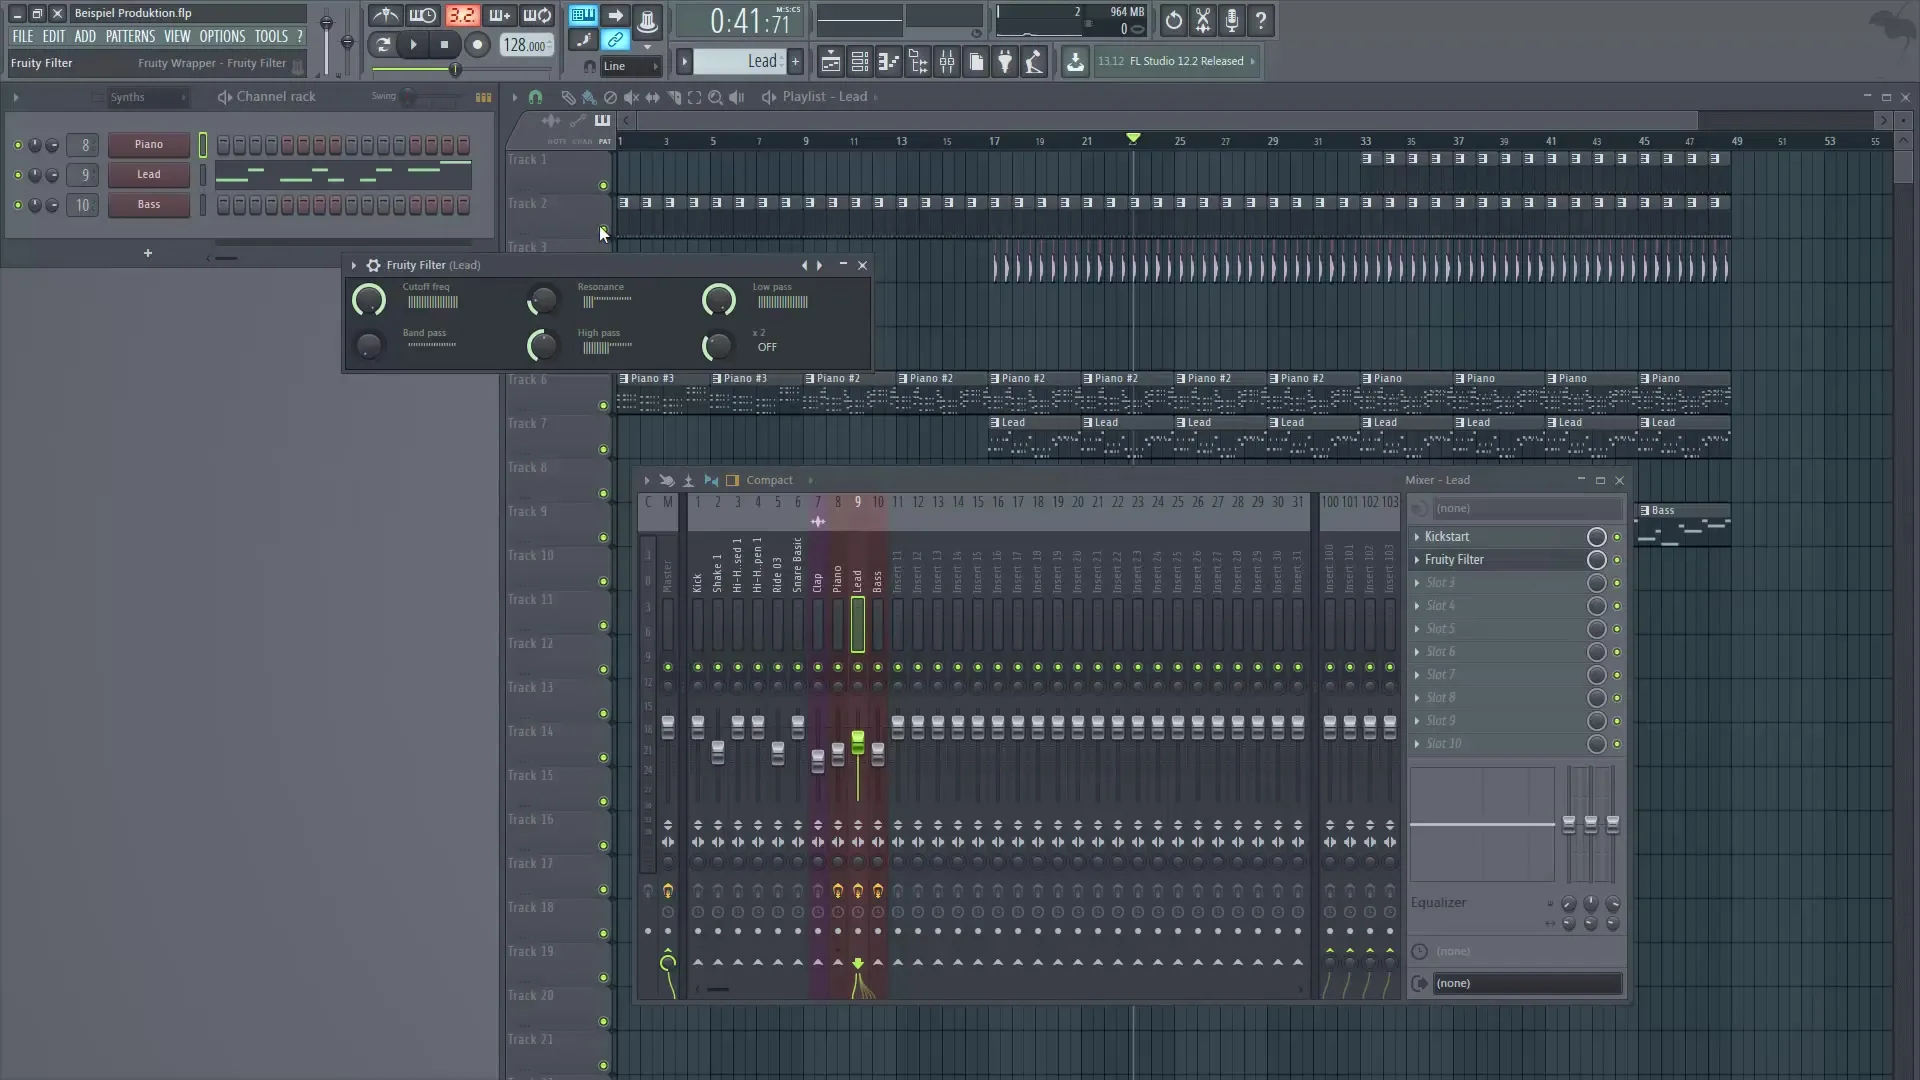
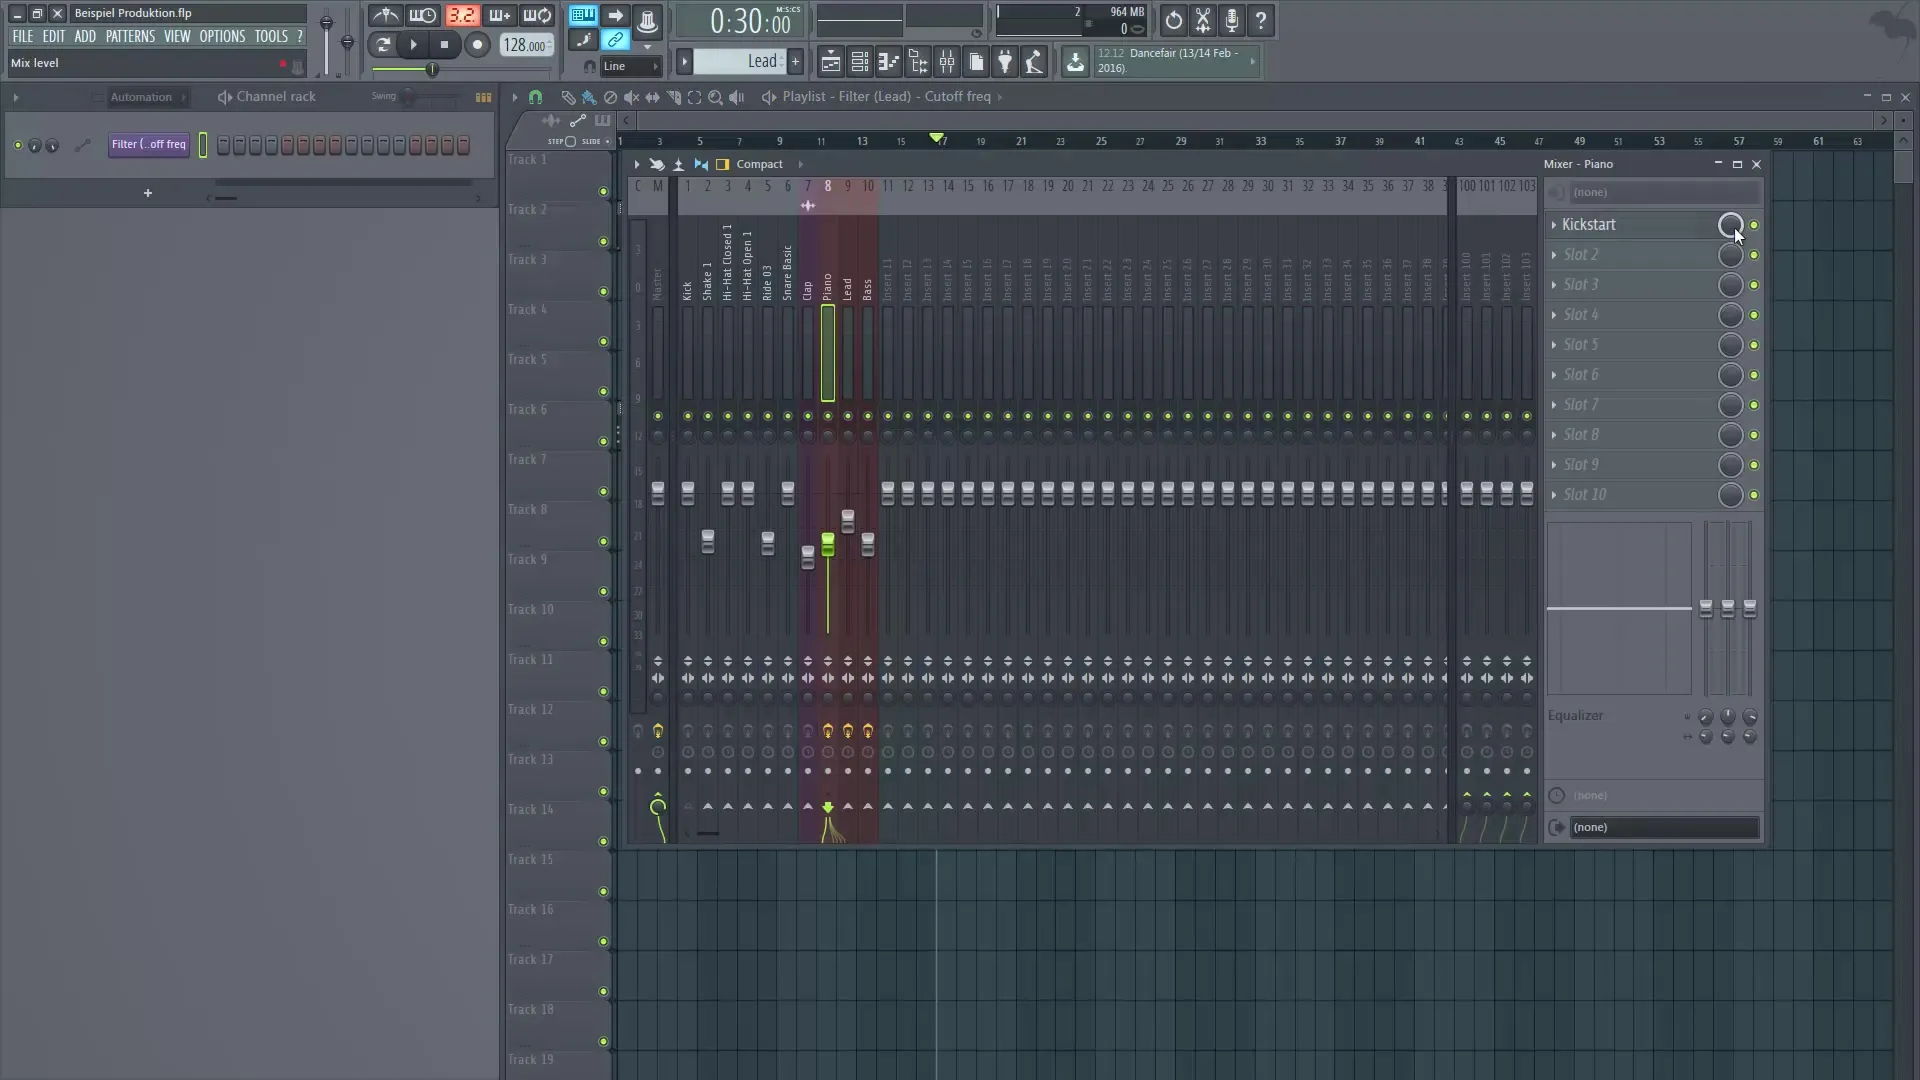
2. Mixer Settings and Adding a Filter Now you should open your mixer and add a filter, such as the Fruity Filter, to a free effect track. Start with the basic settings of the filter and adjust the high-pass filter to create a smooth sound at first.
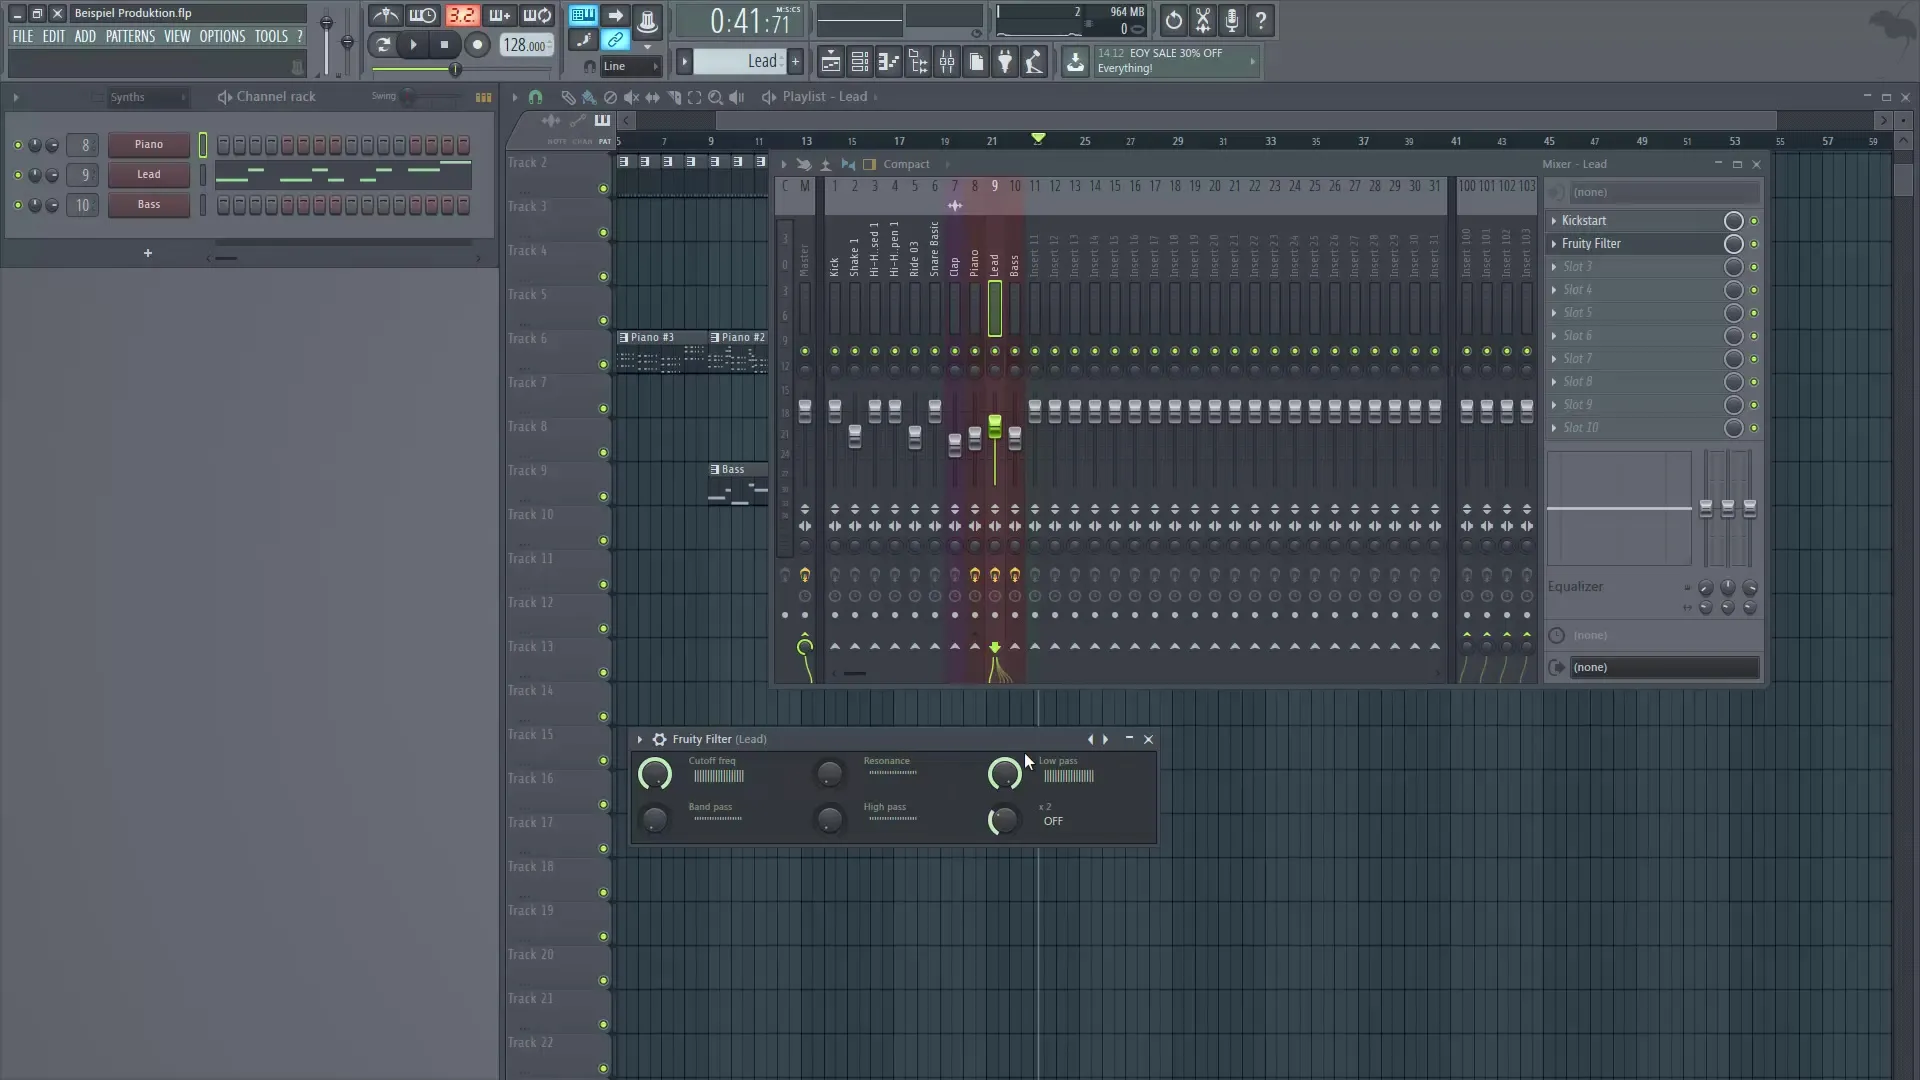
3. Adjusting the Cutoff Control To make the sound dynamic, play with the cutoff control. By pulling down the control for the low-pass filter, you change the frequencies of the sound. This lays the foundation for how you want to introduce the sound into the track.
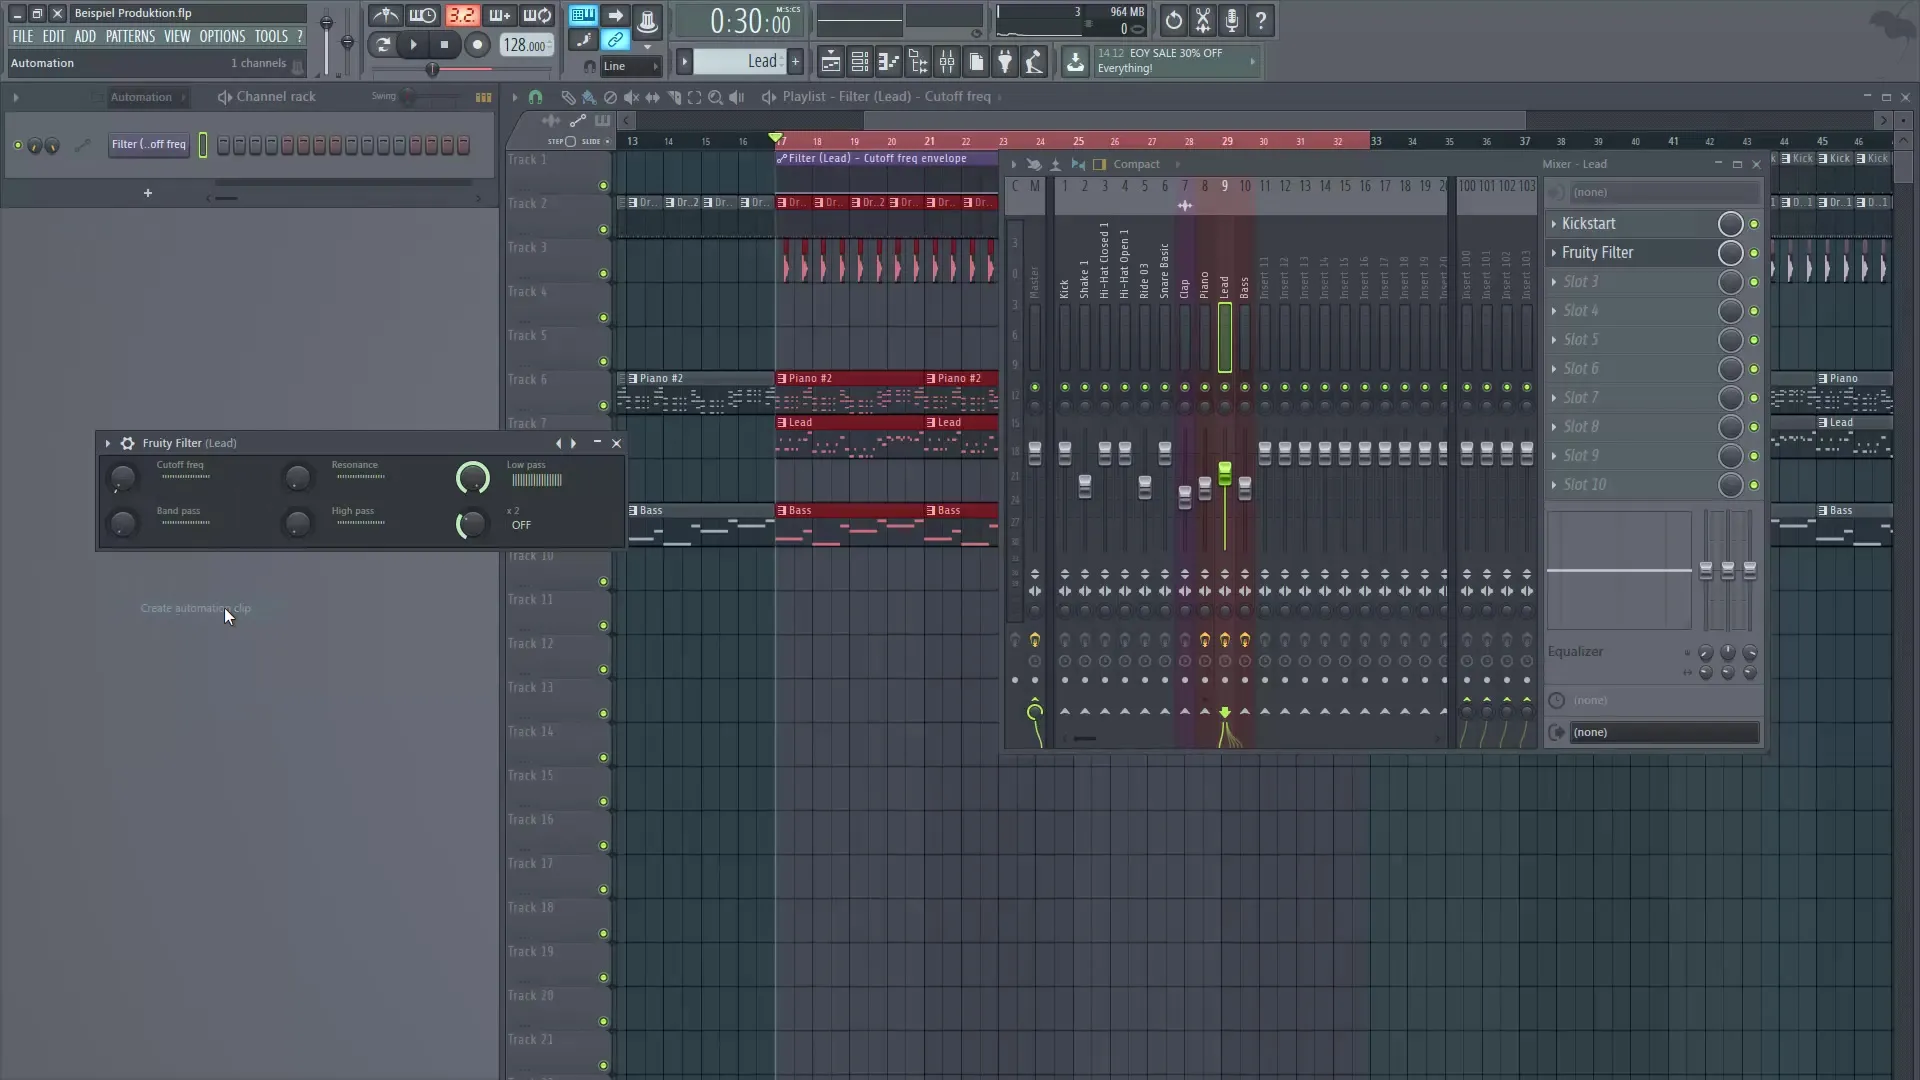
4. Create Automation Clip Here comes the automation clip into play: right-click on the control you want to automate and choose "Create Automation Clip." This creates a new automation area in your playlist.
5. Positioning the Automation Clip To ensure that the automation has the desired effect, move the clip to an appropriate location in the playlist. It is advisable to place it below the instrument clip for a clear understanding of the structure.
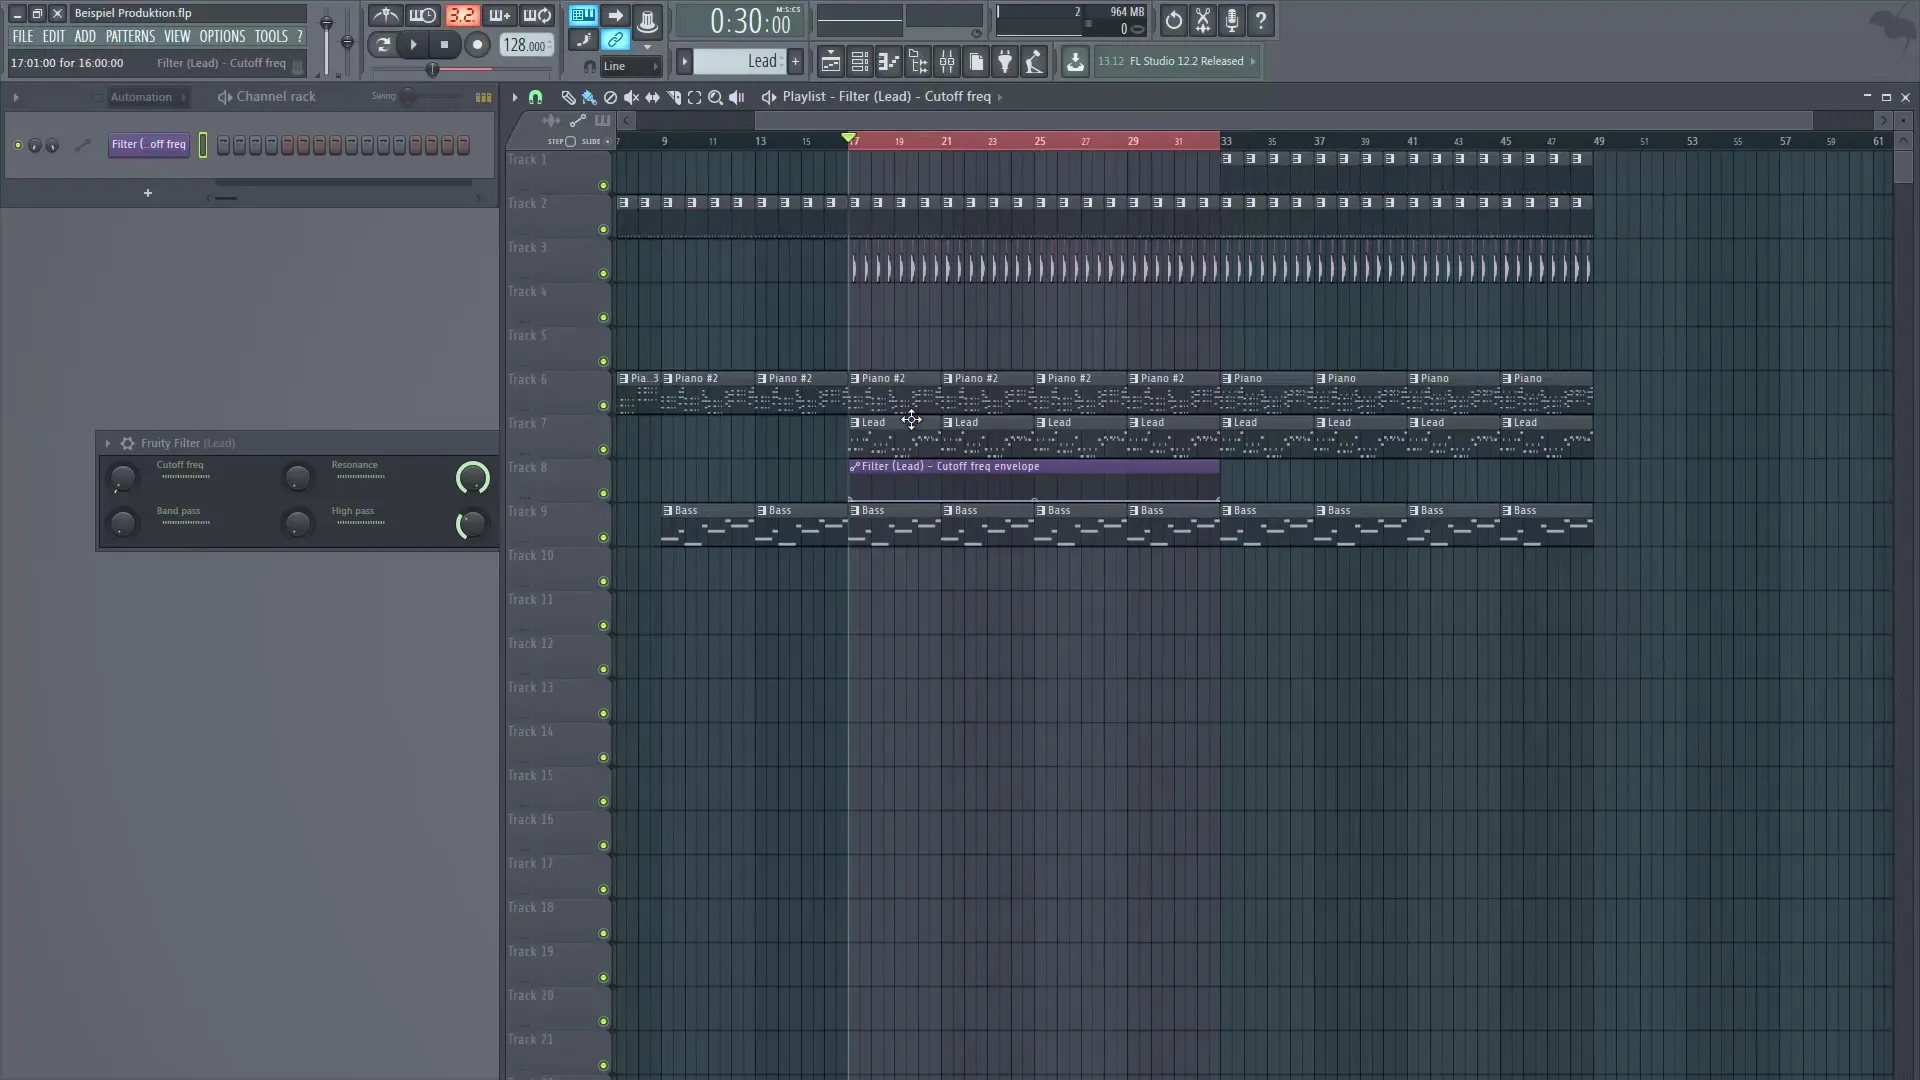
6. Adjusting the Automation Curve Now zoom in on the automation curve and pull it up to gradually raise the cutoff over time. You can also adjust the curve to achieve different effects, such as smooth transitions or sudden changes.
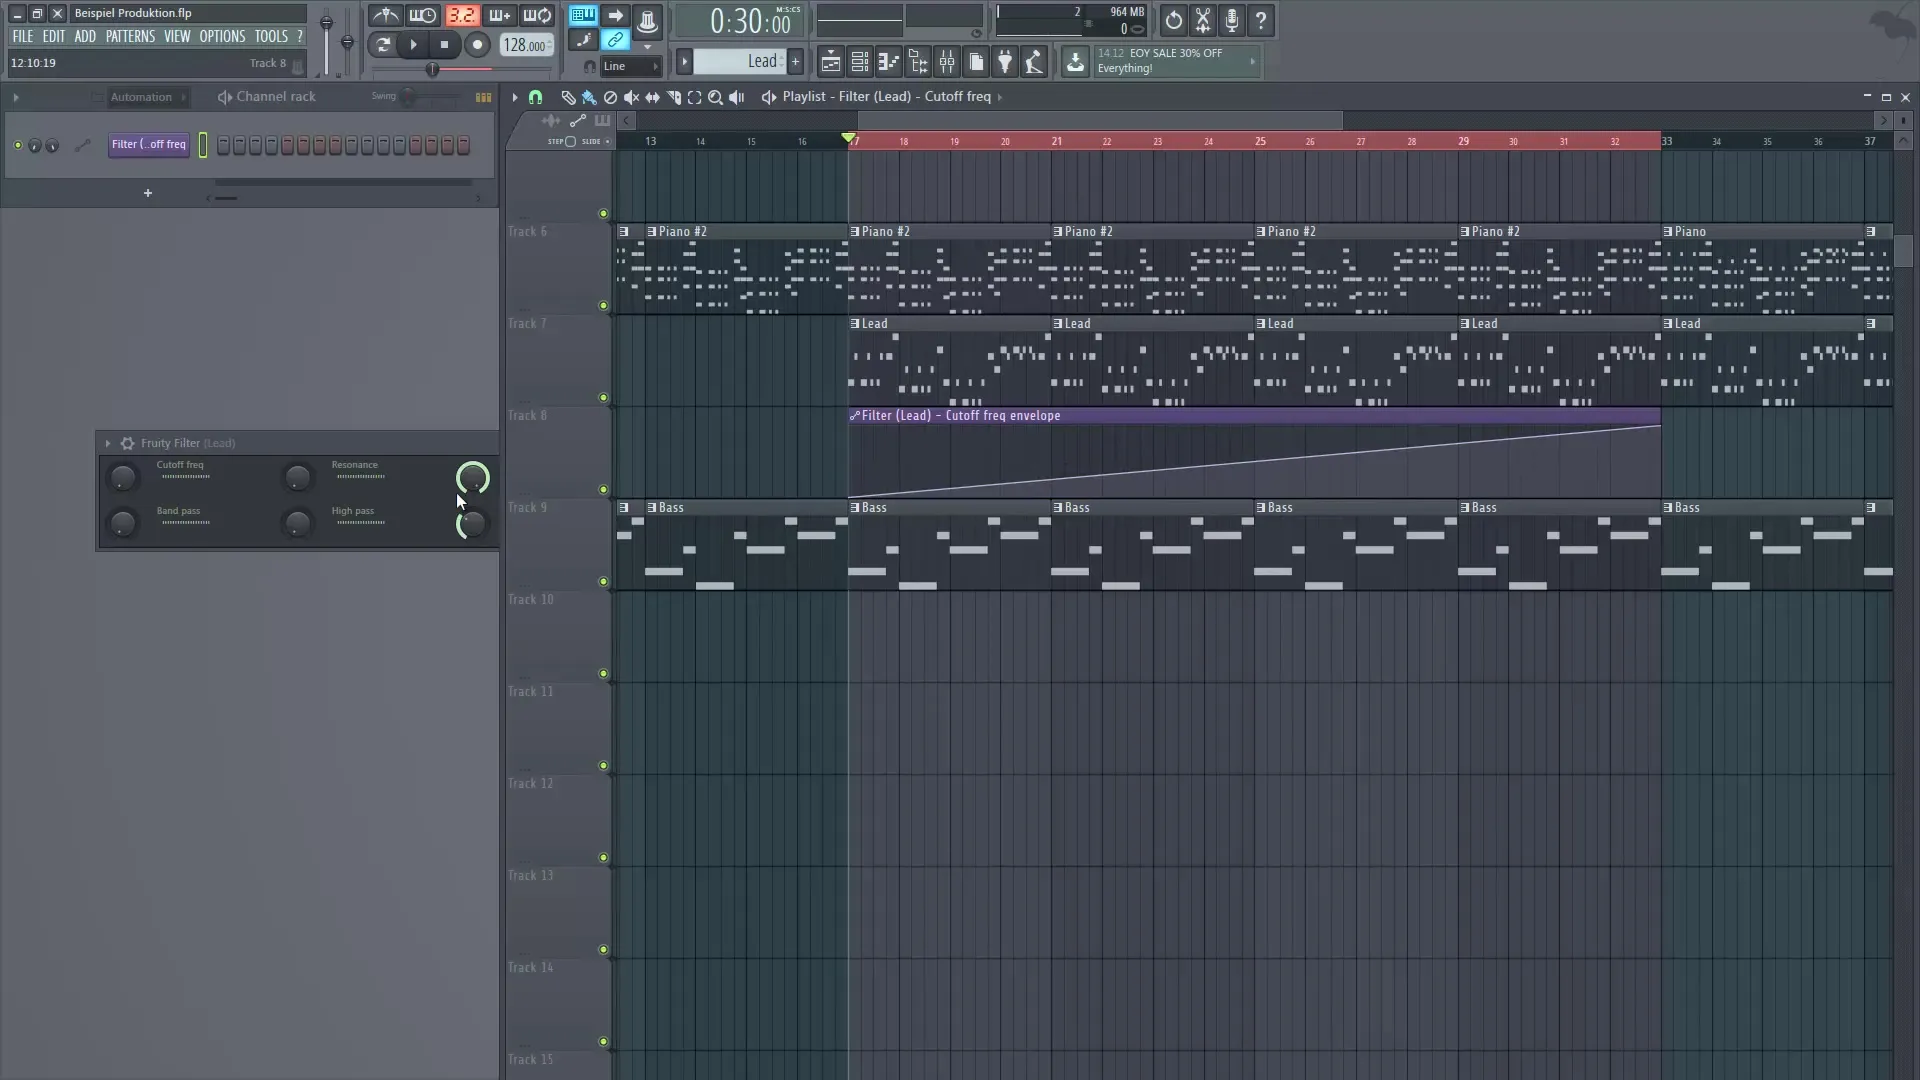
7. Fine-tuning the Automation Points Experiment with the curve by adding additional control points to change the progression. You can create rising or falling curves to enhance the dynamics of the sound.
8. Naming the Automation Track Each automation curve automatically receives a name. You can adjust this to increase clarity. For example, "Lead Cutoff" could be helpful to immediately recognize which effect it refers to.
9. Automating Effects for Other Instruments In addition to automating your lead sound, you can also automate other instruments, such as the kickstart effect for your piano. This creates an interesting dynamic shift in the song during the chorus.
10. Test the Transition Play back the section to hear how the sound develops and whether the automations work as intended. Make sure the transition sounds natural and the track remains fluid.
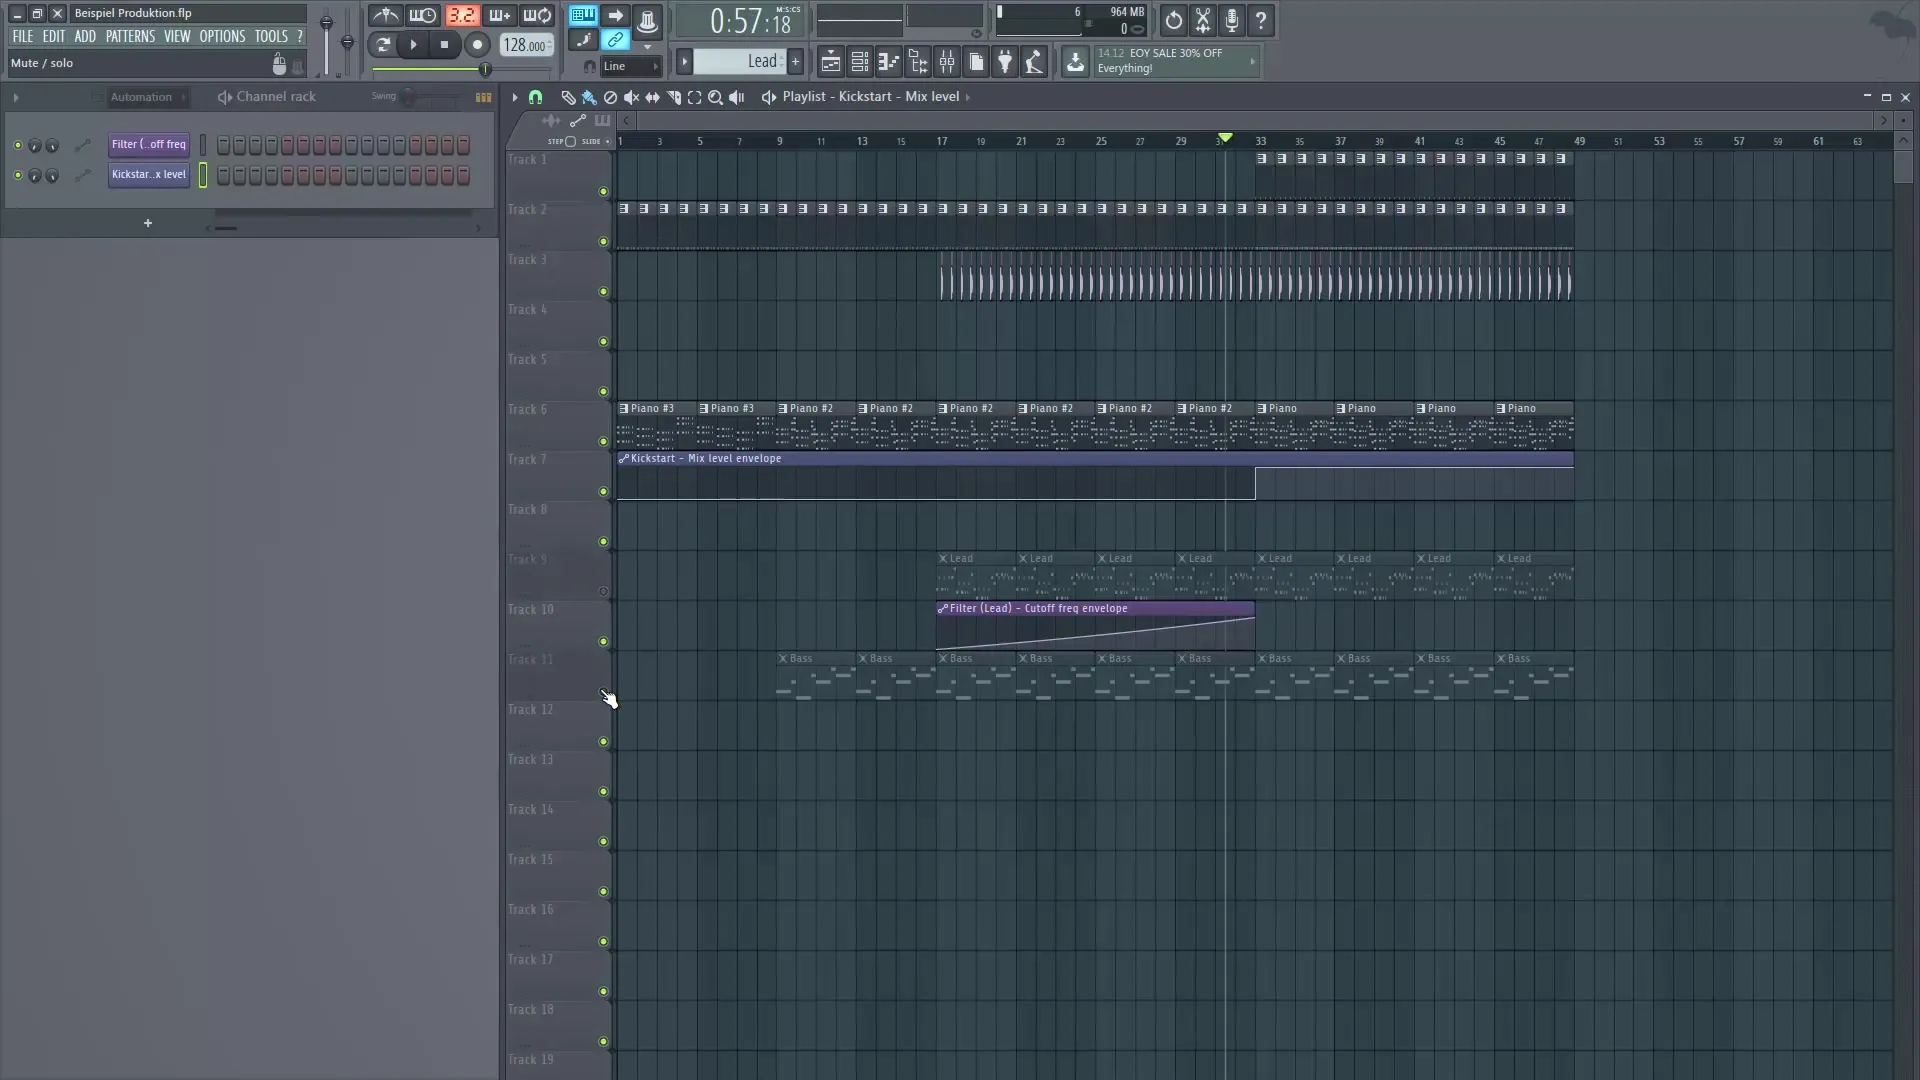
Summary – Using Automation Clips in FL Studio
Automation Clips give you the ability to control sonic changes and add more depth and emotion to your track. You have learned how to create an automation clip in FL Studio and adjust various parameters to create creative transitions in your songs.
Frequently Asked Questions
How do I create an automation clip in FL Studio?Right-click on the control and choose "Create Automation Clip".
Why should I use automation clips?They allow you to change a parameter over time and give your track more dynamics.
Can I create multiple automation clips for different effects?Yes, you can create a separate automation clip for each desired change to a parameter.
Will the automation clip be saved in the playlist?Yes, the automation clip will appear in your playlist and can be edited and moved there.
How do I rename the automation clip?You can change the name by double-clicking on the clip and entering the desired name.
