The successful design of graphic elements in Adobe Illustrator requires a good sense of details and colors. In particular, the creation of loops and ribbons can yield impressive visual results that can be applied in various designs. In this tutorial, you will learn how to effectively design the ribbon of a bow and model it with light and shadow. Let's go over the necessary steps.
Key Insights
- Creating a new layer for the ribbon
- Using the pencil tool to design the ribbon
- Applying gradients to create depth
- Modeling light and shadow effects
Step-by-Step Guide
1. Create a New Layer for the Ribbon
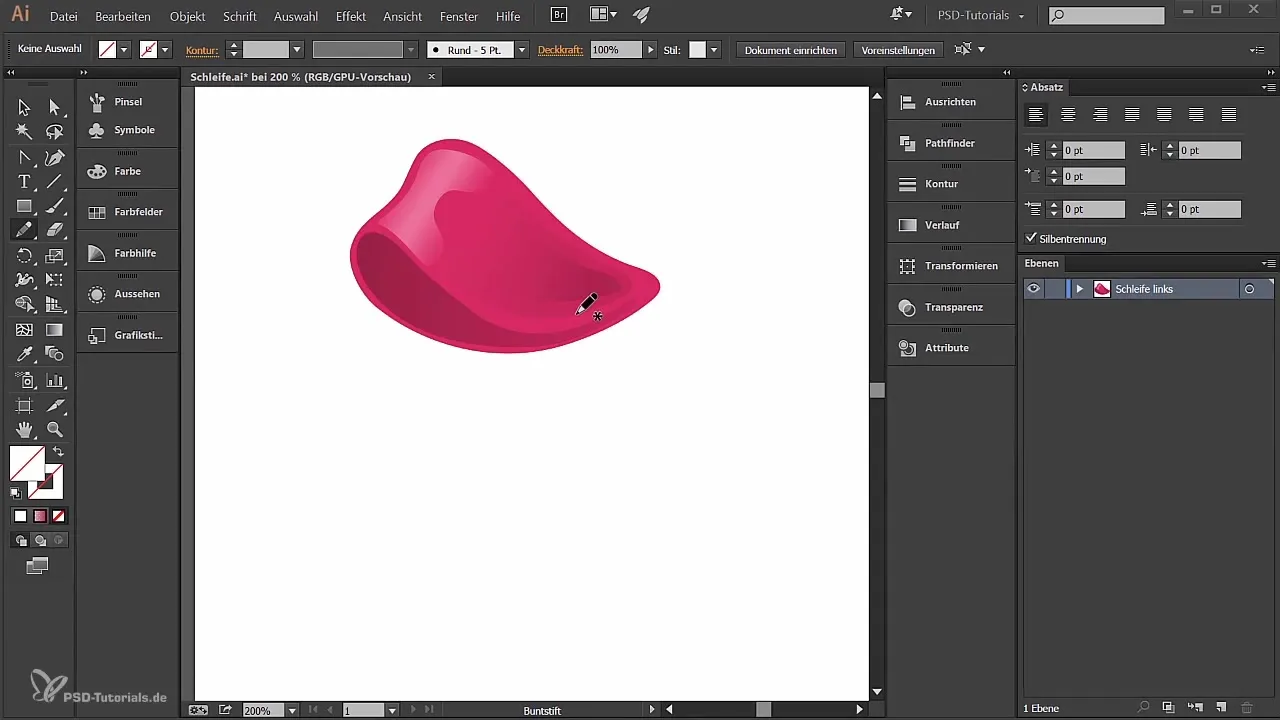
First, you need to create a new layer to design the ribbon of the bow independently. Go to the layers menu, click on "Create New Layer," and name it "Ribbon Left." Make sure this layer is placed below the bow so that the ribbon is displayed correctly.
2. Draw Path with the Pencil Tool
Now, select the pencil tool and start drawing the path of the ribbon. Make sure to draw the path in a way that it takes on the desired shape. You can close the path and adjust it again if you're not satisfied with the result.
3. Add and Adjust Fill
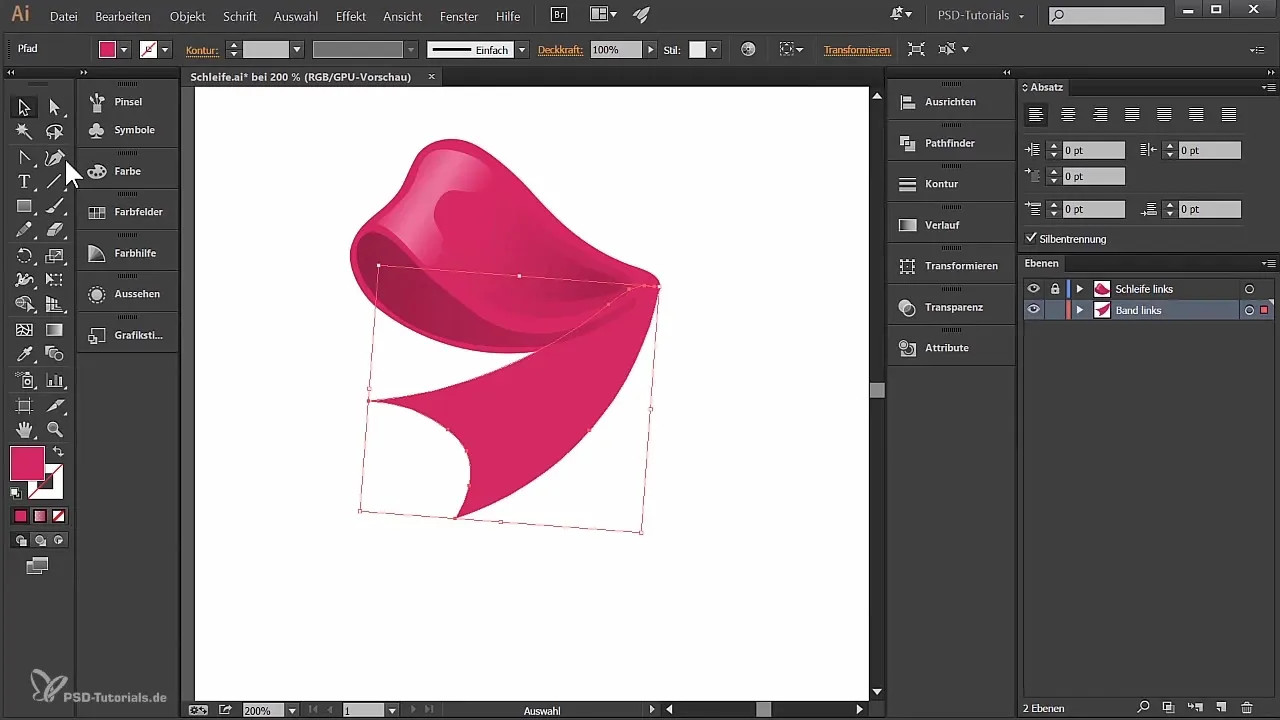
The drawn path initially has no fill. Choose a suitable fill color from the color palette to better evaluate the shape. Here you can experiment with different colors to achieve the best result.
4. Smooth and Adjust Path
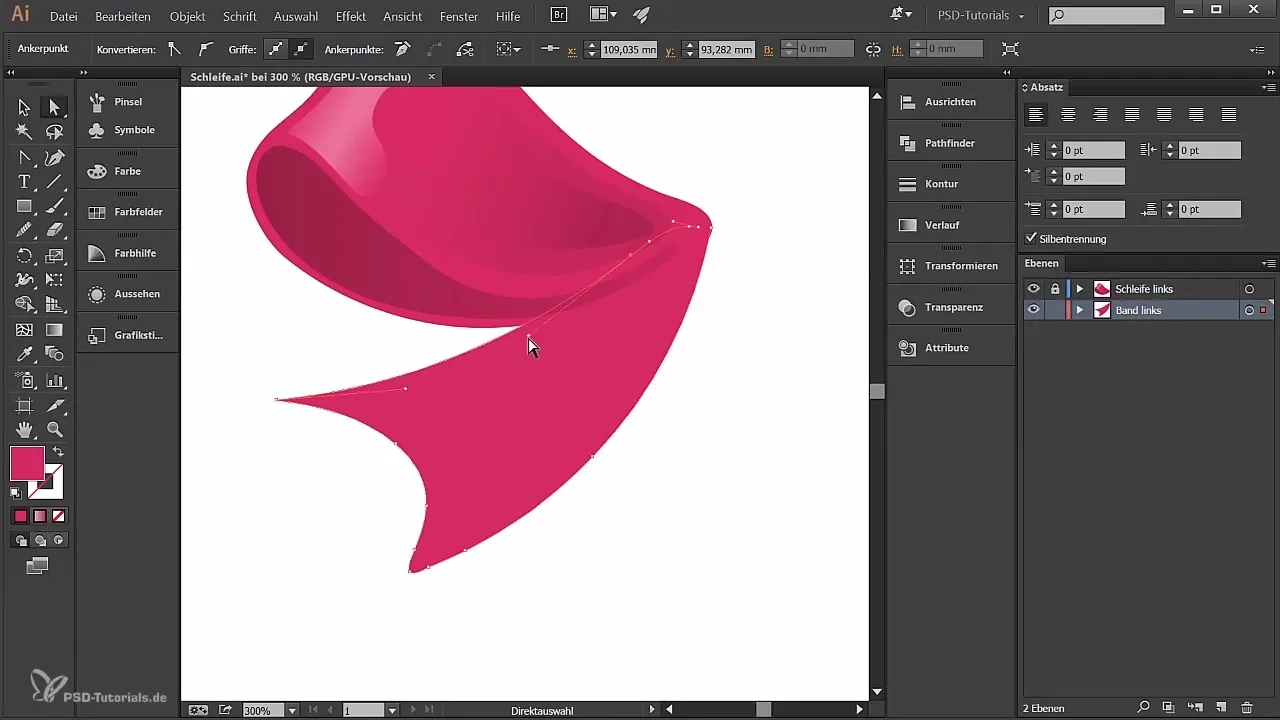
Use the smoothing tool to optimize the edges of the ribbon. You can further adjust the shape, for example, by making the lower area rounder to achieve a more harmonious profile.
5. Apply Gradient to the Ribbon
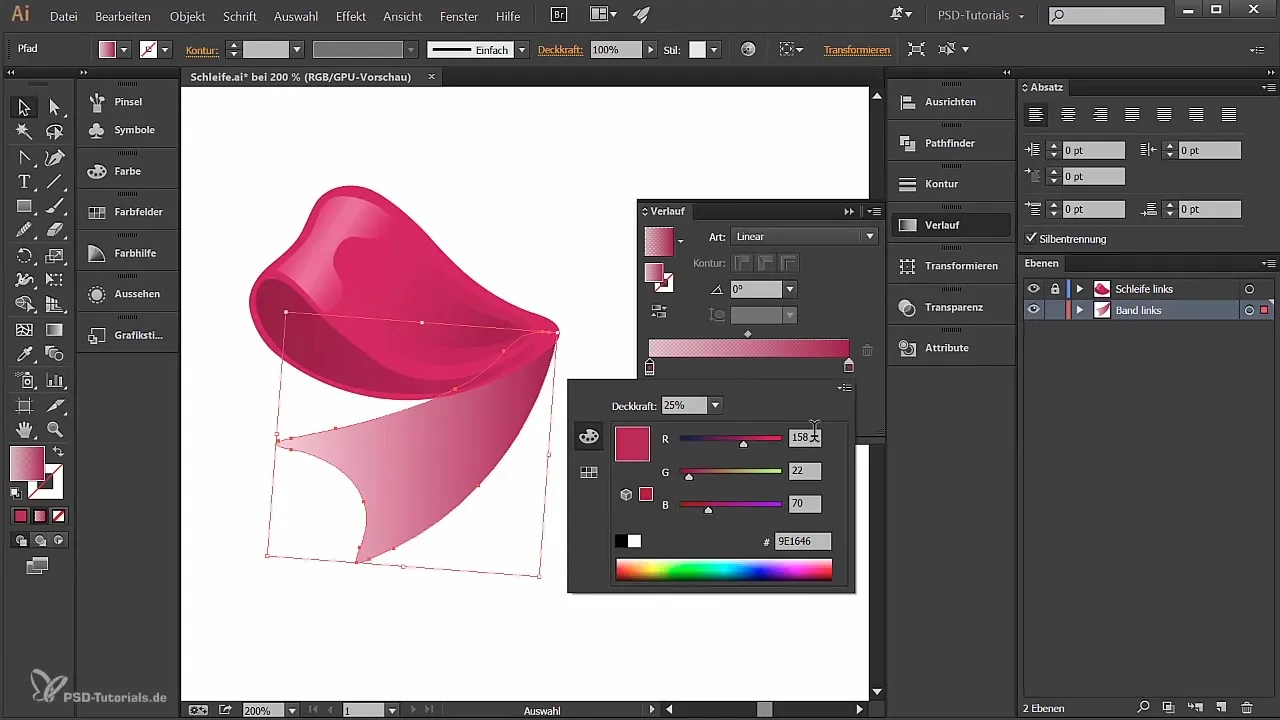
To make the ribbon look lively, add a gradient. Select the active shape, go to the gradient tool, and choose a linear gradient. Experiment with different color values to create the desired shadow effect.
6. Add Shadow as a Detail
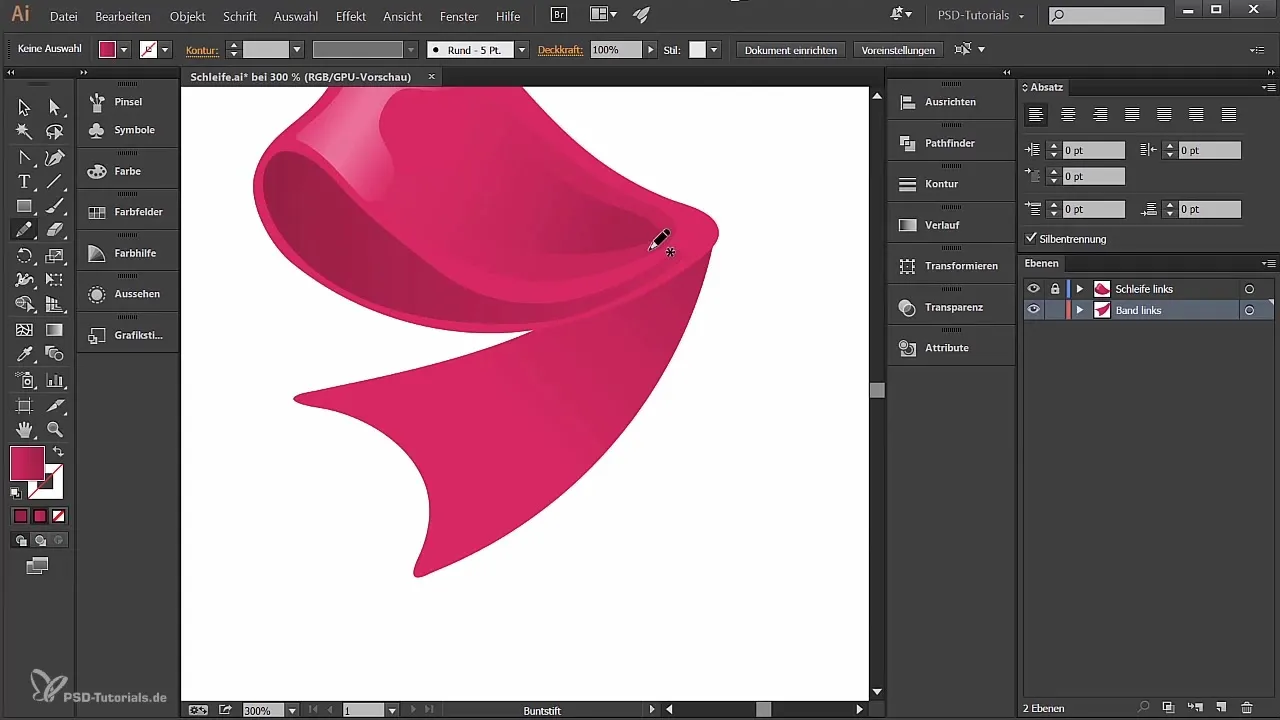
Now you can create the first larger shadow using the pencil tool. Draw the shadow in the appropriate place of the bow, close the path, and smooth the edges. Make sure that the shadow looks natural and underscores the shape of the ribbon.
7. Add Second Shadow
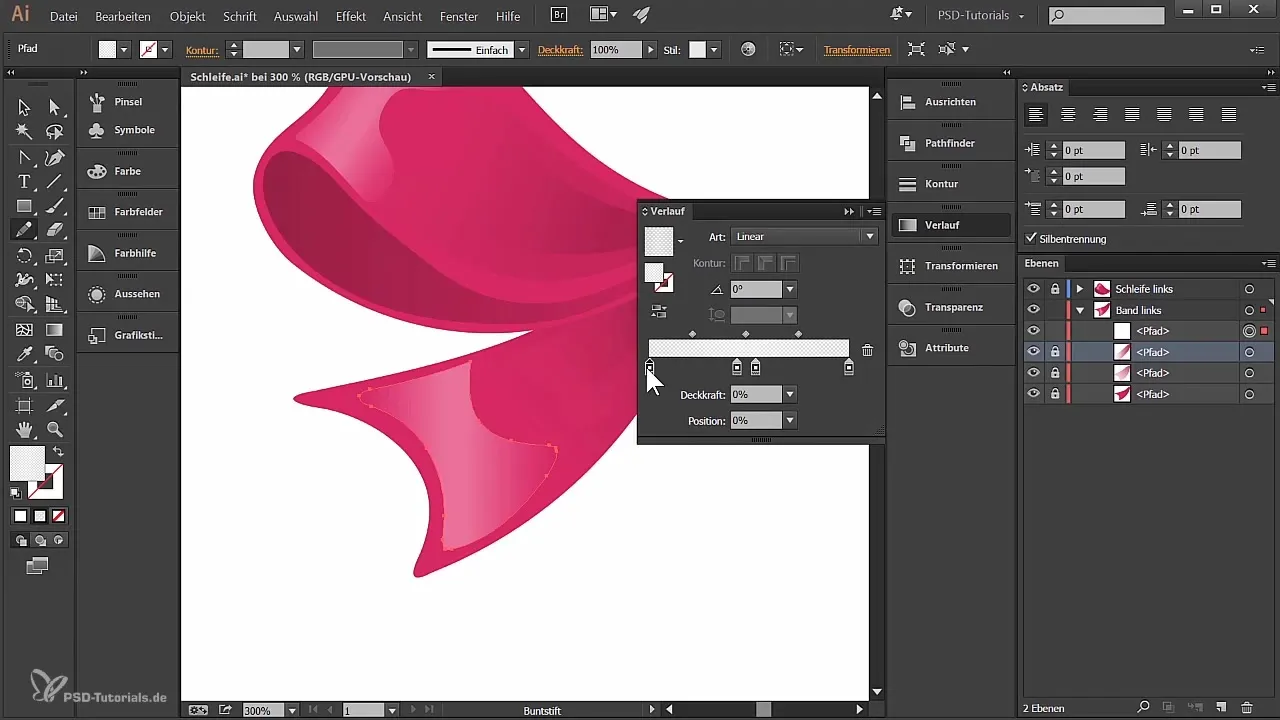
To create additional depth, add a smaller shadow. This is done again with the pencil tool and a gradient that realistically surrounds the shape. When choosing the color, pay attention to lower opacity to represent the shadow subtly.
8. Create Light Effect
To make the bow look lively, add a light point. Use the pencil tool again and draw a path for the light. Again, experiment with the gradient settings to realistically represent the light reflection.
9. Fine-tune the Light Reflection
The light point should also be provided with a gradient to achieve the desired effect. Ensure that the colors are harmoniously selected and that the light reflection supports the overall impression of the bow.
Summary - Designing a Ribbon in Illustrator - Step by Step
Designing a ribbon in Adobe Illustrator is an exciting and creative process facilitated by precise application of tools and techniques. Through careful drawing, applying gradients, and adding light and shadow reflections, you achieve an appealing and realistic bow structure.
Frequently Asked Questions
How do I create a new layer in Illustrator?You can create a new layer by clicking "New Layer" in the layers menu and entering the desired name.
How can I smooth the edges of a shape?Use the smoothing tool to optimize the edges of the drawn shape.
How do I add a gradient?Select the active shape, go to the gradient settings, and choose a linear gradient to adjust the colors.
Can I adjust the strength of the shadow?Yes, by changing the opacity of the color in the gradient, you can vary the strength of the shadow.
How can I create light effects in Illustrator?You can create light effects by drawing paths with corresponding gradients and colors that simulate light reflection.
