You are about to complete your composition with the Sturmtänzern. The aim here is to convincingly integrate the two protagonists into your digital scene. In this guide, I will show you how to optimally place the dancers and adjust the lighting settings and colors to ensure they fit harmoniously into the overall picture. Let's get started!
Main Insights
- Create a group for the dancers.
- Convert the layers of the protagonists into smart objects.
- Precisely scale and position the dancers.
- Use masks to enhance details.
- Make color and shadow adjustments.
Step-by-Step Guide
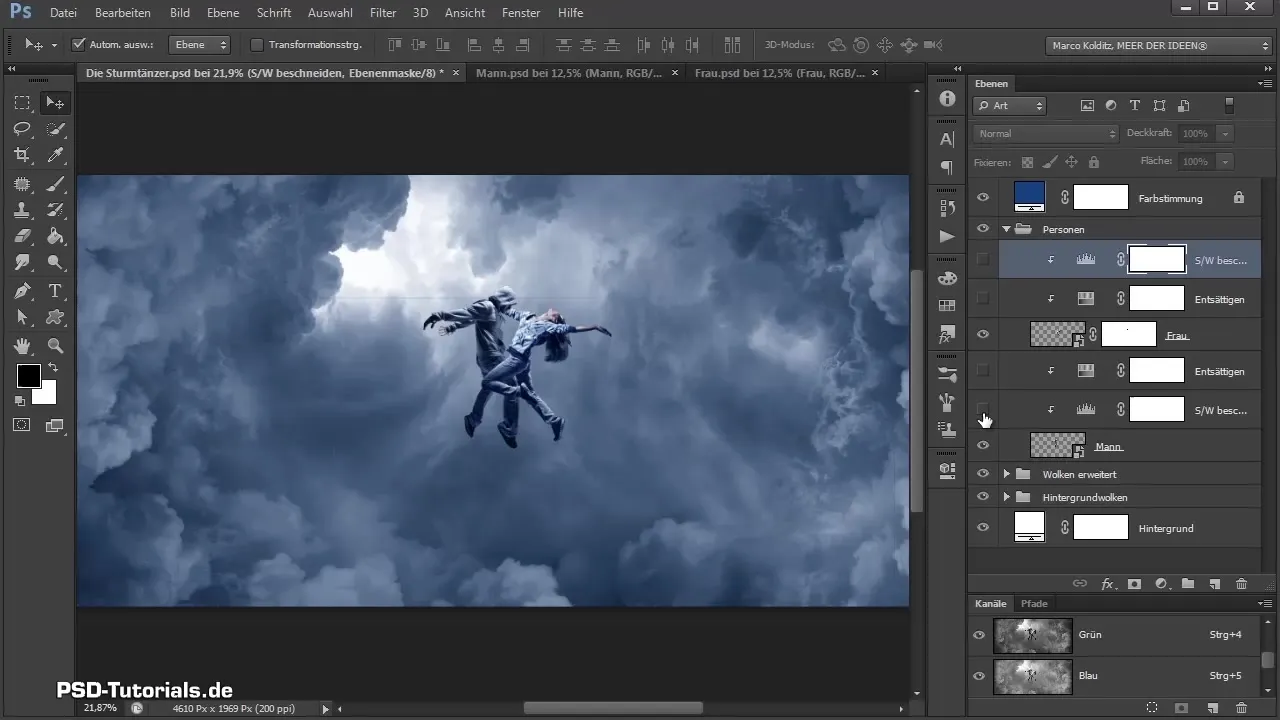
First, you need to create a group for the people you want to add to your composition. To do this, click on the folder icon in the layers view. Name the group appropriately, such as "People." To integrate the dancers, drag the respective files into the group.
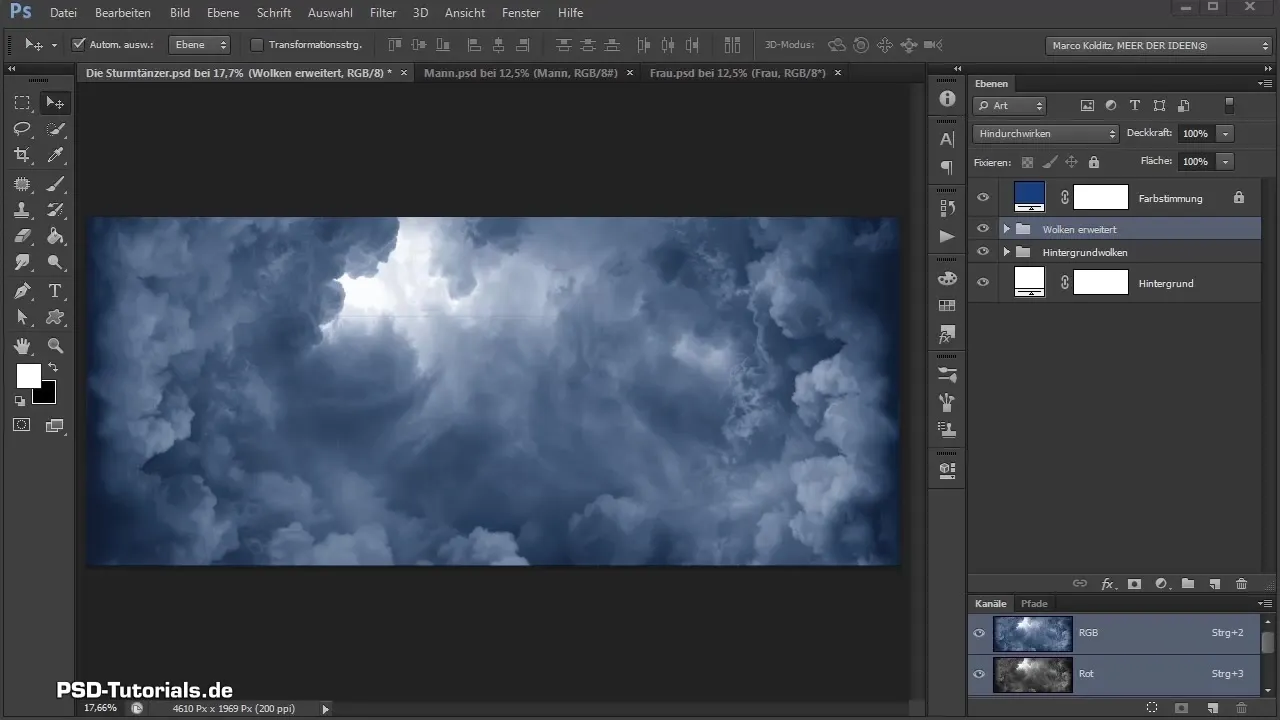
Once you have inserted the two dancer images, male and female, you will notice that they have taken on a bluish tint due to the adjustment layer. This can be adjusted if necessary. Now it is important to convert the image layers into smart objects to make editing more comfortable.
Right-click on the layer and select "Convert to Smart Object" from the context menu. Repeat this step for both dancers so that you can adjust them later without any issues. You can also select the layers simultaneously and then apply the right-click command.
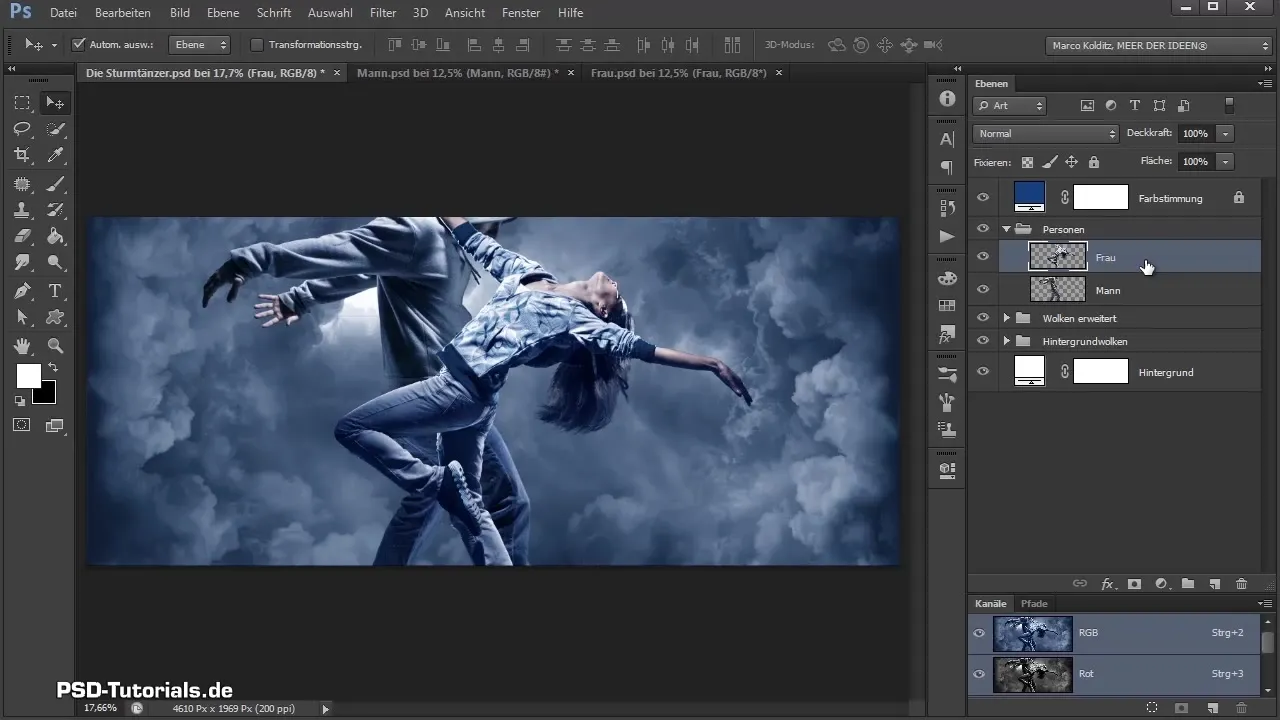
To adjust the position of the dancers, activate the transform mode by selecting both layers with Ctrl and T. Now you can position the dancers exactly where you want them on your stage. Ensure that the woman is in the foreground so that her leg stands out well in the picture.
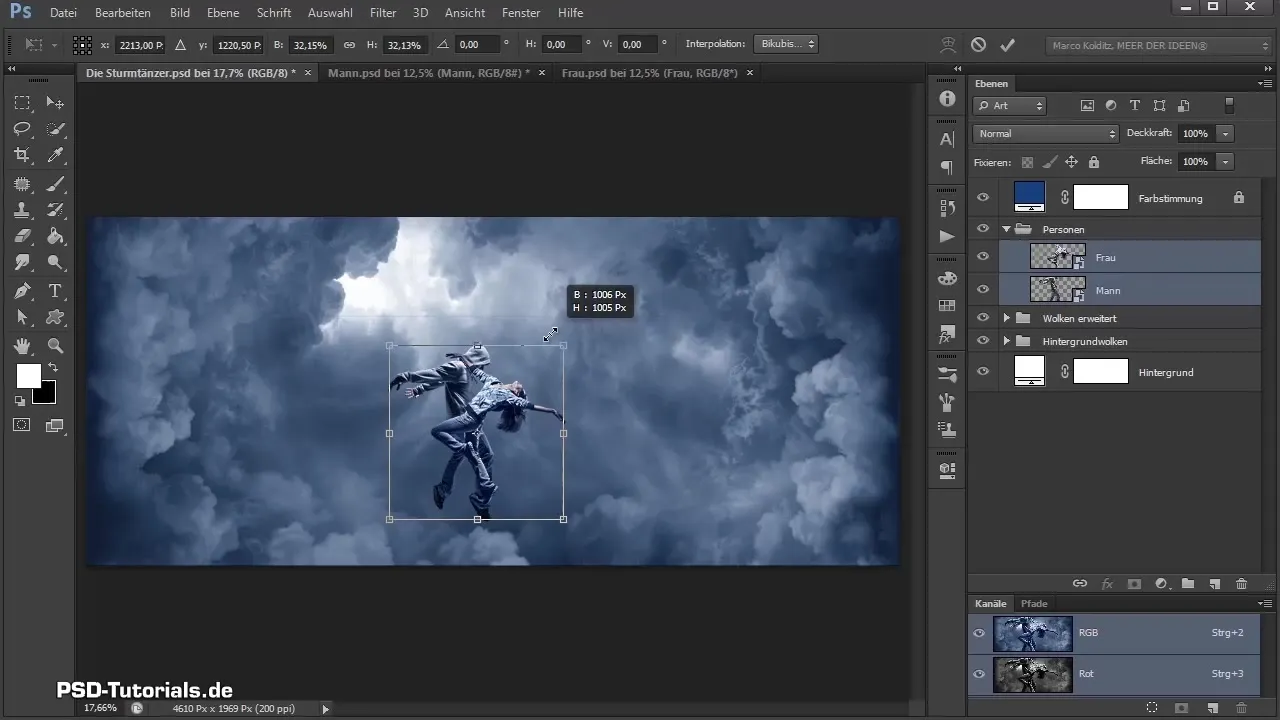
The representation should look such that the woman's hand is on the man's shoulder. A bit of scaling and rotation can also be useful here. If you set the rotation to 17° and slightly enlarge the female figure, it looks as if the two are actually dancing with each other.
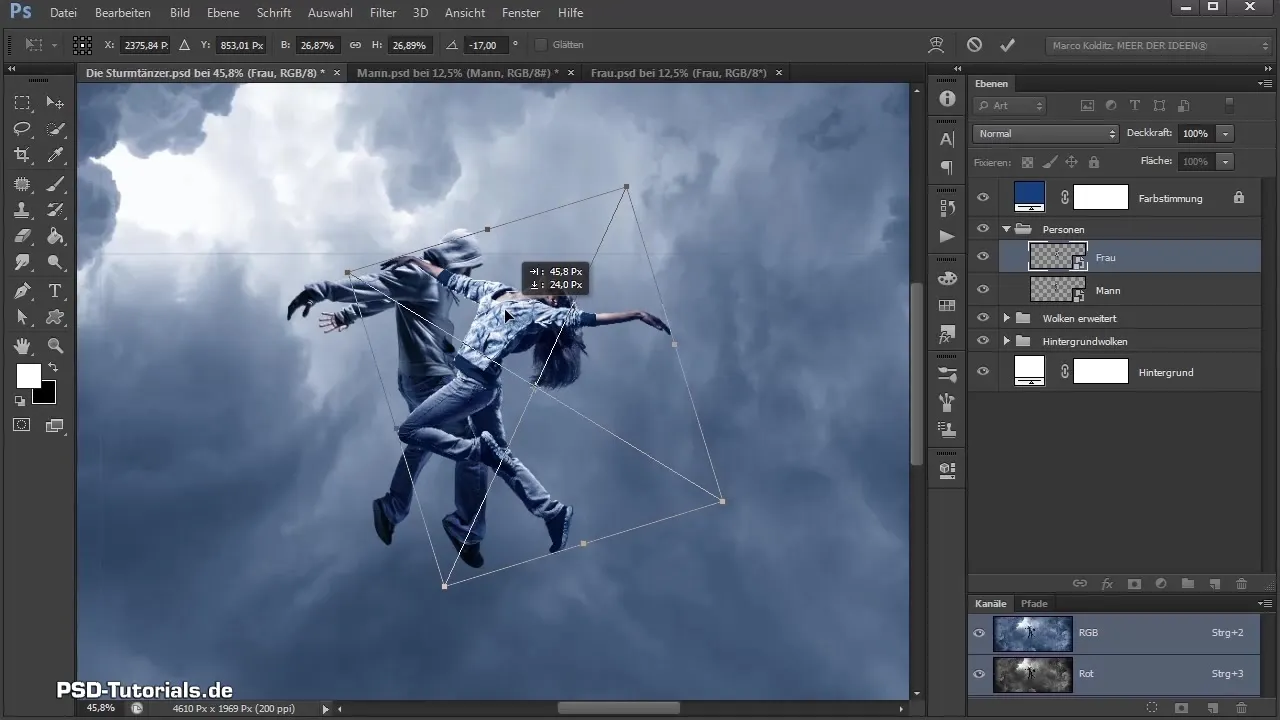
Once you have positioned the two dancers, the next step is to adjust the color saturation and shadows. You can create a new mask layer for one of the protagonists. With black as your foreground color, first wipe back the outlines in the mask to remove unnecessary parts.
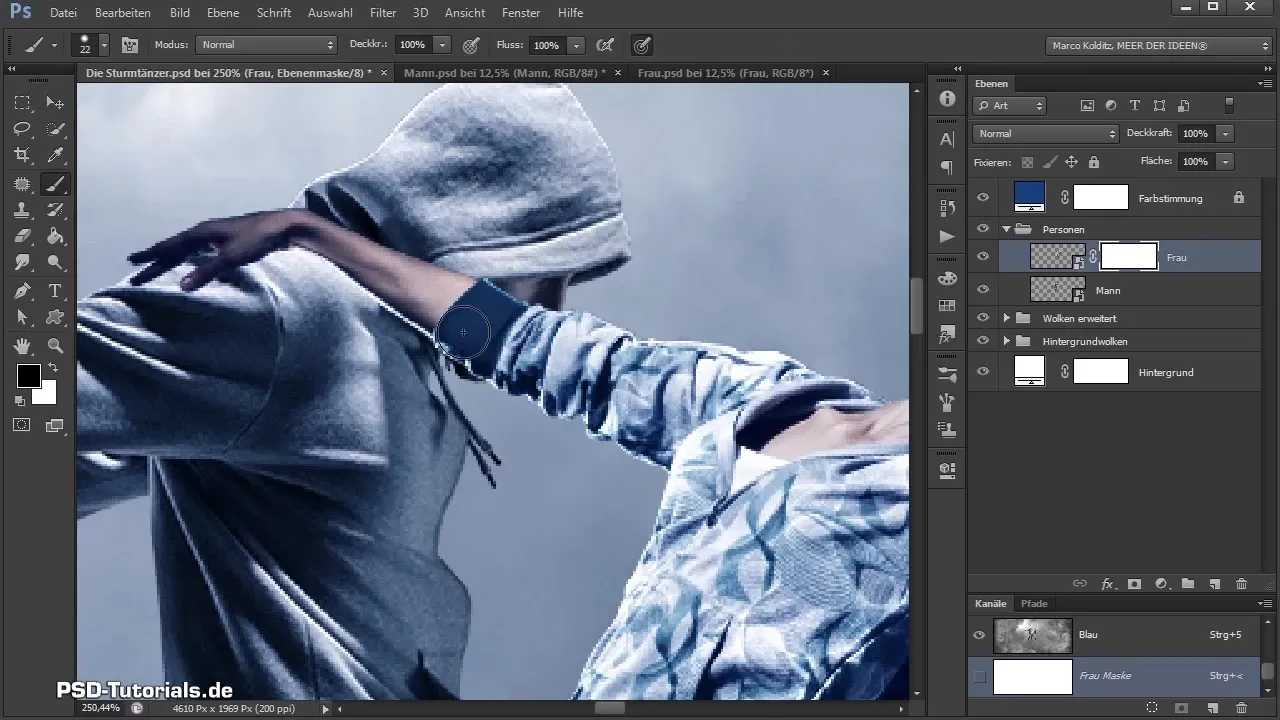
Then switch to white foreground color and paint the hand back into the picture. It is important for the actions of the figures to be clearly visible so that the illusion of dance is preserved.
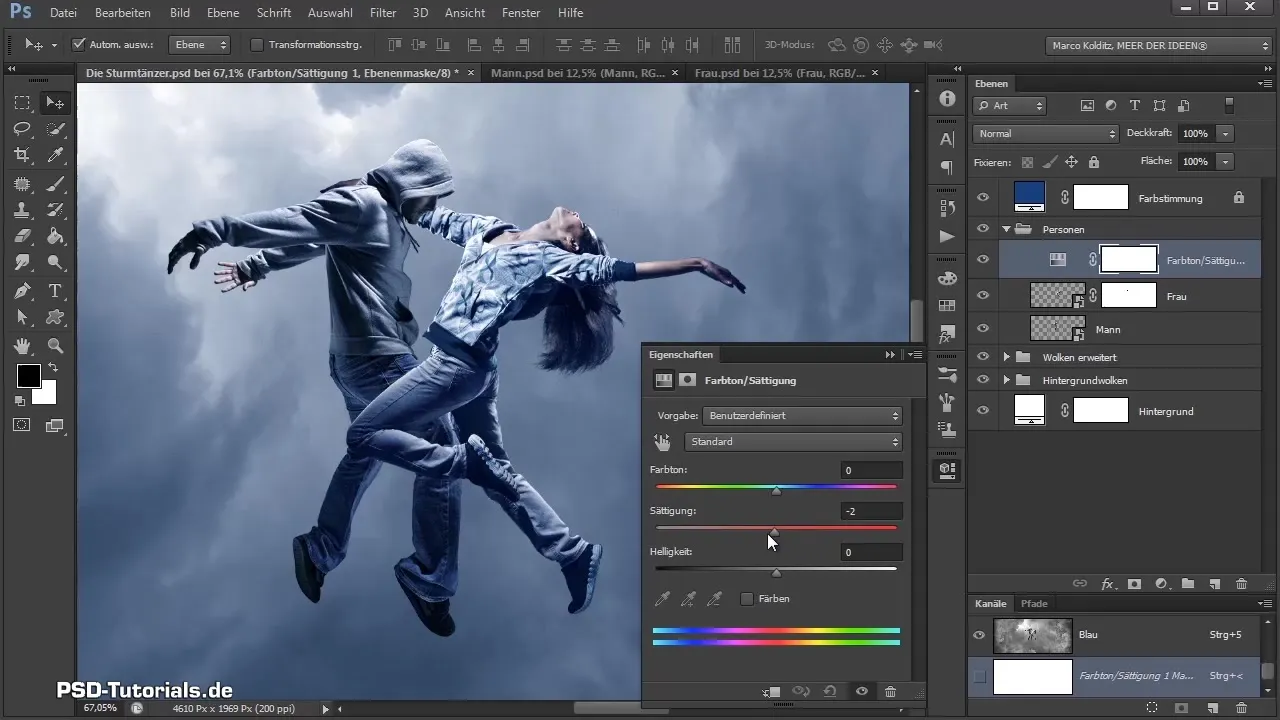
For color adjustment for the woman, you can add a hue/saturation layer, but make sure not to entirely remove her skin tone. You can do the same for the man and create both layers as a clipping mask.
For the final shadow effects, take a levels adjustment layer and adjust the settings for both dancers. Here you can move the black and white sliders to achieve a more harmonious look.
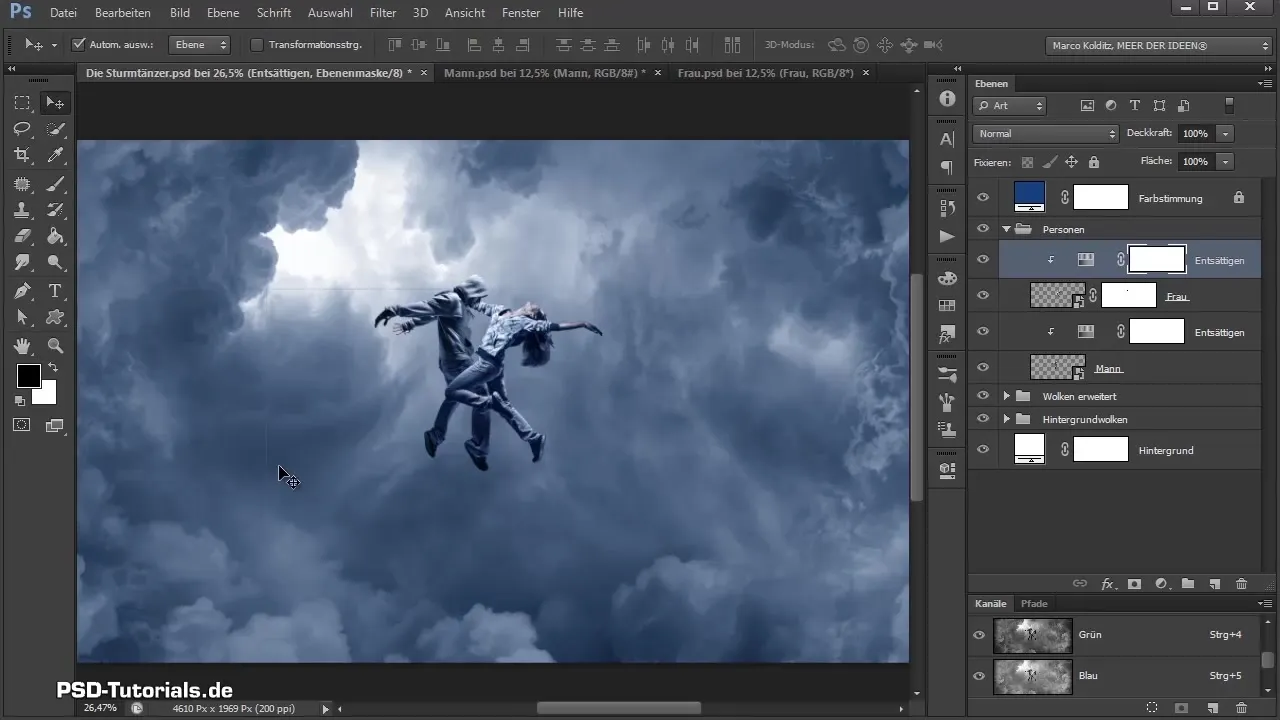
A final adjustment for more contrast brings the figures even better into the picture. Temporarily disable the layers to compare the difference between before and after.
If everything looks good, you are ready for the next video, in which we will add motion effects.
Summary - Integrating Sturmtänzer into the Image - Step-by-Step Guide
You have learned how to successfully insert your Sturmtänzer into the composition, adjust their colors and lights, and create a realistic arrangement. These steps are crucial for bringing your protagonists to life and perfecting the illusion that they are actually dancing with each other. Get ready for the next video, where we will deal with dynamic motion effects!
Frequently Asked Questions
How do I convert layers to smart objects?Right-click on the layer and select "Convert to Smart Object".
How do I adjust the color saturation of my figures?Create a hue/saturation layer and select the desired adjustments.
What role does masking play?Masks help to hide or reveal specific areas to achieve more detail fidelity.
Can I transform multiple layers at once?Yes, select multiple layers and press Ctrl + T to transform all at once.
How can I increase the contrast in my image?Use a levels adjustment layer to adjust the contrast using the black and white sliders.
