In this guide, you will learn how to use BlueWillow as an alternative to Midjourney. If you are a fan of AI-generated images, you are in the right place. BlueWillow works similarly to Midjourney, offering you the ability to turn creative ideas into impressive images. In the following steps, I will show you how to create your own Discord server to simplify access to BlueWillow and organize your creative projects in a structured environment.
Key Insights
- BlueWillow is an alternative platform to Midjourney, based on Discord.
- Having your own Discord server can make image generation more efficient.
- Using BlueWillow is free, even if your Midjourney credits are used up.
- The generated images can be saved in high quality.
Step-by-Step Guide
First, let's take a look at how BlueWillow works. It's important to understand the basics before diving into the creative work. BlueWillow works in principle just like Midjourney and can also be used via Discord. To enhance the user experience, it is advisable to set up your own Discord server.

Step 1: Create Your Own Discord Server
To optimize your creative process, you should first create your own Discord server. This will help you maintain clarity and avoid having to scroll through the many chats of newbies.
Simply go to Discord, click on "Add Server," and choose "Create Your Own." You can name the server as you like, for example, "Blues Willow Course." This is the first step in effectively creating and managing your artworks.
Step 2: Add the BlueWillow Bot
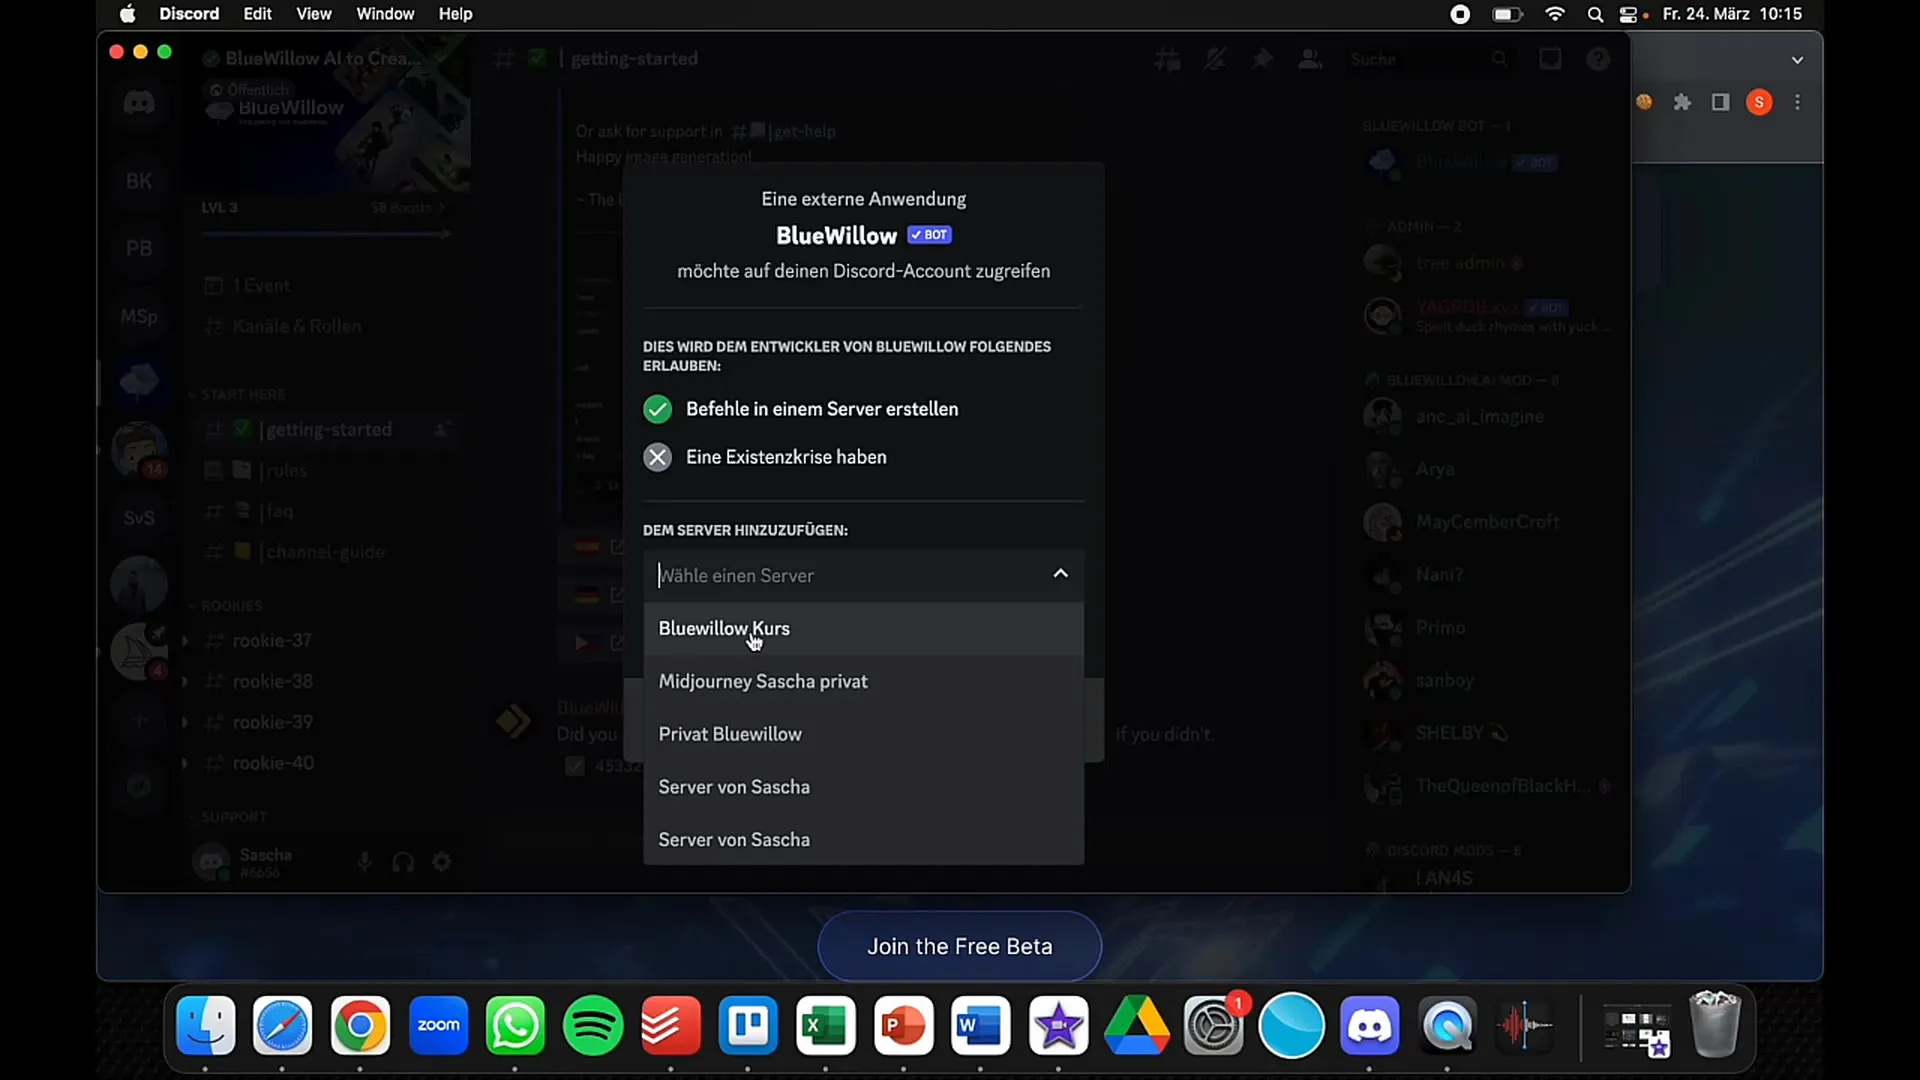
After creating your server, you need to add the BlueWillow bot. Go to the official BlueWillow server, click on the human icon, and then select the server you created to add the bot. Make sure to grant the necessary permissions for the bot to function correctly.

Step 3: Use the Slash Commands
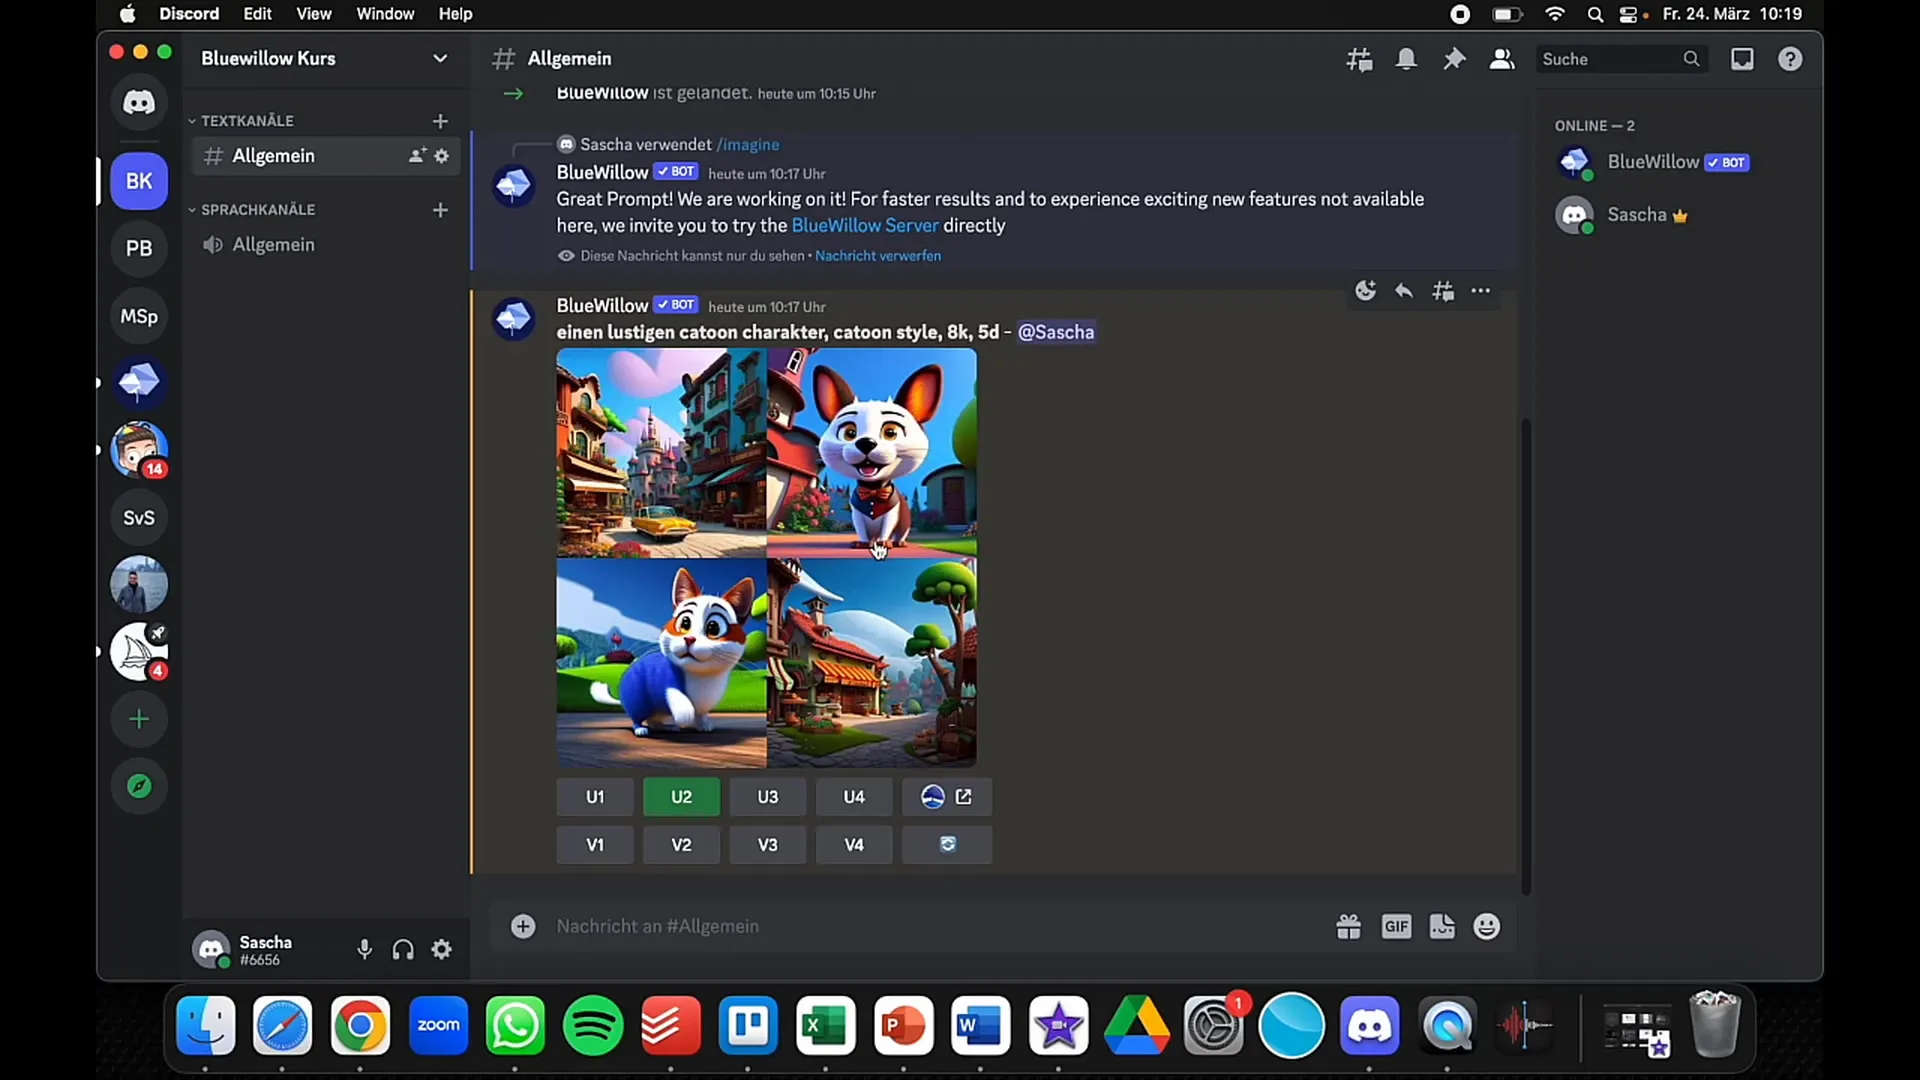
Once the bot is added, you can start creating your images. Begin your inputs with a slash (/) followed by the command "Image" to enter your prompt. It doesn't matter whether you write your prompt in German or English. It's essential to remain creative and try out different approaches.

Step 4: Check the Creation Process
Note that BlueWillow does not show a progress indicator like Midjourney does. This may be confusing at first, but don't be discouraged. The bot will give you feedback if something is not working. Just wait until the image is generated.

Step 5: Analyze Your Results
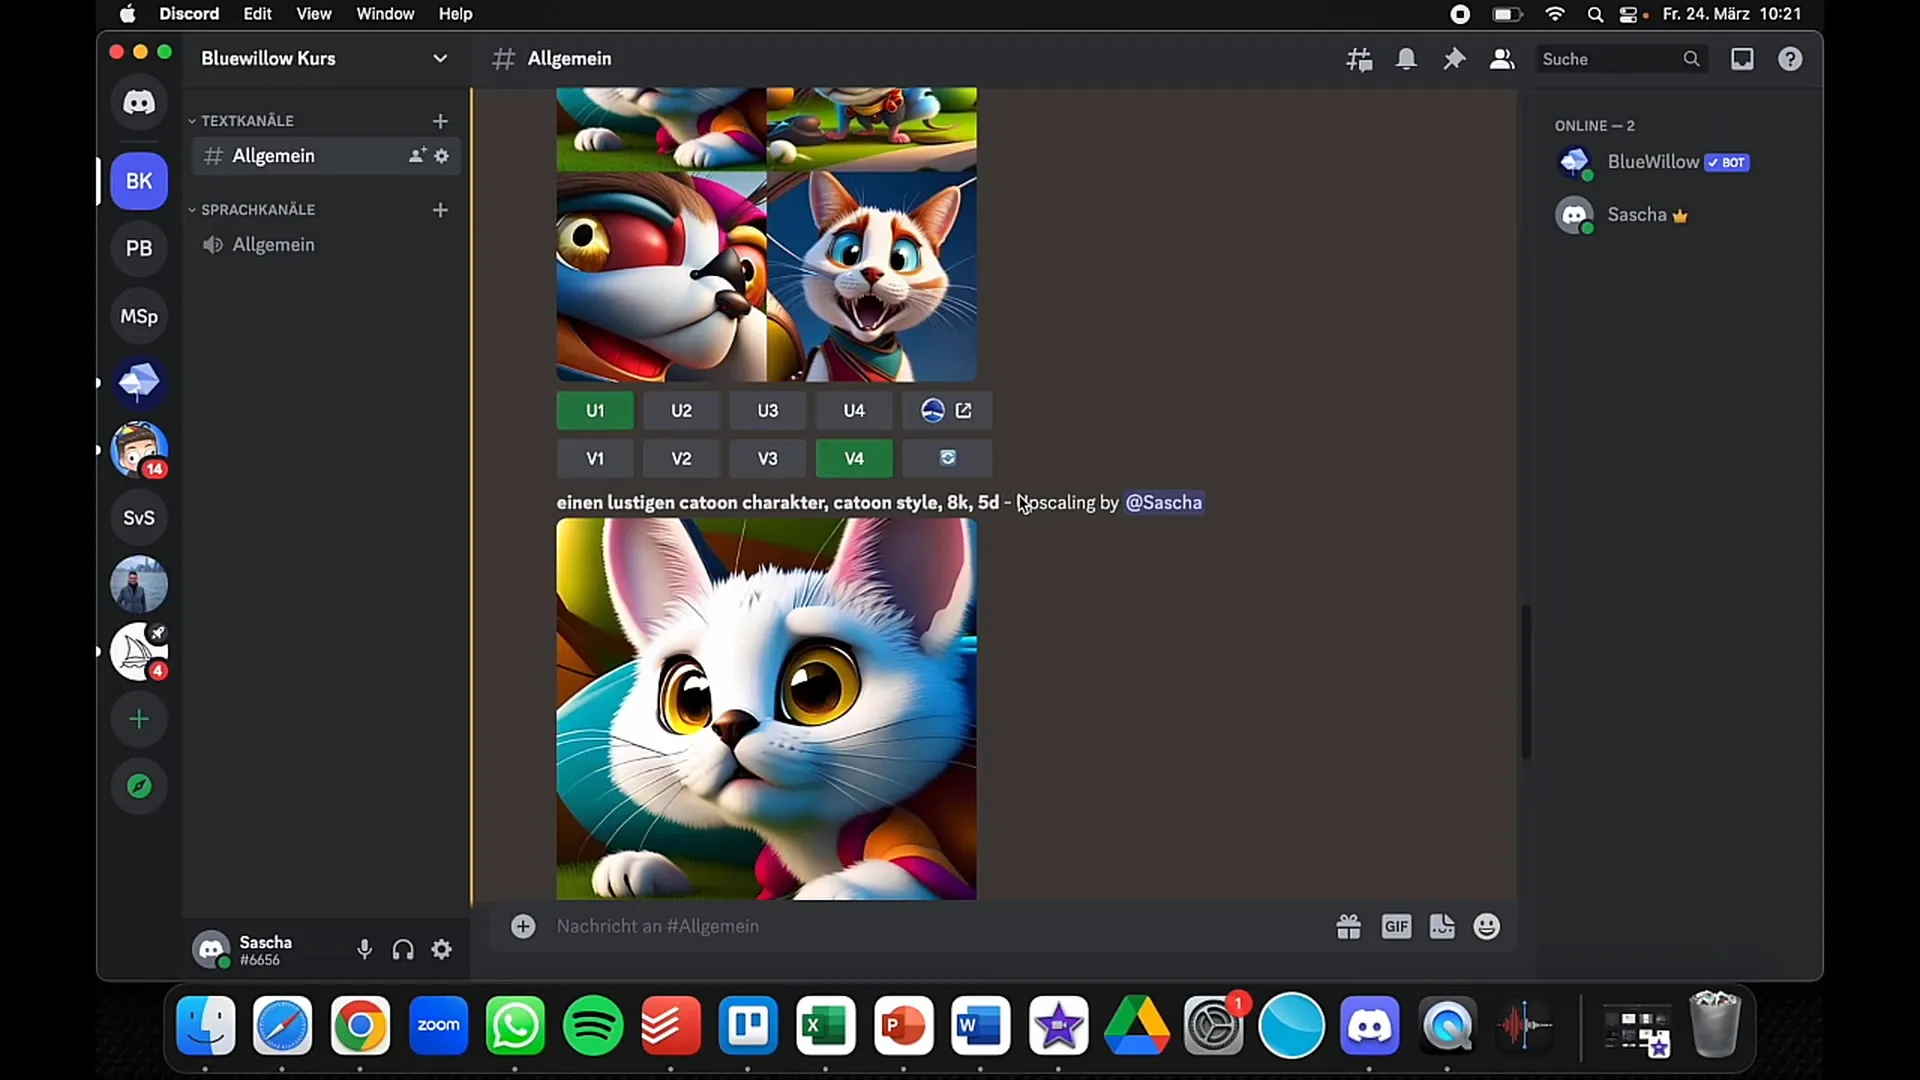
After the image is created, you can examine it more closely. You have various options to modify the image. Click on "U2" if you like the image, or "V2" if you want an alternative version. This way, you can vary and customize the image according to your preferences.

Step 6: Save Your Images
If you are satisfied with the result, you can easily save the image. Right-click on it and choose "Save Image As." The image will be saved in very high quality, which you can use for your creative projects.

Step 7: Invite Friends
A cool aspect of having your own server is that you can invite friends. You can collaborate on your creations and exchange feedback. This not only promotes creativity but also brings in many new ideas and perspectives into the process.
Summary
In this tutorial, you have learned how to use BlueWillow as a creative platform. You have learned how to create your own Discord server, add the BlueWillow bot, generate images, and finally save them. Let your creativity flow and see what unique artworks you can create with BlueWillow.
Frequently Asked Questions
How does BlueWillow work?BlueWillow works similarly to Midjourney and uses Discord for image generation.
Do I have to pay for BlueWillow?No, BlueWillow is free, even if you have run out of credits on Midjourney.
How do I save the images?You can save the images in high quality by right-clicking and selecting "Save image as."
Can I use BlueWillow in different languages?Yes, you can input your prompt in both German and English.
How do I invite friends to my server?You can invite friends to your server using the Discord invitation feature.


