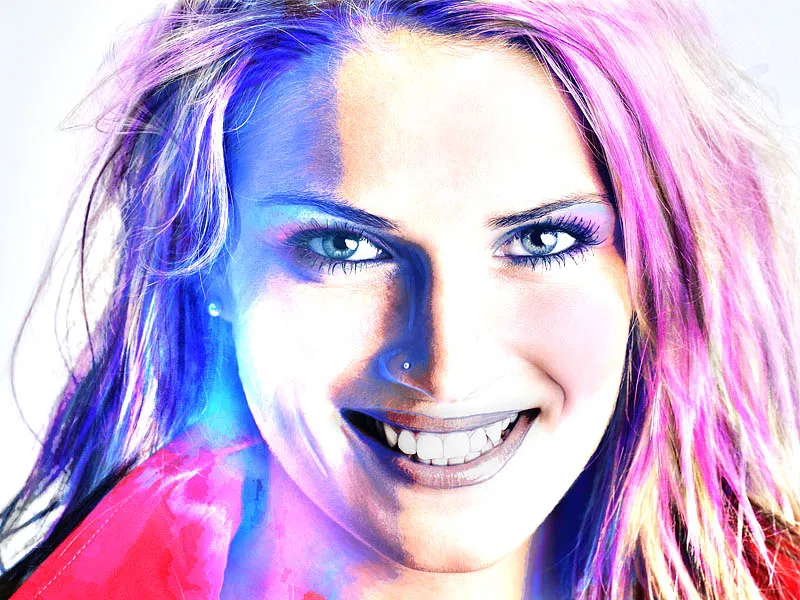
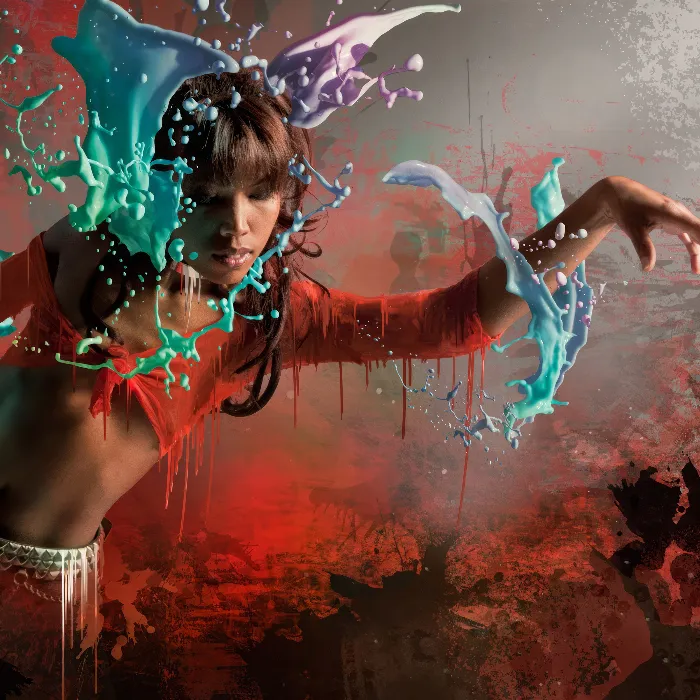
The 80s look is characterized by bold colors, neon-like highlights, and striking contrasts - a style that immediately catches the eye. With Photoshop, you can paint this retro look onto a portrait photo by combining layer effects, brushes, and color corrections. In this tutorial, I'll show you step by step how to transform a portrait into an 80s style - perfect for posters, social media posts, or creative art projects. Let's get started and turn your photo into a vibrant 80s masterpiece!
Step 1 - Optimizing the Original Image
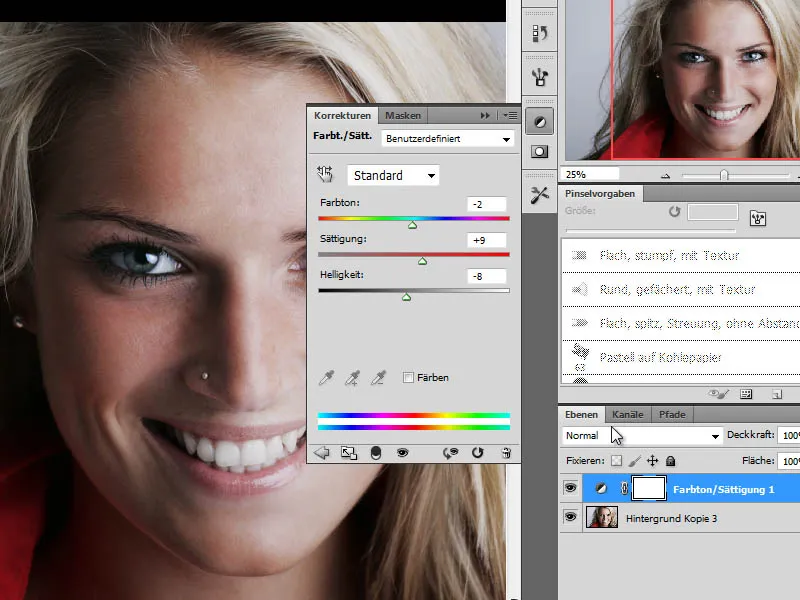
First, I apply an adjustment layer Hue/Saturation to the image to adjust the color scheme.
Next, I make further optimizations to the original image using another adjustment layer Levels.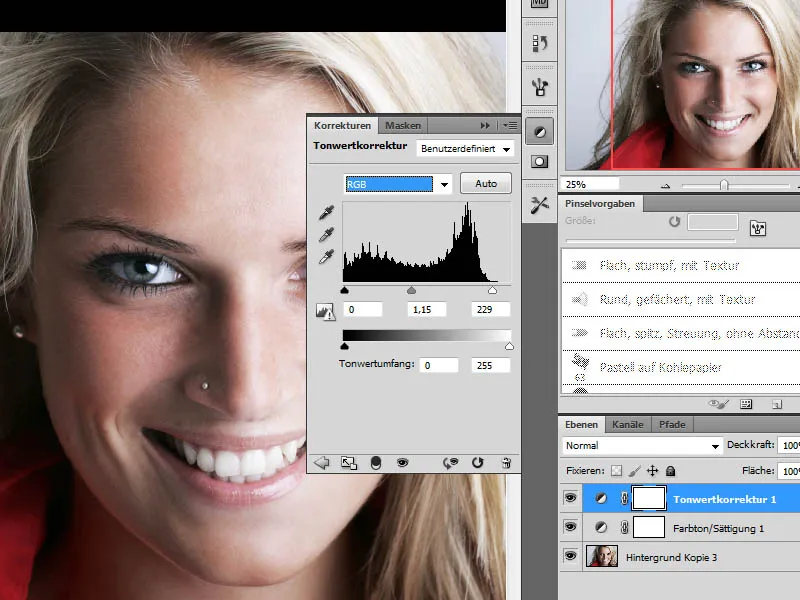
Step 2 - Combining Editing Steps, Sharpening
Once the edits to the original image are complete, I merge the previous steps into a new layer using Ctrl+Shift+Alt+E. I then sharpen this new layer using Unsharp Mask.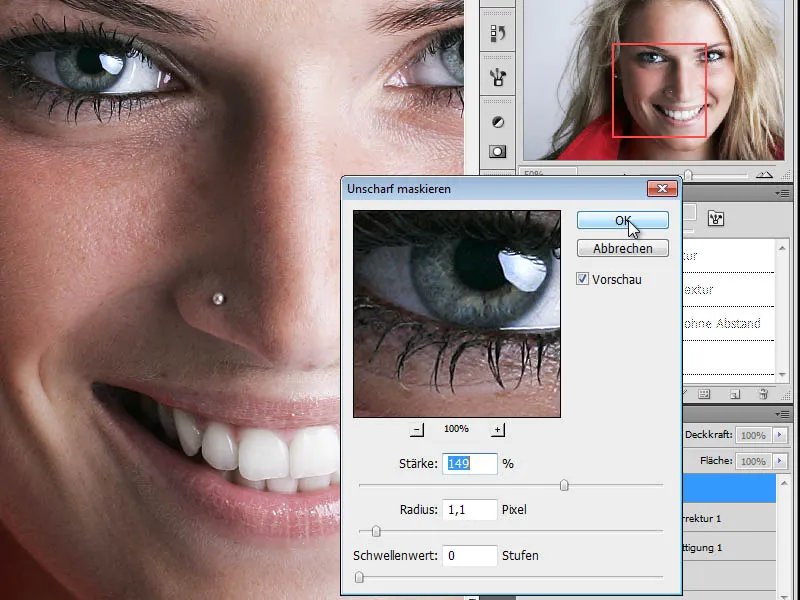
Step 3 - Creating a Copy and Desaturating the Color
In the next step, I duplicate the sharpened layer, desaturate it, and convert it into a black and white copy. There are two ways to do this using the Image>Adjustments.
The first method involves desaturating the image using Hue/Saturation by moving the Saturation slider all the way to the left.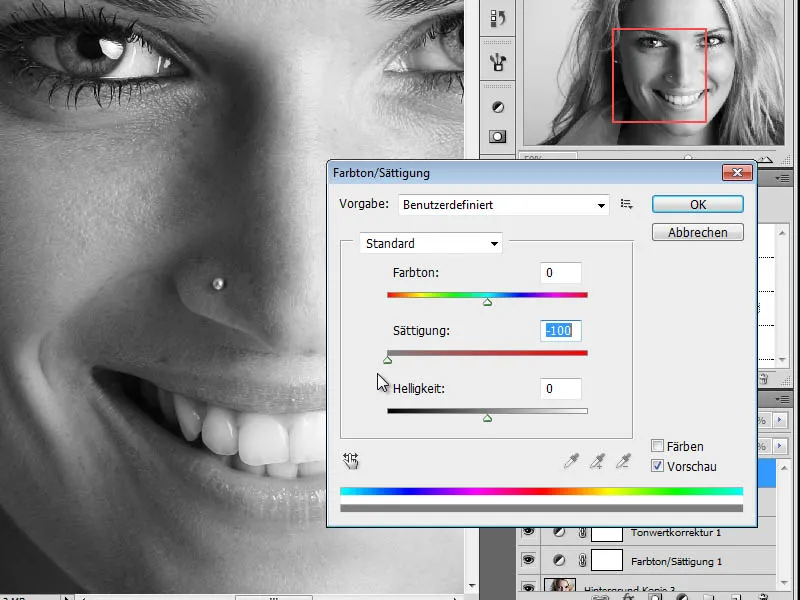
The other method involves individually adjusting the black and white values using the option Image>Adjustments>Black & White. Here, I can set the color rendering for each color range individually, achieving a better conversion to grayscale.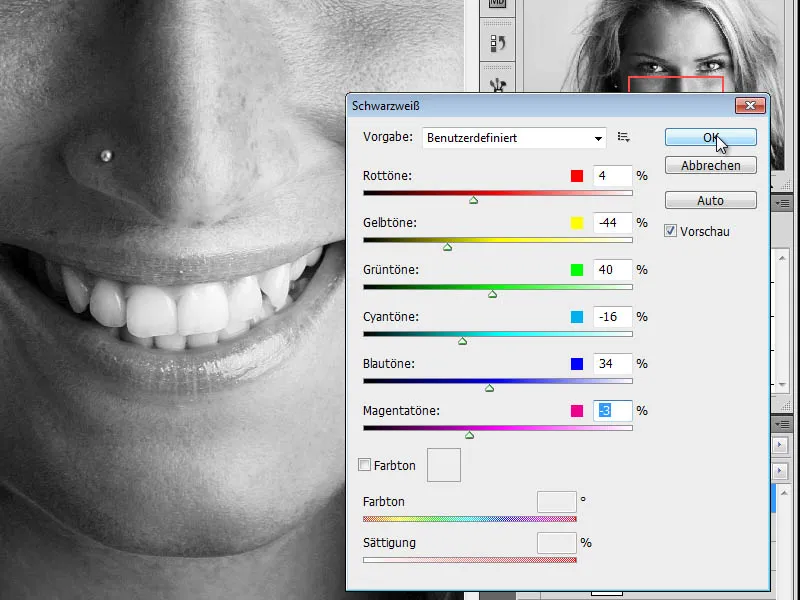
Step 4 - Creating a Copy, Changing Layer Mode
In the next step, I create a copy of my black and white layer and change the layer mode to Color Dodge.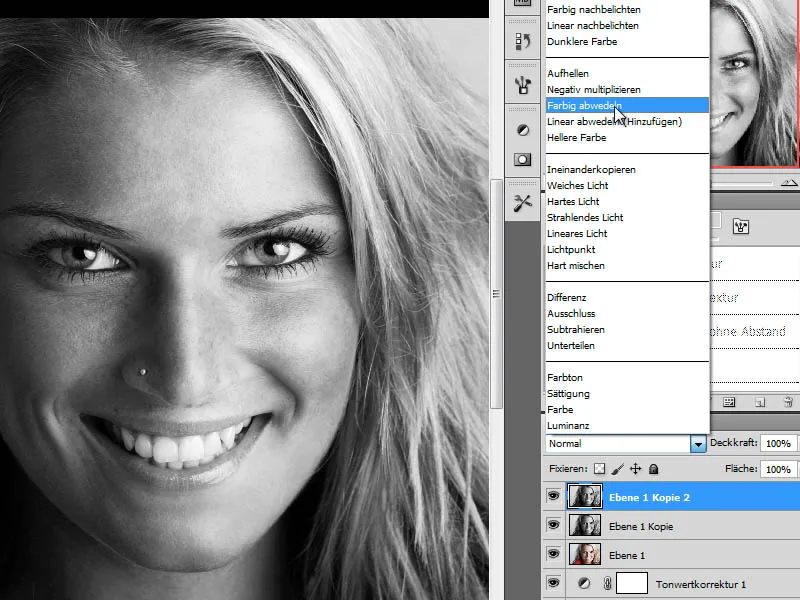
Step 5 - Inverting the Layer
To achieve the desired effect, I will now invert this layer. I do this by pressing the keyboard shortcut Ctrl+I. As a result, a white image will appear. We will undo this in the next step.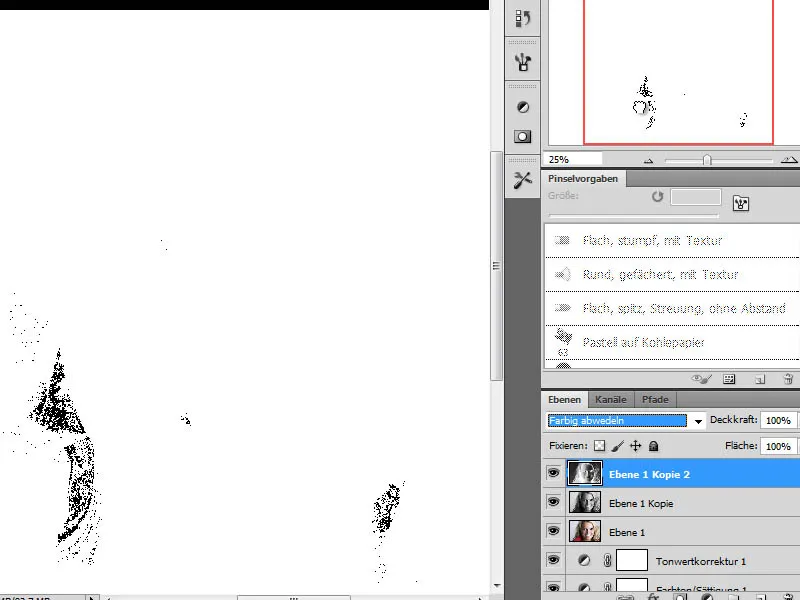
Step 6 - Applying Gaussian Blur Filter
To give the structure a pencil drawing-like appearance, I now apply a Gaussian Blur filter to the inverted layer. I use a fairly high value for the Gaussian Blur in this case.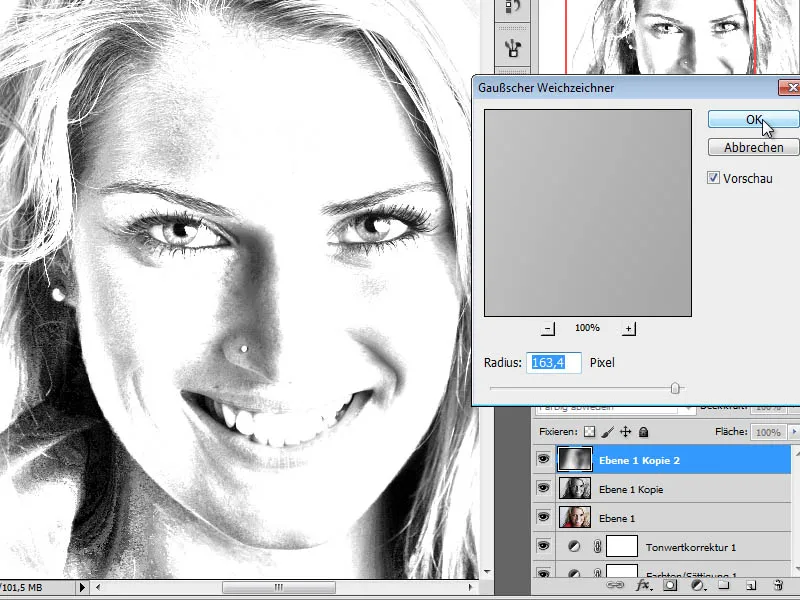
Reducing the layer opacity to about 70% will blend this layer with the layer below in a way that creates a colored drawing effect.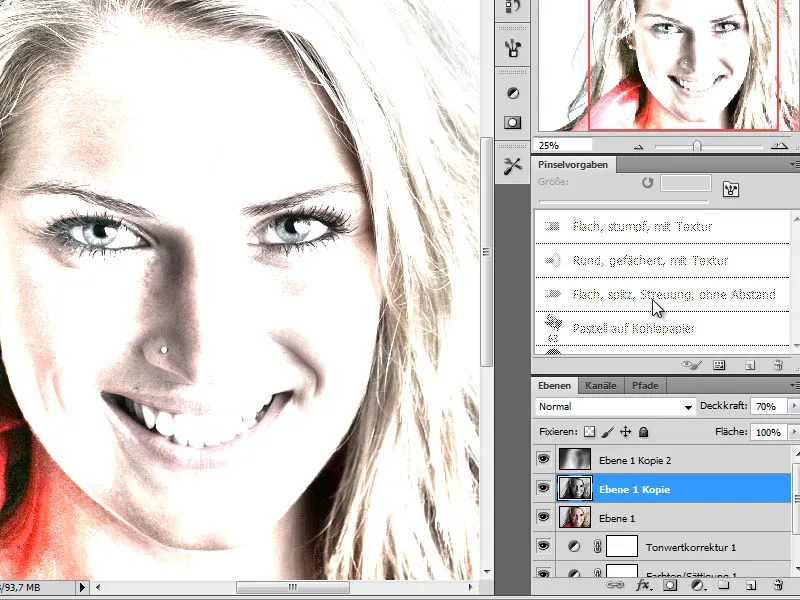
Step 7 - Creating a Drawing Layer and Retracing Facial Features
To achieve the 80s effect with this editing method, we first need to do some drawing in the image. Initially, we will outline the shadow areas.
First, we create a drawing layer between the portrait layer and the black and white layer as a new, empty layer. On this layer, we will outline the shadow areas of the face with a dark blue hue.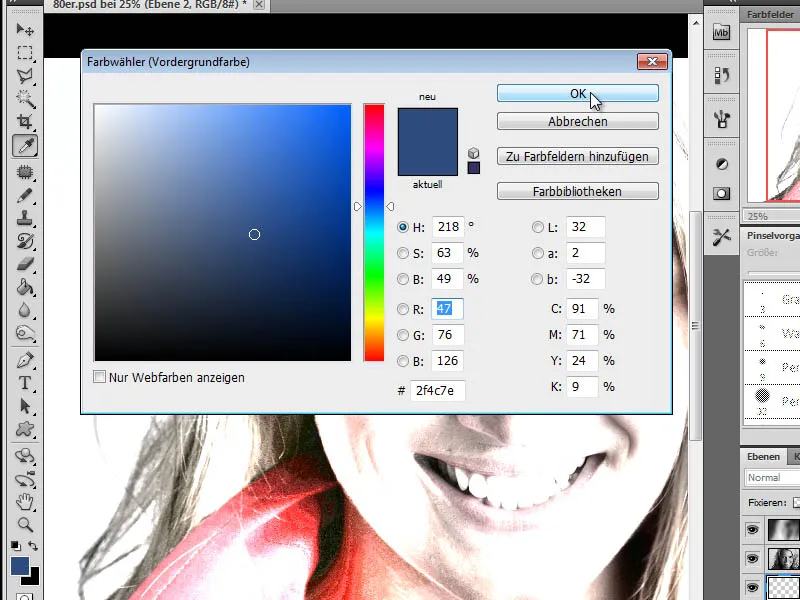
PRO TIP:
To identify the dark areas of an image, additional tools can be useful. Here, for example, it is recommended to use the Select>Color Range option on layer 1 (original portrait).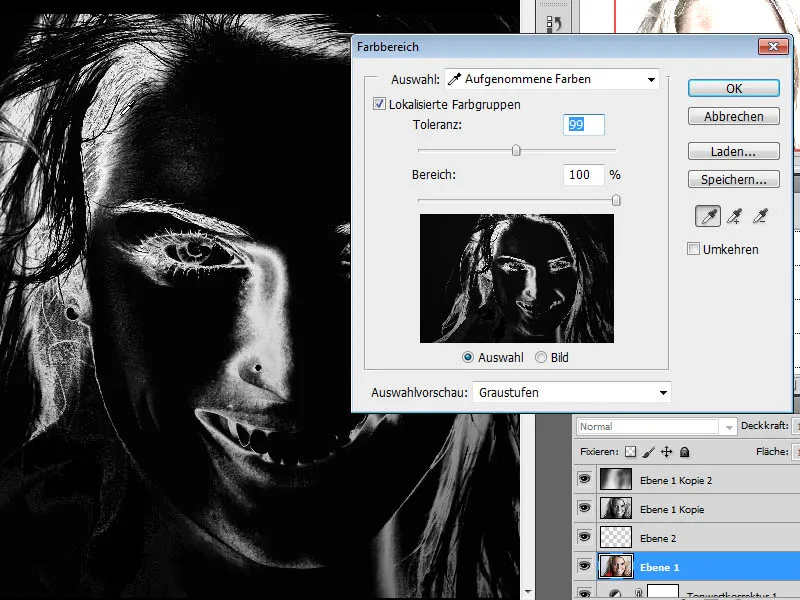
A second method that yields similar results is to use the Image>Adjustments>Threshold option.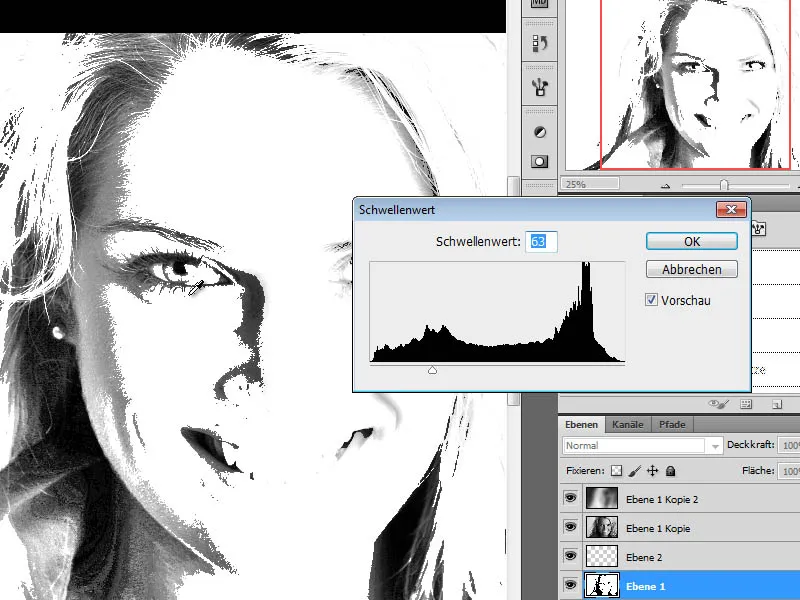
To draw, you can use either a colored pencil tool or a brush. The colored pencil tool is preferred for its properties. From the dry brush set, choose the graphite pencil, adjust it to a suitable brush size. Here, I have set my preferences with a brush tip size of approximately 40 pixels and reduced brush opacity.
Now, I begin to outline the shadow areas and details like the eyes with my colored pencil tool/brush.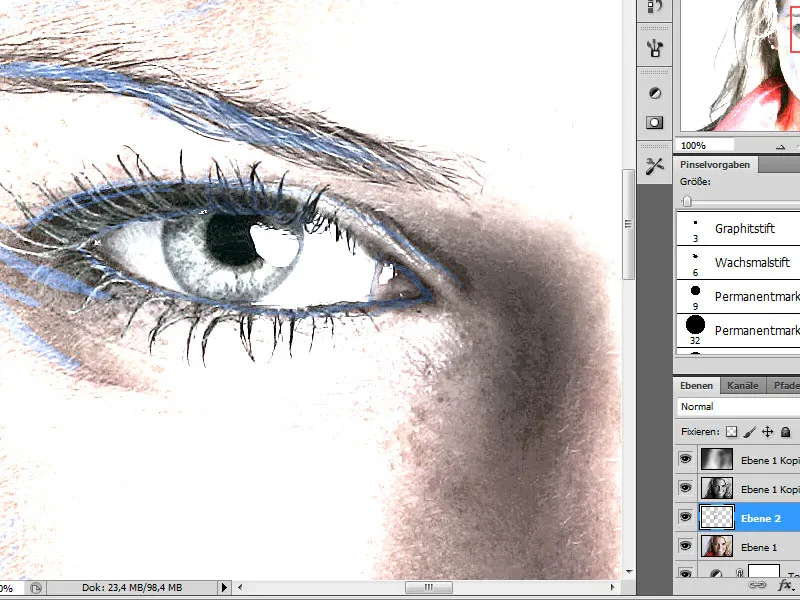
This editing step takes some time and should be done as detailed as possible. The required brush tips can be combined as desired. In the result, the traced layer should look as follows. I have created a white intermediate layer for better representation between the portrait and the drawing layer.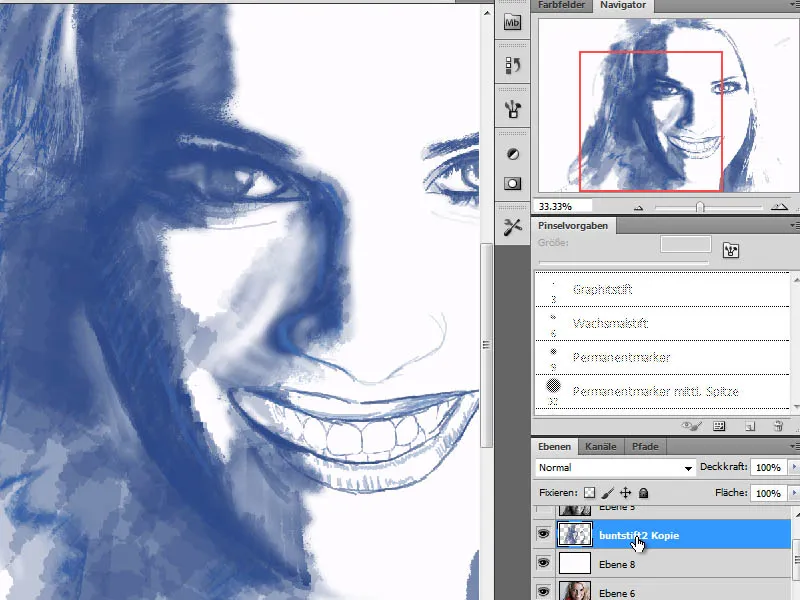
Step 8 - Additional drawing layer for the hairlines
Because our work is created using different traced detail layers, we need another layer in the next step to be responsible for displaying the hairlines. I will create this layer between the contour layer just created and the first black and white layer.
The hairlines will be defined using a purple hue.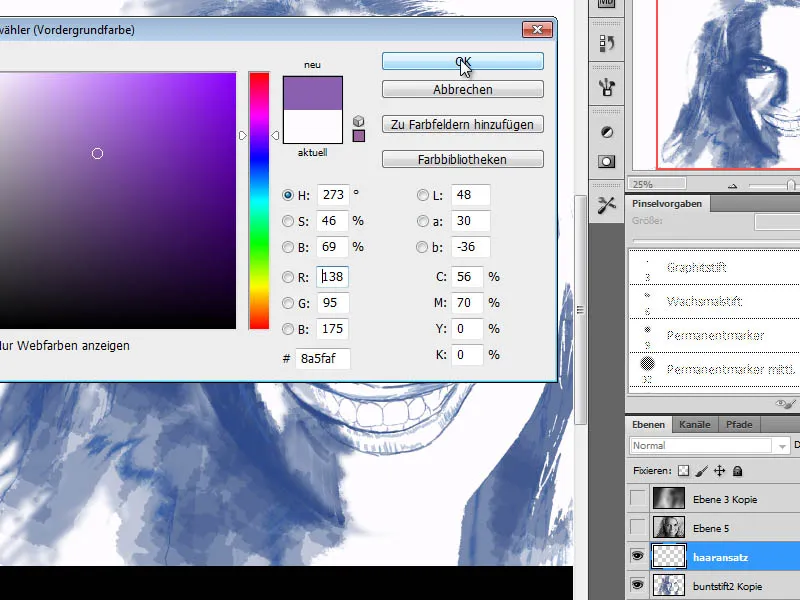
I initially choose a large brush to paint the hairlines in a flat manner. As I progress, I switch this brush several times and replace it with additional brush tips from the Brush set for dry colors. It is important to set the layer to the Multiply mode at this point, and make the brushstrokes as trailing as possible - meaning by applying long, drawn-out brushstrokes. 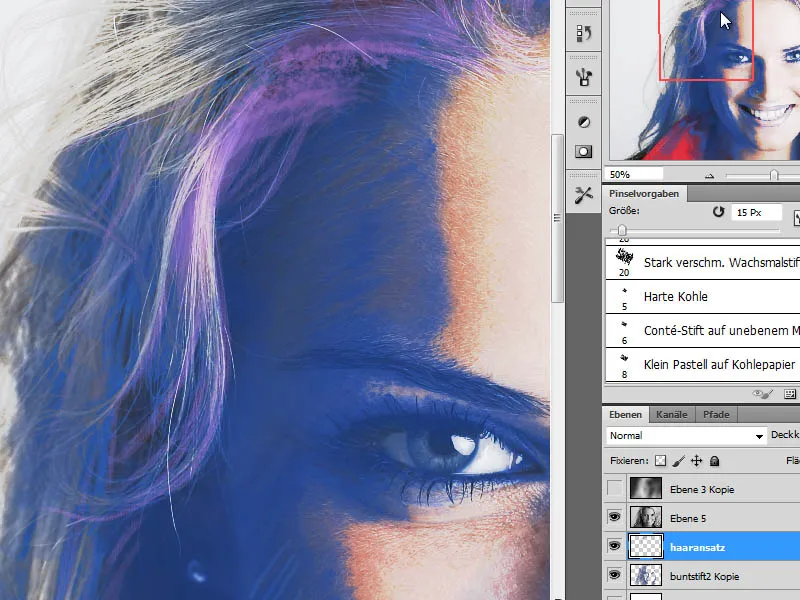
Step 9 - Additional drawing layer for the hair areas
Above the "Hairline" layer, another one is needed for the hair areas. I create a new blank layer and color the hair with the 3 colors Pink, Purple, and White on this layer.
Purple is used for the dark hair areas, Pink for the mid-tones, and White for the light areas. When drawing, I make sure not to draw straight lines, but to follow the flow of the hair, drawing along the waves.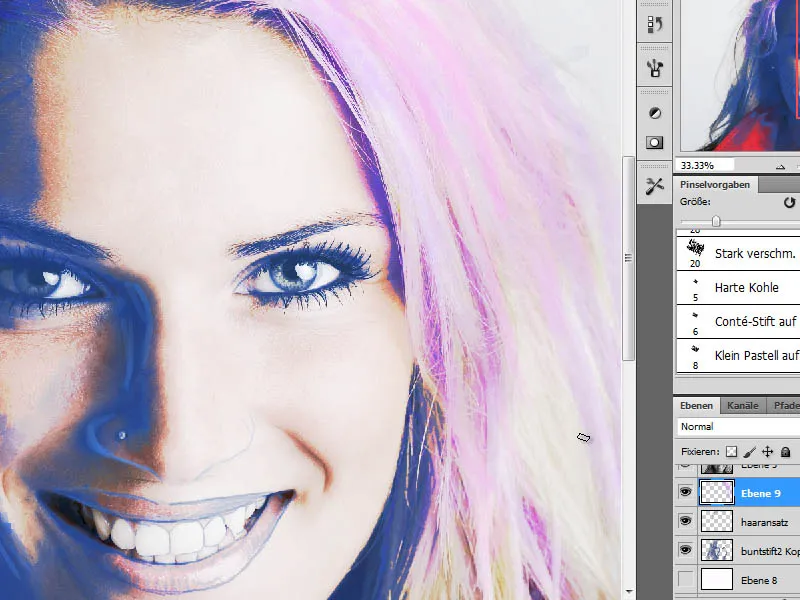
Step 10 - Emphasizing the cheekbones
The face currently lacks expressiveness. I want to add this in this step by applying color. Firstly, I emphasize the areas of the cheekbones with the violet shade R160, G132, B184. I select an appropriate brush from the general brush set with a soft edge and draw over the cheekbones with reduced opacity.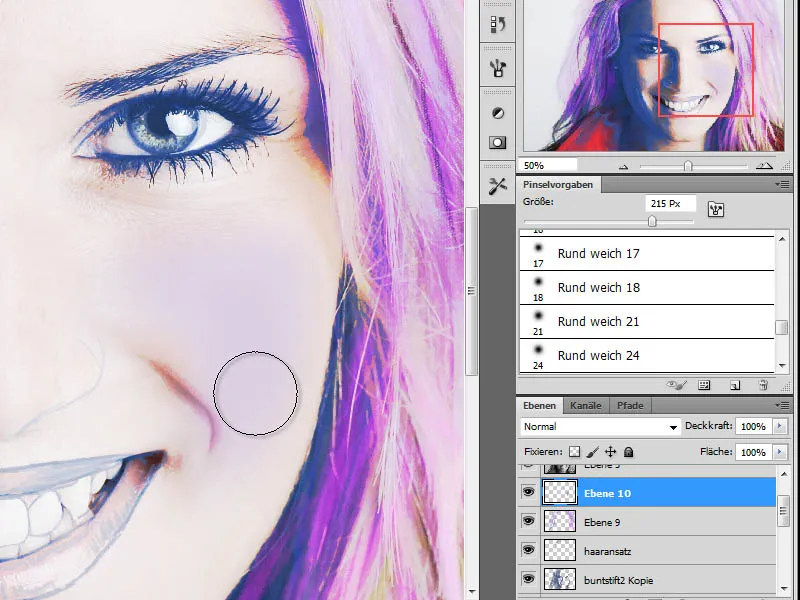
Step 11 - Applying the skin color
Due to the previous editing steps, our skin color is inaccurately portrayed. I aim to correct this now. I start by using the eyedropper tool to pick a skin tone from the portrait layer. I have created a copy of this layer at the very top of the layer stack, sampled the color, and initially hidden it. It will be used in Step 13.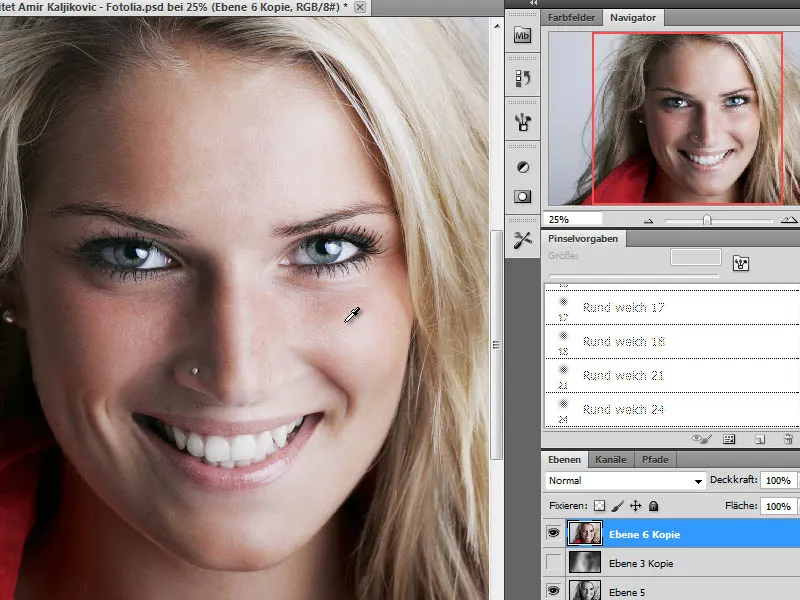
On a new layer, I now draw the sampled skin color onto the face with a large, soft brush tip and at reduced opacity. The layer is set to the Color mode.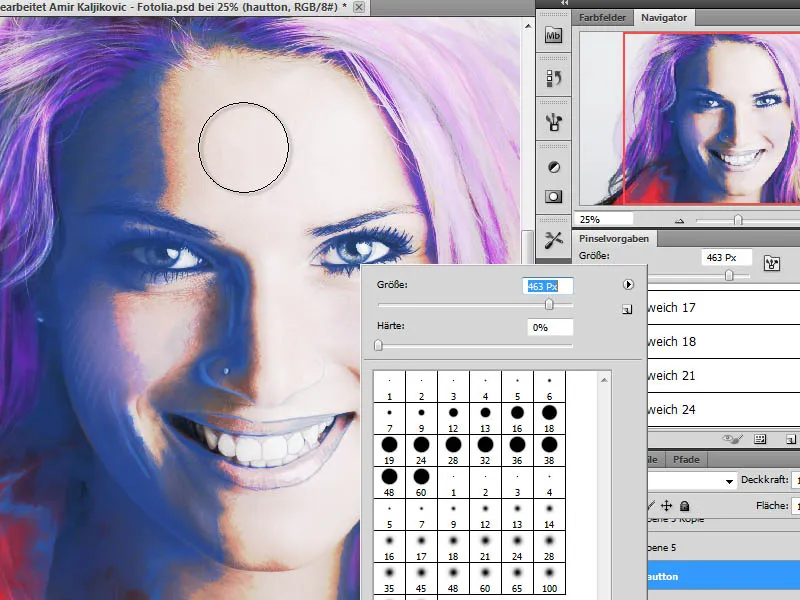
Step 12 - Emphasizing and applying makeup to the eyes
Currently, the eyes appear weak due to the lack of emphasis. I will change this by applying additional color to the eye area on a new layer. Since everyone can decide for themselves which makeup color is suitable, there are no specified colors here. It depends on the original photo and personal preference. For my artwork, I have applied a dark color with a large, soft brush.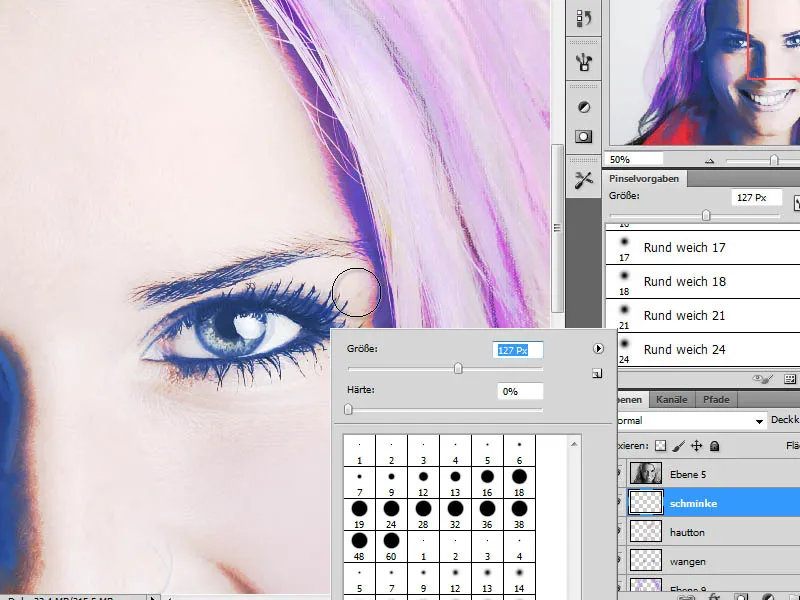
In addition to the first color, a second shade is mixed in to create a more authentic color scheme. The layer's opacity can be adjusted afterwards to allow the colors to blend together. 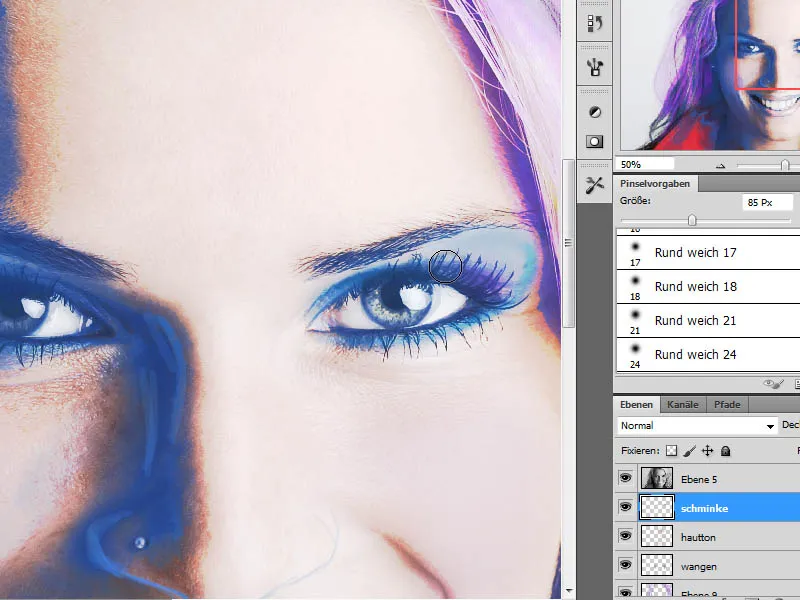
Step 13 - Insert and blend a copy of the portrait layer
In the next step, we need another copy of the portrait layer. A copy of this layer already exists from Step 11. If not, a copy can be created now and moved up to the top of the layer stack. The layer mode is set to Soft Light.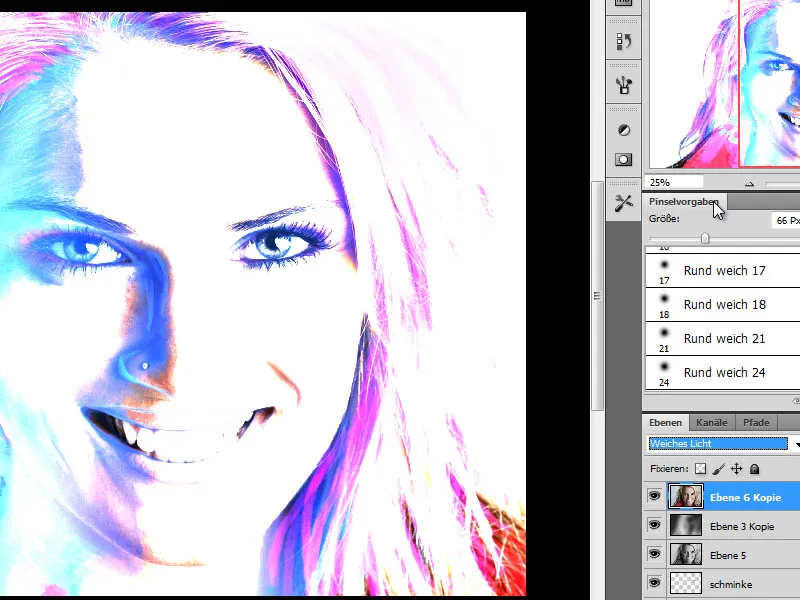
The layer's opacity is reduced for better effect. A value around 50 percent is suitable for this example.
Step 14 - Insert another copy of the portrait layer and apply the Threshold correction mode
The next editing step involves inserting an additional layer that increases the contrast range in the shadow areas. To do this, I create a copy of the base layer at the top of the layer stack and use the Threshold option under Image>Adjustments.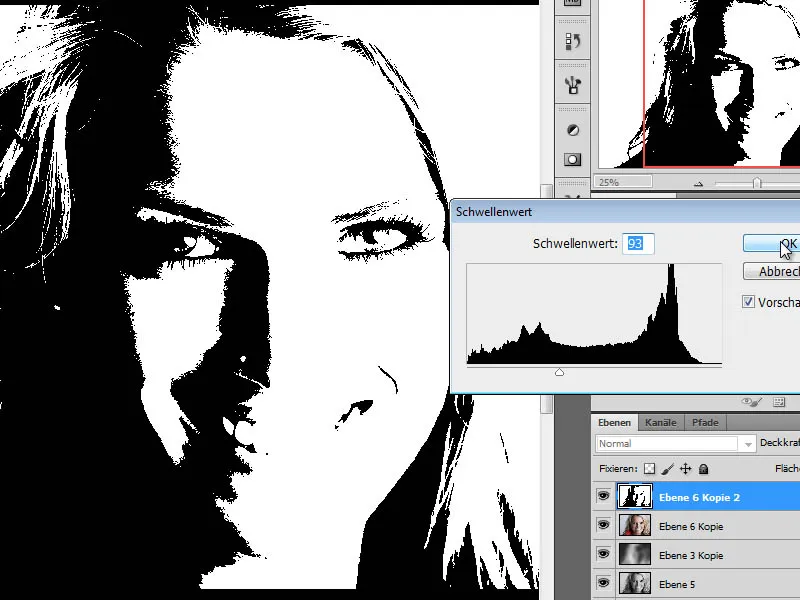
Step 15 - Recolor Threshold Layer
This image will be recolored through the menu item Image > Adjustments > Hue/Saturation. After recoloring, this layer will be set to Soft Light mode with reduced layer opacity of about 50%.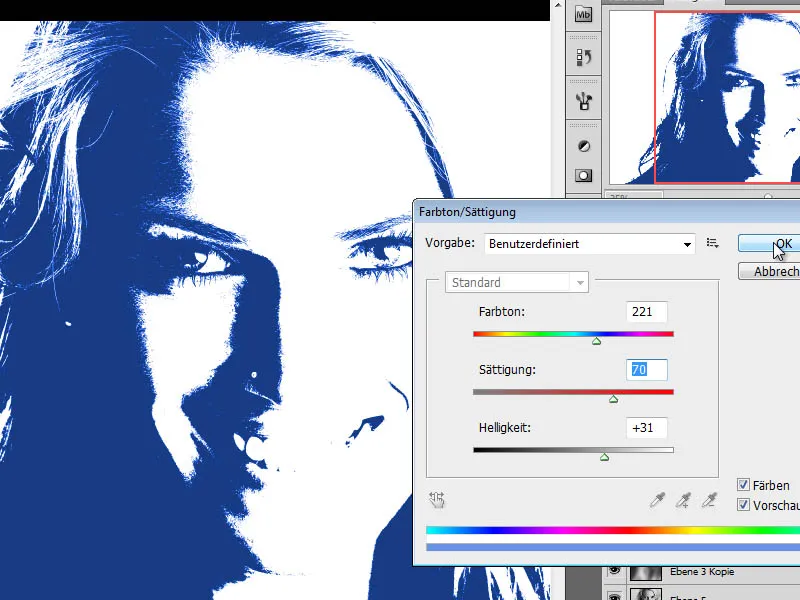
Step 16 - Copy Grayscale Layer, Create Layer Masks
The next editing step requires copying the grayscale layer. This layer is also placed at the very top of the layer stack. A further copy is created using Ctrl+I and temporarily hidden by clicking on the eye icon (left in the layer palette).
The first grayscale copy layer is set to Linear Dodge mode and a layer mask is applied to it. I fill the mask with black foreground color and then draw around the mouth area.
The second copy of the grayscale layer also receives a layer mask. The eyes are revealed in that mask and the layer mode is set to Lighten.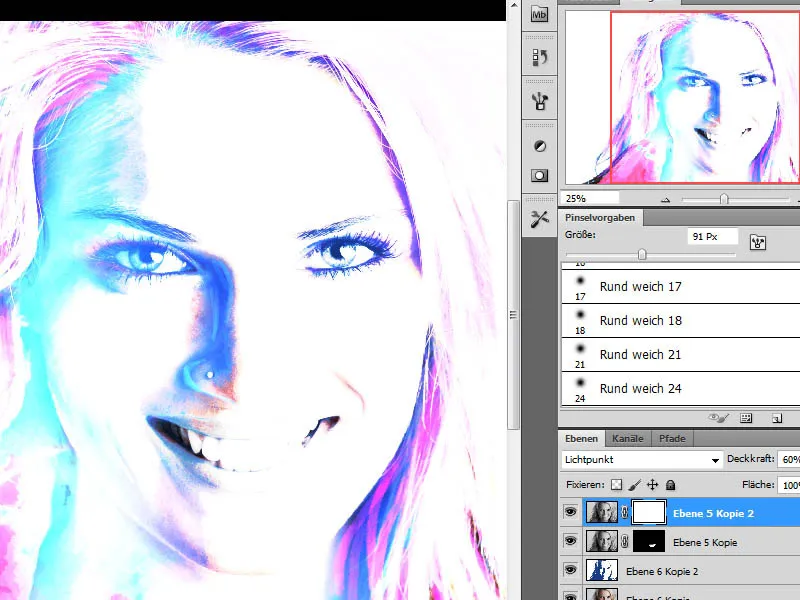
Step 17 - Refine Details
Essentially, the main editing steps have already been completed and we are approaching the finishing line. I first hide the lower black and white layer (Layer 5) to better assess the image. Now I can, for example, make further hair contour adjustments and enhance specific areas. To do this, I use a black brush with a soft tip on the hair layer and draw around the dark areas on the neck.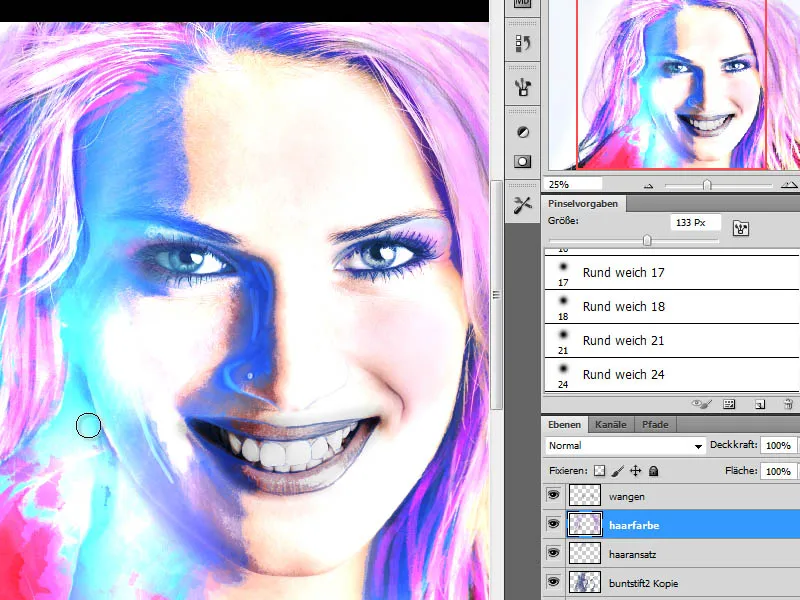
Finally, I check the layers separately and toggle them on and off to see the individual effects they have on the overall image. By fine-tuning the opacity of each layer, I can influence the impact of the overall image and achieve a more positive result. Depending on the edited photo, layer modes can also be modified or additional copies of contour layers can be added.