You are faced with the challenge of creating an E-Mail-funnel that specifically addresses your target audience and leads to conversions? With Mailchimp, you can achieve just that. In this guide, you will learn how to set up a simple yet effective email funnel to promote your products or services efficiently.
Key Insights
- Understand the individual steps of an email funnel.
- A clever retargeting can increase your reach.
- Building a targeted customer journey maximizes your conversions.
Step-by-Step Guide
Step 1: Define Traffic Source
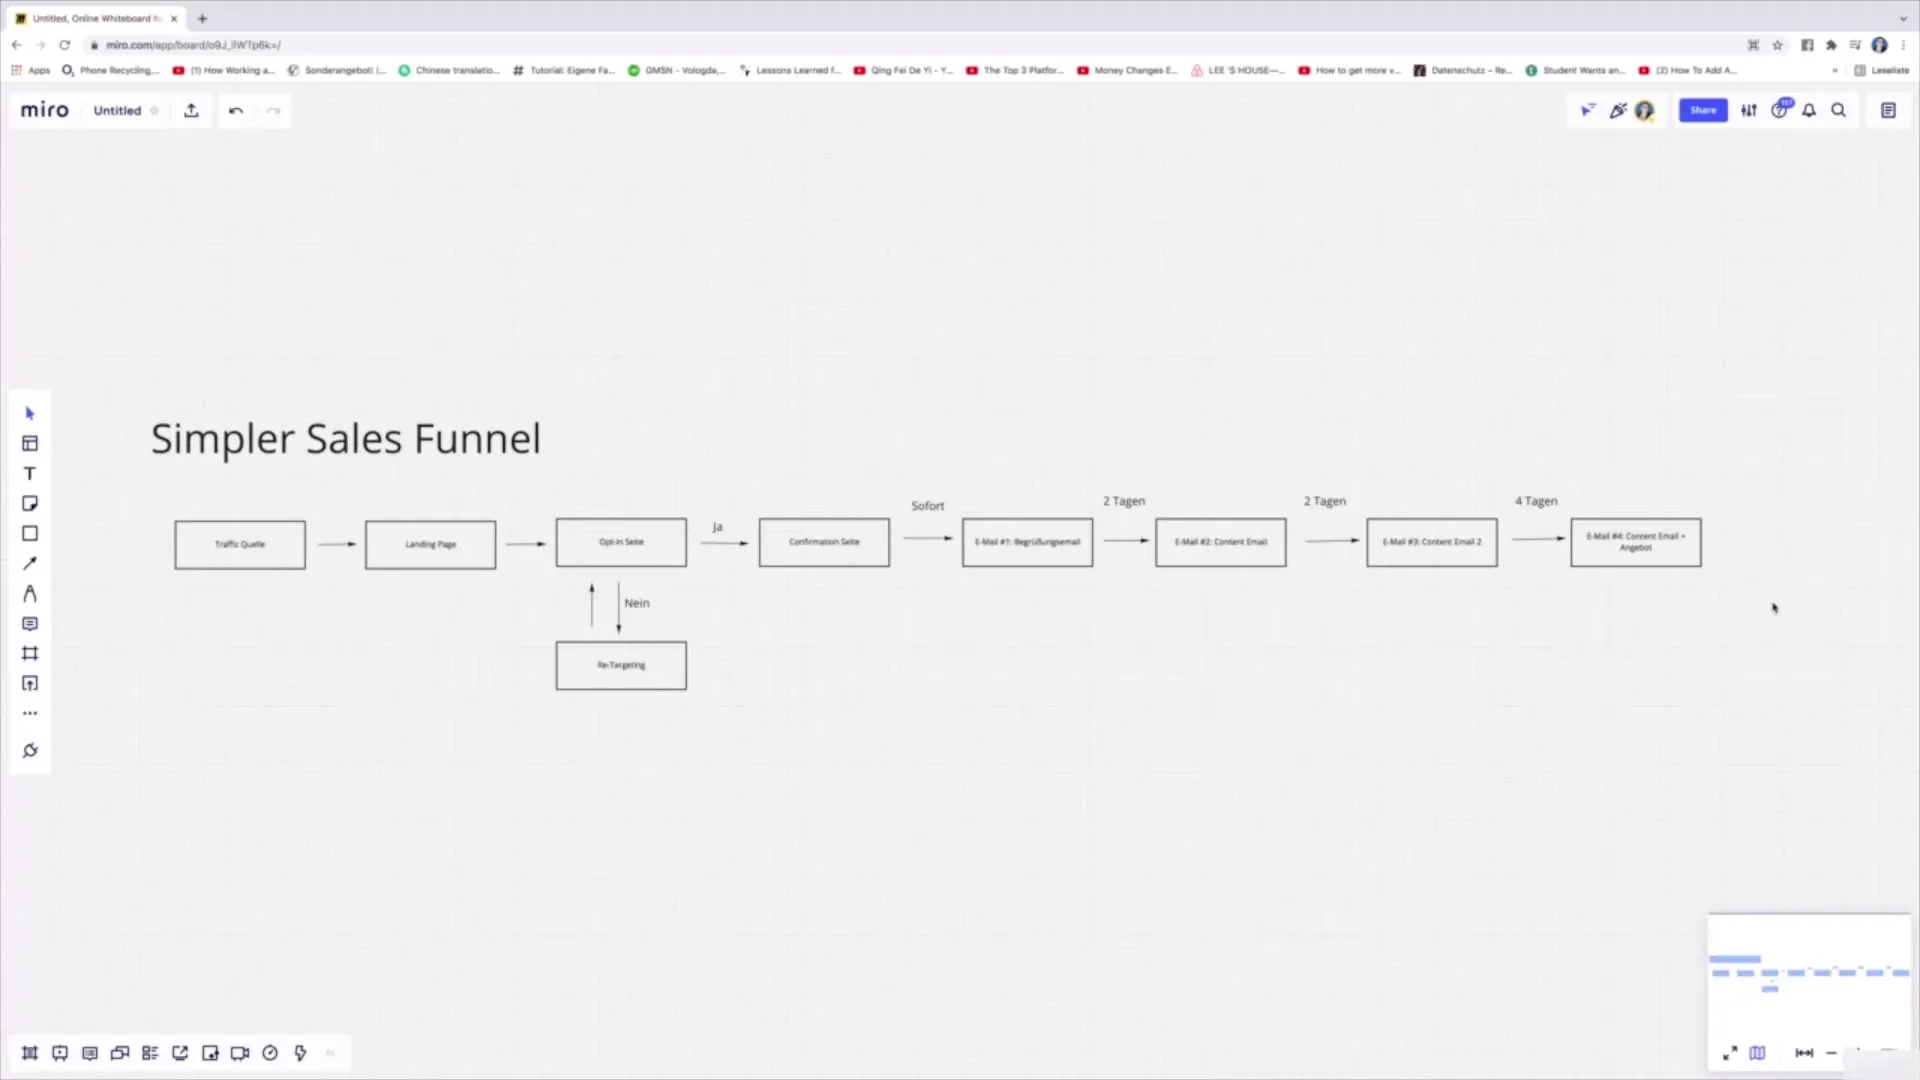
Before you start creating your funnel, you need to first determine a traffic source. Where should your potential customers come from? This could be a YouTube video, a Facebook post, or a contribution on a platform like Quora. It’s important that you are clear about which source you want to use to kick off your funnel.
Step 2: Create Landing Page
Once you have generated traffic, you direct users to a landing page. On this page, you present information about your offer, such as the newsletter you are promoting. Inform your customers about the value they will receive by signing up.
Step 3: Design Opt-In Page
The landing page can also directly function as an opt-in page where visitors can sign up for your list. At this point, it is important that the sign-up process is straightforward to maximize the conversion rate.
Step 4: Set Up Confirmation Page
When a user has signed up, they should be directed to a confirmation page. Here, you thank them and inform them that they will hear from you soon. It is a good way to build trust.
Step 5: Develop Retargeting Strategy
There will be users who do not choose to proceed with your funnel. In this case, it makes sense to develop a retargeting strategy. This means continuing to engage with these users through targeted outreach, for example, by directing them back to the opt-in page.
Step 6: Send Welcome Email
Once a user has signed up and received confirmation, the first email, typically a welcome email, should be sent as soon as possible. Thank the new subscribers and explain what they can expect.
Step 7: Activate Customer Journey
With the sending of the welcome email, the customer journey is activated. This consists of a series of additional emails that you want to send as part of your funnel. Send these sequentially to deepen the relationship with your audience and provide them with valuable content.
Step 8: Plan Content Emails
After the welcome email, regularly send content emails to maintain the value for your subscribers. Schedule the sending so that there is a reasonable time gap between the emails – typically after a few days.
Step 9: Strategically Place Offers
After sending several content emails, it makes sense to send an offer email. This email serves as a re-engagement, in which you present a special product or offer.
Step 10: Closing and Follow-Up
In the final step, you should ensure that you direct subscribers to a sales page to achieve the closure of your funnel strategy. Monitor whether users convert and be ready to use this group for retargeting purposes if they drop off.

Summary
You have learned step by step how to set up and optimize an email funnel in Mailchimp. With a clear plan, a well-structured customer journey, and an intelligent retargeting strategy, you will effectively reach your target audience and increase your conversions.
Frequently Asked Questions
How long does it take to build an email funnel in Mailchimp?Creating an email funnel can take anywhere from a few hours to several days, depending on complexity and number of emails.
How much does Mailchimp cost?Mailchimp offers various pricing models, starting with a free version that includes basic features.
Can I customize the design of the emails?Yes, Mailchimp allows you to customize the design and layout of your emails.


