Welcome to this comprehensive guide where you will learn how to effectively optimize your music productions in FL Studio using Automation Clips. Automation Clips allow you to dynamically control various aspects of your sounds and tracks, whether it's adjusting volume or adding effects. These tools are essential for any music producer looking to add more expression and variability to their tracks. In this guide, you will be guided step by step on how to create and use Automation Clips to achieve a professional sound.
Key Takeaways
- Automation Clips allow the dynamic control of various parameters in FL Studio.
- Envelope curves let you apply volume and effects selectively.
- Using different Automation Clips, you can create different sounds and moods.
Step-by-Step Guide
Step 1: Setting Up the FL Studio Environment
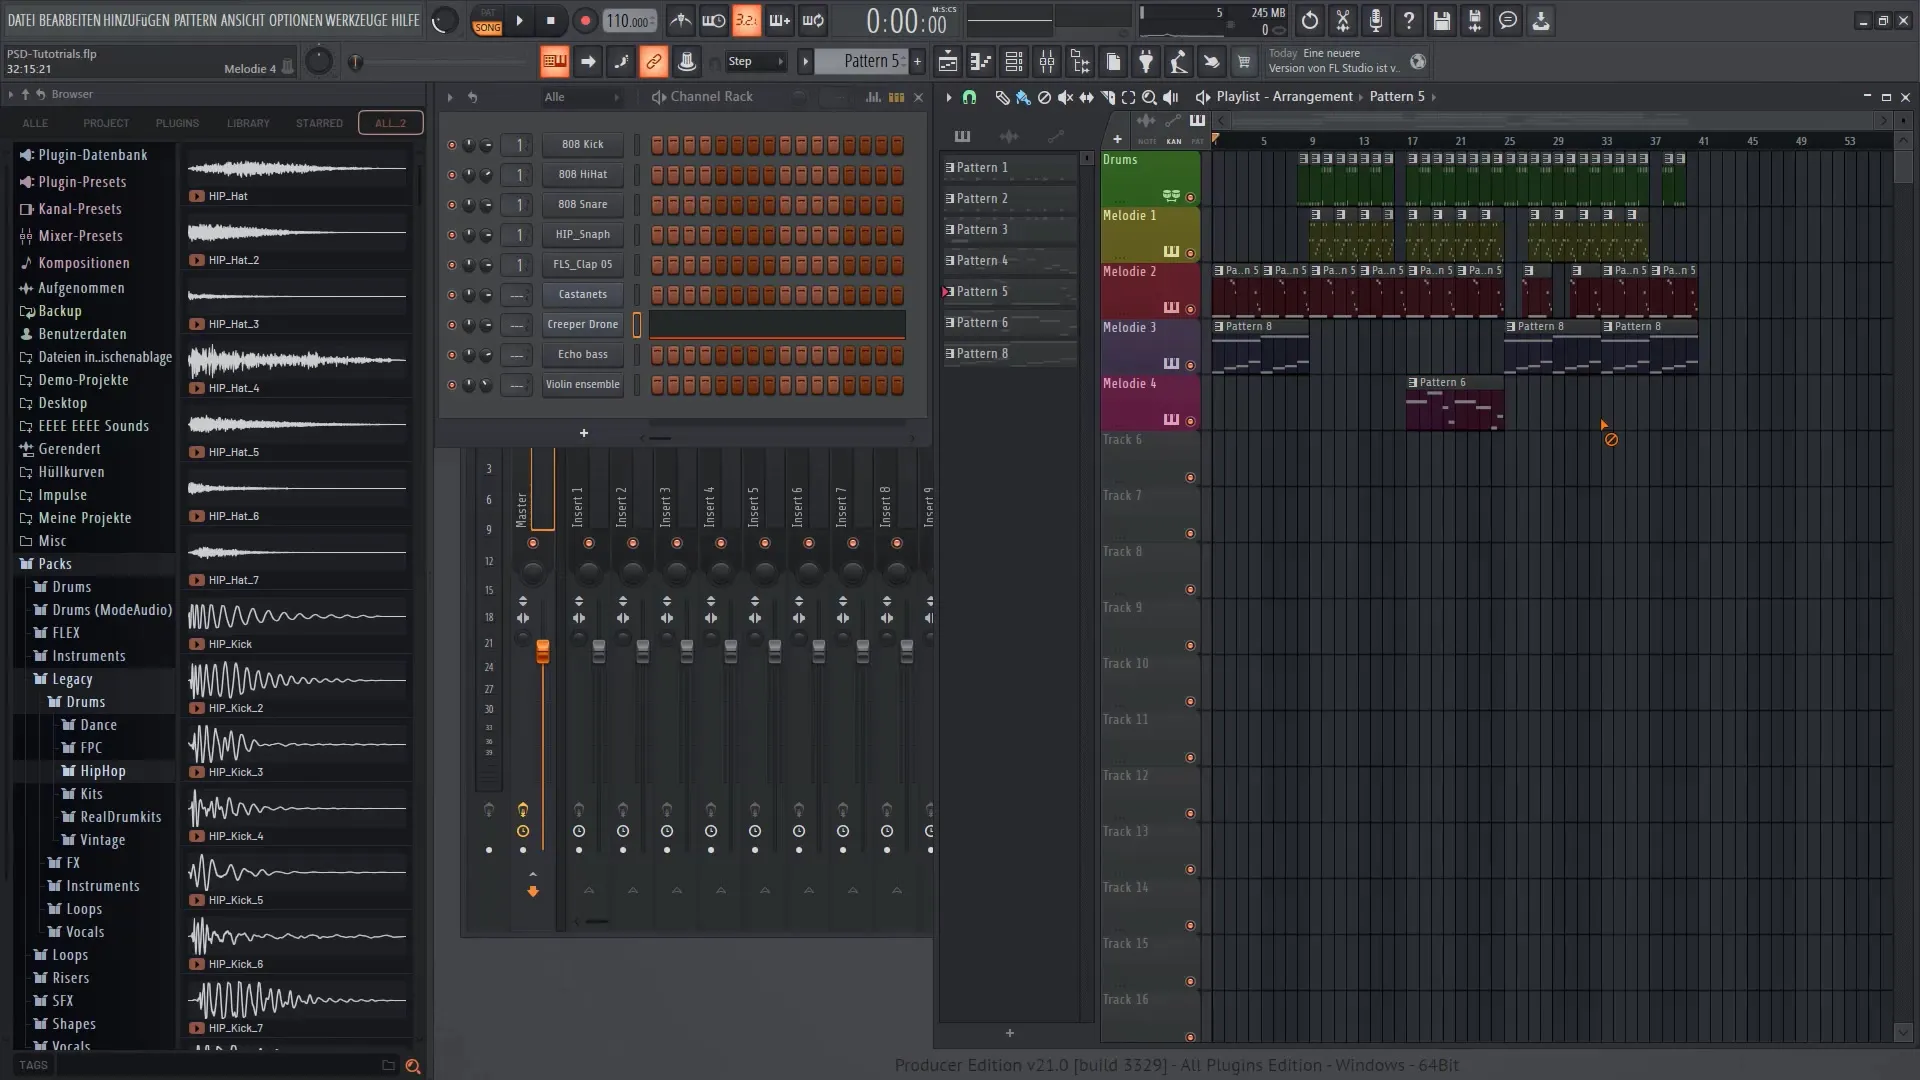
Before you start with Automation Clips, open FL Studio 21 and load your existing project or create a new beat. Make sure you are in the Mixer to effectively control the volume and effects of your track.
Step 2: Creating an Automation Clip for the Master Channel
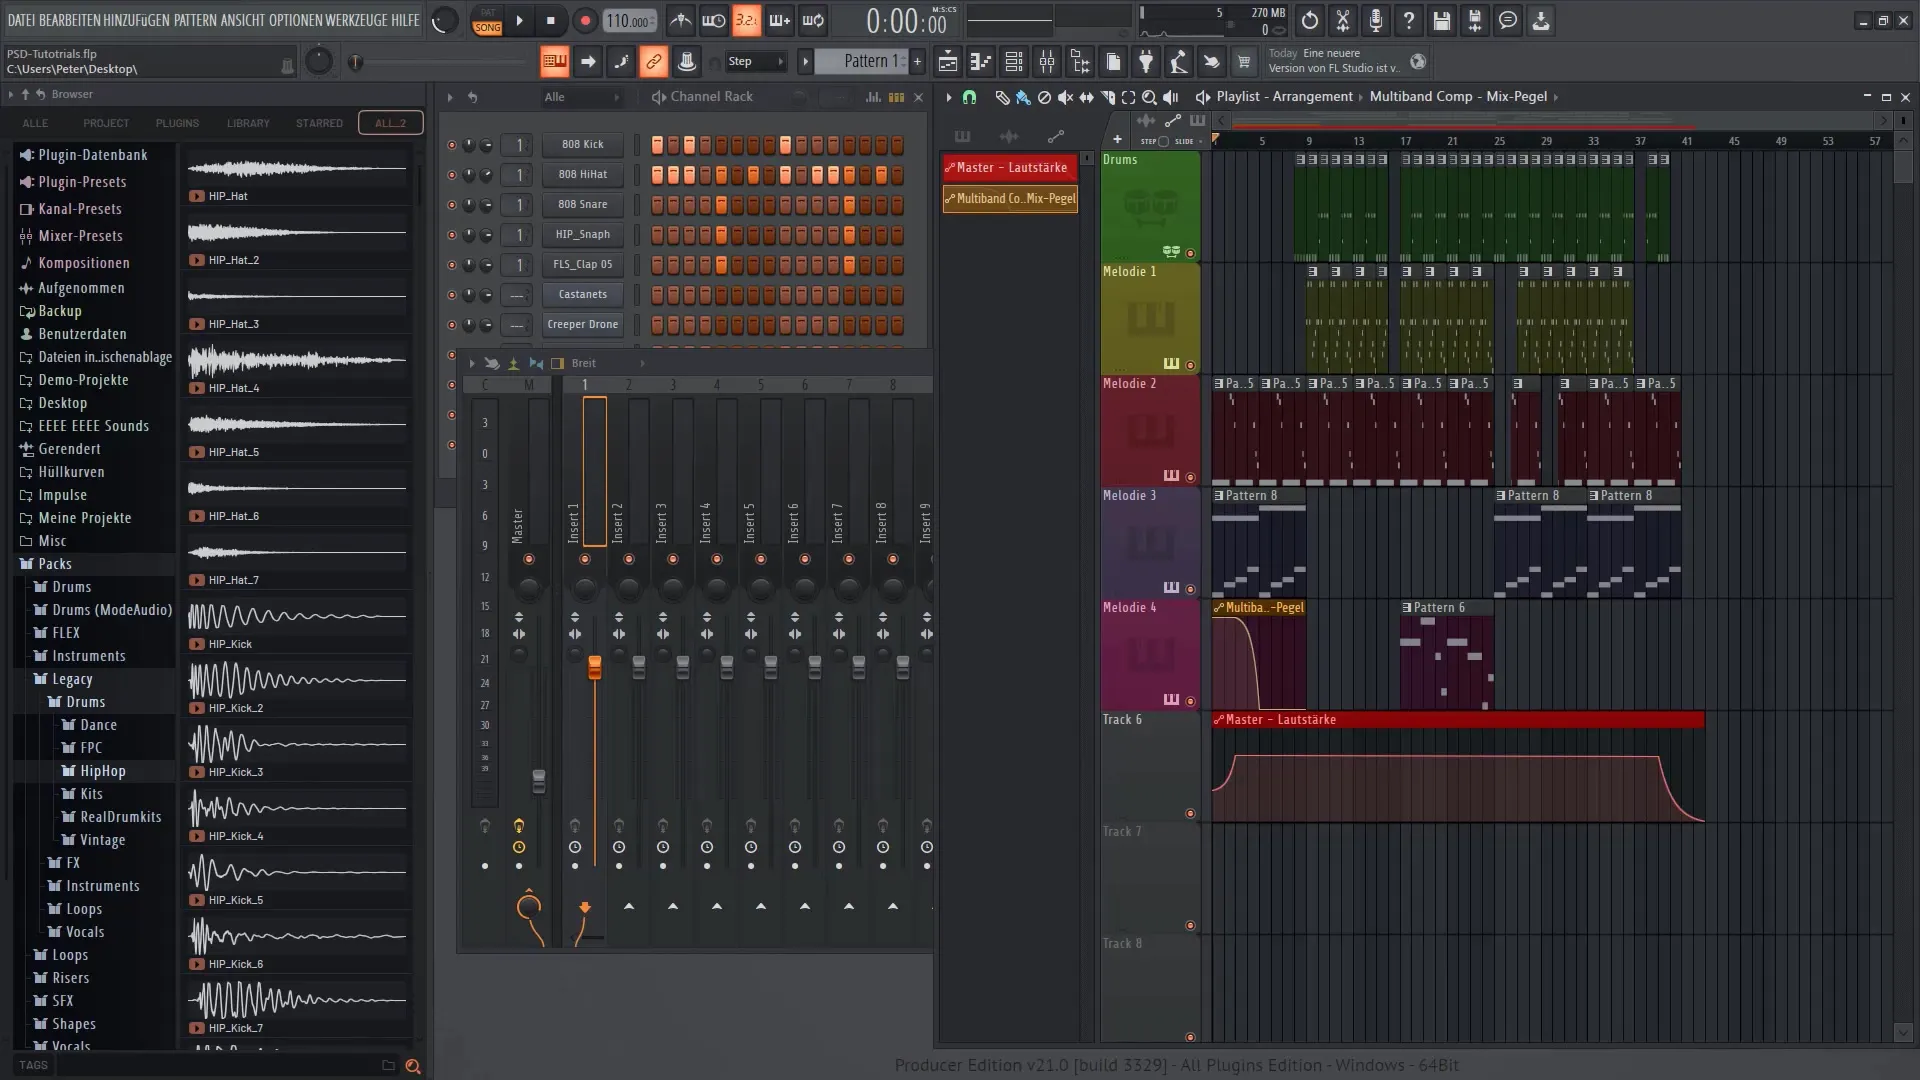
Select the Master Channel in the Mixer. Here you will create your first Automation Clip to control the volume of your entire track. Right-click on the volume fader and choose "Create Automation Clip." This will allow you to dynamically adjust the volume later on.
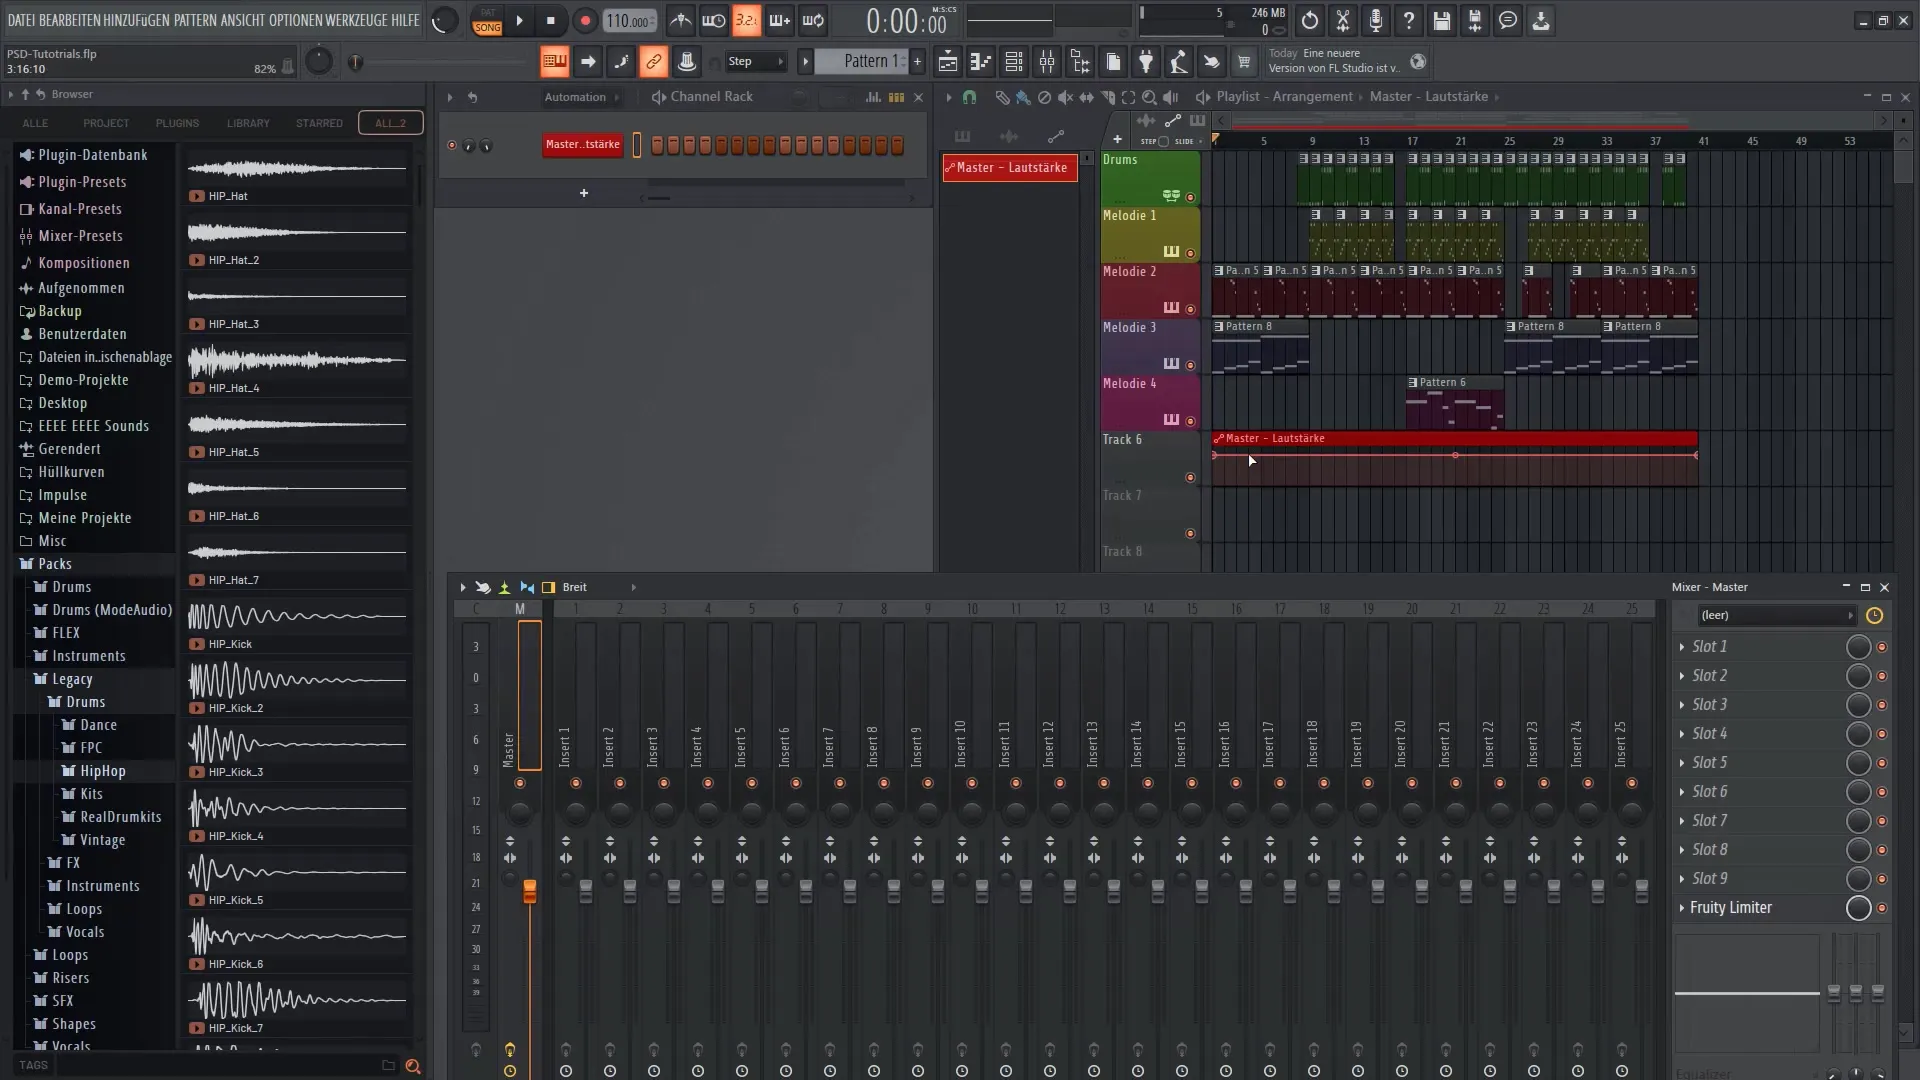
Step 3: Understanding Automation Curves
Now you should see a new red track in the Step Sequencer representing your Automation Clip. The curve in this clip indicates how the volume will vary over time. Begin editing this clip by adding points and adjusting their positions to create an interesting volume curve.
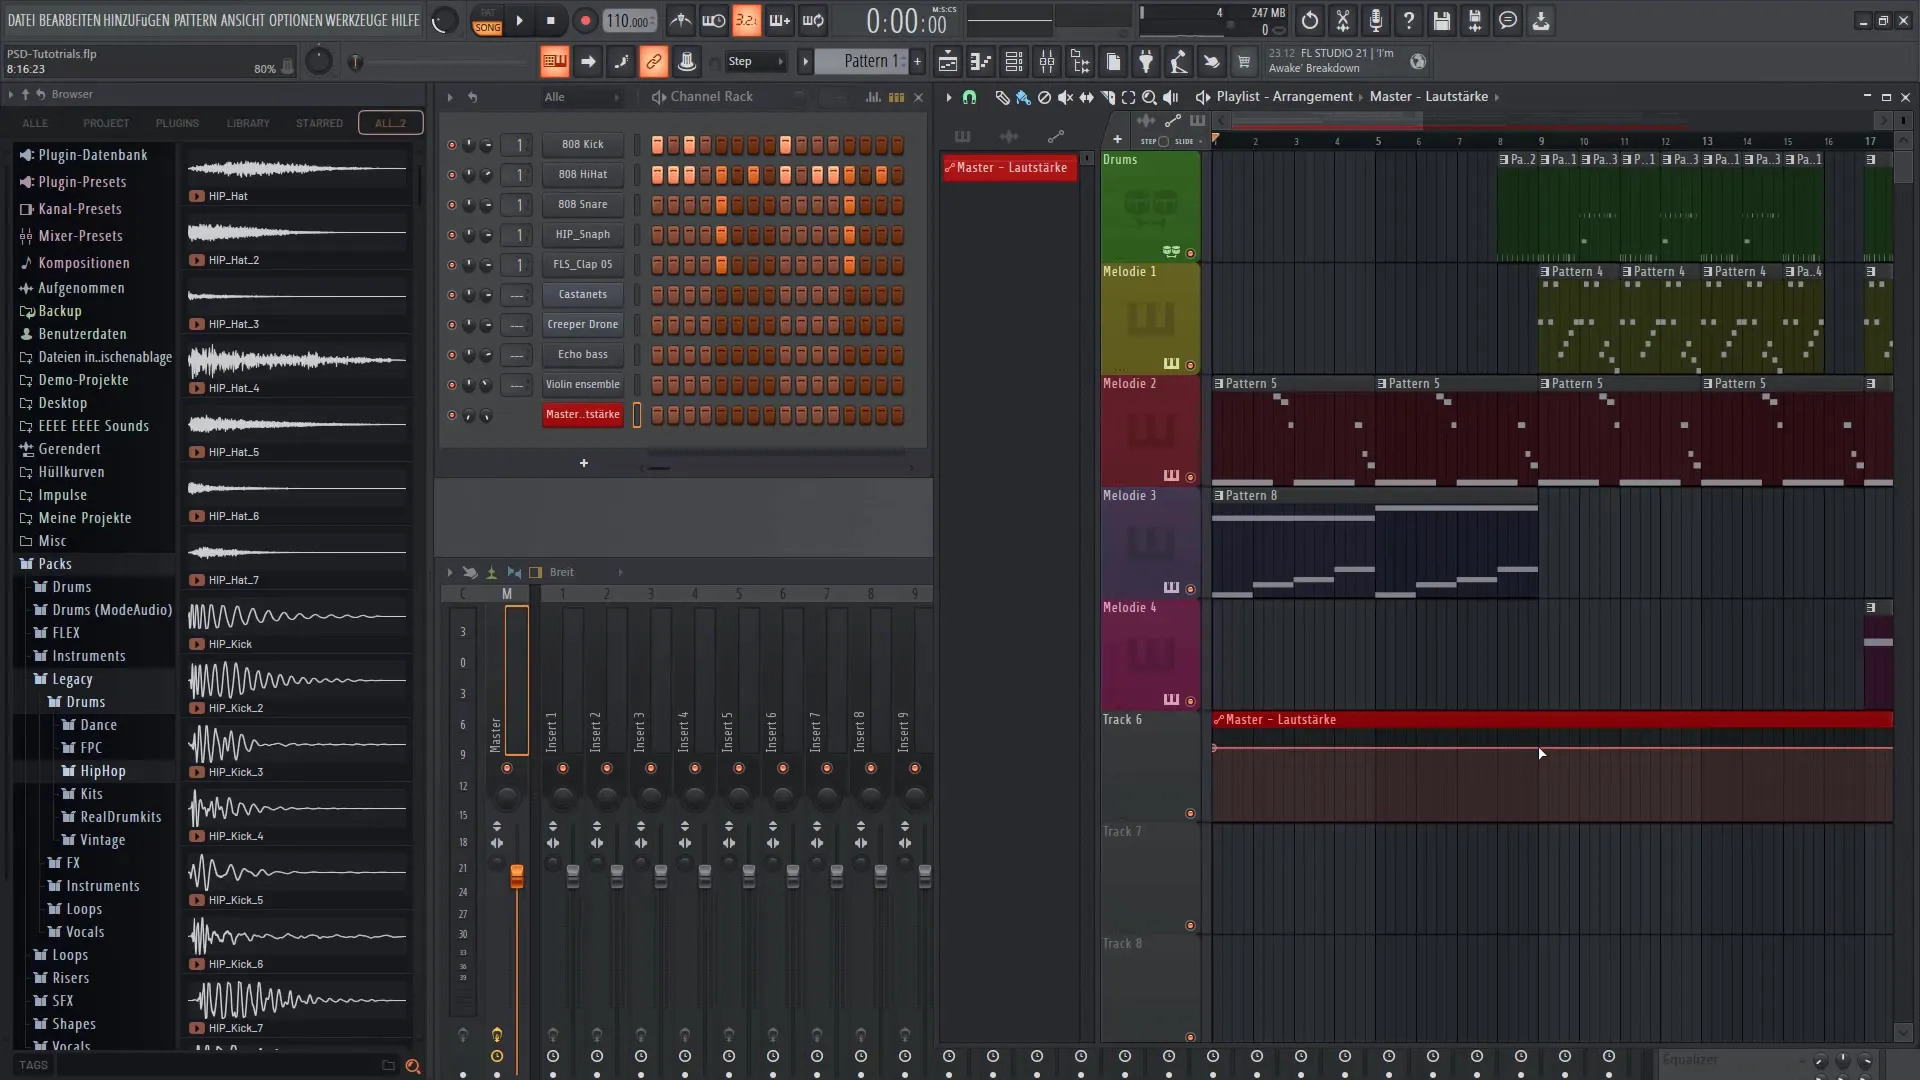
Step 4: Tweaking the Automation Curve
To create a smooth fade-in and fade-out, adjust the points in the Automation curve. Click on the curve and drag the points up or down to modify the trajectory. Experiment to find the optimal volume changes that give your track the desired feel.
Step 5: Adding Effects
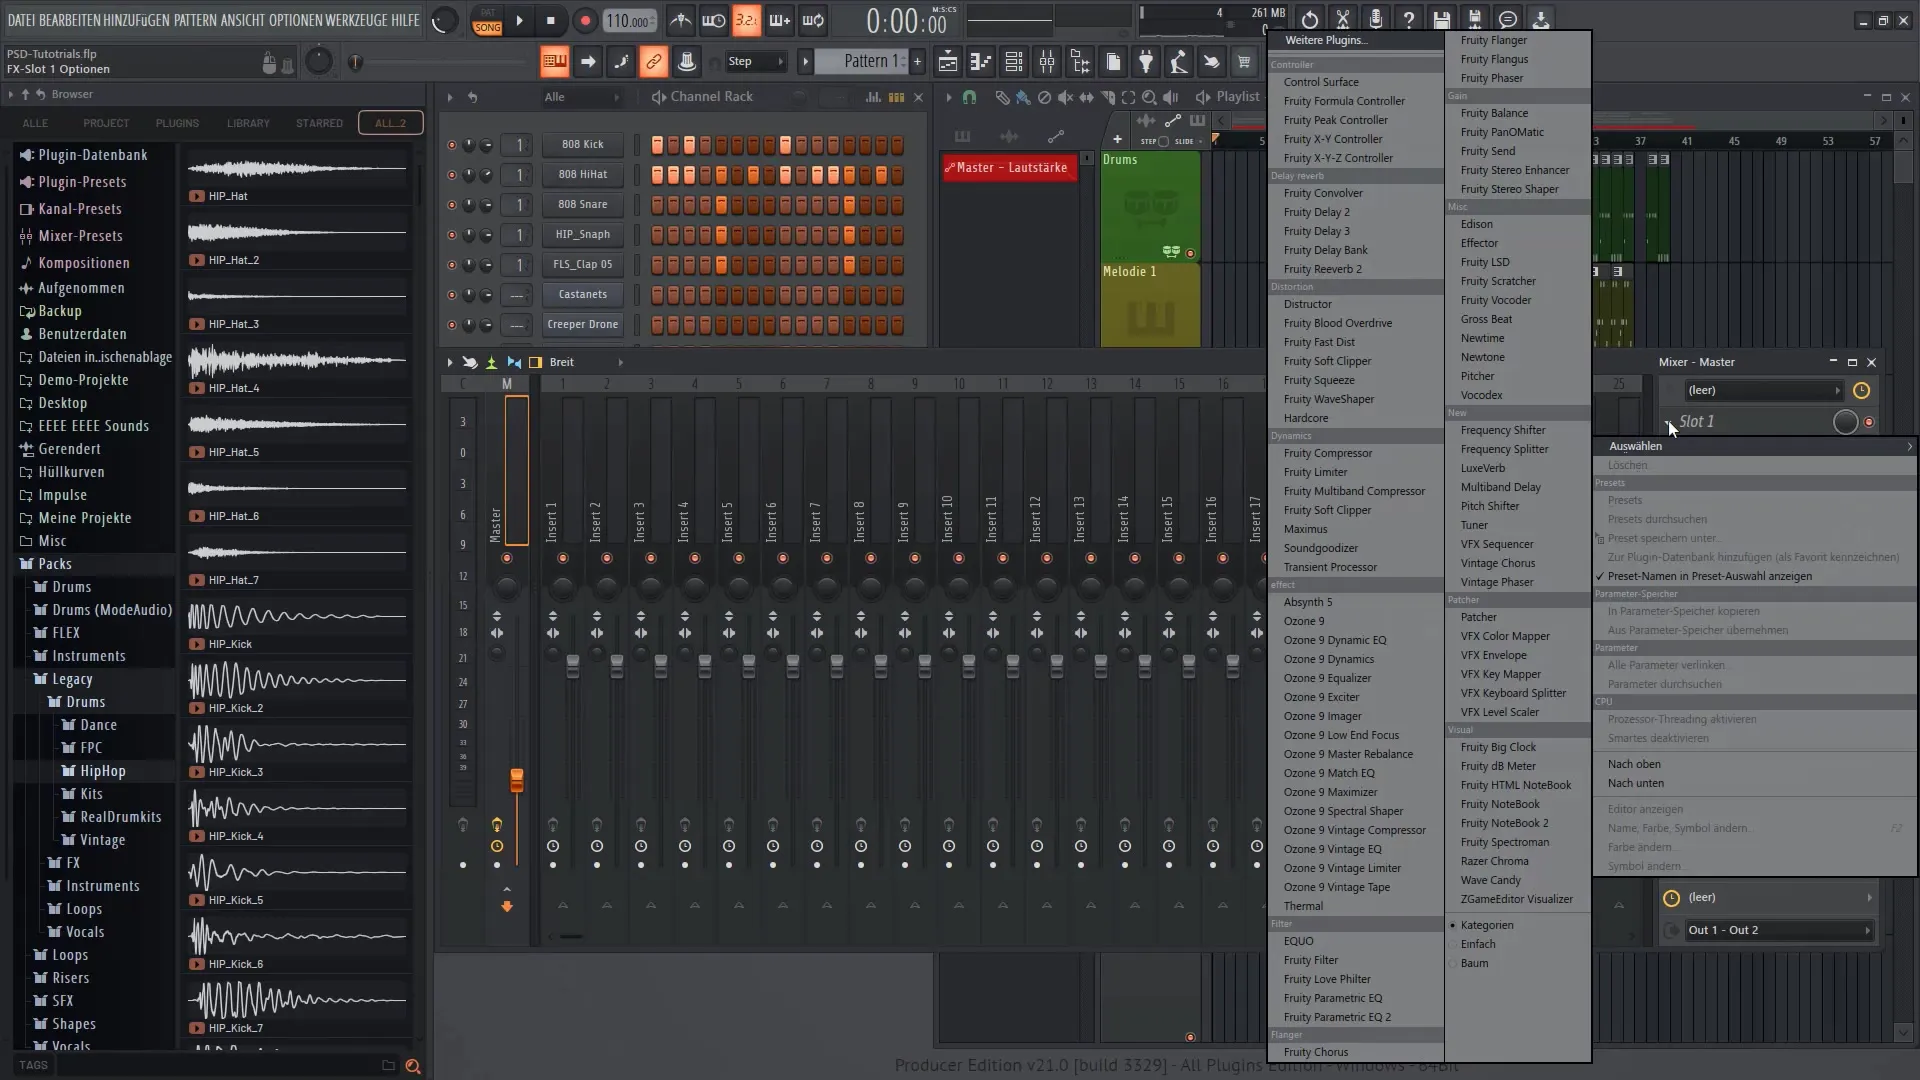
Once you have created the foundation of your track, you can add effects. Select a slot in the Mixer to add an effect like a multiband compressor. This will further enhance the sound of your track and give you better control over different frequencies.
Step 6: Automating Effect Parameters
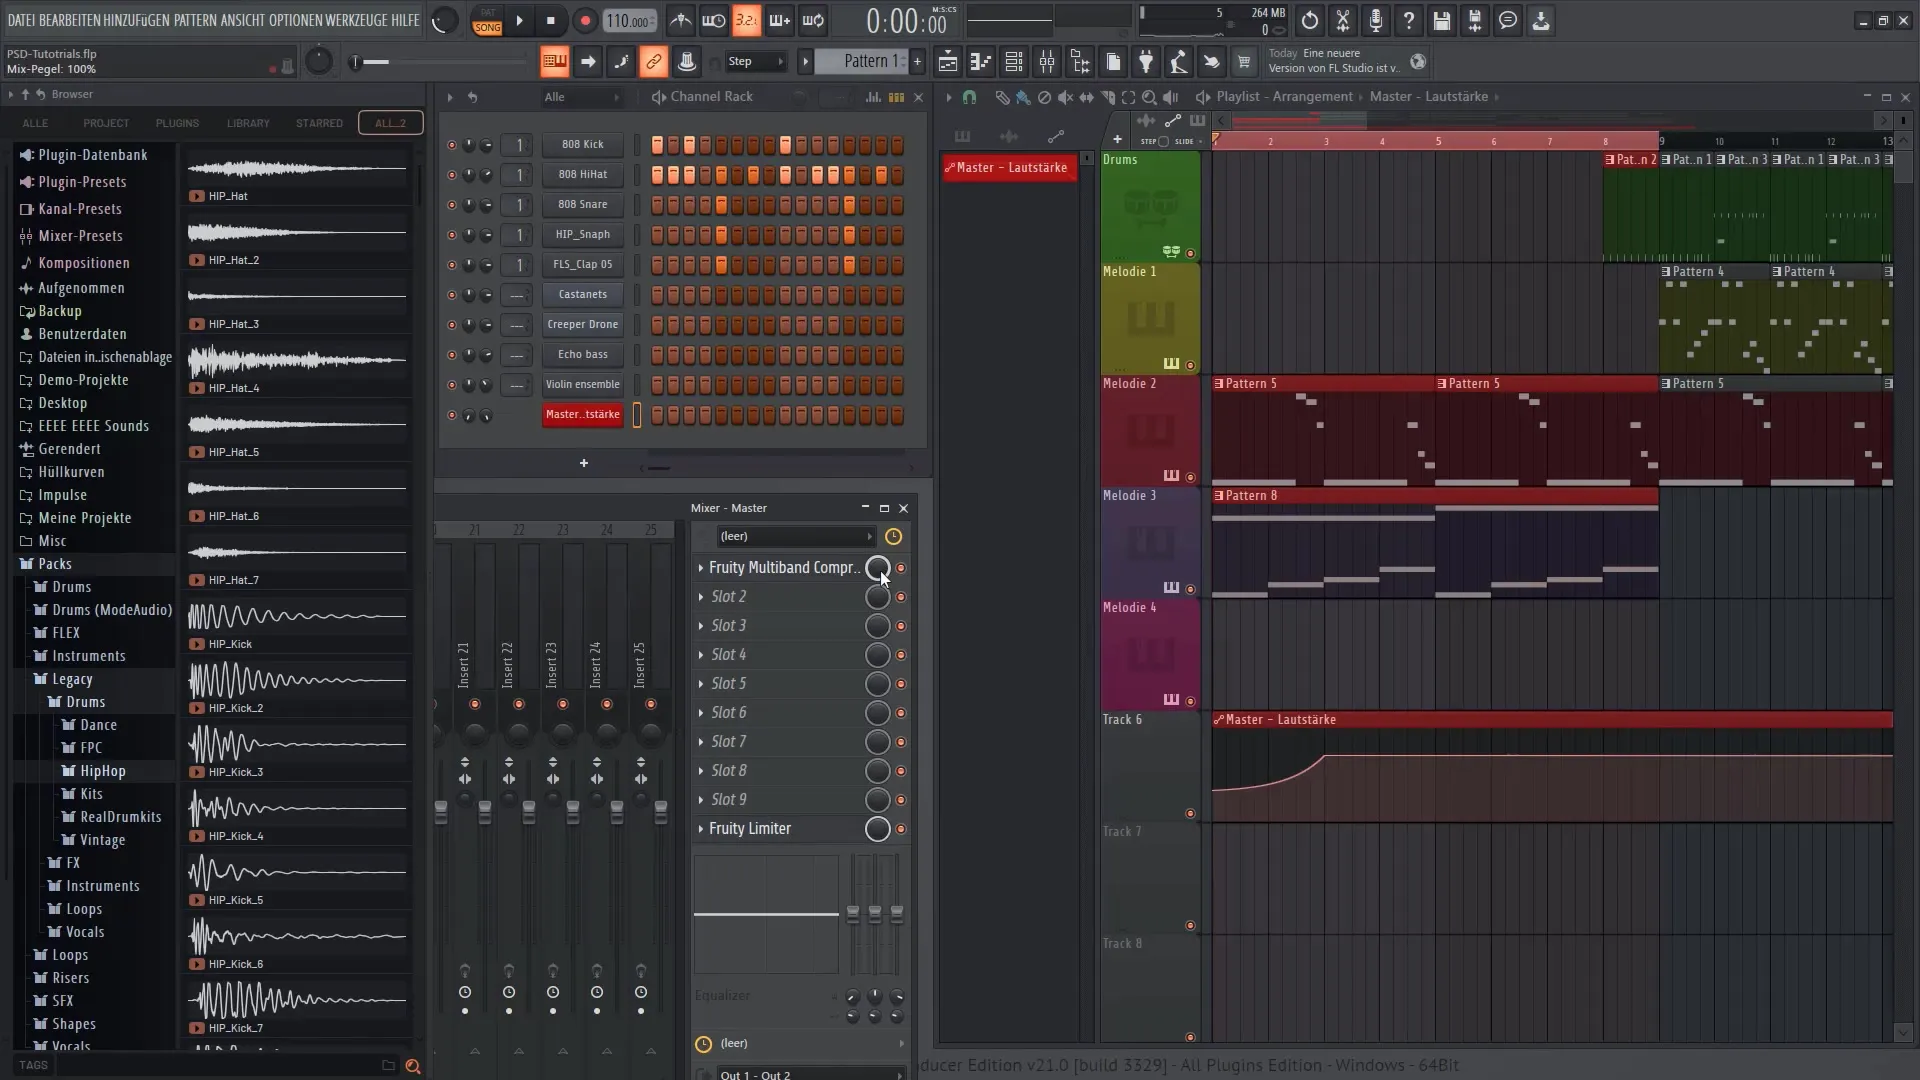
To control the effect during the track, you need another Automation Clip. Go back to your Mixer and right-click on the knob of the desired effect (e.g., the multiband compressor). Create another Automation Clip. This will give you control over the effect and allow you to dynamically enable or disable it throughout the song.
Step 7: Fine-Tuning the Effects
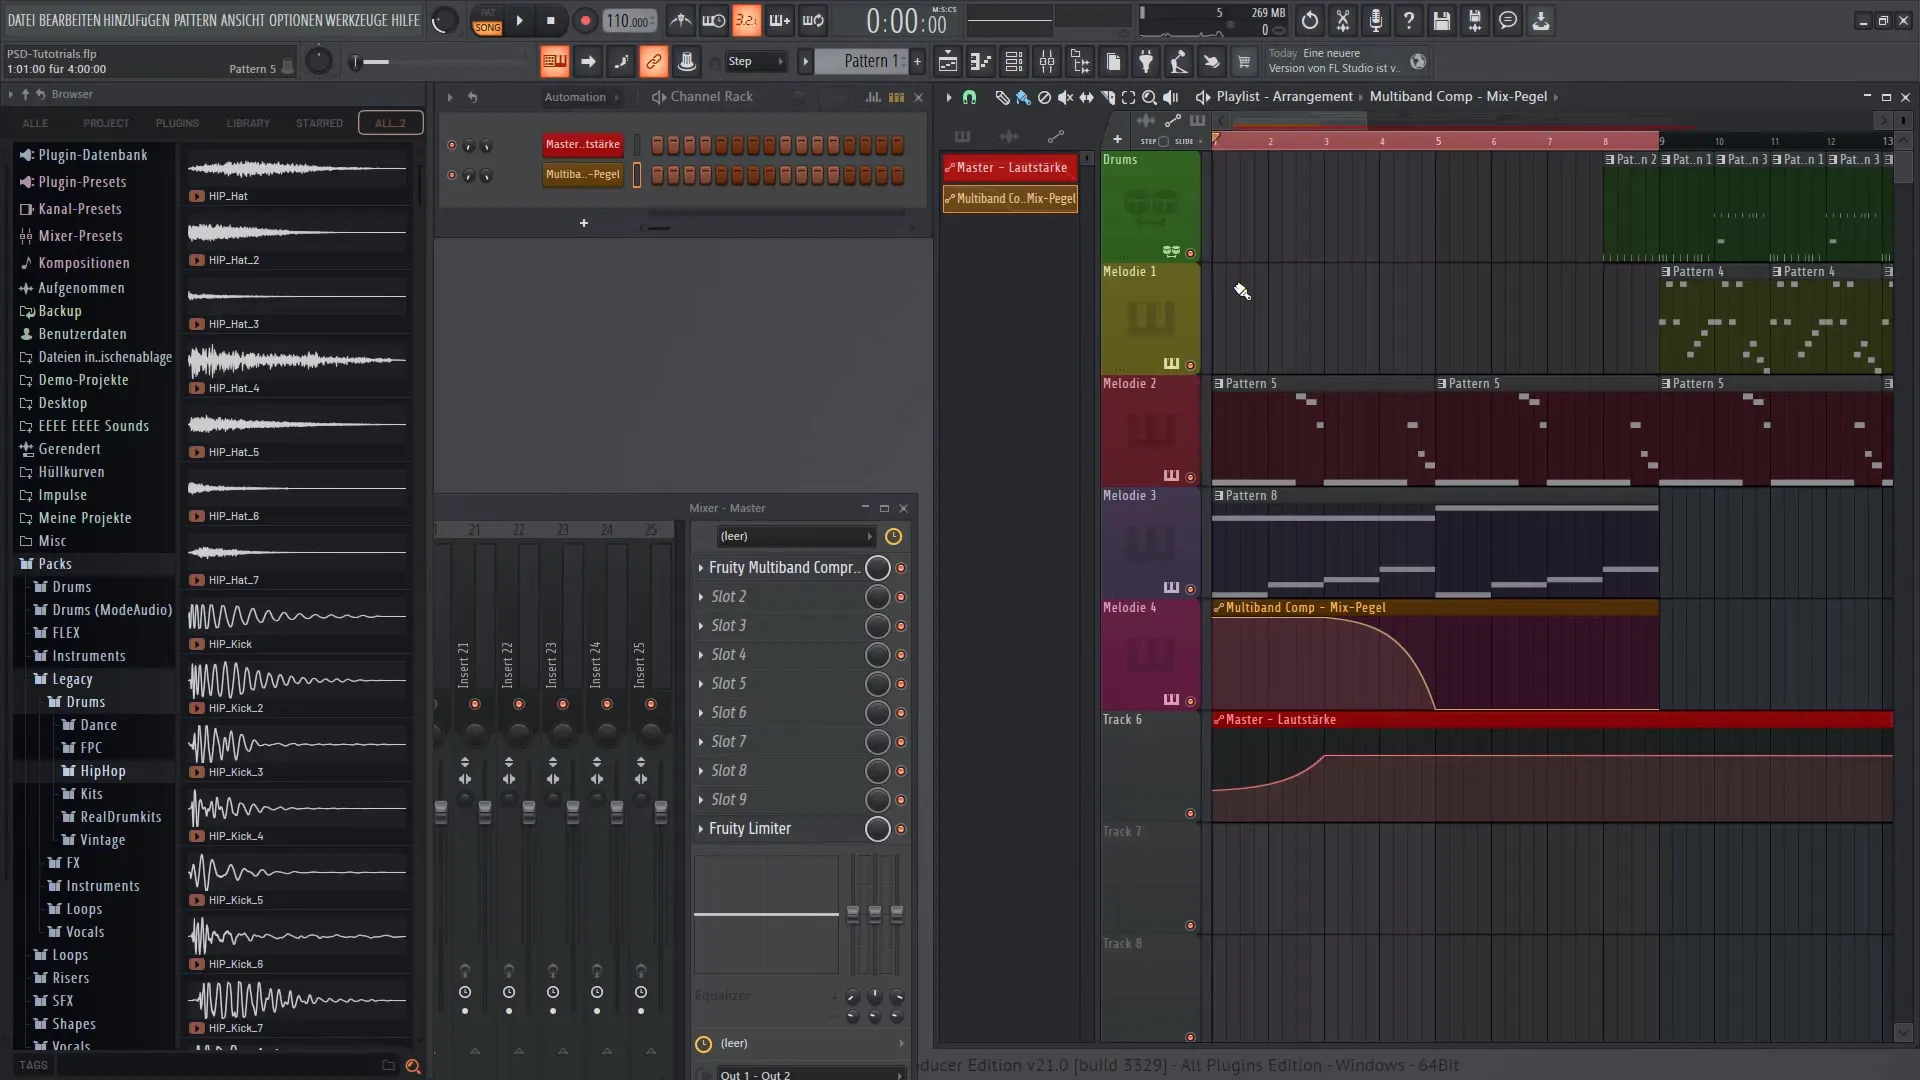
Now you can adjust the curve of the effect. As before, you can drag the points on the curve to determine when the effect should be more intense or weaker. Listen to the result regularly to ensure that applying the effects achieves the desired sound.
Step 8: Overlapping Automations
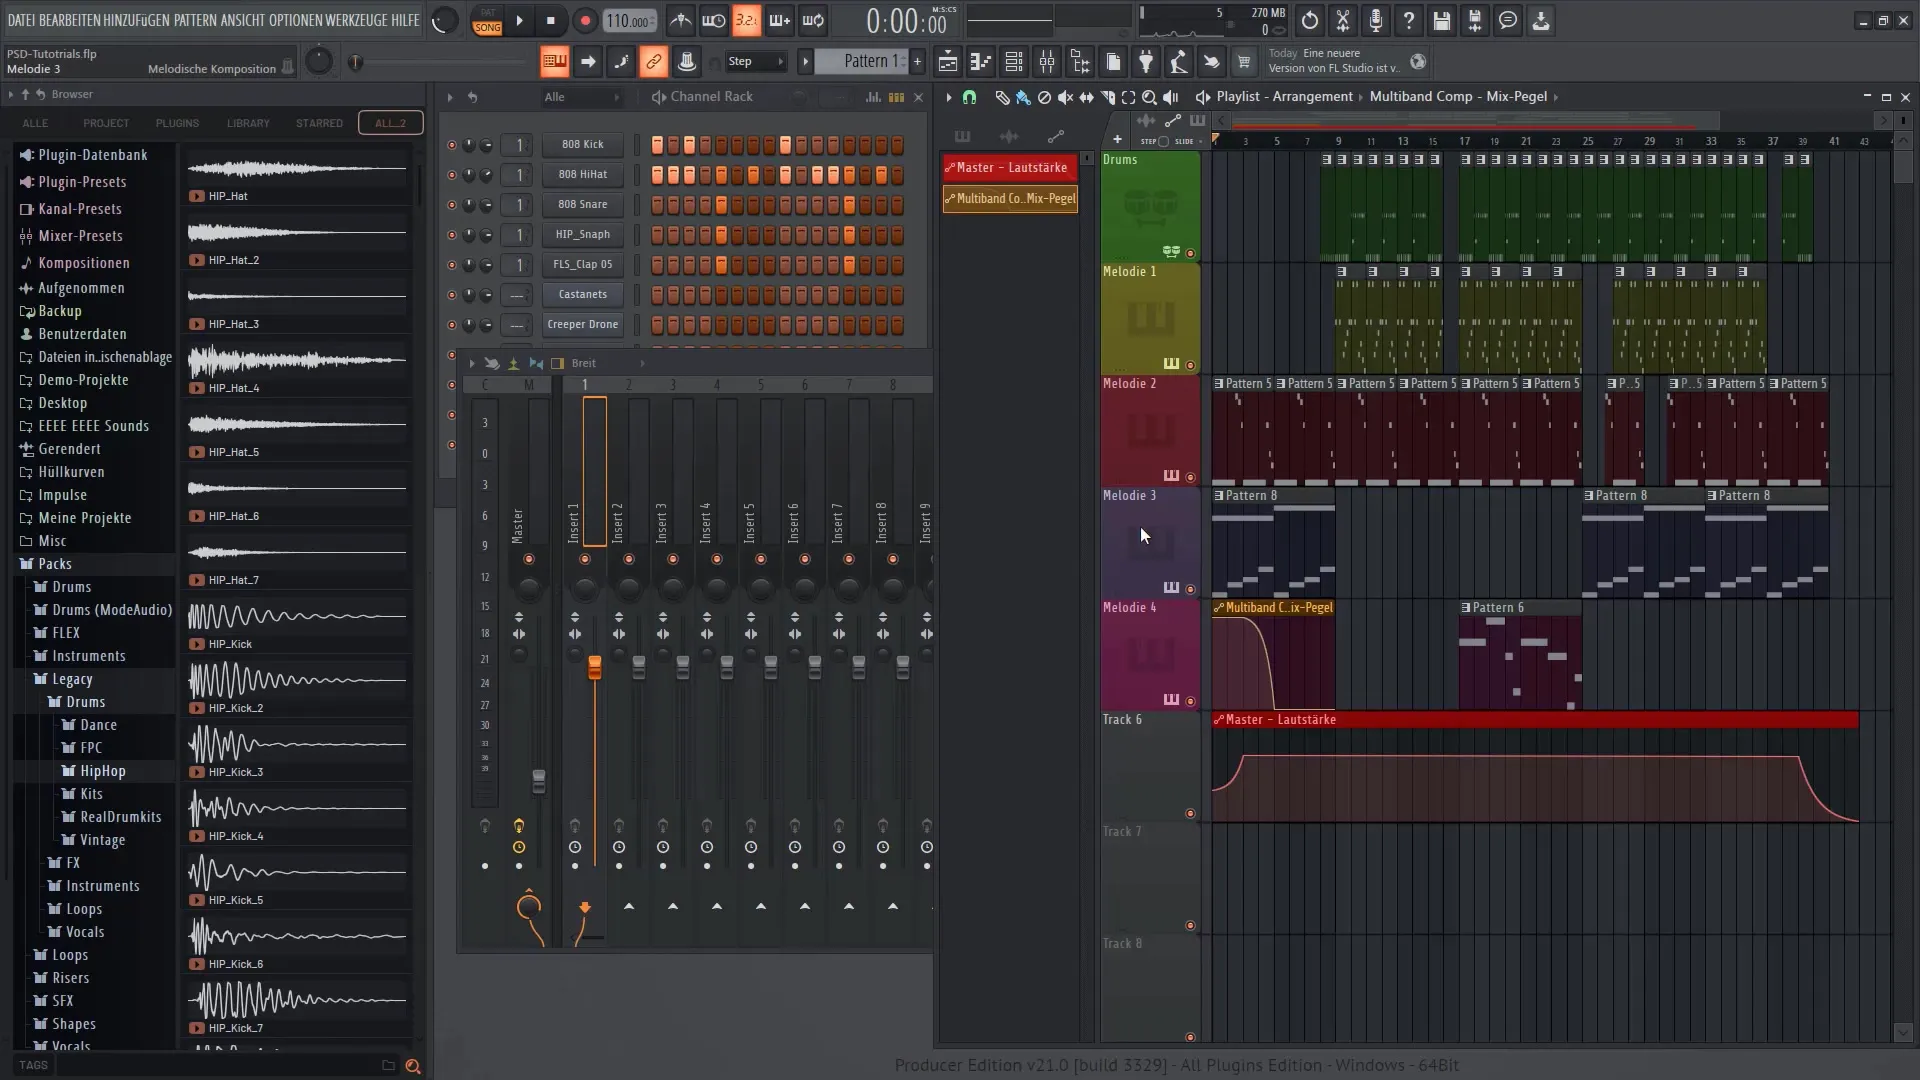
It's possible to use multiple automations simultaneously. You can create a separate Automation Clip for each parameter you want to control. This gives you the flexibility to combine different sounds, especially for drum sounds and other instruments.
Step 9: Conclusion and Export
After adjusting your automation clips and inserting your effects, it's time to finalize your track. Check if everything sounds good and then export your project. Make sure to consider the automations and effects in the export to achieve the best results.
Summary
In this tutorial, you have learned how to effectively use automation clips in FL Studio 21 to dynamically control the volume and effects of your track. By understanding the functionality of these clips, you can bring more depth and emotion to your productions.
Frequently Asked Questions
How do I create an automation clip in FL Studio 21?An automation clip is created by right-clicking on a knob and selecting "Create Automation Clip."
Can I use multiple automation clips simultaneously?Yes, you can create multiple automation clips in one project to control different parameters at the same time.
How can I adjust the effects in my track?You can adjust the effects by selecting a knob in the mixer and creating an automation clip to control its parameters throughout the track.
