In this tutorial, I will show you how you can export and structure your music project in FL Studio to be able to present it to others. I will cover important points that you should consider to avoid possible pitfalls. At the end, you will be able to save your tracks in different formats, create backups, and neatly organize the entire structure of your project.
Key Takeaways
- Export your project in different formats (e.g. WAV, MP3, OGG).
- Create backups of your project data.
- Pay attention to structuring options in FL Studio.
Step-by-Step Guide
First, when you have completed your project, open FL Studio and make sure you have your mastered and finalized track available.

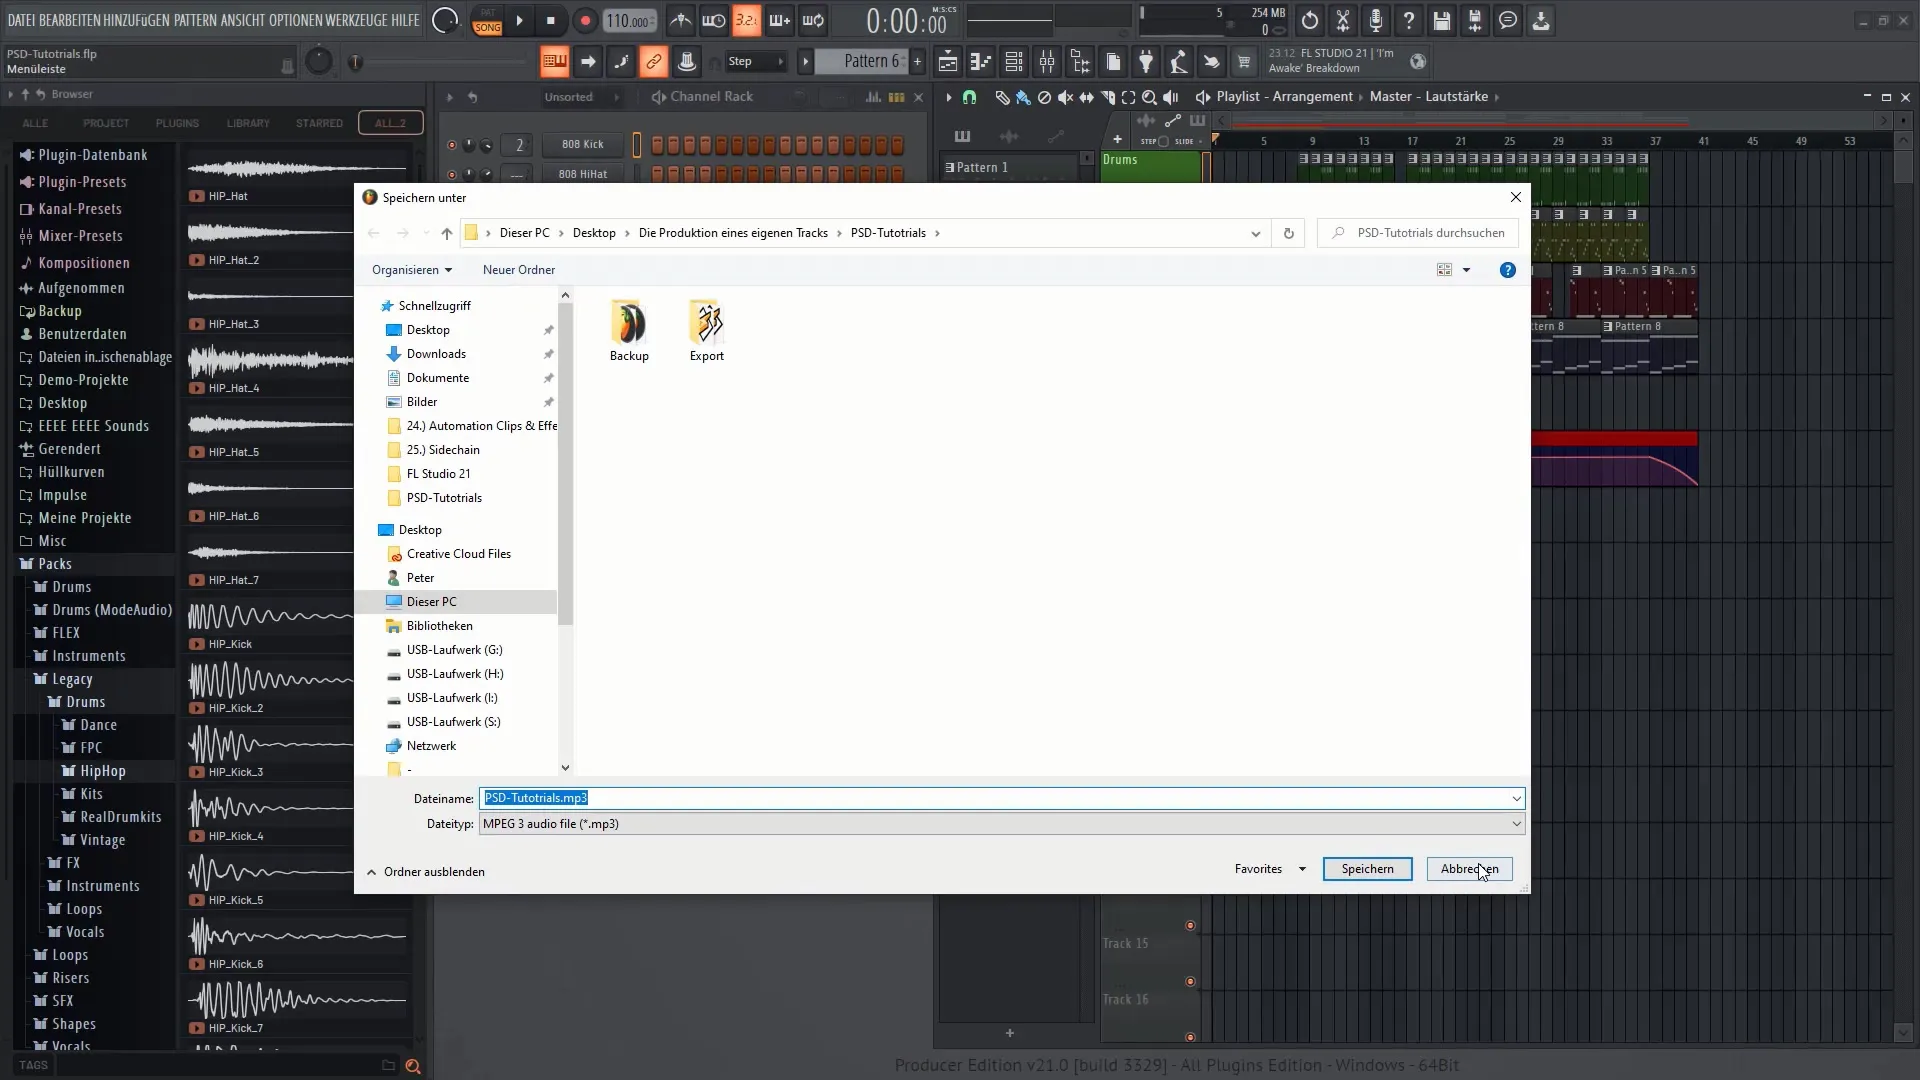
After selecting the track, it is important to save it before exporting. Go to "File" and choose "Save As". Here you have the option to save your project properly so you can access it later.
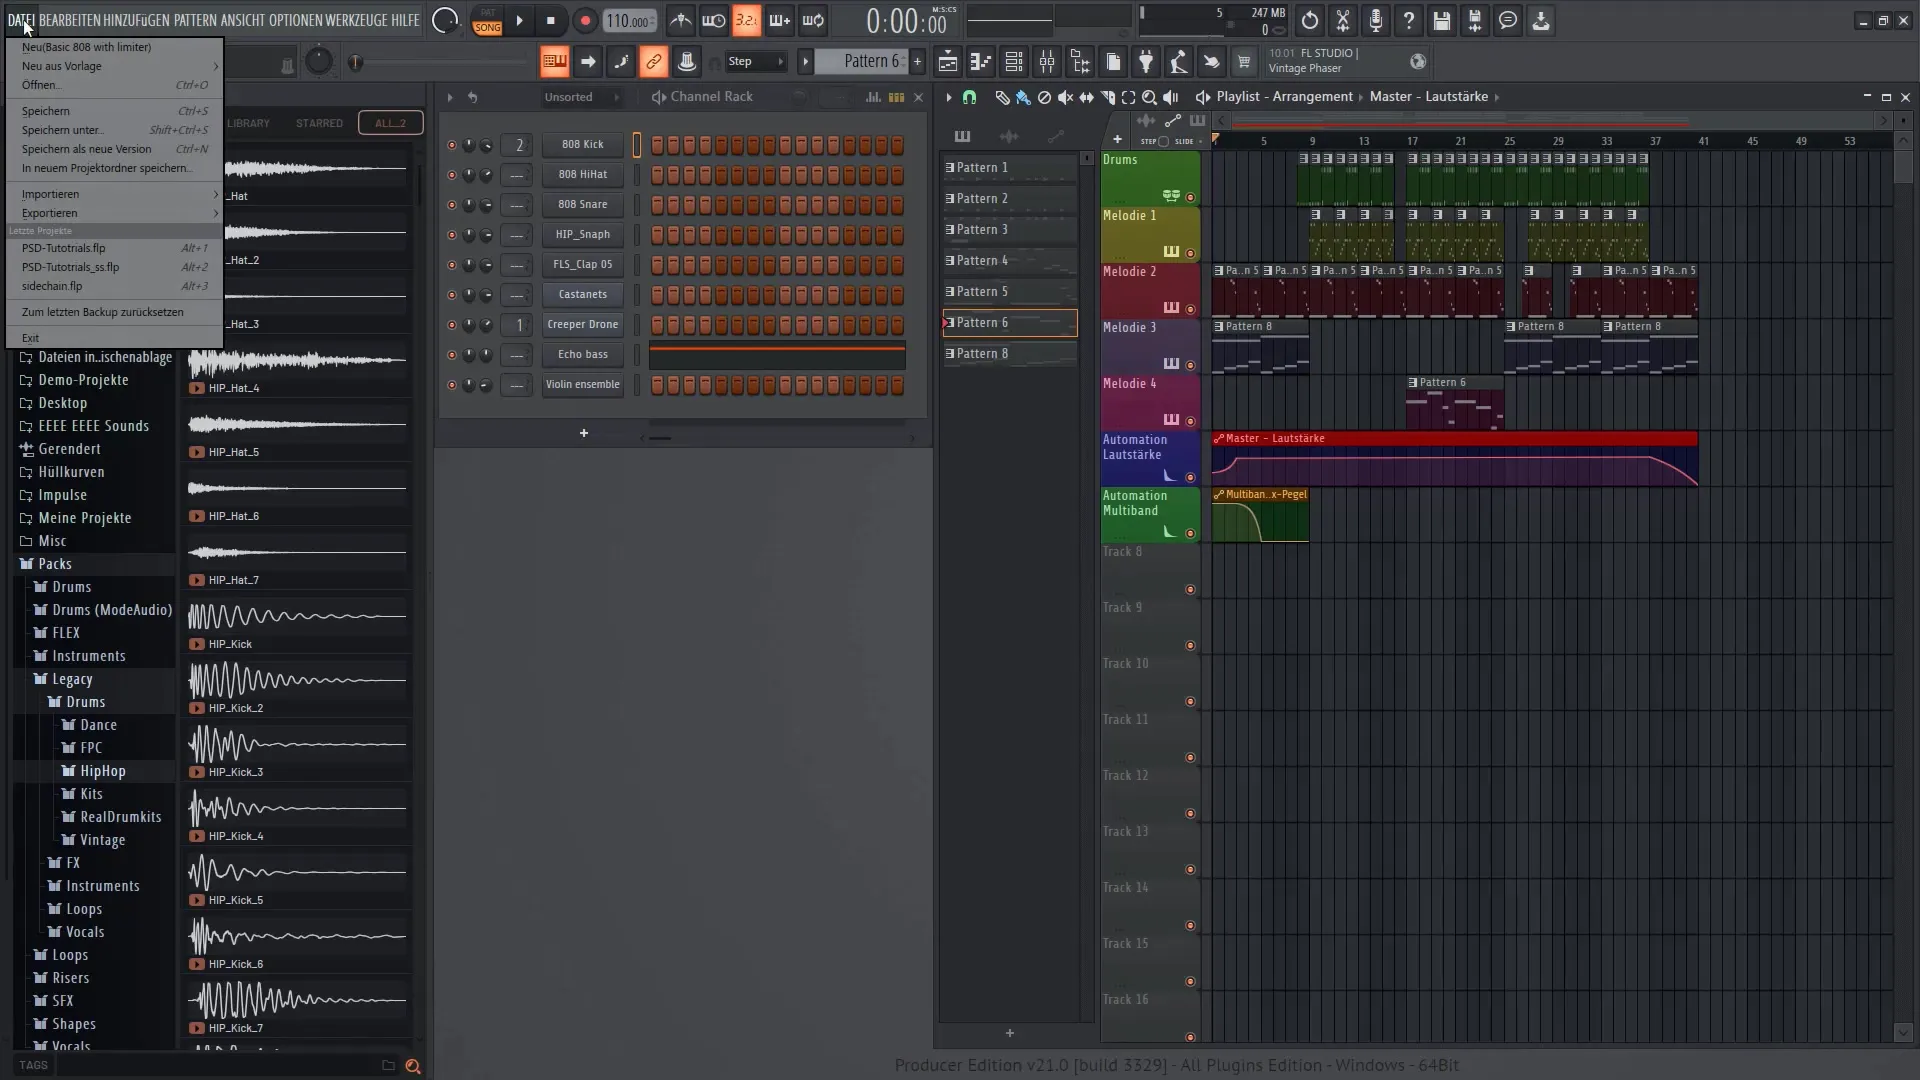
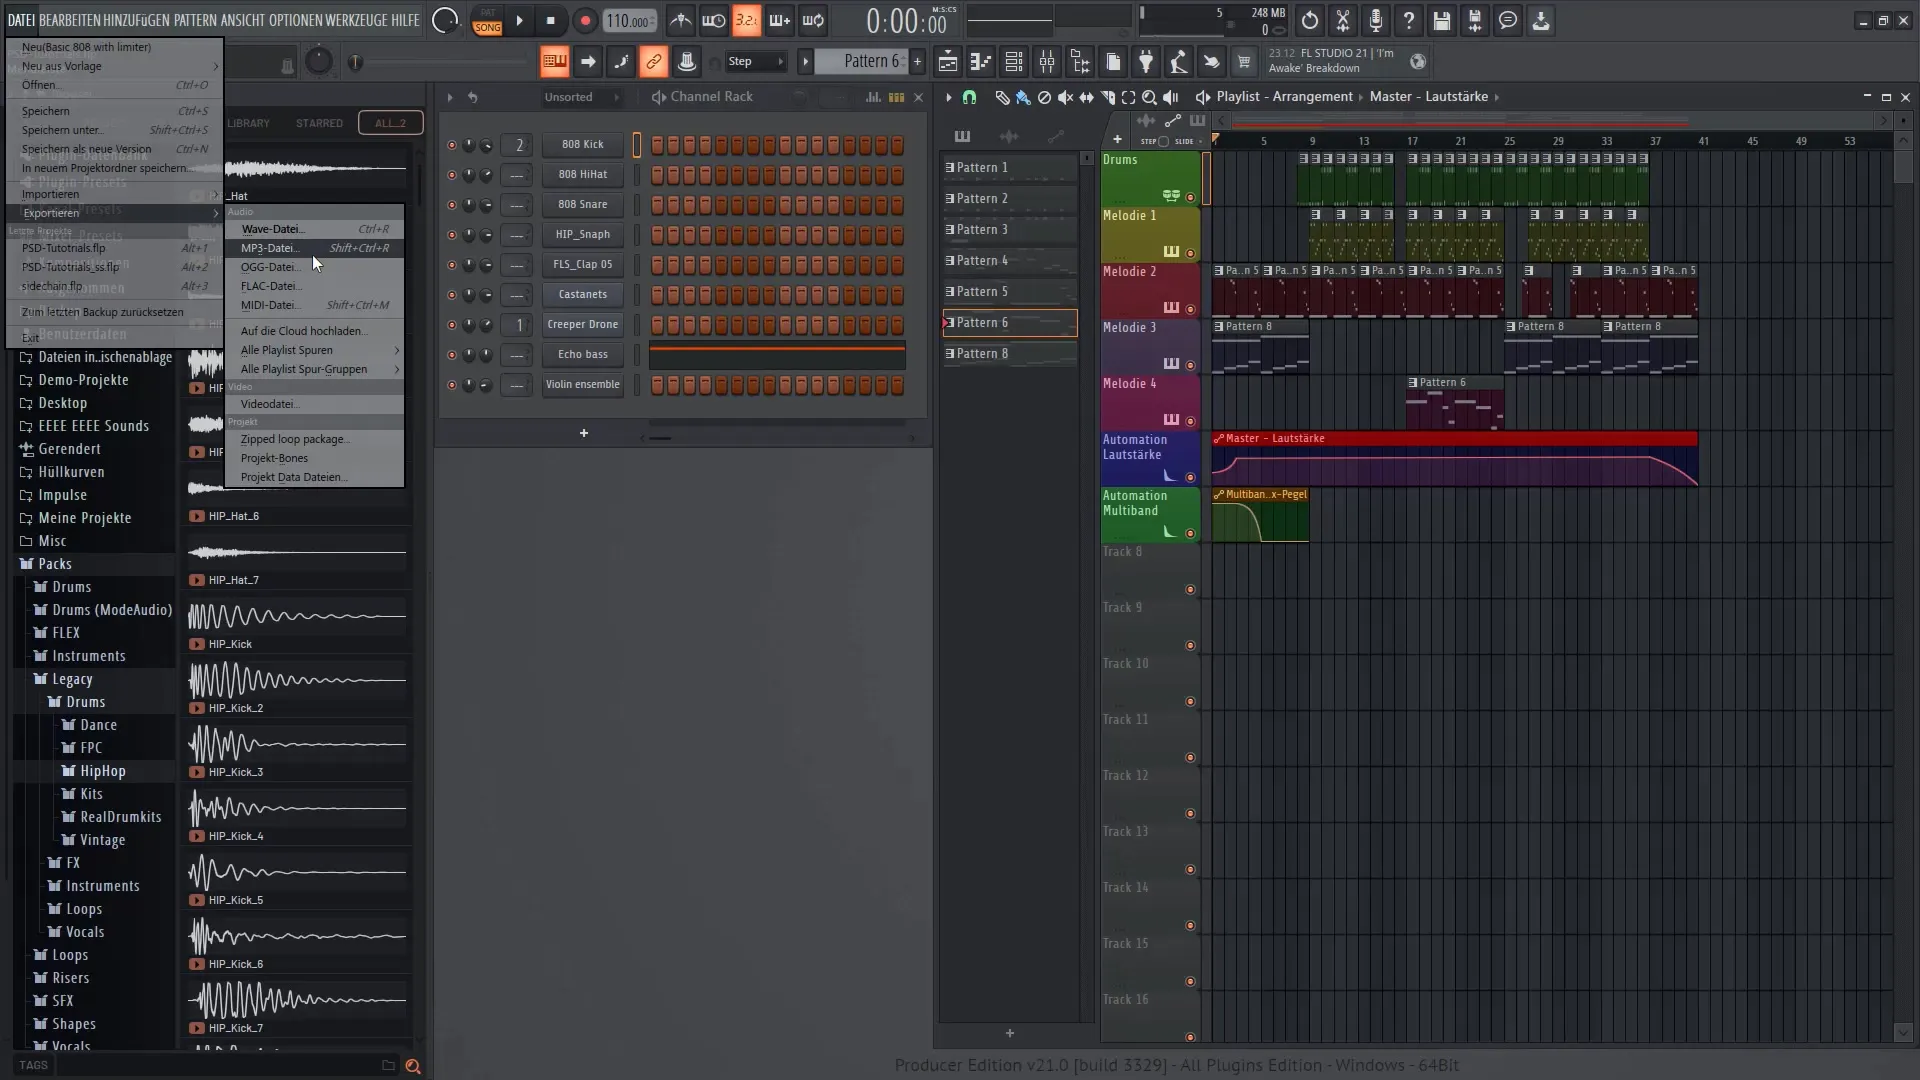
Now we come to the actual export. Again, go to "File" and choose "Export". Here you can select various formats for your track. I recommend starting with clicking "Project data and files". This way, you can ensure that all necessary files are linked to your project.
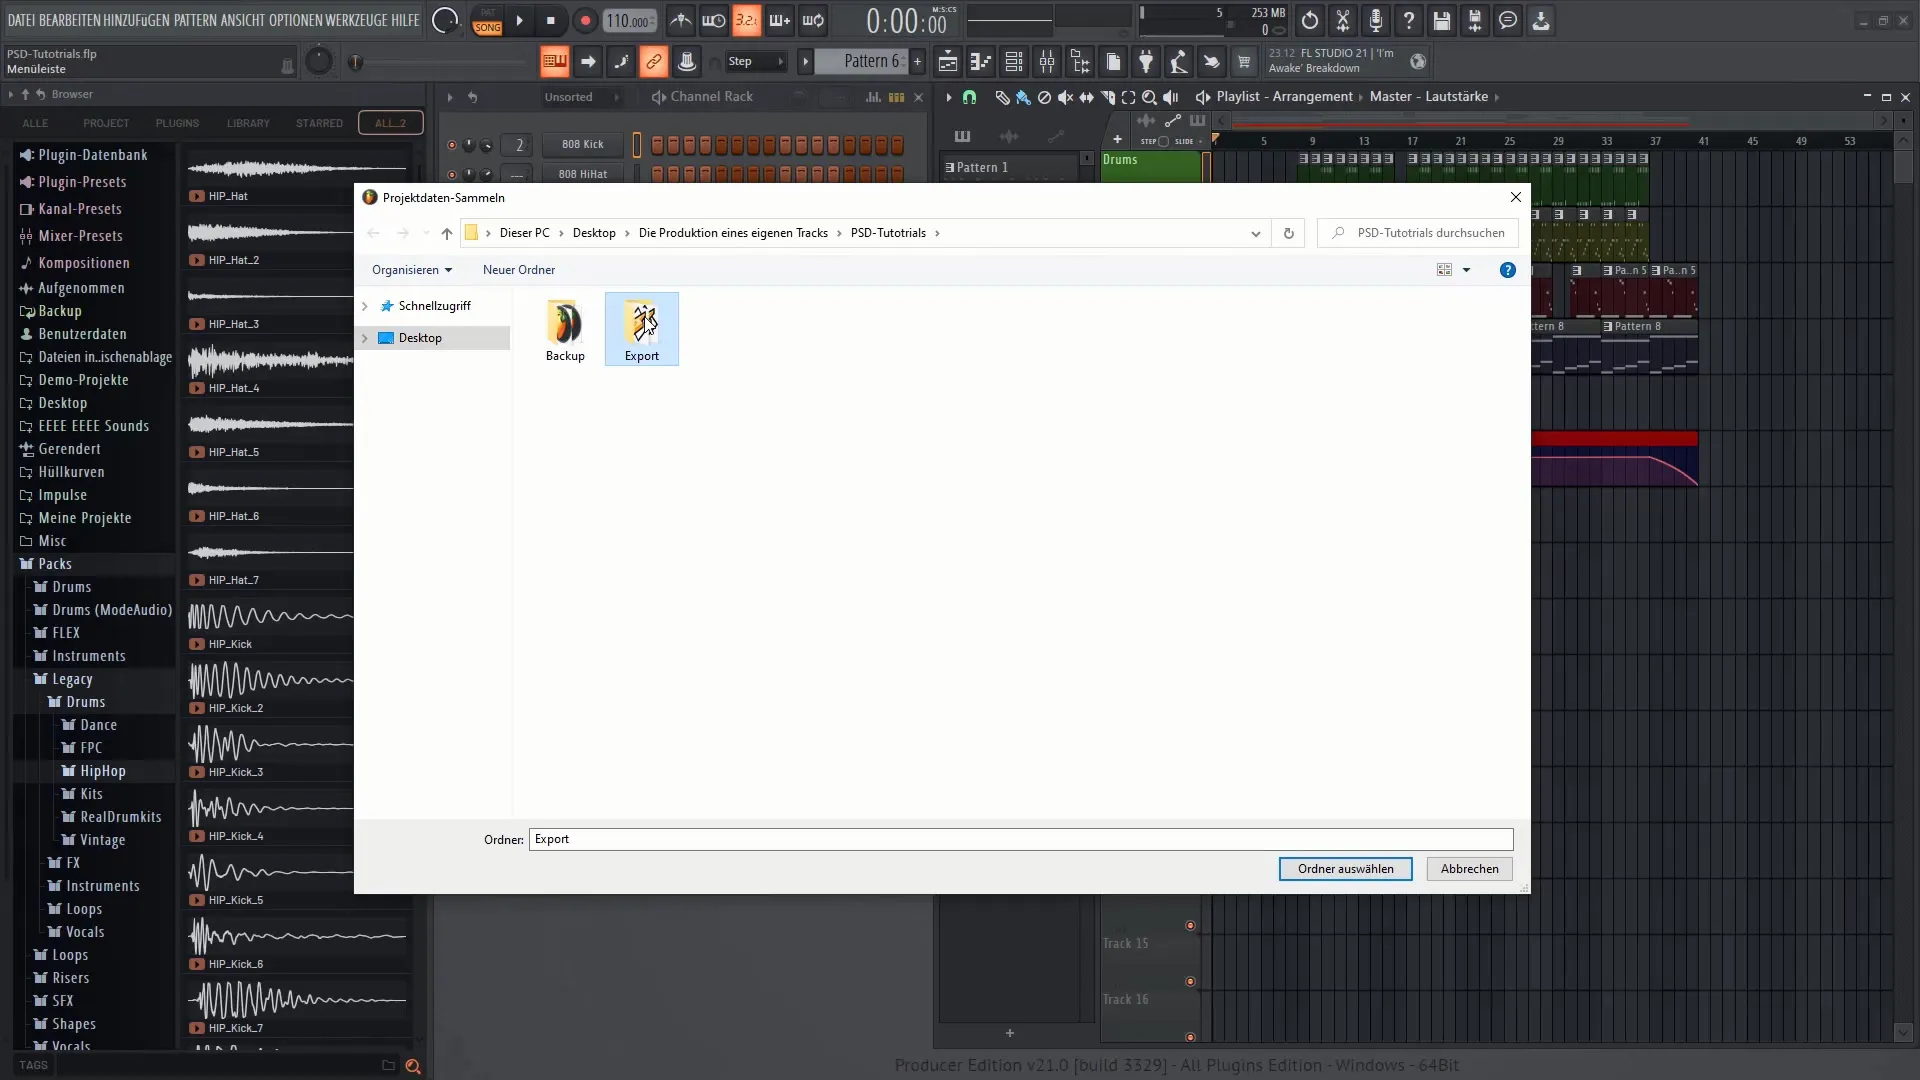
Now select the destination folder where you want to save your exported files. This way, you have everything in one place and can easily access it. It is advisable to create a specific folder for your exported tracks to maintain clarity.
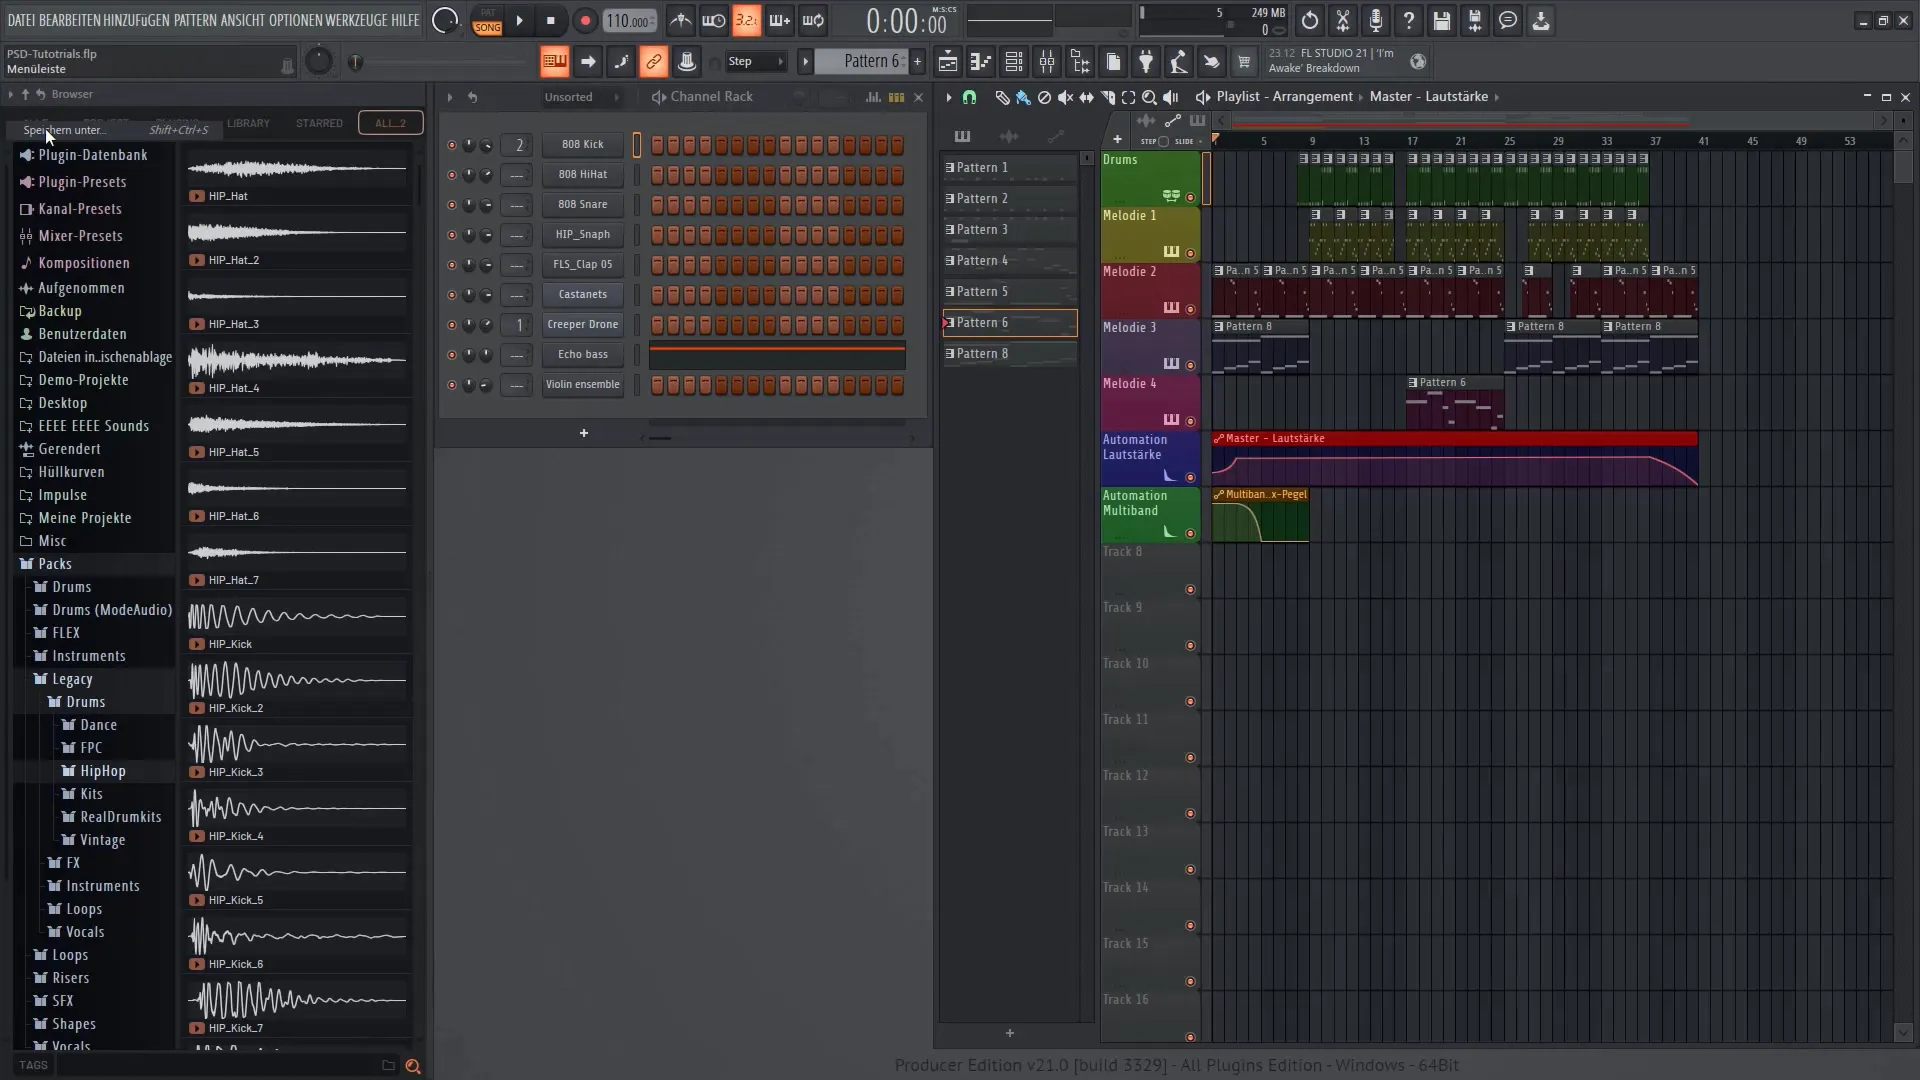
Once you have done that, go back to "File" and click on "Save As" again to ensure that you have saved all changes in your project. Make sure that all files end up in the same folder to keep everything organized.
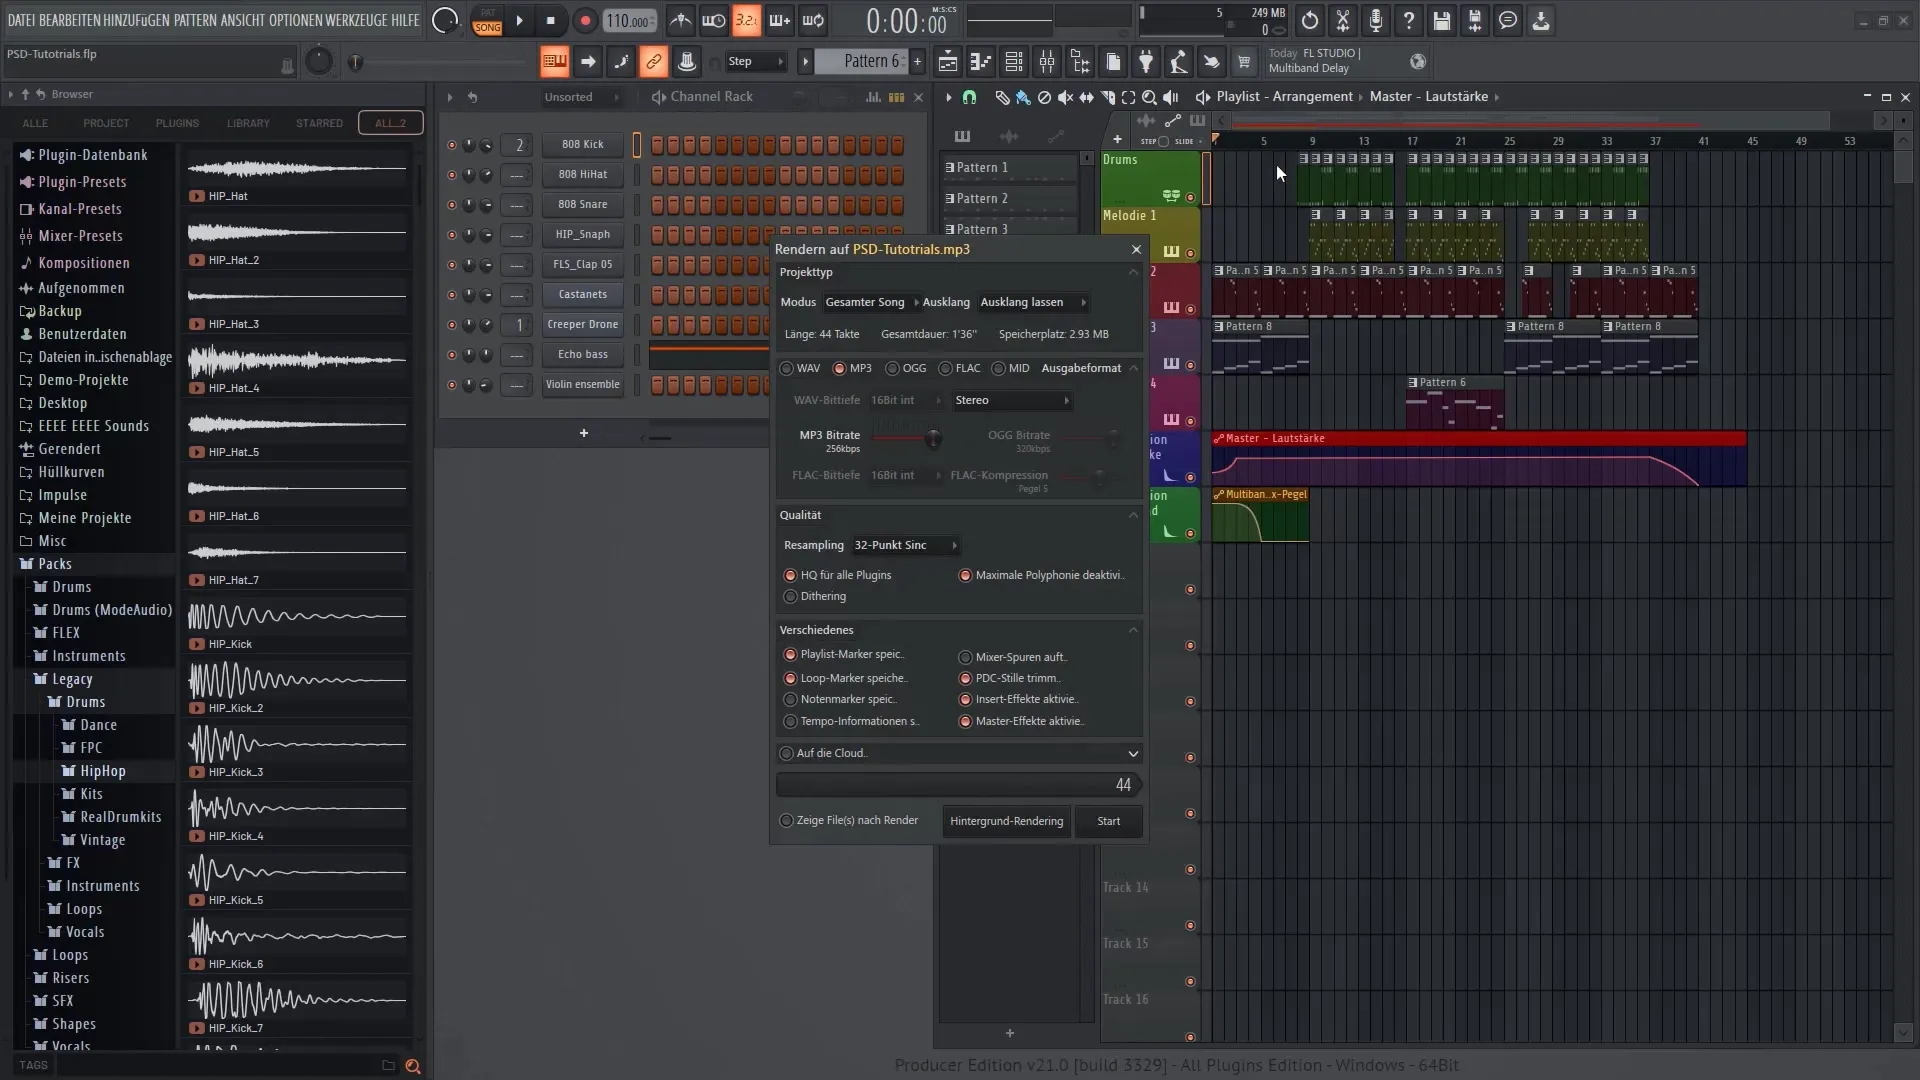
Now you can start the export process. Go to "File" again and choose "Export", and then "MP3 File". Here you can save your track as an MP3. When you do this, you will see a rendering menu.
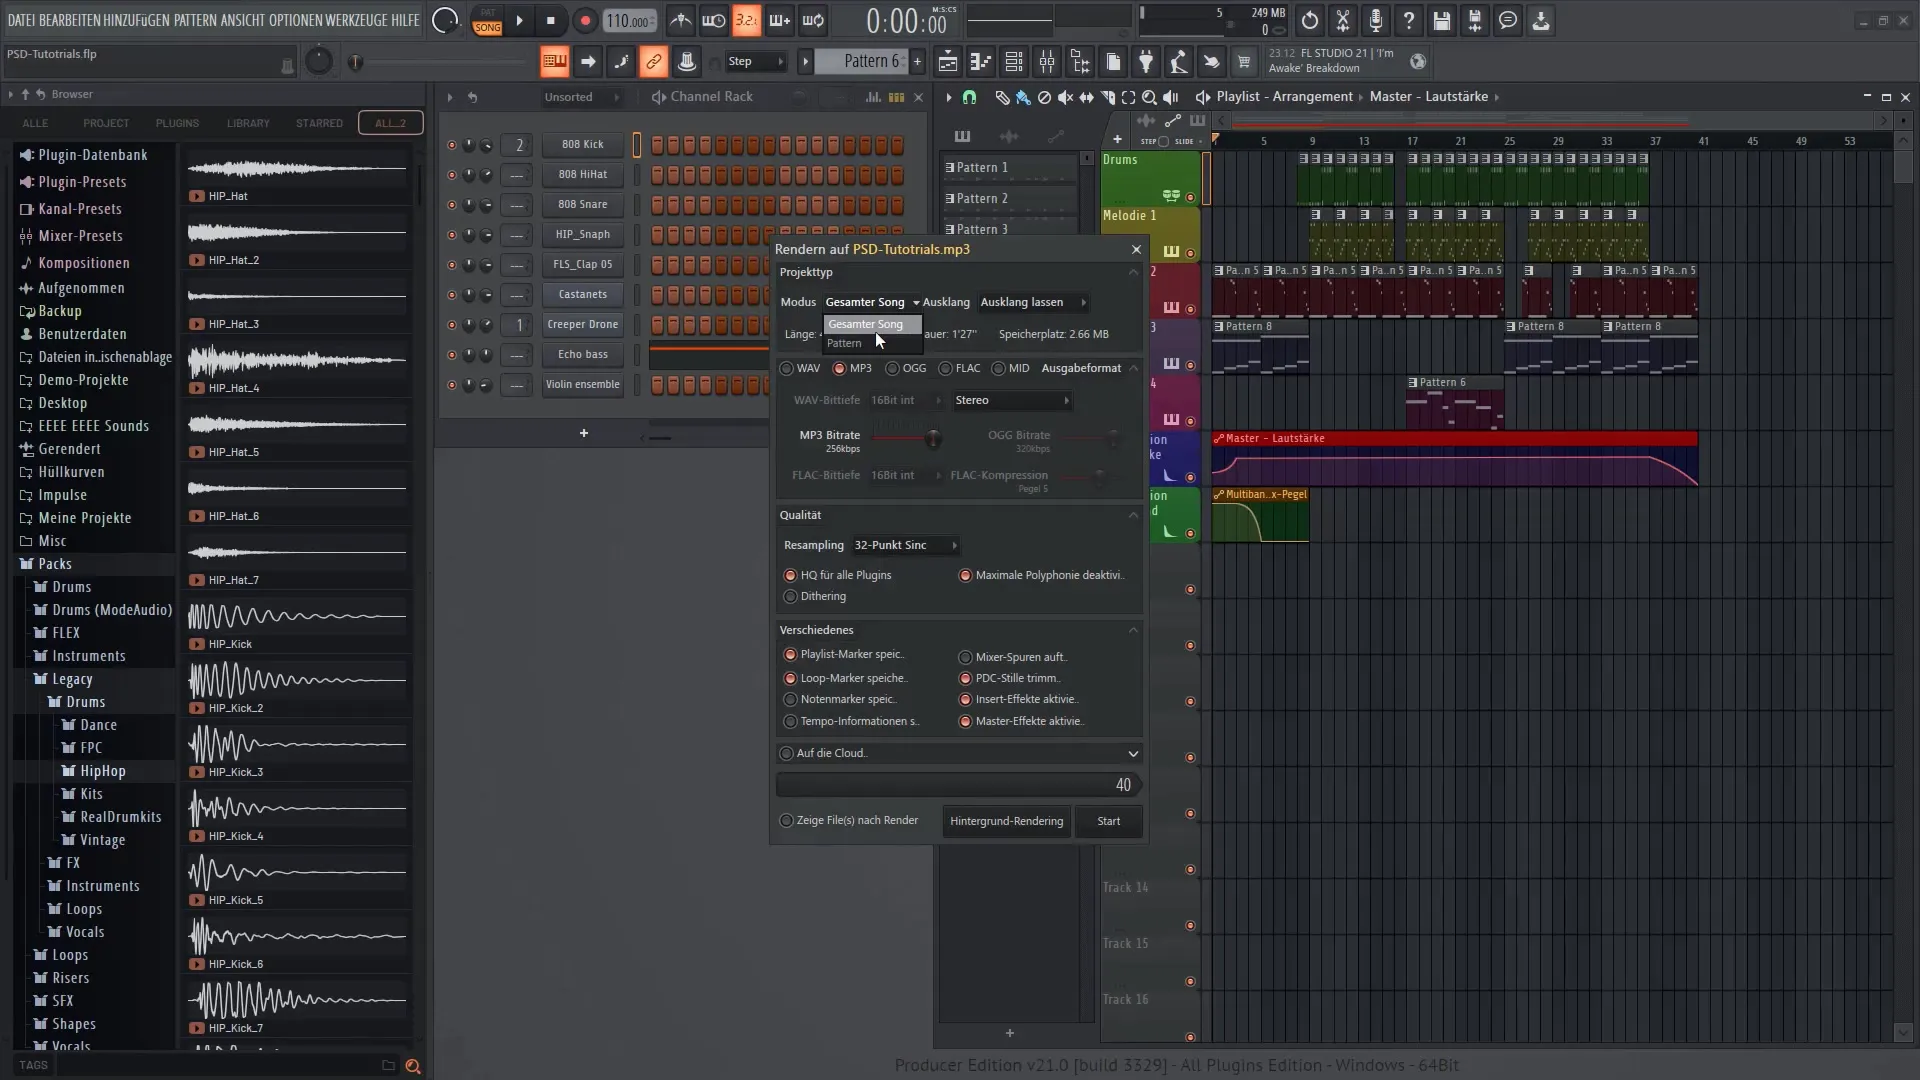
In this menu, you have the choice of rendering the entire song or only specific patterns. In most cases, you will want to export the entire song. Also, make sure that the song's fade-out is considered in the rendering. You can do this by adjusting the end time accordingly.
Make sure to select all desired output formats. FL Studio offers you the option to export both WAV and OGG files simultaneously, which can be very useful.
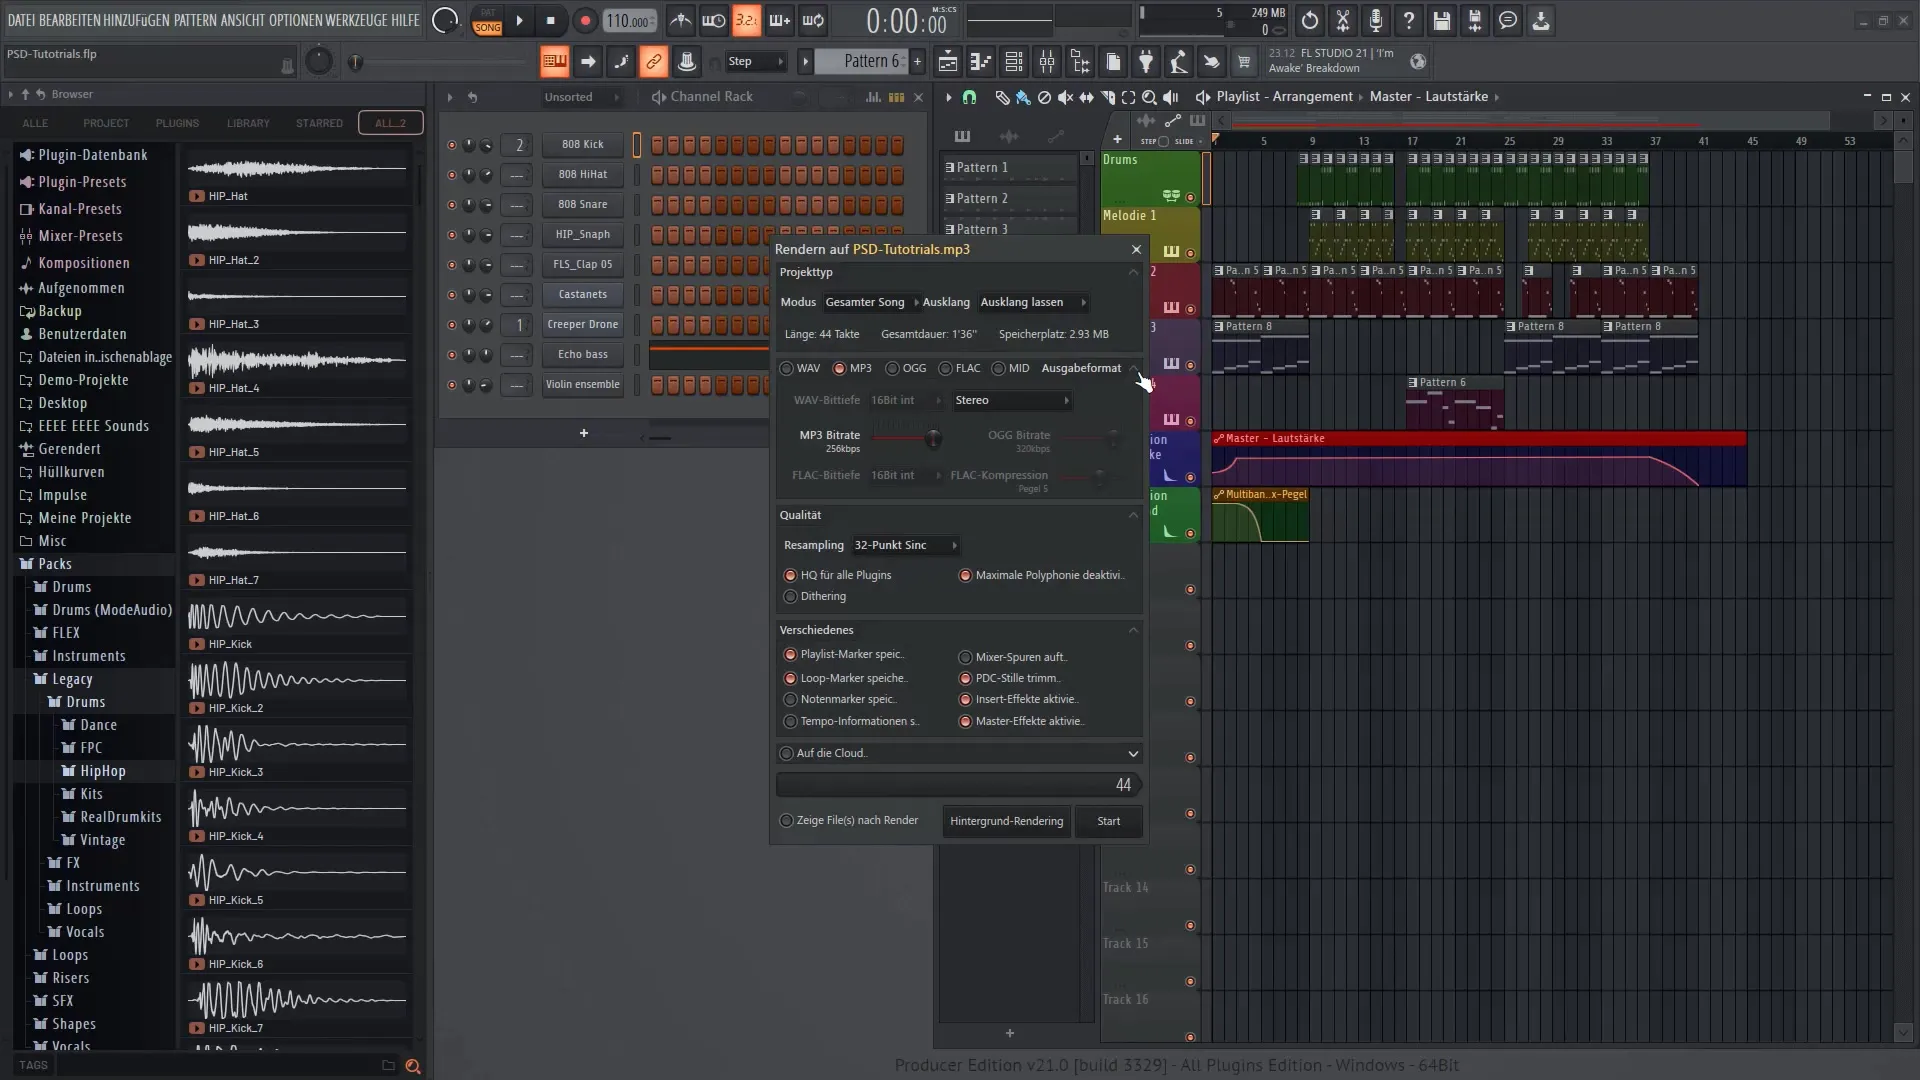
Ensure that you adjust the bitrate for the MP3 file, as this affects the quality of the exported file. A recommendation is between 224 and 256 kbps to achieve a good balance between file size and sound quality.
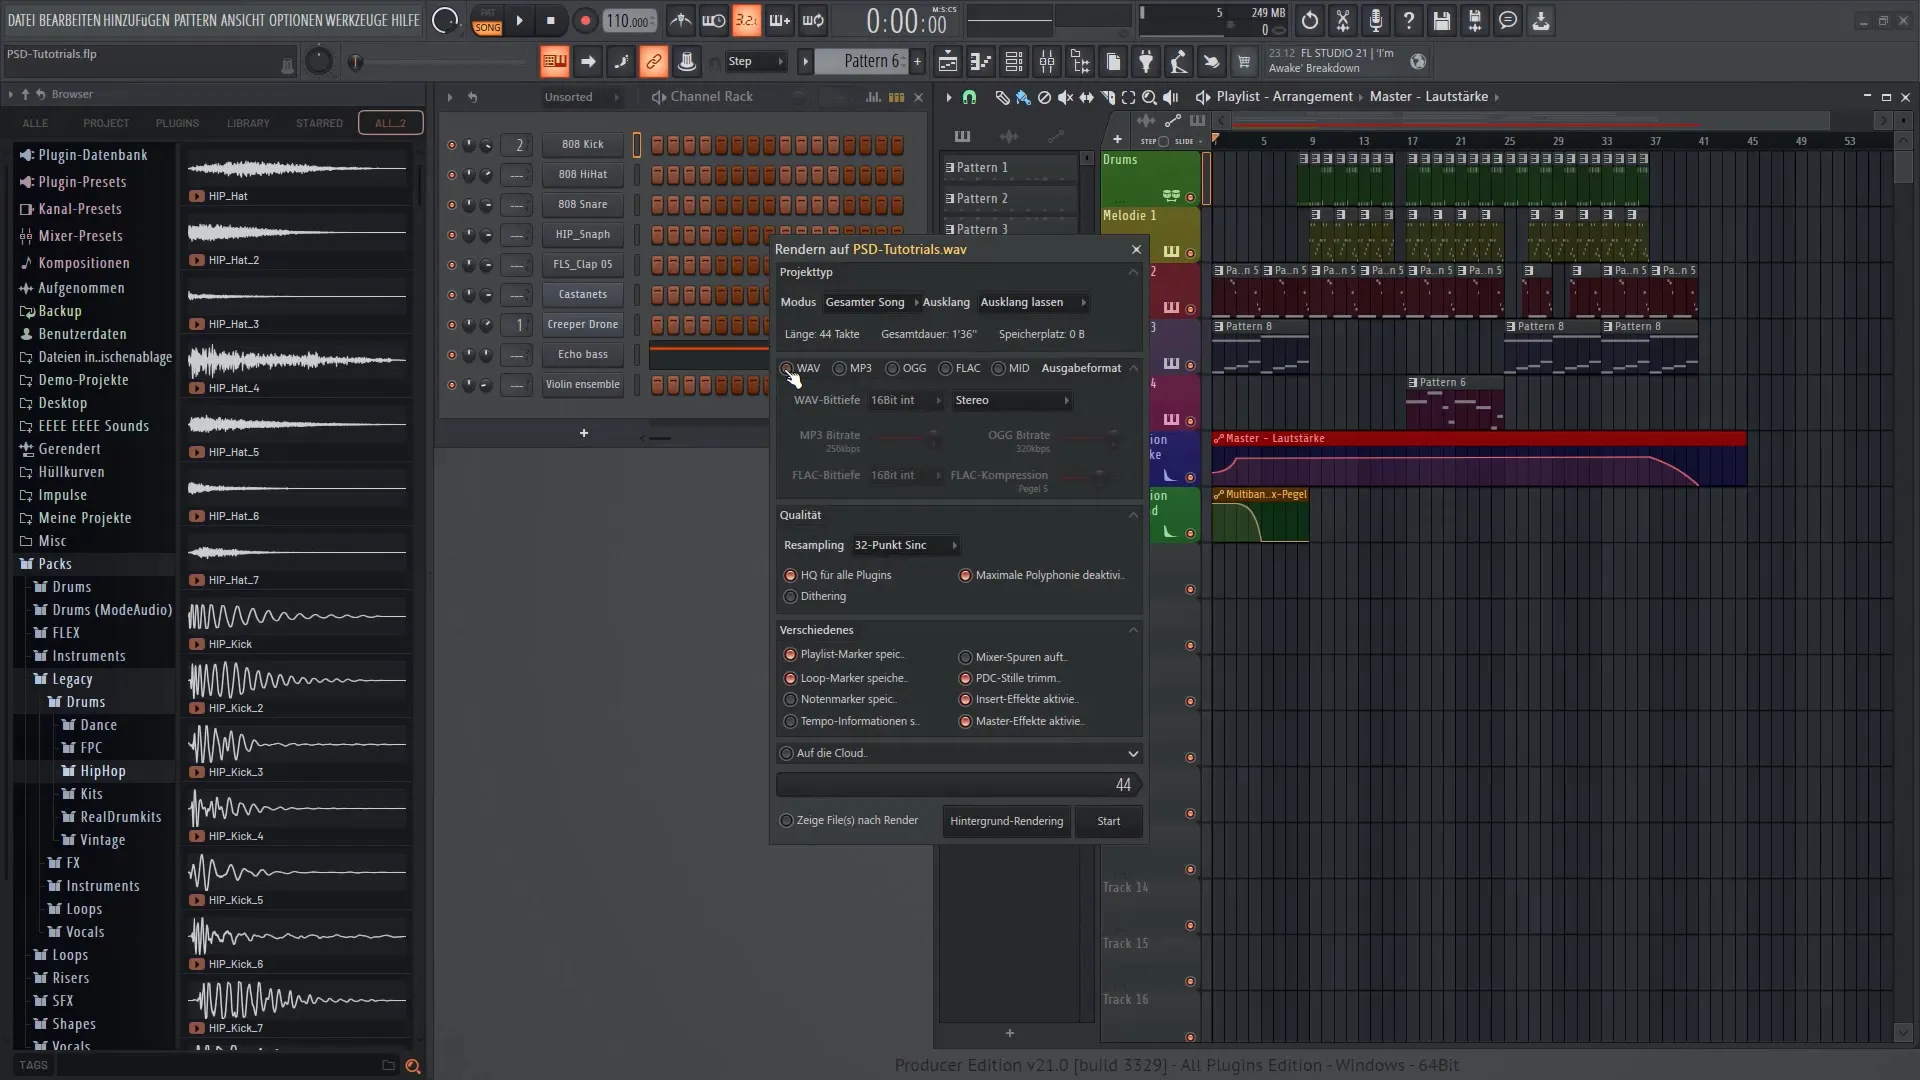
Once you have made all the settings, you can start the export. FL Studio will show you how much time is needed during rendering. This usually only takes a few seconds.
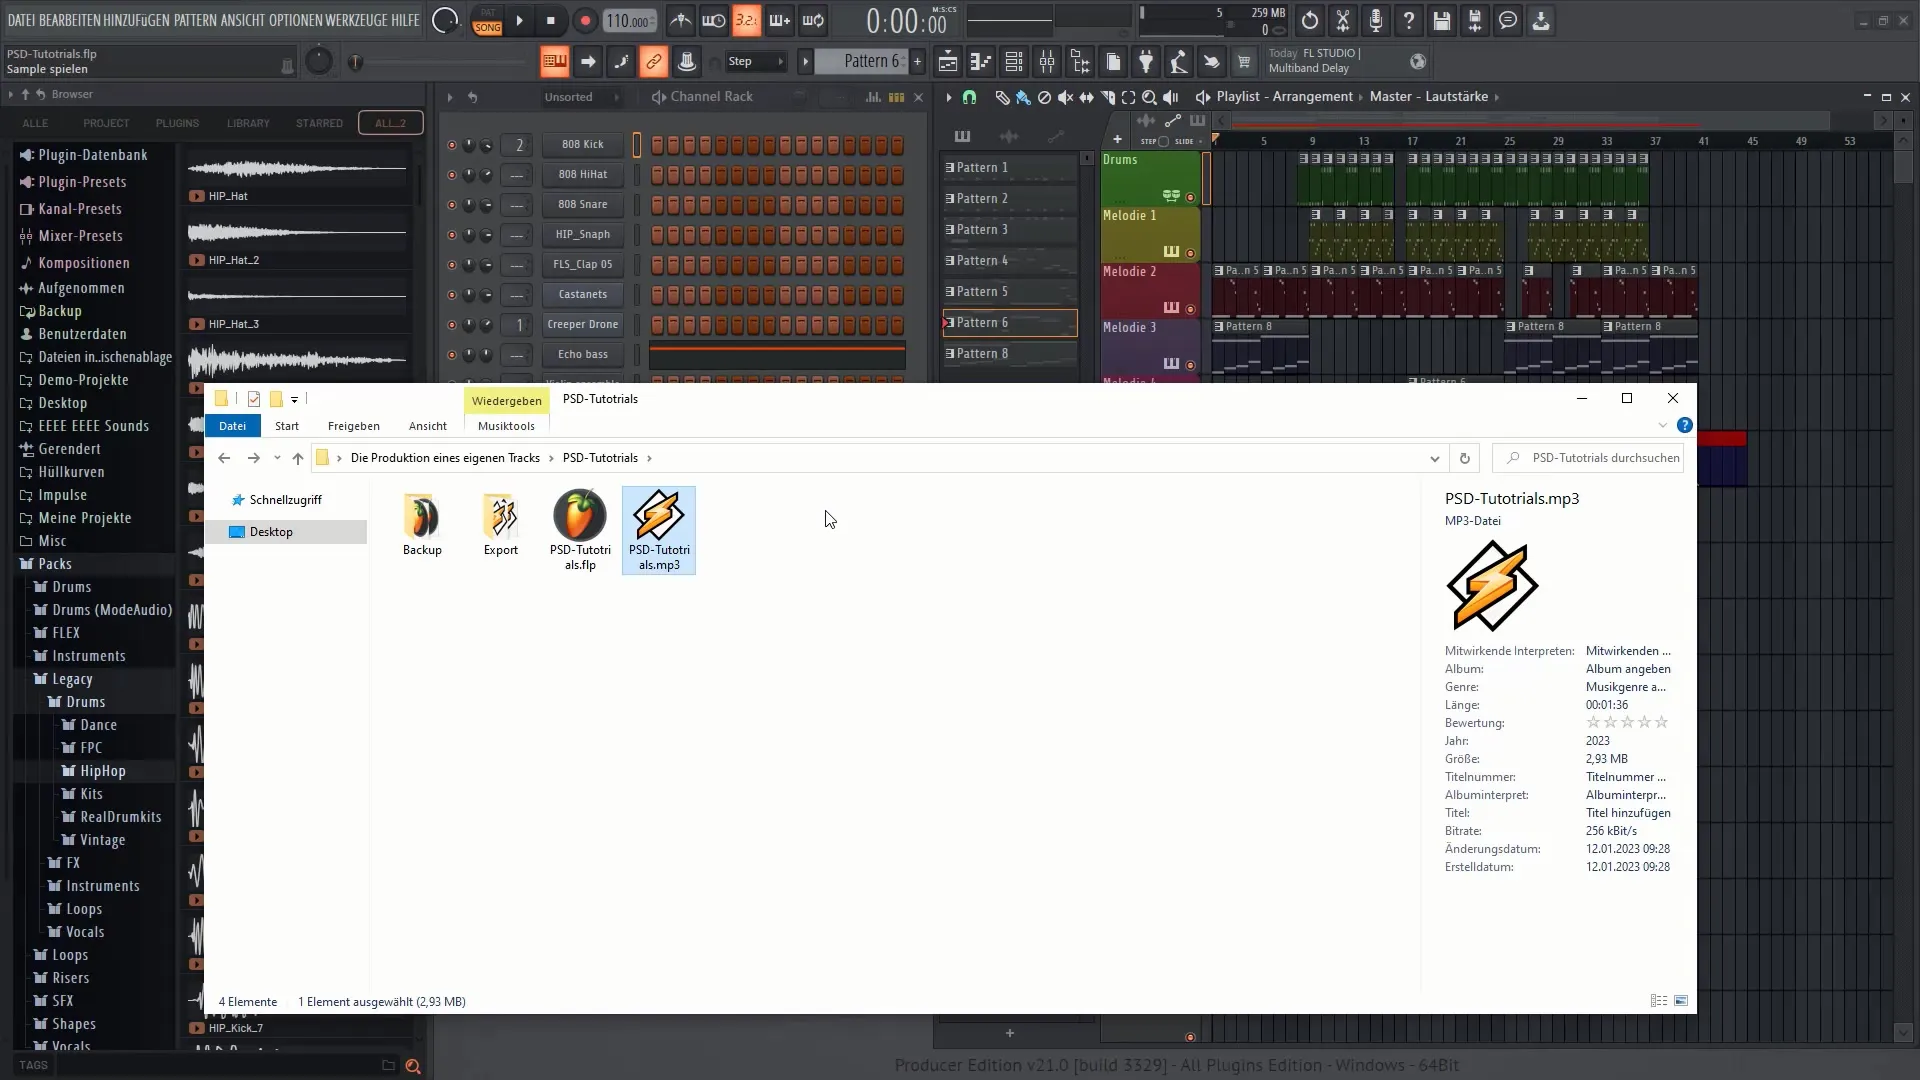
After the export is complete, you will find your file in the chosen folder. From there, you can easily play your tracks or even reimport them into FL Studio.
Finally, one important note: It is advantageous to save all your instruments in the project. This way, you can ensure that you will be able to access them in future projects as well.
I hope this guide has helped you to successfully export and structure your track in FL Studio 21. Good luck with your beat production!
Summary
In this guide, you have learned how to safely export your project in FL Studio 21 and structure it sensibly. Make sure to always create backups and keep an overview of your file structure to ensure smooth work in the software.
Frequently Asked Questions
How can I export my project in FL Studio 21?You can export your project under "File" → "Export" and then choose the desired format.
Which formats can I choose for export?You can export your project in formats such as WAV, MP3 or OGG.
How can I create a backup of my project?Go to "File" and choose "Save As" to create a backup copy of your project files.
What should I consider regarding export bitrate?A bitrate between 224 and 256 kbps is recommended to achieve good sound quality with reasonable file size.
Can I reuse my exported file in FL Studio?Yes, you can always re-import and play the exported file again in FL Studio.

