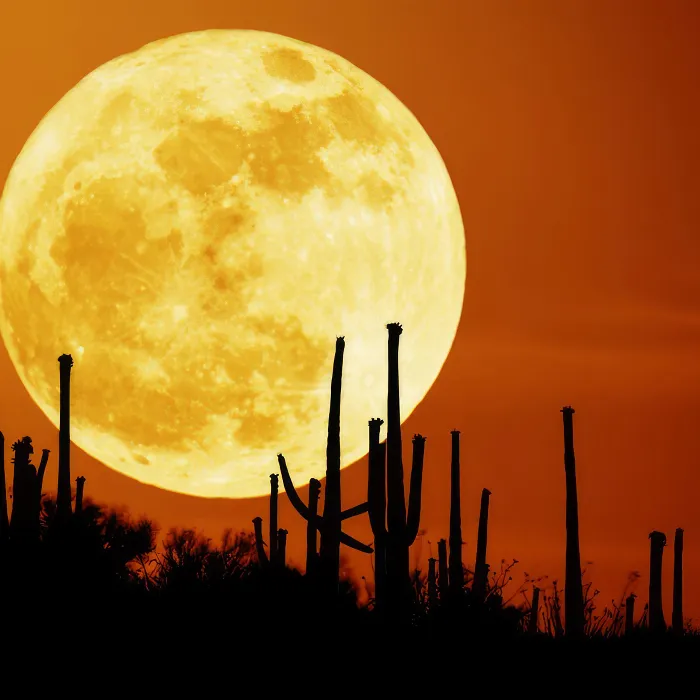
Photos of meteors (shooting stars) cannot be forced. A portion of luck is an important prerequisite.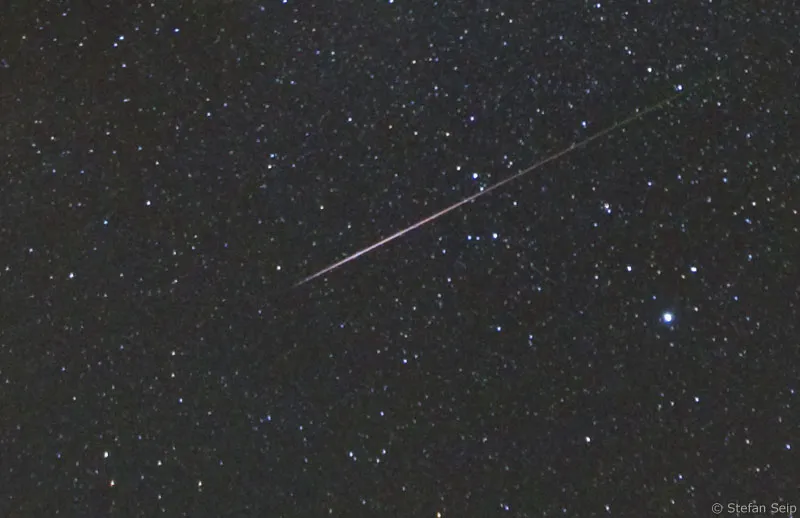
Part 4: Photos of shooting stars
"Anyone who sees a shooting star whizzing across the night sky for just a fraction of a second should make a wish, because this wish will come true", as the saying goes.
Of course, this is a superstition, but it was created in exactly this form by the most diverse peoples on earth independently of each other. So if you still have hope that it is more than just a superstition, you should give it a try next time - nothing can go wrong... ;-)
If you take a more serious look at shooting stars, the popular name for meteors, you'll learn no less exciting things.
Meteors are often confused with comets. While a meteor only shines in the sky for a fraction of a second or a few seconds at most, comets are objects that can be seen for several days, weeks or even months. Like planets, comets orbit the sun, while meteors are more or less small particles that penetrate the Earth's atmosphere and are heated to such an extent that they burn up.
The appearance of a meteor cannot be predicted, i.e. they occur sporadically every night (and incidentally also during the day, but then usually invisible), although there is a noticeable accumulation of meteor events in certain date periods throughout the year (see table below).
This is due to the fact that the Earth travels around the sun at a speed of 30 kilometers per second (!) and collides with particles in interplanetary space.
These particles are called meteoroids before they enter the Earth's atmosphere. Meteoroids are therefore potential meteors. Most of these particles are very small, often only a few hundredths of a millimeter in diameter, but occasionally there are also larger chunks with a diameter of several centimeters.
If a meteoroid the size of a tennis ball enters the atmosphere, a particularly bright meteor, known as a "fireball", becomes visible in the sky. A meteor of this size heats up more on its surface than in the center, creating thermal stresses that cause it to burst.
The fragments that are blown off upwards, i.e. accelerated against the direction of flight, can reach the ground at a much slower speed. A remnant of a meteor that lands on the earth's surface is a meteorite.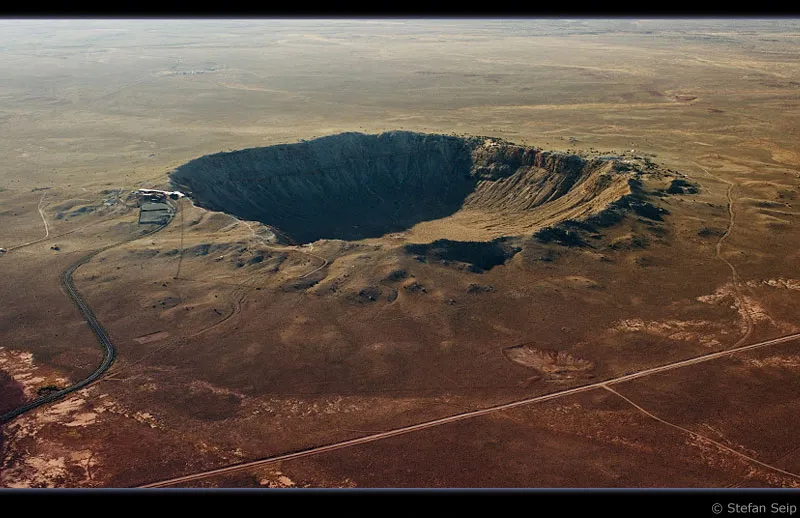
The "Barringer Crater" near Flagstaff, Arizona, USA, is the best-preserved impact crater of a meteorite on Earth. It is 1.2 kilometers in diameter and 170 meters deep. About 50,000 years ago, a projectile from outer space hit the crater, the mass of which is estimated at 300,000 tons. The meteorite, made of iron, was probably about 50 meters in size.
Meteors penetrate the Earth's atmosphere at around 10 to 70 kilometers per second. Due to the frictional heat, most of them burn up at an altitude of around 120 to 80 kilometers above the earth's surface, whereby the actual luminous phenomenon is not the glowing particle itself, but the surrounding air, which is ionized by the heat. This sometimes makes meteor trails appear greenish in the photos.
Only larger meteors penetrate even deeper and disintegrate at an altitude of ten kilometers at the latest. The closer a meteor approaches the earth's surface, the denser the air becomes and the stronger the deceleration. Fireballs are therefore not only conspicuous for their great brightness, which can even reach that of the full moon, but also for their relatively slow movement in the sky. Exceptional specimens can be tracked for several seconds, and the trails they leave in the air can last for many minutes. Even the bursting of a large meteor can be heard from time to time.
Sporadic meteors can appear at any time of day or night with no chance of predicting them. However, there are times of the year when the Earth passes through a region with a relatively large number of meteoroids on its orbit around the sun. The frequency with which meteors can be observed then increases, sometimes considerably. These periods of increased meteor activity are called meteor streams. They always repeat at the same time every year.
If you draw the meteors of a meteor shower on a star chart, you will notice that if you extend their trajectories backwards, they all appear to originate from one point in the sky. This is a perspective effect, comparable to driving a car while it is snowing; even then it looks as if all the snowflakes are coming from a central point.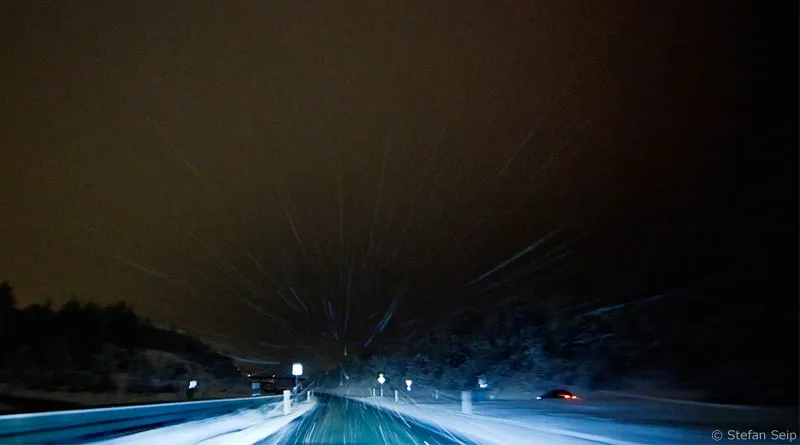
Driving a car during snowfall.
In the case of meteors, it is the movement of the earth that causes the perspective effect. The meteor stream is named after the Latin name of the constellation in which this central point, the so-called radiant, is located. In the case of the Leonids, for example, the radiant is located in the constellation Leo.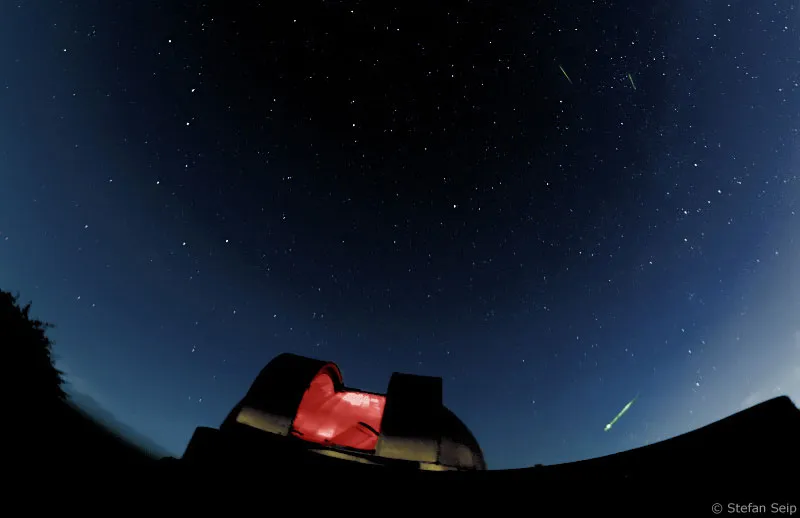
A large area of the sky was captured using a fisheye lens with a format-filling image. During the 2-minute exposure time, three meteors of the Perseids meteor stream crossed the field of view, including a fireball. A CCD camera was used.
The same image with the constellations drawn in. The backward extension of the trajectories is aimed at the radiant in the constellation Perseus (Per); shown in yellow. Uma=Big Dipper/Bear, CVn=Hunting Dogs, UMi=Little Dipper, Dra=Dragon, Cep=Cepheus, Cam=Giraffe, Cas=Cassiopeia, Lac=Lizard, Polaris=Polar Star.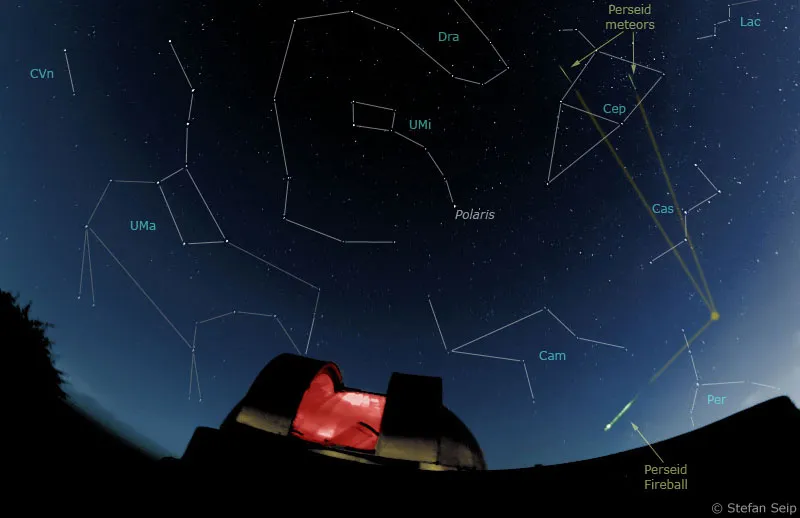
The following table provides an overview of the most important meteor streams of a year. In addition to the name of the stream and the position of the radiant, it contains the period and the maximum of their occurrence. In the column "Rating" a "+" stands for pronounced, which means either relatively many and/or bright meteors, an "o" for a medium shower up to about 15 meteors per hour and a "-" for the weakly pronounced meteor showers.
| Name | Radiant | Period (max.) | Rating |
| Quandrantids | Bear Keeper (Bootes) | 1.1.-6.1. (3.1.) | + |
| Lyrids | Lyre | 12.4.-24.4. (22.4) | o |
| Eta Aquarids | Aquarius | 1.5.-8.5. (4.5.) | + |
| Delta Aquarids | Aquarius | 20.7.-10.8. (29.7.) | + |
| Alpha Capricornids | Capricorn | 15.7.-10.8. (30.7) | - |
| Perseids | Perseus | 20.7.-20.8. (12.8.) | + |
| Cappa Cygnids | Swan | 9.8.-6.10. (18.8.) | - |
| Cepheids | Cepheus | 18.8. | - |
| Piscids | Pisces | 31.8.-31.10. (20.9.) | - |
| Taurids | Taurus | 19.9.-1.12. (13.11.) | o |
| Delta Draconids | Dragon | 7.10.-11.10. | - |
| Andromedids | Andromeda | 25.9.-12.11. (3.10.) | - |
| Orinids | Orion | 14.10.-28.10. (21.10.) | + |
| Leonids | Leo | 15.11.-19.11. (17.11.) | + |
| Geminids | Gemini | 6.12.-17.12. (13.12.) | + |
| Ursids | Little Bear/Carriage | 17.12.-24.12. (22.12.) | o |
| Coma Berenicides | Hair of Berenice | 12.12.-23.1. | - |
The most important meteor showers during the year.
Technical equipment
No astronomical equipment is necessary to try your hand at photographing meteors. Wide-angle or even fisheye lenses with extremely large image angles increase the chance of catching a bright meteor. Due to the mostly fast movement of meteors, fast lenses with an aperture of f/2.8 or better are preferable.
Also essential:
- Stable tripod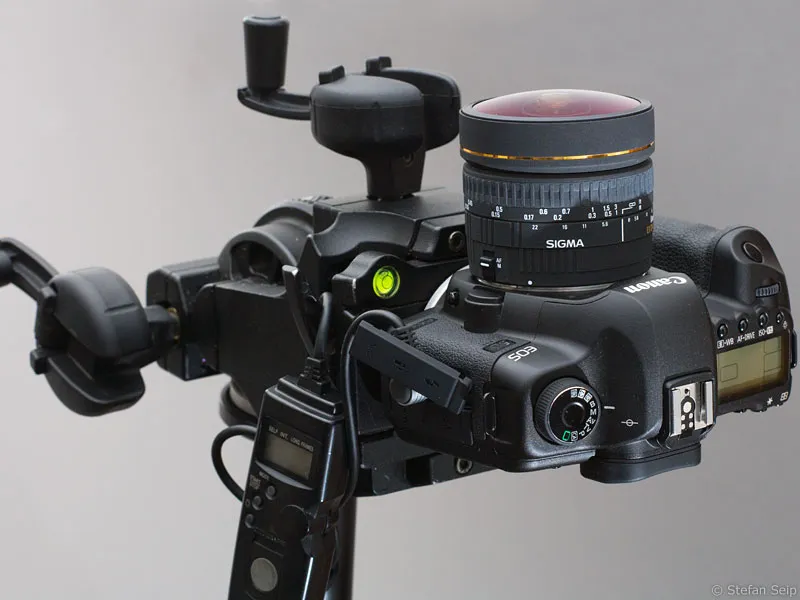
A good tripod and a tripod head, in the example shown a geared panhead, will ensure sharp, steady shots. Shown is a setup suitable for photographing meteors with a cable release and fisheye lens.
- Cable release/timer
Cable releases allow the camera to be triggered without contact in order to avoid camera shake. Wireless remote triggers can also be used.
- Lens hood (= backlight, lens hood or sun visor)
Keeps out extraneous light coming in from the side and delays the possible fogging of the front lens on humid nights. A specially designed lens hood is available for each lens. However, a lens hood is not recommended for the round fisheye shown above; it would shade the image field.
With the equipment described, the stars are shown as lines after a short time (see Tutorial 2 from this series: "Line-trace images of stars"). A meteor then appears in the photos as a "ricochet". If you want to image the stars as dots despite a long exposure time, you must follow the path of the stars, which is described in tutorials 9, 10 and 11 of the series "Astrophotography and Sky Photography".
How to proceed
In order to have a chance of success, the simultaneous coincidence of many factors would be ideal, but in practice this is very rarely the case:
- Abundant meteor stream
On the night of August 12, for example, the maximum of the Perseids stream can be expected.
- Clear skies
While individual, smaller clouds are hardly disturbing, the transparency of the atmosphere should be good.
- Observation site
A location away from terrestrial light sources is preferable for observing and photographing meteors. The easiest places to find are in rural regions and/or at higher altitudes in the low mountain ranges or the Alps.
- Moonless night
The best time would be around the new moon, but it is sufficient if the moon is not in the sky at the desired observation time. If, for example, you want to try your luck with photography in the second half of the night, you can still do this when the moon is waxing or at most half-moon, as it usually sets in the first half of the night. If in doubt, research the exact moonrise and moonset times (e.g. on the website www.calsky.de. Click on "Moon" and then on "Ephemeris" after selecting the observation location). Of course, on August 12 of each year, for example, the peak of the Perseids, the moon is not in the same phase. Sometimes you are lucky and they take place during a new moon phase. In other years, you catch a full moon phase. If the sky is very bright due to the moon, you will only be able to see and photograph the brightest meteors.
Often not all of the desired factors can be optimized. This should not stop you from at least trying. For example, if all the conditions are right but you don't have the opportunity to go to an ideal observation location, you can still take pictures from your balcony, garden or yard.
One factor is always beyond any possibility of planning: you need luck! Even announced meteor streams (see table) turn out to be very disappointing in some years, while in other years they put on an unexpectedly spectacular show.
The best time to see or photograph meteors is the second half of the night just before dawn. This is because during this time we are looking in the direction in which the Earth is flying on its orbit around the sun. We are then "behind the windshield", so to speak, while the view in the early evening corresponds to the view "out the back window".
For those familiar with the coordinate system in the sky, I would like to express this in a different way: The Earth's apex, i.e. the "direction of flight" of the Earth, lies 90 degrees west of the sun on the ecliptic (solar orbit). If the sun is in Aries, for example, the earth's apex is (approximately) in Capricorn.
As a result, about four times as many meteors are registered in the morning hours as in the evening.
1. make basic settings
The following basic camera settings are recommended:
File format
The RAW format is to be preferred.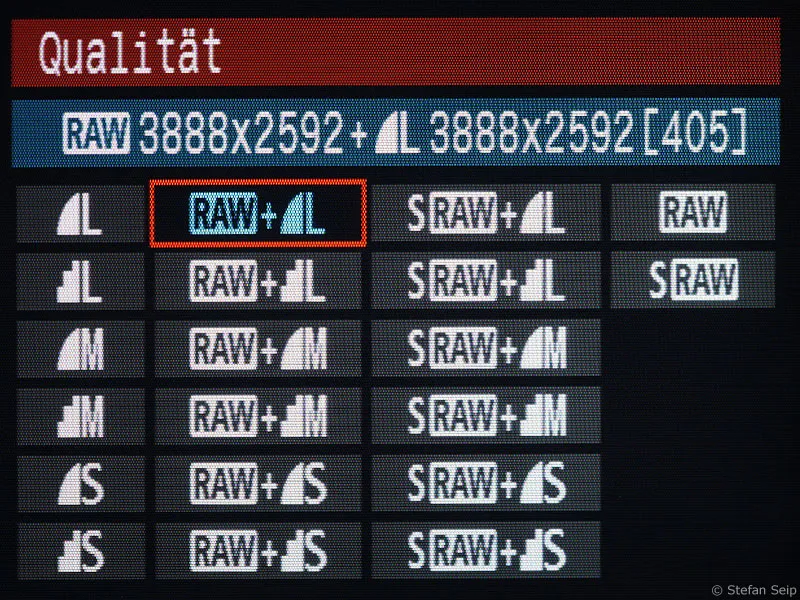
Setting the image quality for a Canon EOS 40D: The RAW format is selected here, while the photos are saved in JPG format at the same time. The JPG files are useful for quickly preselecting the best shots.
ISO value
Even bright meteors whizz across the sky at relatively high speed. Only high and highest ISO values are suitable for recording them. So set the highest ISO value at which your camera still delivers acceptable results.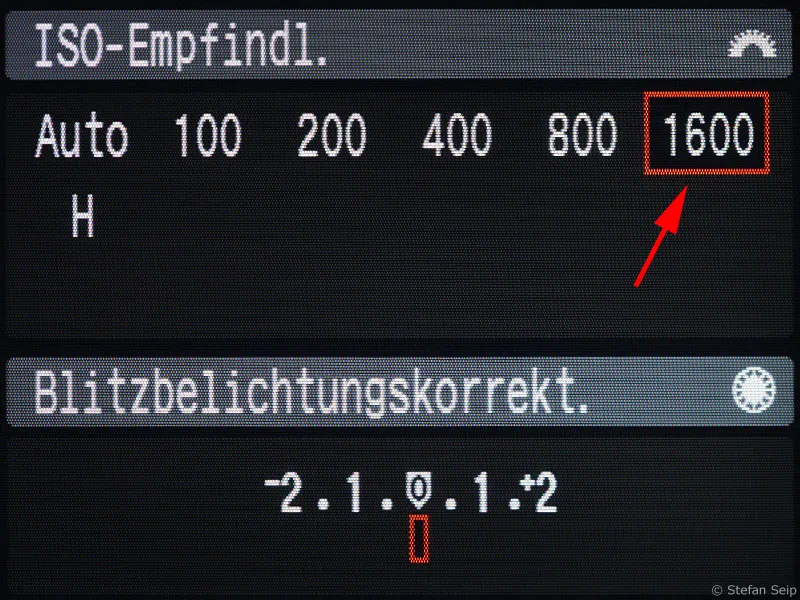
Setting the ISO value to 1600 on a Canon EOS 40D. The image noise of this camera is still acceptable even at such a high value.
White balance
The manual setting to "Daylight" (symbol: "Sun") has proven itself.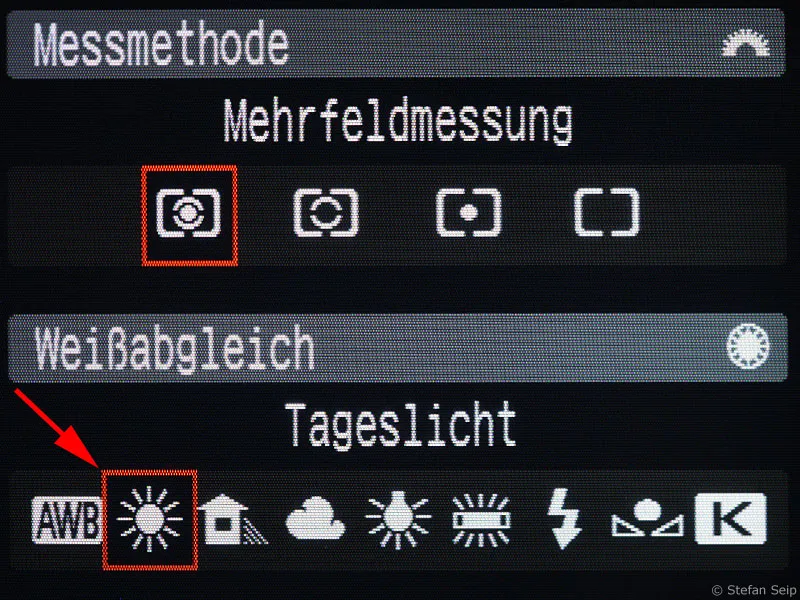
Setting the white balance on a Canon EOS 40D to daylight (5200 Kelvin).
Noise reduction
The noise reduction setting for long exposures causes the camera to take a dark picture with the same "exposure time" after each shot with a longer exposure time (from one second). This means that it needs the same time again after an exposure, during which it cannot take another picture. Although activating this function is useful for long exposures, "Murphy's Law" will ensure that the brightest and most beautiful shooting stars occur when the camera is not taking any images and is busy taking a dark frame instead. I therefore usually refrain from switching on the noise reduction.
Tip for advanced users: You can also take one or more dark frames manually, for example at the end of the series, and subtract these from the meteor photos to reduce the noise. The procedure is explained in tutorial 15 of this series ("Calibration: taking bright field and dark images"). With this technique, you can take one image after the other without pauses and the probability increases that you will catch a rare fireball photographically.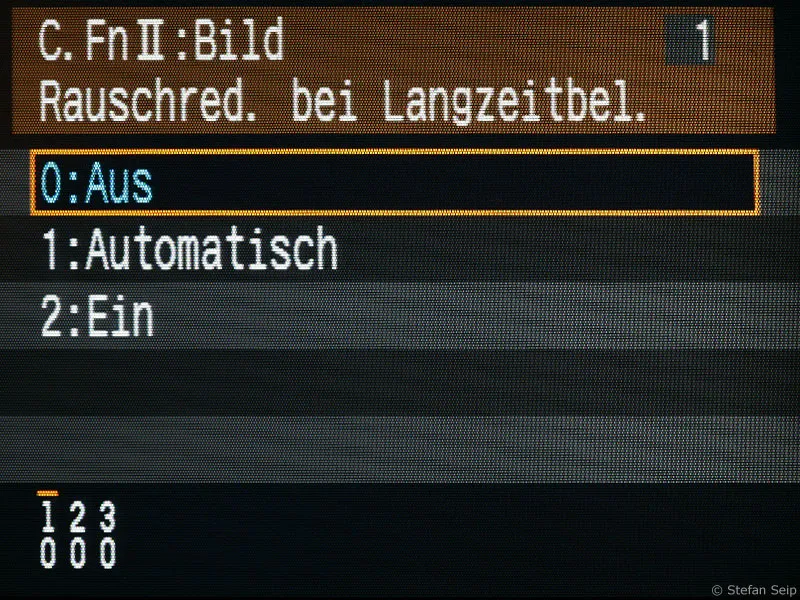
Switching off noise reduction for long exposures, here using the example of a Canon EOS 40D.
I have not had good experiences with the High ISO noise reduction setting (newer Canon EOS models) and therefore leave it switched off.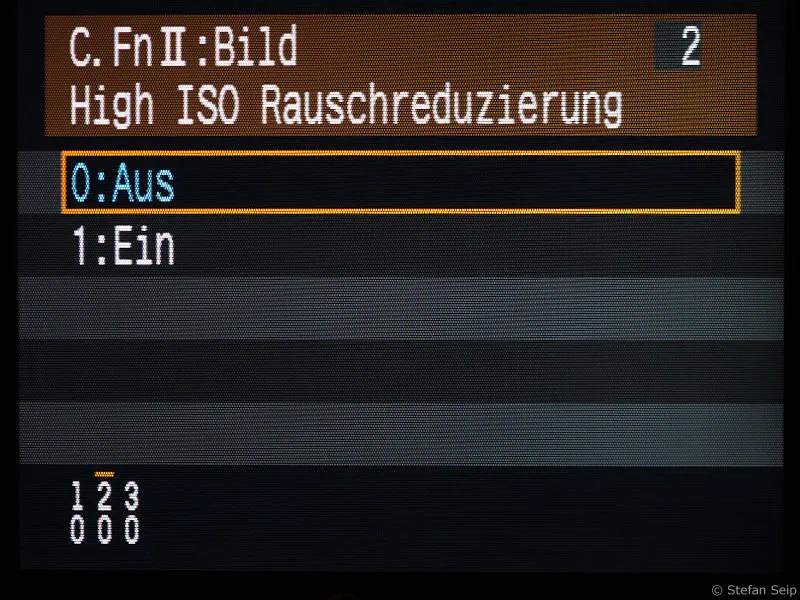
The "High ISO noise reduction" remains switched off.
Exposure program
Select the manual setting(M).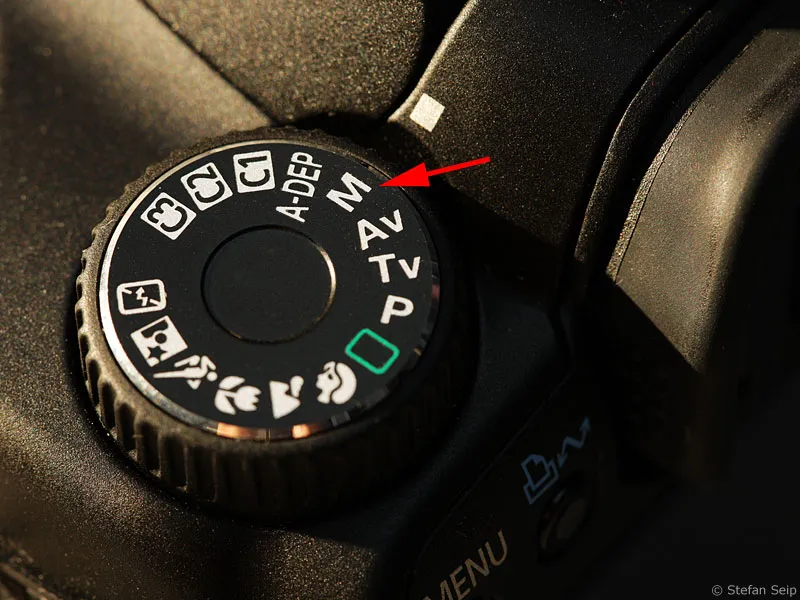
Setting the manual exposure control ("M") on the setting dial of a Canon EOS 40D.
Blender
Always set the largest possible aperture (i.e. the smallest f-number). Fast lenses with an aperture of F/2.8 or better are ideal.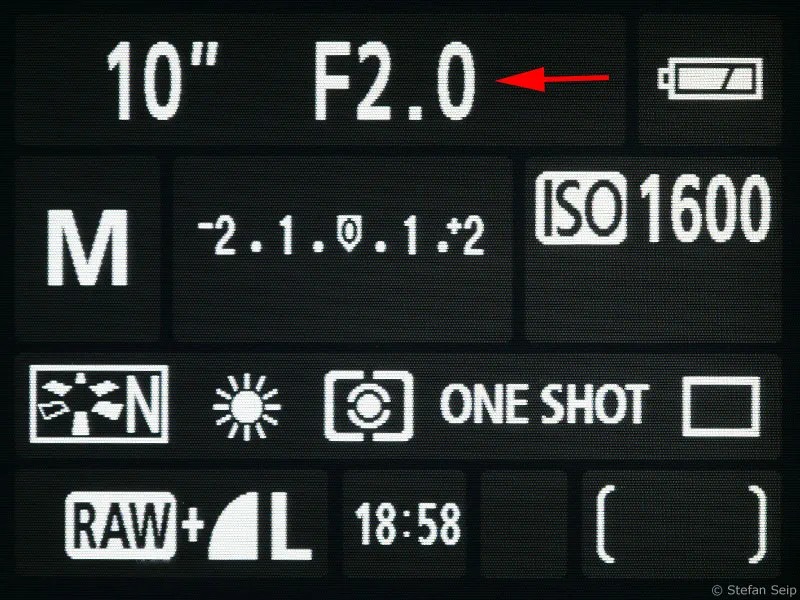
The display of the Canon EOS 40D: The arrow indicates the f/2.0 aperture setting. The "speed" of a lens is the smallest aperture value that can be set. Zoom lenses are usually less fast than fixed focal length lenses.
Mirror lock
This setting is used to prevent camera shake caused by the camera's mirror. If your tripod is not stable enough to absorb the shocks caused by the mirror, use this setting.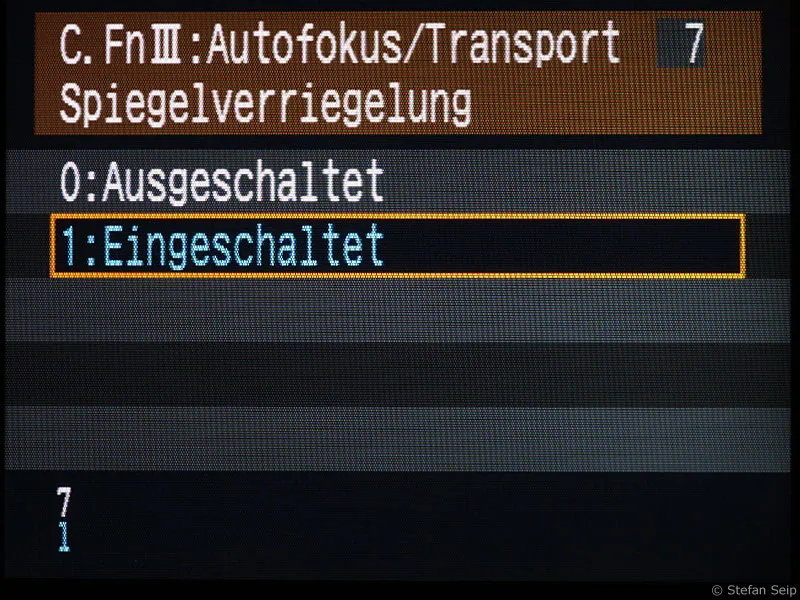
Mirror lock switched on. The first press of the shutter release button only raises the mirror. Then wait a few seconds before pressing the (cable) release button a second time to start the exposure.
Image stabilizer
It is very important to switch off any existing image stabilization mechanism! According to the manufacturer, the electronics should register the use of a tripod and automatically deactivate the image stabilizer in this case, but this does not always work reliably. If the image stabilizer remains active, there is a risk of "distorted" stars despite the tripod!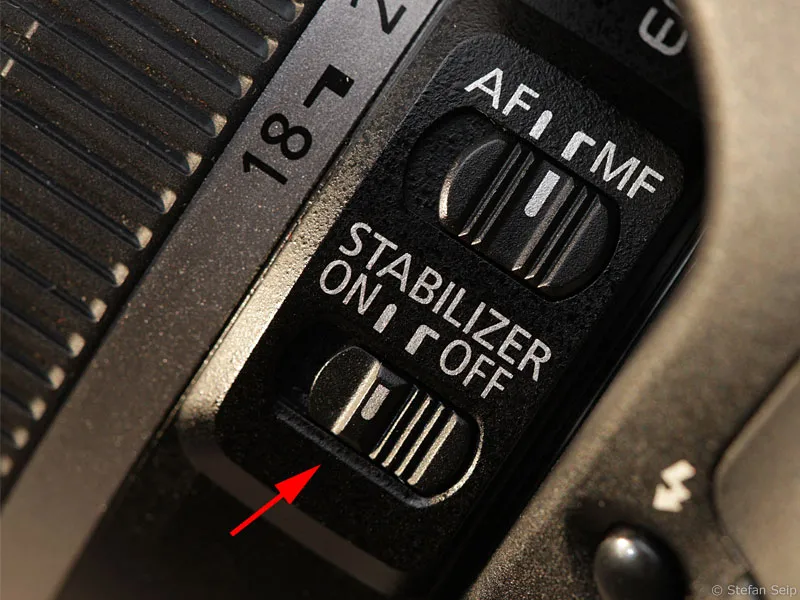
It is better to switch off the image stabilizer when the camera is on a tripod.
"Distorted" stars caused by the image stabilizer when using a tripod.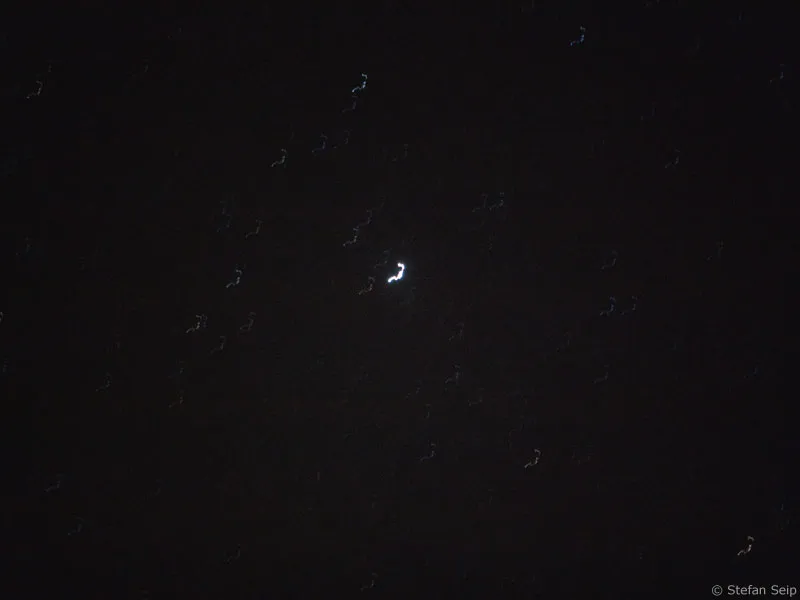
3. taking pictures
One major difficulty is focusing as precisely as possible to "infinity". The autofocus will fail in most cases, even with bright stars, so that only the manual distance setting comes into question.
Unfortunately, the infinity index on some lenses is generally not precise enough.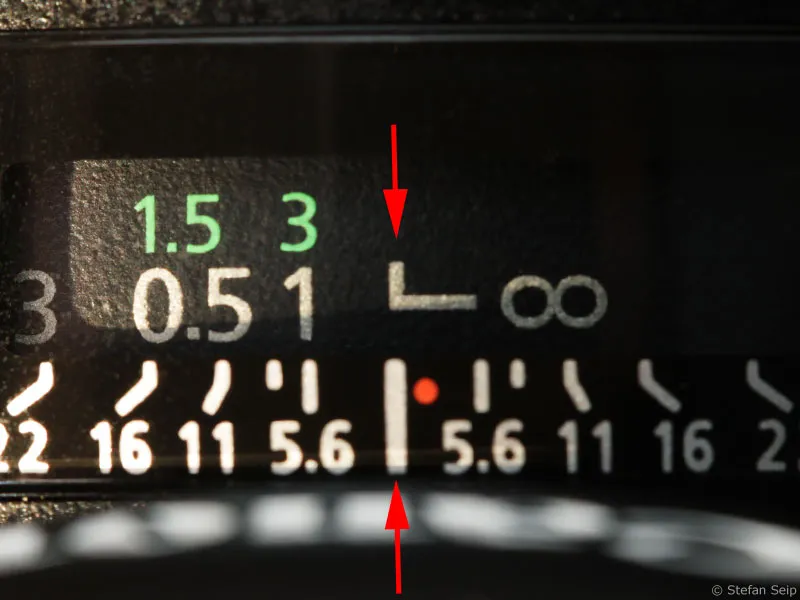
The index mark for "infinity" is not precise enough when searching for the best focus point.
Ideal for focusing are camera models with a "live view" function, where you can aim at a bright star and then focus accurately at high magnification on the camera display.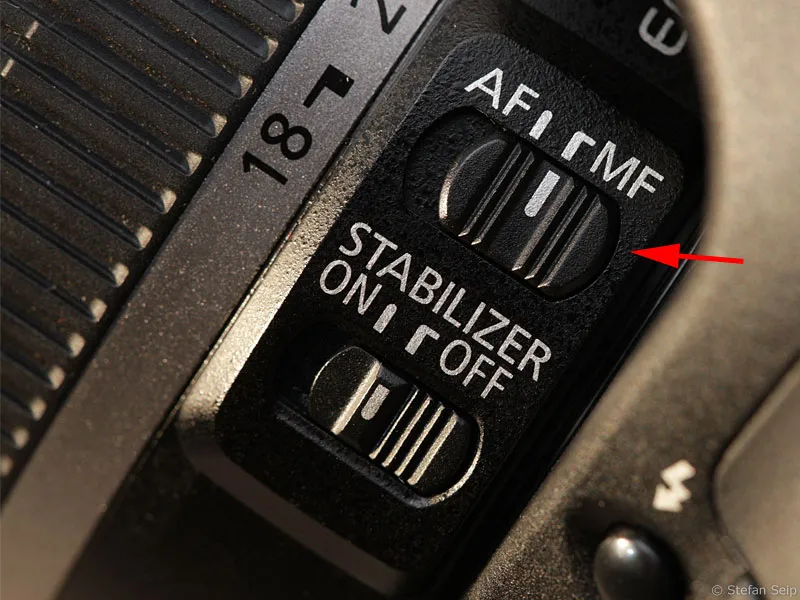
After focusing, the autofocus switch remains on "MF" for manual focus.
Now point the camera at the desired region of the sky. For wide-angle shots, it is highly recommended to include the foreground in the image, for example a landscape or beautiful trees. If you aim at the radiant of a shooting star stream, you will not necessarily increase your chances of capturing bright meteors. The closer a meteor appears to the radiant, the shorter its trail of light will appear, as it is practically flying towards you. Therefore, regions of the sky away from the radiant are also possible where particularly long trails can be seen.
When choosing the focal length, you have to make a decision: If you use a lens with a very wide angle of view, in extreme cases perhaps even a circular fisheye with a 180 degree angle of view, you can image the entire sky. Then you won't miss a bright meteor, no matter where it appears in the sky. The disadvantage is that the image of the tracer will be very small. Another extreme is a telephoto lens, with which you only capture a relatively small area of the sky. In this case, the probability of a meteor passing through your field of view is correspondingly low. However, if you are lucky enough, the trails of light will be large and show a lot of detail. A good compromise can be a normal lens or a slightly wide-angle lens.
If you have more than one camera, you can also consider working with several devices and focal lengths at the same time.
When deciding on a suitable exposure time, it depends on whether you can accept a streaky star image or not. If not, you must limit the exposure time, depending on the focal length used, to the values discussed in Part 1 of this tutorial ("Atmospheric photography at twilight"). If you can live with line-shaped stars, the upper limit of the exposure time is set by the residual brightness of the night sky. Depending on your location and observing conditions, you must avoid at all costs overexposing the sky and having areas with fully saturated pixels.
If you are using a wired or wireless remote shutter release with a lockable shutter release, you can configure the camera to "Bracketing" and set the desired exposure time, in which case you cannot use "BULB" but must opt for a fixed time, which is a maximum of 30 seconds for many camera models. If you now press the shutter release button and lock it, the camera will automatically take one picture after the next until the battery is empty or the memory card is full.
The ultimate success, however, depends on the chance that during an exposure a bright meteor appears at the exact point in the sky that is captured by the camera's angle of view.
Image processing
The necessary processing steps depend largely on the nature of the source material. Therefore, the following explanations are to be understood as a sample and not as a "recipe". If you were to apply exactly the same steps with the same values to other image material, the result could be catastrophic.
First, open the RAW file of your Meteor shot in Photoshop. The "Camera Raw" module appears, in which the image is "developed". Significant improvements can already be achieved here. Switch on the overexposure warning by clicking on the small black arrow on the right above the displayed histogram: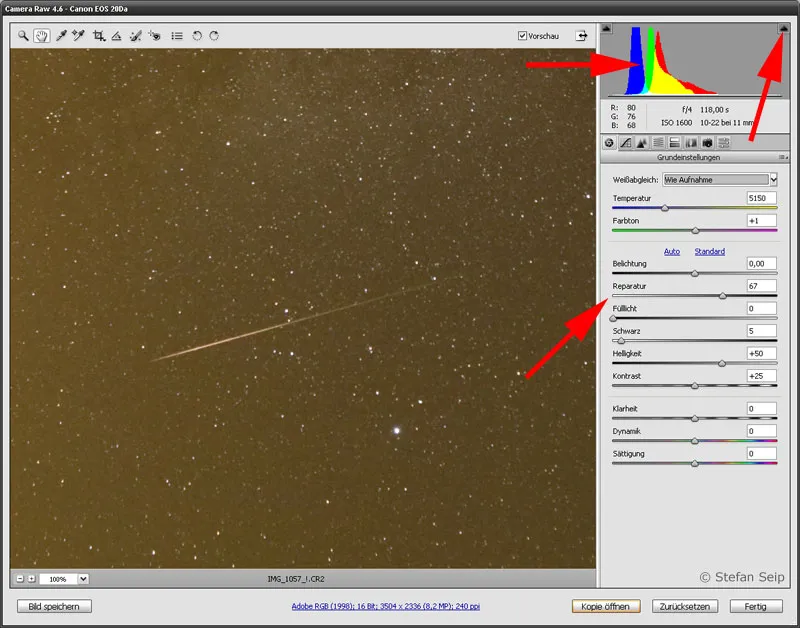
The "Start screen" of Photoshop's "Camera Raw" converter. By moving the "Repair" slider (lower arrow) to the right, overexposed, bright stars can be "rescued" from total saturation if necessary. The light emissions from the cities sometimes cause a brightened sky background, which is often shifted to a reddish color. A look at the image and the corresponding histogram (upper arrow on the left) show this very clearly. The red arrow at the top right shows the small button that you need to click on to identify overexposed regions in the image.
The next step is to remove the color cast. This is done using the Temperature and Tint sliders: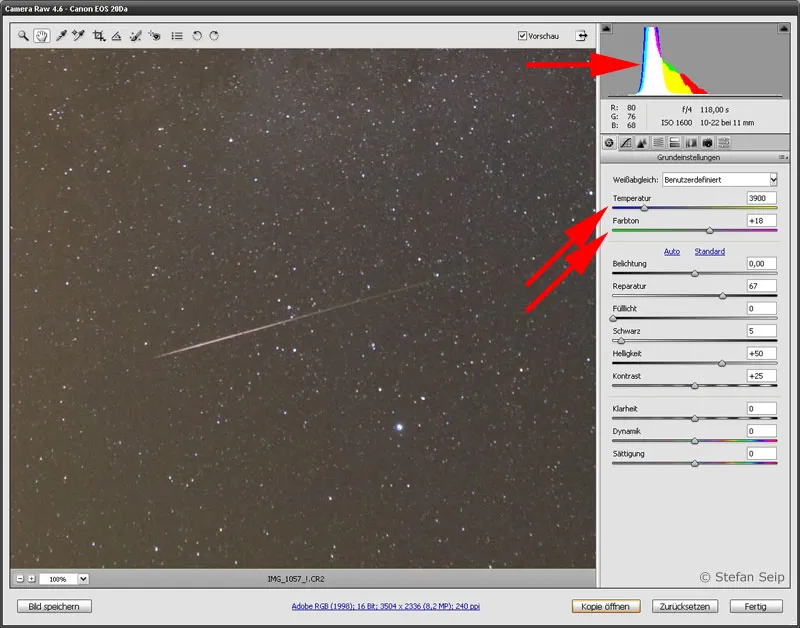
To eliminate the yellow cast, the "Temperature" slider (upper red arrow) has been moved to the left. The "Hue" slider (lower red arrow) was moved to the right in order to obtain a sky background with a neutral color and to align the "mountains of data" of the three histograms for the red, green and blue channels (upper red arrow).
Now click on the third tab of the RAW converter, which is called Details. This is where the image sharpness and noise reduction are adjusted: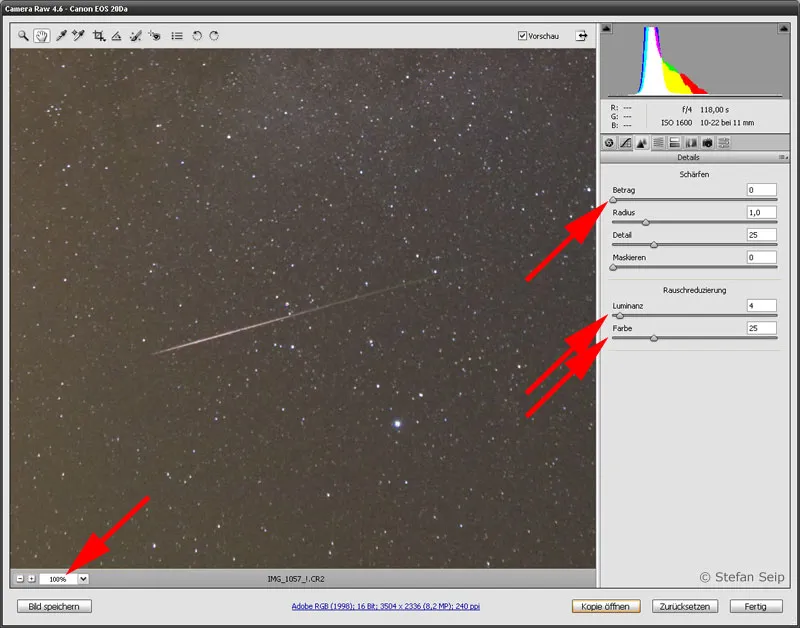
To check the effect of the settings made, it is useful to display the image in "100%" size. To do this, click on the field marked with the red arrow on the left and select "100%" from the list. The arrows on the right show the changed settings.
Sharpening should not be applied, so I have moved the Amount slider (top arrow) all the way to the left. The reason for this is that sharpening the image would also make the noise more visible. With noise reduction, on the other hand, I have combated both luminance and color noise by moving the sliders to the right. Depending on the camera model, exposure time and ISO value, you should decide which values are appropriate by looking at the image in the preview window.
Click the Open image button to complete the "Image development" and make the final corrections in Photoshop.
The heavily brightened sky now looks unpleasant; it is therefore best to take a look at the histogram with the Photoshop command Image>Adjustments>Tone correction... You will first see a combined histogram of all three color channels: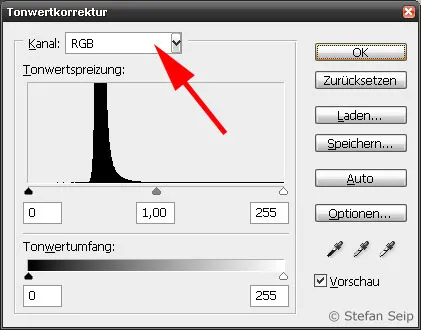
RGB (arrow) means the combination of the red, green and blue color channels.
As an image of the night sky consists mainly of dark sky components, the histogram must not reach its maximum value shifted to the right, as is the case here. Therefore, cut off the histograms of all three color channels on the left side (black point) so that the steeply rising edge of the "data mountain" is close to the intersection point, but is not cut off. Select the individual color channels one after the other and perform this operation in each of the three channels:
After selecting the red channel (upper arrow), I moved the black point (small black marker below the histogram, lower arrow) to the value "59", i.e. just before the start of the rising edge.
Proceed accordingly with the two remaining color channels for green and blue, whereby the amount is of course selected individually for each color channel. The result of this trimming of the histograms is a color-balanced photo with a dark sky and bright stars.
After cropping the RGB histograms, the sky appears dark and in a neutral color.
Small corrections may now be necessary to achieve the final result. For example, a slight increase in contrast with the Photoshop command Image>Adjustments>Gradation Curves...: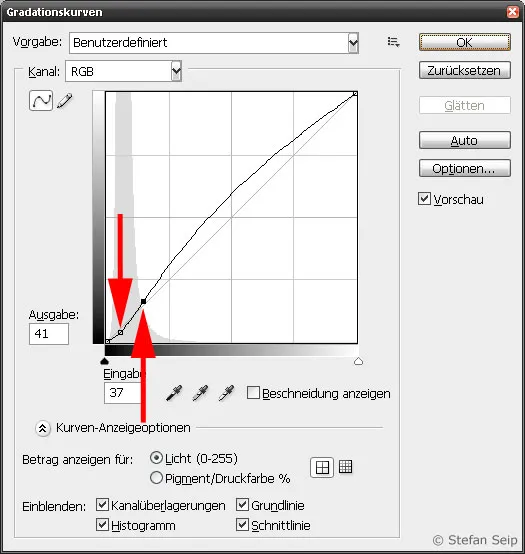
A sigmoid (S-shaped) bending of the gradation curve achieves an increase in contrast. The red arrows mark the positions at which the curve was shifted downwards (left arrow) and upwards (right arrow).
The result of the efforts looks like this: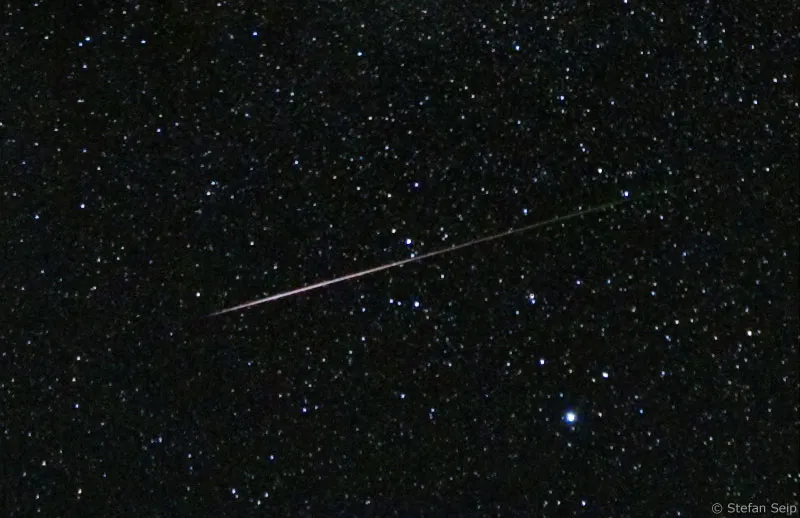
By increasing the contrast, the meteor becomes brighter.
To highlight the colors of the tracer, I decided to increase the color saturation in this image. In Photoshop, select the command Image>Adjustments>Hue/Saturation...
The following dialog box appears: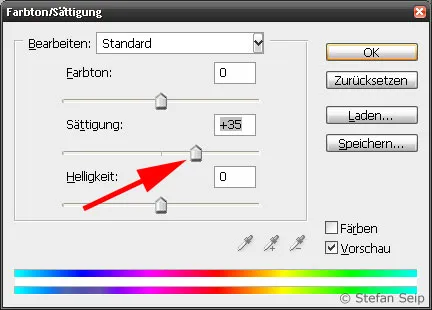
I found increasing the color saturation to +35 to be appropriate. Pay attention to the appearance of the sky, as over-saturating the colors can make it blotchy and uneven in color.
The finished image, which incidentally is a section of the original full image, then looks like this: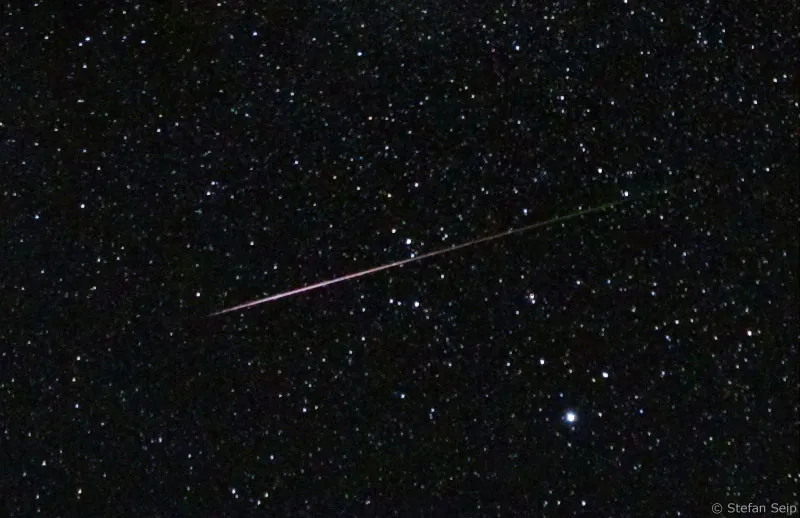
The increased color saturation in this meteor shows an initial green coloration that soon turns reddish.
Sample images
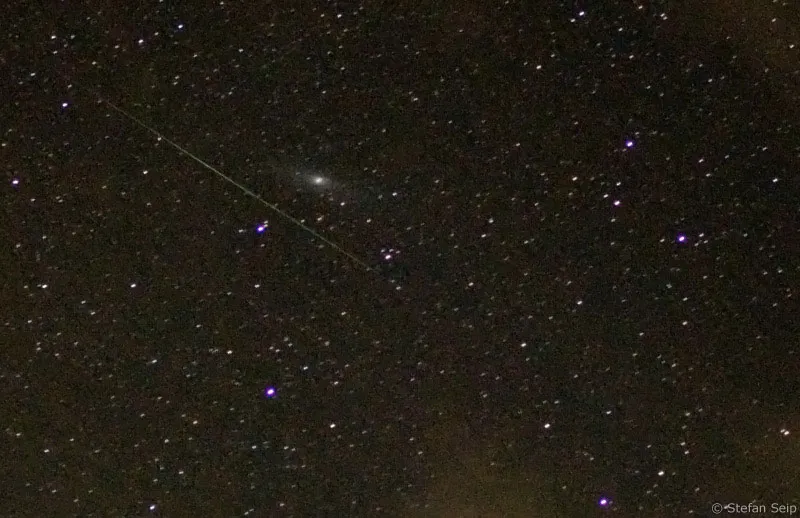
Not a particularly beautiful photo, but I'm showing it because it's a lucky shot. Originally, the image had a "sporty" background: I wanted to try to photograph the Andromea galaxy with ISO 3200 freehand, leaning only against a tree. The exposure time was four seconds at Blender 1:1.4 with a 35mm lens. By chance, a Perseid passed just below the galaxy (high magnification of the entire image field).
Six peresidian meteors and a small "ricochet" (sporadic meteor) against the background of the summer Milky Way. I used a Canon EOS 20Da in August 2005 and a wide-angle zoom with a focal length of 11mm and an aperture of 1:4. Due to bad weather in Germany, I had to travel to Alsace in France for this shot.
A circular fisheye lens with 8mm focal length captures the entire sky in a circular image on a full-frame camera (Canon EOS 5D). Here you can see five meteors of the Perseids and the Milky Way. The Big Dipper can be seen at the bottom of the image.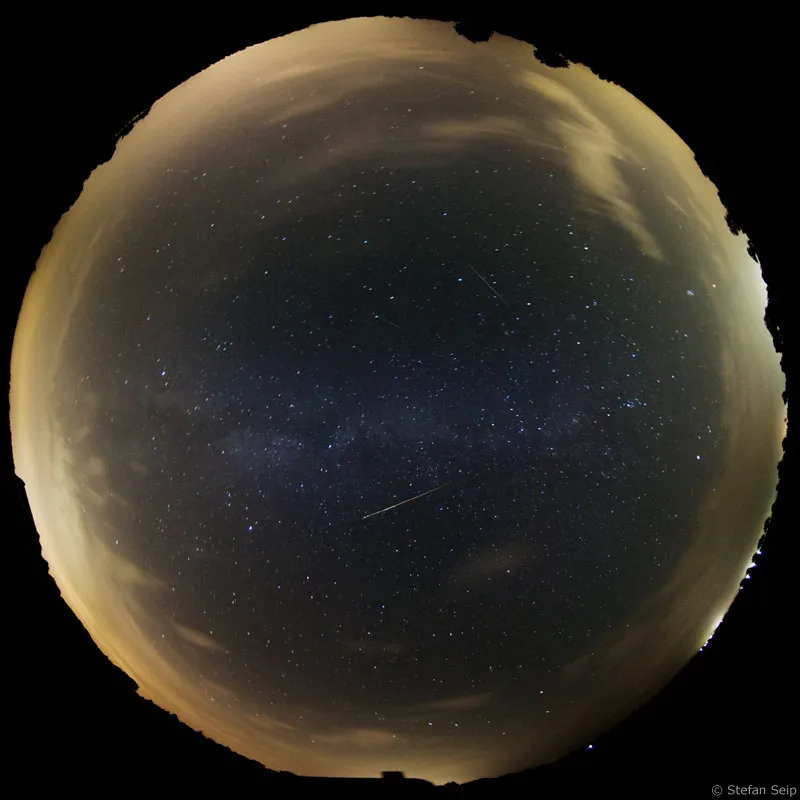
Unfortunately, I wasn't always lucky when it came to taking photos of meteors. Therefore, here are some links to impressive photos by other image authors from the NASA "Astronomy Picture of the Day" (APOD) archive:
http://antwrp.gsfc.nasa.gov/apod/ap081011.html
http://antwrp.gsfc.nasa.gov/apod/ap080911.html
http://antwrp.gsfc.nasa.gov/apod/ap080814.html
http://antwrp.gsfc.nasa.gov/apod/ap080103.html
http://antwrp.gsfc.nasa.gov/apod/ap070812.html
http://antwrp.gsfc.nasa.gov/apod/ap061118.html
http://antwrp.gsfc.nasa.gov/apod/ap061023.html
http://antwrp.gsfc.nasa.gov/apod/ap041222.html
http://antwrp.gsfc.nasa.gov/apod/ap040813.html
http://antwrp.gsfc.nasa.gov/apod/ap031116.html
http://antwrp.gsfc.nasa.gov/apod/ap020816.html
http://antwrp.gsfc.nasa.gov/apod/ap011122.html
http://antwrp.gsfc.nasa.gov/apod/ap991202.html
Note on our own behalf:
All image examples used are not photomontages, but were created in the manner described in the tutorial.
