In today's digital world, it is essential for e-commerce companies to comply with legal regulations, especially when it comes to value-added tax. If you are liable for VAT in Germany, you have probably already received a value-added tax identification number (VAT-ID). In this guide, I will explain to you how you can easily and quickly enter your VAT ID in your Shopify store to ensure that you provide all the necessary information for correct billing.
Key Takeaways
- It is important to enter your VAT ID in your Shopify store to comply with legal requirements.
- You can add your VAT ID through the billing settings in Shopify.
- This information is particularly relevant if you deliver internationally or offer digital products.
Step-by-Step Guide
To enter your VAT ID in your Shopify store, please follow the instructions below.
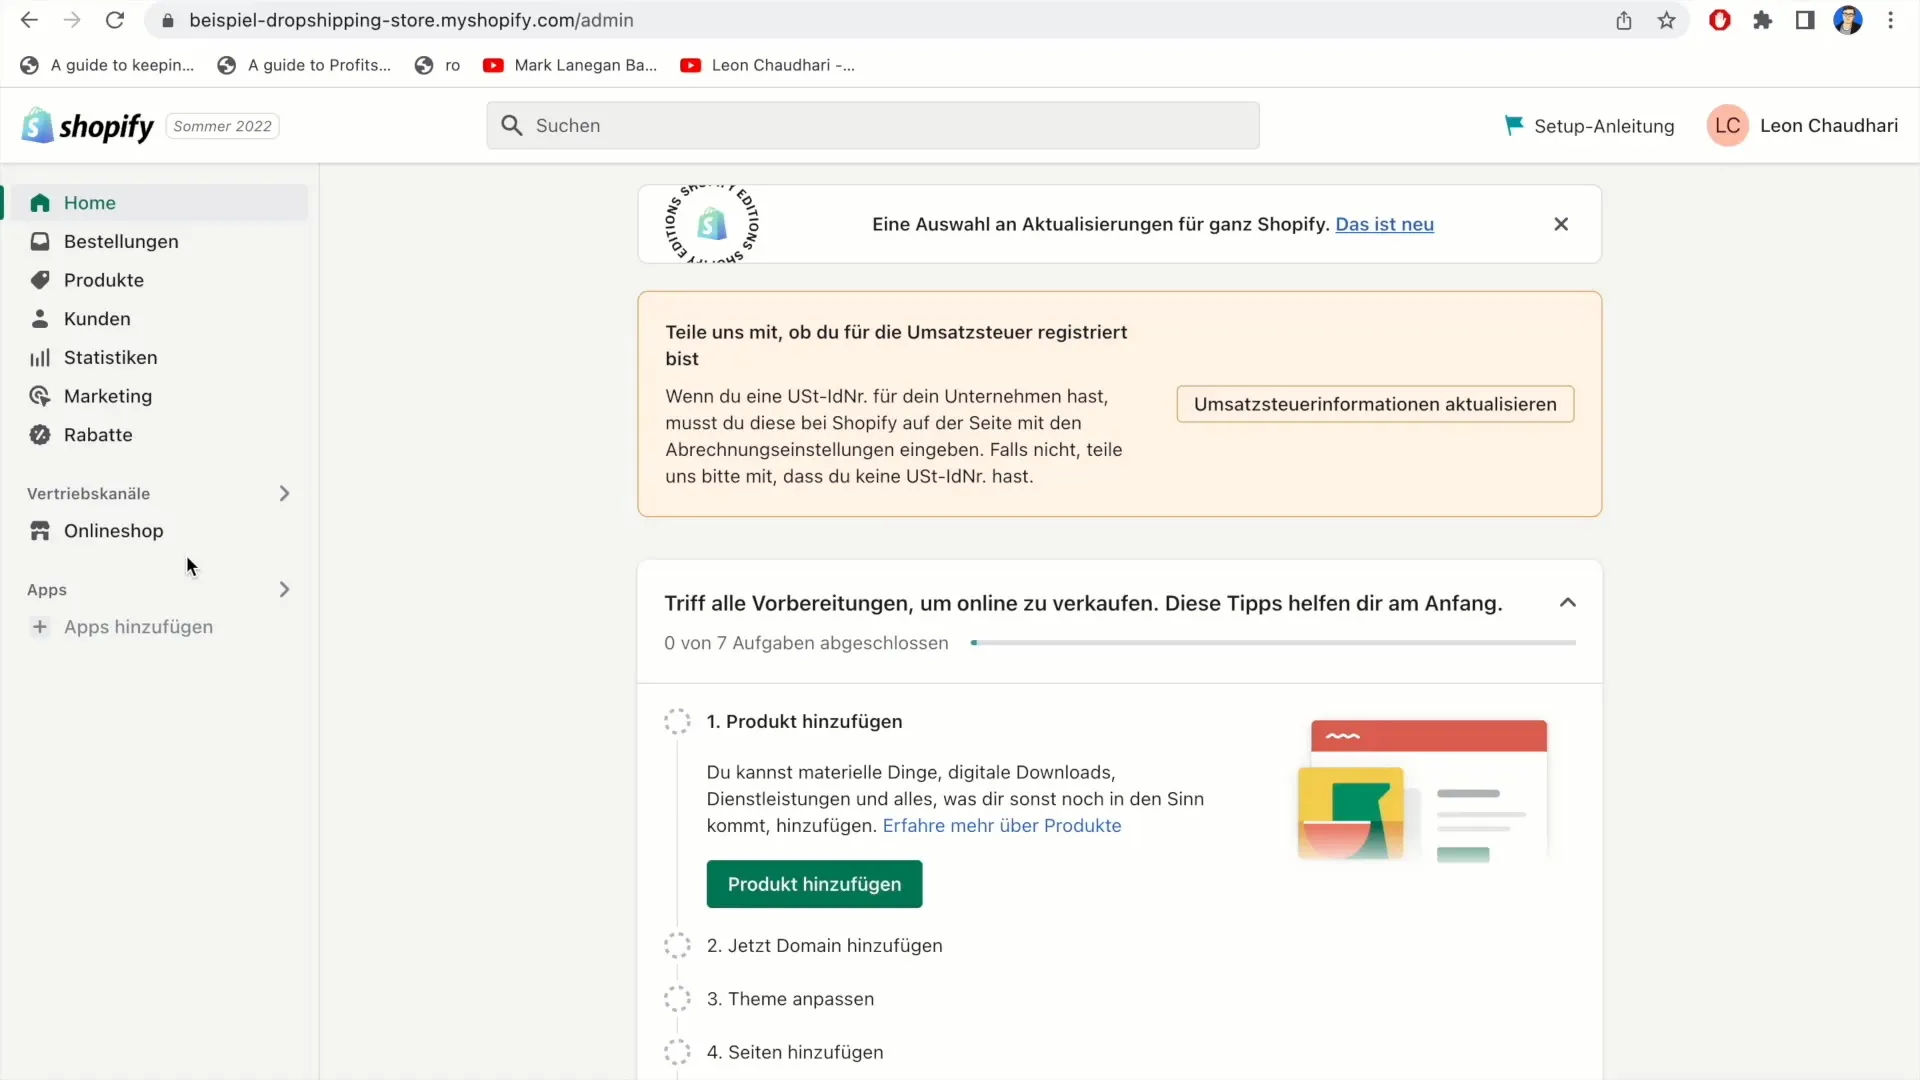
Step 1: Access the Dashboard Start by logging into your Shopify account. You will arrive at the dashboard of your online store. This is the central area from which you can access all settings.

Step 2: Check VAT Registration To add your VAT ID, you must first check if you are registered for value-added tax. In the dashboard, you will see a message asking if you are liable for VAT. It also states that you should enter a VAT ID if available.
Step 3: Update VAT Information Click on the section "Update VAT Information." This is the area where you can add or update your VAT ID. When you click on this link, a new window or page will open listing the required information.

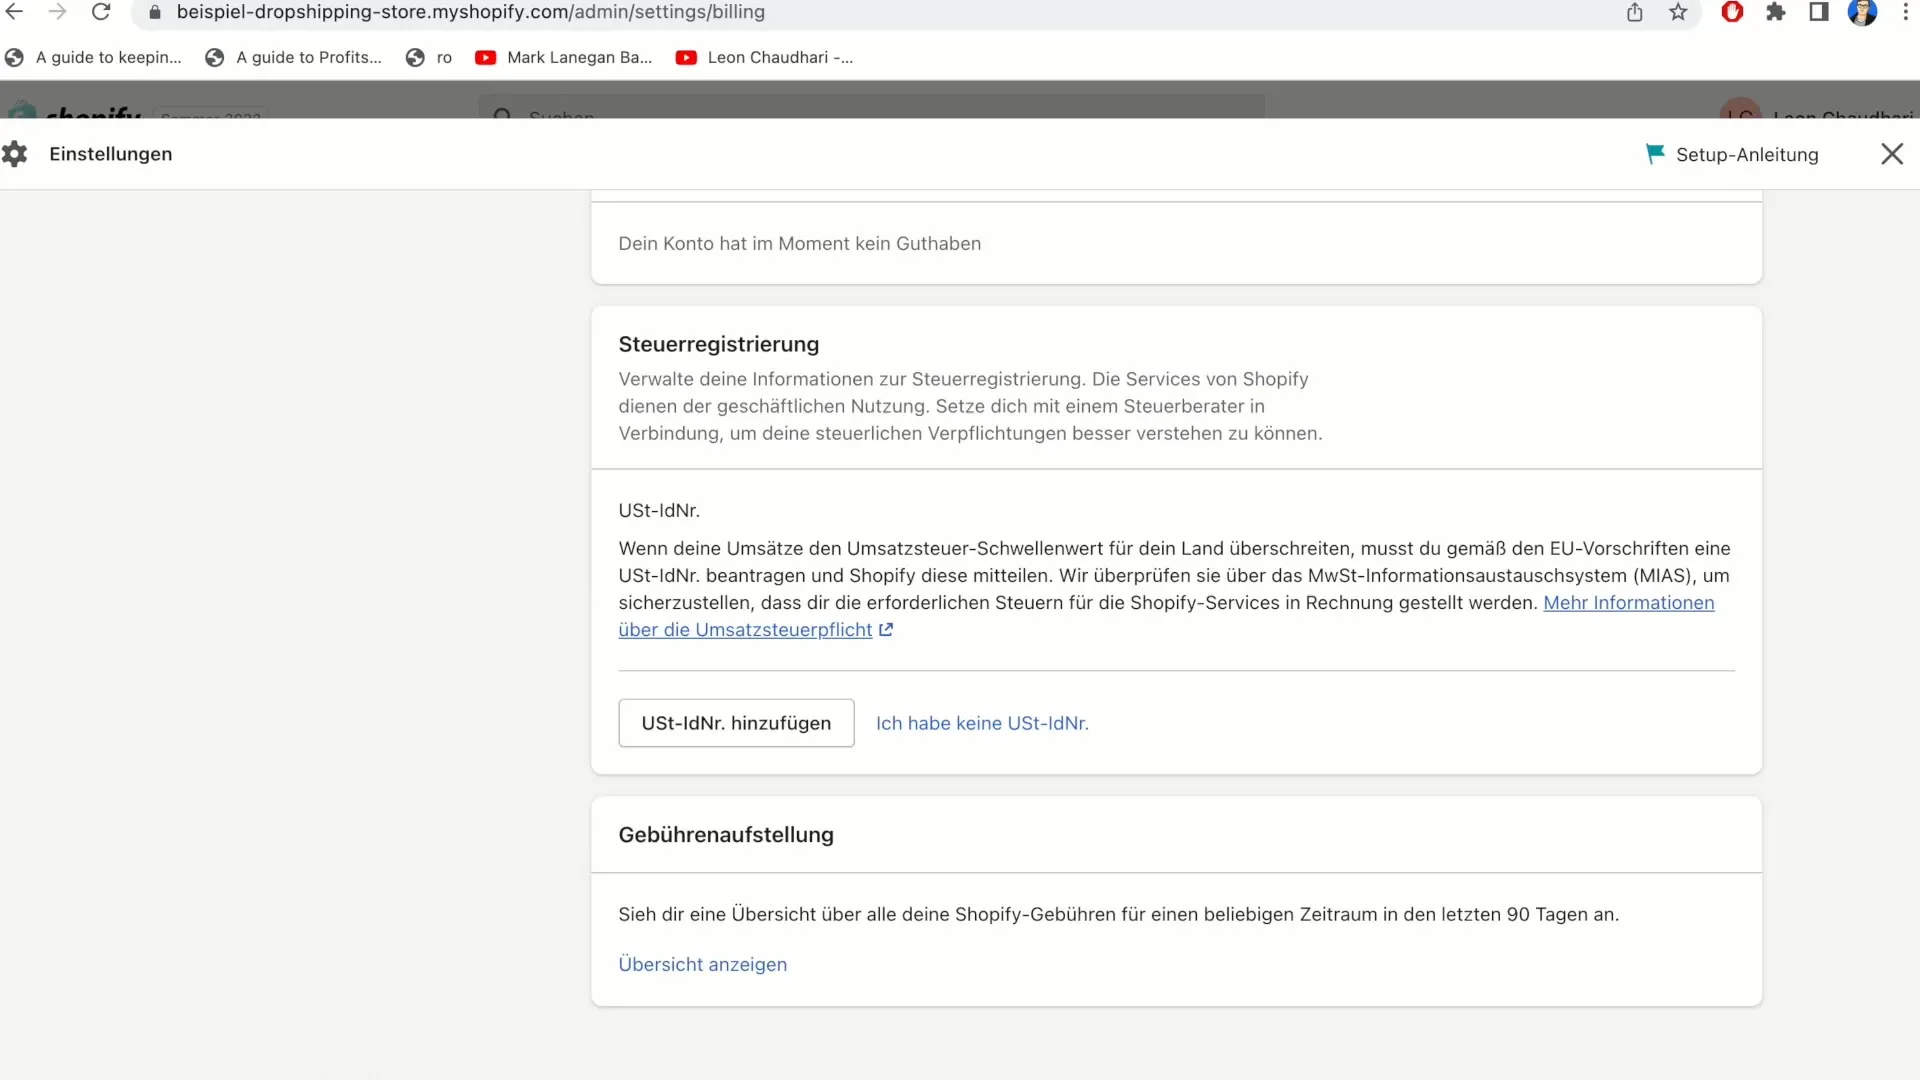
Step 4: Scroll to the Input Field In this section, you may need to scroll down to find the input field for the VAT ID. This field is typically located at the bottom of the page and is specifically designed for entering your VAT ID.
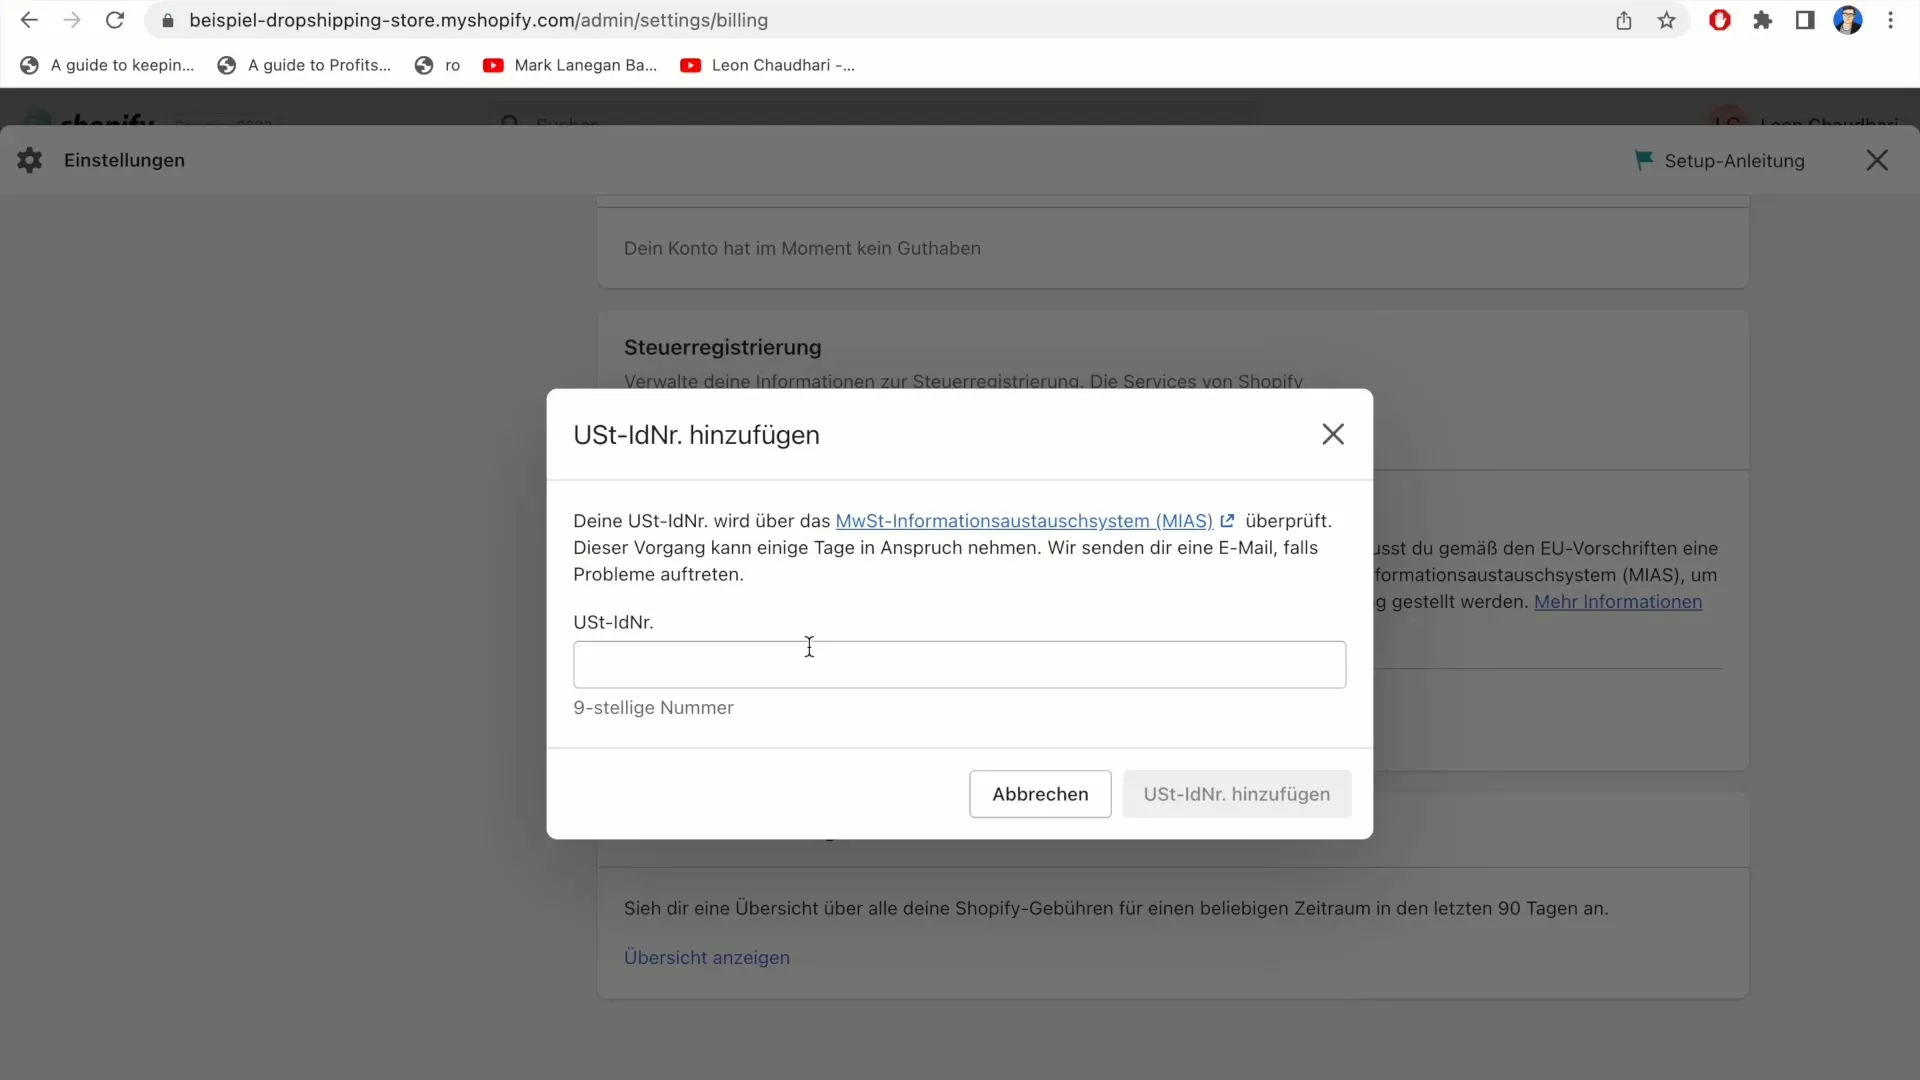
Step 5: Add VAT ID Click on "Add VAT ID." If you do not have a VAT ID, you have the option to indicate this. If you have a VAT ID, enter it in the designated field. Ensure the number is entered correctly as it is crucial for billing.
Step 6: Save VAT ID After entering your nine-digit VAT ID, click on "Add VAT ID Number" to save the entered ID. You should then receive confirmation that the ID has been successfully entered in your Shopify store.

Step 7: Review and Completion After adding your VAT ID, double-check if all details are correct. This is particularly important to ensure that your future billings are handled properly.
Summary
Entering the value-added tax identification number in your Shopify store is a simple yet crucial step to meet legal requirements. With this step-by-step guide, you can ensure that your tax information is always up to date. Remember to review this information regularly, especially if your business activities change.
Frequently Asked Questions
What is a value-added tax identification number?A VAT ID is a unique identification for taxable companies used for tax billing purposes.
Why is the VAT ID important?The VAT ID is important for legal and tax purposes and must be integrated into your shop to ensure correct billing.
What happens if I do not have a VAT ID?If you do not have a VAT ID, you can indicate this to Shopify, and no value-added tax will be recorded in your bills.


