To work really efficiently and retain control over processes that run automatically in the background (e.g. when importing or exporting files), you should check the default settings of Acrobat 11 and adapt them to your own requirements if necessary.
You can open the window for editing the default settings via the Edit menu or the shortcut Ctrl+K.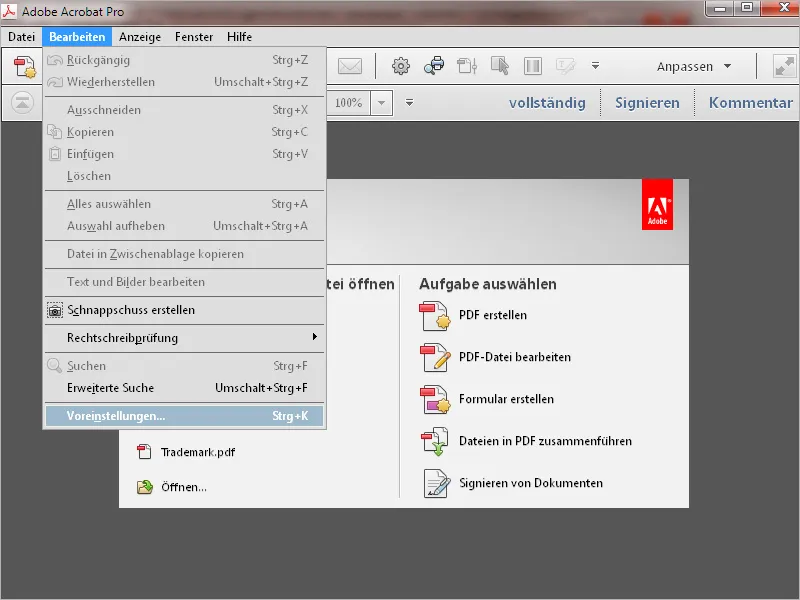
Here you will find a list of categories on the left-hand side and all the setting options for the selected entry on the right-hand side.
In this tutorial, I will not go into every option in detail, but rather pick out a few as examples. Often the description itself is self-explanatory, in other cases simple trial and error helps or the context requires additional familiarization with the topic in question (e.g. colour management).
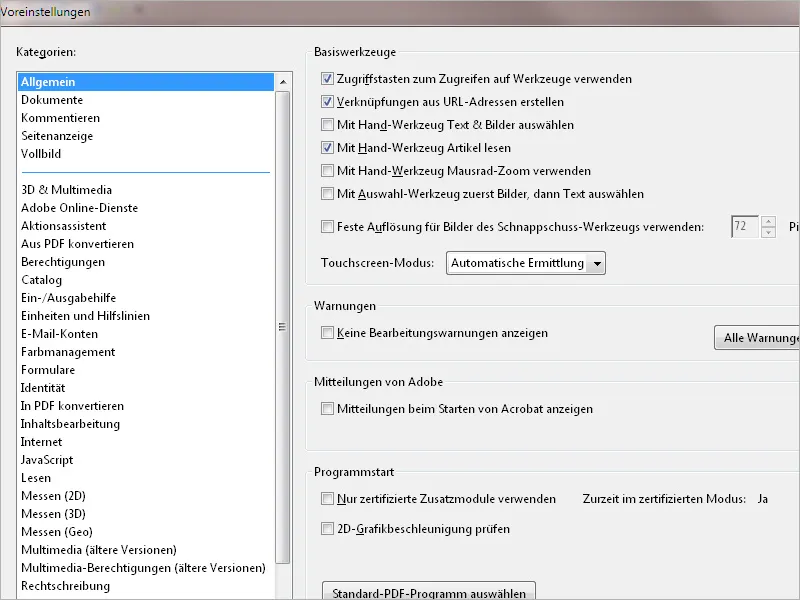
In the General category in the Warnings section, somewhat advanced users can prevent security queries and warnings from stealing their time on all possible occasions (e.g. when deleting a page from a multi-page document) by ticking the Do not show editing warnings checkbox.
The Select default PDF program button at the bottom takes into account the possibility that you may have both the full version of Acrobat and - for whatever reason - the free Acrobat Reader installed. In this case, you can use this setting to decide in which program version a PDF document should be opened.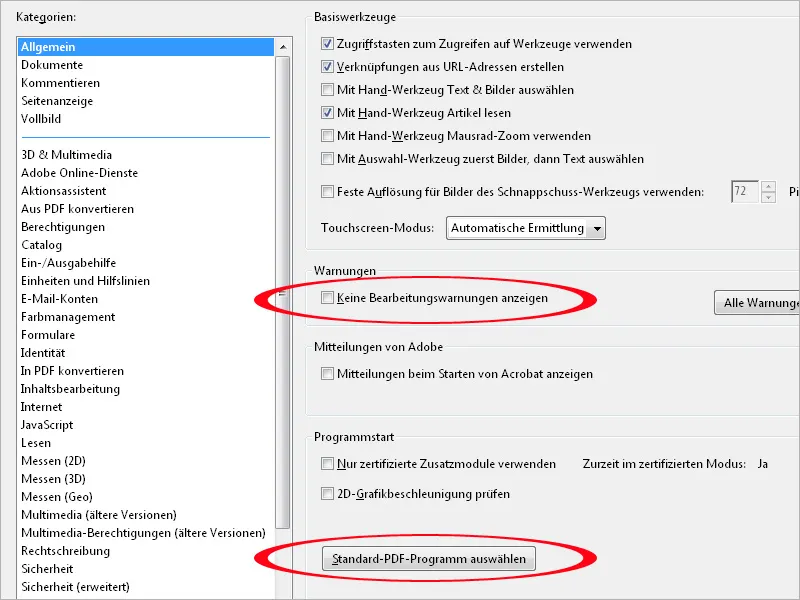
In the Documents category, you can define the number of entries in the list of recently used documents, which is displayed on the start screen when only the Acrobat program window is open, but not a document.
Other interesting options are offered further down in the Hidden information section:
The background to this is the fact that every file contains invisible meta information such as the author, hidden text, comments, possibly layers or file attachments with potentially confidential content or personal information, the unintentional disclosure of which should be prevented.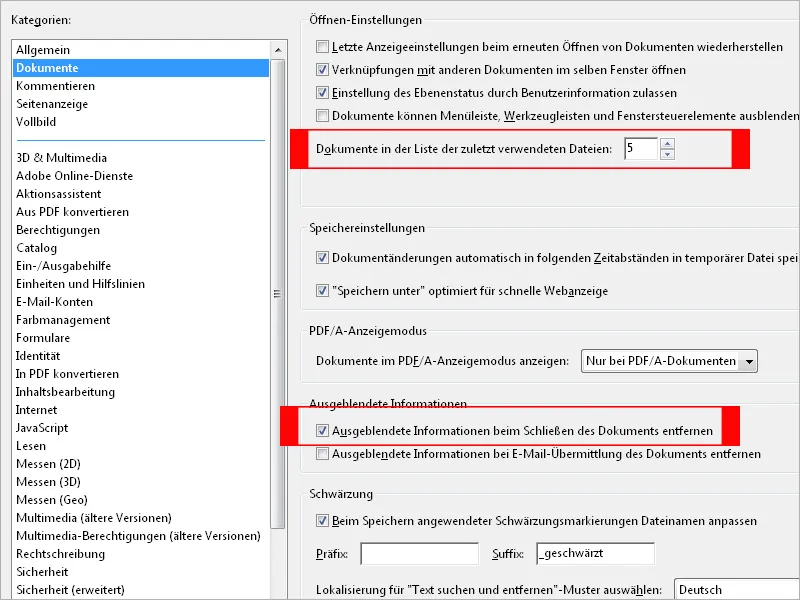
If one of the two options is activated (i.e. the removal of this hidden information either when closing or when sending the file by email), a new dialog will appear when the respective action is carried out, in which you must actively select whether this information should actually be removed or not to be on the safe side. In this way, you can also specifically exclude documents from this security routine if required.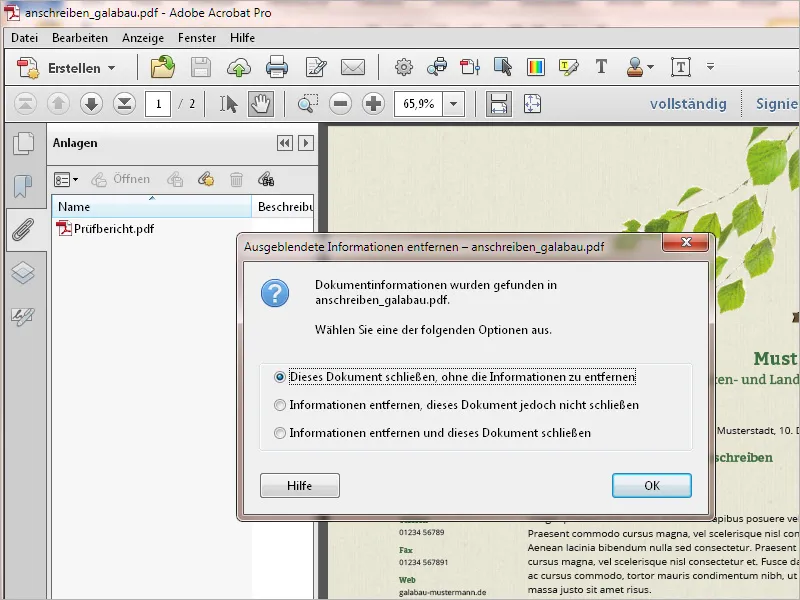
In the Comment category, you can enter the font and size for the comments. If the default font size of 10 pt is too small for you, you can change this here.
The checkbox Hide comment popups when comment list is open has the effect that the comments placed in the small comment boxes on the document are then only displayed in the comment bar on the right-hand side of the screen (if you show the comment bar ).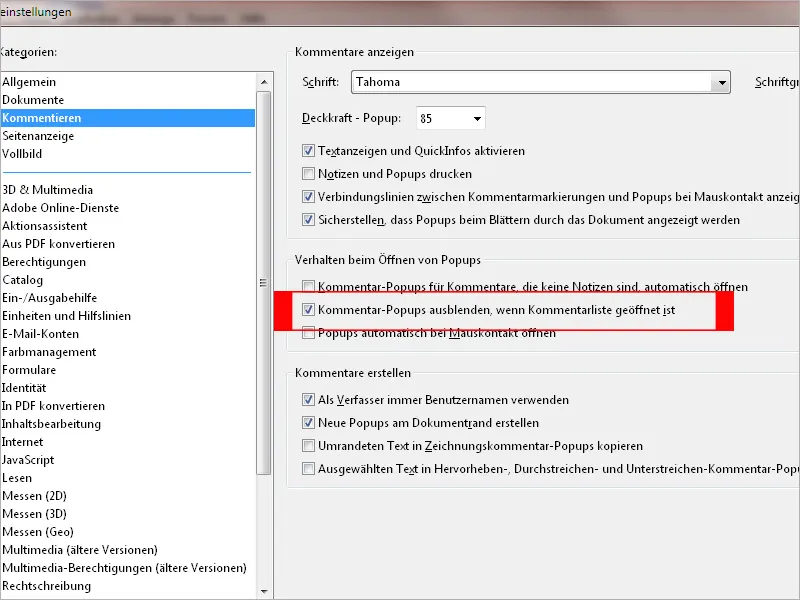
If you uncheck the box, comments marked in this list will also be displayed in the comment boxes on the document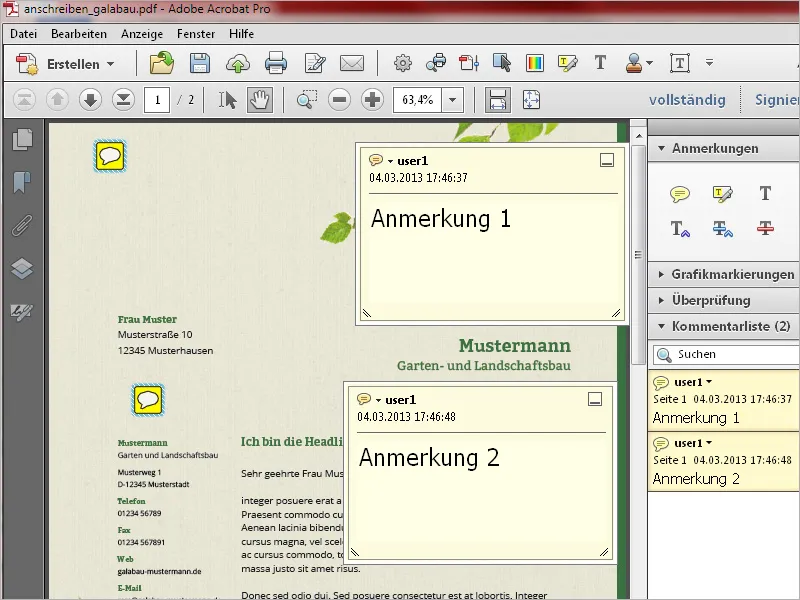
In the Page display category, you can set whether a document should be displayed on one or two pages and as a single or continuous page. It is best to leave the default setting at Automatic and only switch to the desired mode via the Display>Page display menu if required. The difference between single page and continuous is that the next page is displayed immediately when scrolling in the first case, while the transitions between the pages remain visible with the continuous setting.
For a better overview when opening a document, you can also set Window size instead of Automatic in the Zoom field - this will give you a view of the entire page or double page and you can later zoom into the desired areas.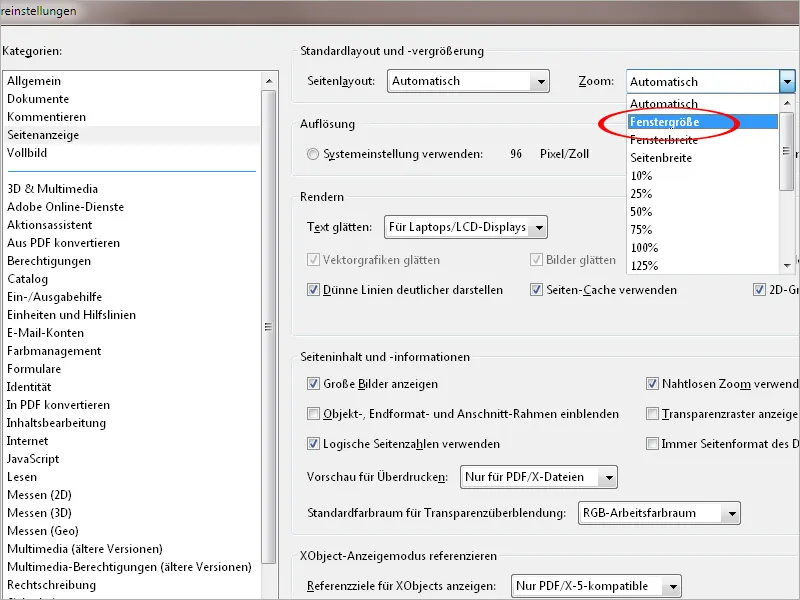
An important setting if you want to subsequently edit the text of PDF files is the Use local fonts option. The checkbox is activated by default. However, when editing text, this means that the fonts with the same name installed on the system are used instead of those embedded in the document. This results in font substitution. However, as fonts with the same name can also have differences, you should deactivate this checkbox to avoid problems.
By activating the Show object, final format and bleed frame checkbox, you can display the bleed created for a document (trim and bleed box), which is an important prerequisite for printing.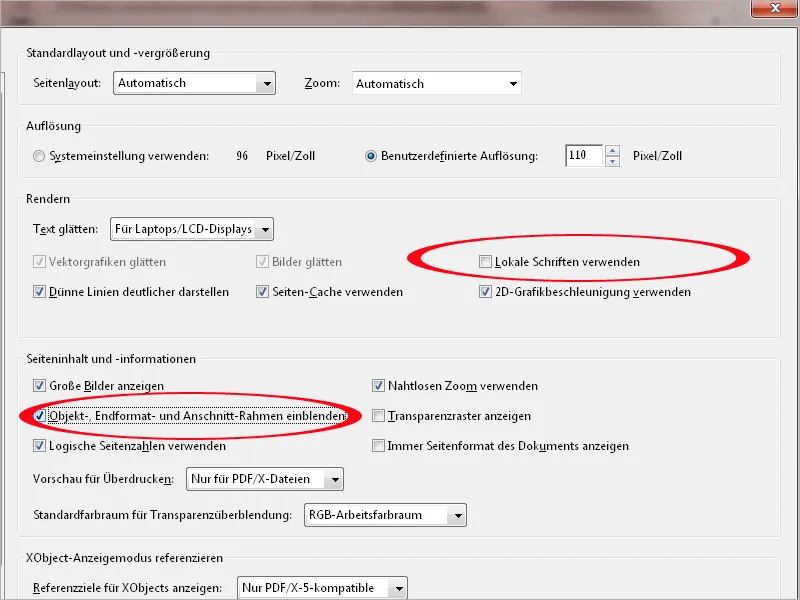
In the Full screen category, you can set how Acrobat should handle this display type. For example, a message is displayed by default if you want to open a PDF file that the creator has created so that it is immediately opened in full-screen mode. If the message annoys you, simply remove the tick from the checkbox.
It is best to try out the settings in the full-screen navigation area yourself (shortcut Ctrl+L). Simply press Esc to exit this mode, use the arrow keys to navigate forwards and backwards and endless causes the first page to appear again after the last page. You can also have Acrobat scroll automatically and set the desired dwell time.
The less purist user may also like the animated transition effects when scrolling in full-screen mode, which can be selected from the drop-down menu at the bottom.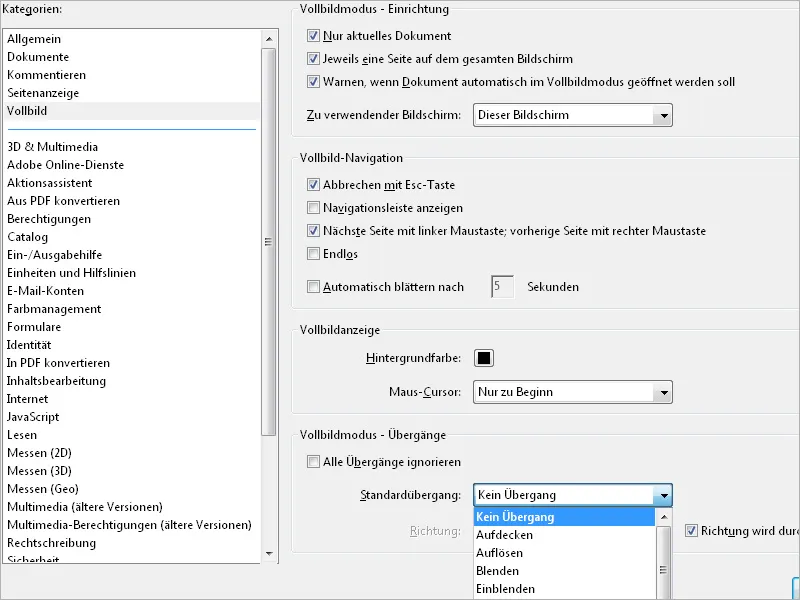
In the Convert from PDF category, you can make important settings for the way in which a PDF file is saved in another file format, e.g. as JPEG, TIFF etc. (see the middle list Convert from PDF) via the File>Save as dialog. From the wealth of possibilities, I will pick out the frequently used JPEG format. To do this, select the file format in the middle field and then click on the Edit settings button.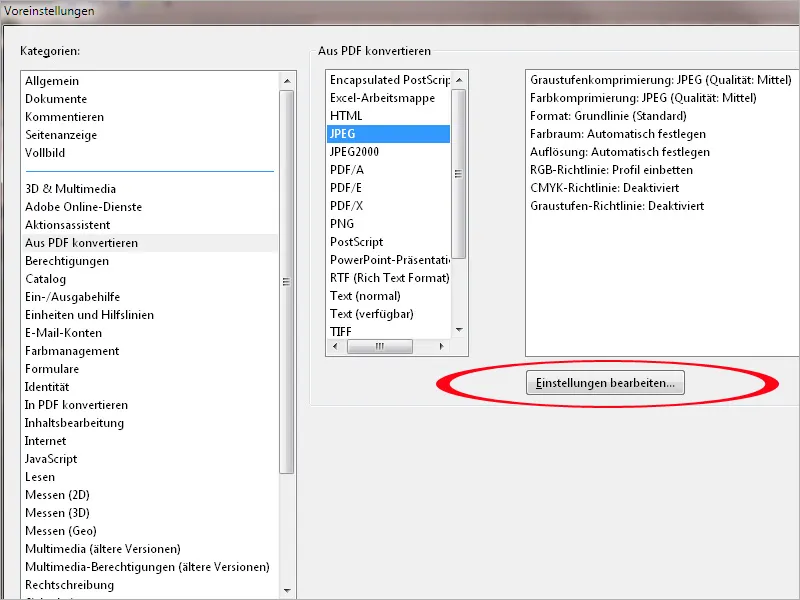
In the window that opens, you can now set the JPEG quality to at least High in the interests of good playback. The default setting is medium, which would of course limit the quality of the output result. Such details alone make it clear how important it can be to carefully check the default settings.
The profiles for the color spaces (RGB, CMYK and greyscale) should be embedded and the conversion to a color space should take place automatically so that all options remain open for later use.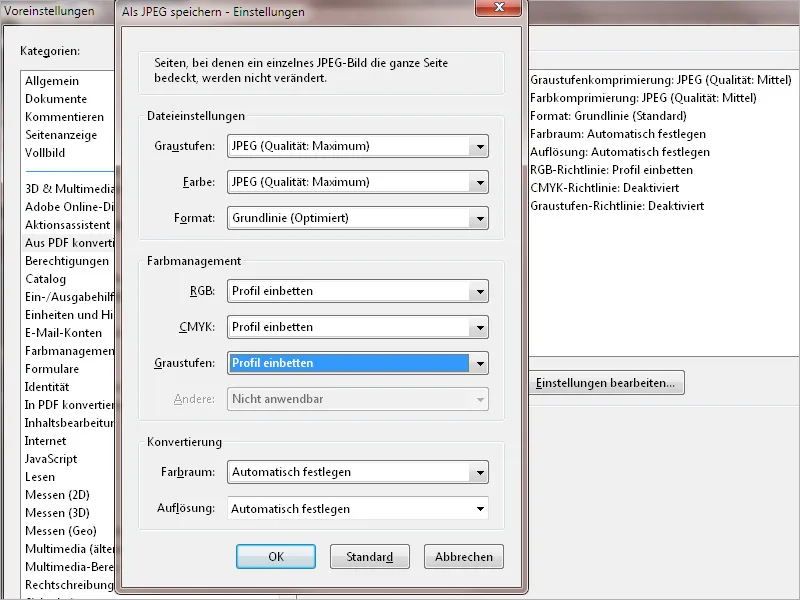
The reverse approach is taken via the Convert to PDF category. Here, the modalities are defined according to which a file is converted to PDF format via the File>Create>PDF from file dialog, using the PNG format as an example. For a satisfactory result, lossless compression with a high quality level must also be ensured here. Embedded profiles are retained (CMYK is not applicable in this case as it is not supported by the PNG format).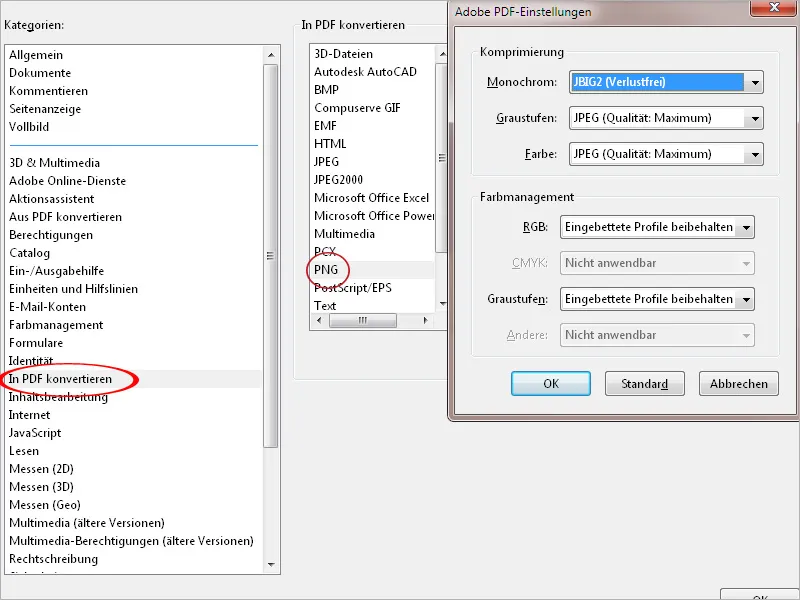
The Permissions category provides a setting option for handling file attachments that are not PDF files.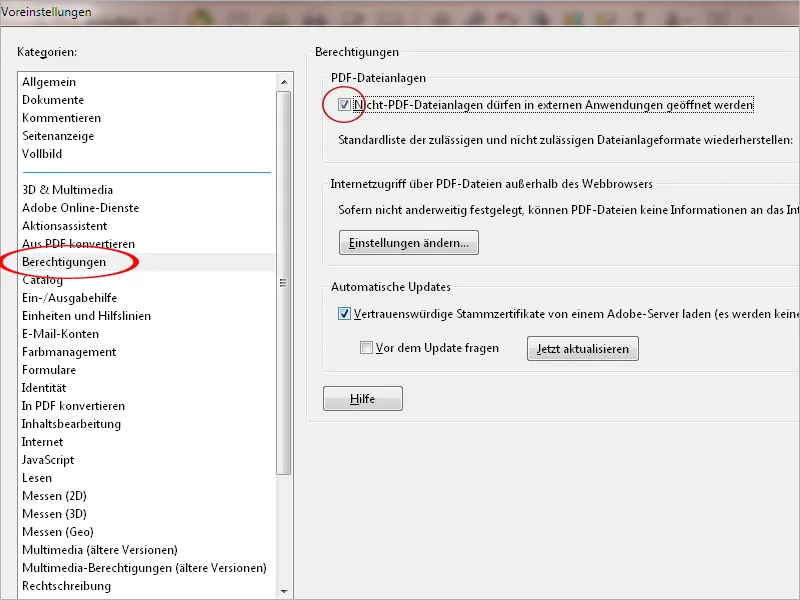
If the checkbox is unchecked, the error message shown below appears when opening a file attachment that is not a PDF file. This is intended to increase system security, as otherwise malicious code could enter the computer in this way, e.g. via an infected Office file.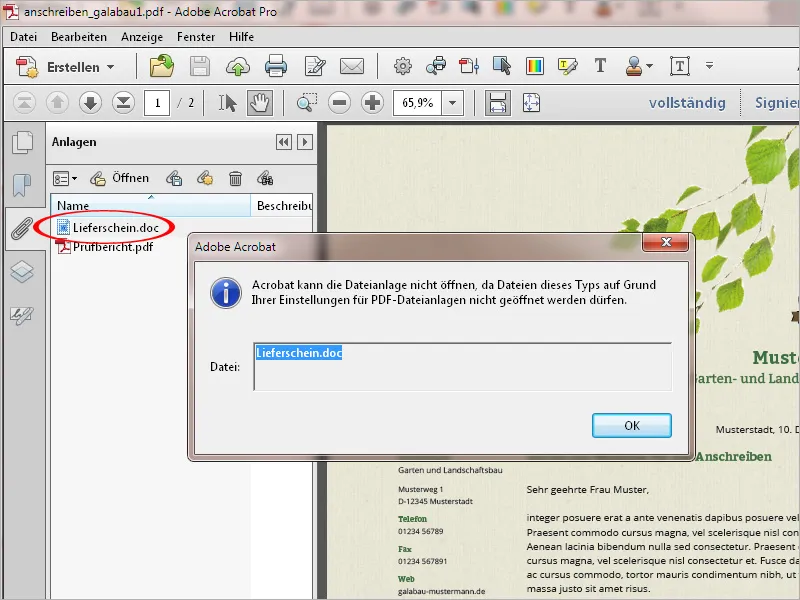
On the Units and guides tab, you can make settings for the units of measurement and distances of the guides of the layout grid. You can show and hide this with the shortcut Ctrl+U and can thus assess the placement of the layout elements and their distances to each other and to the page margins more precisely.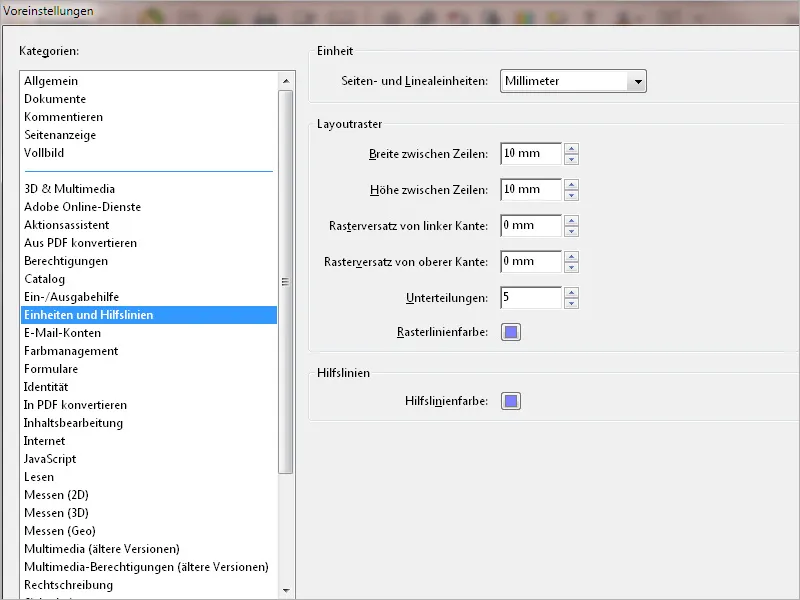
After the settings shown above, the layout grid then appears as a 10 mm box with 5 subdivisions of 2 mm each. In this way, dimensions and spacing can be determined more quickly.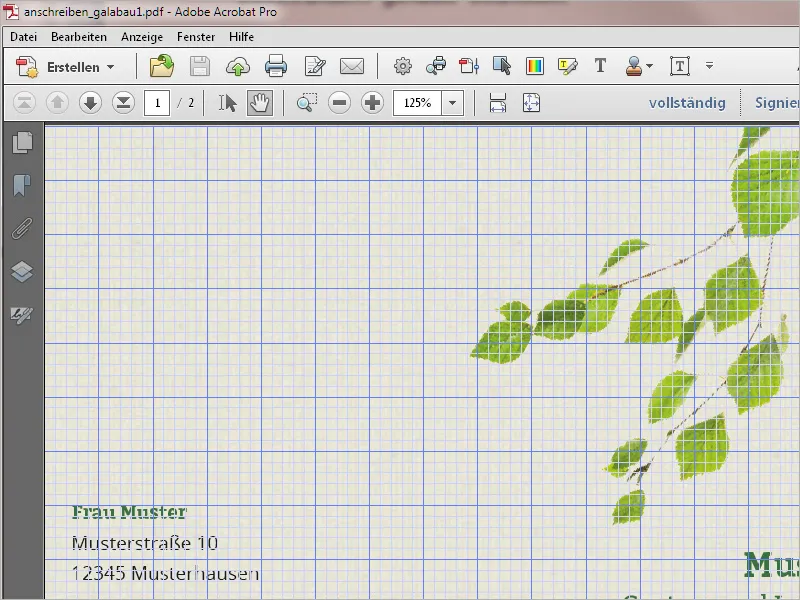
You should also take a look at the color management settings. The basic settings for this are made in Photoshop and are then synchronized with all Creative Suite applications using Adobe Bridge. This procedure has already been documented elsewhere, so I won't go into it in detail here. However, you should check again in the Acrobat preferences that the correct working color spaces are stored for screen and print output.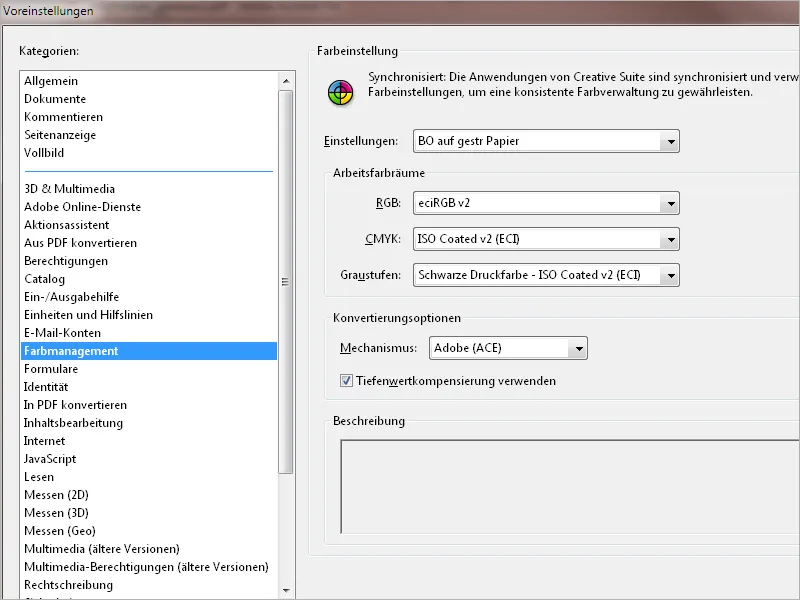
On the Identity tab, you can enter your name and other personal information, such as your e-mail address, for exchanging PDF files with other users in order to facilitate communication.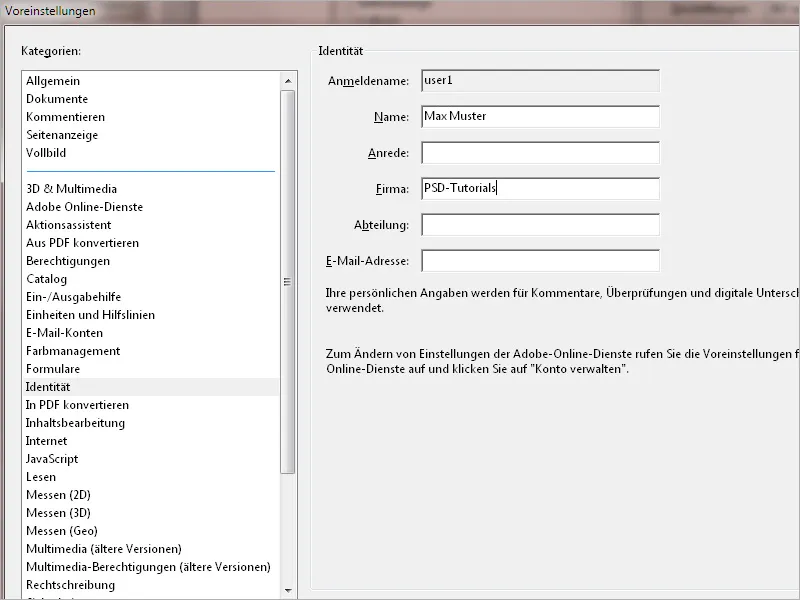
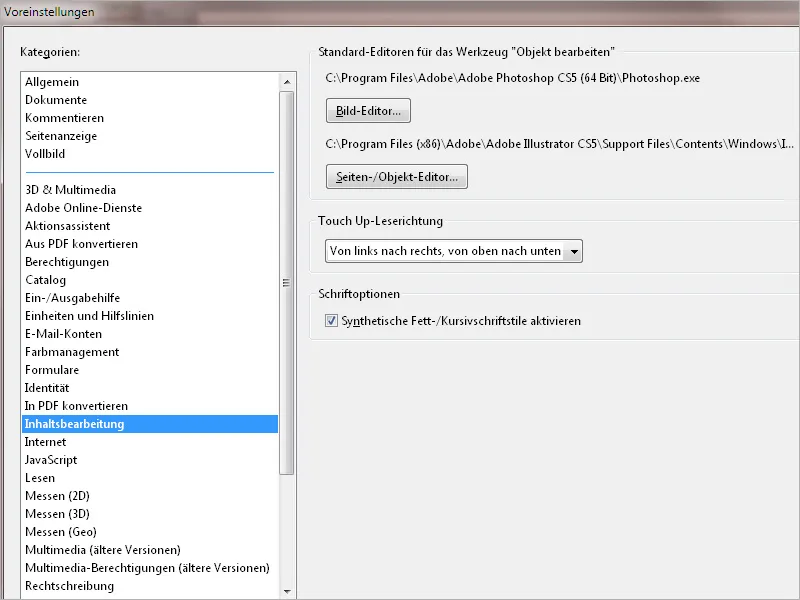
For the subsequent editing of images or objects in a PDF file, the relevant programs can be set in the Content editing category. If the Adobe Creative Suite is installed, Acrobat automatically enters the editors Photoshop and Illustrator. If you use other tools, you can select them using the Image or Object Editor buttons.