In this tutorial, you will learn how to synchronize music animation in Adobe After Effects using the Linear-Expression. We will focus on how to convert amplitudes of your music into scaling values to achieve dynamic and engaging visual effects. This tutorial is suitable for both beginners and advanced After Effects users looking to refine their animation techniques.
Key Takeaways
- Understand the concept of Linear-Expression and its application for transforming value ranges.
- Learn how to manipulate the parameters of the Linear-Expression to achieve the desired scaling results.
- Demonstrate your understanding by applying the knowledge to different examples.
Step-by-Step Guide
Step 1: Setting up the Slider
Before working with the Linear-Expression, add a slider to your composition representing the values of your music track. Create the slider and make sure it is named correctly, as you will refer to it later in the expression.
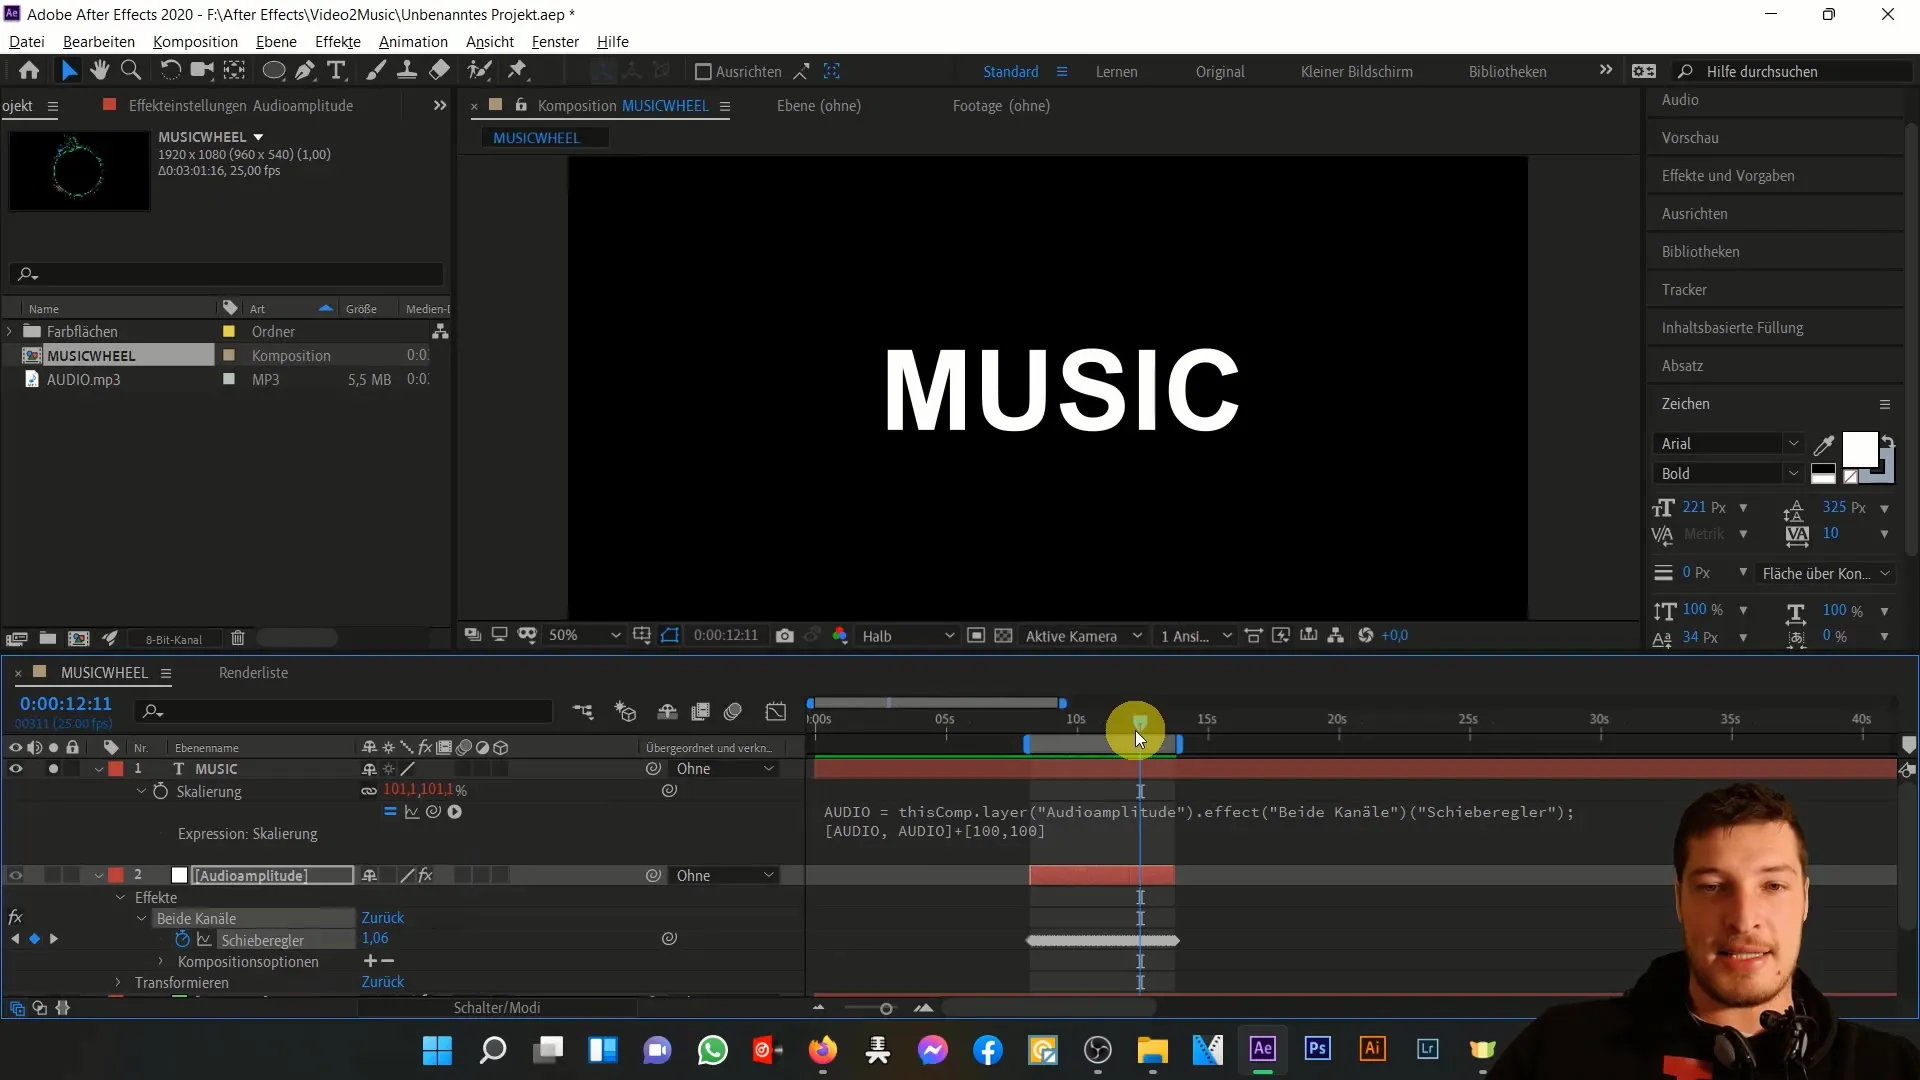
Step 2: Checking the Value Range
Examine closely how the values are scaled on the slider. Let's consider a range from 0 to about 50 units. The goal is to trigger scaling only when reaching maximum values of around 50 units.
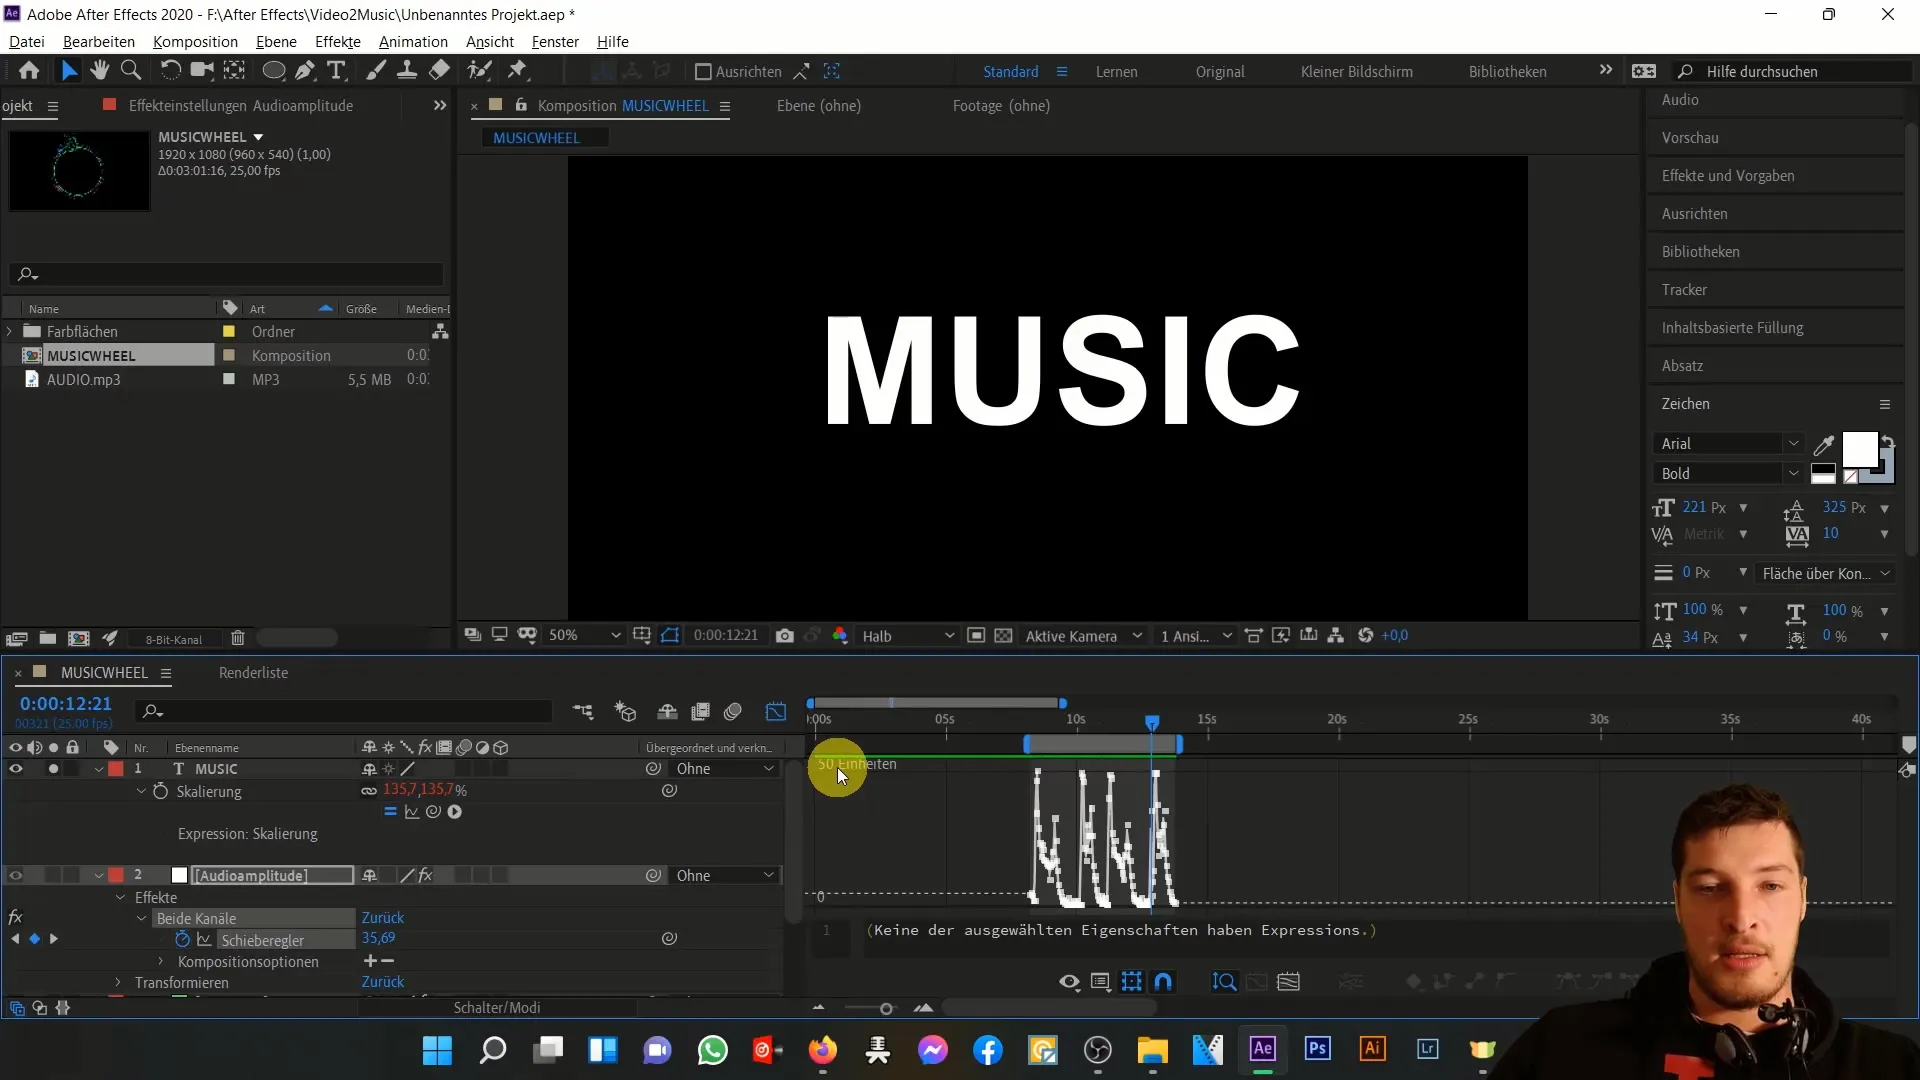
Step 3: Applying the Linear-Expression
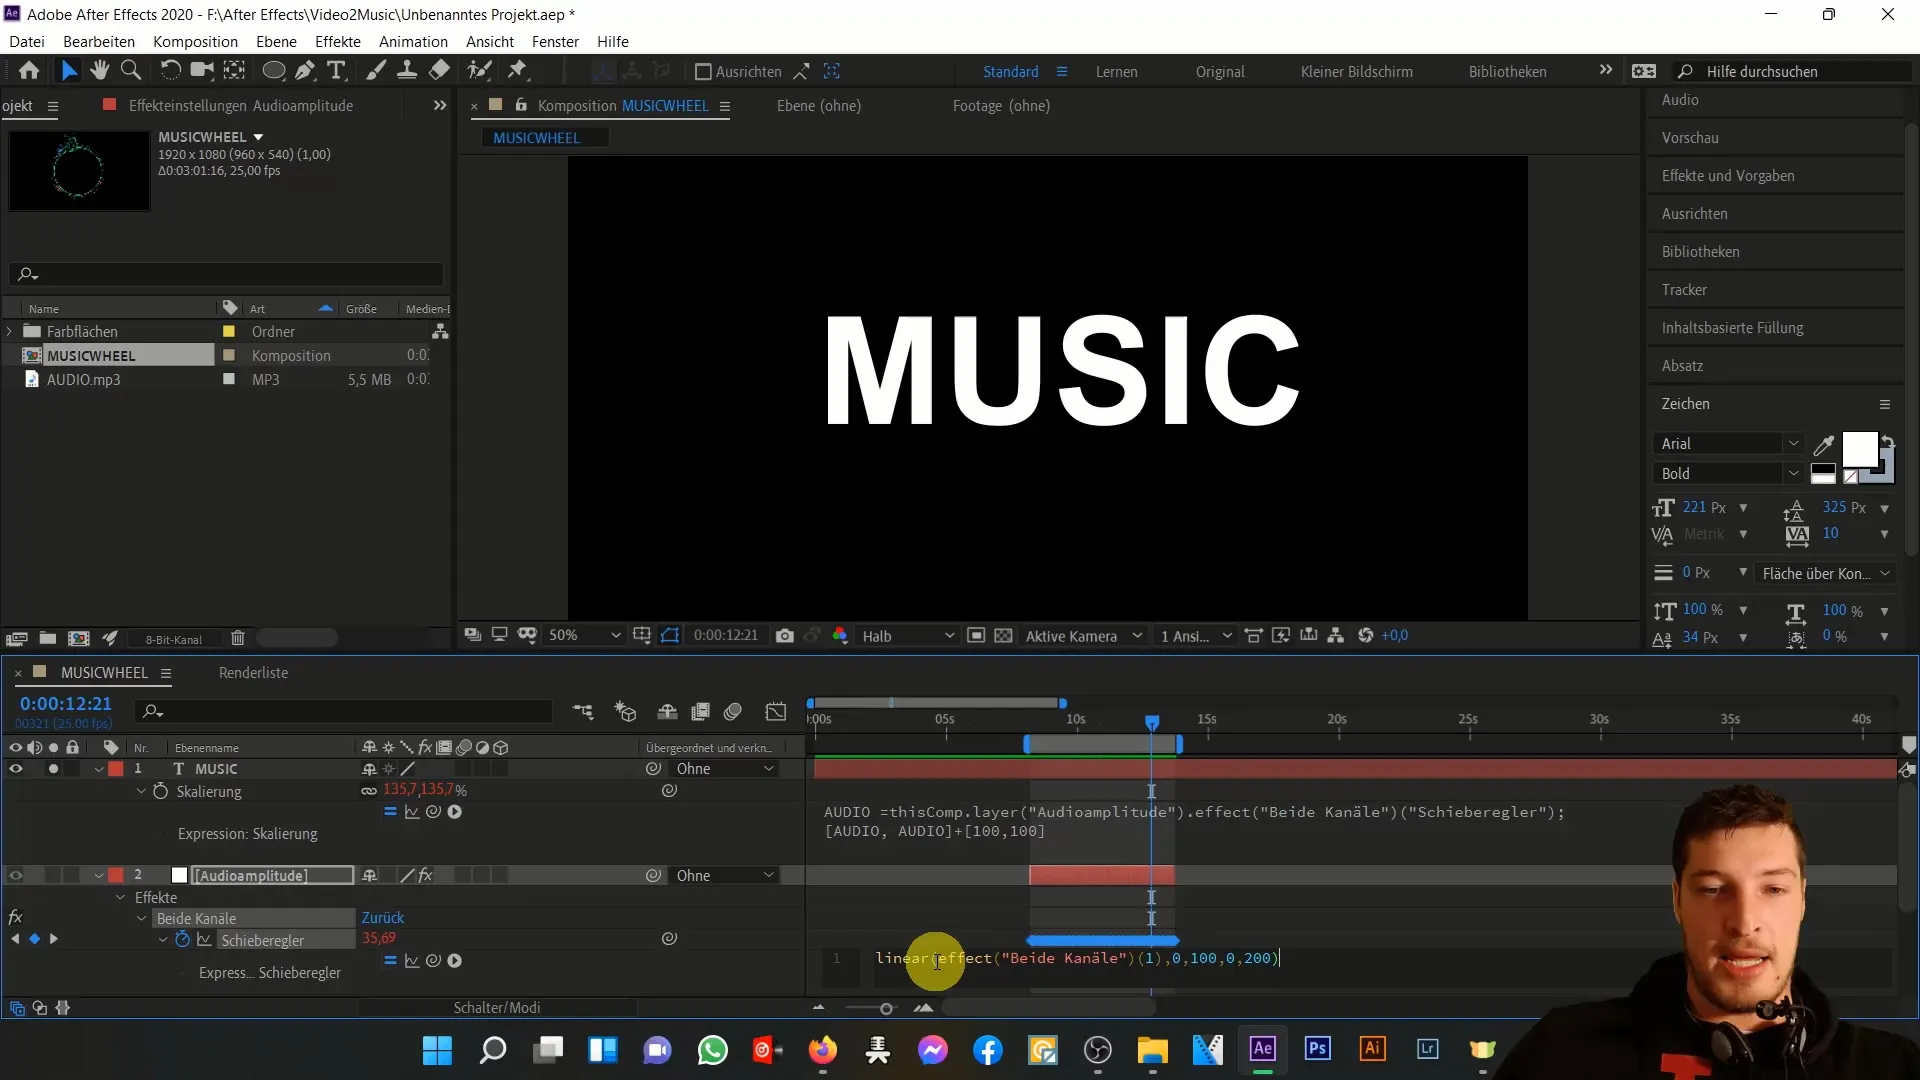
To apply the Linear-Expression, select the slider and add an expression. Hold the Alt key and click on the stopwatch next to the slider. Now you can directly input the expression.
Step 4: Defining the Parameters of the Linear-Expression
You need to enter the parameters of the Linear-Expression. This typically consists of five parameters:
- Source (Slider value)
- Input Range (0 to 50)
- Output Range (0 to 200)
If the music values range from 0 to 100, you want to ensure that these values are linearly translated into the target range of 0 to 200.
Step 5: Conversion of Input Values
Enter the next parameters to clarify the conversions. A value of 0 should remain at 0, while 100 scales to 200. Everything in between will be converted according to a linear scale, for example, a value of 50 scales to 100.
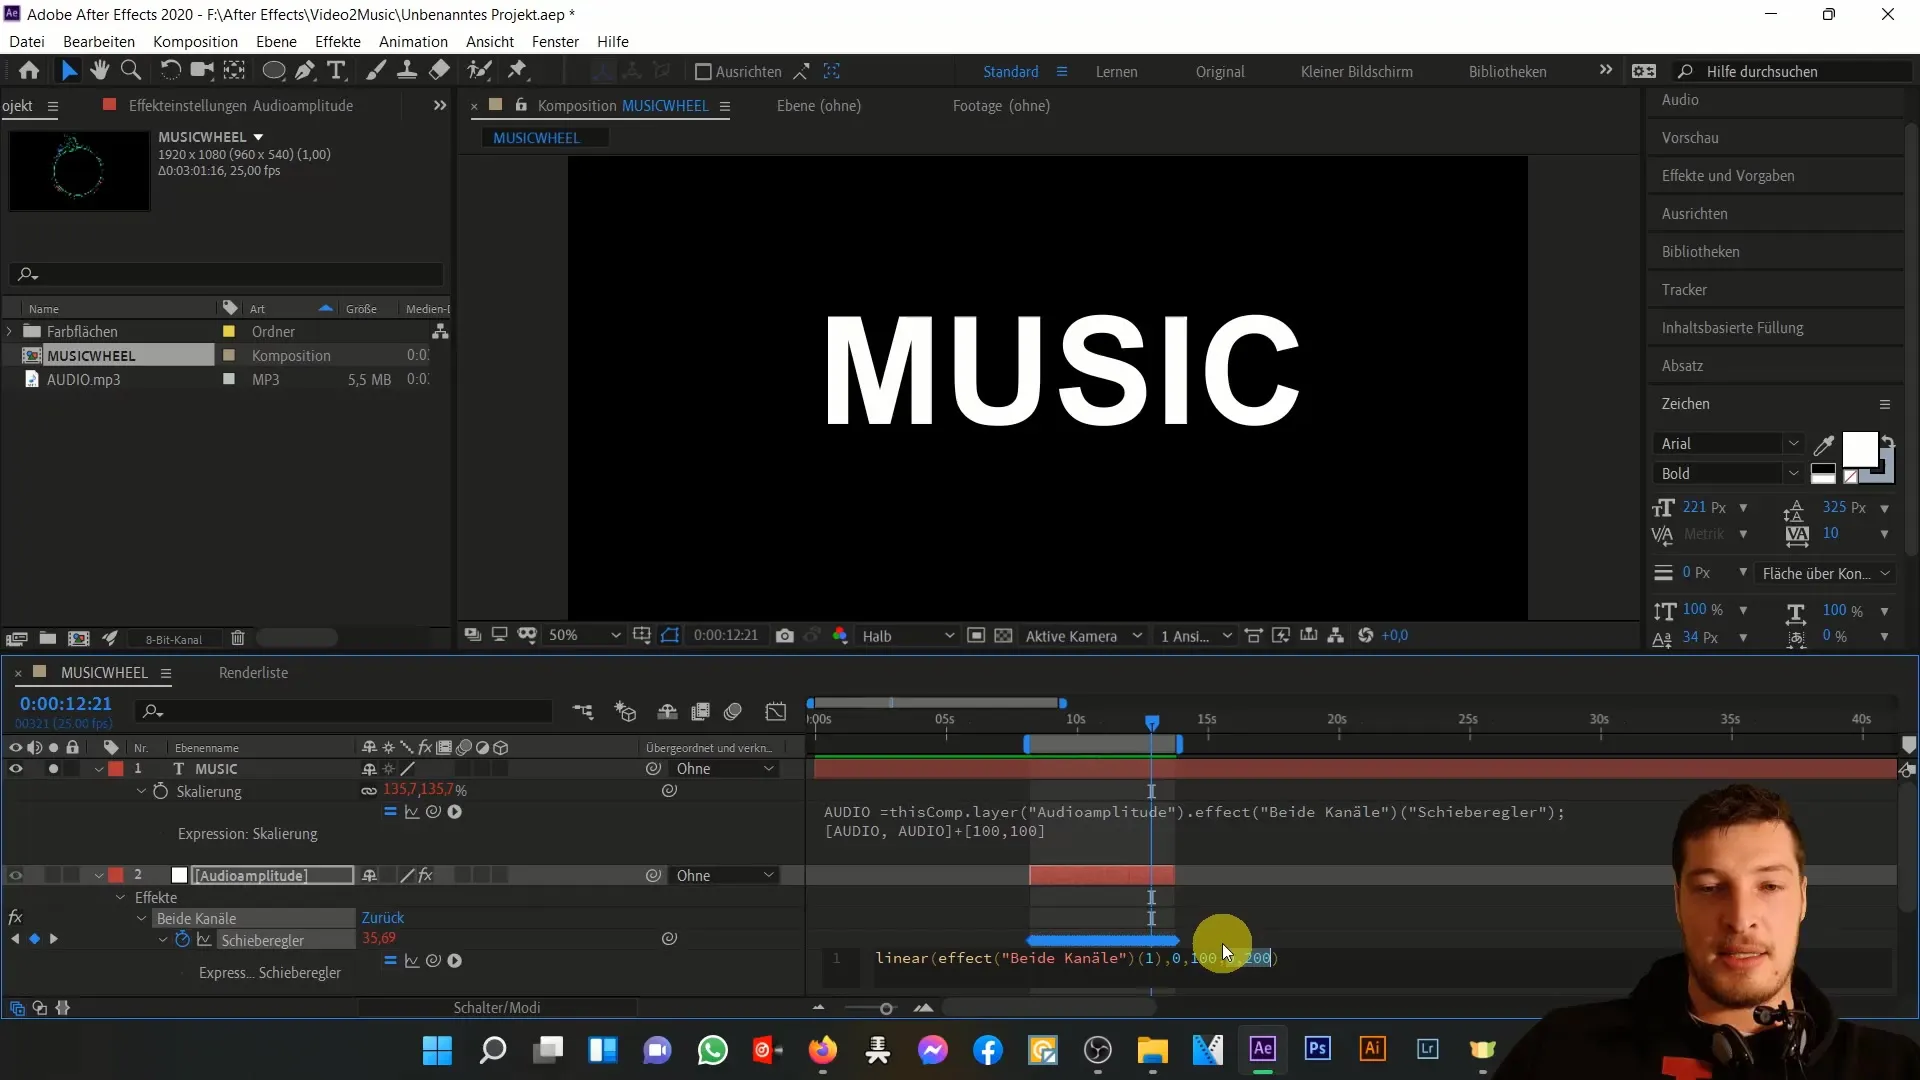
Step 6: Refining the Expression
Now, refine the value. Your expression should be set so that anything below 40 units is set to 0 and values above 50 units are set to 100. Values between 40 and 50 are linearly translated into the target range of 0 to 100.
Step 7: Finalization and Verification
Verify if everything is working by moving your slider. You should now see that the scaling of your animation only increases at the high spikes. Make sure to view the correct values in the timeline.
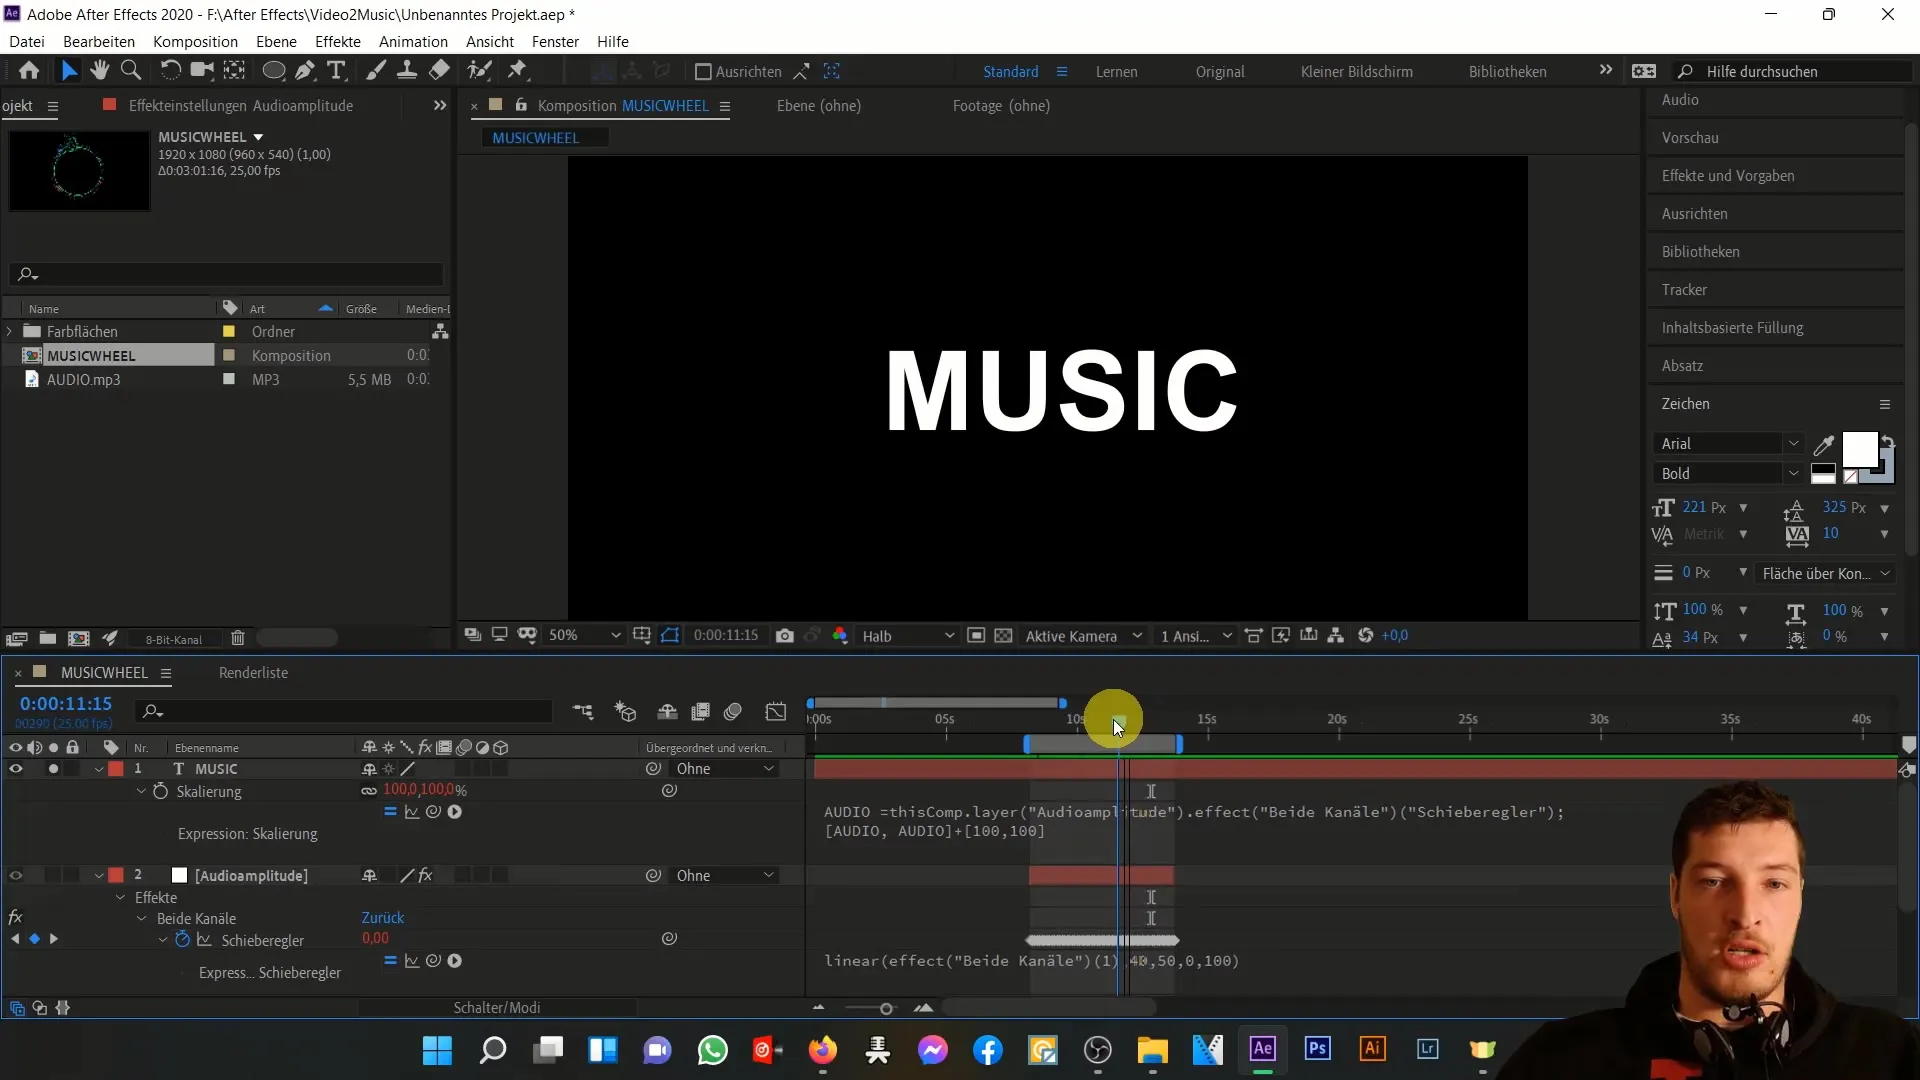
Step 8: Applying to Audio Variables
Another important aspect is that you can also apply the Linear-Expression to the audio variable. The goal is to use the slider values here too, to synchronize the scaling based on music spikes.
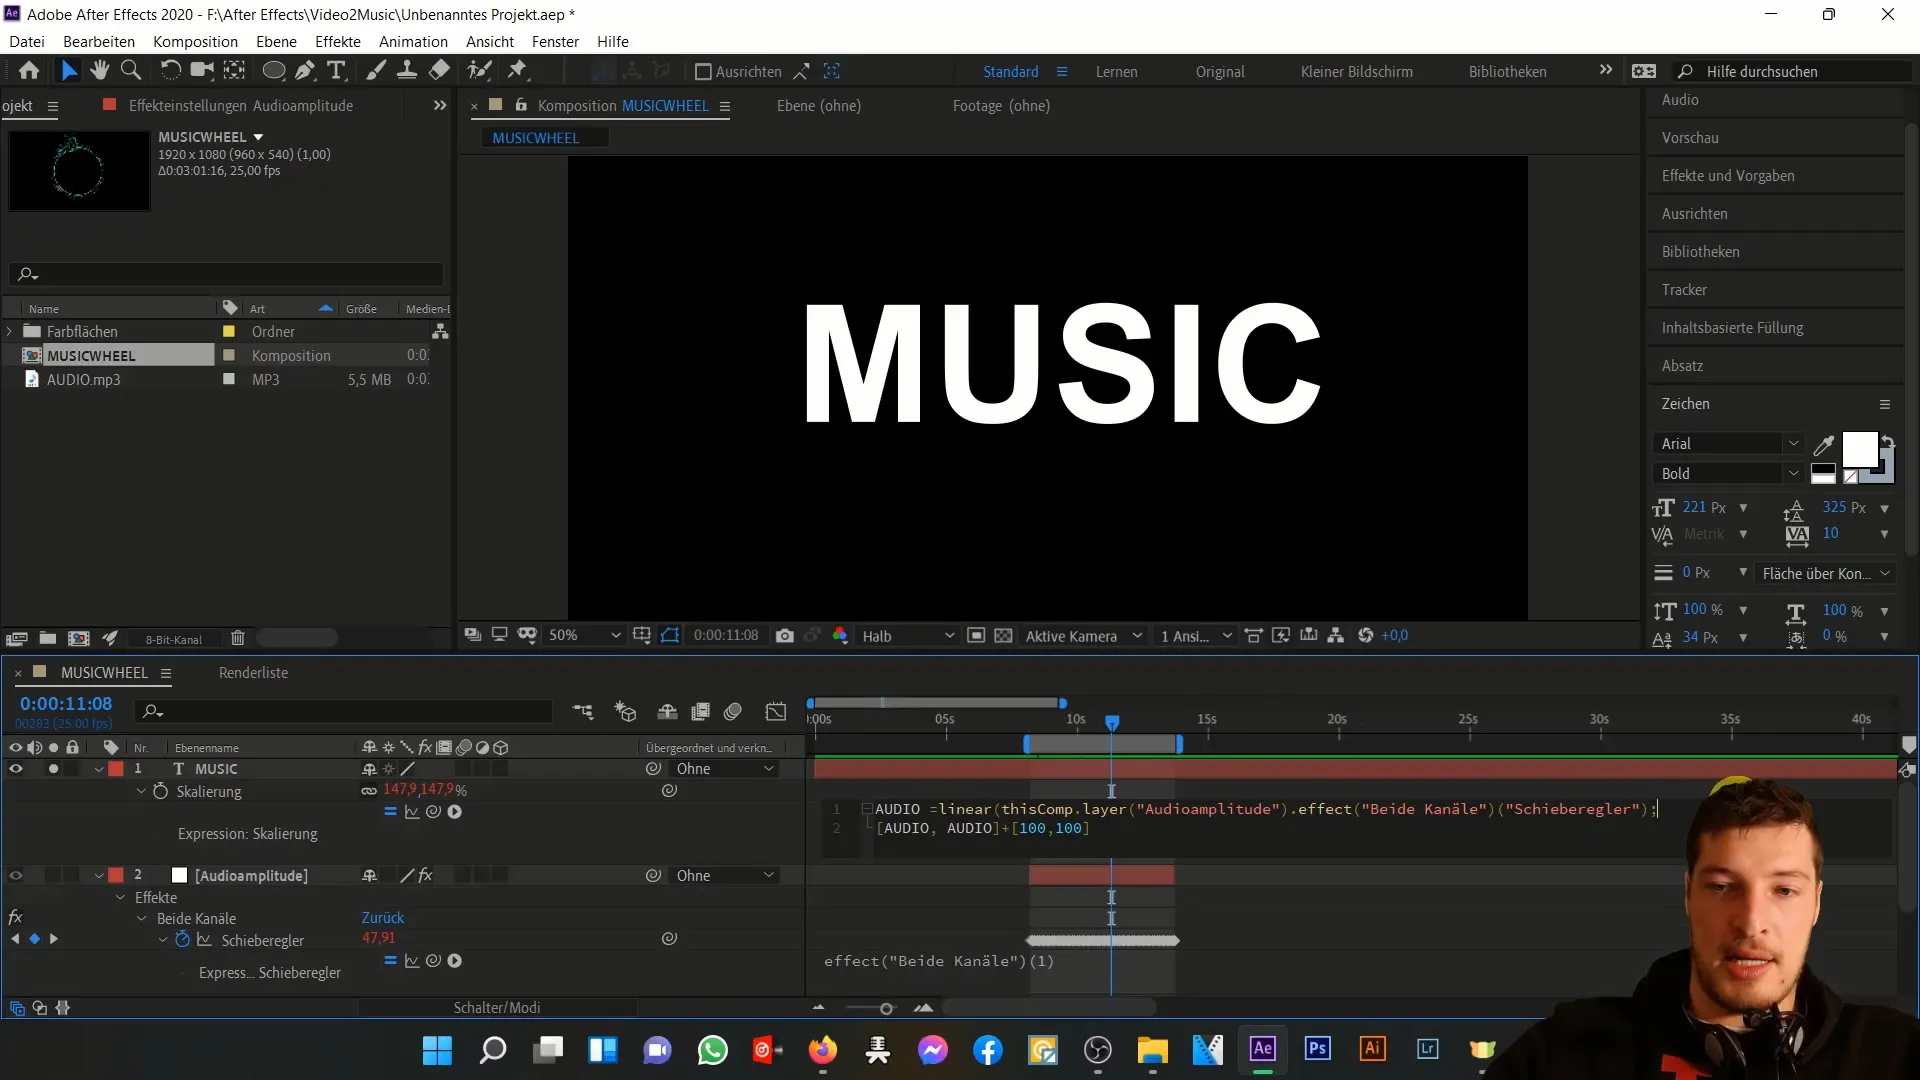
Step 9: Final Adjustments
If you feel confident in understanding the parameters now, test the expression directly with the audio variable. Make sure to document everything well to keep track of what each parameter does.
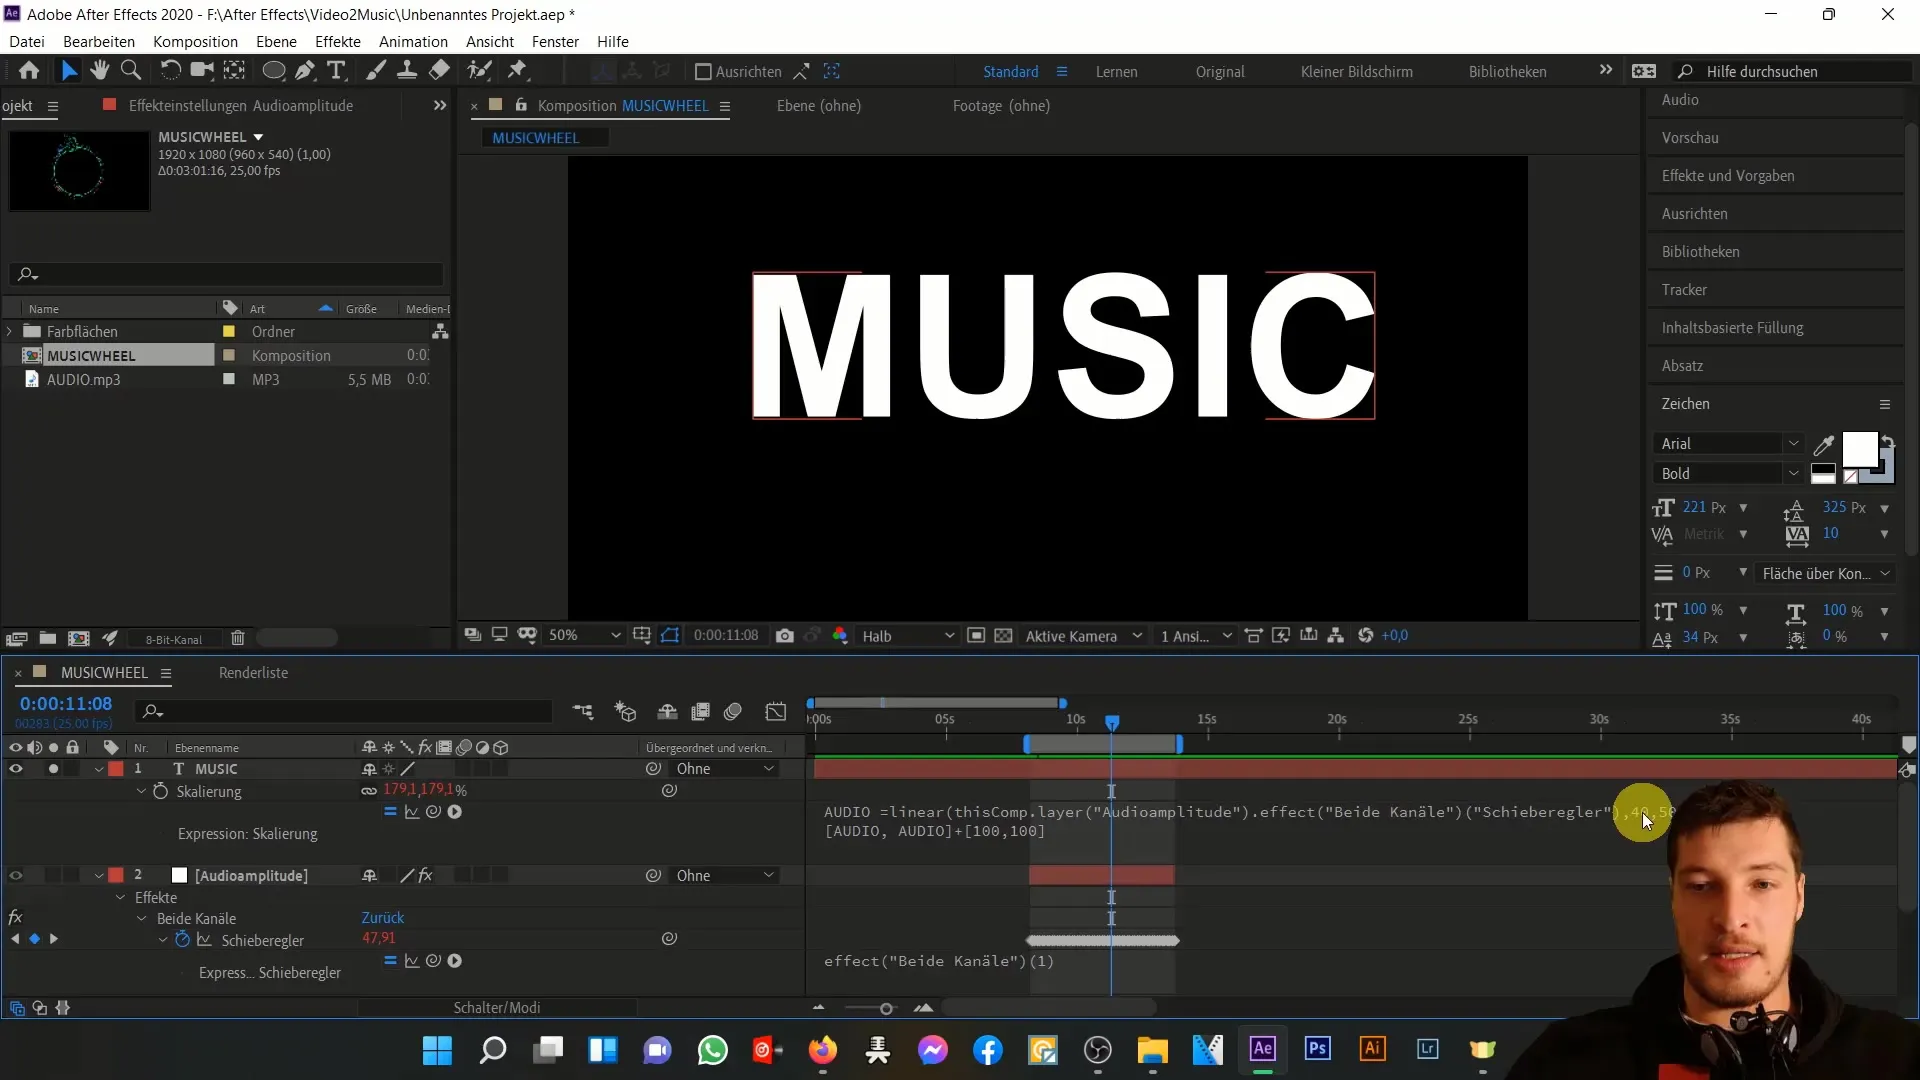
Summary
Understanding the Linear Expression in Adobe After Effects opens up a variety of possibilities for visually enhancing music through animation. You have learned how to transform value ranges to create scaling effects, gaining valuable knowledge in handling expressions along the way.
Frequently Asked Questions
How does the Linear Expression work in After Effects?The Linear Expression converts values from a source range to a target range, allowing for dynamic adjustments.
What are the key parameters of the Linear Expression?The key parameters are the source, the source range, and the target range.
Can I use the Linear Expression for effects as well?Yes, the Linear Expression is excellent for controlling various effects based on values such as audio or animation.


