In this tutorial, you will learn how to achieve impressive effects using a greenscreen in After Effects to insert yourself into various scenarios. You will also learn how to cut out objects or people without a greenscreen. I will guide you through the entire process, starting from basic settings to the intricacies of the keying effect.
Key Takeaways
- The Keylight effect is crucial when working with a greenscreen.
- Masks help remove unwanted areas and optimize the image.
- Even without a greenscreen, you can cut out using other techniques.
Step-by-Step Guide
Step 1: Set Up Project
First, open After Effects and import your video file with the greenscreen and the background image you want to use. Ensure you have the correct composition where you can blend your elements together.

Step 2: Create Masks
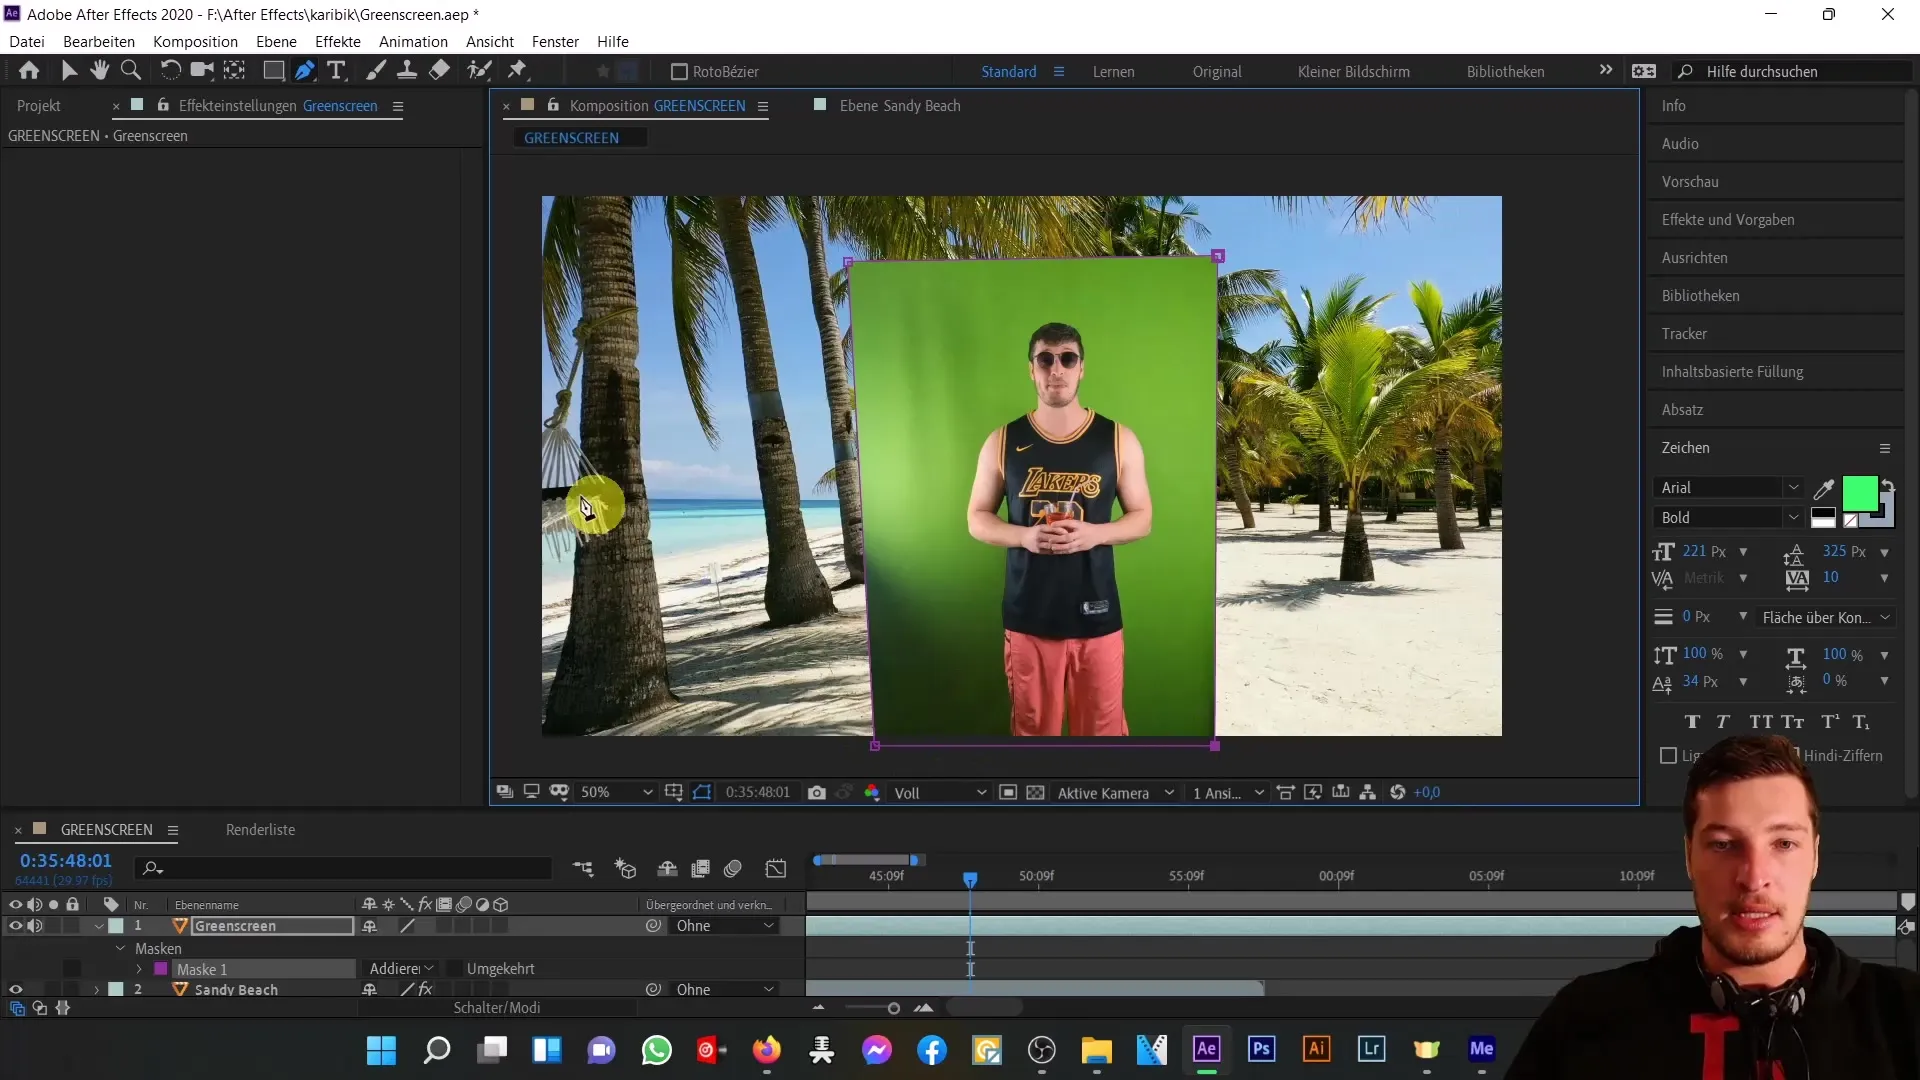
To remove the area outside the greenscreen, it is essential to use masks. Select the pen tool and start masking the area around you. Your goal is to only keep the area with the greenscreen visible.
Step 3: Add Second Mask
If the lighting was not optimal and some unwanted areas are displayed, add a second mask. This one should cover the areas that were over-selected the first time. Make sure to subtract this mask only from the first mask to achieve a better result.
Step 4: Apply Keylight Effect
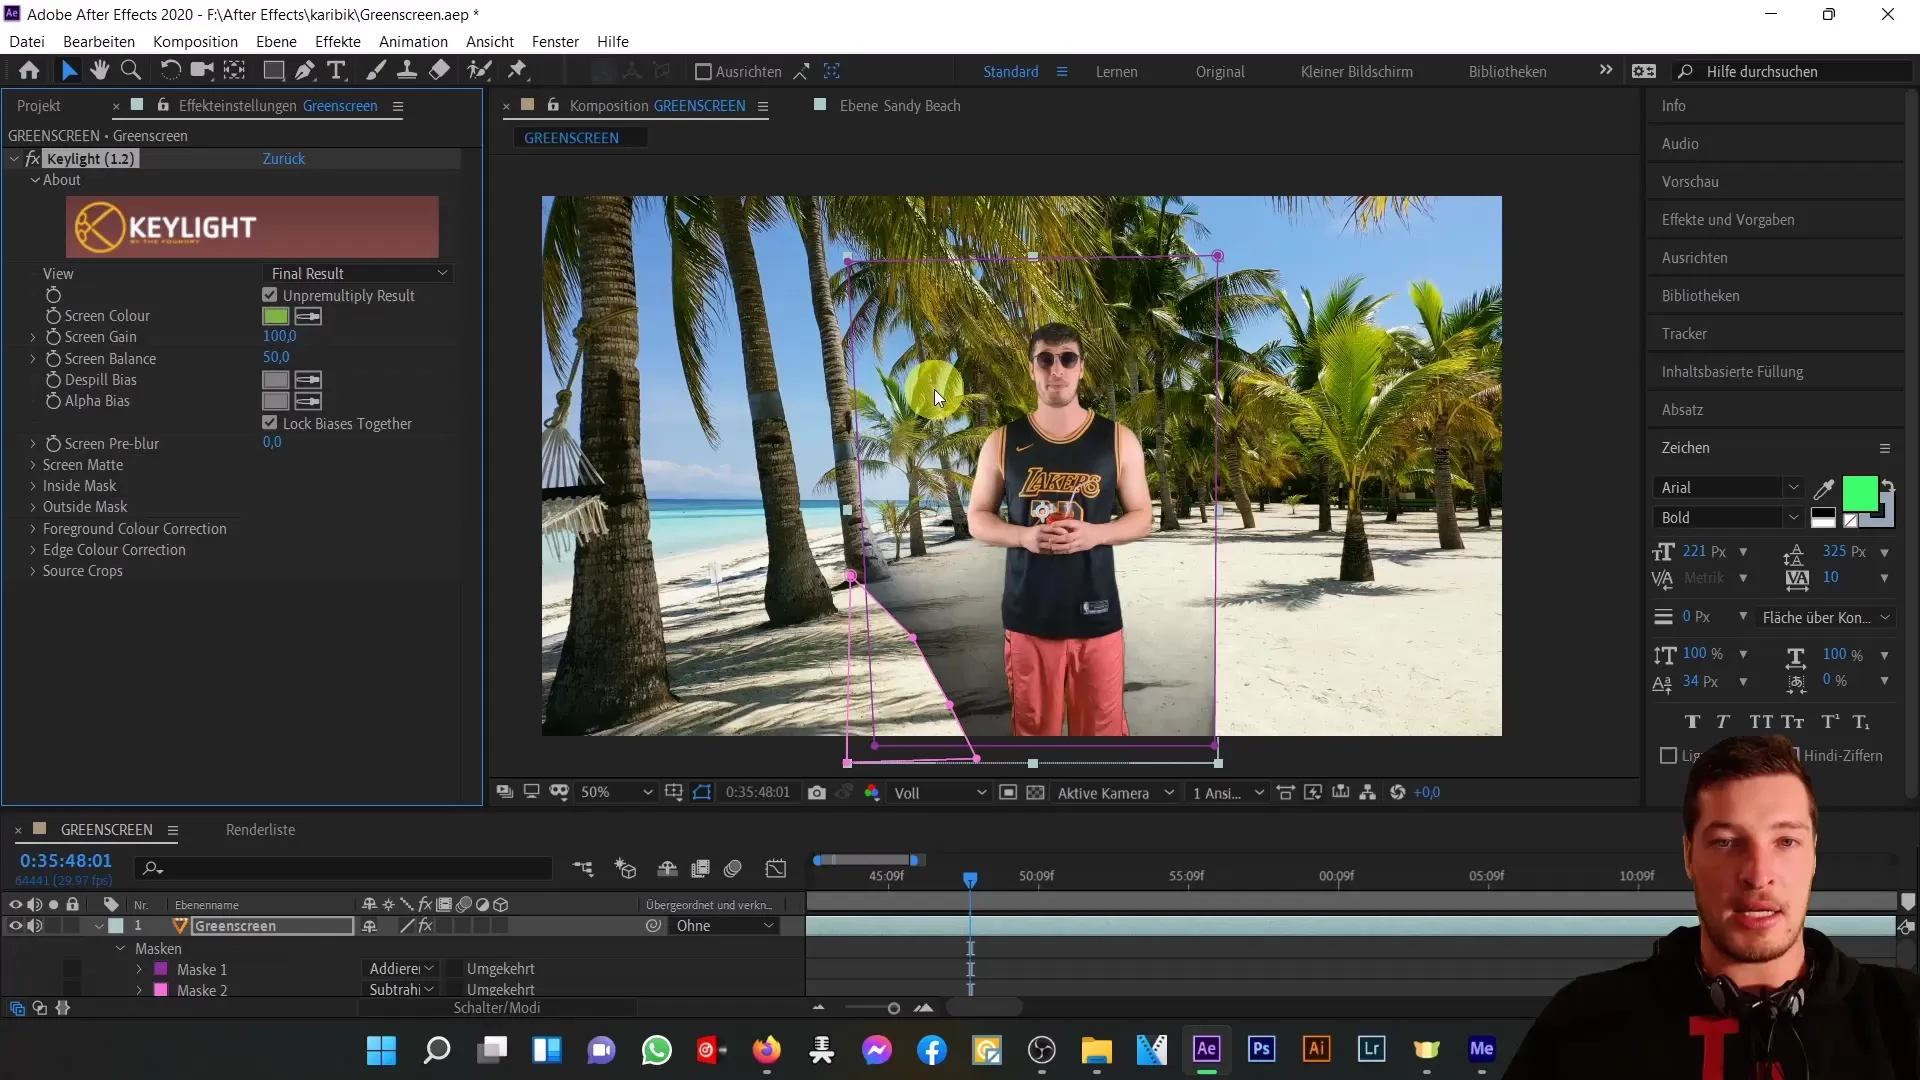
Go to the effects and select the keying effect "Keylight". This will allow you to remove the green background. Click on the eyedropper tool and select the green area. You will see the green being removed quickly, but you may need to make some adjustments.
Step 5: Fine-Tune the Matte
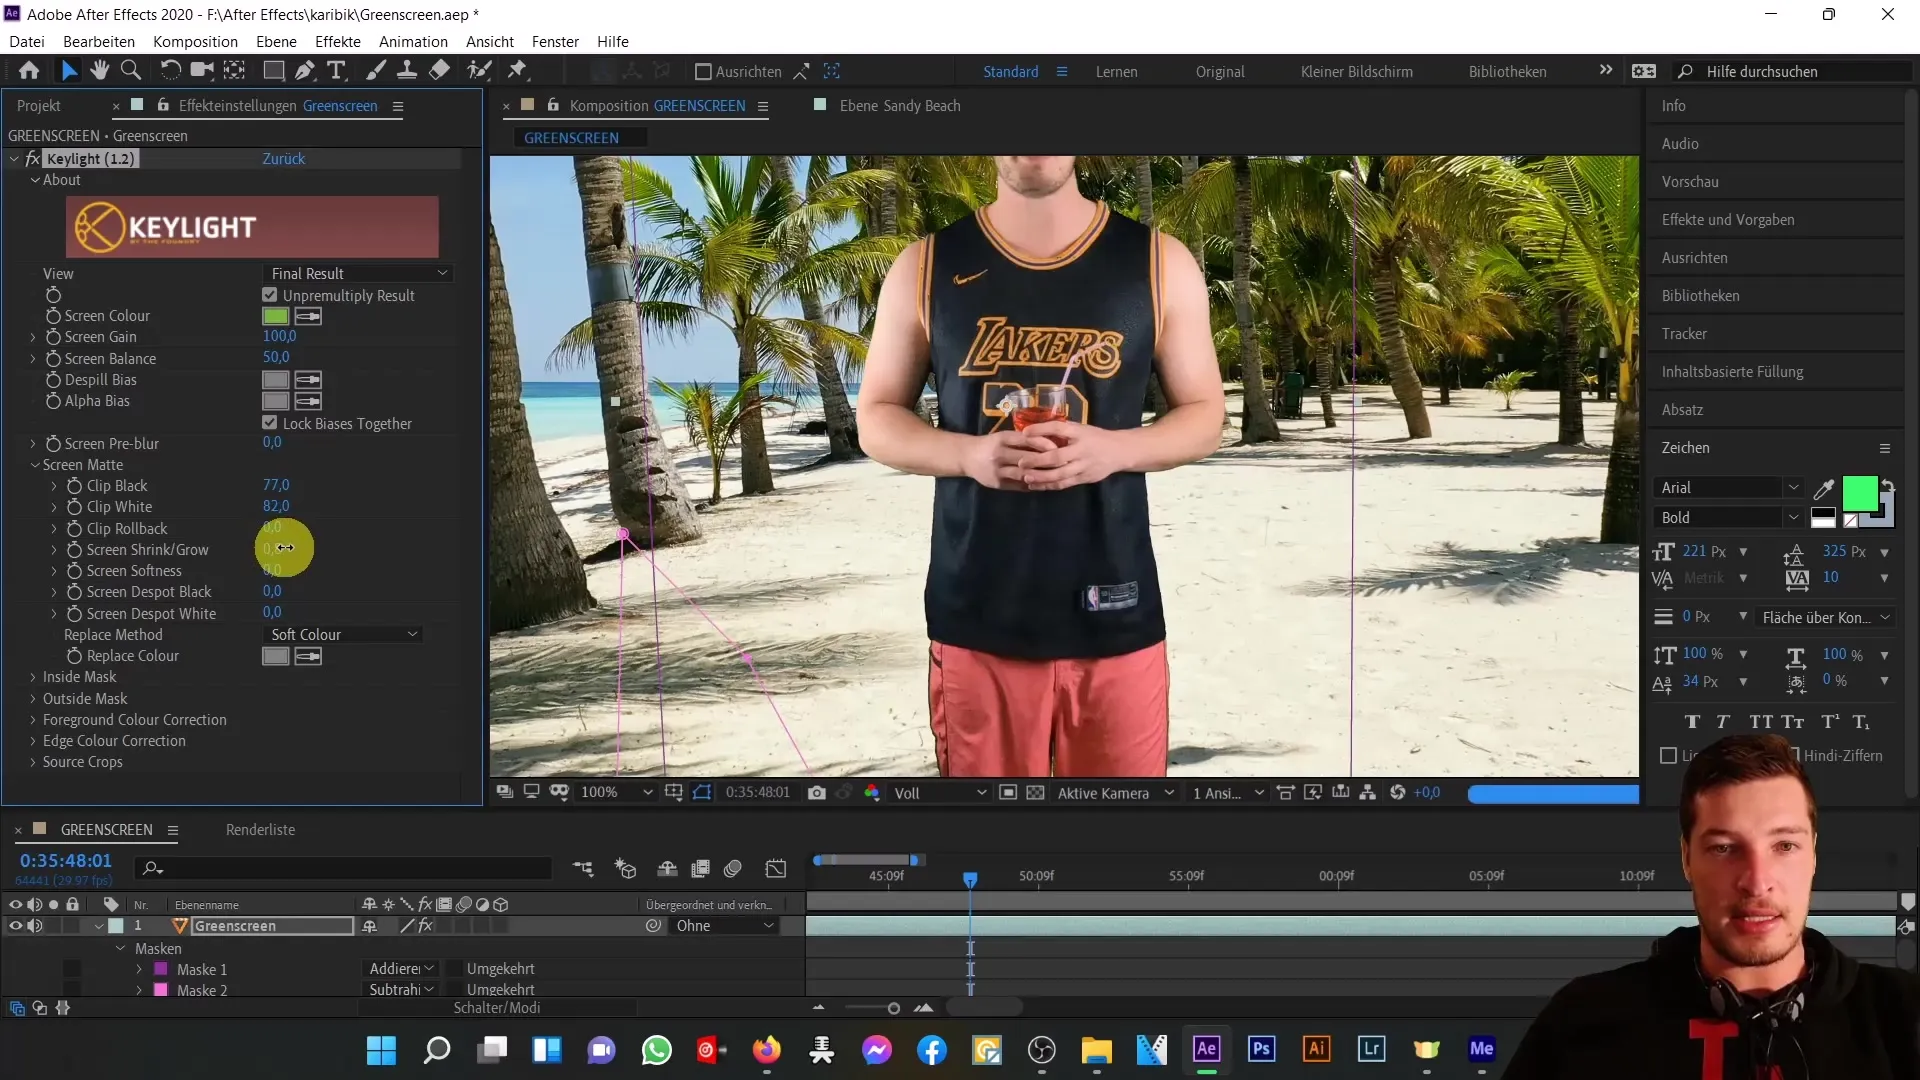
Open the matte settings and start with the clip values. You can work further on the edges using "Clip Black" and "Clip White" to remove unwanted borders. Be patient and work diligently here to obtain a clean image.
Step 6: Blur the Edges
To soften the edges of an image, you can use the "Screen Shrink/Grow" options. Start with small values and observe how the edges adjust. Often, a small value outwards is necessary to make the image look more natural.
Step 7: Make Further Adjustments
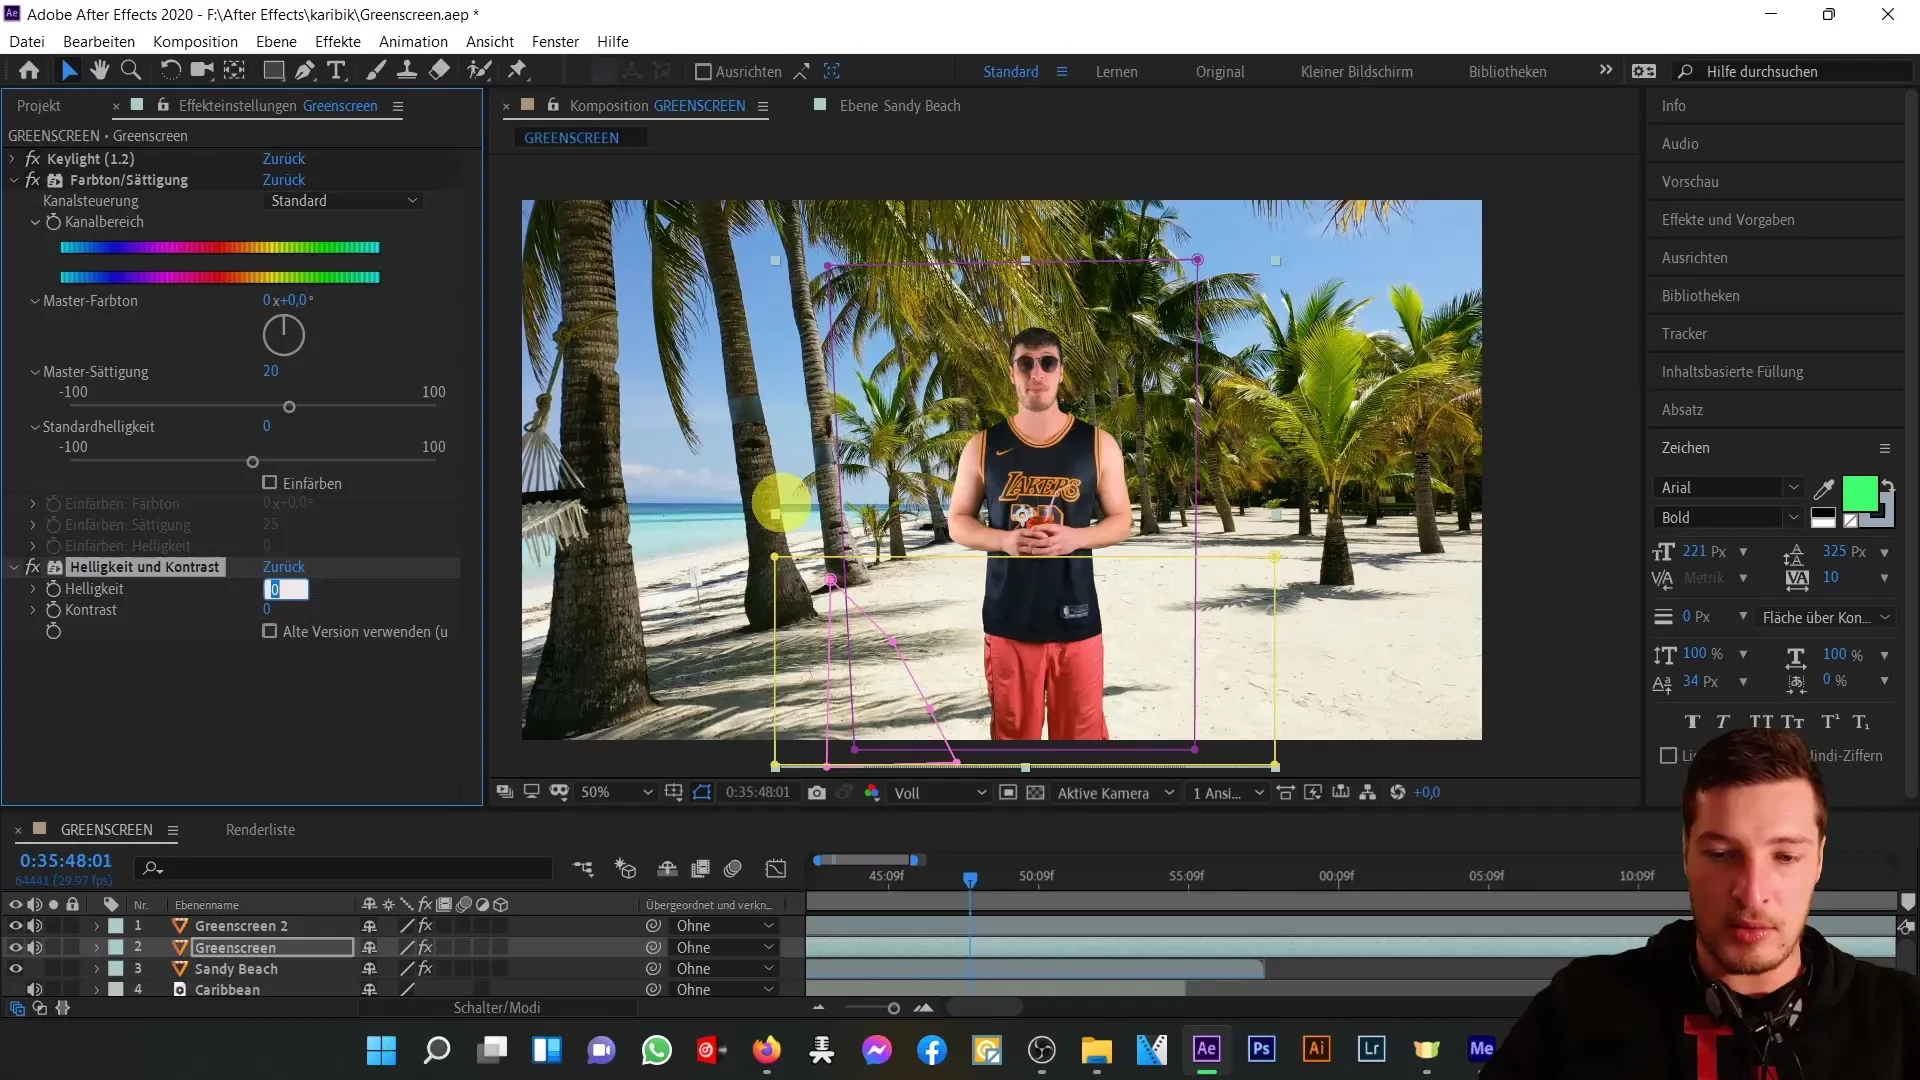
If the image still doesn't look perfect, you can make further adjustments to brightness and contrast. These settings are crucial to integrate your cut-out image more into the background.
Step 8: Perform Color Correction
To make colors appear more realistic, you can increase the saturation. In the After Effects menu, find the Hue/Saturation, where you raise the saturation to about 15. Transfer these settings to the other layers for a consistent image.
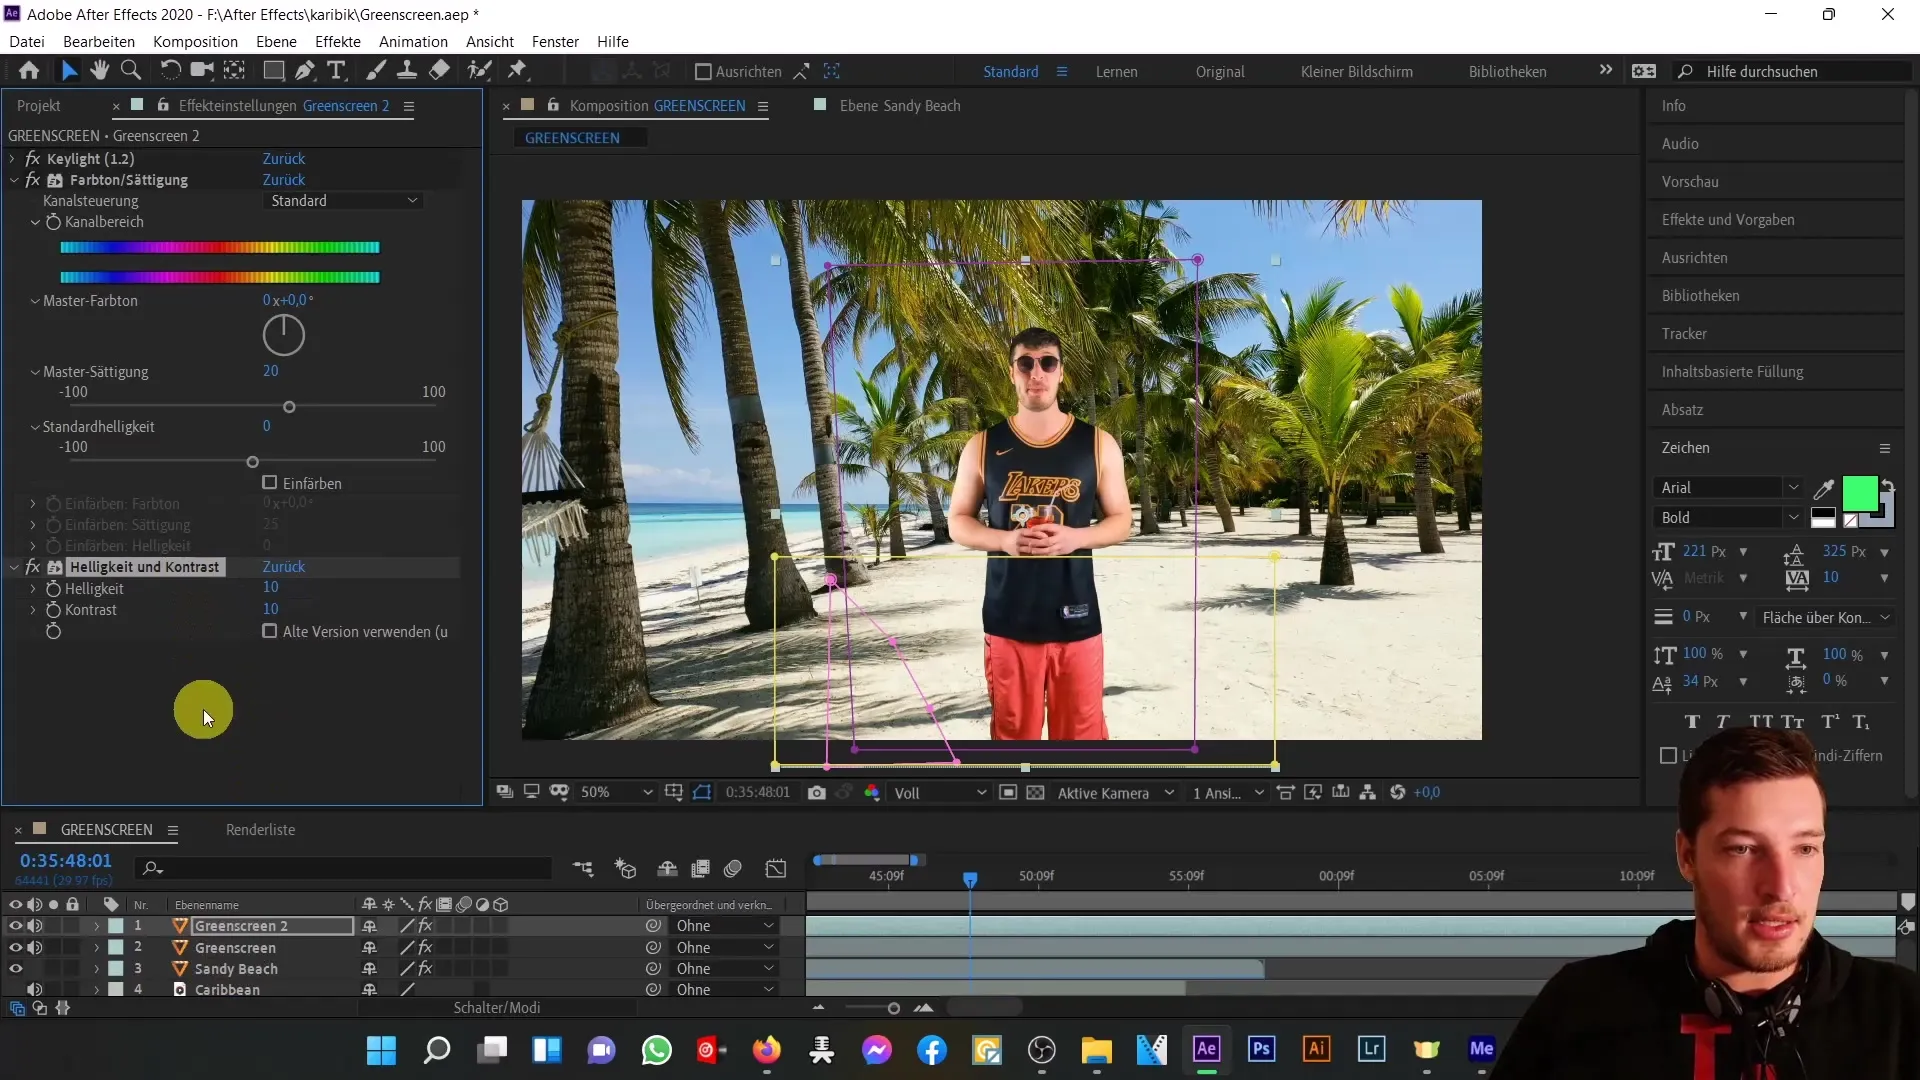
Step 9: Finalize Layout
By now, you should have a row arrangement that includes both the greenscreen and the background image. Ensure everything blends harmoniously by further adjusting masks or color corrections if needed.
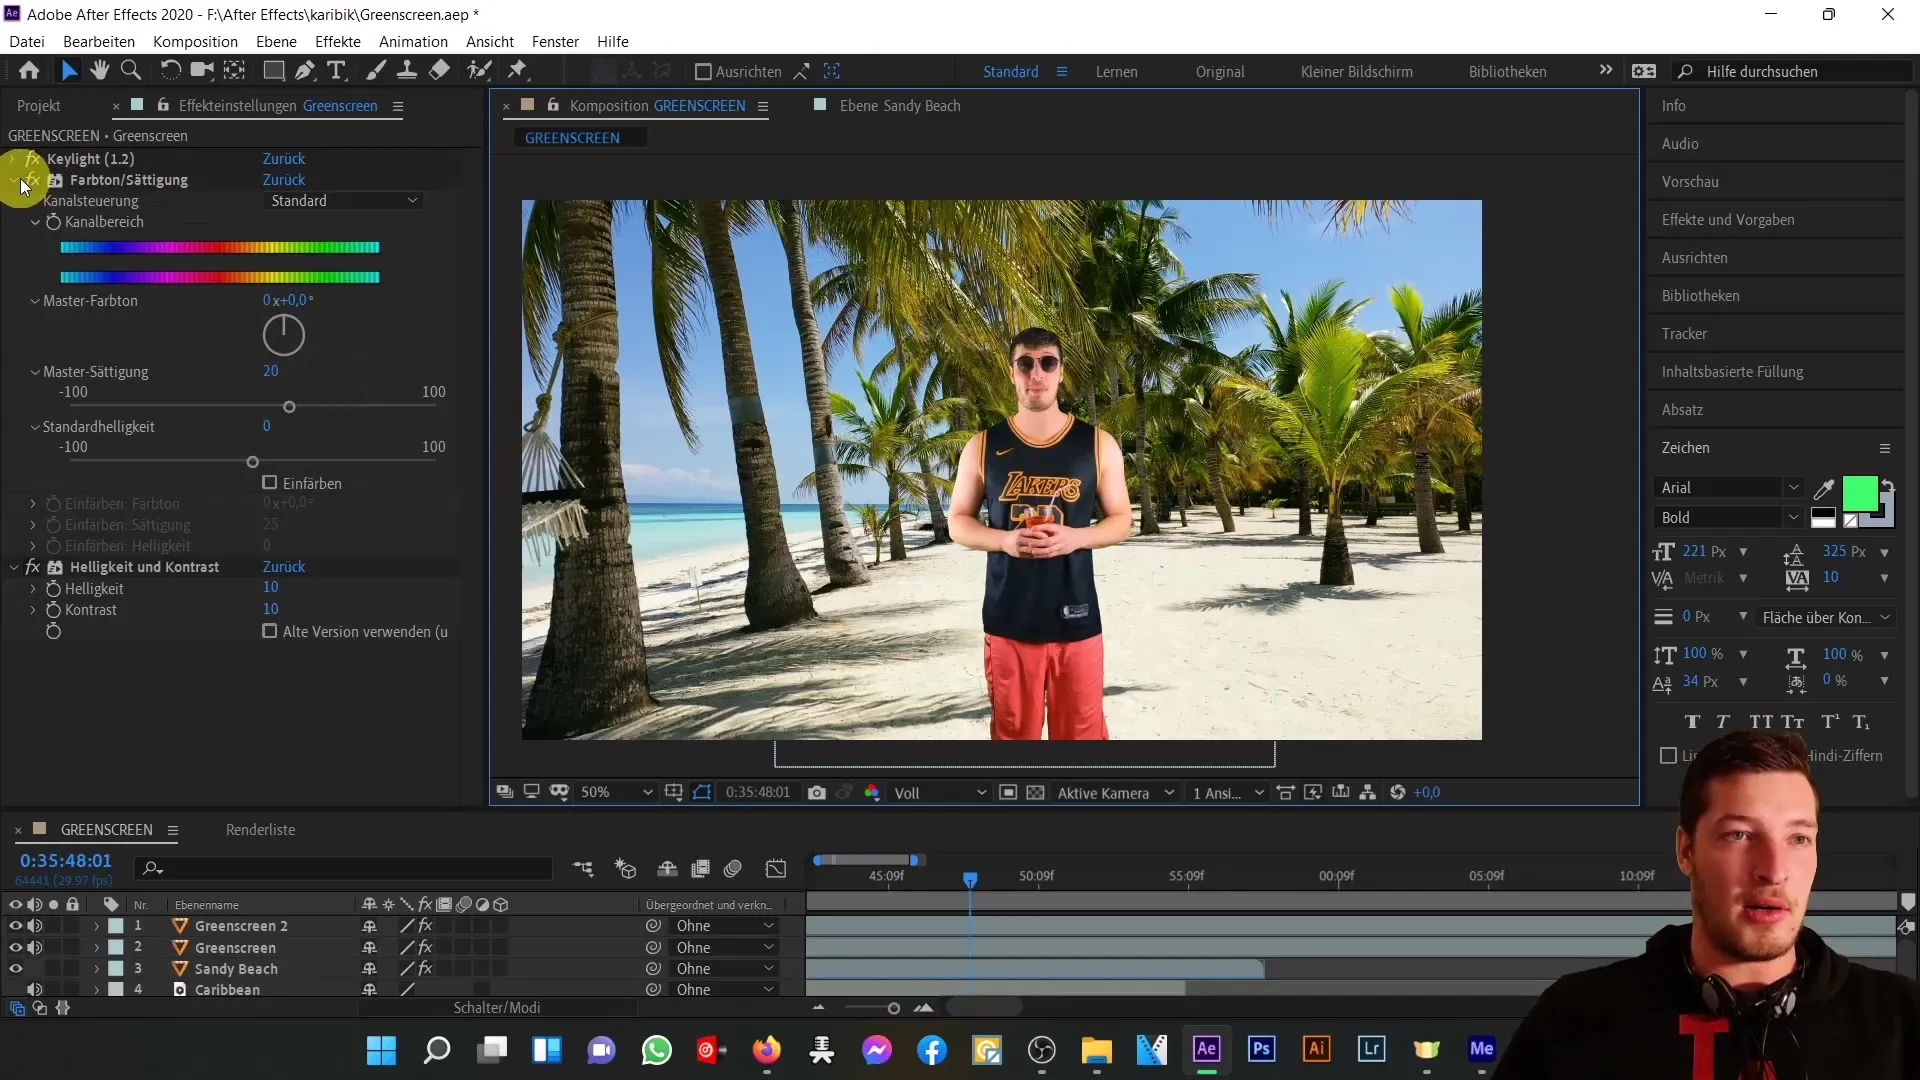
Step 10: Export Your Project
After all adjustments have been made, you are ready to export your project. Make sure to choose the right format and desired settings to get the best quality.
Summary
In this tutorial, you learned how to create a greenscreen effect and adjust your environment in After Effects, allowing you to appear in different scenarios. You can also apply these techniques to integrate objects without a greenscreen, significantly expanding your creative possibilities.
Frequently Asked Questions
How does the Keylight effect work?The Keylight effect removes the color of the greenscreen, making the background transparent.
Can I apply the effect without a greenscreen?Yes, there are also ways to perform keying without a greenscreen by using alternative techniques.
How can I soften the edges?Use the Screen Shrink/Grow settings to soften the edges of the keyed area.
How can I adjust the colors?Use the Hue/Saturation effects to adjust the saturation and contrast of your image.
How do I export my project?Choose "File" > "Export" and then select the desired formats and quality settings for your project.


