Now let's take a look at what it looks like if you take this shadow over to Photoshop, but on a separate layer, just like this object, the sphere.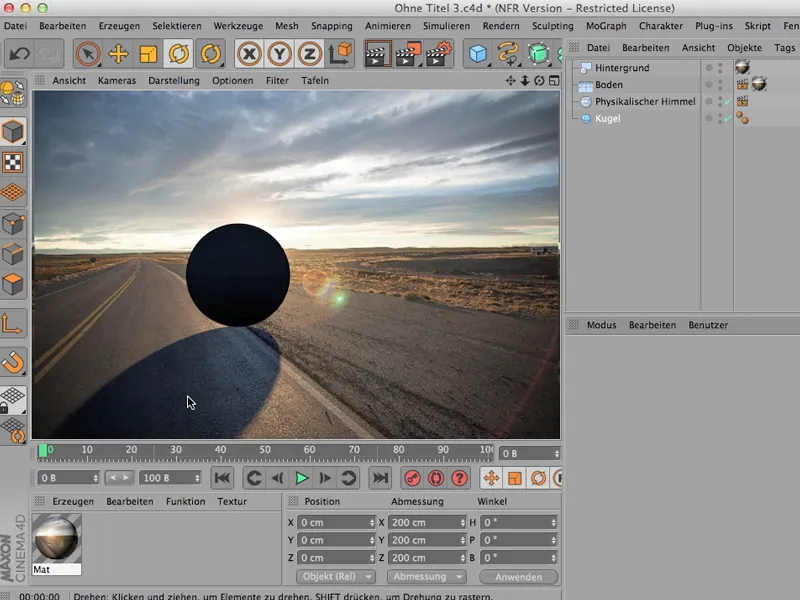
Render correctly
Is that possible? - Of course it can - you have to adjust a few things, but yes, let's just start at the beginning and I'll start by giving this sphere a little bit of the Global Illumination so that it doesn't get quite so black. So first I'll go over here to the render presets. I'll get the GI or global illumination here via the effects; it can also be found a little further down, ...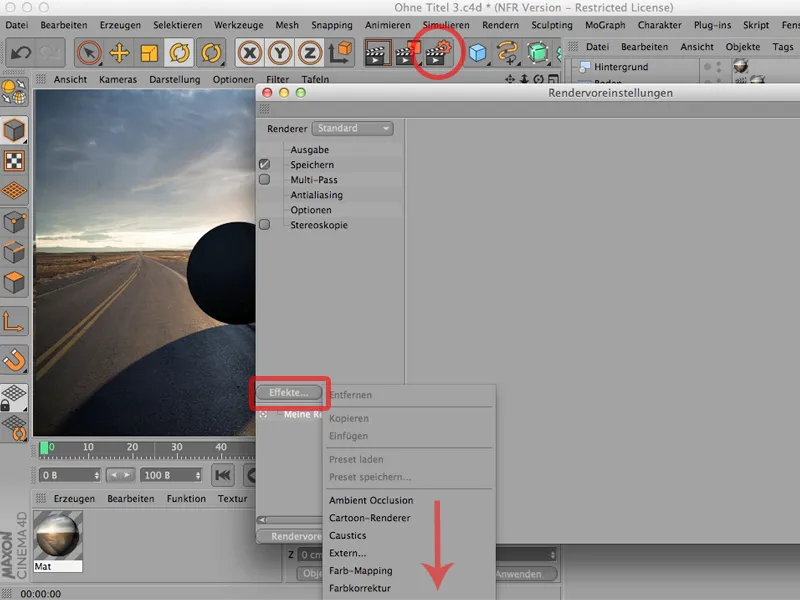
... as well as the Ambient Occlusion, which I select so that I get a deep shadow here directly below the sphere.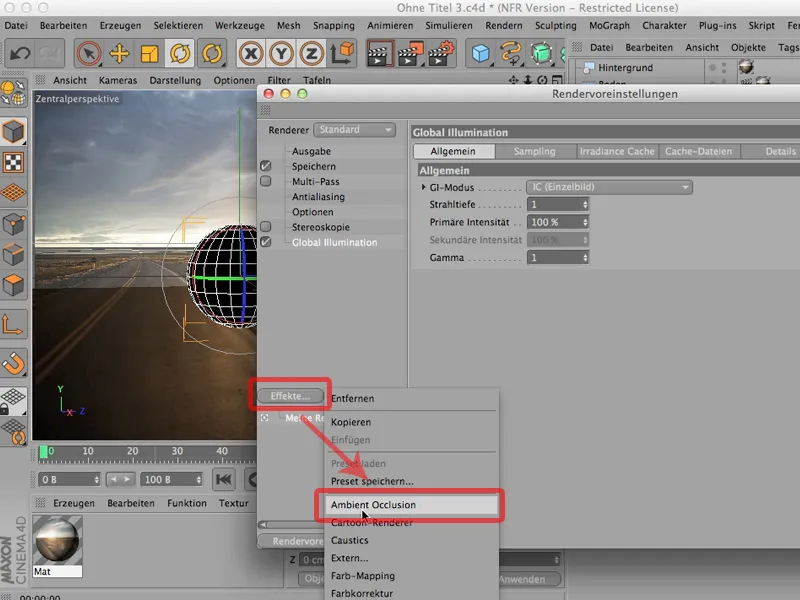
This makes the sphere look much more natural, but I haven't yet done anything to ensure that the shadow is on a separate layer, because we need the so-called multi-pass rendering for this. I'll click on that and go to this little Multi-Pass button, where you'll find the so-called mixed channels relatively high up.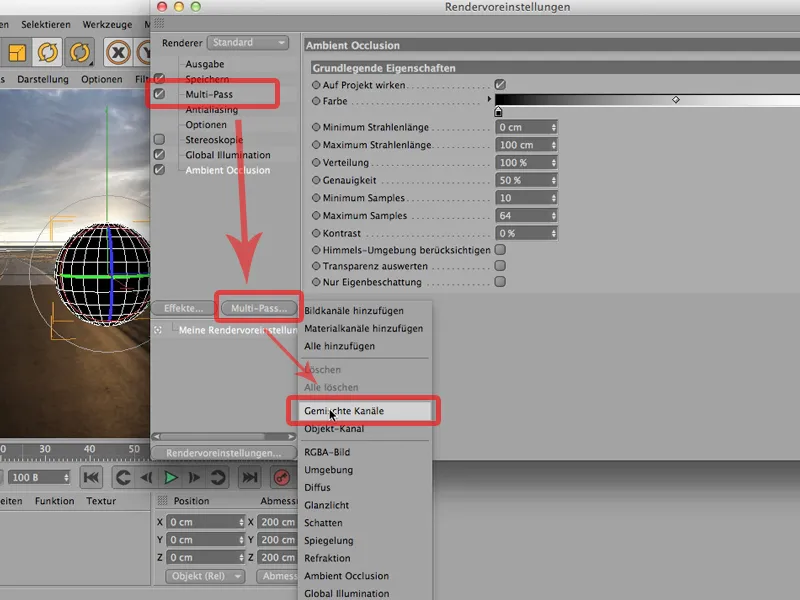
Mixed channels simply means that everything you want to have in one channel comes in here and all the things you want to have in a separate channel don't come in.
What do we want to have separately? As I said, I would like to have the shadow separately, then the post effects - ambient occlusion is enough for me, but I'll leave the check mark out here too, and I can simply click on everything else. You can also see that the term then becomes bold, which gives you a better overview of the whole story, and now we've only left out these two things: the shadow and the post effects.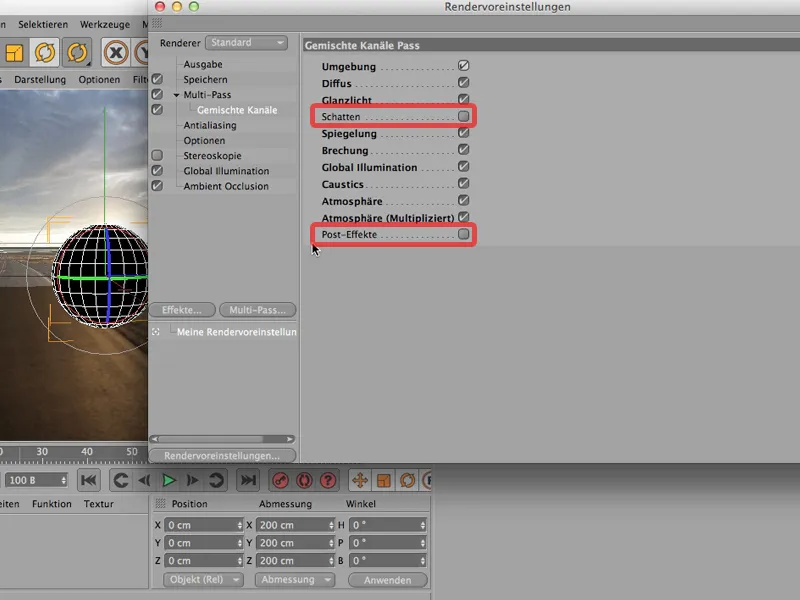
Of course you can say: Why is he ticking off caustics? There are none in there. That's right, you're right. You can leave them out, but on the other hand - if you check this box and read out this pattern here so that you only uncheck the box where you want to have a separate channel, then you will probably make fewer mistakes, because the caustics calculation, which is not created at all, of course costs neither memory nor time. So ... I simply leave the checkboxes unchecked where I want to have my own channel.
And of course I still have to create it here in Multi-Pass. I also do this via Multi-Pass : I get the shadow,...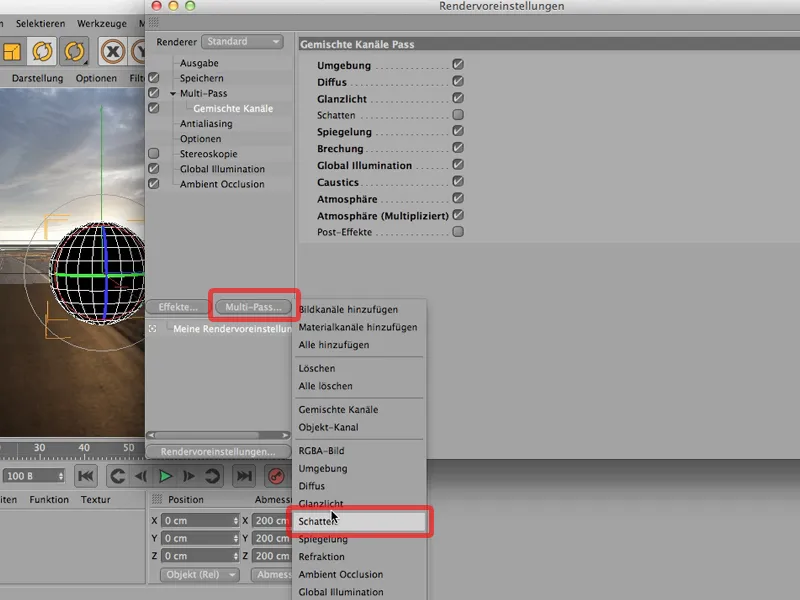
... and then there was the ambient occlusion that I would like to have.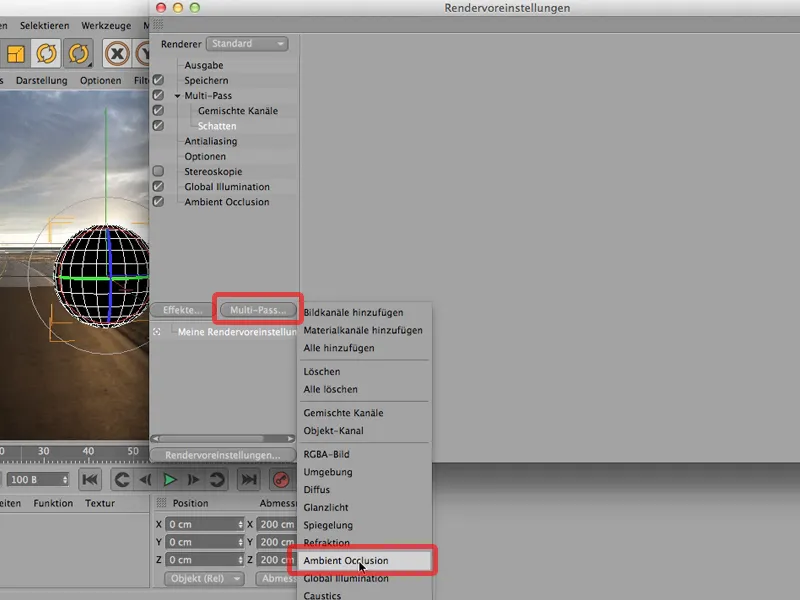
Now I'm almost ready to start, but there's still one small thing missing, of course, because I'd like to have the sphere on its own layer or calculate a channel for the sphere. To do this, I have to assign a render tag to the sphere again ...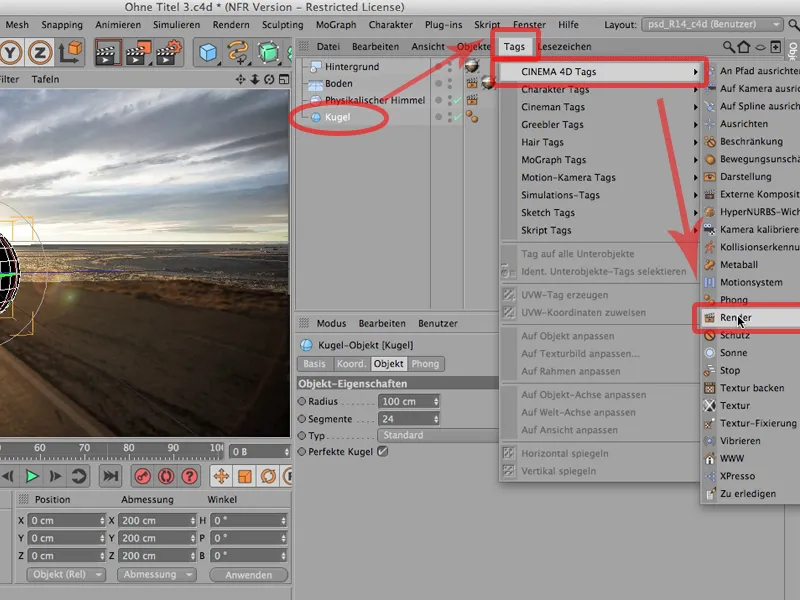
... and activate channel 1 under channel. Whether you name the channel 1 or 27 doesn't matter at first.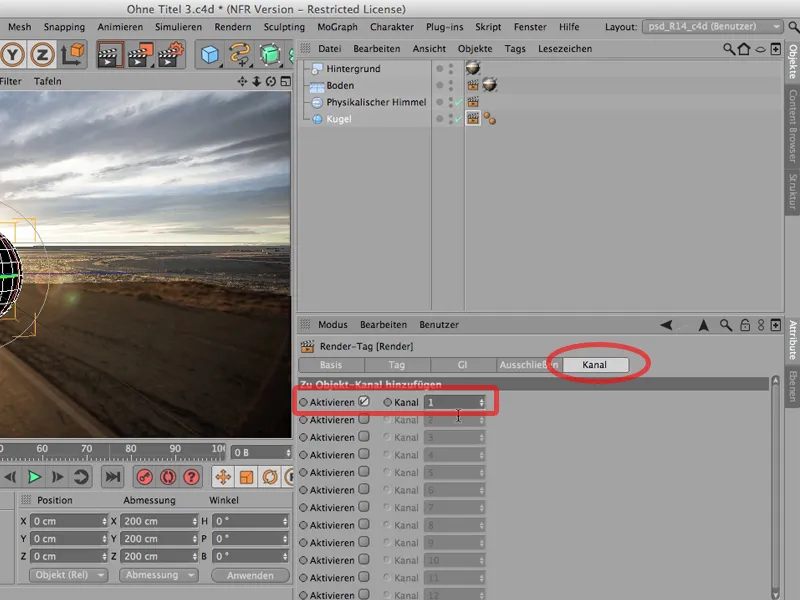
However, you must also create the counterpart in the render presets. I therefore select a so-called object channel for the multi-pass.
This must now have the same ID as what we have just clicked on here. In this case, it is 1 both times.
And now we can start rendering. Let's try our luck. I'll just render here in the image manager. It will look like this. Let's first take a look at the image in progress ... it actually looks pretty good. You can leave it like this for now. Maybe click on this one - this is what we've just rendered: Looks wonderful.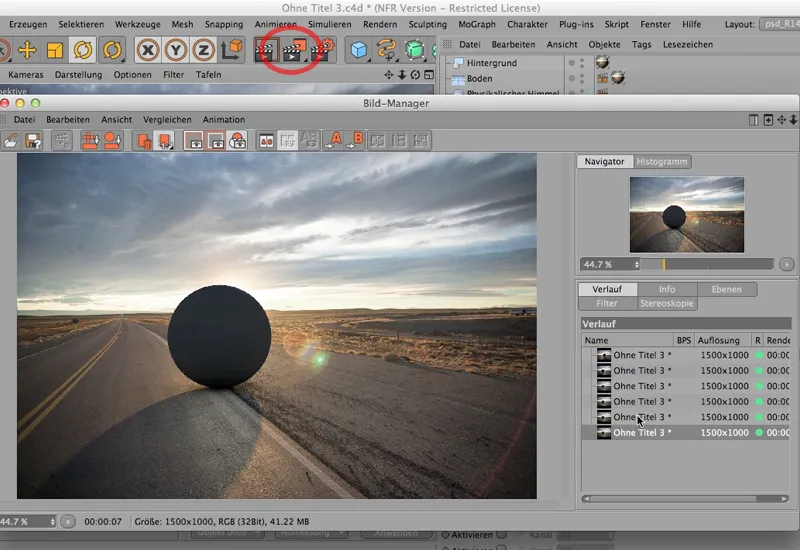
Now I'll go to the layers and see what it looks like there. And then you can see: Ambient Occlusion has its own channel, Shadows has its own channel, and all the things that are otherwise allowed to be in a channel are here.
Unfortunately, there is no icon for the object channel. There should actually be a white circle, and as soon as I go to Simple Pass, you can see that an object channel has actually been created.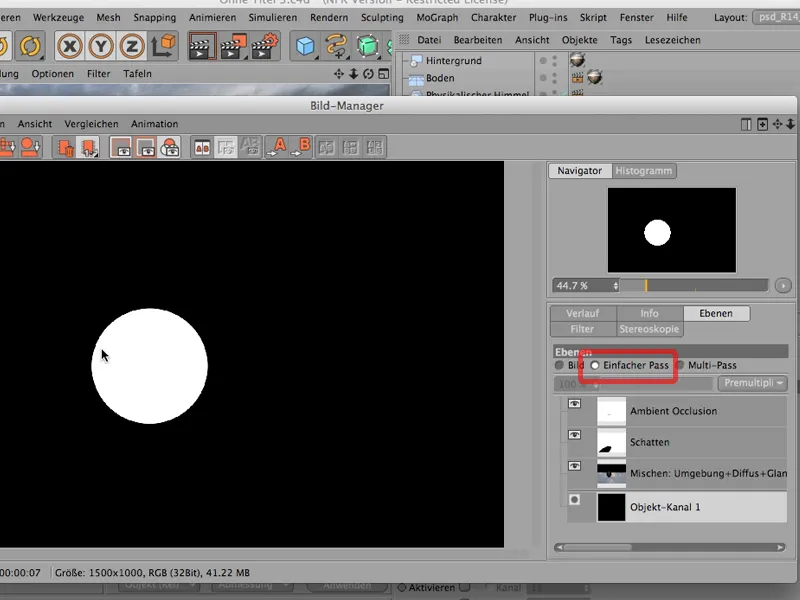
It's just that CINEMA 4D doesn't show this in the icon. And before you grow gray hairs about it, I'd rather tell you that this is the way it is and you don't need to worry about it.
Saving for Photoshop
Back to the image, back to the history, and we're done with rendering so far. Let's take a look at how the whole thing gets to Photoshop.
To do this, of course, we first have to save it to see how it works, having the shadow on its own layer. Under Save file, I save either as a TIFF with PSD layers or as a PSD file. I'll stick with the TIFF...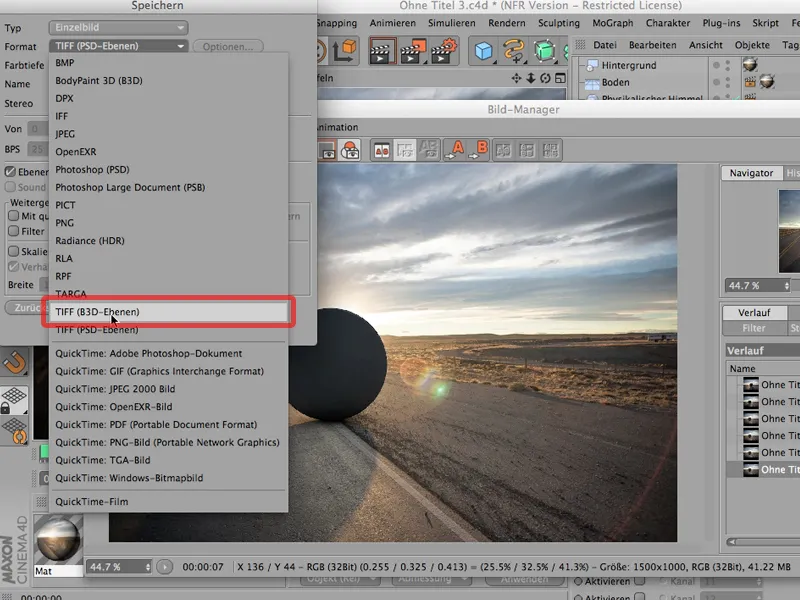
... and must - this is important - go to 16 bit/channel. I don't want to have any shadow problems. You get them relatively easily with 8 bit. Please go to 16 bit in any case.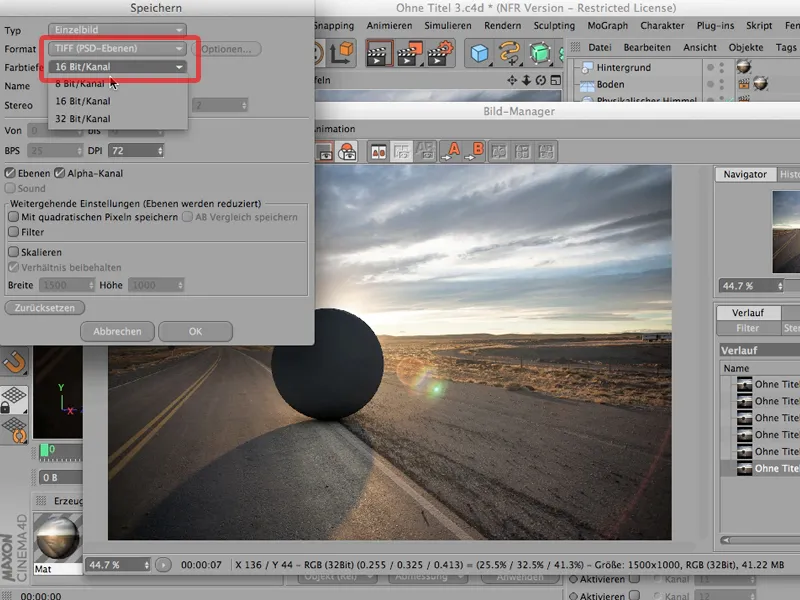
The next thing you should pay attention to (it's not automatically checked) is this: the layers. You have to check the layers, otherwise you will not have the layers that you have rendered out in the image. That would be a shame, so you have to click on it, just like the alpha channel that we have created here.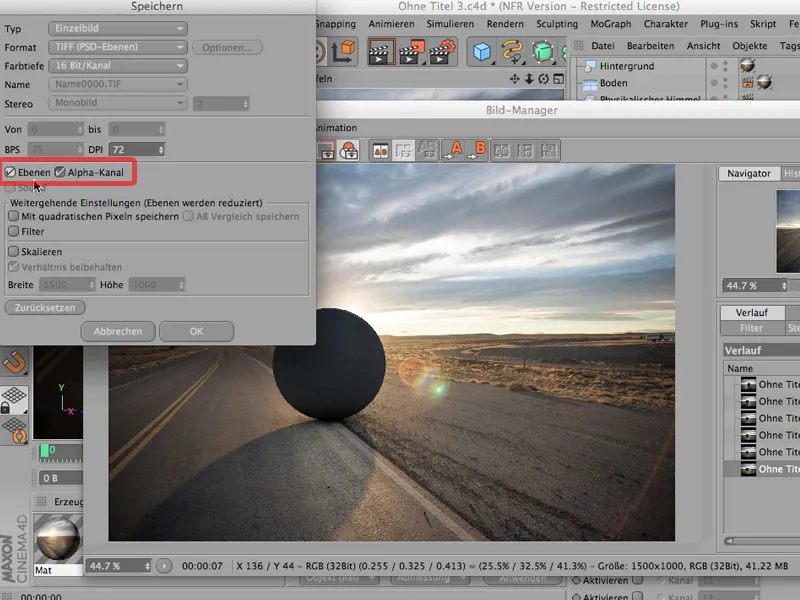
And then you're ready to go; I can save it. I'll save it as "Untitled 3", save that, and now I can close my image manager again.
Merging in Photoshop
Now let's go over to Photoshop and have a look. You can already see that I've already got the street open because that's our background image that we'll need later,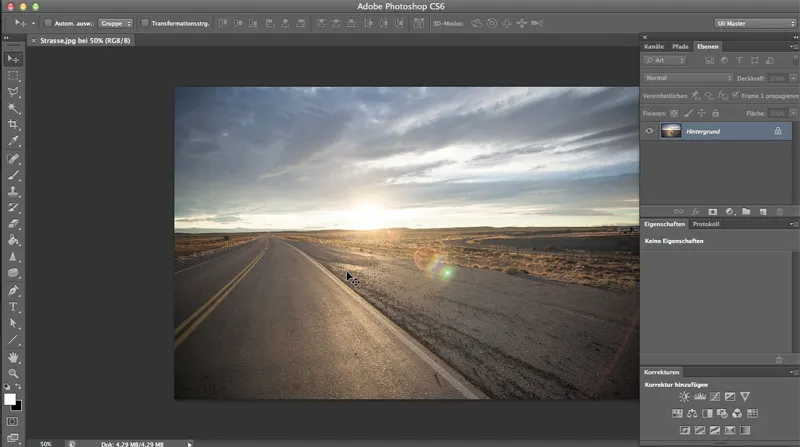
... but now let's use Ctrl>O to get what we've just saved. We should find it down here - exactly.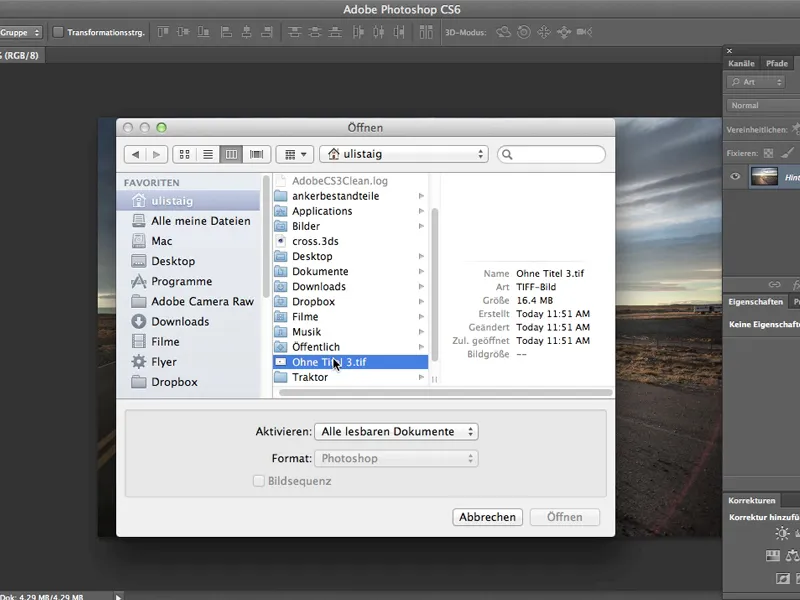
Photoshop asks me again about the color space of CINEMA 4D - whether that's okay, and I say: Yes, of course it's okay.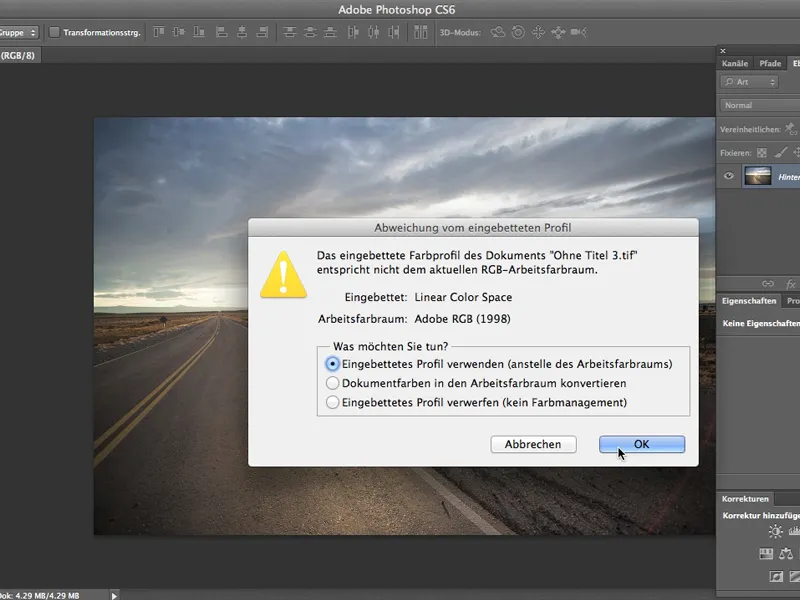
Wonderful, it looks great, even if the street doesn't have the color tone we want, but that's not what matters to us at the moment.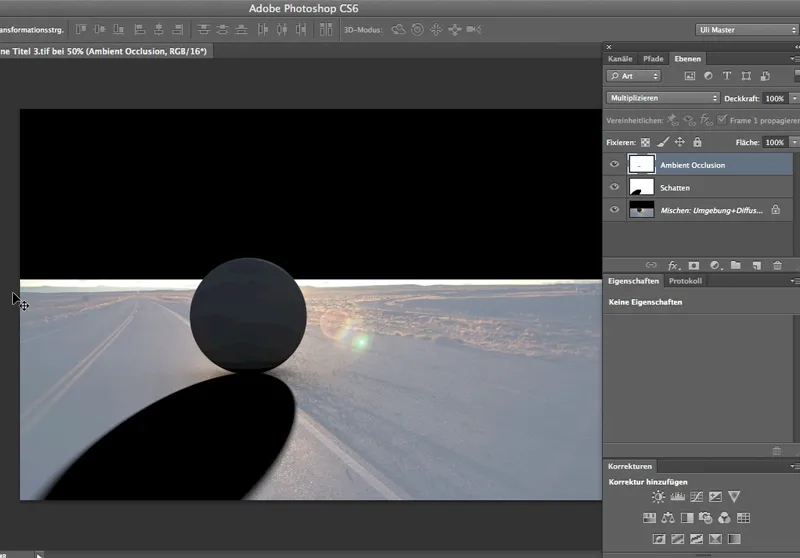
We want to have a look first: What does the whole thing look like once we've loaded the channel that releases the sphere and once we've seen what it looks like with the new background? So: I need the channel here, of course, in the mixed channel I get Selection>Load Selection...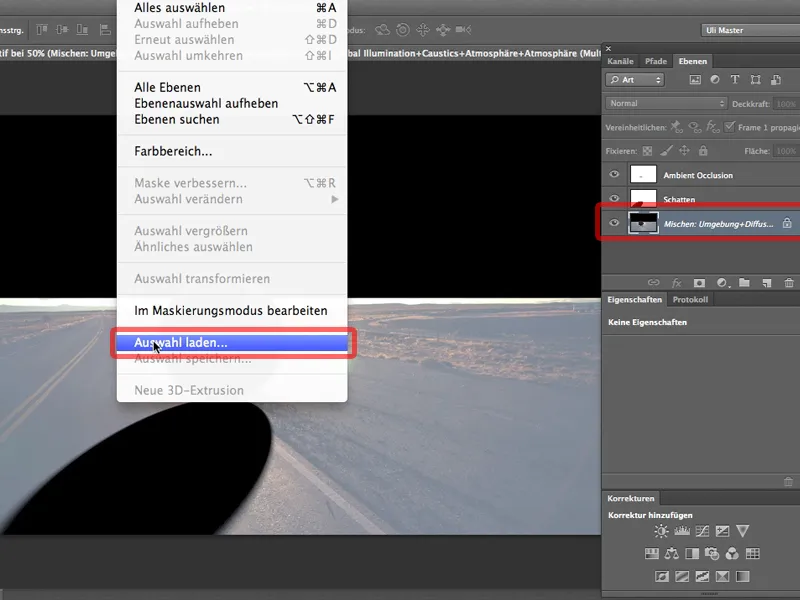
... and it's object channel 1, and as soon as I've clicked on it, I can immediately create a layer mask using this symbol.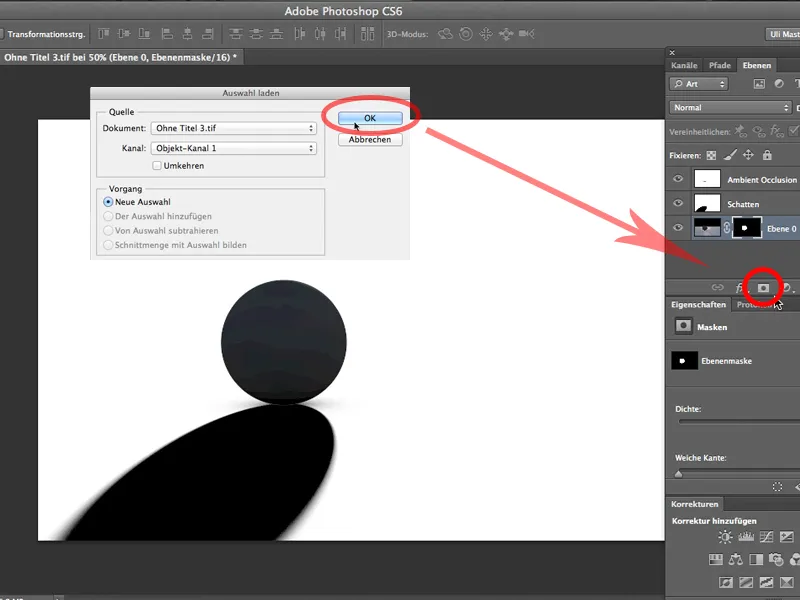
I've almost got it, now I just need to drag my street onto our object here using the Move tool...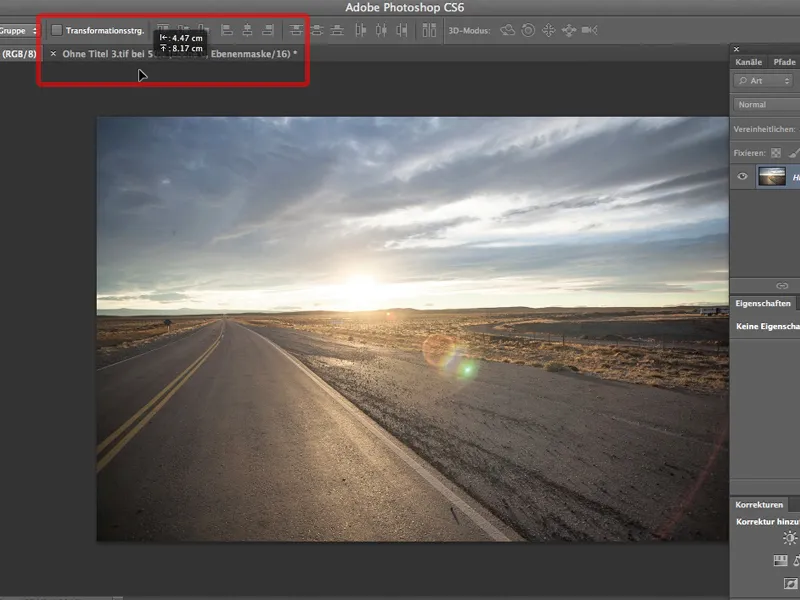
... (Photoshop asks me again if this is okay because of the color models. Yes, it is), and I move my street to the right place. Of course, it's still in the layers - so it has to go down. And now we're almost through.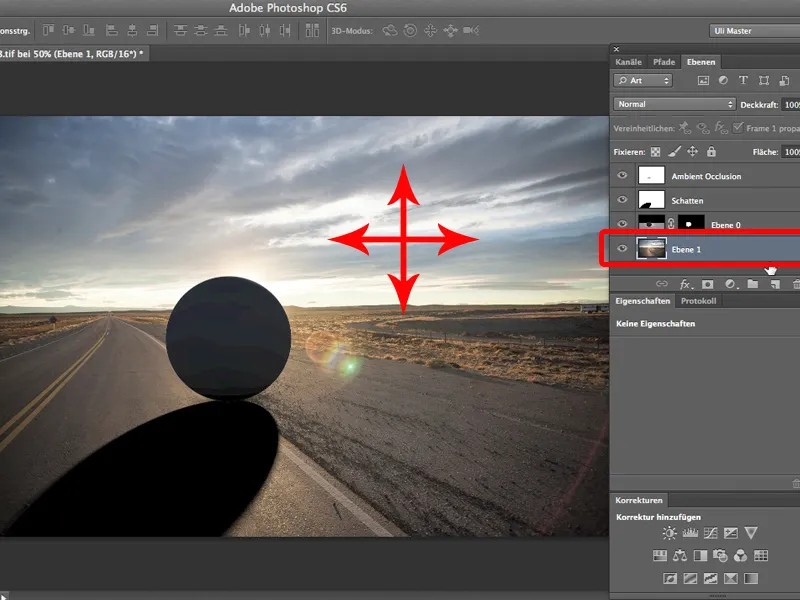
The only thing you almost always have to change is the shadow depth. The shadow arrives here at 100%, and an opacity of 60-70% would certainly look better.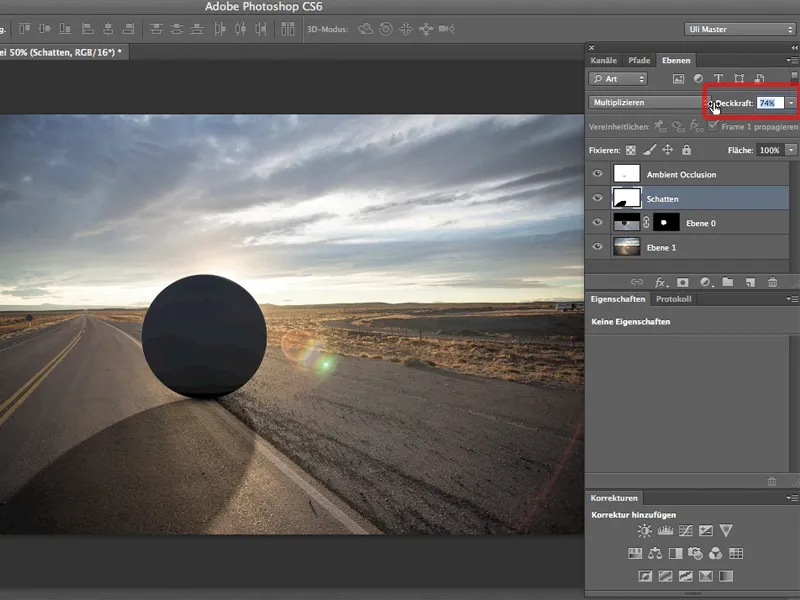
And that's the great thing about this method: I can make the shadow just as deep as I want, like the shadow of these little stones, for example. 76% is not quite enough, I have to go to 80. I can just as easily - and this is also great - change the ambient occlusion if I want to, or make it even deeper, i.e. this small core shadow here, which is important to demonstrate that the sphere is really there.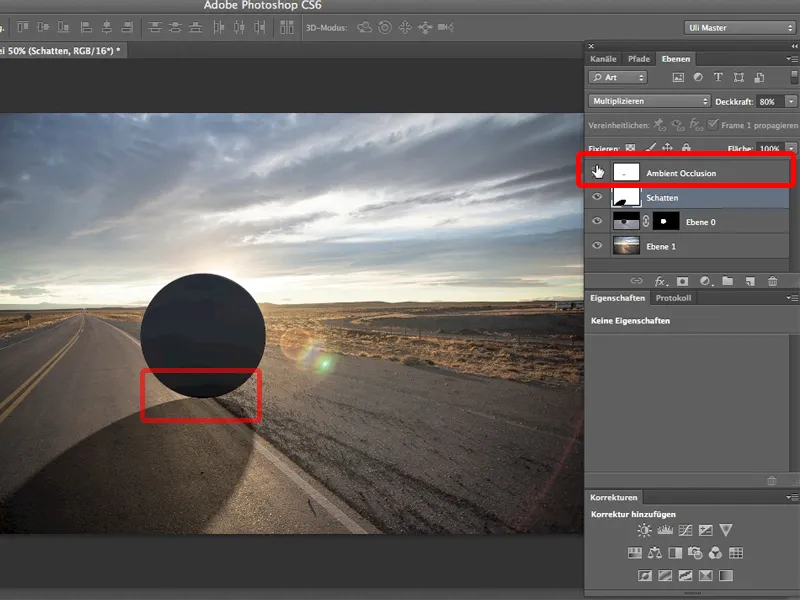
And that's the advantage of multi-pass rendering: I can always put shadows, ambient occlusion and of course other things like highlights or reflections on their own channels and then edit them separately later in Photoshop.
