With regard to the color concept, we had considered making the whole thing very simple and reduced with a blue background and yellow lettering. Blue and yellow are complementary colors, so they are wonderfully legible and stand out nicely from each other.
We could now theoretically create a new color space, give it the blue and then color the text yellow. We could do that, but then we run into the problem of how to create a wiper over the entire image in the middle of the animation that reverses the colors.
We can try to create an adjustment layer via Layer>New>Adjustment Layer or Ctrl+Alt+Y and then apply an Invert Channels effect. But then we see that our colors are not completely complementary. Orange would be complementary to blue and that doesn't quite fit here, we can't get to the colors.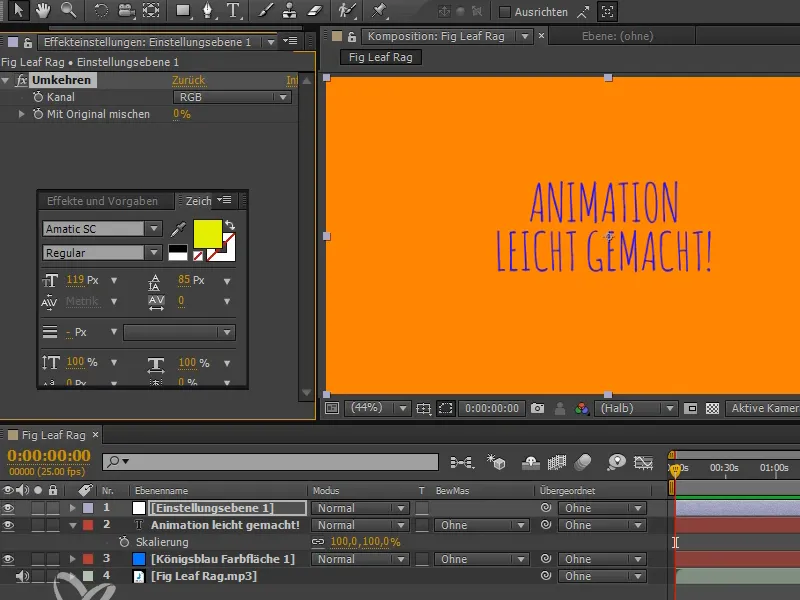
But I definitely want to do this and there is a possibility.
Step 1
Let's build this up as follows: We take the royal blue color plane and press Ctrl+Shift+Y or go to Layer>Settings for Color Planes and set the color to black.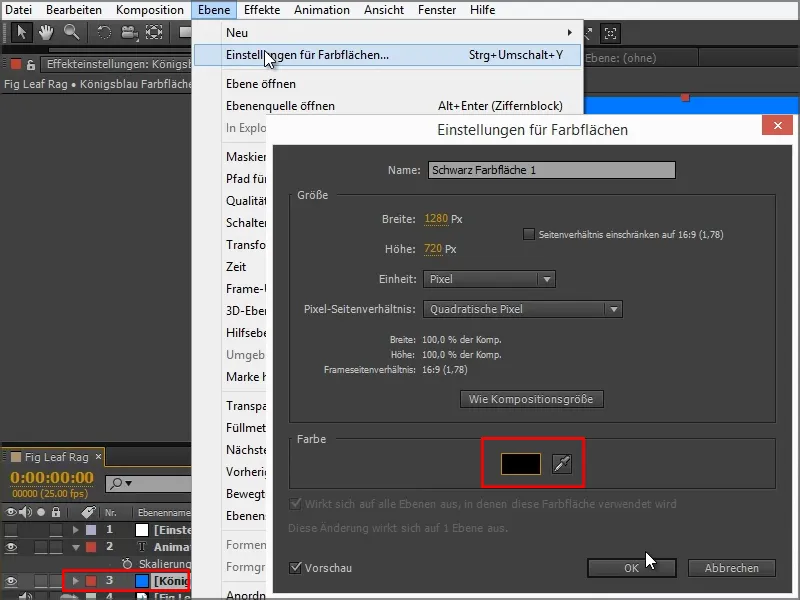
This is then changed nicely and After Effects even renames the color area.
We now simply write the text "Animation made easy" in white.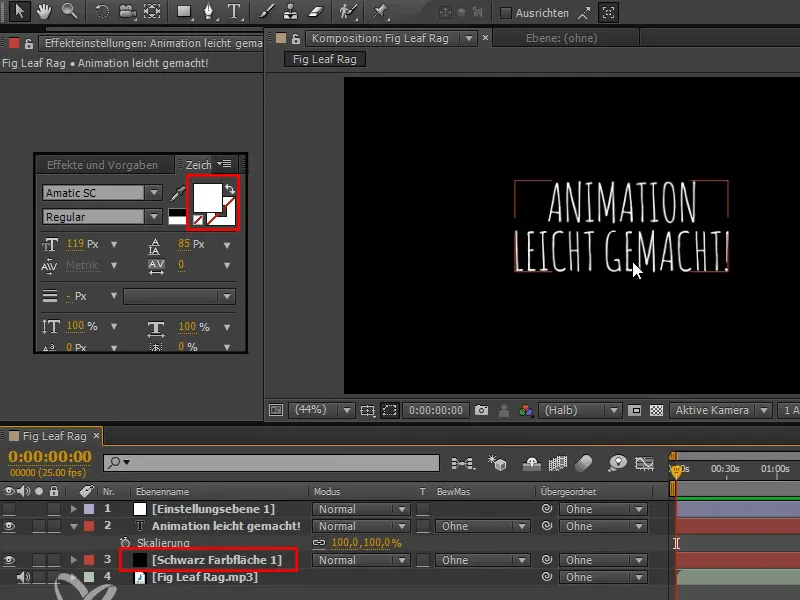
We have black and white without transparency and can reverse this very easily.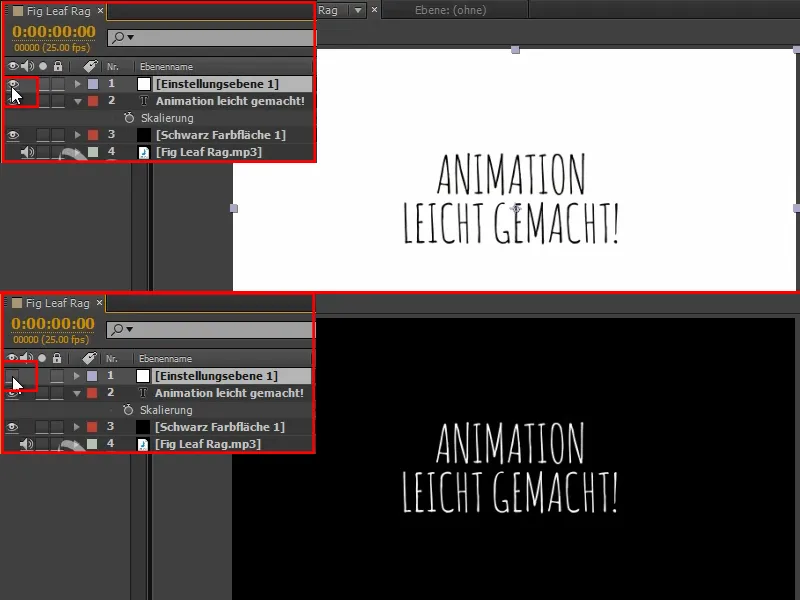
But now it stays with black and white, but I want blue and yellow.
Step 2
So we create another adjustment layer with Ctrl+Alt+Y ("Adjustment Layer 2") and apply Effects>Color Correction>Colorize to it.
The effect is very simple and just premapped the colors. It takes black and white and assigns a different color value.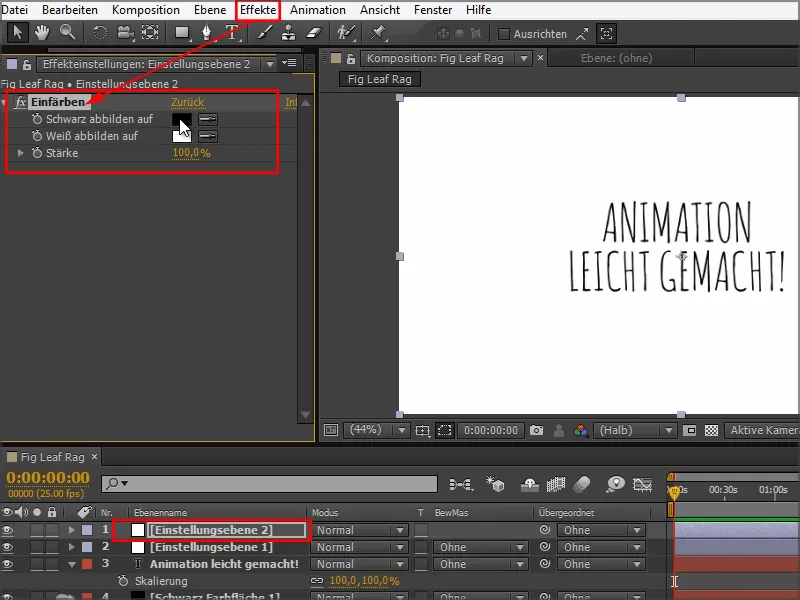
We then take the black here and adjust our blue. I had already written down a color code "008FF", which is this beautiful blue.
And we also adjust the white with the yellow, the color value is "FFF000", a really strong yellow.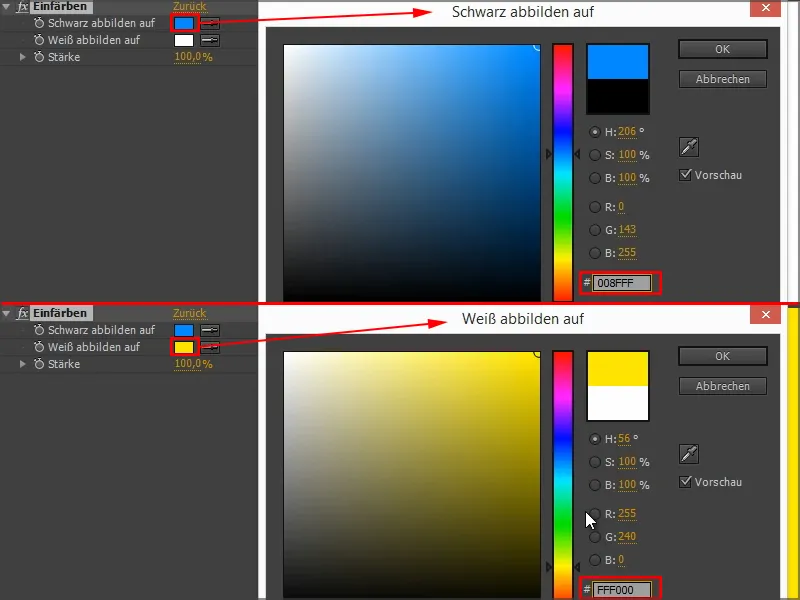
Step 3
Now we've applied this after the invert layer. I will also name the whole thing "Change Colors" and "Colorize".
Let's also lock the top layer because we never have to touch it again.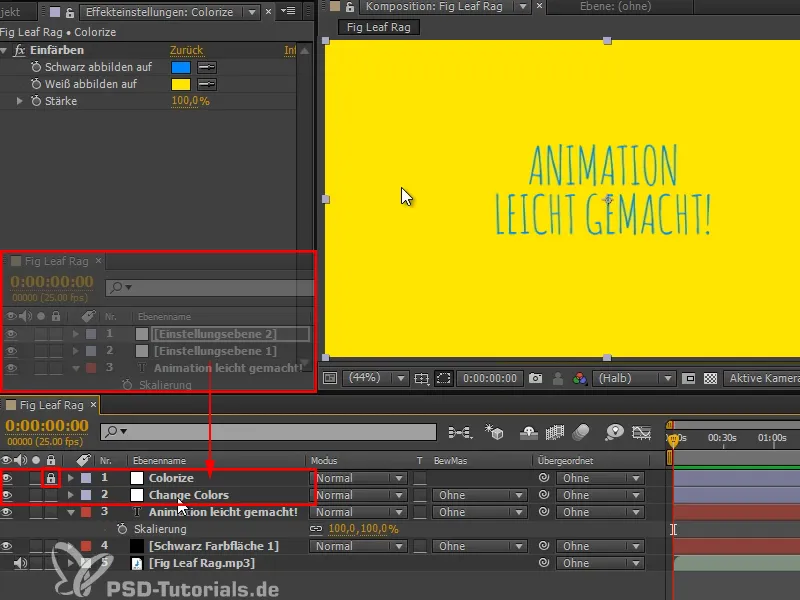
When I turn "Change Colors" on and off, we have a wonderful reversal of colors without slipping into orange or purple.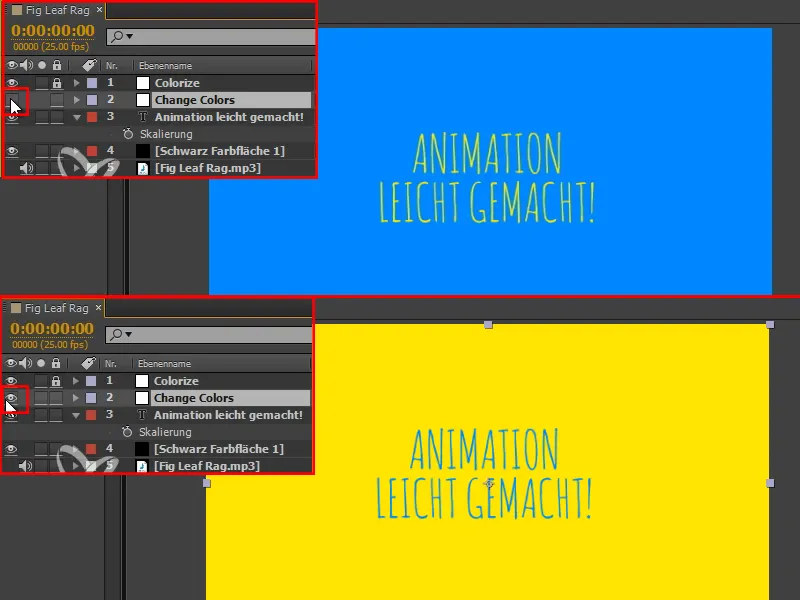
But how do we design the transition? We can move the "Change Colors" layer from left to right or from top to bottom through the image to create a transition. But that's not so interesting.
I would like to do something more, and that is to divide the whole thing into strips, and these strips should wipe across the image to break up the edges a little more. What's the best way to do this?
Step 4
There are effects for this, such as Effects>Transition Effects; we have the Line Sweep, which goes in one direction, but first one line is finished, so to speak, before the next one starts.
That's not irregular enough for me.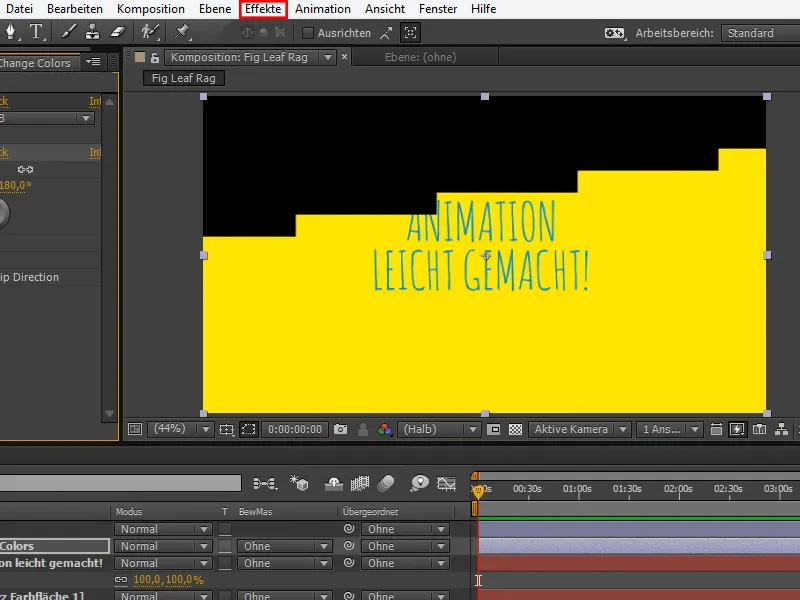
Step 5
That's why it's best to do this with masks. I double-click on the mask icon and create a mask that fits my dimensions exactly. This is a very practical function that we will use again later.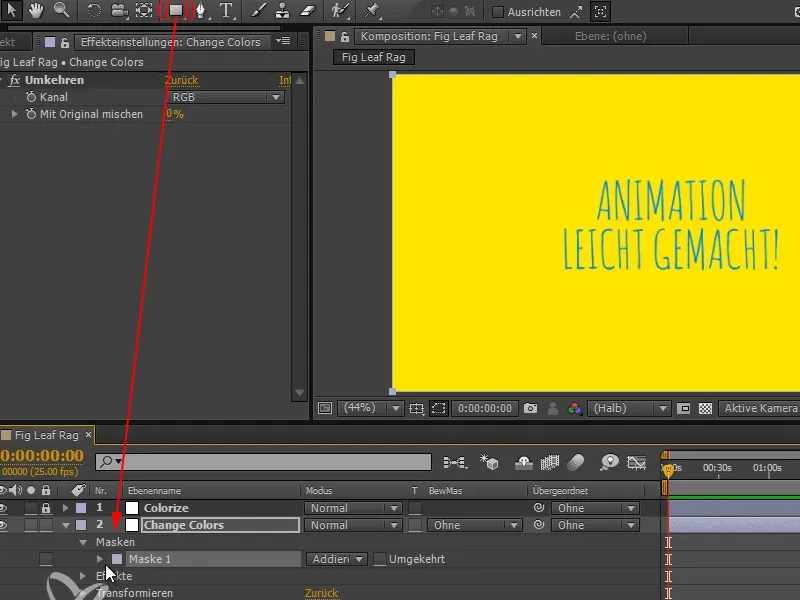
Step 6
I want to divide this mask into 20 pieces so that we have 20 individual columns. This is not possible with standard After Effects tools.
But in situations like this, I just write a script for it. For the things we use here, I've included the scripts with the respective tutorial.
There we find Layer Chainer, Mask Slicer and Sequence Strokes. Mask Slicer is what we need here, as you can imagine.
This symbol in front of the file name belongs to the Extendscript Toolkit, which I can start here. If I start it, this Extendscript Toolkit will also start.
This toolkit has to be installed separately because it is not installed by default. You still have to do that, it's very easy to do via CreativeCloud.
We have a few settings in this script above. I haven't built a user interface for all the scripts because they are for my own use. This means that you have to change all the settings here directly in the text file.
In this case we can change two values: The "noOfSplices", so how many individual slices we want to have in the end.
And the "seperateLayers", which can be set to true or false. If true, a new layer is added for each slice.
Let's try this out with 4 slices, ...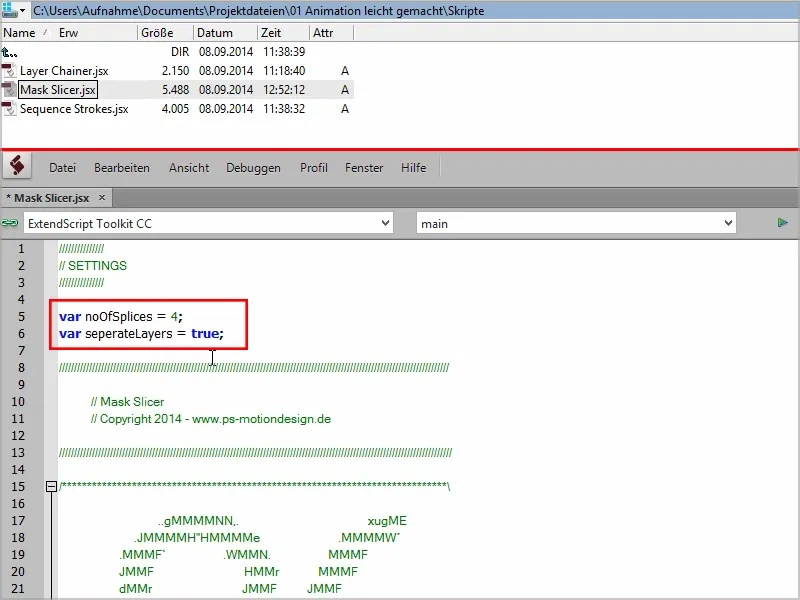
... go to After Effects and select the mask that we want to slice. This is very important.
Then we select After Effects CC at the top of the application target. As you can see, there are also other programs in there, this toolkit is there to write and test scripts.
So in this case we select After Effects, then I press the play button....webp?tutkfid=58296)
... and go back to After Effects. There we have the new layers, each consisting of one layer.
And if I now generate a 4-color gradient here, ...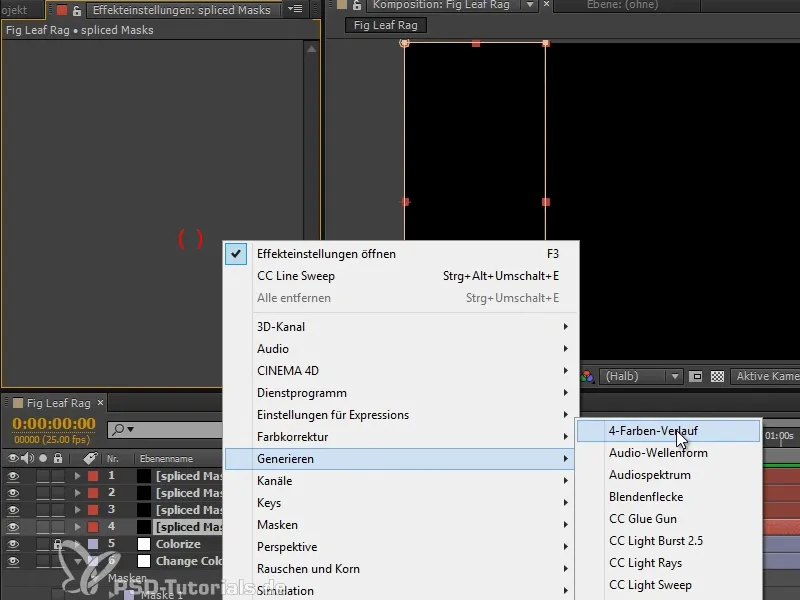
... then you can see that the whole thing gives an image again. It's actually a layer with one coordinate, only the masks are sliced. This means that we have individual slices of this layer, which can be very practical because we can move and rotate them individually.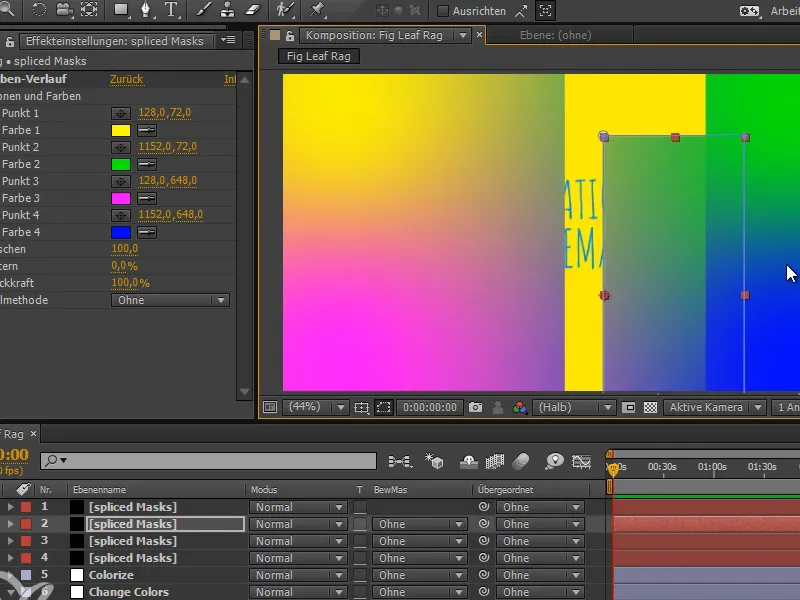
But we don't need that here. I want something else.
Step 7
I want to have all the masks on one layer, not 4, but 20.
And we set seperateLayers to false. I save, go back to Play,...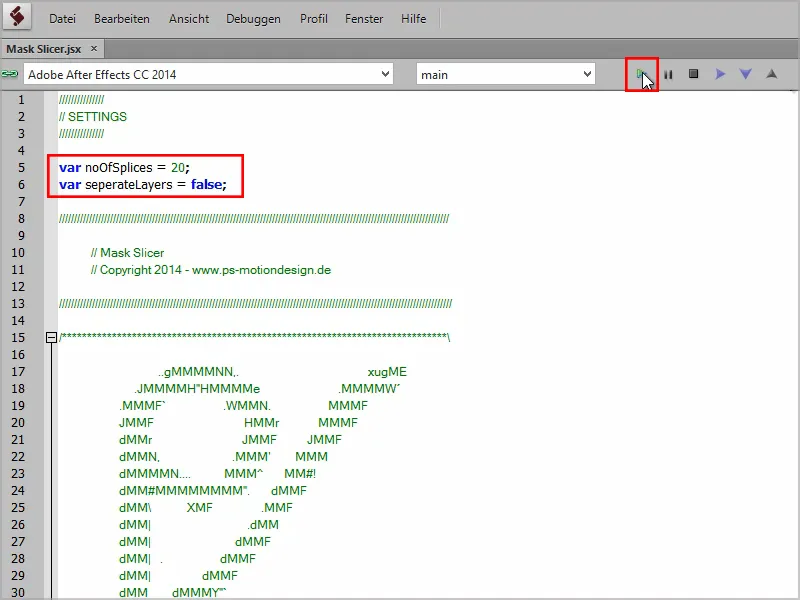
... and now we have all 20 masks on one layer.
I select them from 1-20 and press Ctrl+C or cmd+C. Then I delete the original mask and paste them all here in their place.
Now they're all there and I'd like to animate them in the next step.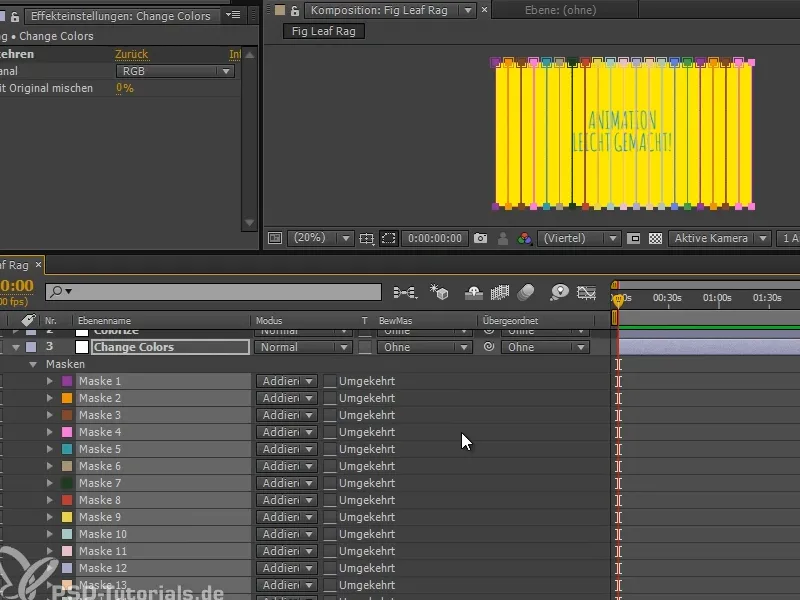
Step 8
Unfortunately, masks do not have transformation properties such as rotation and scaling, only the mask path. But that's not a problem.
We select all the masks and unfold them. Then we click on Mask path, set a keyframe and go into the composition a little later, where we move all the masks directly downwards out of the image.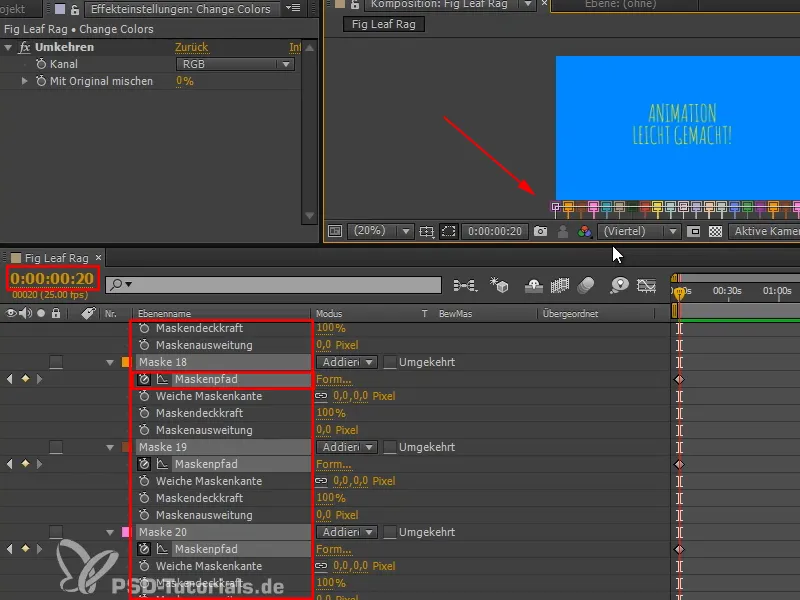
Step 9
Let's take a look at this. The music is playing in the background, that fits. And we now have two linear keyframes, which isn't particularly exciting.
I'd like it to be a bit more exciting and I don't want to work with linear keyframes, because we've already heard it in the Disney Rules: constant speed doesn't happen in real life, so we don't need it in animation either.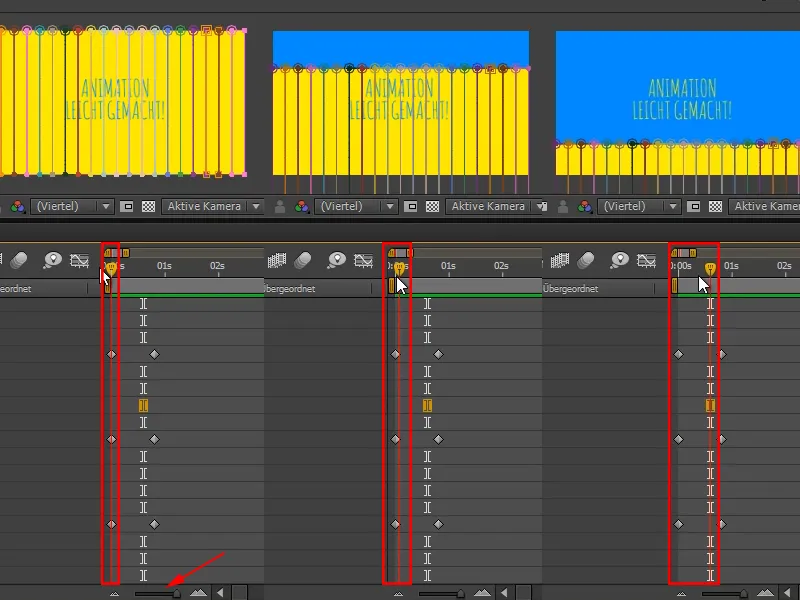
Step 10
To do this, we click on the diagram editor. There I get the curves that we will get to know in detail with the bouncing ball.
To limit it to the mask paths, I select all the masks and press U, because that gives me all the animated properties.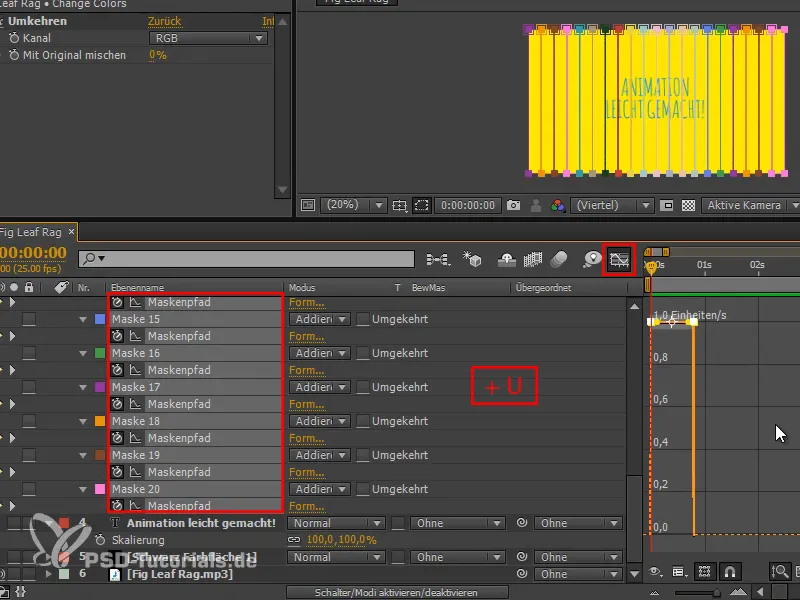
Here we can now see the speed graph. It's not quite as nice to work with as the value curve, as we'll see later. But you can work well with it if you want to animate many properties at the same time.
I would first like to give it an Easy Ease, either with F9 or with this button.
This has changed the graph dramatically. The one on the left would be a constant speed, we start at a certain speed and stop abruptly.
With Easy Ease, we slowly increase the speed from zero and then decrease it again. This is a parabolic shape.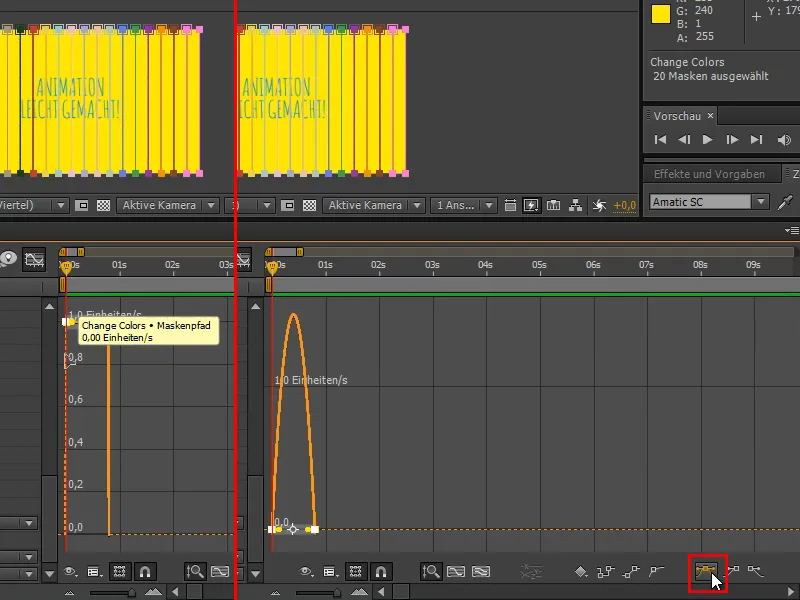
I would like to make it a bit more extreme. I'll take the tangent and just pull on it a bit so that we really have a peak in the middle.
So what, let's see what that looks like ...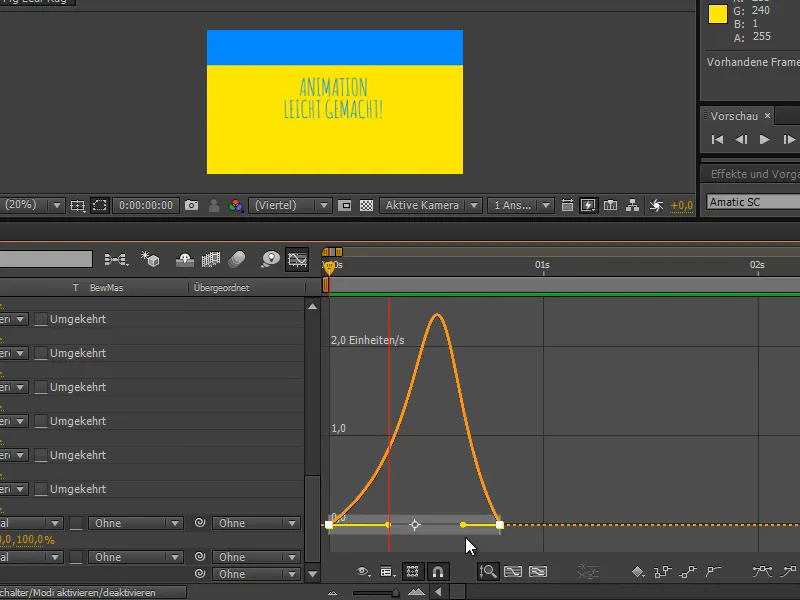
I'll let it run and see: That swooft right over it. We have a much faster movement in the middle than at the beginning and end. I like that a lot.
Step 11
We could have done the same thing with the position - but why did we make the slices?
We're now moving it irregularly in time and arranging the keyframes here randomly so that we get a bit of variance in the shape of the reveal. The lines shouldn't all scurry across at the same time.
In the end, it looks a bit like a skyline. We want to break up this one line that would normally separate our image. Sometimes that's only enough on one side or only at the front or only at the back. I try to avoid them ending at the same height.
That looks good.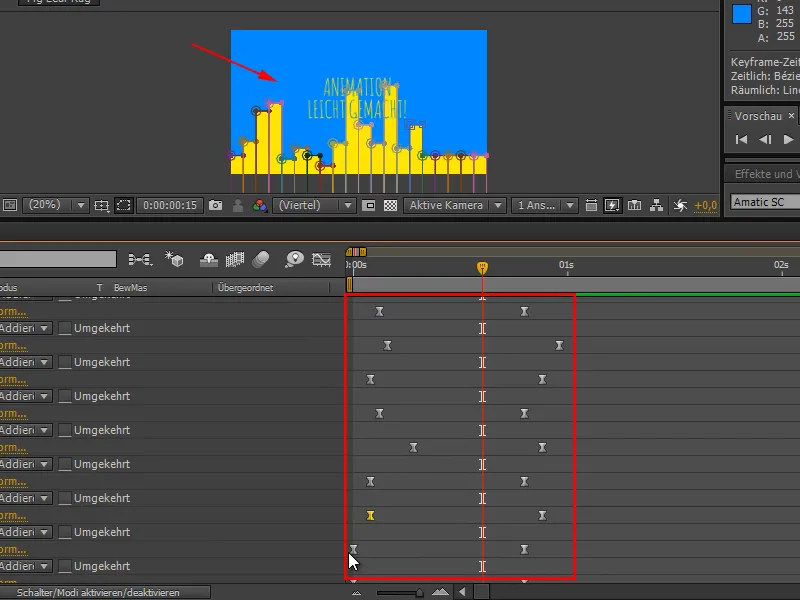
And you can see when you activate the preview - it looks cool. Fantastic.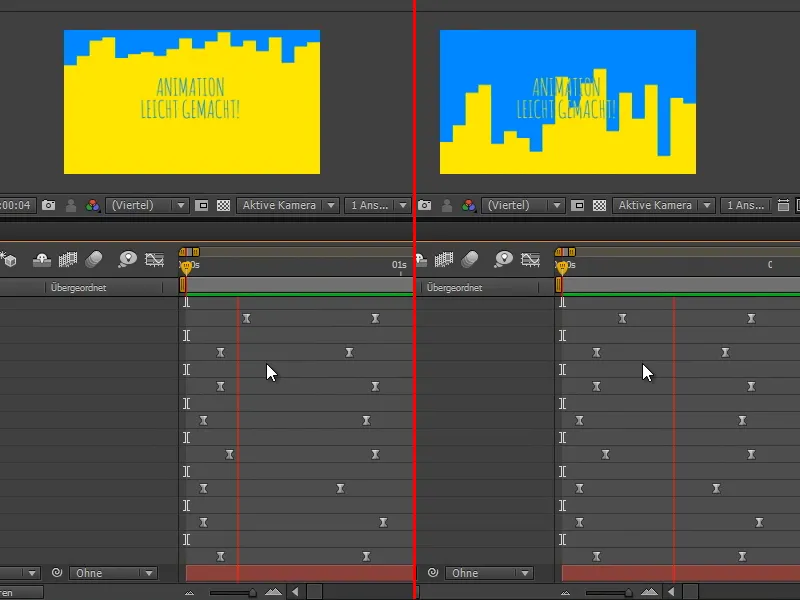
Step 12
And we can now take this layer, rotate it, scale it, move it, and of course use it more often because it's just the invert effect.
We duplicate it, move it in time and change from yellow to blue and from blue to yellow.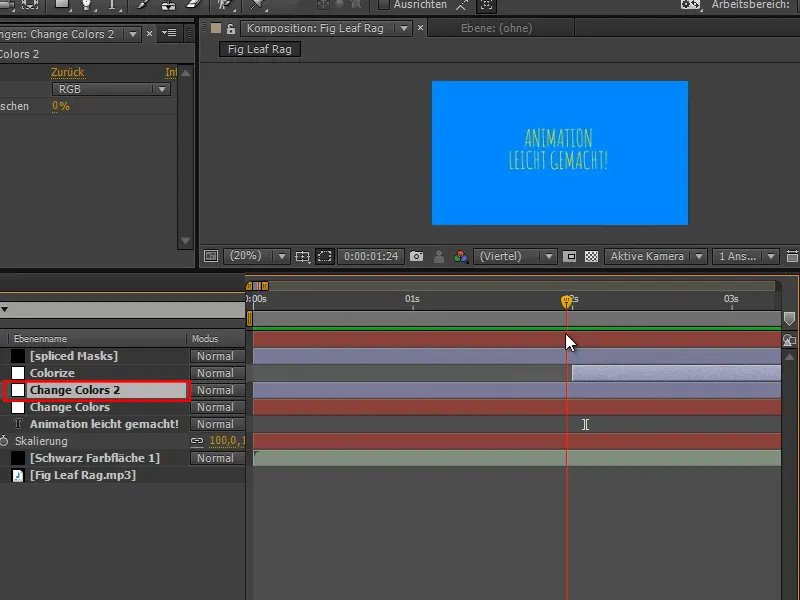
In this case, however, it is shown beforehand and then no longer there. We still have to reverse this, because I want us to have no layer at the beginning and for the layer to move in front of it.
So I delete the duplicated layer again and activate the "Change Colors" layer. Then we select all the keyframes by drawing a rectangle over them.
I right-click on the keyframe wizard and find Reverse Keyframe Order at the bottom.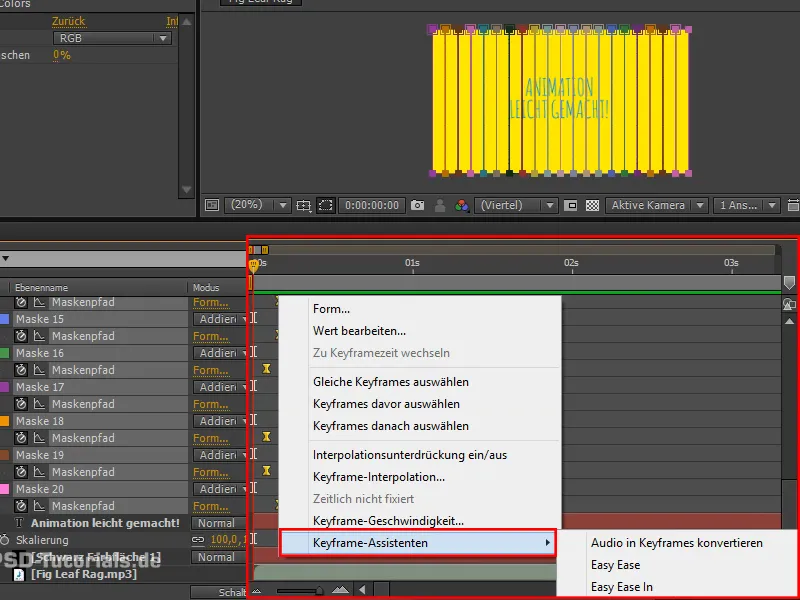
I just pressed that and now the yellow color moves from the bottom into the blue.
And now it should also work if I duplicate the layer again and then move the whole thing a little further back.
We can now move from one color to the other and back again. Perfect.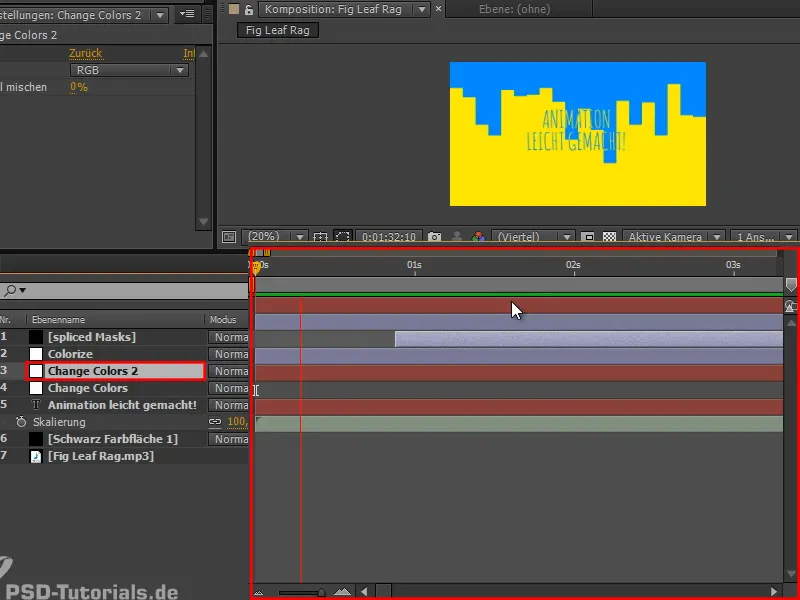
That's already working. Our next construction site in the next part of this tutorial series is the text.
