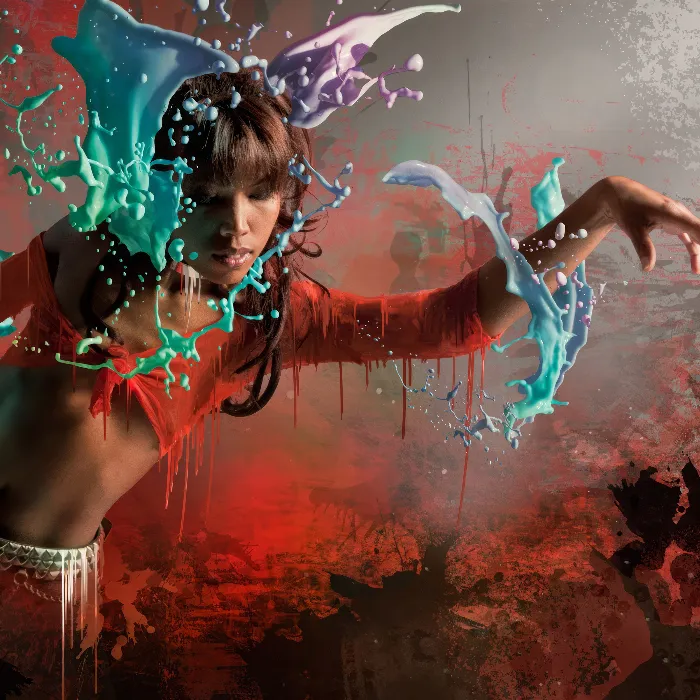
The Lomo effect gives your photos a unique retro look with bold colors, strong contrasts, and a typical vignette. Inspired by the iconic Lomo cameras, this style is perfect for giving images a nostalgic yet modern touch. With Photoshop, you can quickly and easily apply the Lomo effect. In this tutorial, I'll show you step by step how to enhance colors, adjust contrasts, and add a moody vignette to create the characteristic Lomo look. Let's get started and turn your photos into works of art!
Step 1
Open stock image 2425769 in Photoshop and adjust the size if necessary (Image>Image Size...)
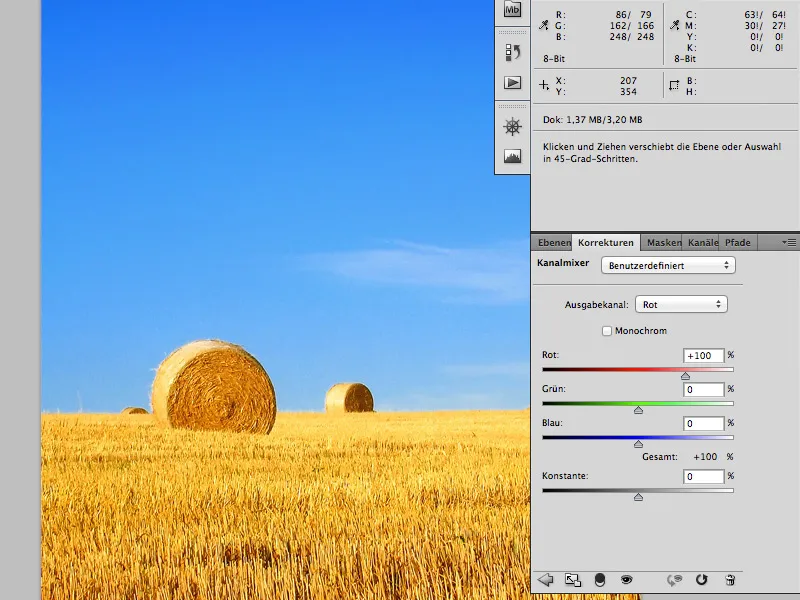
Through the menu Layer>New Adjustment Layer>Channel Mixer..., create a new Channel Mixer Adjustment Layer and enter the following values:
Red | Green | Blue | Constant
• Output Channel Red: +100 | 0 | 0 | 0
• Output Channel Green: -15 | +115 | 0 | 0
• Output Channel Blue: -15 | 0 | +115 | 0
• Layer Mode: Color | Opacity: 100%
Step 2
In the following sections, we will increase the contrasts of the image and move the colors into a somewhat surrealistic range using various adjustment layers.
Now, create another adjustment layer - this time for the Curves (Layer>New Adjustment Layer>Curves...)
Here, we will trim the color range of all channels, but individually for each channel.
Red Channel:
• Left Point: Output 0 | Input 25
• Right Point: Output 255 | Input 230
Green Channel:
• Left Point: Output 0 | Input 50
• Right Point: Output 255 | Input 210
Blue Channel:
• Left Point: Output 0 | Input 50
• Right Point: Output 255 | Input 205
• Layer Mode: Normal | Opacity: 60%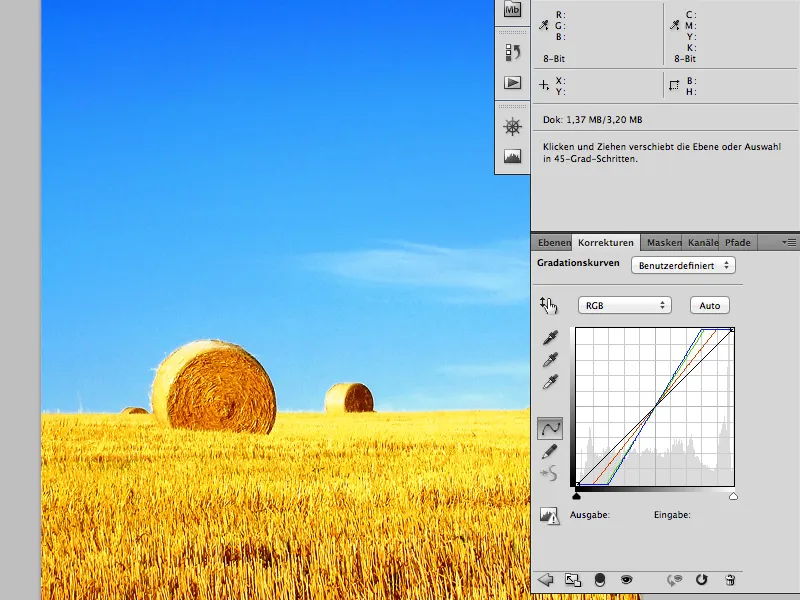
Step 3
Next, create another Curves adjustment layer (Layer>New Adjustment Layer>Curves...) Here, each channel will be edited individually as well.
Red Channel:
• Left Point: Output 55 | Input 0
• Right Point: Output 210 | Input 255
Green Channel:
• Left Point: Output 0 | Input 50
• Right Point: Output 255 | Input 210
Blue Channel:
• Left Point: Output 0 | Input 50
• Right Point: Output 255 | Input 205
• Layer Mode: Hue | Opacity: 100%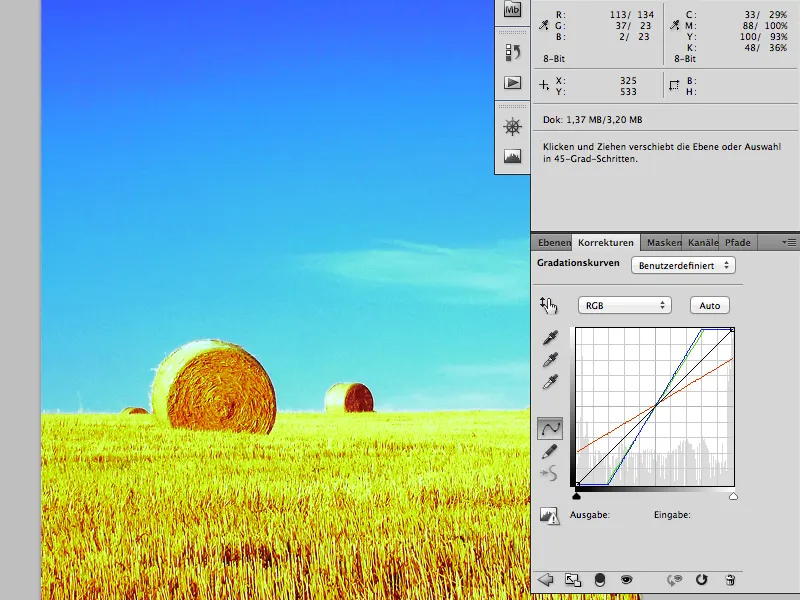
Step 4
Add another Curves adjustment layer (Layer>New Adjustment Layer>Curves…) Here, we will edit all channels simultaneously, in RGB mode. Adjust the curve to create a slight S-curve as shown in the image: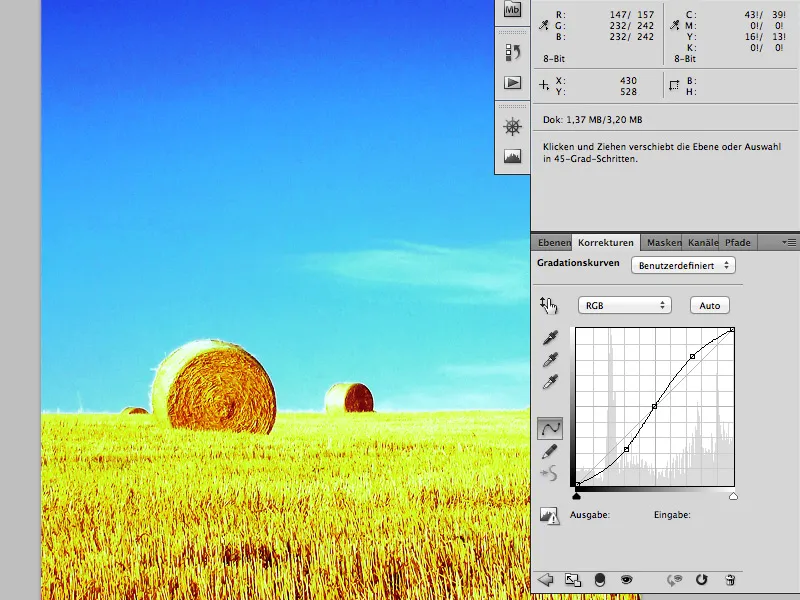
Layer Mode: Luminosity | Opacity: 100%.
Step 5
Create a selection in the middle of the image using the Lasso Tool. Specifically choose the areas that should not be darkened later. In this step, we create the darkened border.
Then, invert the selection (Select>Inverse). Right-click and select Feather..., set the Radius to 60-80 pixels depending on the image, and confirm with OK.
Keep the selection active...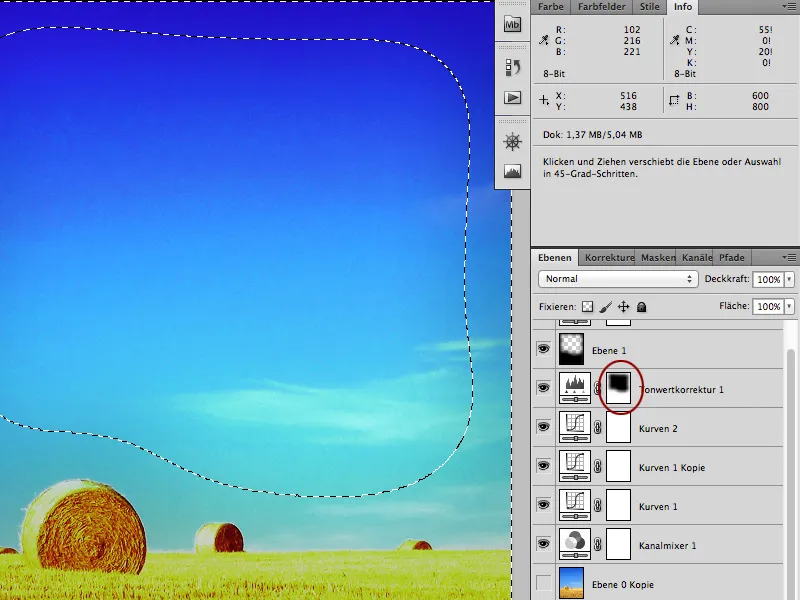
Step 6
... and create a new adjustment layer (Layer>New Adjustment Layer>Levels...)
The Levels adjustment should now only affect your selected area. Set the midtones slider to 0.80. Layer Mode: Normal | Opacity: 50%.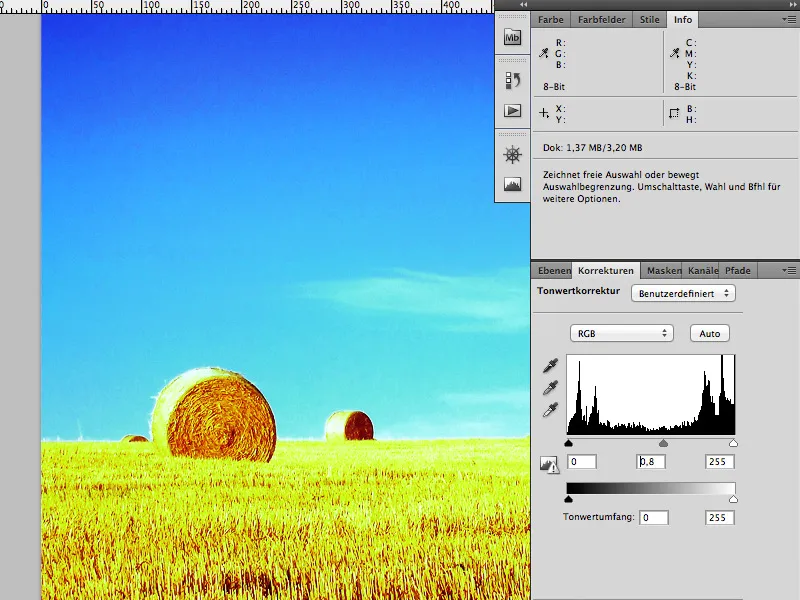
Step 7
Reload the selection of the Levels adjustment (pressing Ctrl/Cmd while clicking on the Layer Mask of the Levels adjustment) and create a new layer, with the corresponding Layer Mask also applied.
Fill the layer with black, set the Layer Mode to Hard Light, and the Opacity to 20%.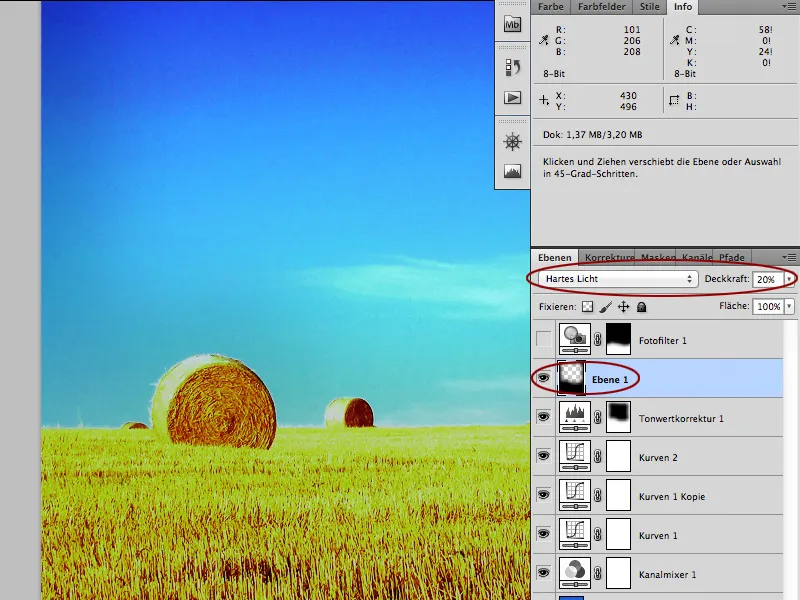
Step 8
This step specifically applies to my image, as the corrections made the hay slightly green. Fix this by using a Photo Filter (Layer>New Adjustment Layer>Photo Filter...) In the Layer Mask, select only the hay area.
Set the Color of the Photo Filter to: #ec8a00 and the Density to: 35%. You can now set the Opacity of the layer to 80%.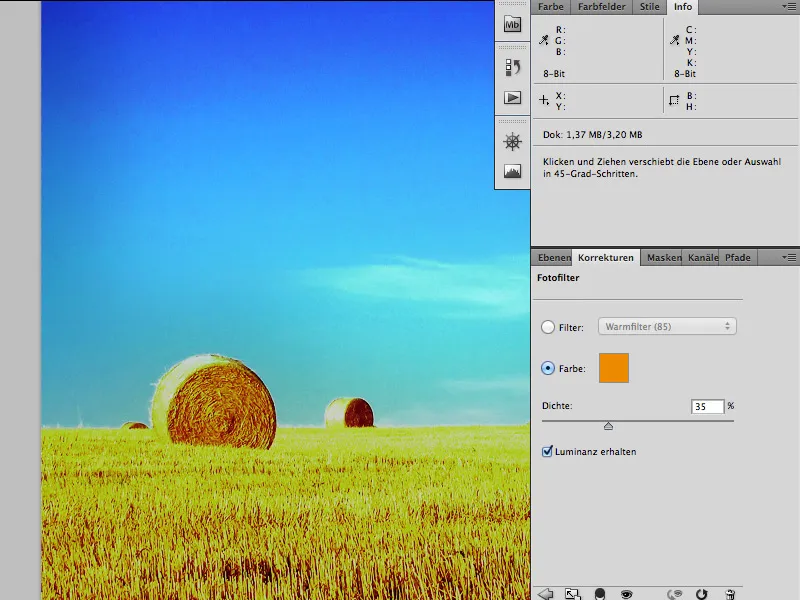
That's it. Have fun recreating it...
