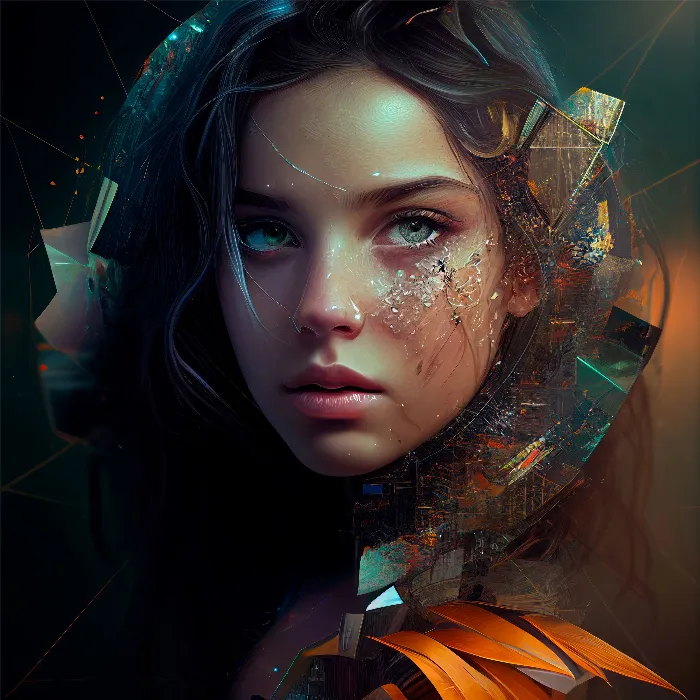
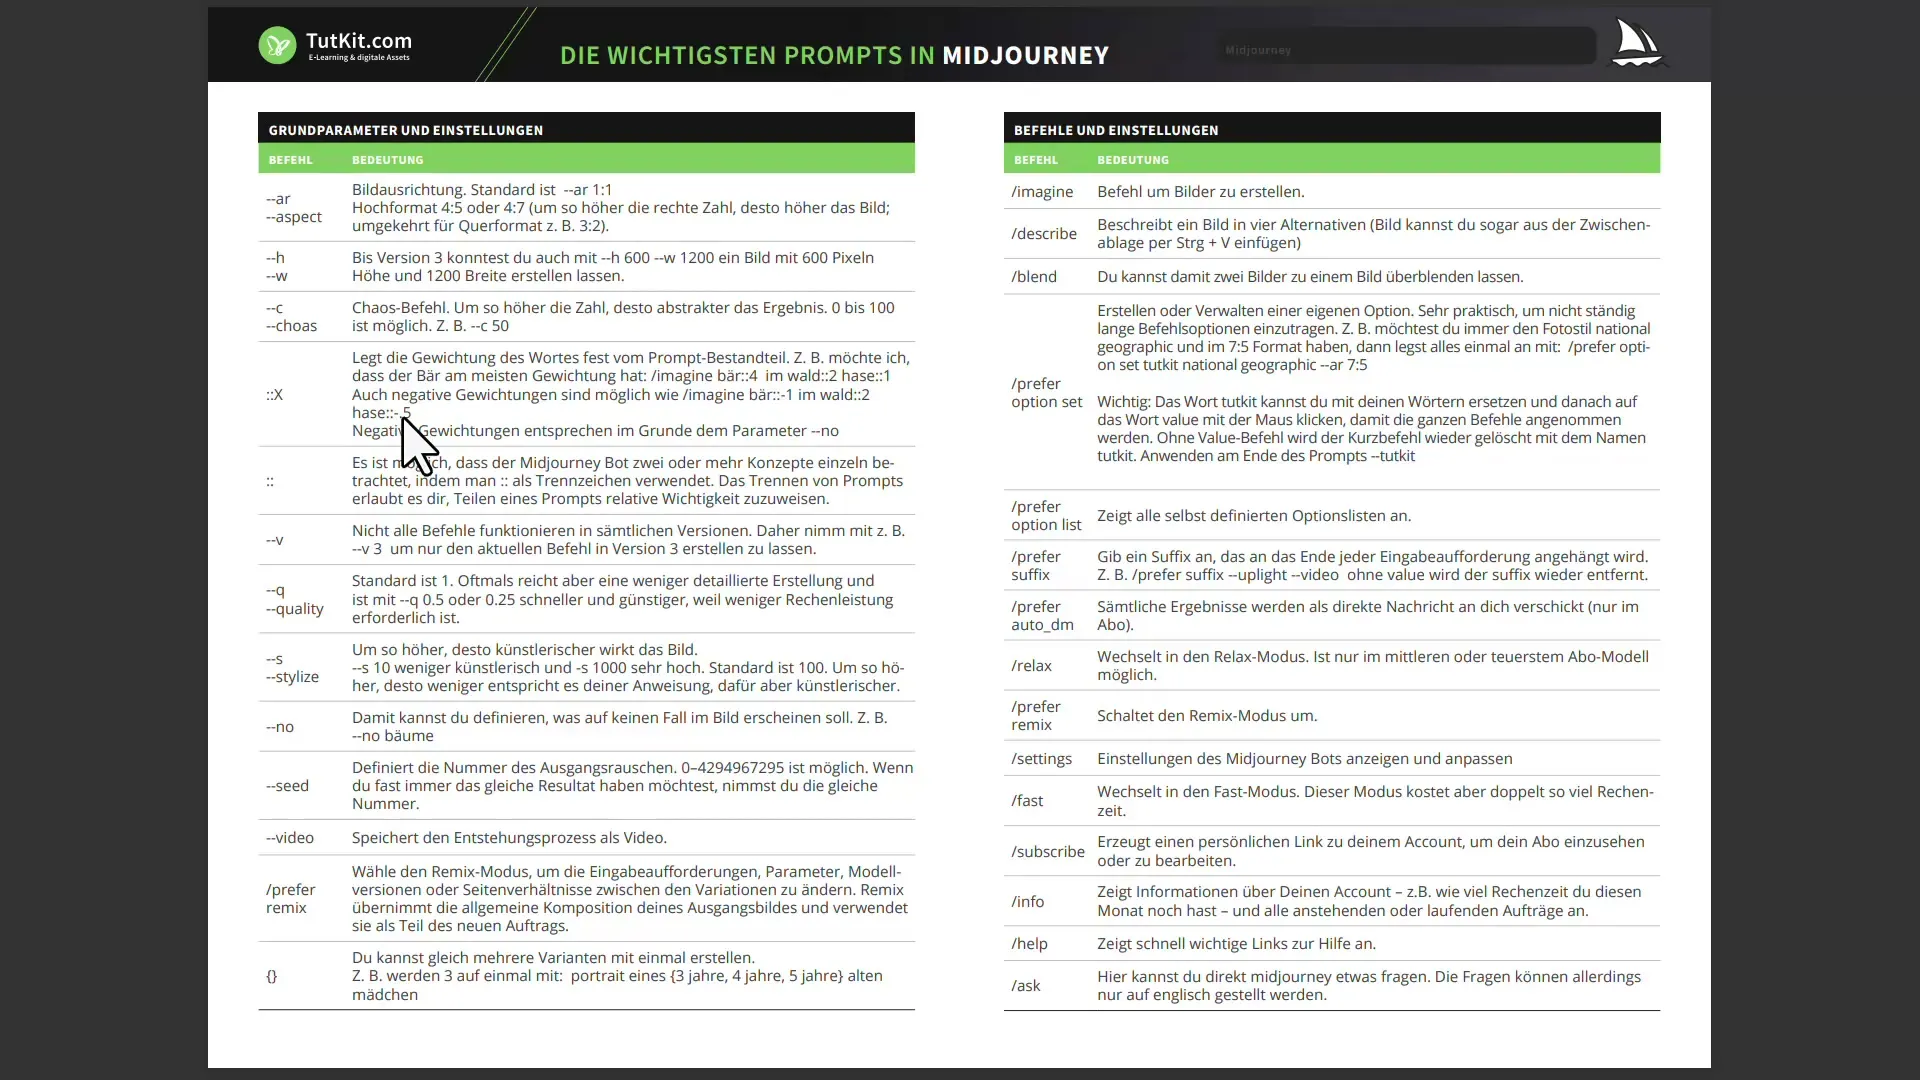
In the constantly evolving world of AI-generated art, Midjourney is a remarkable player. This software allows you to create impressive images through simple text commands. However, since the introduction of Midjourney, there have been some changes regarding accessibility and paid subscriptions. In this guide, I will introduce you to the basic commands and tips that will help you unlock the full potential of Midjourney. This reference card and its accompanying explanations will allow you to achieve the desired results faster and understand the capabilities of this AI.
Key Takeaways
- Midjourney now requires a subscription to use the software.
- Specific parameters and commands are crucial for creating specific images.
- The quality and creativity of your results can be influenced by adjusting parameters like "Chaos," "Quality," and "Weight."
- Use curly brackets to generate multiple variants of images with different parameters simultaneously.
Step-by-Step Guide
1. Subscribe and Get Started with Midjourney
Before you can start using Midjourney, you need to subscribe. Without an active subscription, you will have limited access to the features. The subscription requirements vary, with the middle option being recommended for effective use of the software.
2. Adjust Basic Image Orientation
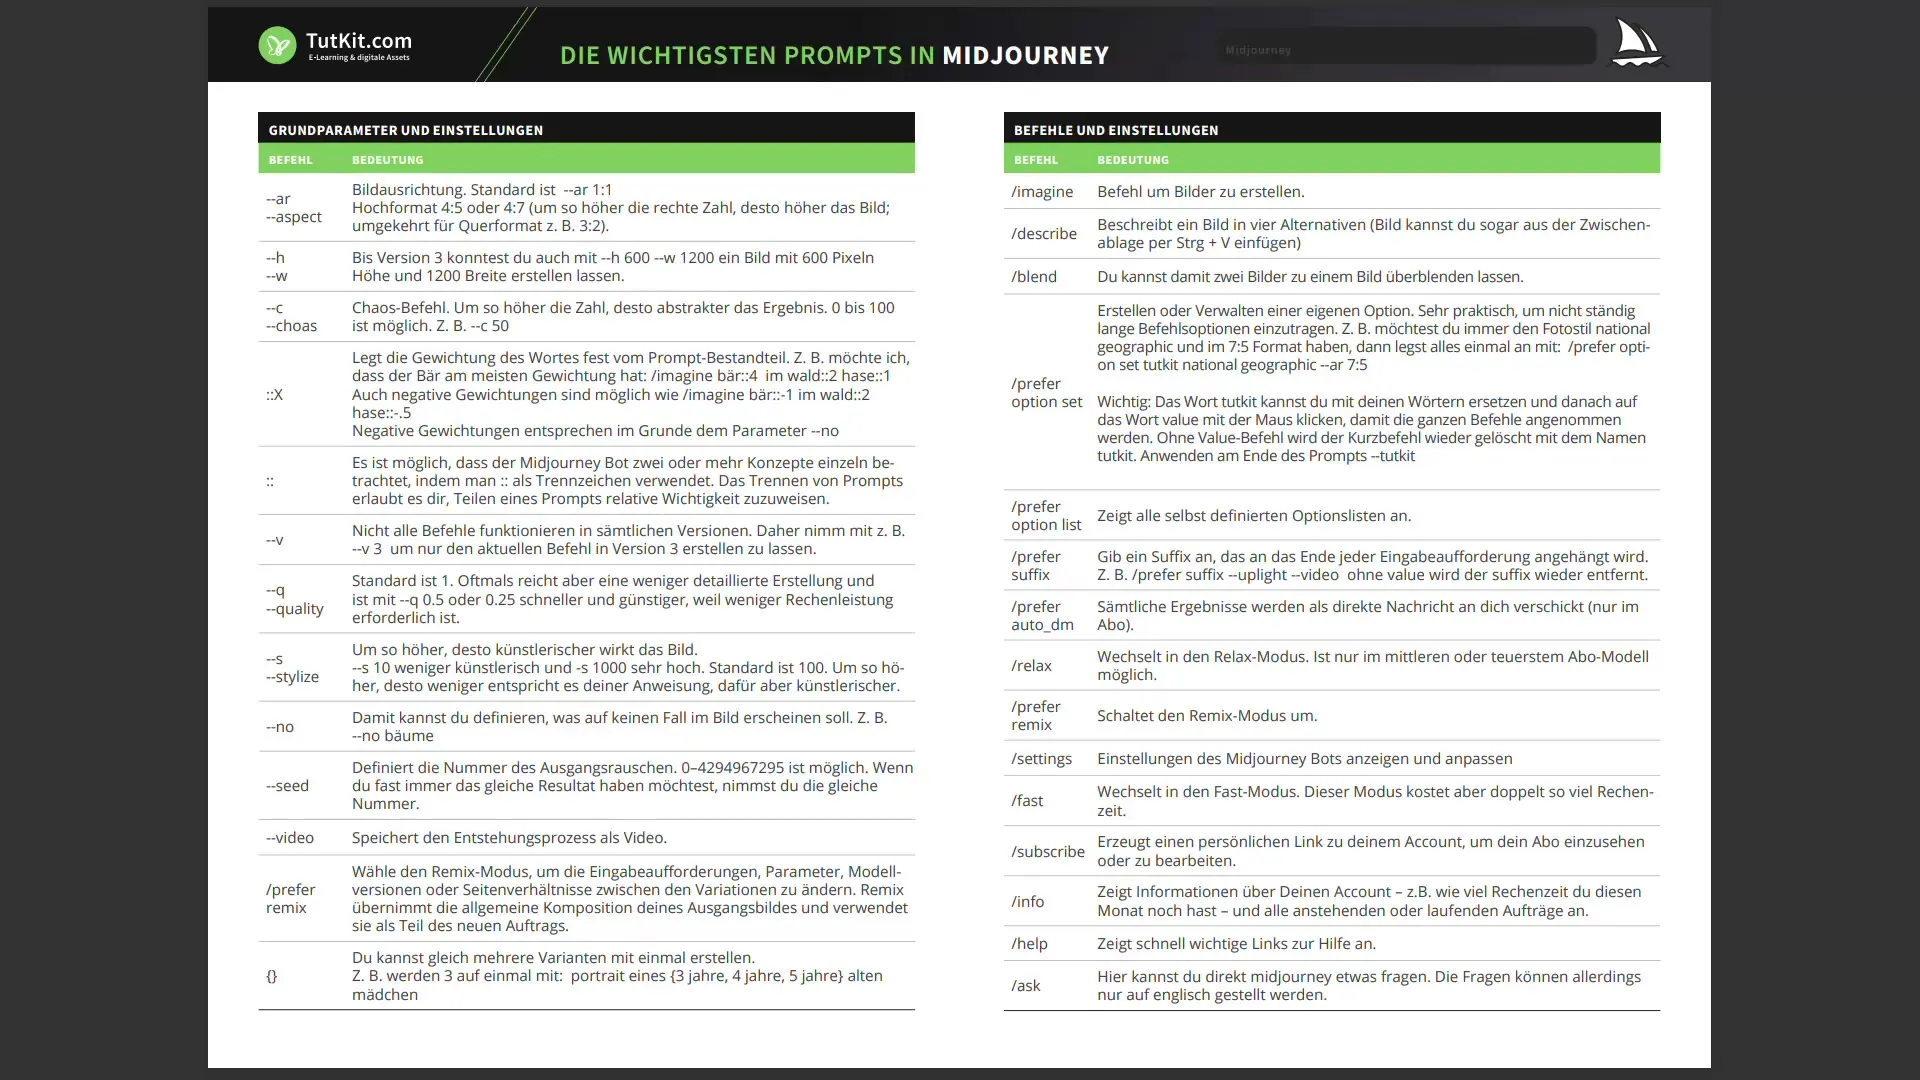
To change the image orientation, you can use the command --ar followed by the desired aspect ratio numbers. For example, if you want to create a portrait-format image, simply type --ar 9:16. This allows you to create specific visual compositions.
3. Resolution Adjustment in Version 3
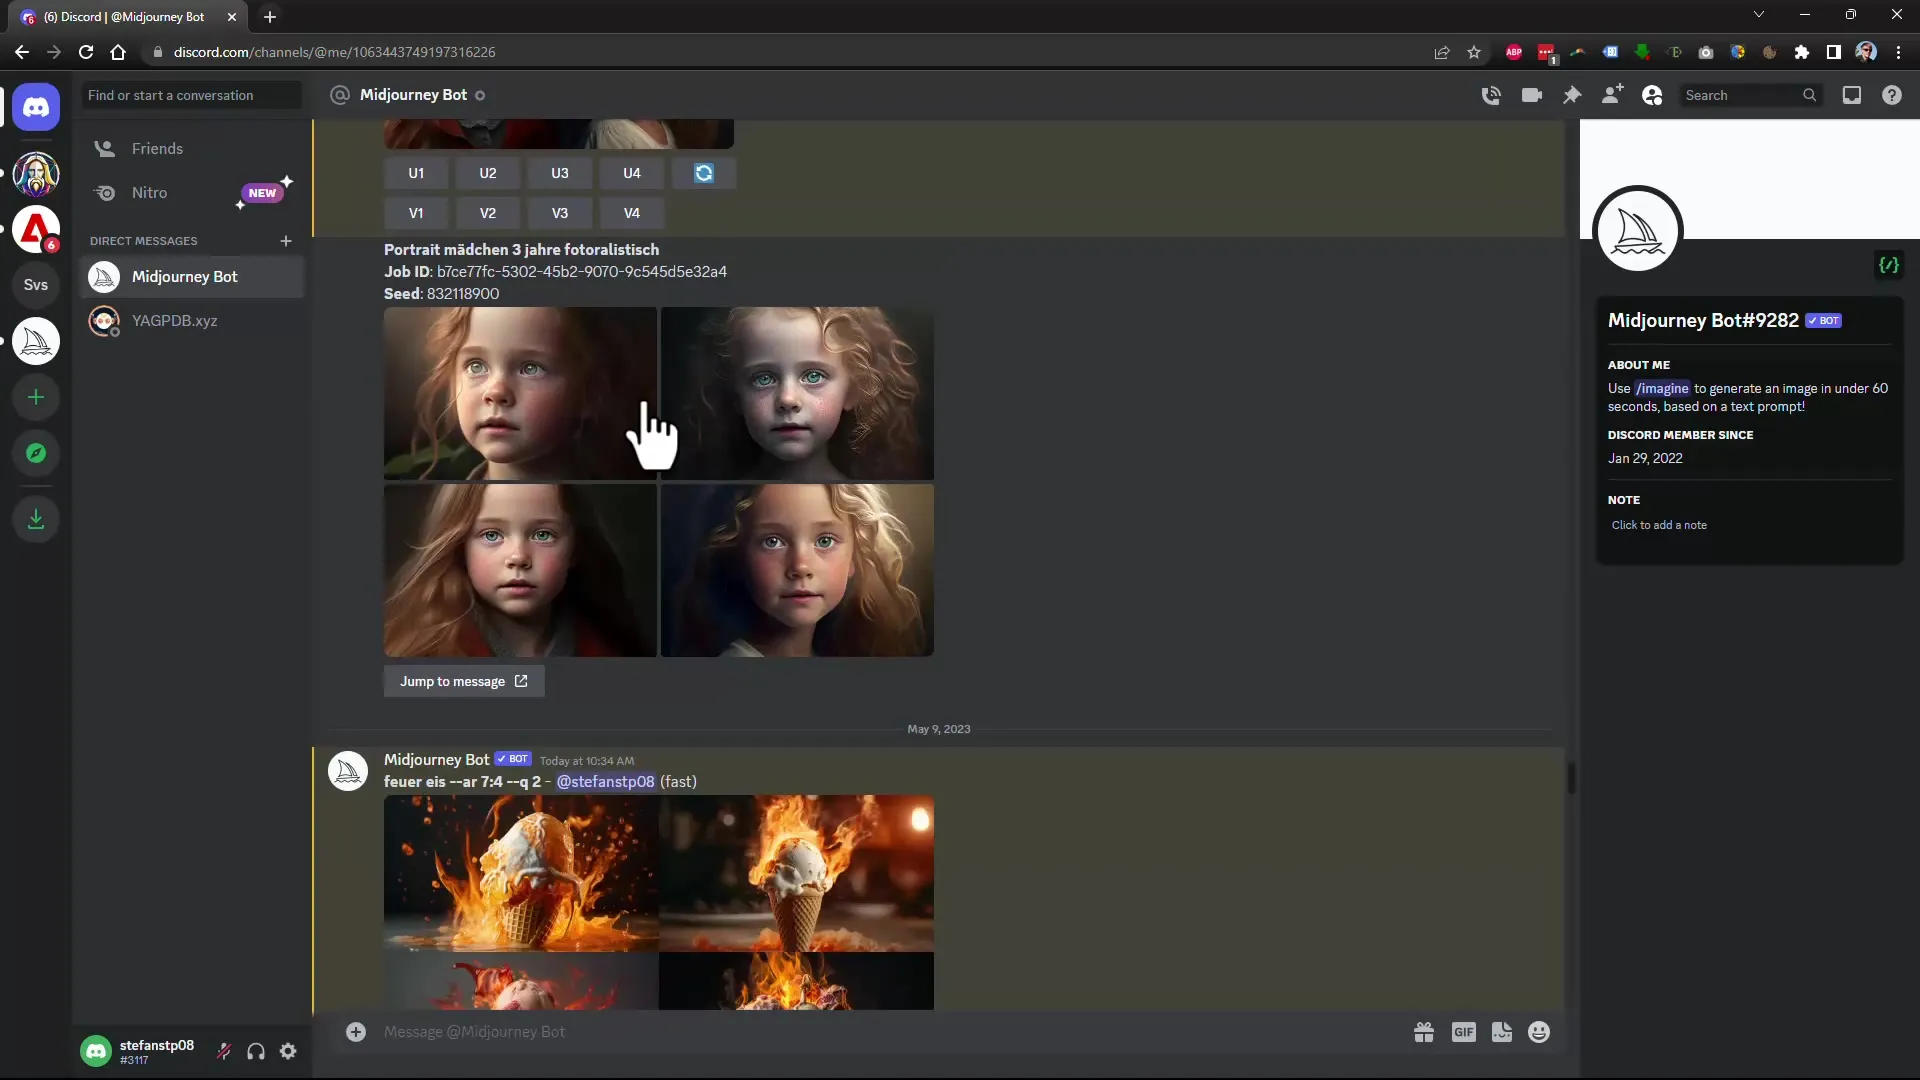
In older versions of Midjourney, you could set the resolution of your image directly using the parameters --h for height and --w for width. However, this has changed with the introduction of Version 4. In Version 4, this command no longer works, so you should focus on using the correct settings with the latest versions.
4. Set Chaos Factor
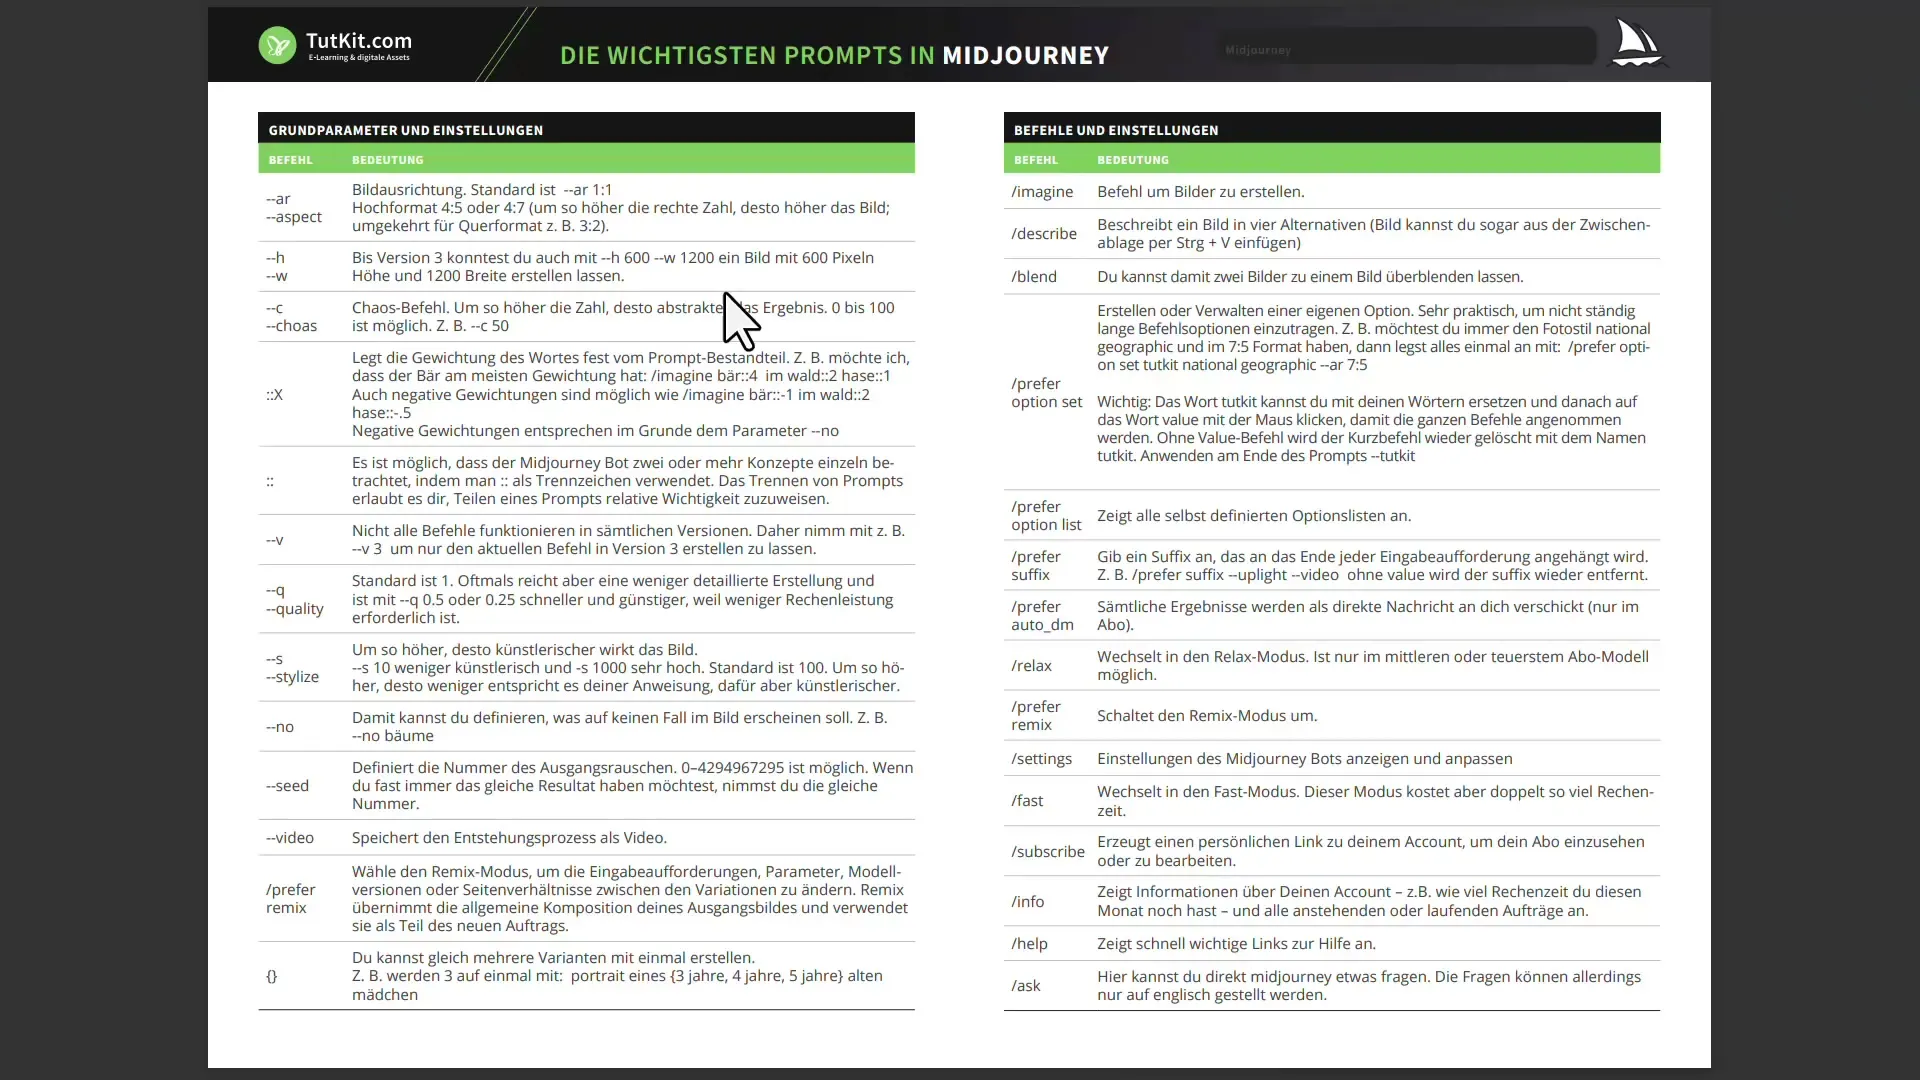
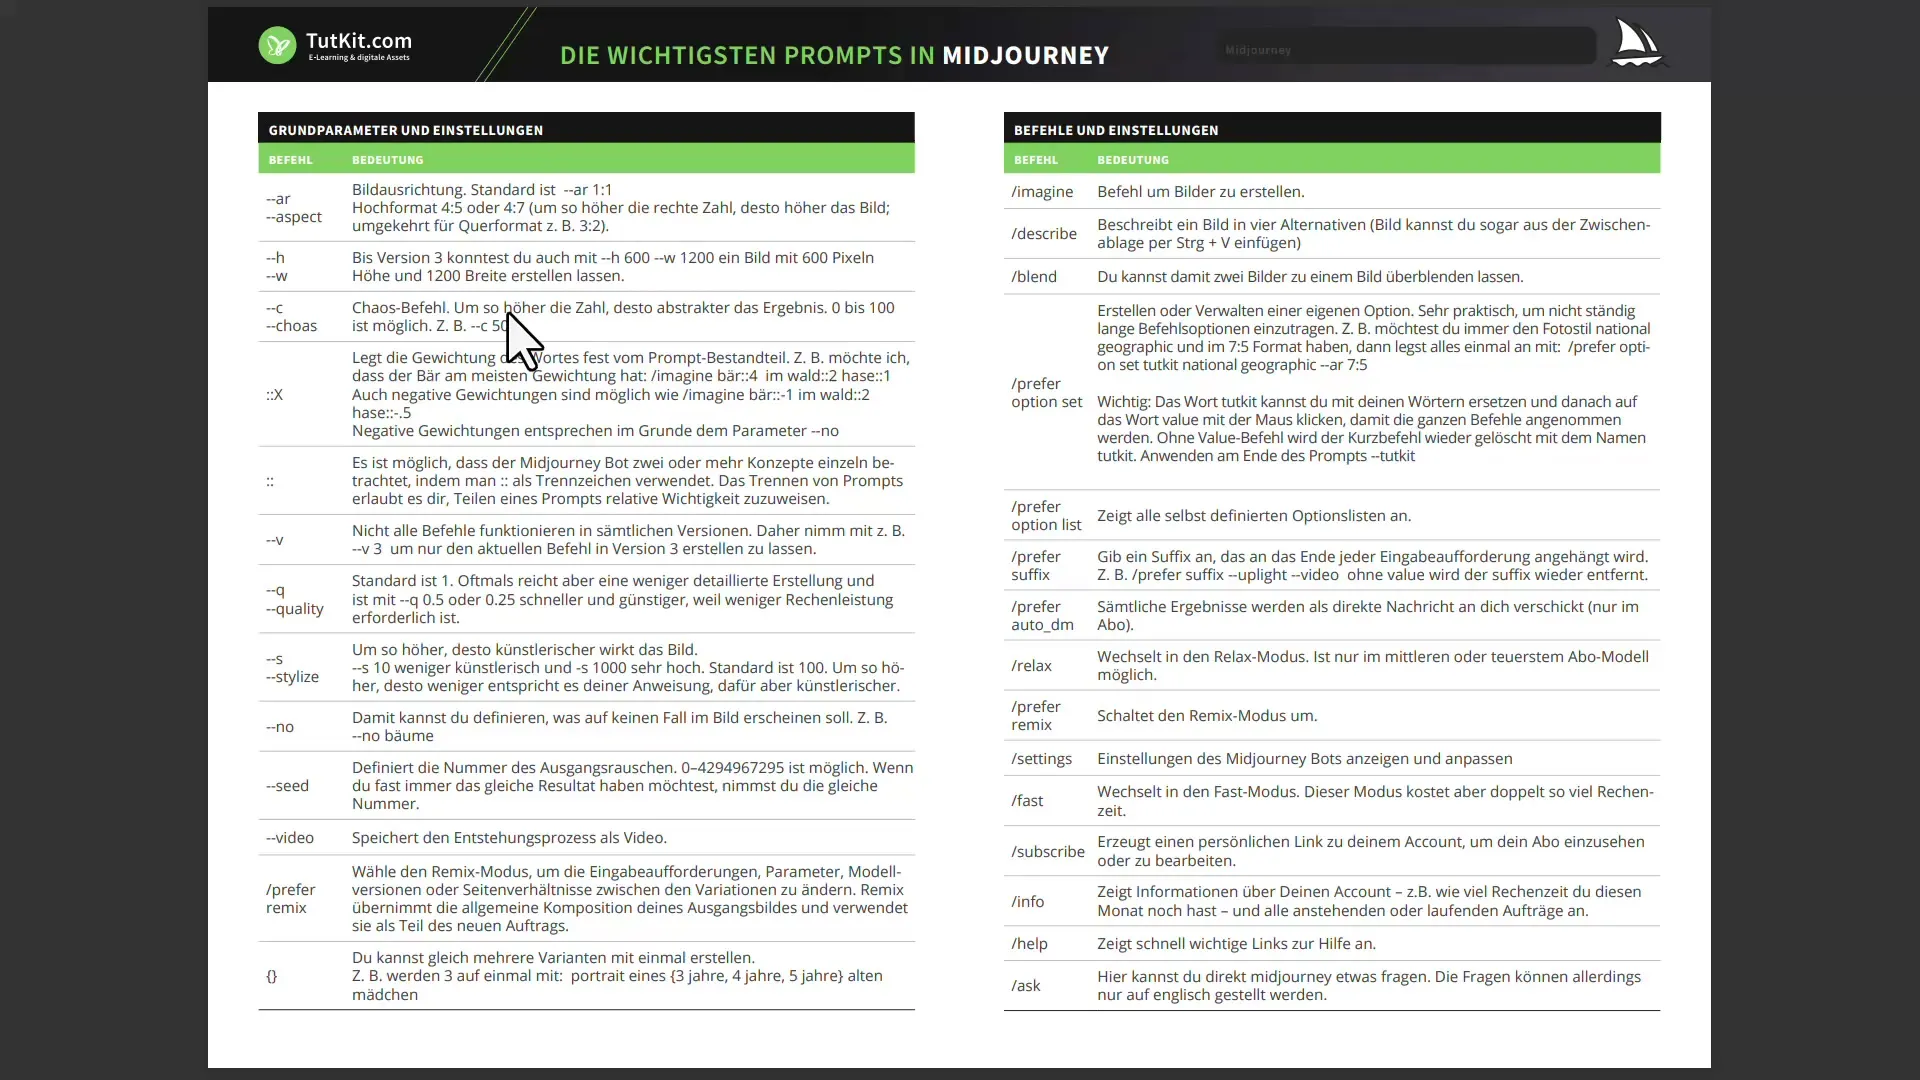
Another important parameter is the "Chaos Factor," which determines how creative or unpredictable the result is. A higher value (e.g., --chaos 100) leads to more adventurous and unpredictable images, while lower values (e.g., --chaos 10) help the result stay closer to the given instructions.
5. Weighting of Image Components
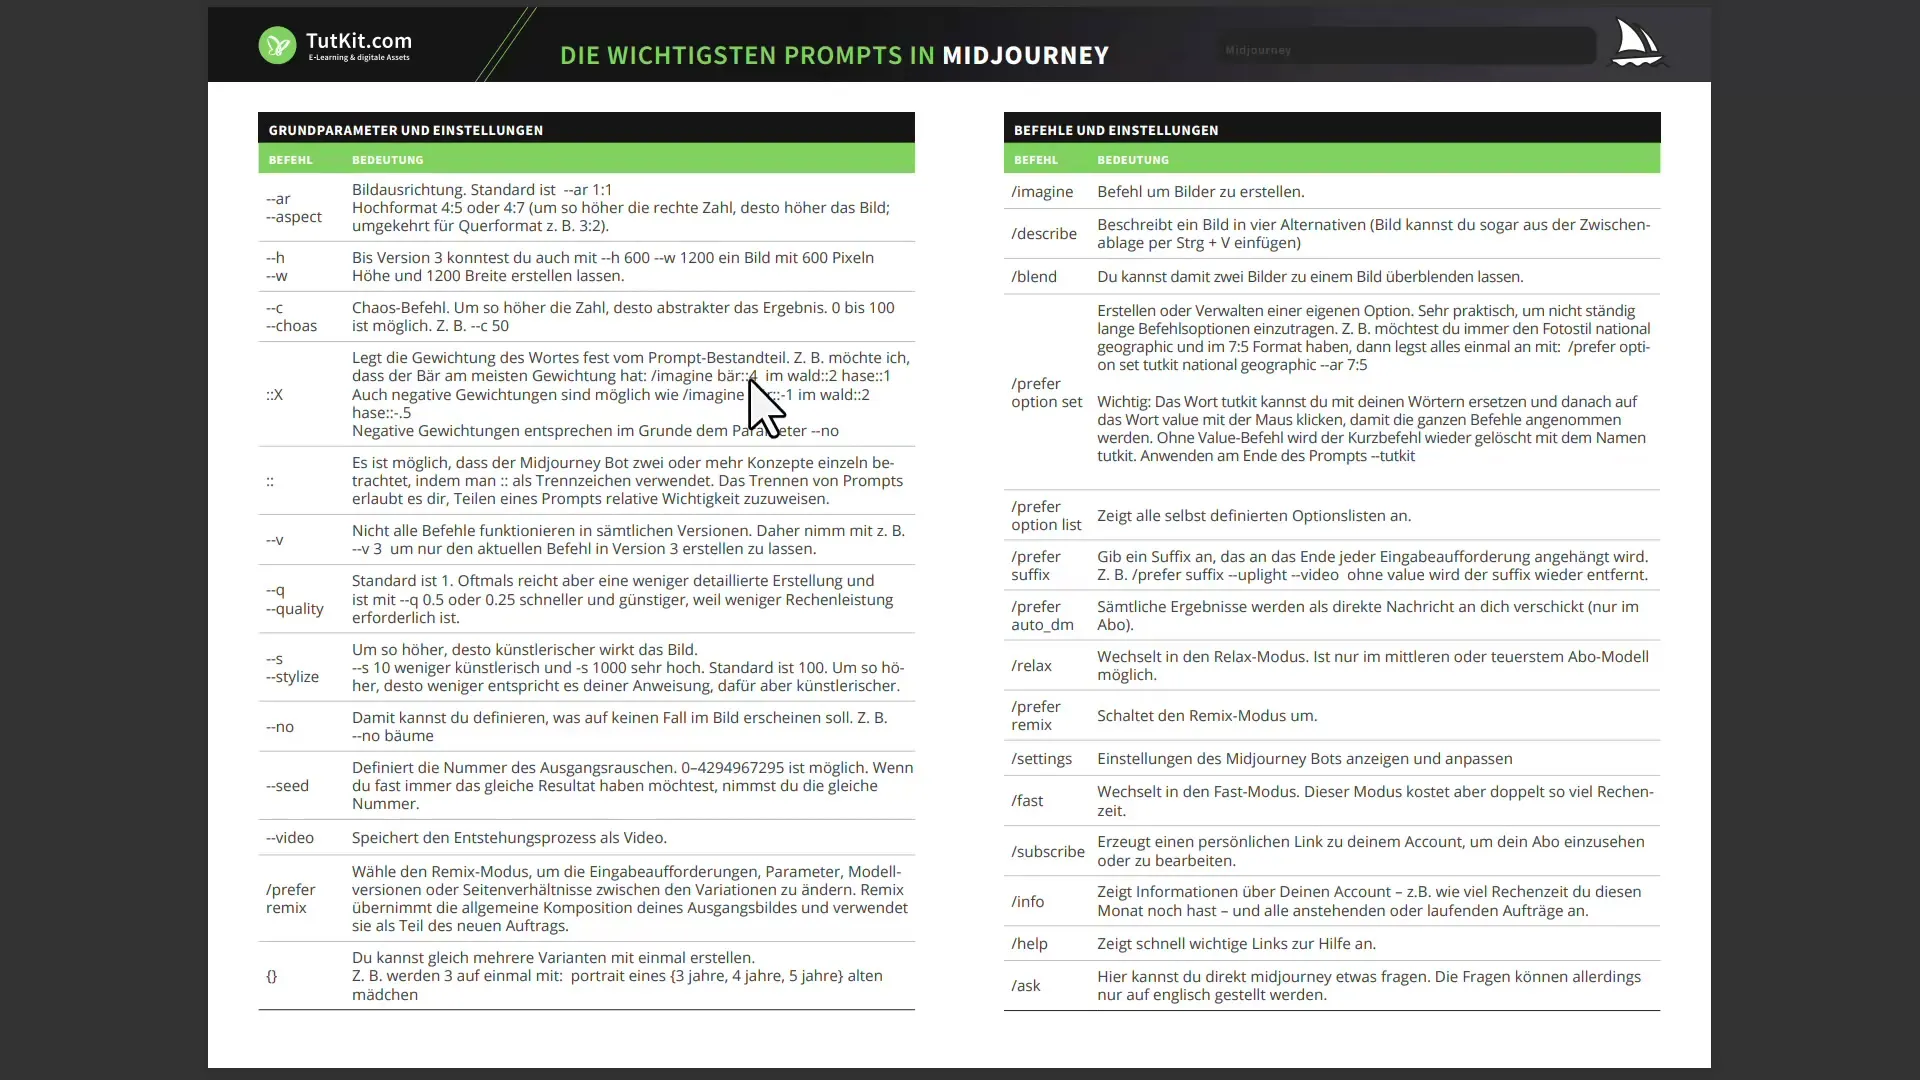
If you have multiple elements in your image, you can adjust their weightings. For example, if you input Bear:2, Forest:1, and Rabbit:0.5, the Bear has higher priority than the Rabbit, and the Forest is minimally considered. This helps you combine the desired elements more effectively.
6. Adjust Image Quality
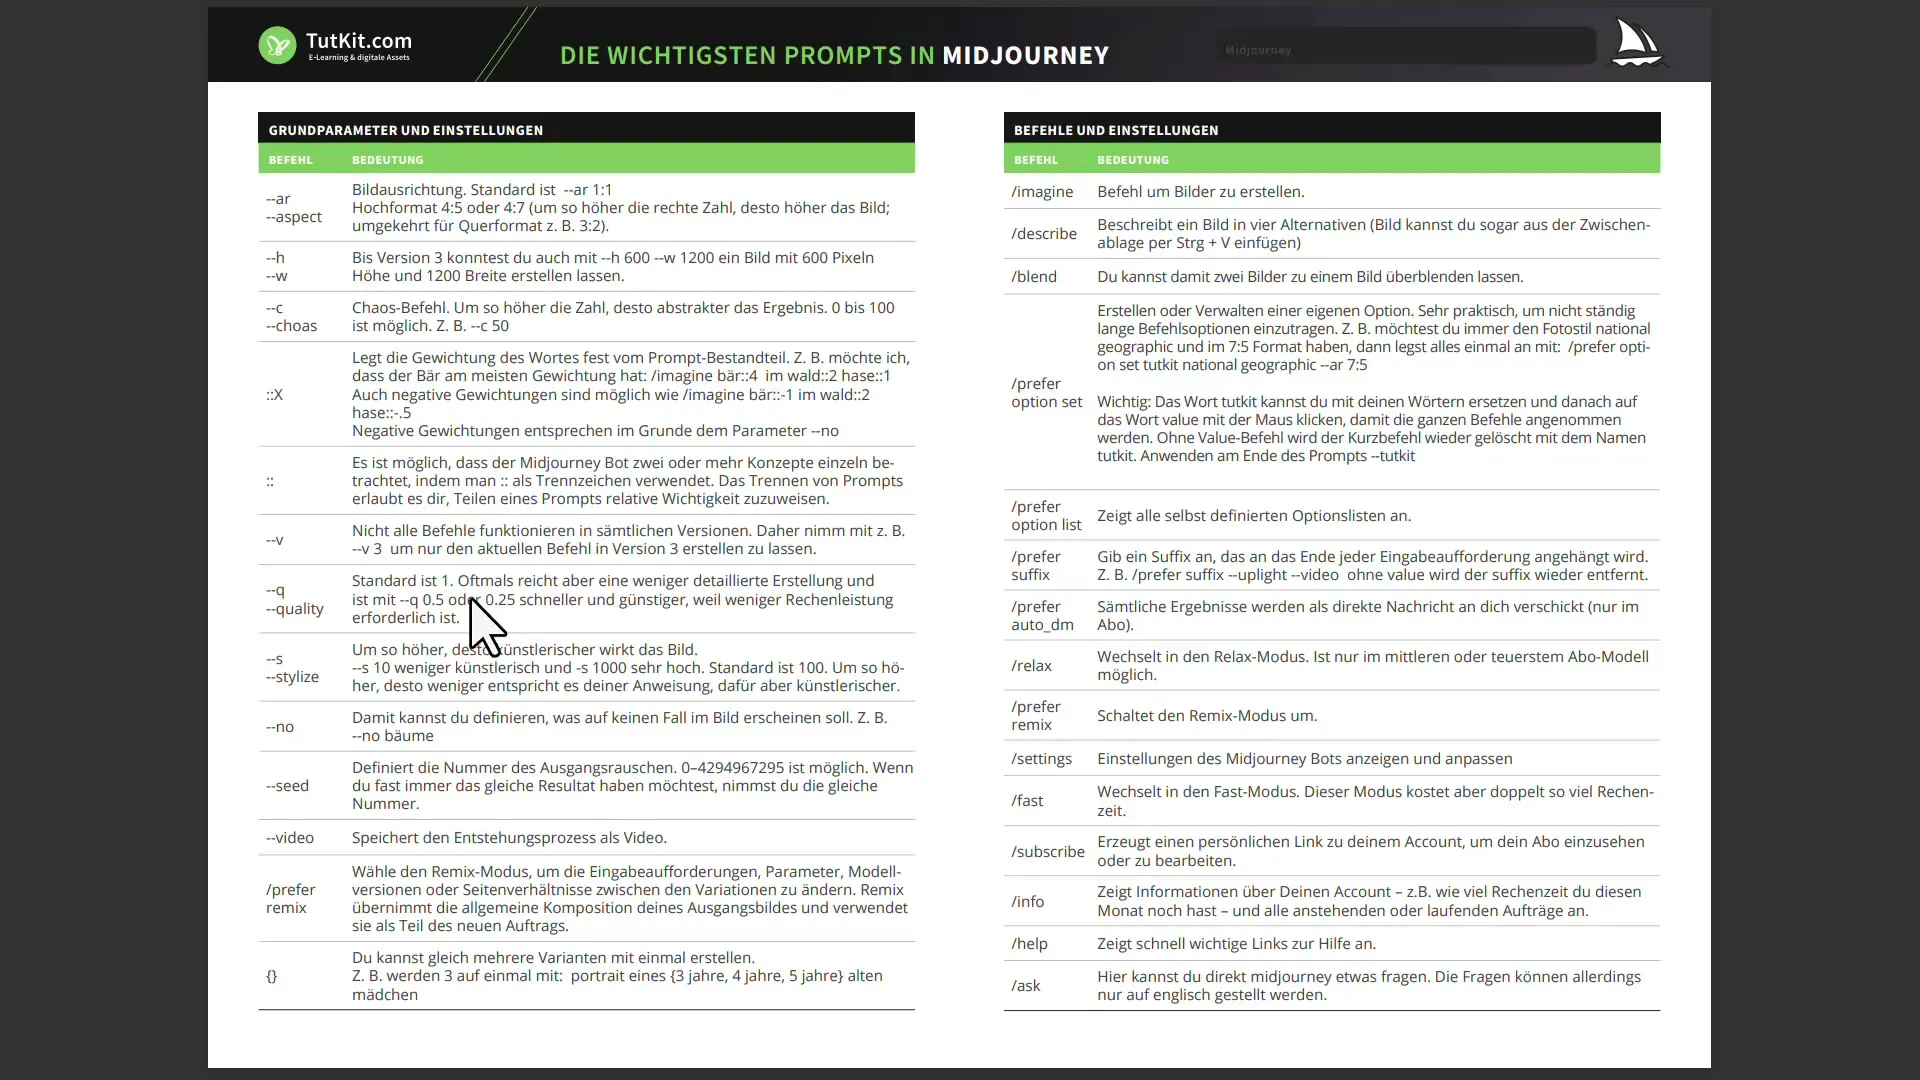
The quality of an image can also be adjusted using the command --q. By default, this is set to 1, but you can use a lower value (e.g., --q 0.5) to reduce computational power, with a decrease in image quality as well.
7. Selecting the Version of Midjourney
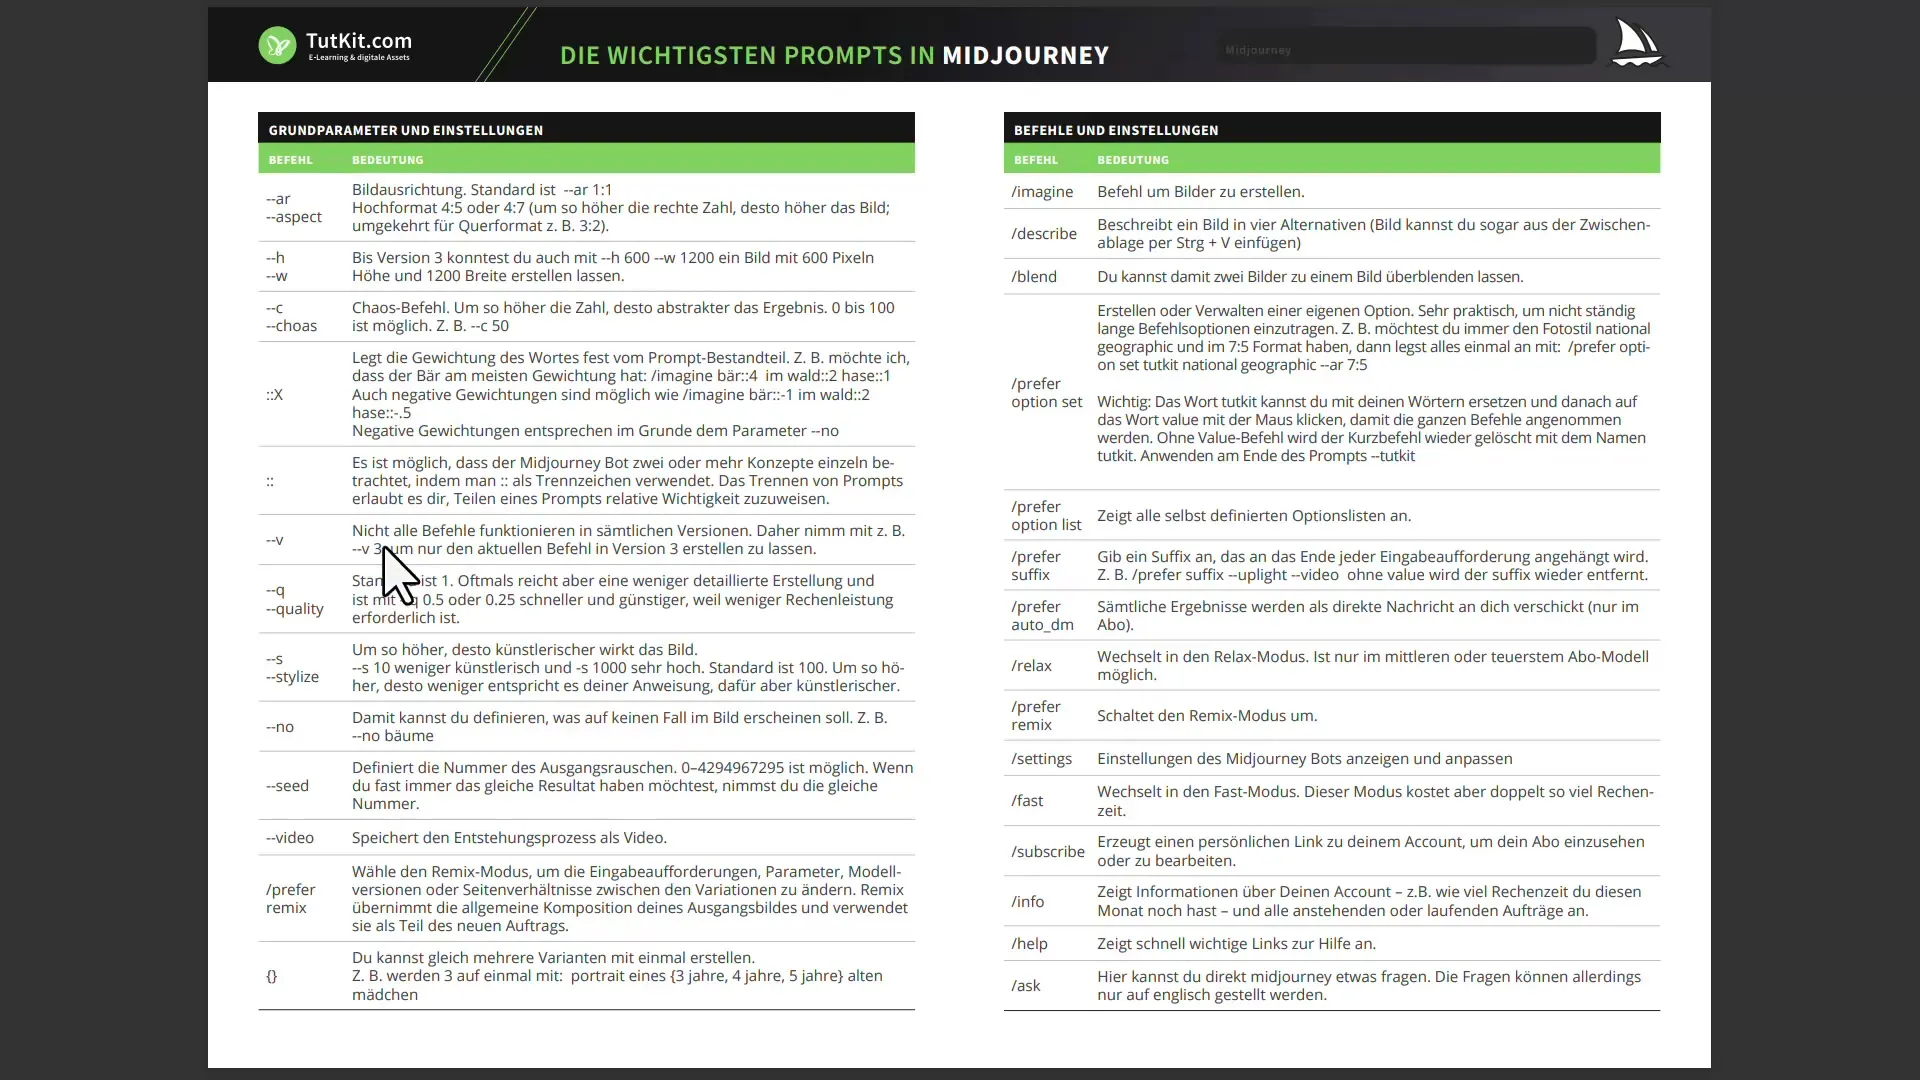
If you want to experiment with different versions of Midjourney, you can use the command --v followed by the version number (e.g., --v 5). This allows you to switch between different options easily.
8. Enhance Creativity through Positive and Negative Weighting
If you want to ensure that certain elements are emphasized more or less, you can also use negative weightings. For example, if you do not want the roof of a house to be visible, you can use --n Roof:0, and the roof will be hidden.
9. Generating Multiple Images
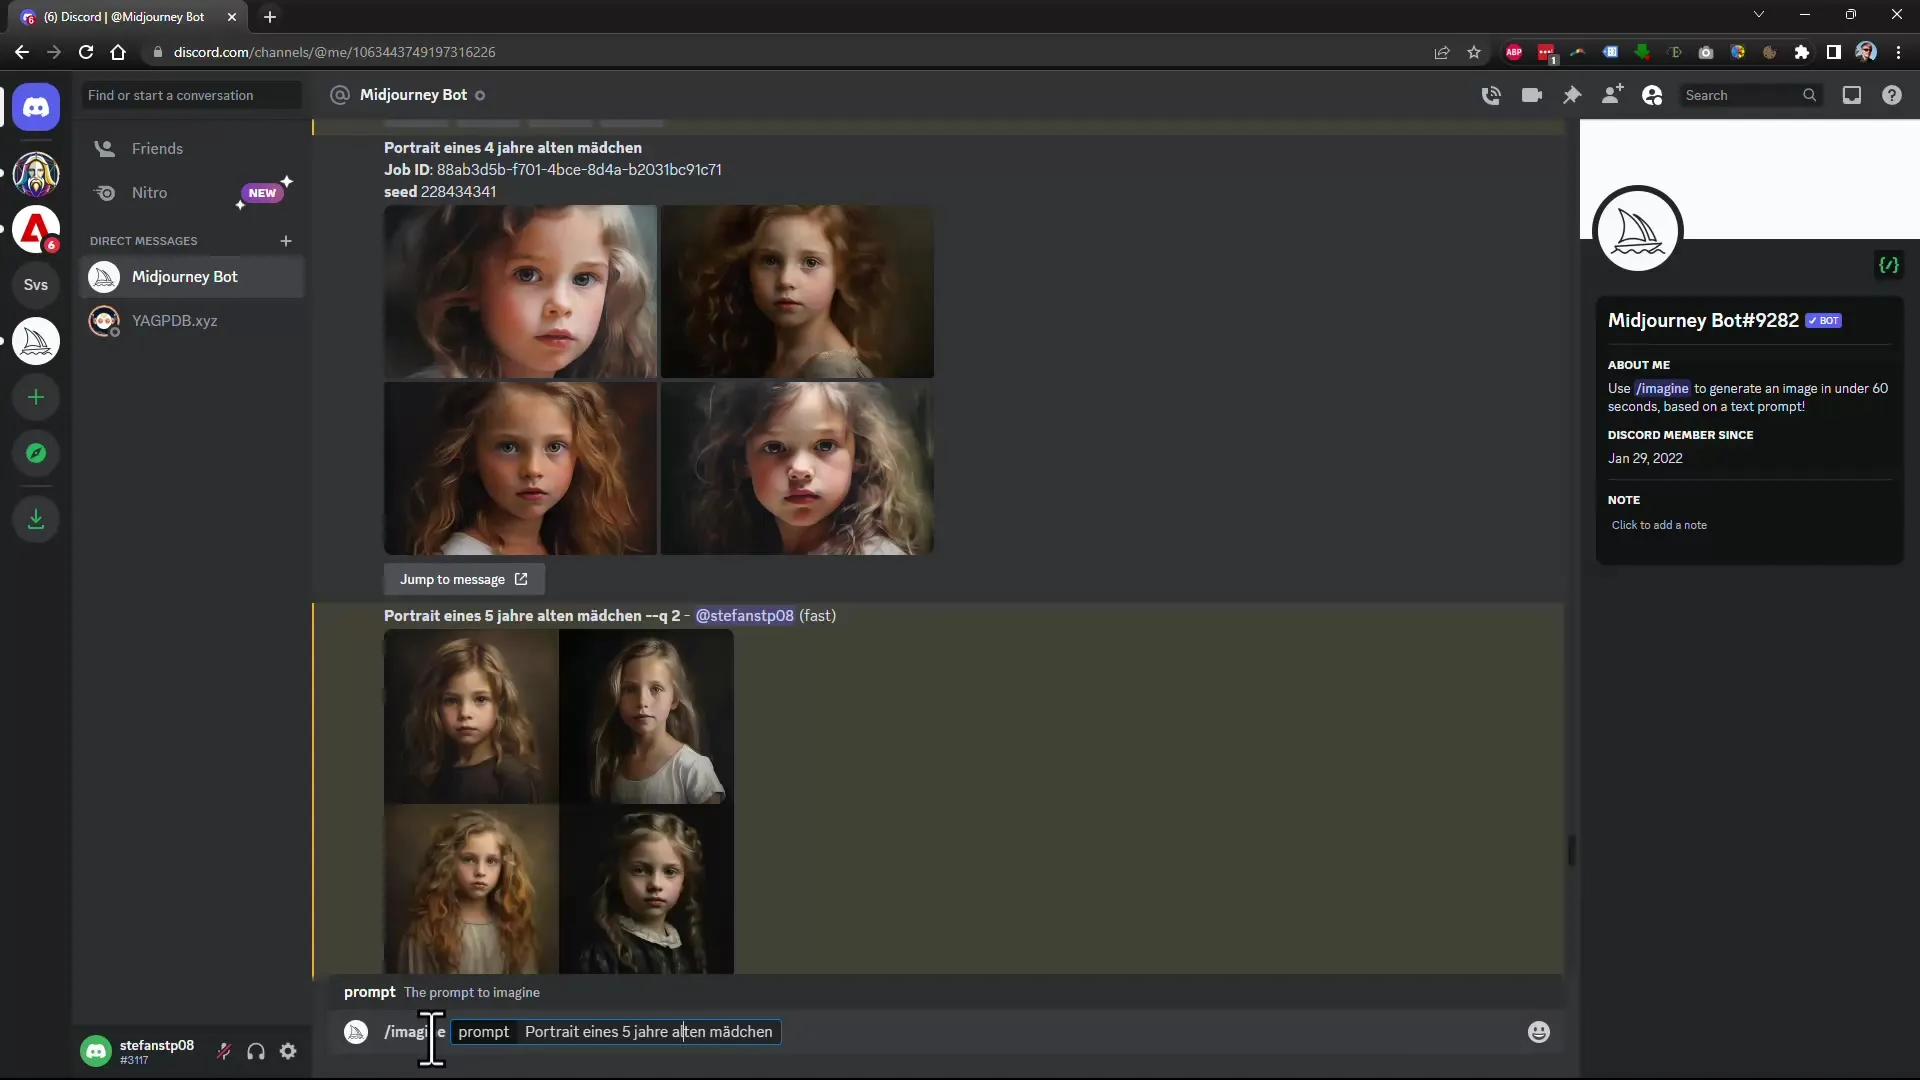
With curly braces, you can generate multiple image variations in a single command. For example, imagine {5 years old, 10 years old, 20 years old} automatically creates images of girls at different ages.
10. Describing Images
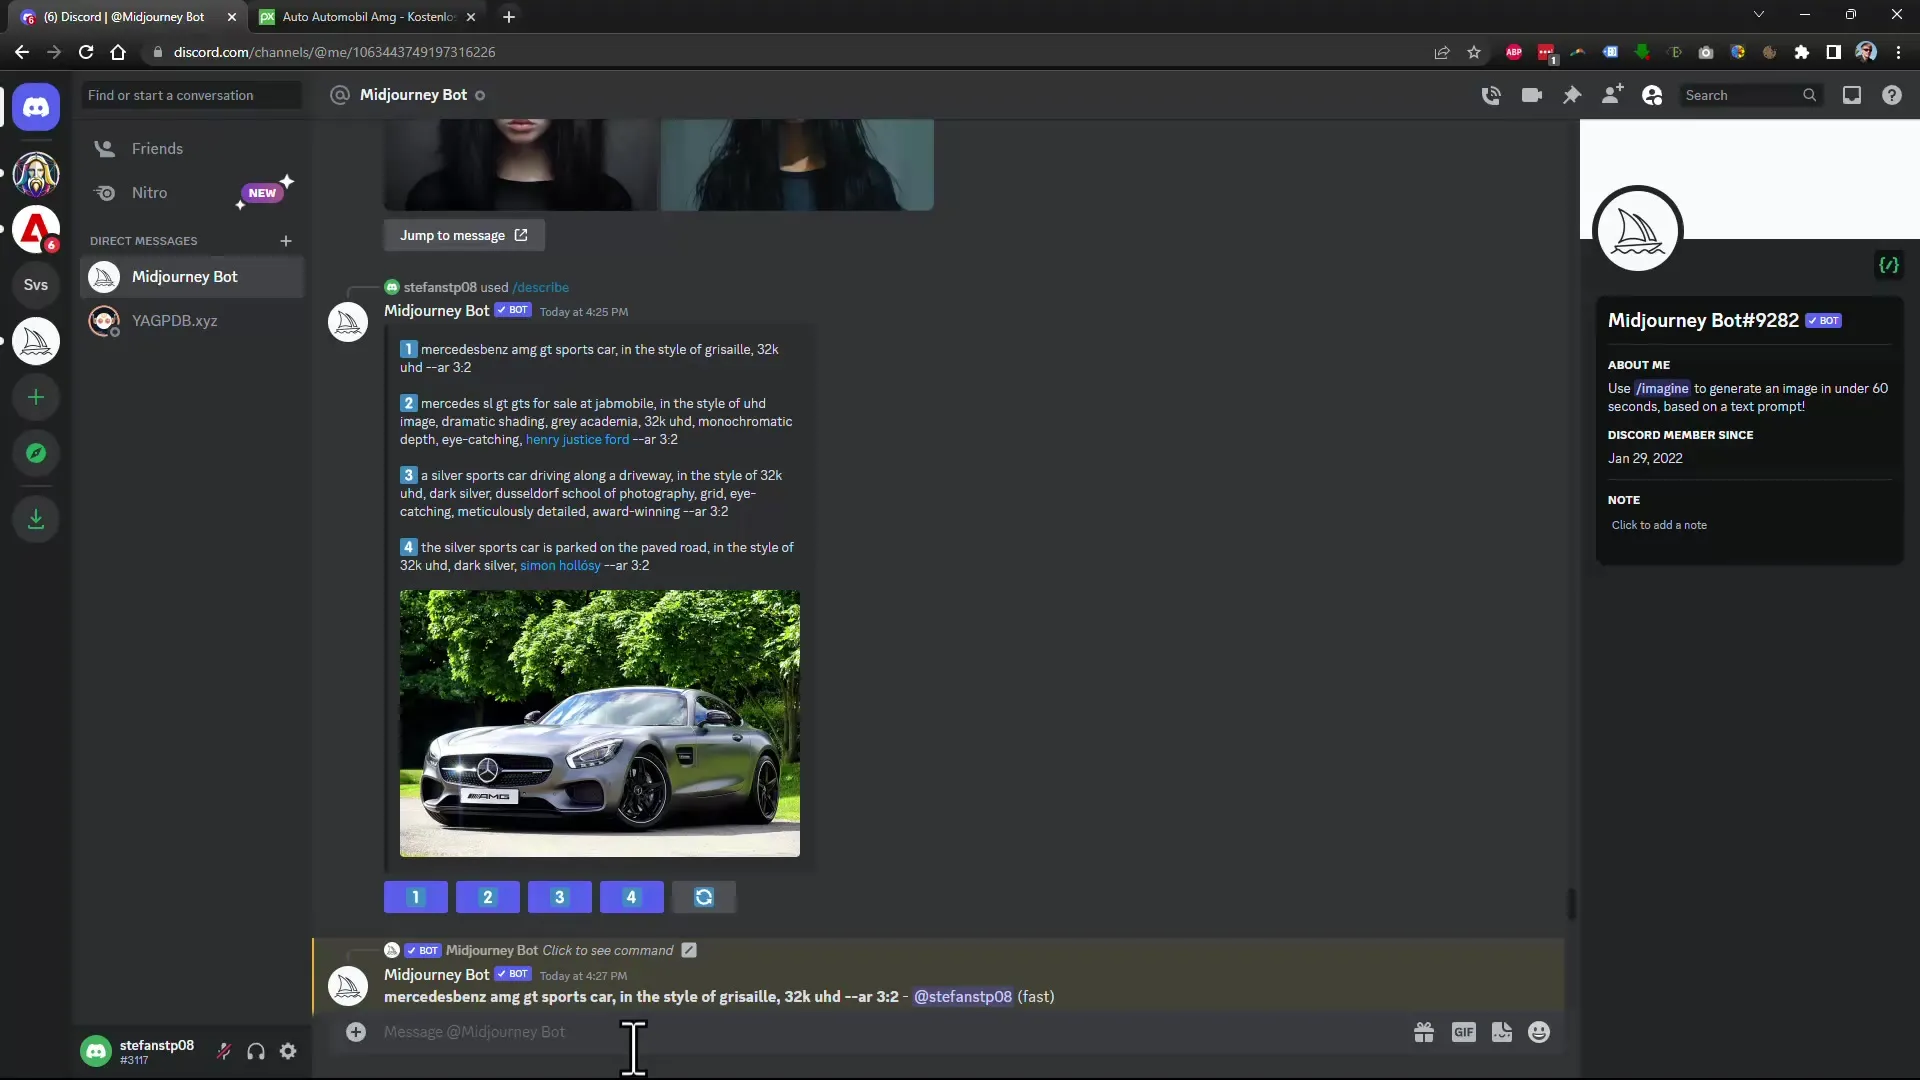
If you have an image and you want to describe its properties, you can use the describe command. Upload the image or paste it from the clipboard, and Midjourney will automatically capture its properties.
11. Nozzles, Styles, and Creative Adjustments
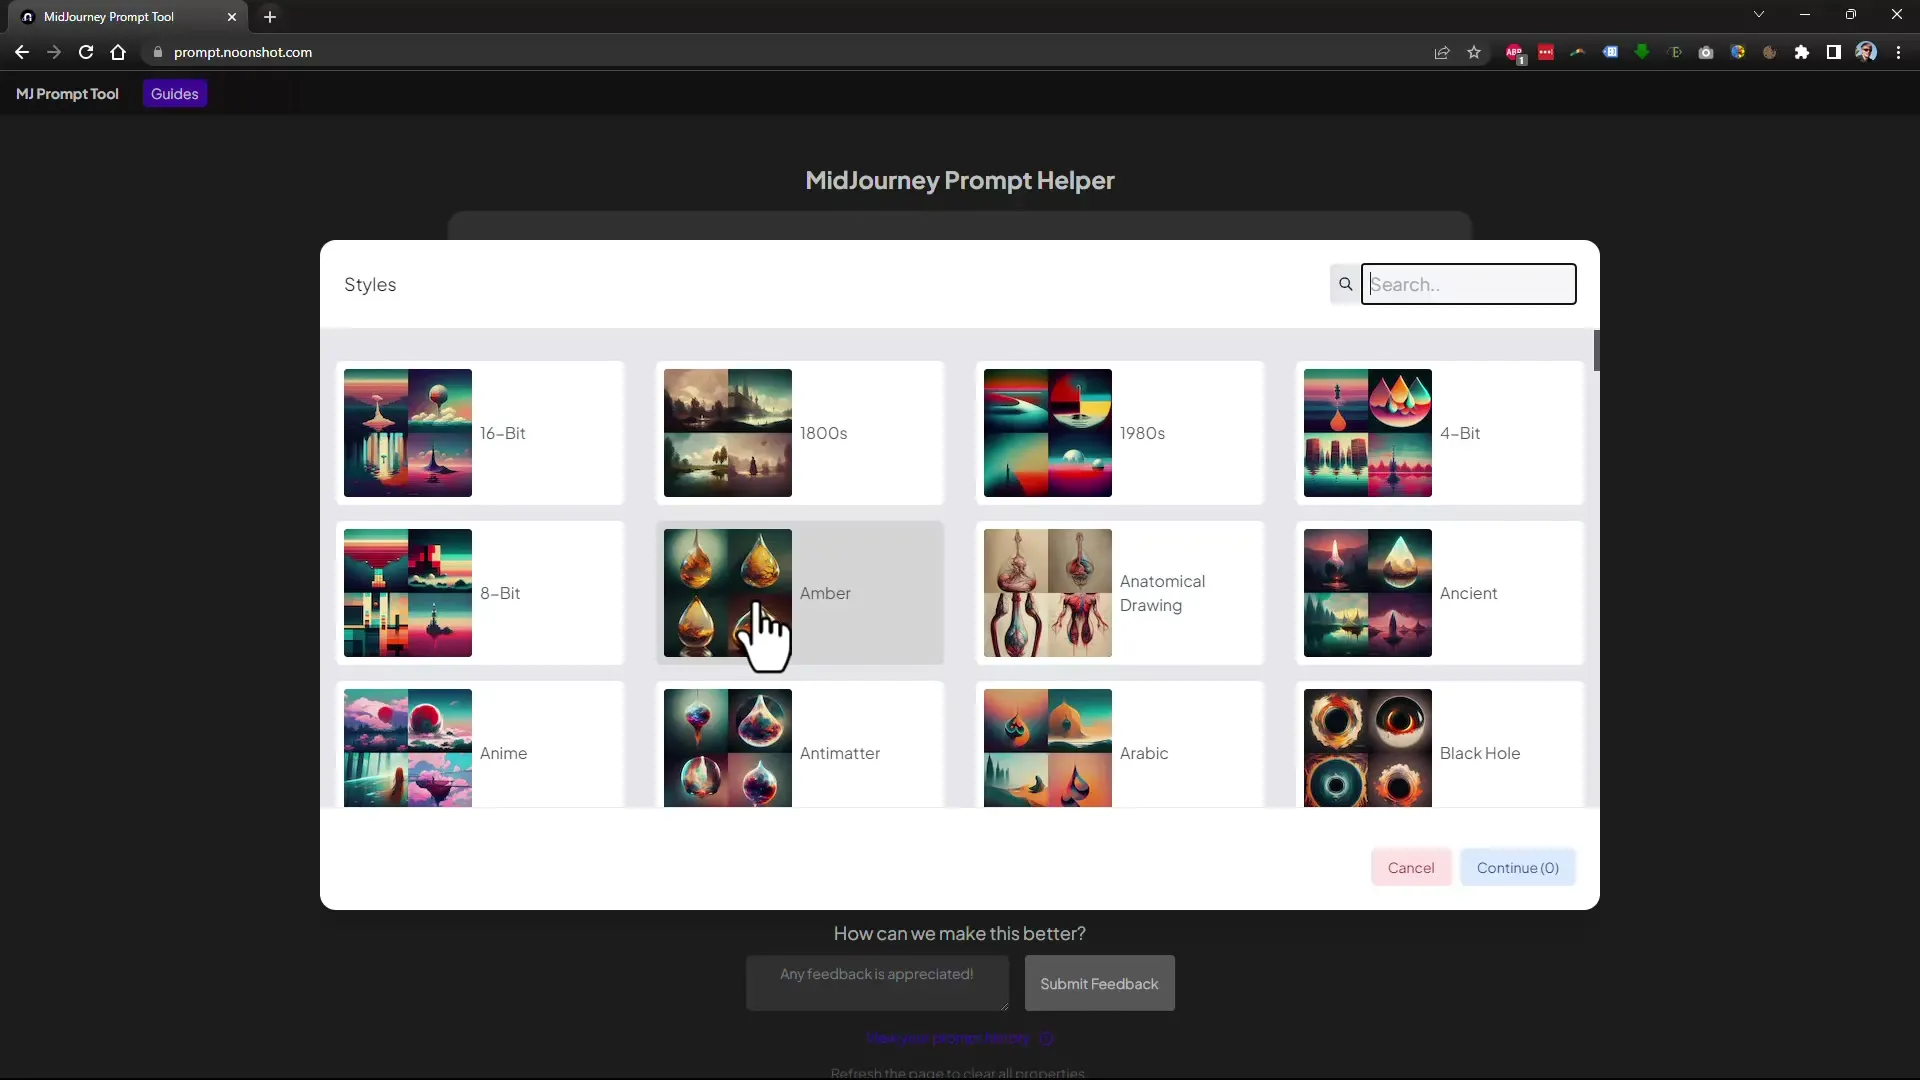
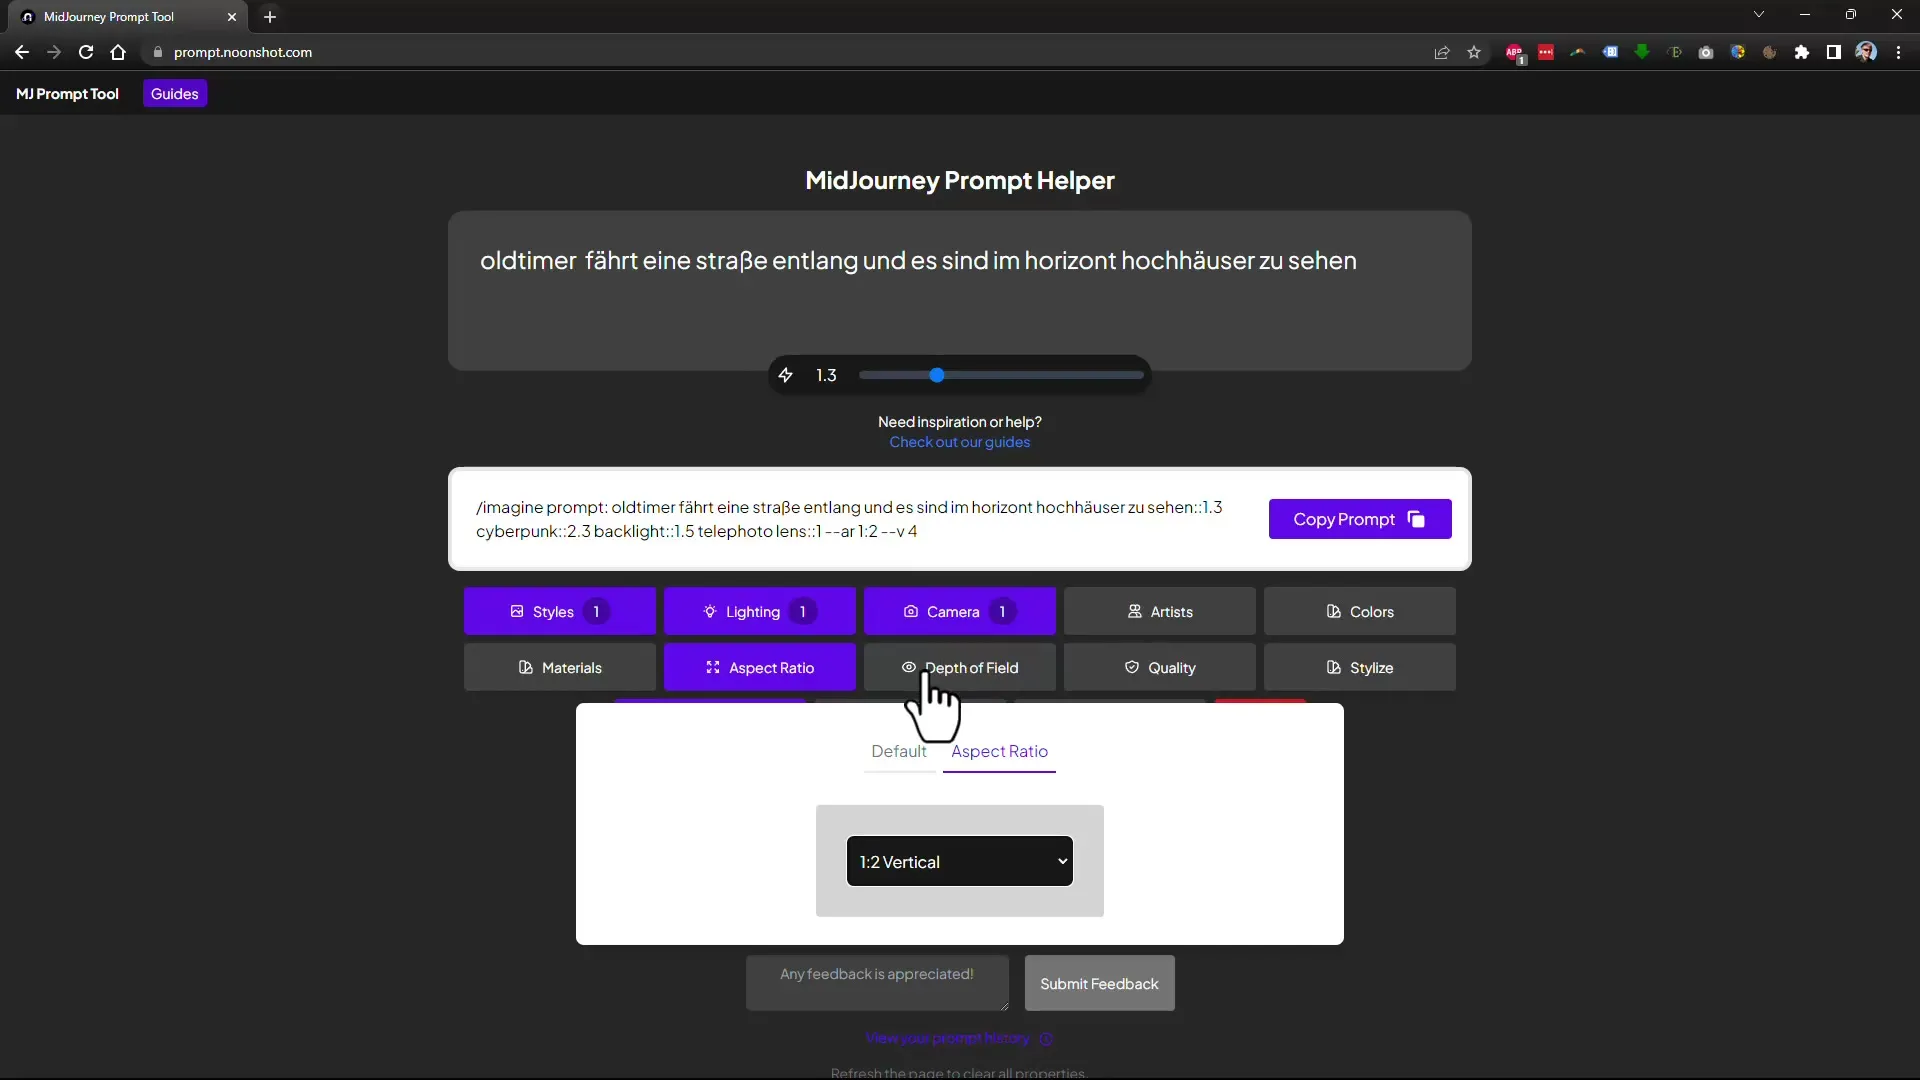
By using specific styles and parameters, you can further adjust the generated image, e.g., by specifying --style cyberpunk or --light backlight. This gives your image a particular flair and varies the aesthetic orientation.
12. Practical Use of Prompts
Finally, it is helpful to use a prompt assistant. This makes it easier for you to add and customize specific parameters. Here, you can also search for look and style specifically and receive suggestions.
Summary
Here you have received a comprehensive overview of the main commands and functions of Midjourney. Whether you want to change the image alignment, adjust the quality, or create different versions of an image, this guide will be helpful in using the software. Feel free to experiment with different parameters and find out which combinations are best suited for your creative projects.
Frequently Asked Questions
How much does a Midjourney subscription cost?There are various subscription options, with the middle one being recommended for effective work.
Can I change image properties after the fact?That is not possible. The properties must be specified when creating the image.
How can I generate multiple images at once?Use curly braces {} in your command to create multiple variants simultaneously.
Where can I find the best help for my prompts?Use a prompt assistant that facilitates input and offers various suggestions.
What do I do if I am not getting good results?Experiment with different parameters and weigh the elements in your command to achieve better results.
