In the digital era, it is not uncommon that you want to create classic drawings or sketches on paper. Whether it's fine handwriting, a comic, or an artistic sketch, the goal remains the same: you want to digitize your analog creations and convert them into vector graphics. In this guide, I will show you how to prepare your drawings optimally, convert them into vector objects using Inkscape, and further optimize the results.
Main Insights
To carry out an effective vectorization of your drawings, the following steps are crucial:
- Photograph your drawing in optimal lighting.
- Edit the photo to minimize the background and highlight the line drawing clearly.
- Import the edited image into Inkscape and use the "Trace Bitmap" function.
- Adjust the tracing as needed to achieve the best possible results.
Step-by-Step Guide
Step 1: Photograph Your Drawing
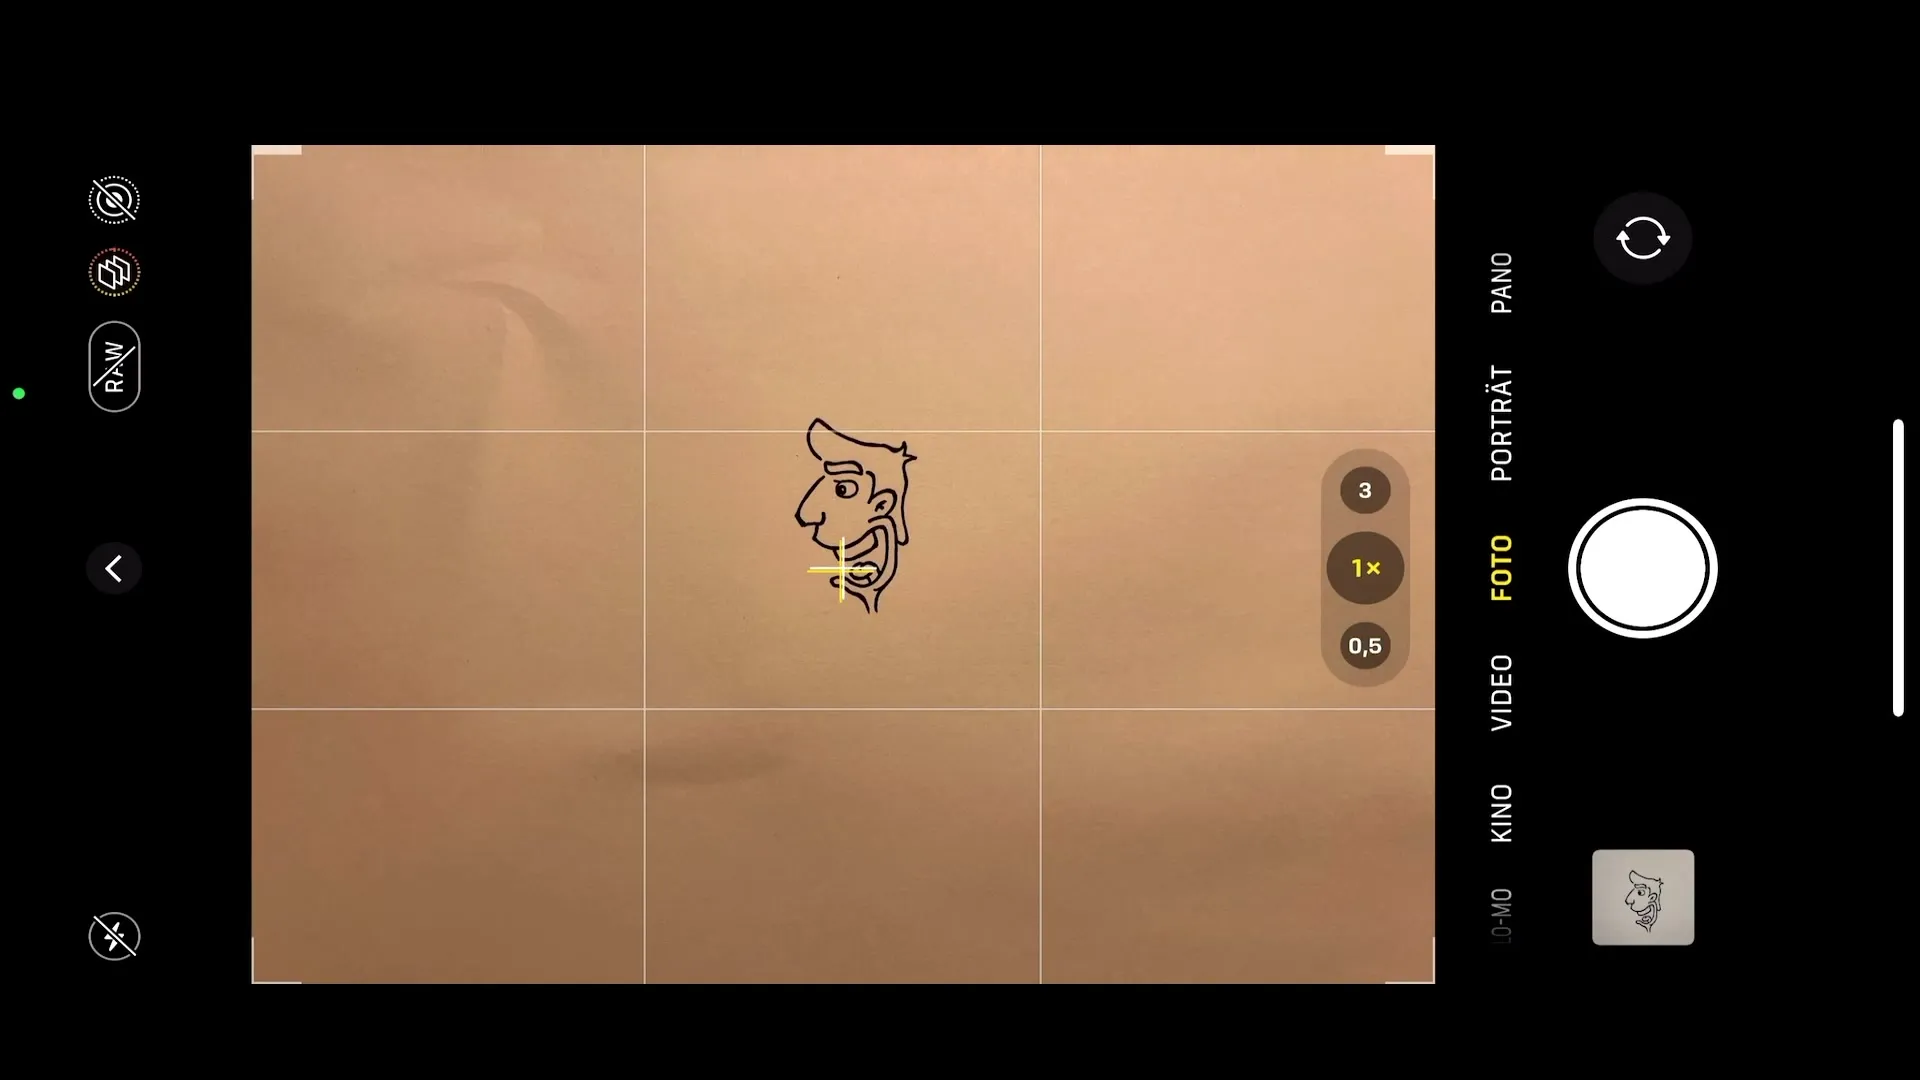
First, you need to prepare your drawing. Find a well-lit area to take a clean photo. For example, you can use your smartphone to take a photo of your drawing and ensure that the light falls optimally.
Step 2: Image Editing on Your Smartphone
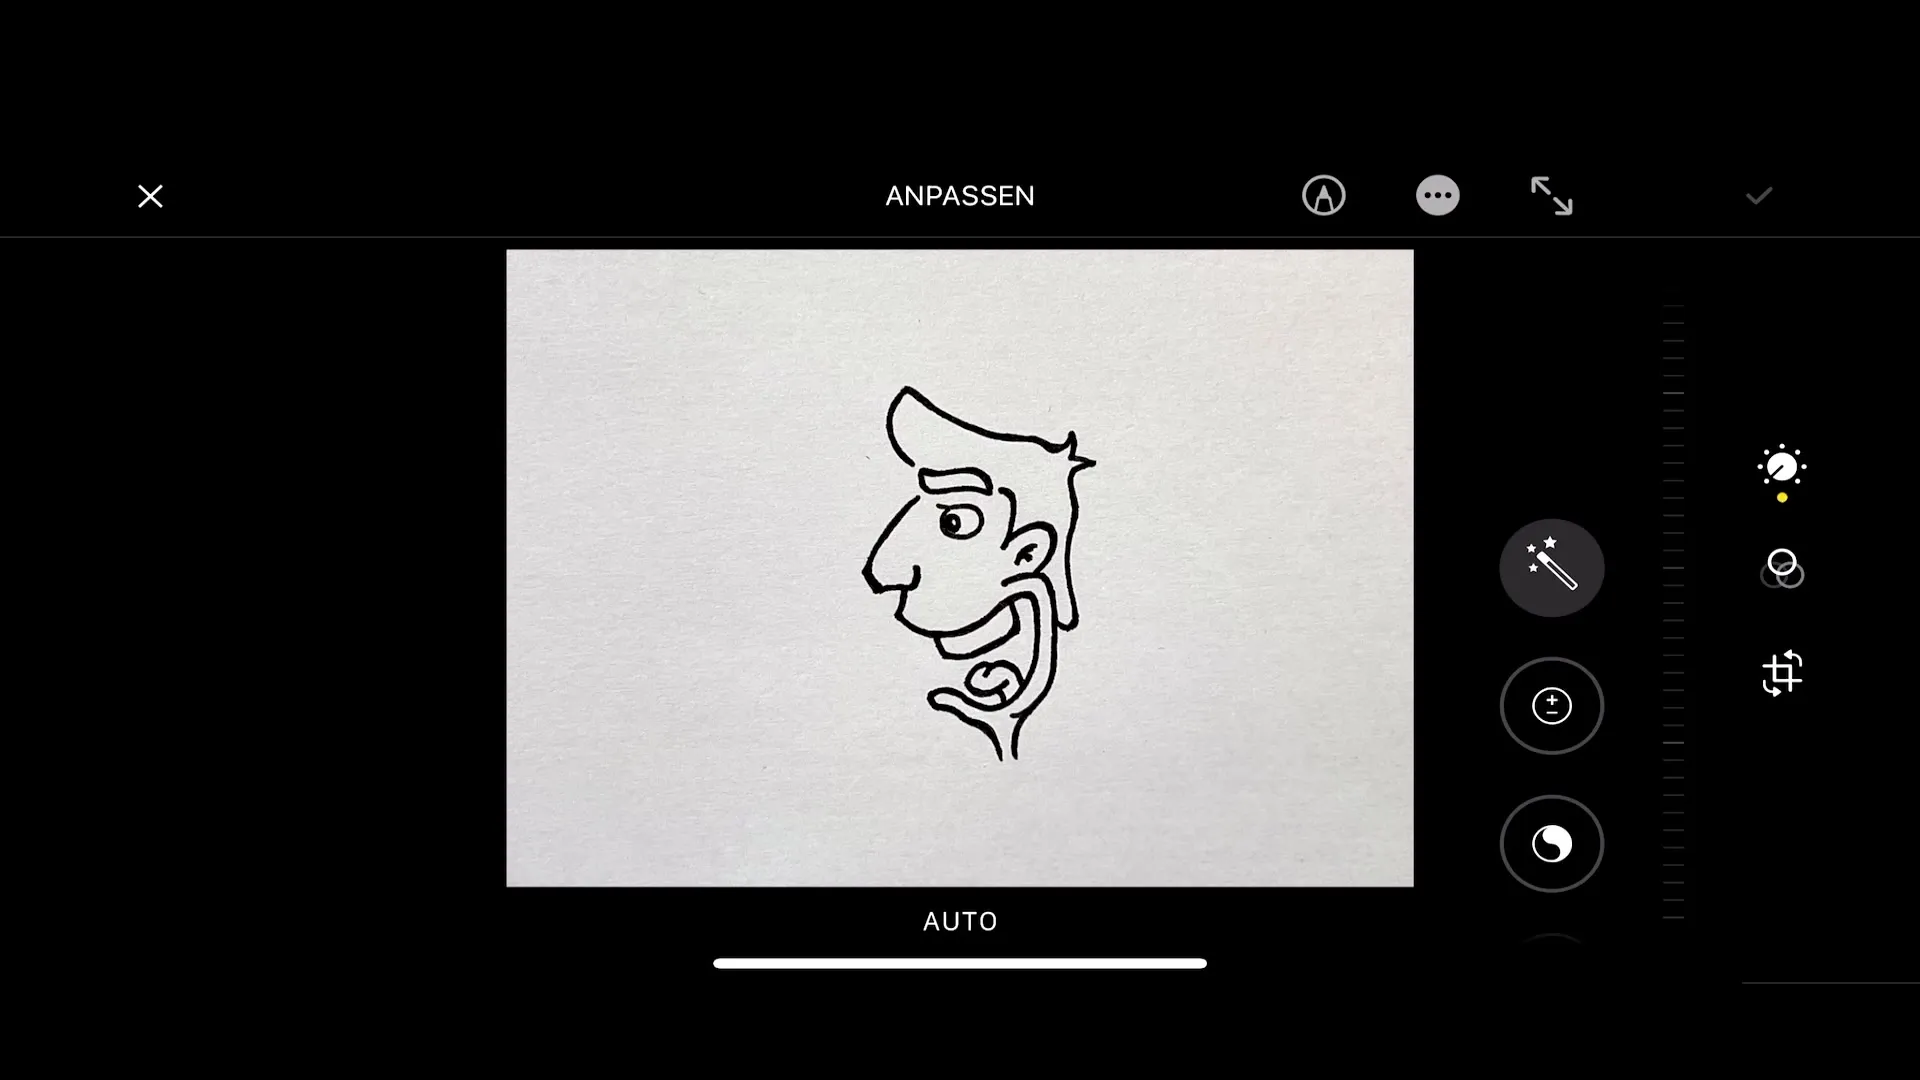
After taking the photo, open the image on your smartphone. Most smartphones offer built-in editing tools that allow you to crop the image and adjust the brightness. The goal is to remove the background as much as possible and highlight the drawing clearly. Adjust the exposure to enhance the white background and make the black lines appear more saturated.
Step 3: Using GIMP for Further Editing
If you wish to make further edits, you can use a pixel-based graphic program like GIMP. GIMP can help you remove unwanted spots or enhance the contrast of your drawing to ensure optimal preparation for importing into Inkscape.
Step 4: Importing Image into Inkscape
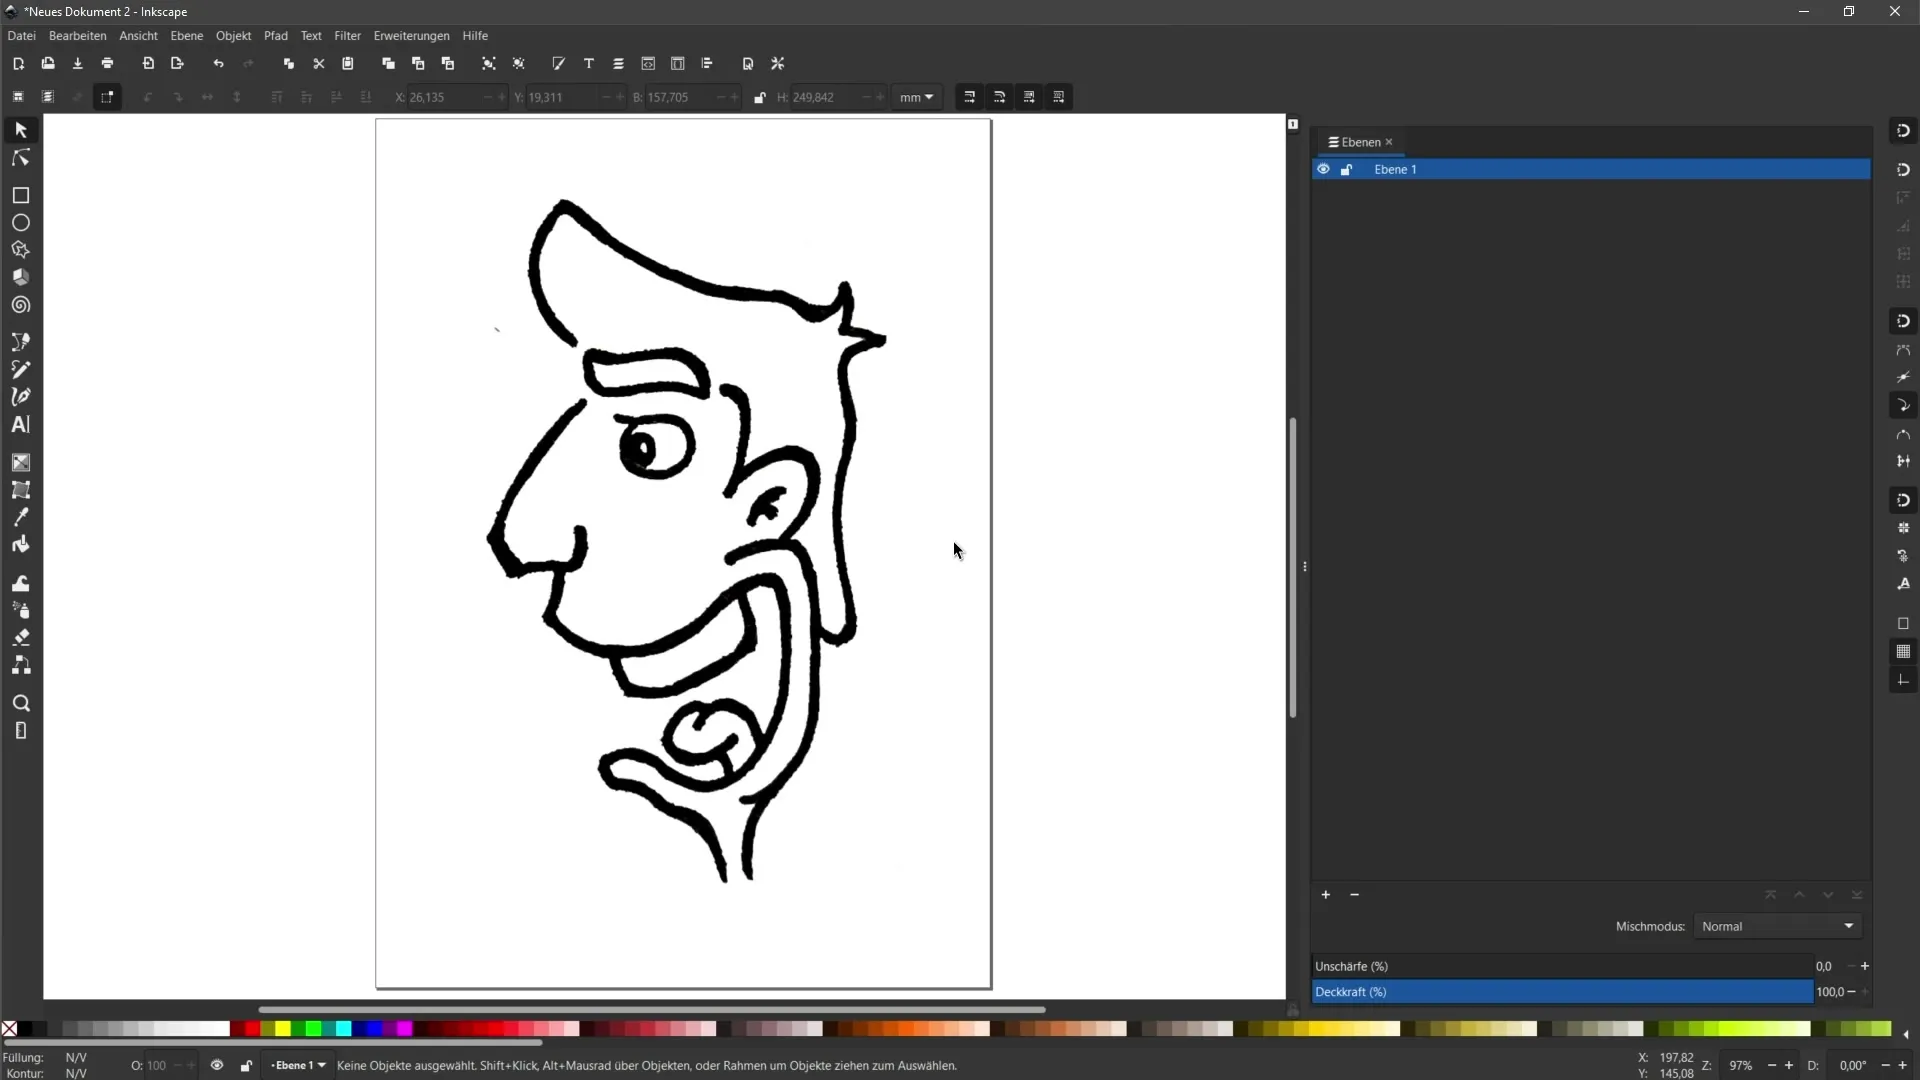
Now that you have edited your image, open Inkscape and import the file. Check if the image looks good in Inkscape and if the background has been mostly removed.
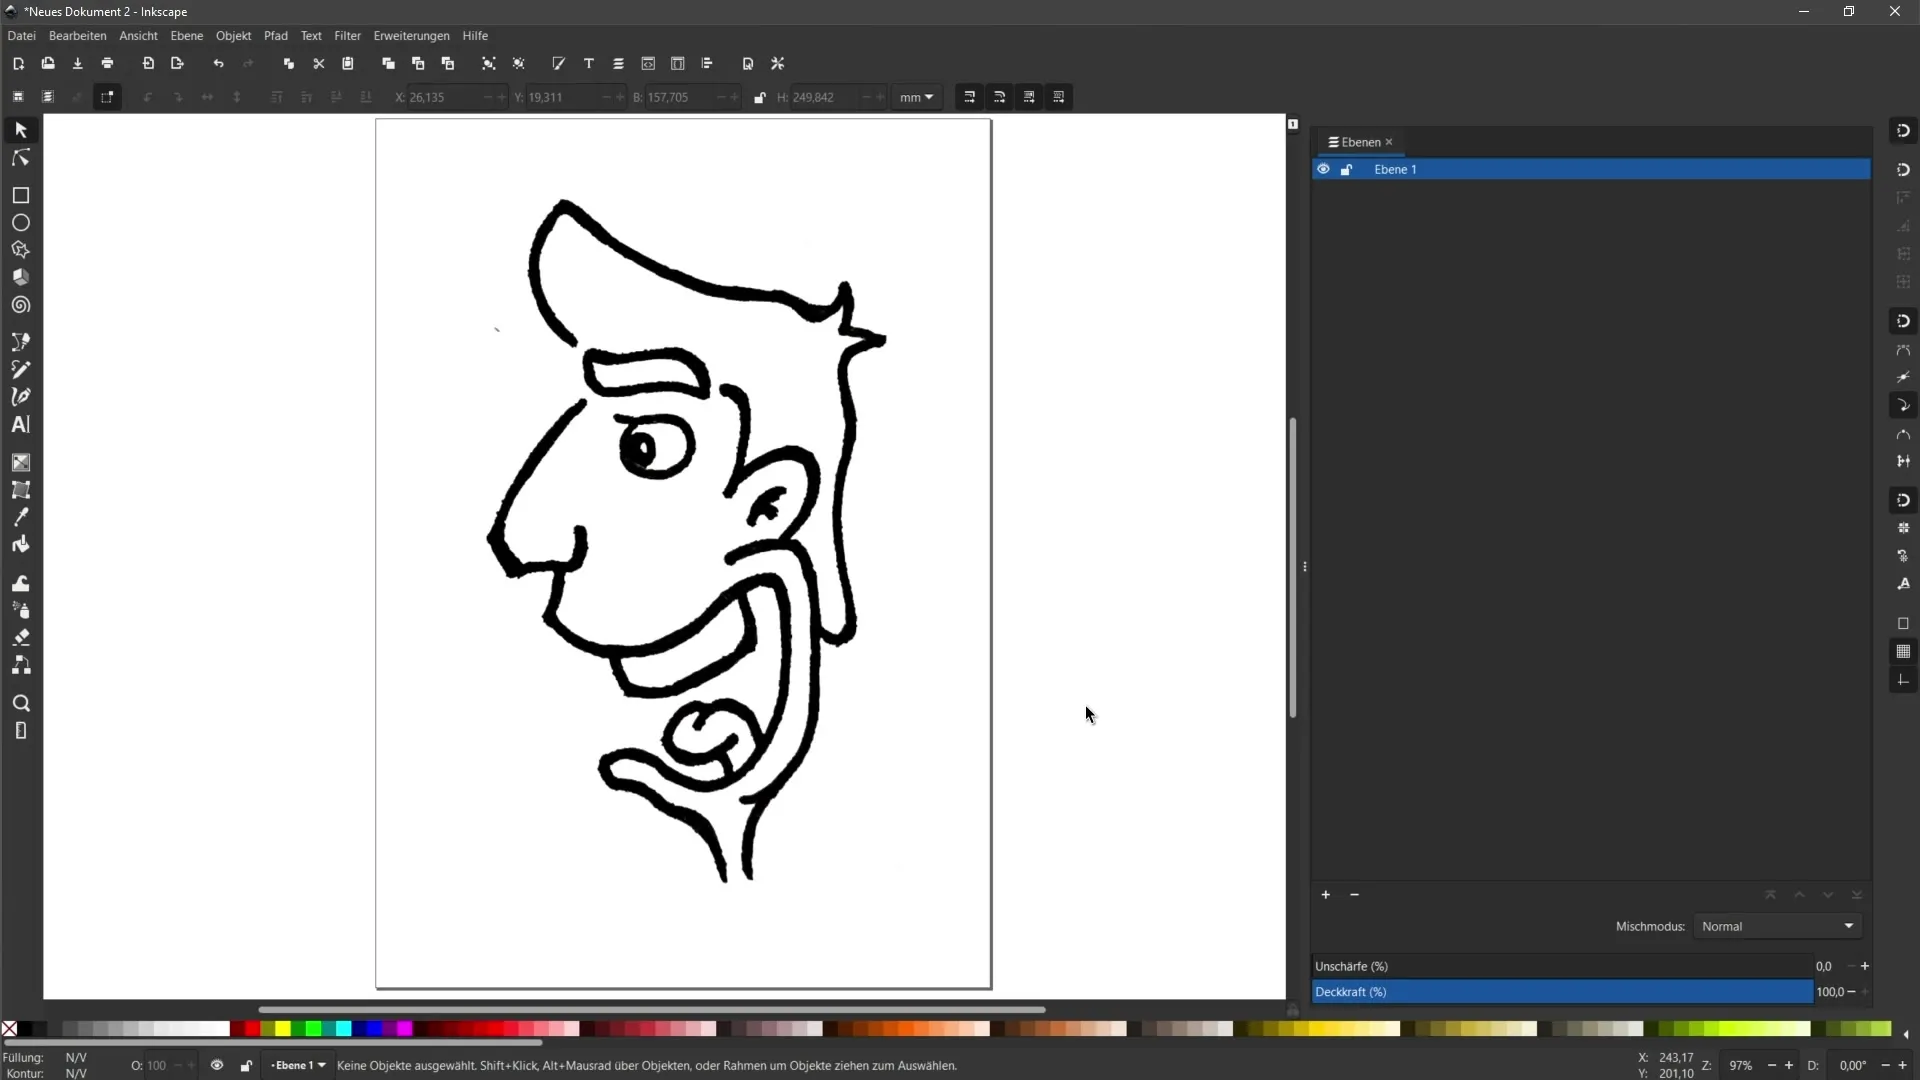
Step 5: Trace Bitmap
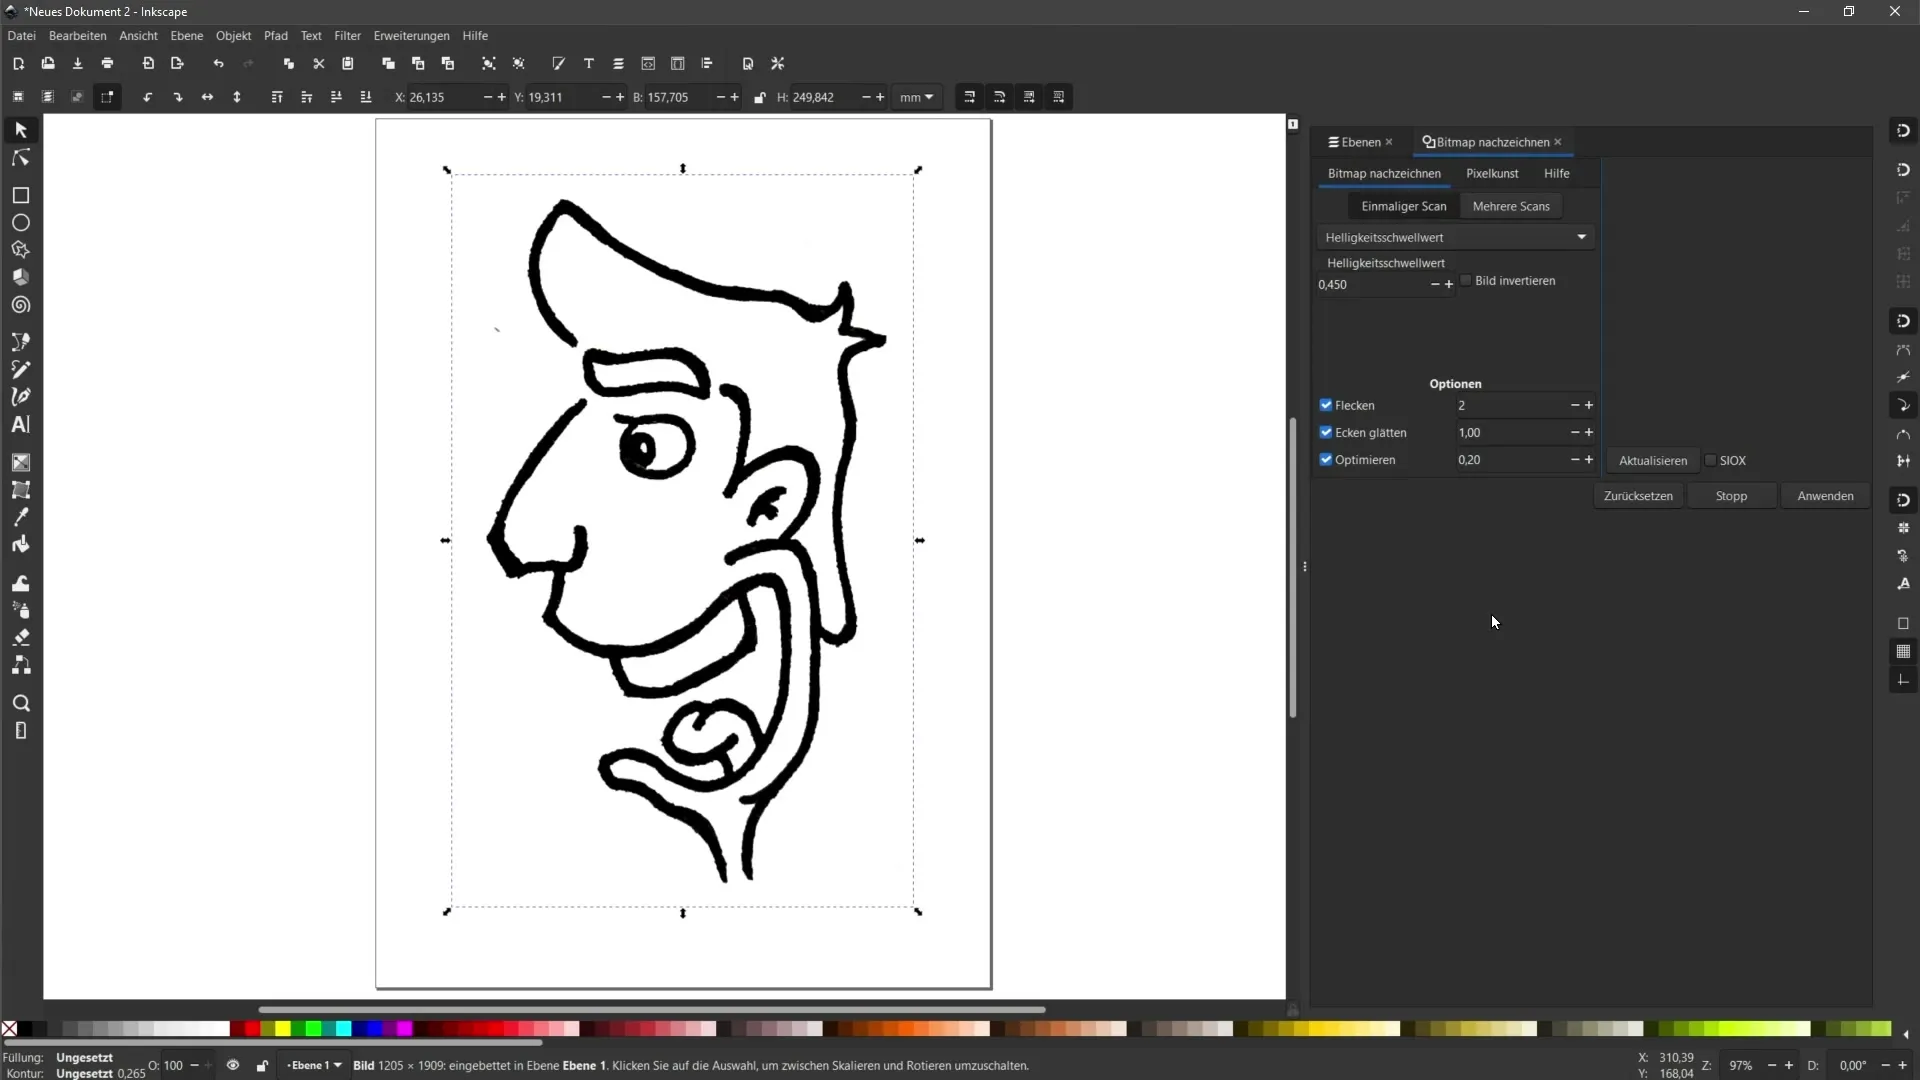
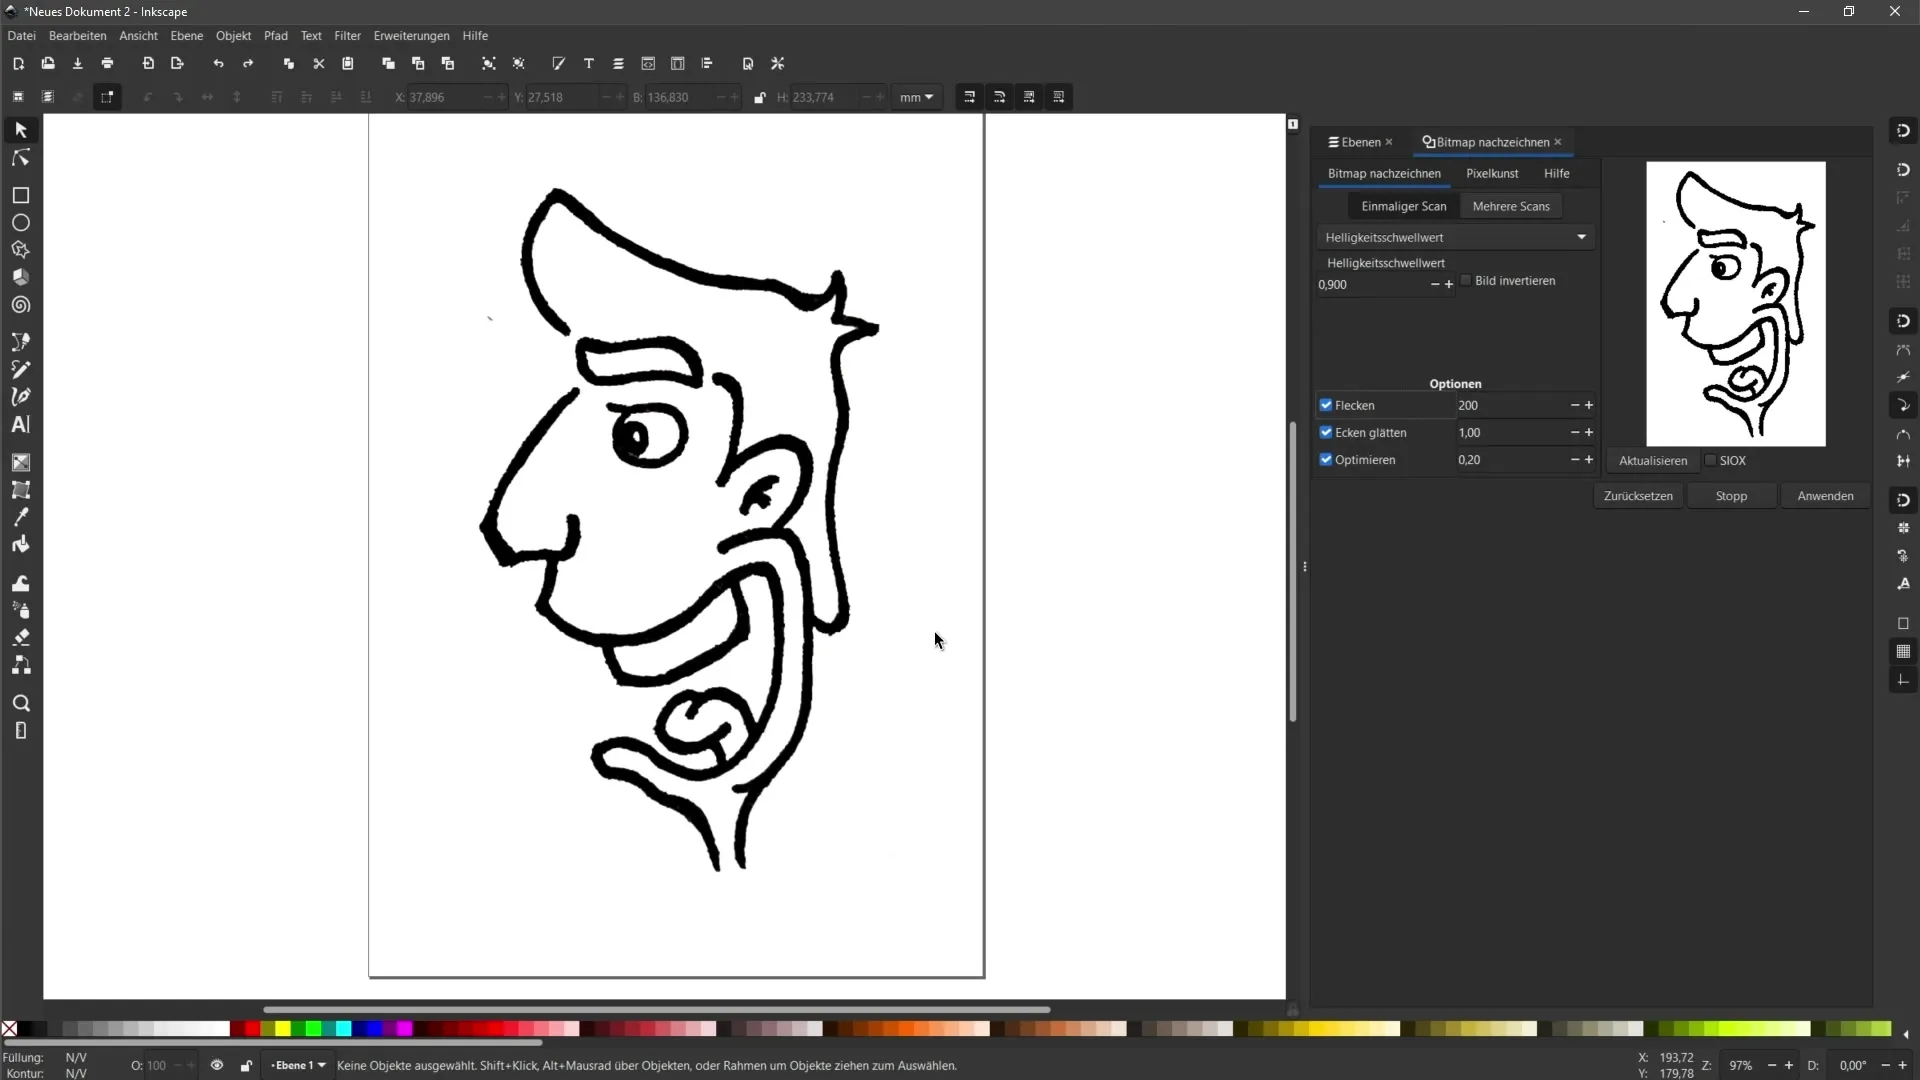
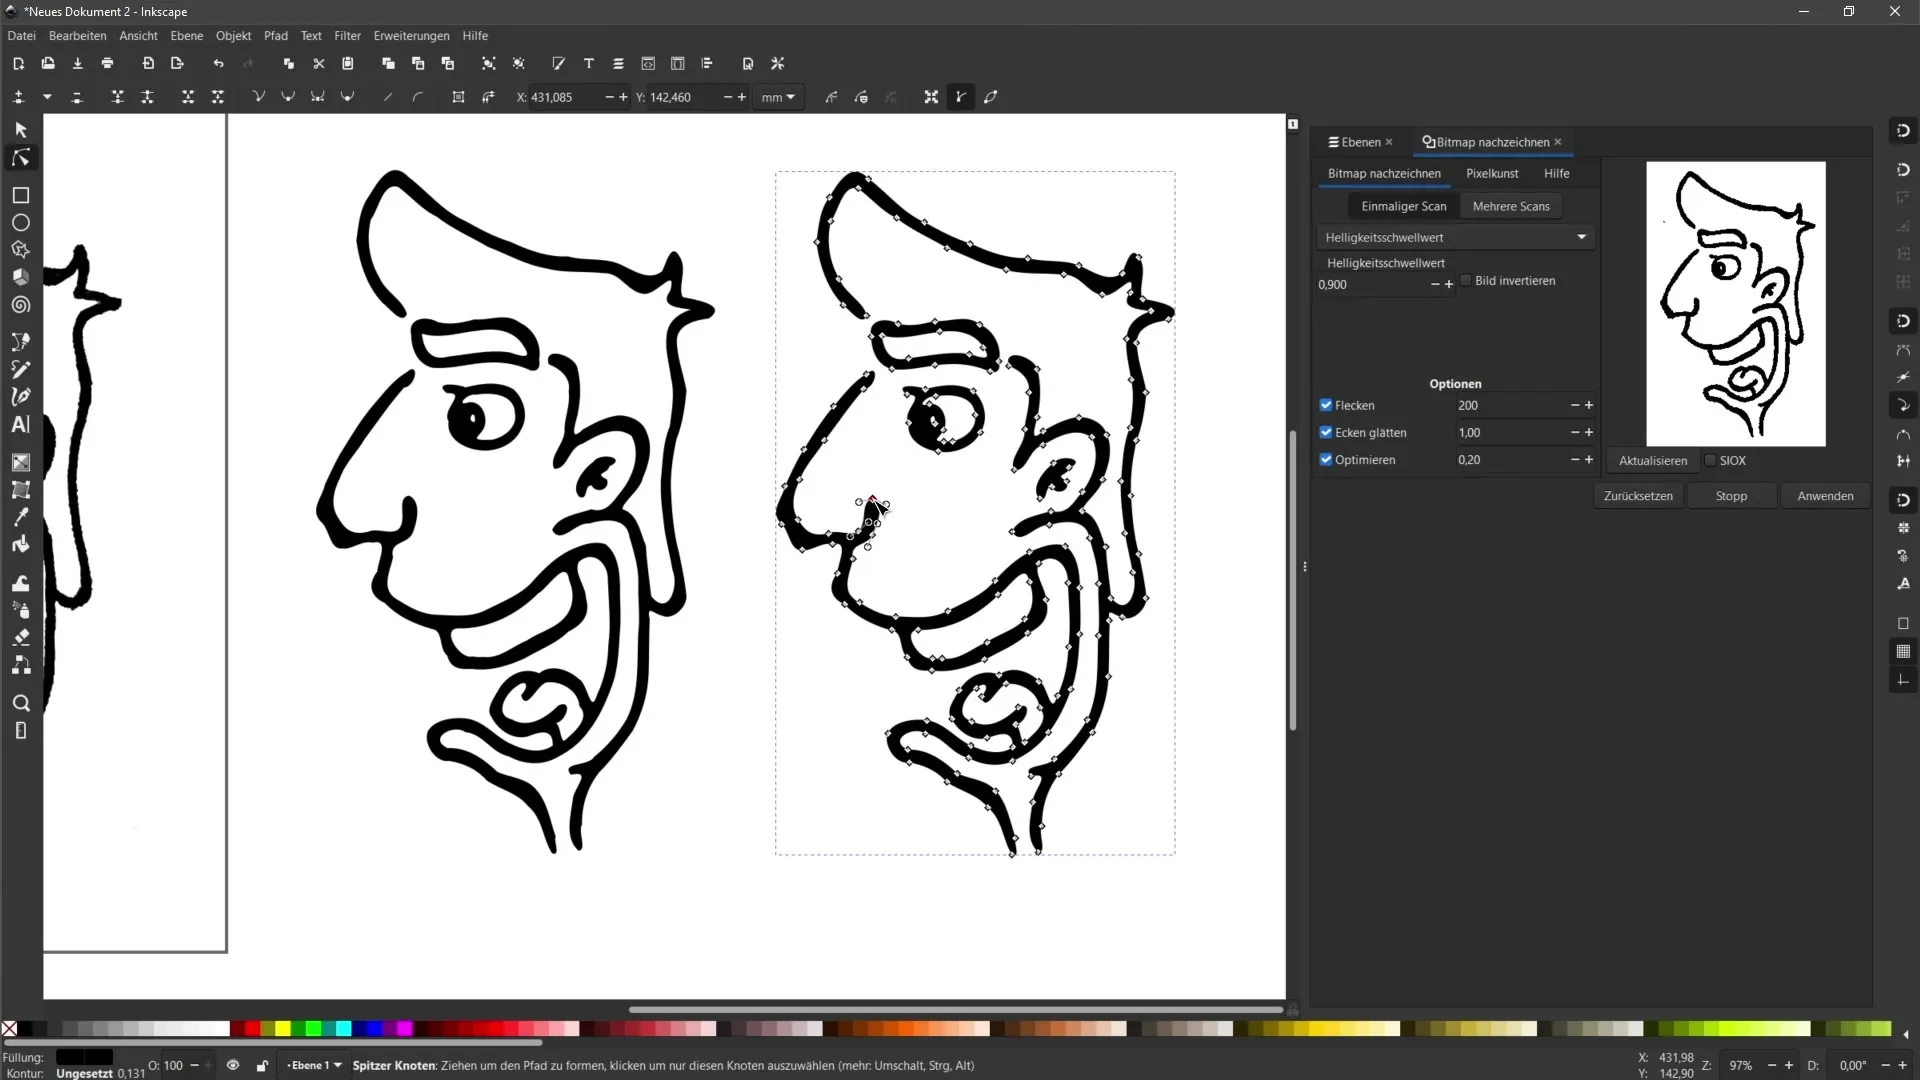
To convert your drawing into a vector object, select the image and go to "Path" > "Trace Bitmap". Here, a panel opens on the right side offering you various tracing options. For line drawings, you have the option to adjust the conversion to mainly cover the black contours.
Step 6: Adjusting Tracing Options
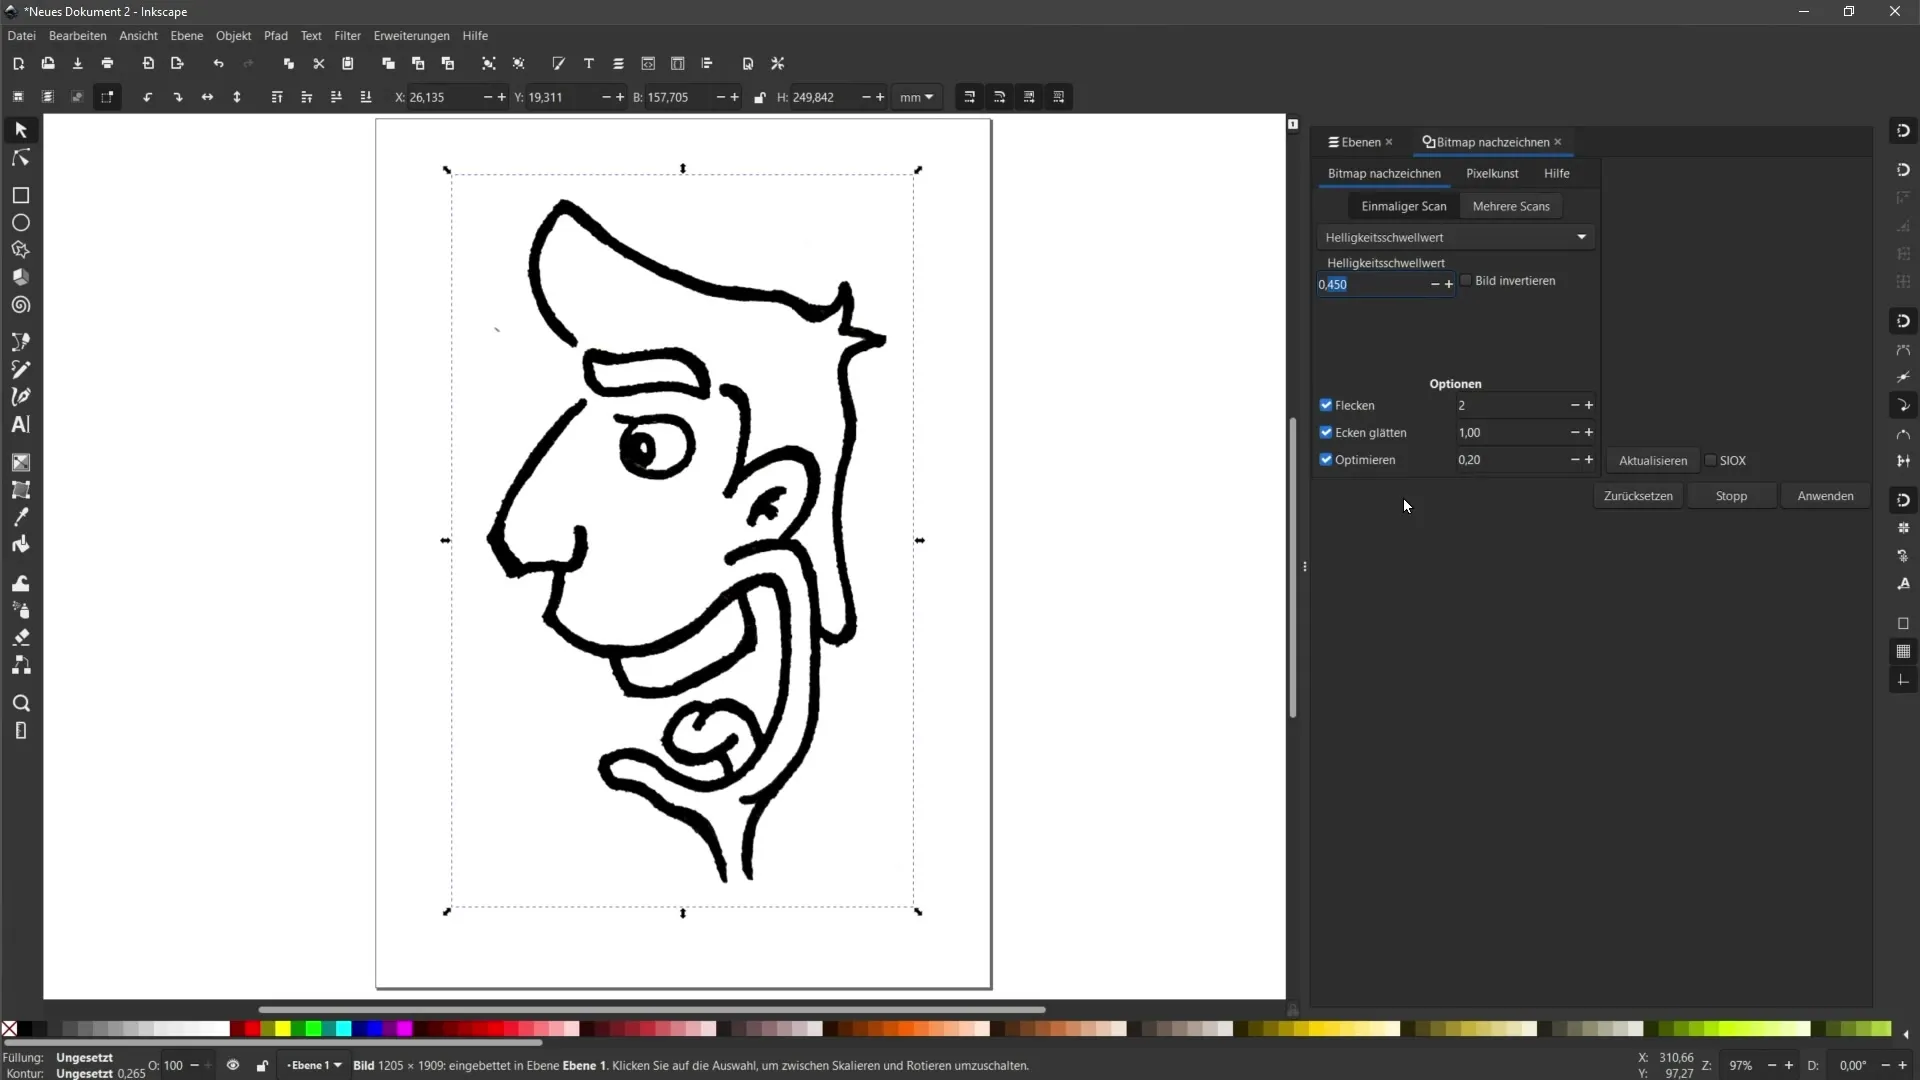
In the Bitmap-tracing panel, you can adjust the brightness threshold as well as the default values. Experiment with these settings to achieve the best results. For example, you can adjust the brightness cutoff value to control the darkness and lightness in your drawing.
Step 7: Removing Spots
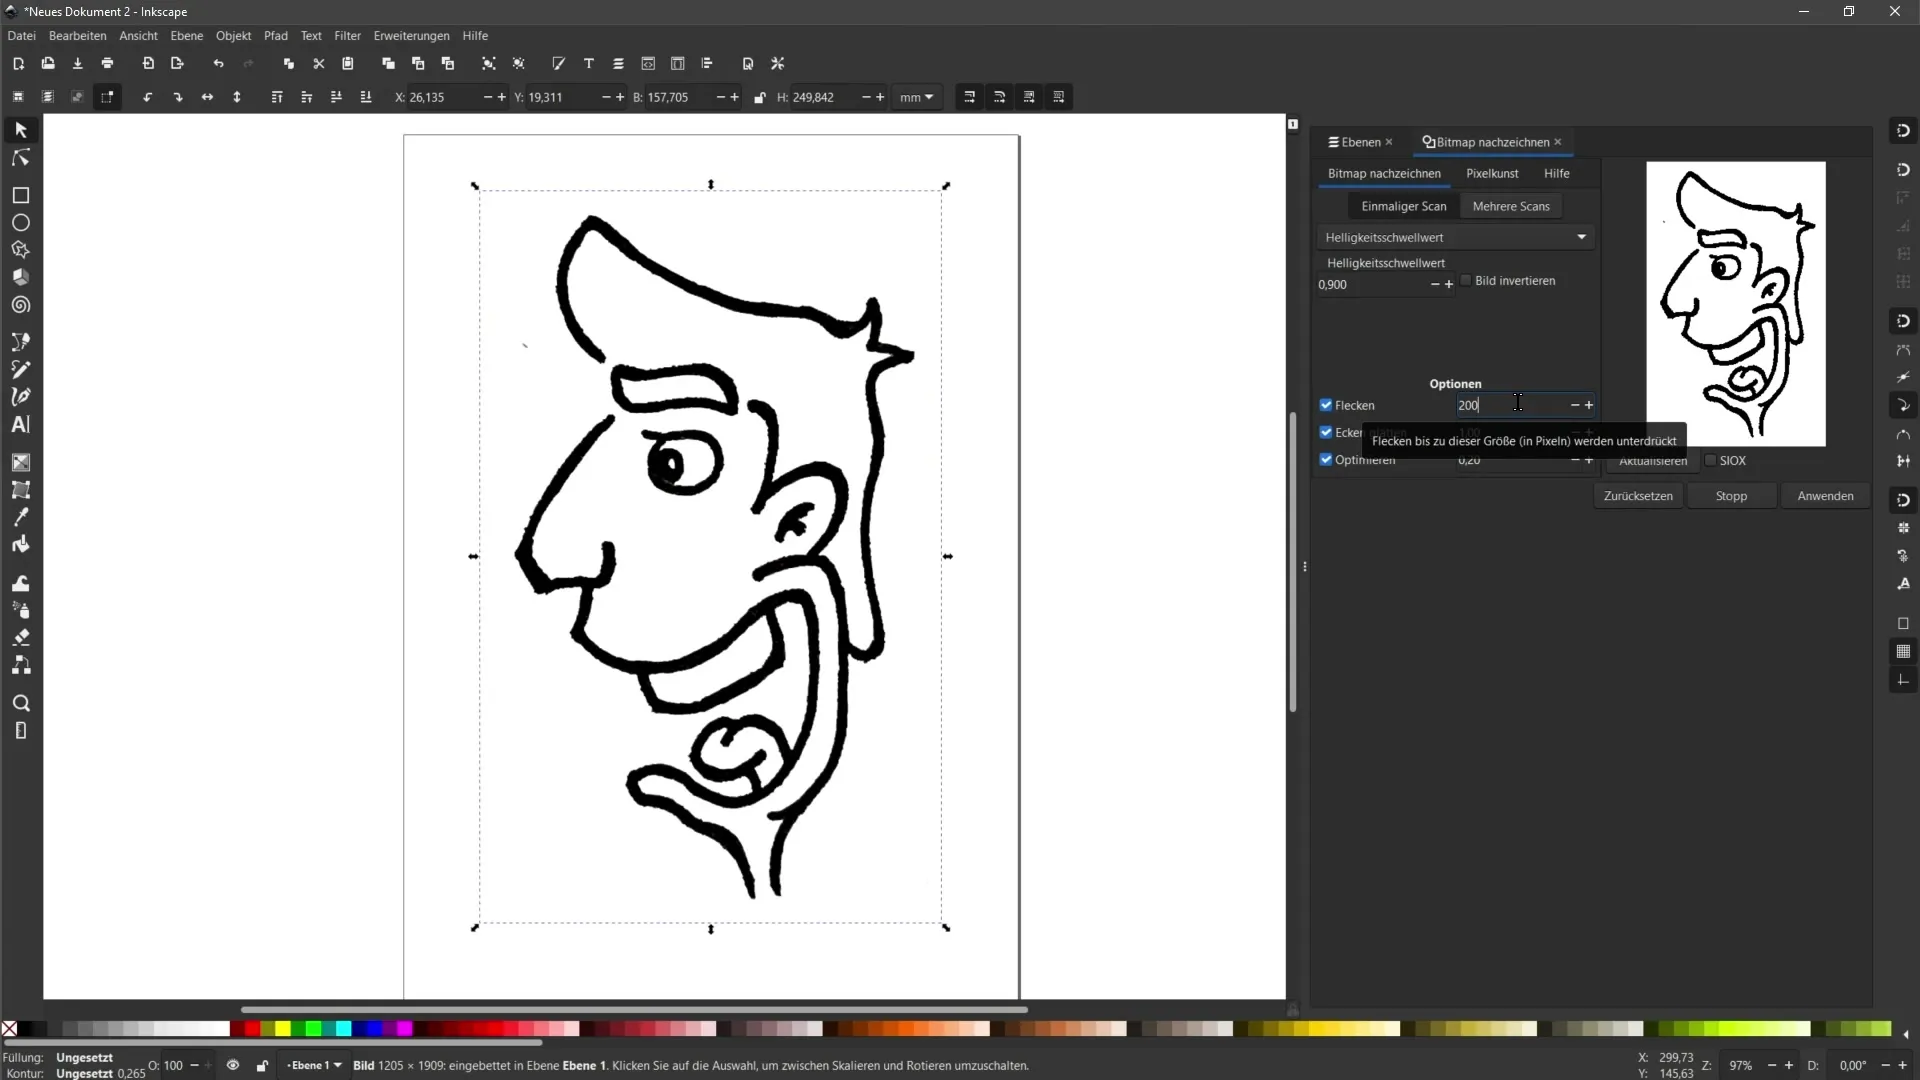
If your image has unwanted spots, you can activate the spots option. This helps eliminate small errors in the image when adjusting the subsequent threshold value to get the best results.
Step 8: Smoothing and Optimizing Edges
To smooth and optimize the edges of your drawing, activate the "Smooth Corners" and "Optimize" options. These can help make the drawing visually appealing, but be careful not to overdo it.
Step 9: Applying the Tracing
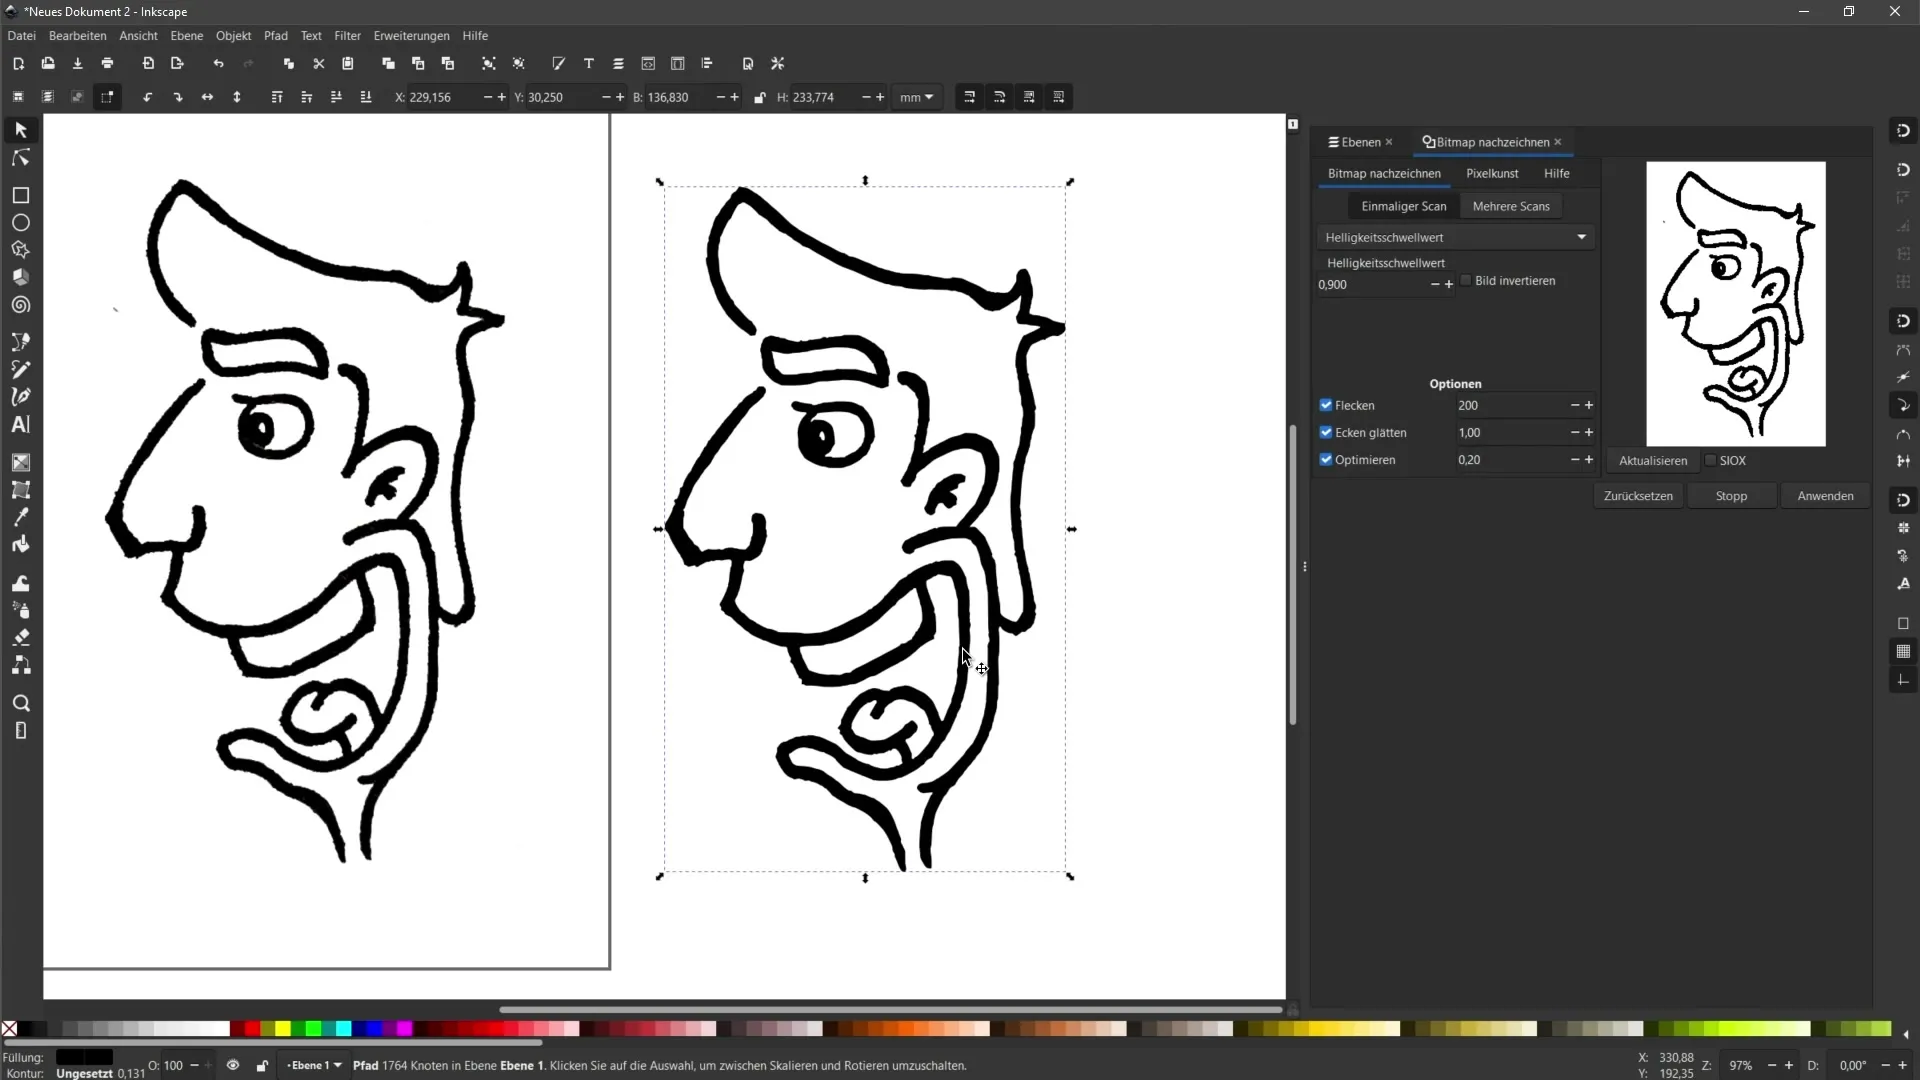
After you have made all adjustments, click on "Apply". Now you will see the original drawing on the left side and the vectorized version on the right side. Check the result to see if the contours look clear and clean.
Step 10: Simplifying Paths
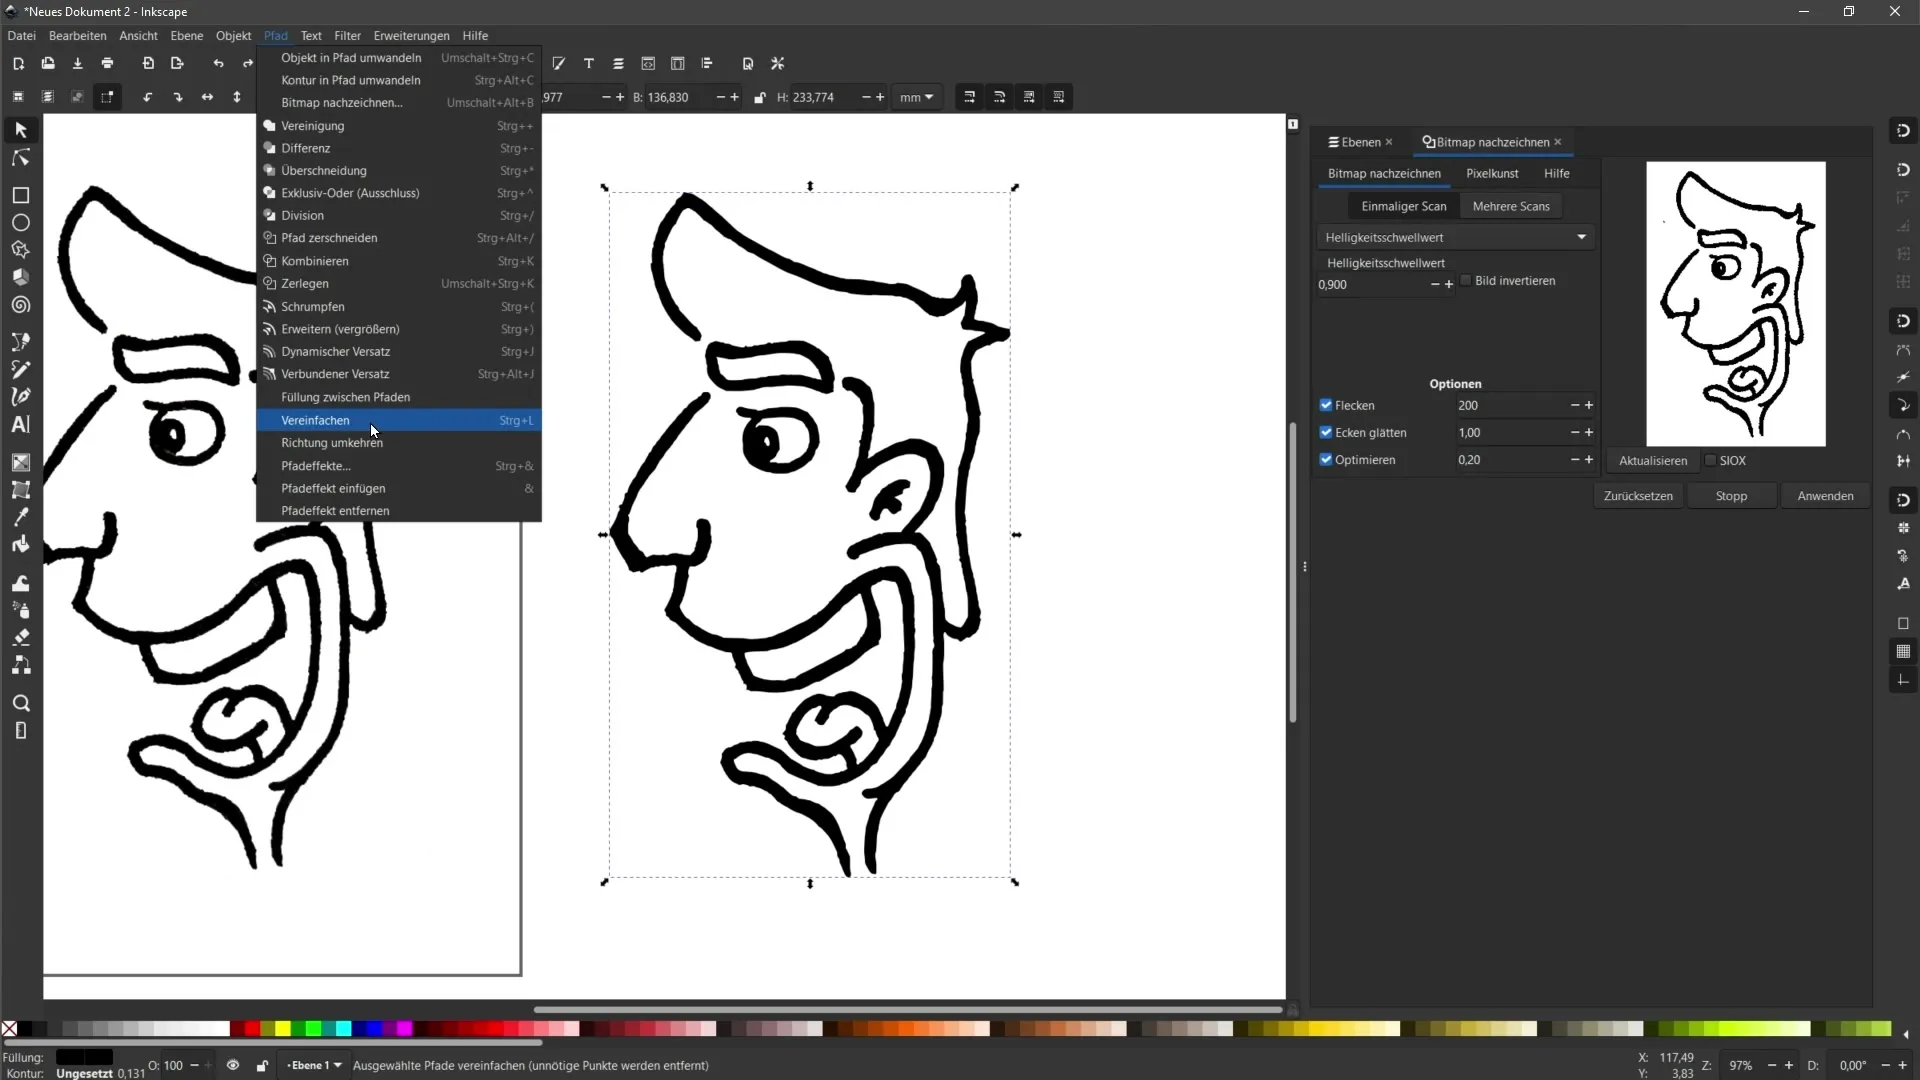
If the drawing contains many anchor points and appears cluttered, you can work with the "Simplify" command under "Path". However, note that this step is destructive, meaning you should create a copy of your object before.
Step 11: Non-Destructive Editing with Path Effects
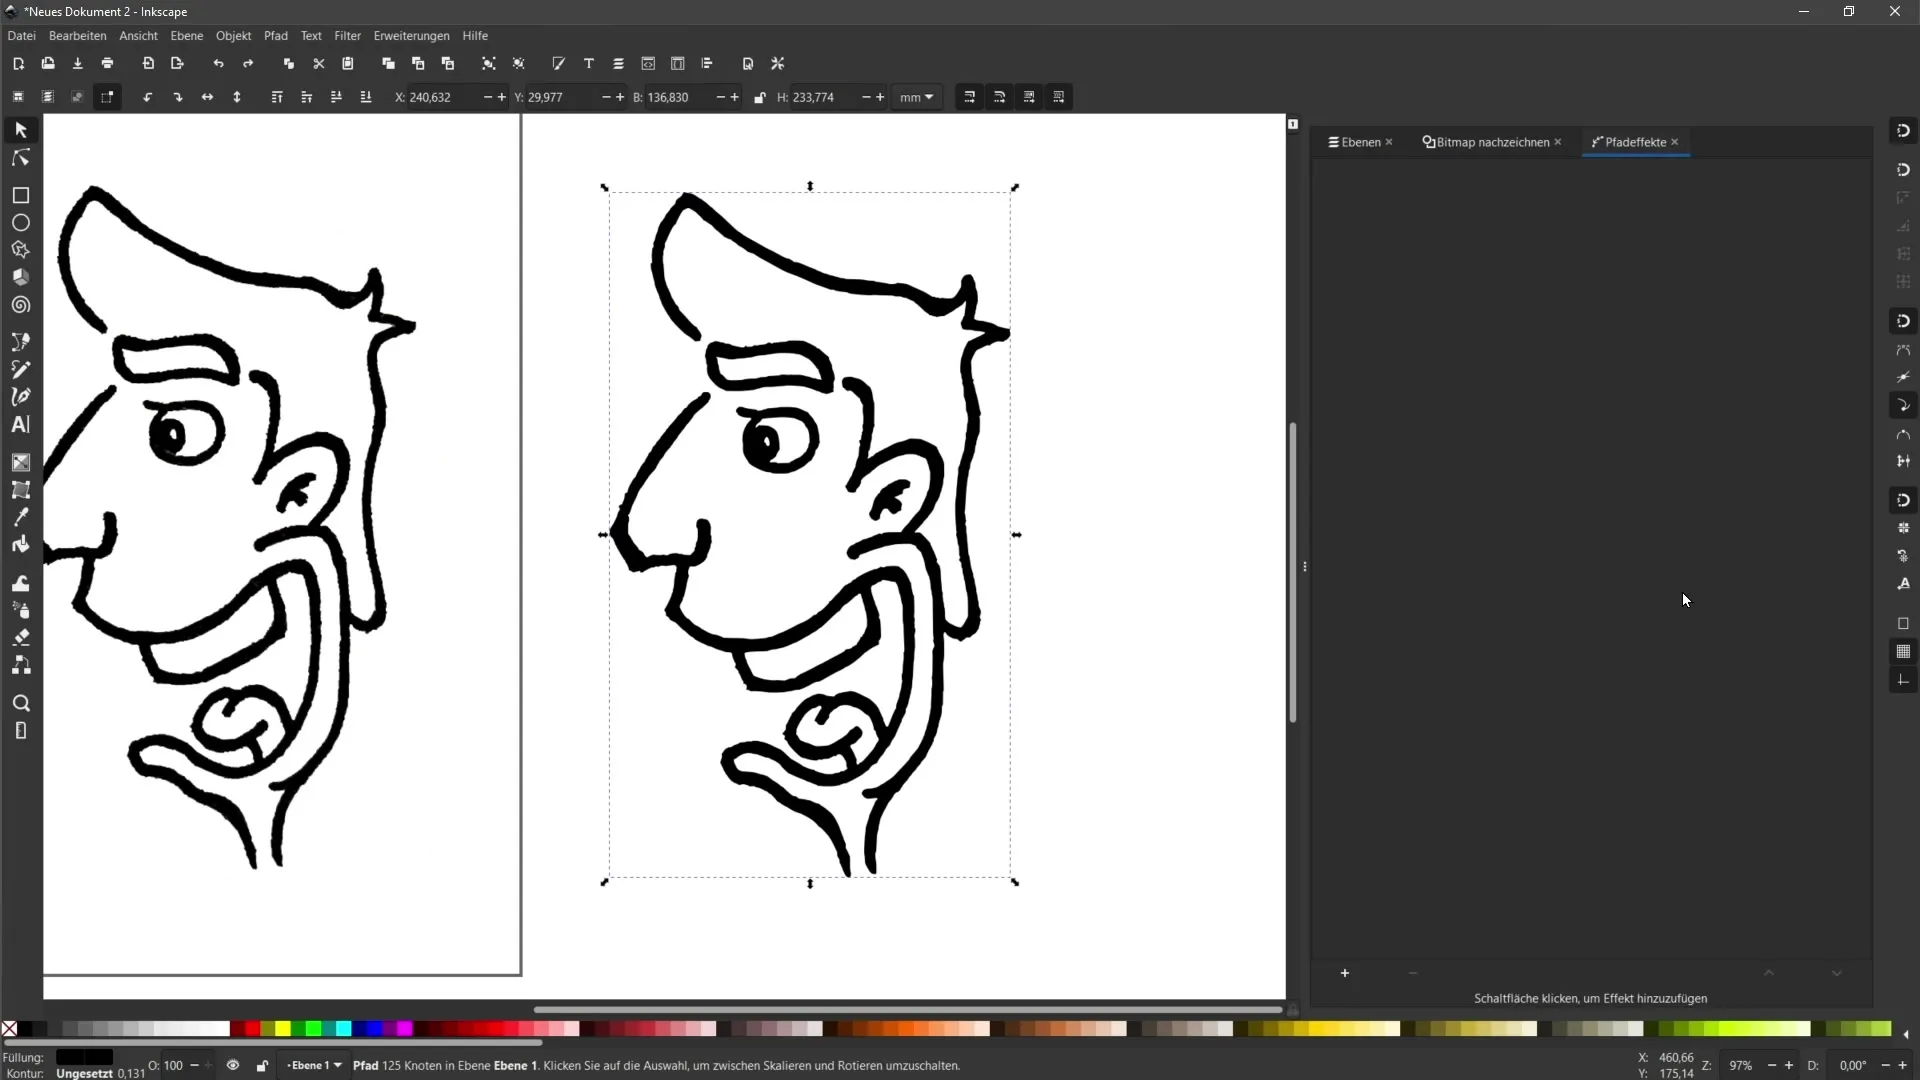
For non-destructive editing, you can use path effects. Under "Path" > "Path Effects", you have the possibility to edit the effects as desired, without making permanent changes.
Step 12: Saving and Using the Vector Graphic
Once you are satisfied with your vectorization, save the file in the desired format. You can now use your vector object for various applications, whether for printing on t-shirts or for digital designs.
Summary
In this guide, you have learned how to easily convert your drawings into vector graphics. From photographing and editing your images to the intricacies of tracing in Inkscape, you have gone through all the steps to achieve optimal results.
Frequently Asked Questions
How can I best photograph my drawing?Make sure there is sufficient light and that the image is taken straight.
Can I use other image editing programs?Yes, you can use any image editing program that provides the necessary functions.
How can I adjust the brightness when tracing in Inkscape?You can adjust this in the bitmap tracing panel by changing the brightness threshold.
How can I remove unwanted spots?Use the spot removal option in the bitmap tracing dialog to remove small errors.
What does it mean to simplify a path?Simplifying reduces the number of anchor points in your vector object and ensures smoother lines.
