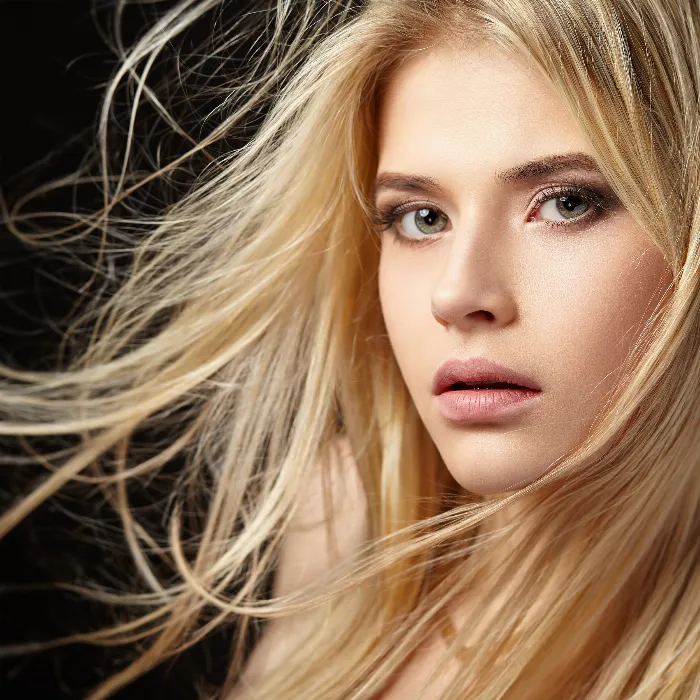
Depending on the subject and further processing, I can simplify the cropping of hair by offsetting the new background against the existing image. The possibilities of this offsetting should not be underestimated. It depends on three factors: the color/brightness of the original background, the color/brightness of the subject to be cropped (the outer hair area) and the color/brightness of the new background. If you understand how the offsets work, you can achieve fantastic results very quickly. In this section, I would like to show how blending modes can be used for clipping hair. I will not go into the layer modes in general, but only in the specific context of hair and background offsets.
Image source: Giorgio Gruizza, pitrs, Deklofenak, Ben Heys, T.Tulic, Ontario Ltd @ Fotolia.com
A little theory first
Blending modes can be used to offset the colors and brightness values of a layer against the colors and brightness values of other layers. The layer mode or blending mode of a layer always affects the layers below it, not the layers above it!
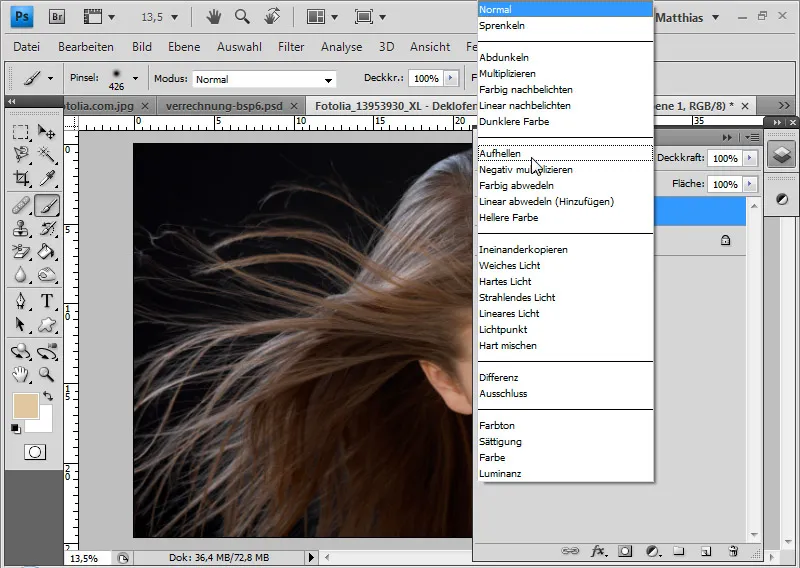
Hair clipping with offsets is technically not clipping at all, but overlaying or hiding image content.
What is important for offsetting is the tonal range between the background and the main subject, within which the new background must move. So if the background is black and the hair is blonde, the two corresponding tonal values form the boundaries. All tonal values between blonde and black are suitable as new backgrounds to ensure that the offset works perfectly.
The HSB model and the CMYK model are suitable for evaluating the tonal value ranges. With the HSB model, the B value for brightness is a good indicator of the latitude. For highly saturated images, the S value must also be taken into account. In the CMYK model, the K value is decisive. It reflects the black in the image and is therefore the limit between lightening and darkening for offsetting. The HSB model is very suitable for checking the tonal range because it most closely represents Photoshop's color picker. The hue is the right-hand color bar, the saturation can be adjusted with a left-right movement in the color selector and the brightness with an up-down movement.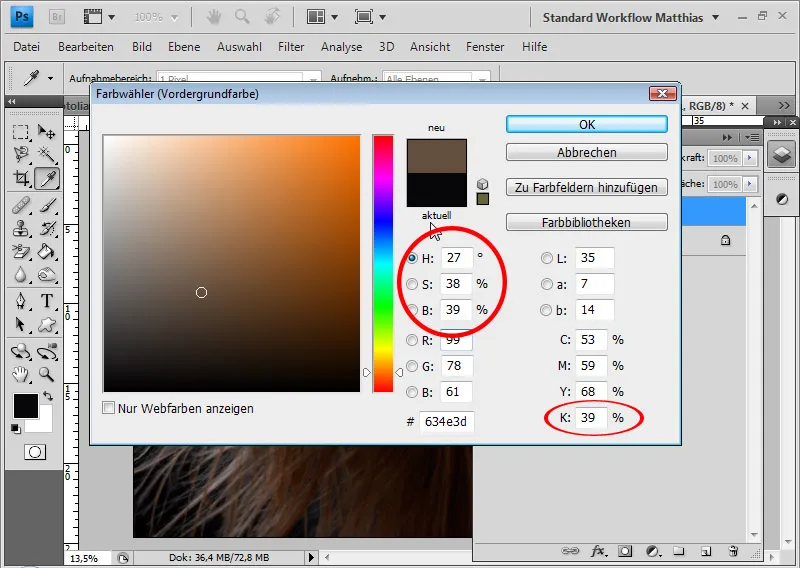
Example 1: Lighter color/negative multiply - brown hair and black background
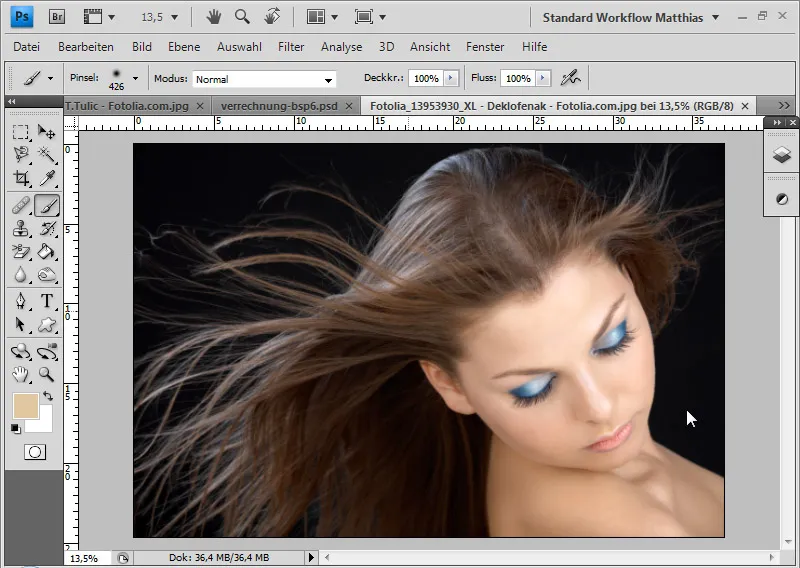
In this example, I have an almost black background and brown hair with a light-colored face. The brightness value of the individual hairs on the left of the image is important for the assessment because they cannot simply be corrected with a layer mask . This value therefore forms a limit for offsetting. The other value is the brightest value in the background. According to the HSB model - in the color selector top left - there are the following brightnesses (B):
Background: 2 percent (at the darkest point) Hair left: 35 percent (at the brightest point)
By the way: I can also display the HSB values in the info window. There I just have to activate the HSB values in the control panel options.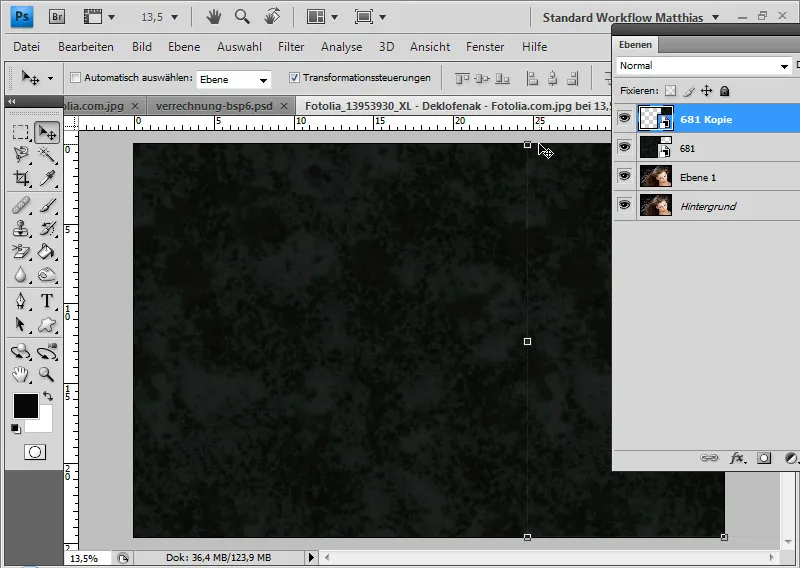
The new background texture has an average B value of 4 to 11 - it fits almost everywhere exactly within the tonal range.
My new background can move within these limits if I set my original image with the "Lighten" blending mode. The new background is placed under the layer with the model because the layer modes always offset the underlying layers. The Lighten mode always makes the lighter of the two values appear in the result for each color channel. If the new background is completely darker than the B value of 35 and lighter than 2 percent, the hair is completely faded in and the dark "old" background is faded out.
If the result looks a little pale, which can happen with the Lighten layer mode, I can compensate for this with an adjustment layer. However, this is not necessary in this case.
I can also use the Lighter color layer mode. The lighter tone values of the relevant layers are then blended in, which in this example produces the same effect as Lighten.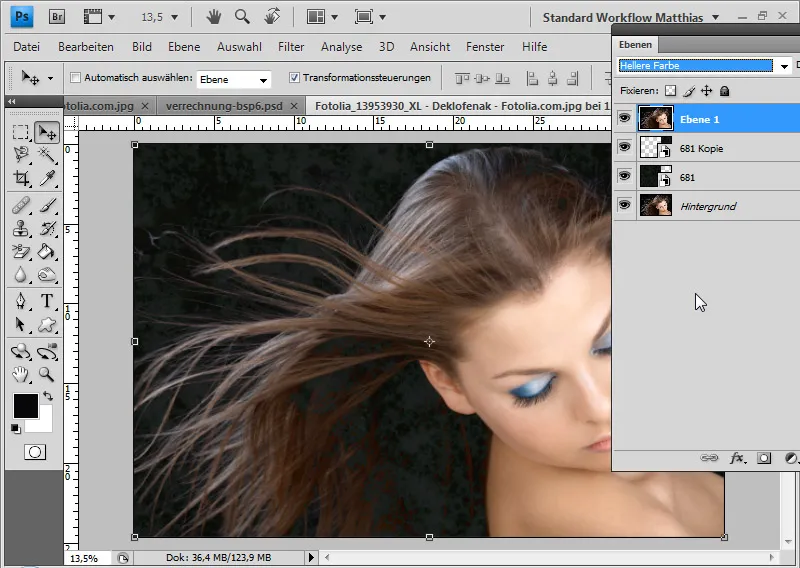
The hair next to and below the ear is darker than in other places. The new background, which is lighter than the hair in these areas, partially shows through. I therefore duplicate the background layer, set it to Normal mode and add a layer mask to the layer.
I invert the layer mask with Ctrl+I and mask the entire outer area so that the hair, which should not contain any background, remains hidden.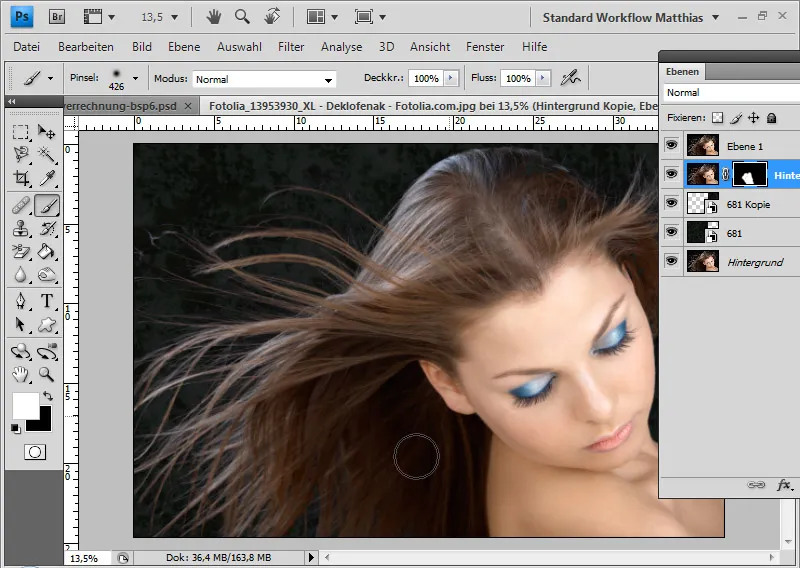
In this case, there are still individual light-colored hairs that are not displayed in their current state. I can quickly fix this with another duplicated layer in Multiply Negative mode. This filling method offsets the light hairs and the dark ones are hidden. This makes the light areas appear stronger. If this is too strong, I can reduce the opacity to 60 percent.
I add a layer mask to this layer in which all the inner hair areas are masked. My first offsetting with the Lighter Color layer mode in combination with the Multiply Negative blend mode is complete.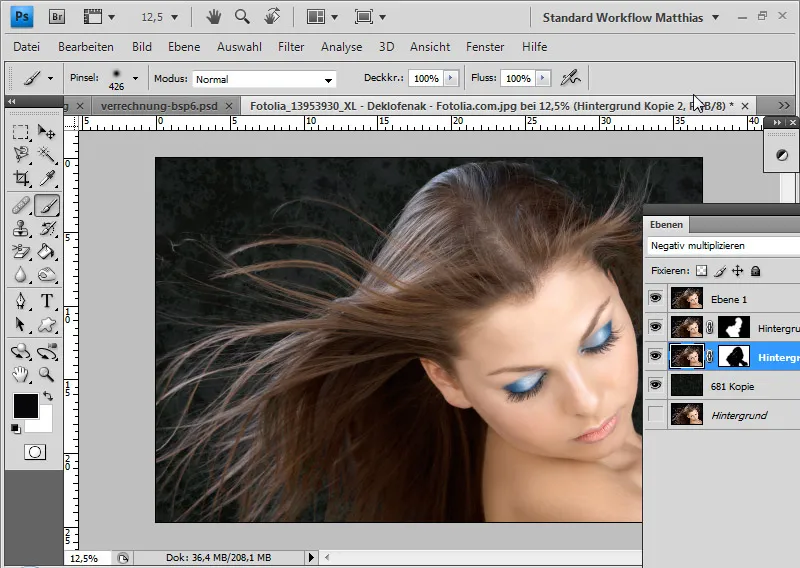
Example 2: Lighter color - light dog hair in front of an irregular background
This example is a little more complex because there is an irregular background here, which limits the scope of the new background somewhat.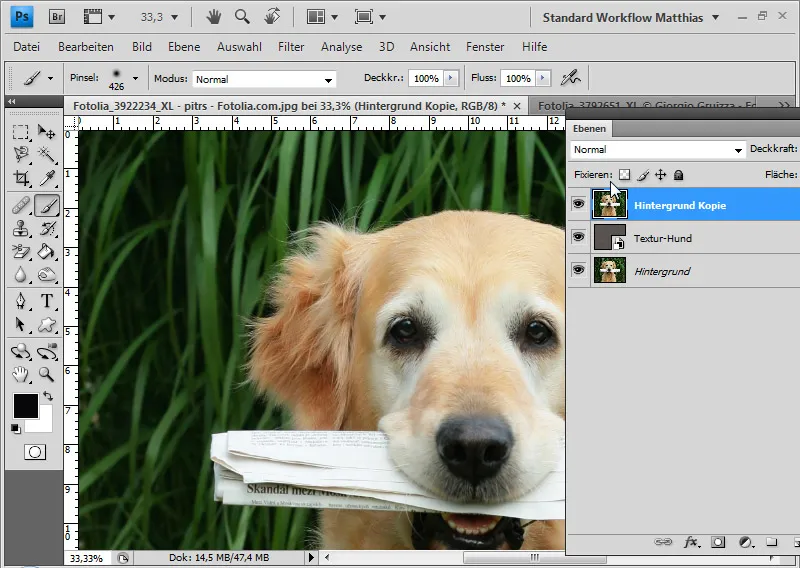
According to the HSB model, there are the following brightnesses in the image: - Dog hair: 55 percent (at the darkest point in the outer hair area) - Background: 36 percent (on average, there are points that are even above 50 percent)
The new background texture has an average B value of 40 percent.
As the average free space for a new background in this image is between 36 and 50 percent brightness, the Lighten or Lighter color fill method can also be used here. Some points in the background are brighter, but I can fix this with an adjustment layer.
First, I add my new background below the dog layer. I set the dog layer to Lighter color mode.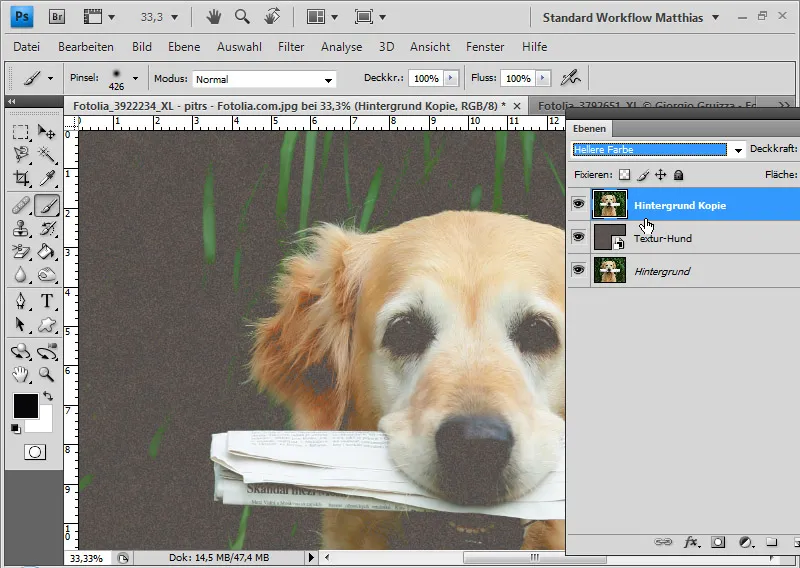
I duplicate the dog layer and place it below the original layer in Normal mode. I add a layer mask to the duplicated layer, invert it with Ctrl+I and paint the inside of the dog white so that the inside of the dog is fully visible.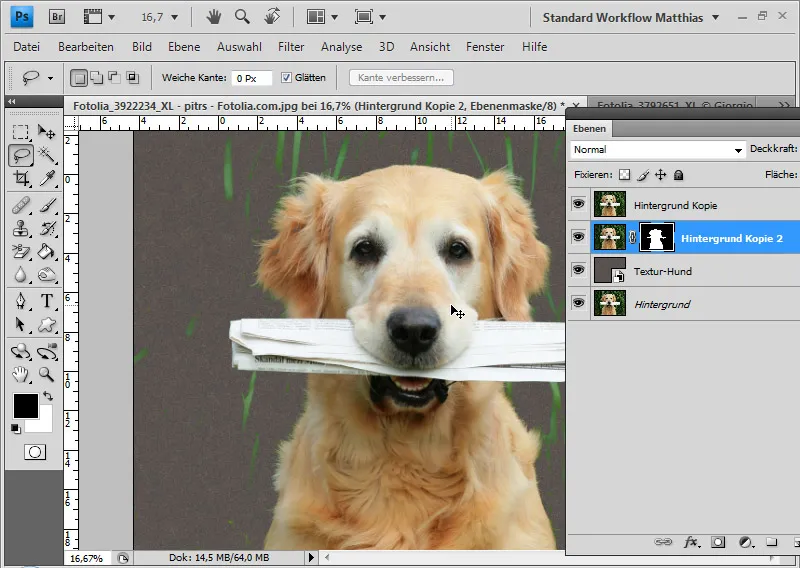
Now there are still some straws from the background in the image that are lighter than the new background and therefore show through.
Here's a little trick: I add a Hue/Saturation adjustment layer to the dog layer as a clipping mask. The clipping mask ensures that the adjustment layer only affects the dog layer and not the layers below it.
In the adjustment layer, I call up the green tones and reduce the brightness to -100. This increases the scope for the new background because the brightness of the old one has become darker. Result: The light-colored stalks disappear. I also move the hue slider to the left to turn the green colors in the picture yellowish. This allows me to change the slight green fringe on the fur to the fur color.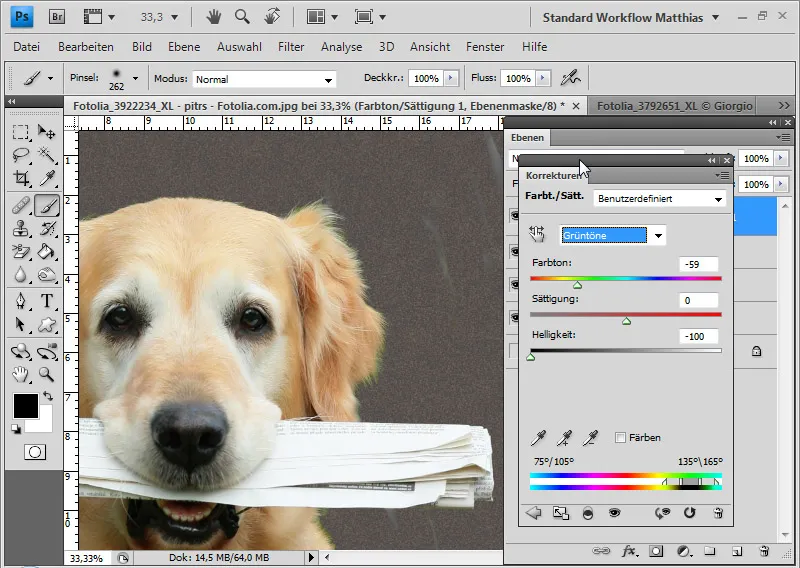
If individual areas in the background are still shimmering through, I mask them directly in the layer mask of the dog layer. The offsetting is finished.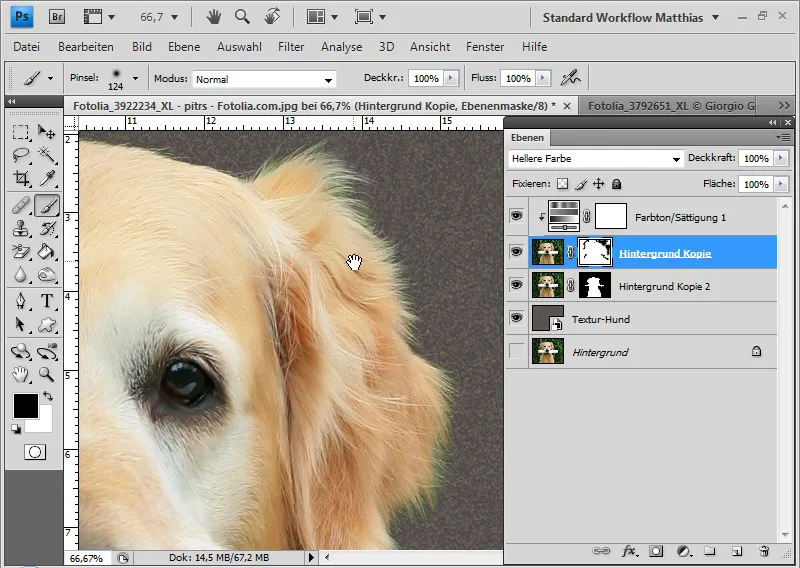
Example 3: Lighter color - Blonde hair against a red background and the special feature with the saturation
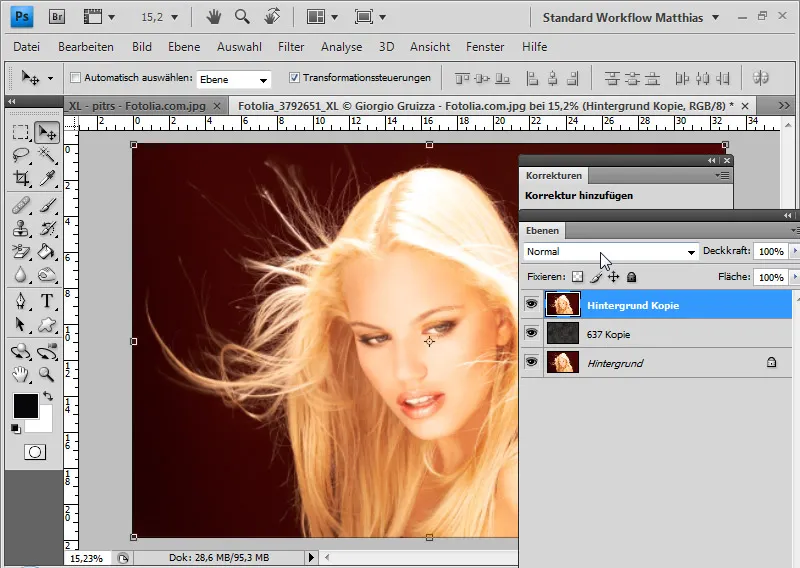
In this example, I have a red background that I want to replace with a gray texture. The red is very saturated. There is therefore a special feature with the values.
According to the HSB model, there are the following brightnesses (B):
Background: 15 to 30 percent (increasingly bright from left to right) Hair: 80 percent (at the darkest point)
The new background has a brightness of 20 percent. In theory, this does not cover all areas of the image. In practice, however, it does. This means that the B value is a good indicator of the offsetting, but is not solely meaningful for certain saturations. The red background has a saturation of 95 to 99 percent. This means that the red is darker in the interplay of brightness and saturation and the offsetting will work in the Lighter color layer mode.
This limit value becomes particularly clear in the area where the red background shows through a little. According to the CMYK model, both the new and the old background have a K value of around 70.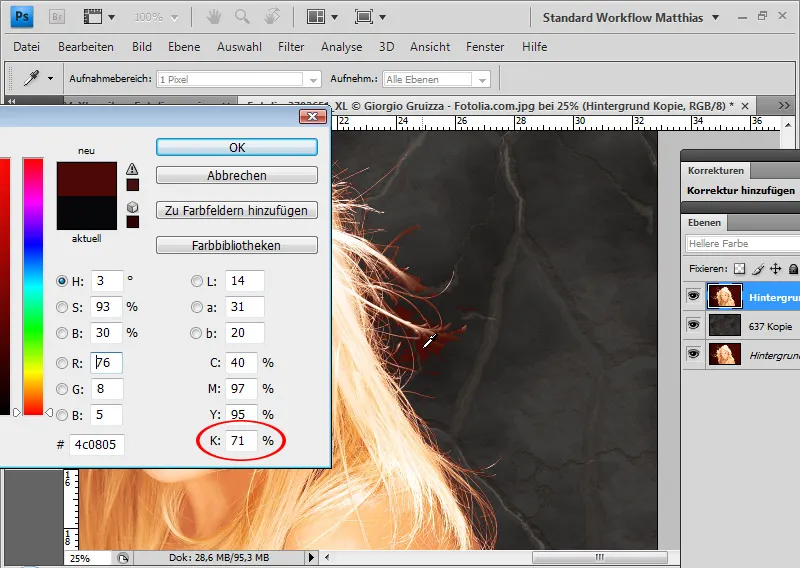
The hair still has a red color fringe. First, I duplicate the background layer and place it in Normal layer mode under my layer with the Lighter color mode. I mask the outer area so that the face and inner hair areas are fully displayed.
Again, I can use a little trick with the Hue/Saturation adjustment layer. Because of the red background, I call up the red tones and reduce the brightness by about 45; I move the hue slider to +10 to color the red hair into blonde. The background red becomes darker and duller and disappears from the picture.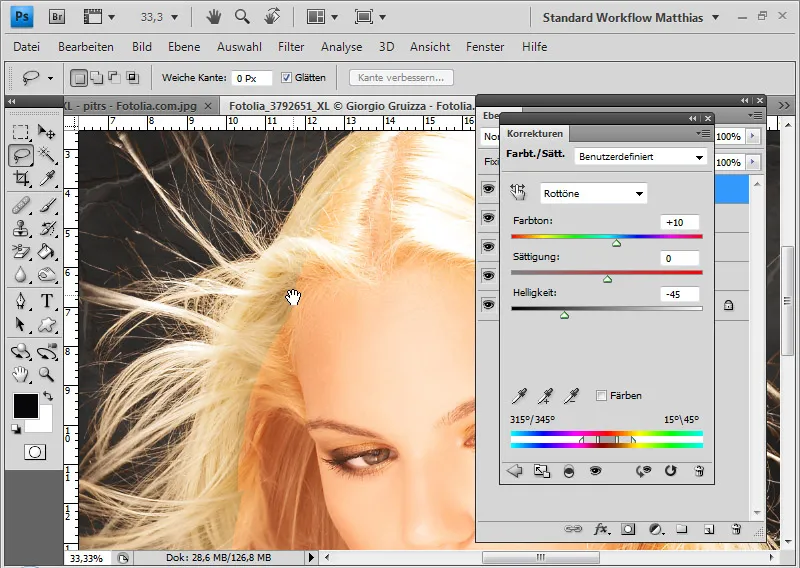
For a smooth transition, I paint the hair areas in question in the existing layer mask.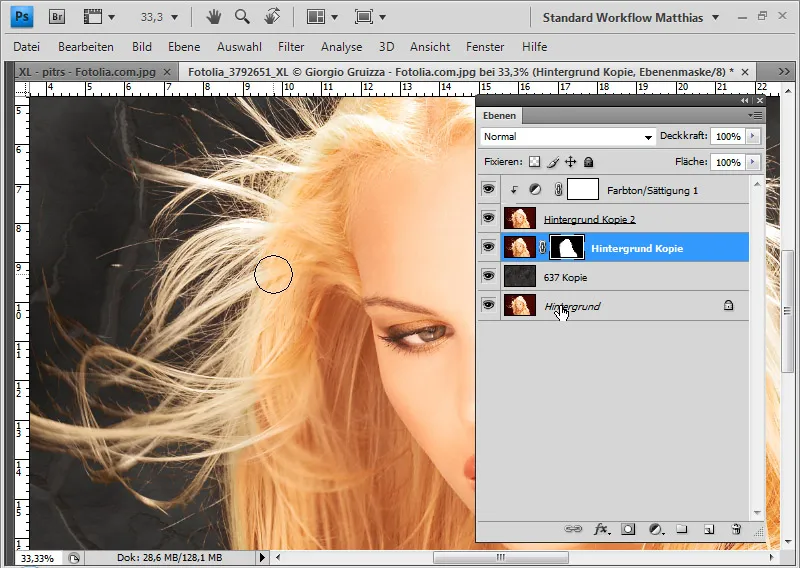
My offset with the new background is finished.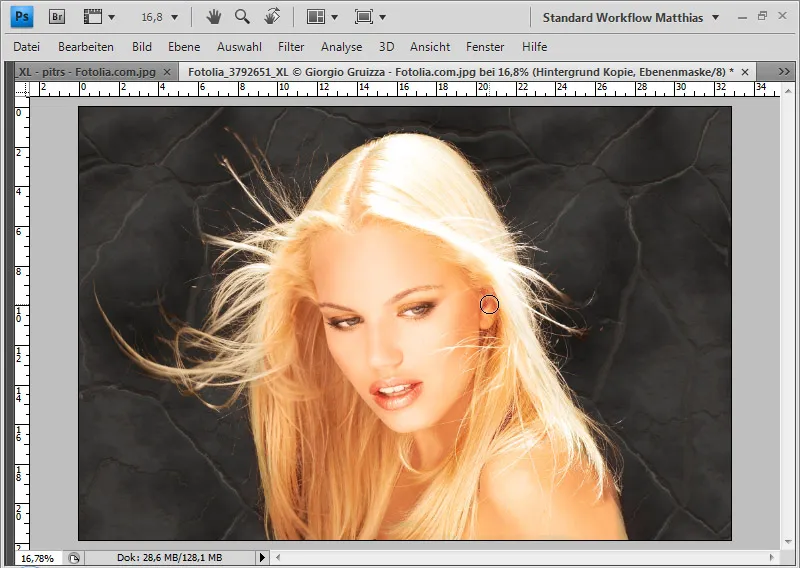
Example 4: Copying into each other - dark hair with simple detailing
Here the model has dark hair with a gray background.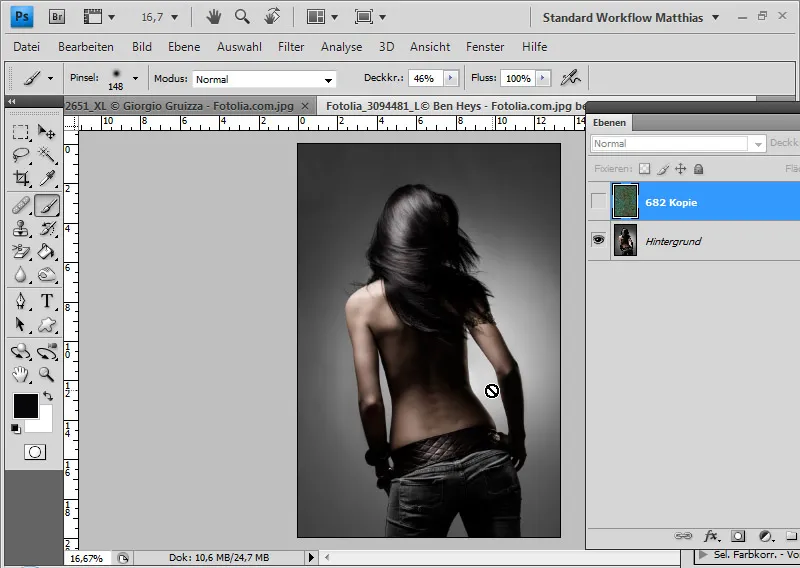
First, I add the texture and place it above the model layer.
Using the Magnetic Lasso, I select the model's body and add a layer mask with the selection to the texture layer. I invert the layer mask with Ctrl+I so that the body remains visible.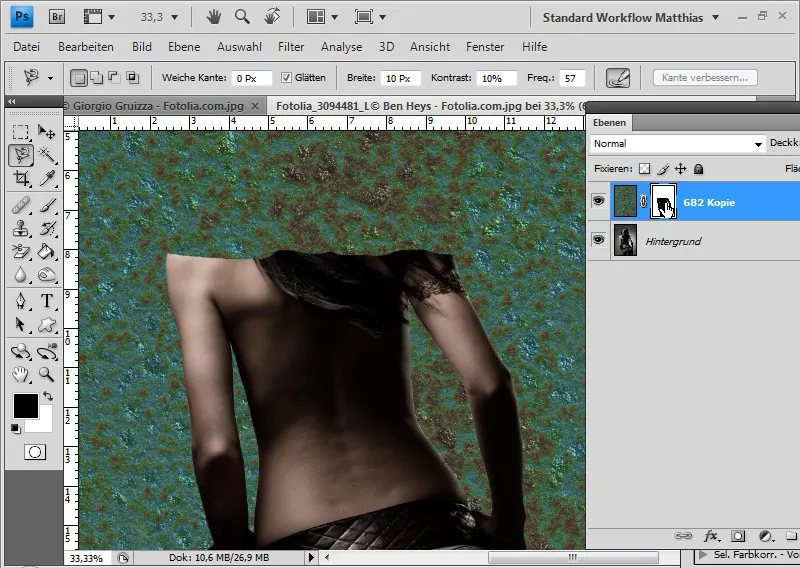
I set the texture layer to the blend mode Copy one into the other. This layer mode mixes the colors in such a way that the shadows and highlights of both layers are retained with a simultaneous slight increase in saturation. This means that, unlike the Lighter/Darker color blend modes, the colors are not separated but blended. The tone values therefore only play a subordinate role here.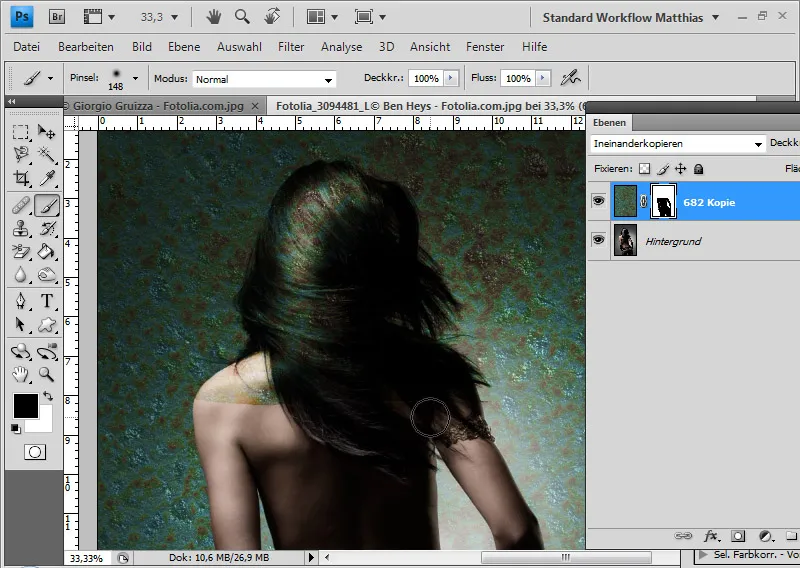
As a result, the texture remains clearly visible overall, but the hair areas drown out the texture as they have darker tones.
The new background blends in perfectly with the dark hair of the model and the details are still clearly visible.
In the layer mask of the texture layer, I mask the light reflections in the hair so that they are not offset and remain fully blended in by the underlying layer.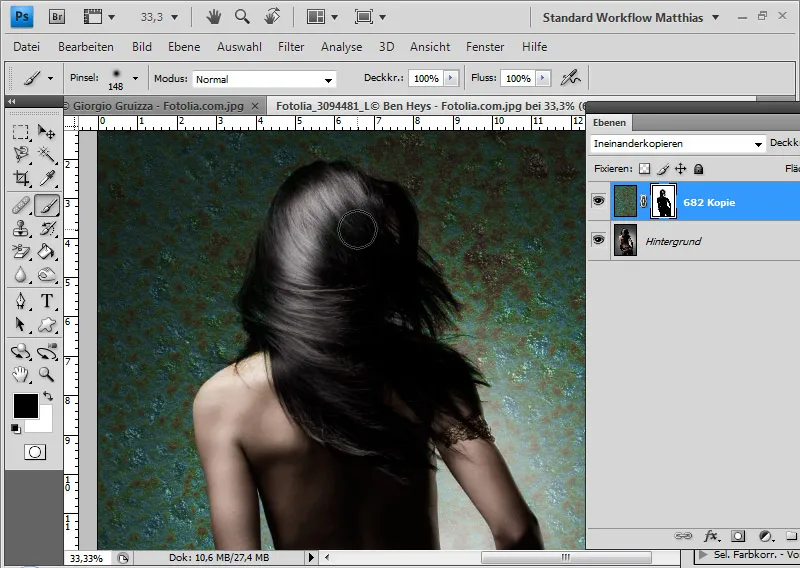
My offsetting is finished. Even the hair details come out very well in the image.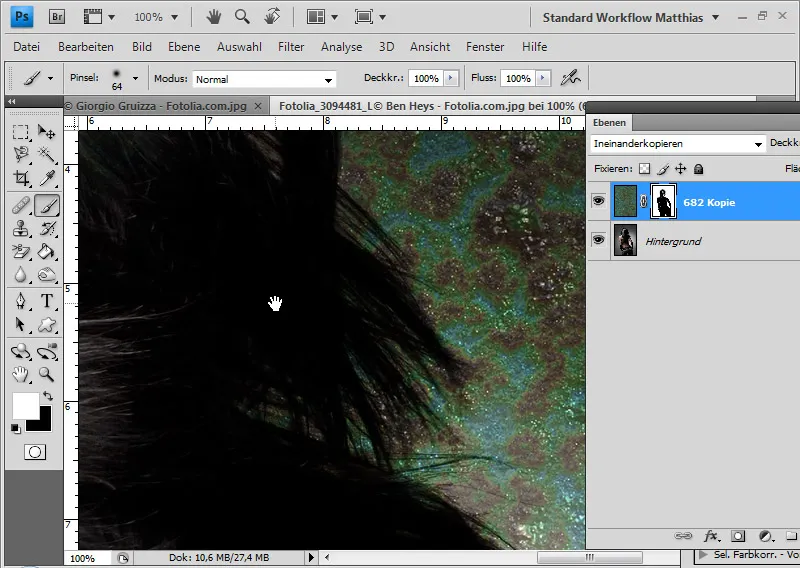
Tip: Instead of copying into each other, I can also try the Soft Light or Hard Light blending modes. If there are color shifts, I can quickly compensate for them with an adjustment layer.
Example 5: Darker color/soft light - Dark hair with complex detailing
In this example, the hair is a little more difficult to adjust because it is very fine and detailed.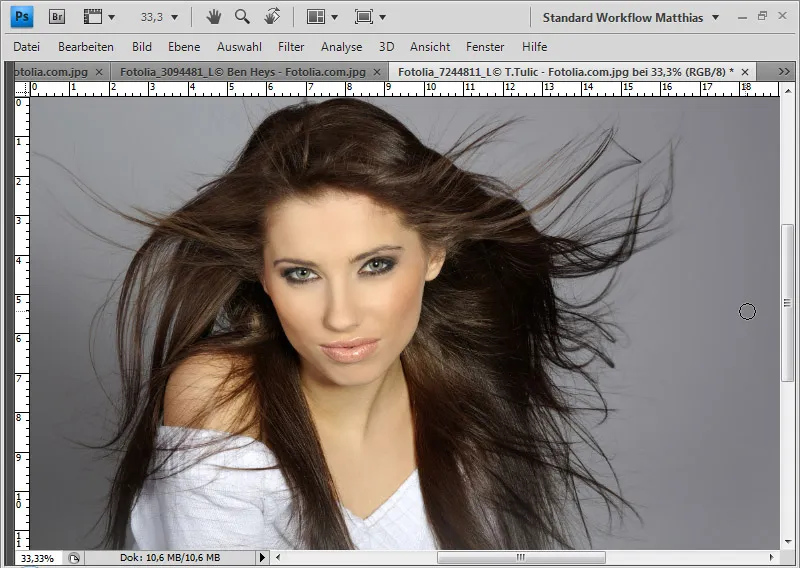
First, I place my texture over my background layer again and set it to Darker Color layer mode.
With this fill method, the darker of the two layers is always blended in. This is therefore the counterpart to the Lighter color blend mode.
Here I have the following limitations according to the HSB model: - Background on average 33 percent - Hair on average 43 percent
The new background has an average B-value of 35-38 percent brightness.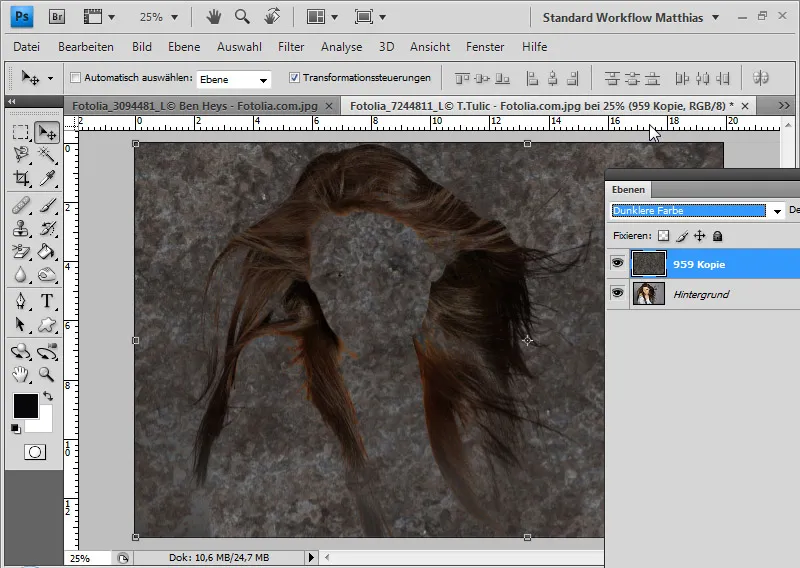
I blend in the inner area of the model again by duplicating the background layer, placing it at the top of the layer hierarchy and assigning it a layer mask. In this layer mask, I mask all the outer areas so that only the face and body remain visible.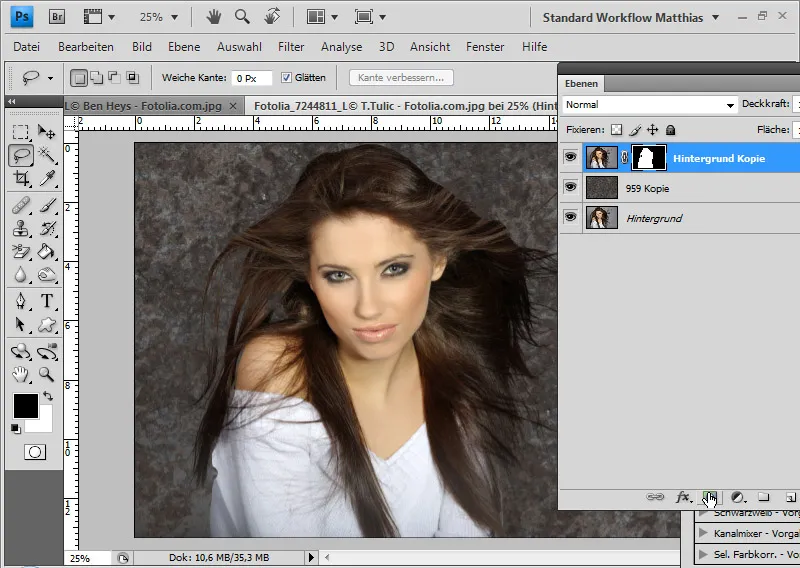
It turns out that the fine hair has been offset and is no longer displayed. These apparently had a value of over 50 percent gray.
I can solve the problem with another layer. To do this, I duplicate the background layer and add the same layer mask to it as the existing layer mask. To do this, I simply Alt-click on the layer mask and drag it into the new layer. I invert the layer mask with Ctrl+I so that only the outer hairs remain visible.
The new layer is given the Soft light blending mode. Soft light increases the contrast. All areas that are darker, i.e. less than 50 percent gray, are darkened further and the contrast is increased. This brings the fine hair structures back into the picture.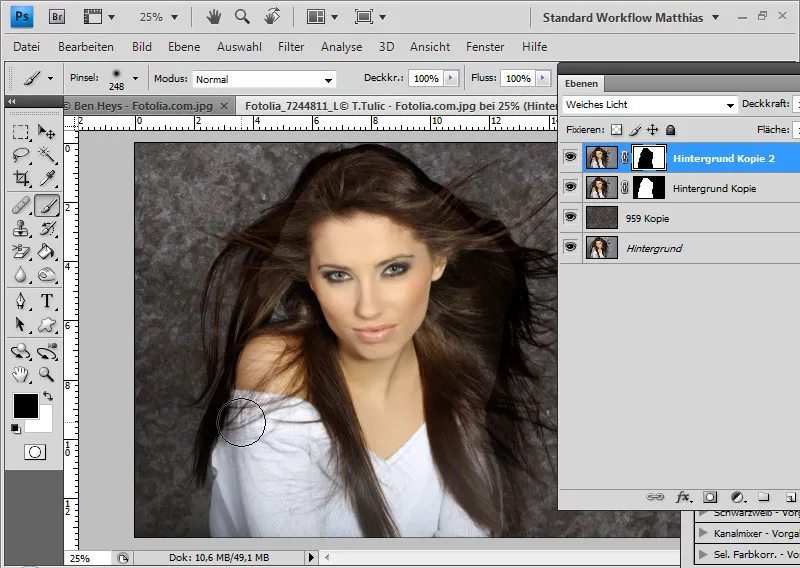
I smooth the transition with a soft round brush at the edges of the layer mask.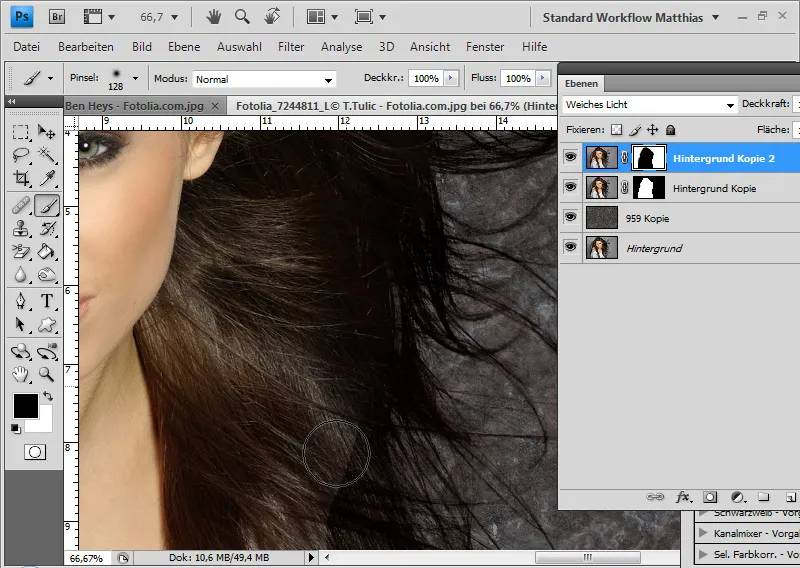
If the hair appears too dark at the edges, I can simply reduce the opacity of this layer a little. My offsetting is finished.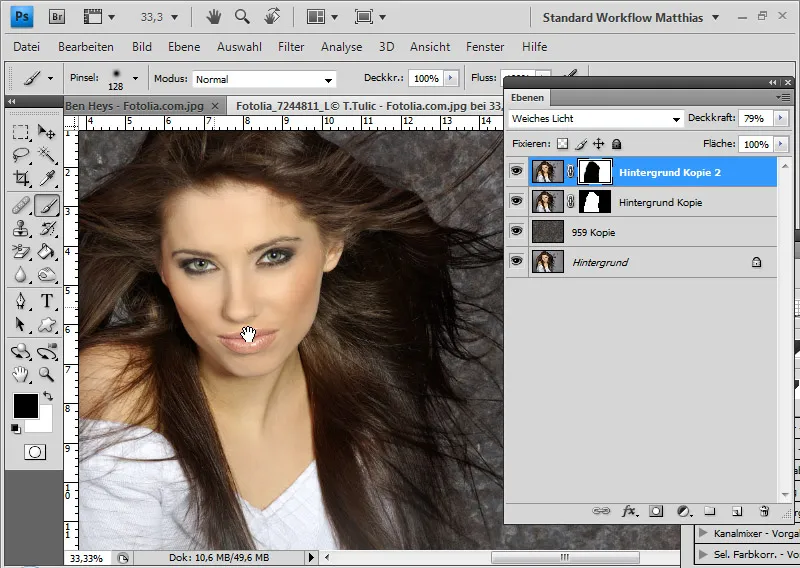
Example 6: Blending mode variation - dark hair in outdoor light
Outdoor shots have it all. The light and shadows are very different to studio shots. While the offsets work very well for studio shots, they are only recommended to a limited extent for irregular backgrounds in outdoor shots.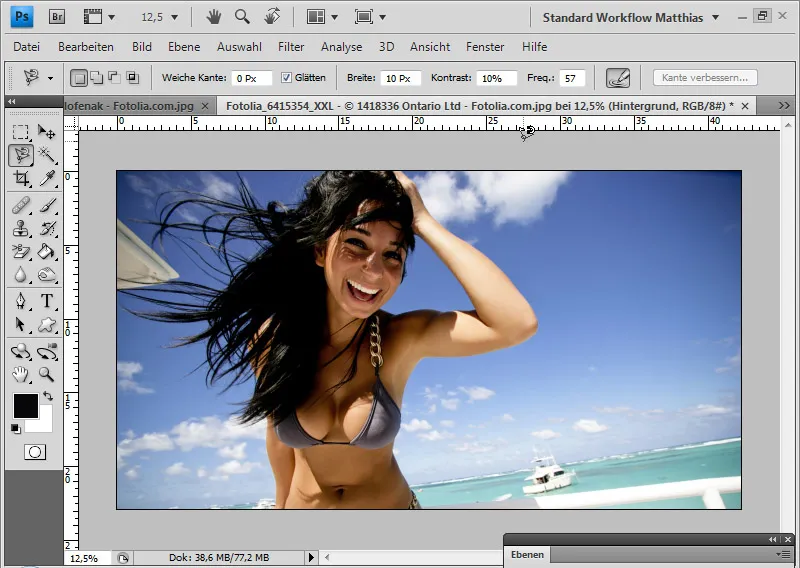
The difficulty in this image lies not only in the uneven background and the complex hair details, but above all in the reflection of light in the hair.
In the last example, I show how I approach such a task by making the calculations individually for the main hair, light in the hair and hair details - and using a different fill method for each.
If you can follow this example well, you should have fully understood the offsetting technique for cropping hair.
First, I place my new background over the existing background layer again. I duplicate the background layer and arrange it in the layer control panel at the top.
In the duplicated layer, I create a selection of the body up to the hairline, which can still be easily separated from the background. I use the quick selection tool for this.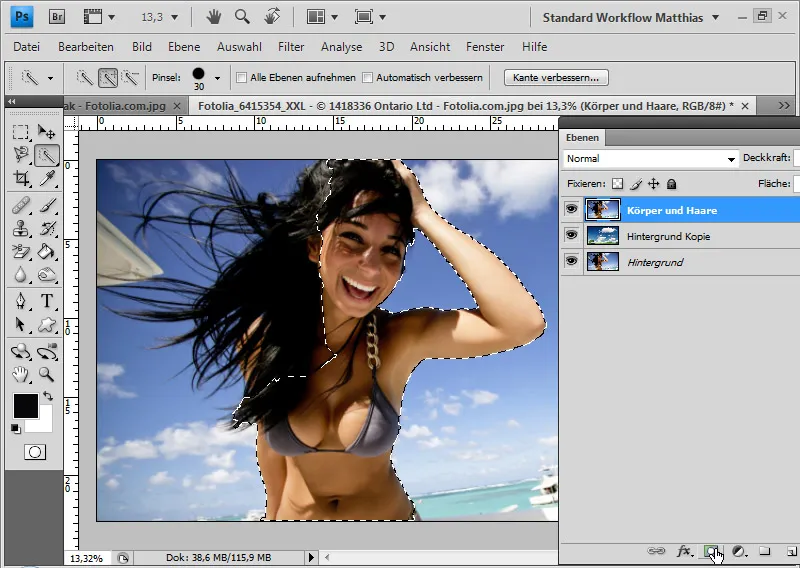
Once the selection has been created, I add a layer mask to the layer. The selection is immediately transferred to the layer mask and the background of the original image is hidden over a large area. This layer forms the body and face area, which remains visible in the original Normal layer mode. I name the layer "Body and hair".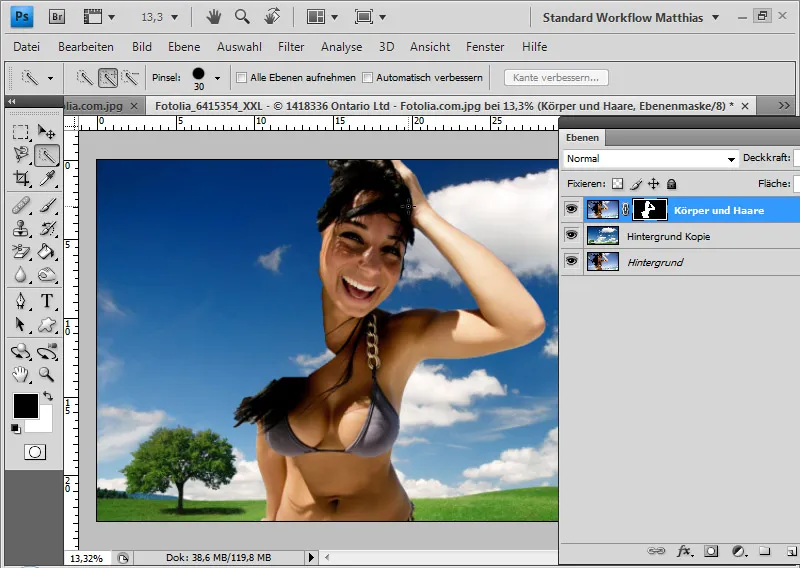
I duplicate the "Body and hair" layer. Using a white brush with the layer mask activated, I extend the white area in the duplicated layer with all the hair. To do this, I first hide the layer with the new background. I then show this layer again. The duplicated layer is given the name "Hair black".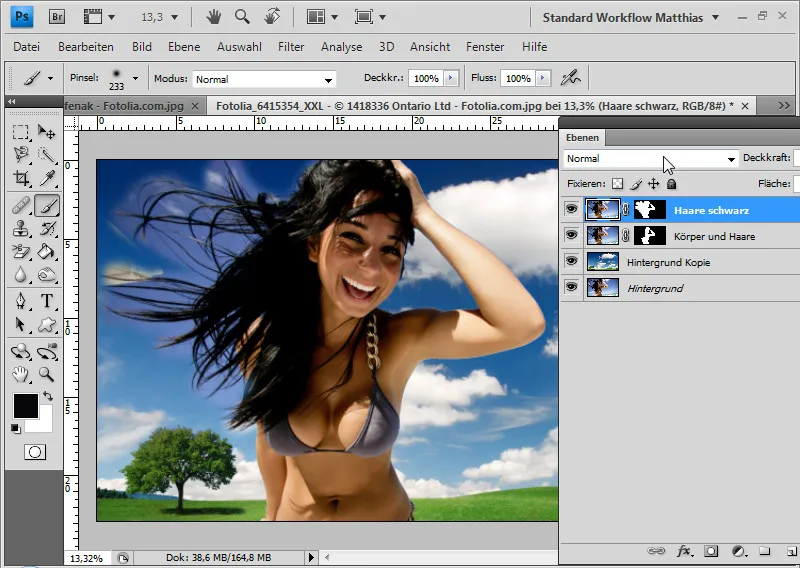
I set the "Hair black" layer to the Darker color layer mode. The black hair becomes visible against the new background.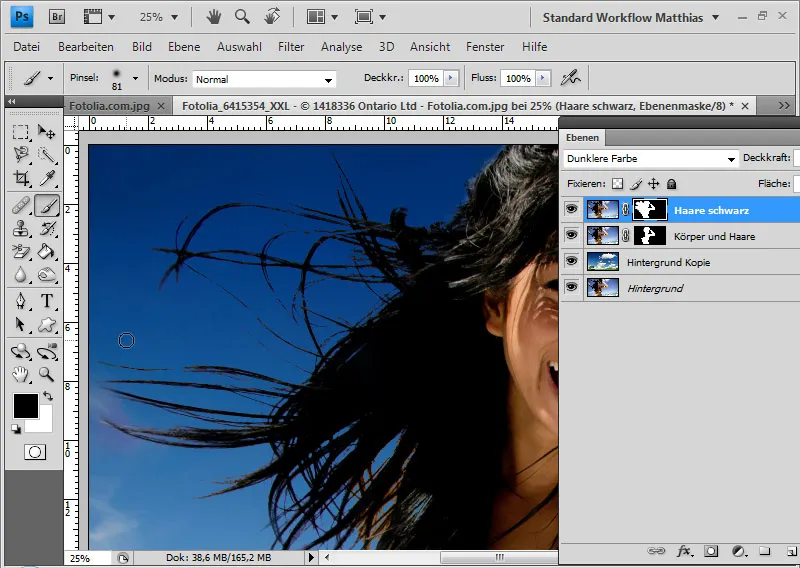
However, not all the hair details and the light reflections are included.
The first step for more hair details is to create a Tone Correction adjustment layer as a clipping mask. I increase the contrast of the dark hair by moving the Black Point slider to a value of 26 to the right and the White Point slider to a value of 195 to the left. The gamma slider is moved to 0.66 for a better distribution of the mid tones.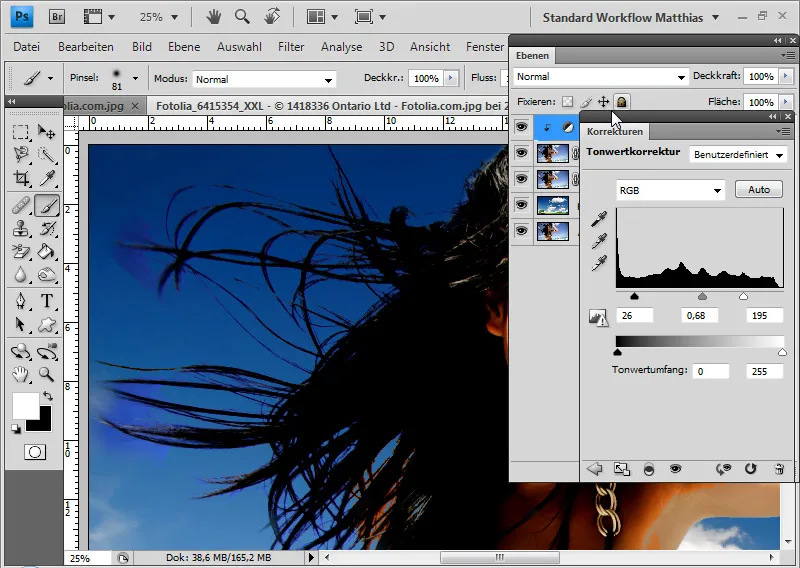
To ensure that the body is not affected by the tone value correction, I mask it in the layer mask for the adjustment layer. I can also mask elements from the original background that have re-entered the image with the tonal correction in the layer mask for the adjustment layer.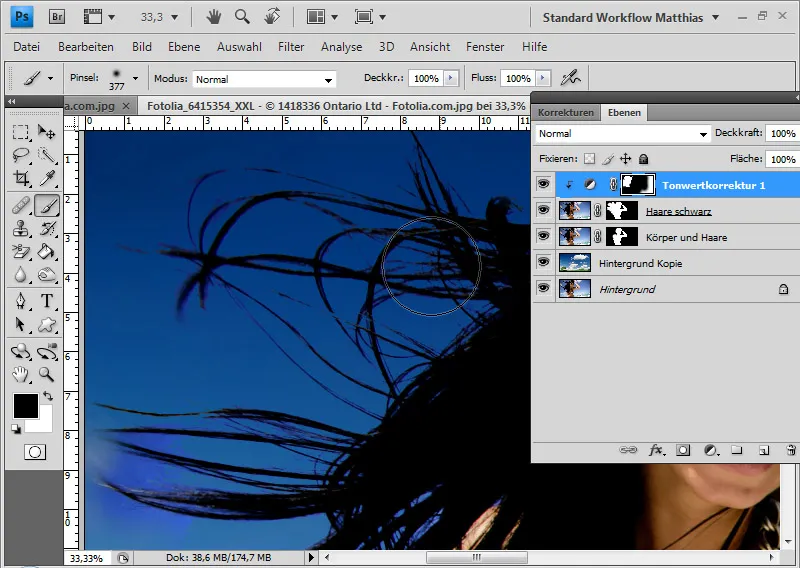
Now the hair is clearer in the image, but the fine details are still missing.
I duplicate the "Hair black" layer and further narrow down the area of the hair in my mask. Only the area of flowing hair in the wind remains - where the fine hair details should be.
The layer is set to the soft light blend mode to give the details more contrast.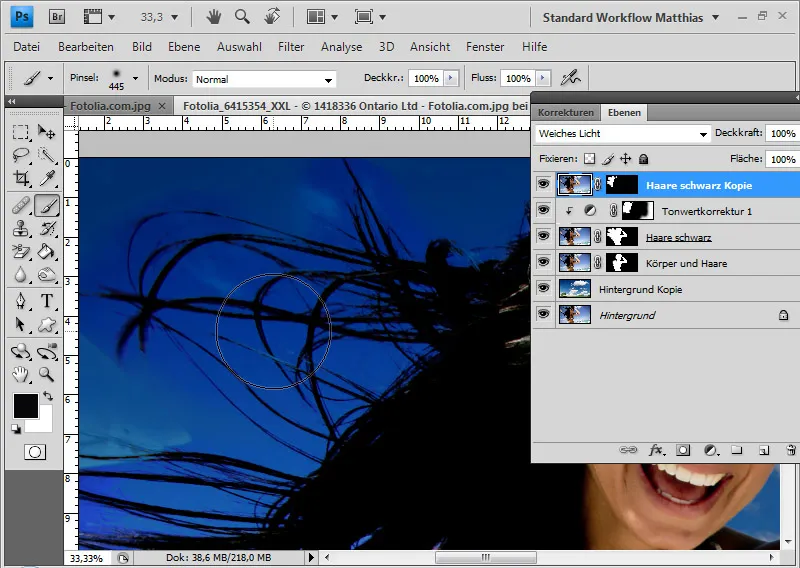
The problem that arises is the contrast enhancement of the background. I therefore open the blending options by double-clicking on the layer thumbnail. Under Color Range, I select "Red" because this is the best setting for fading out the background. You should not think of this in terms of the typical colors, but in terms of the color information of the individual channels.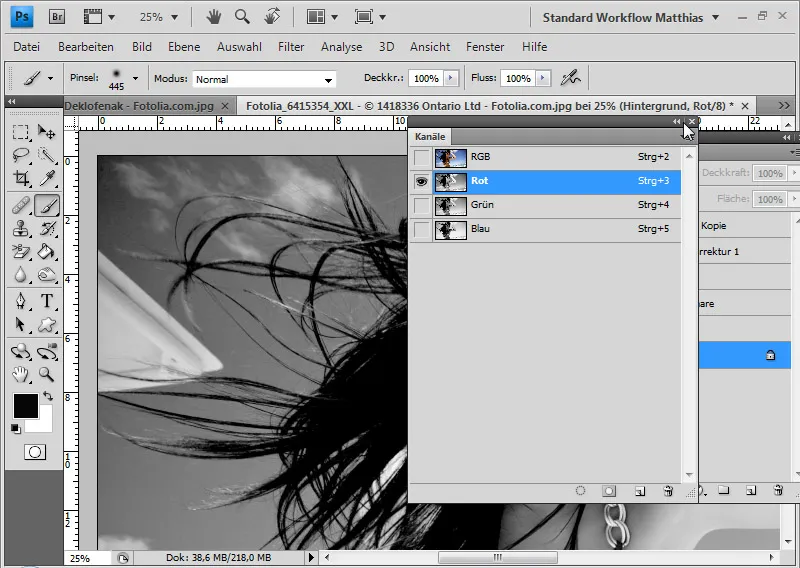
Here I move the white slider to the left to the value 49 to hide the highlights and midtones in the image. With Alt I can separate the right part of the slider from the left part and thus ensure a smooth transition. I move the right-hand slider to the value 164.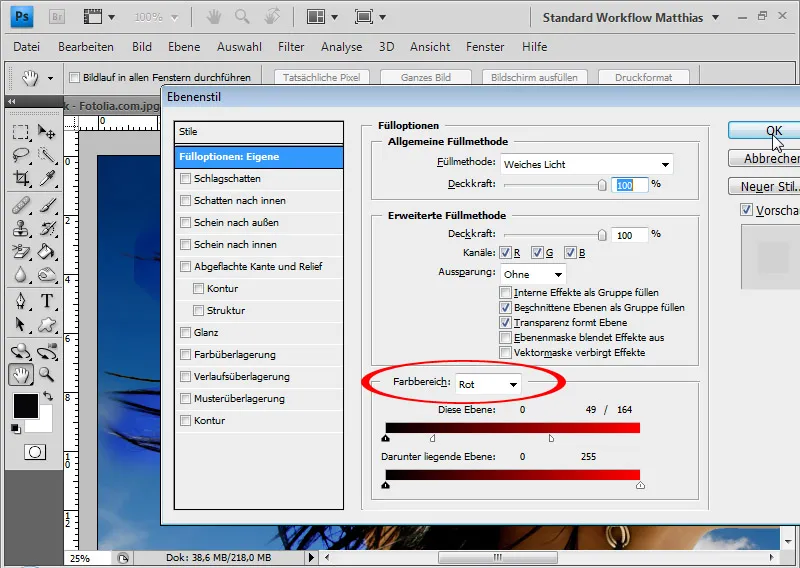
Now the light areas in the layer have disappeared and the hair details have appeared. This layer is given the name "Hair details".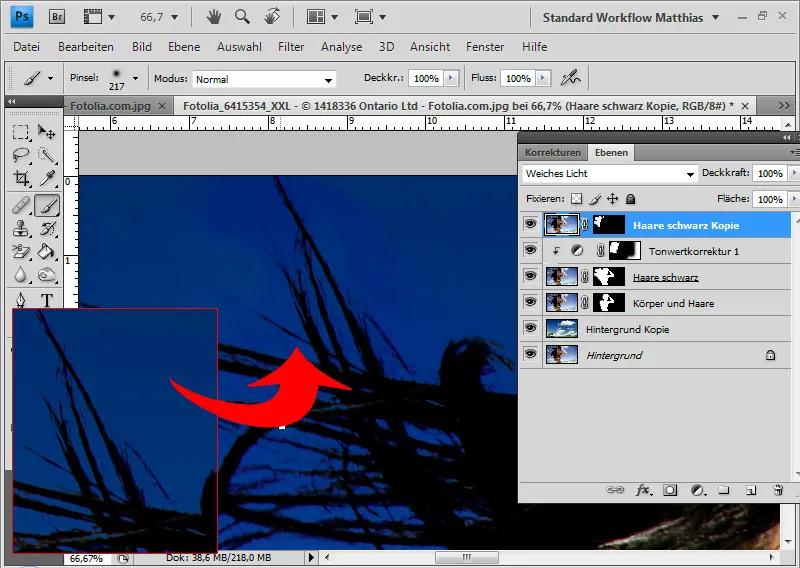
The last step is to add the light reflections to the hair. These are not yet in the image because the dark areas were blended in with the various layer modes. The light reflections are bright and therefore not visible.
For this reason, I duplicate the "Detailed hair" layer and place it at the top of the layers panel. The layer is given the Lighter color mode and the name "Light reflections".
I change the layer mask so that only the areas in which light reflections should also be present are shown.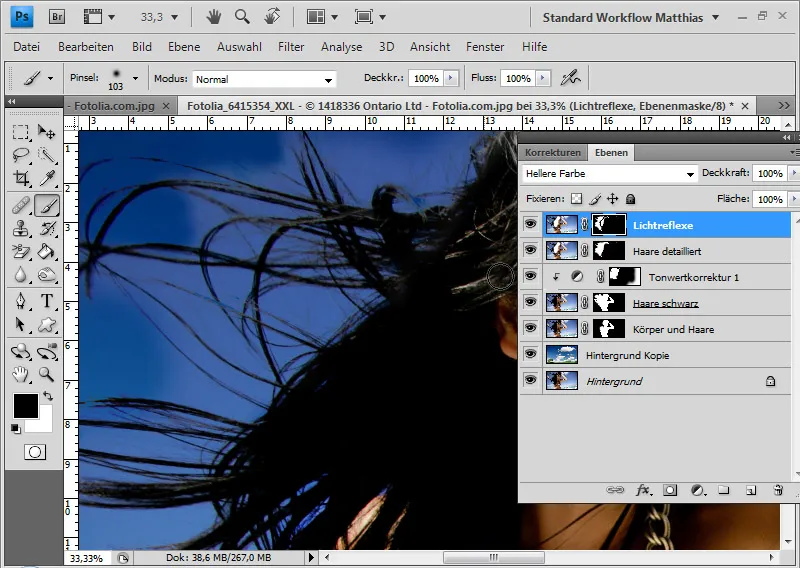
Now that all the bright image elements have been blended in, the sky from the original image is back because it is also brighter than the sky in the new background. I have to hide the original sky and do this again with a color range selection. I open the fill options and set the blue color range. There I move the right-hand slider to 51 / 126.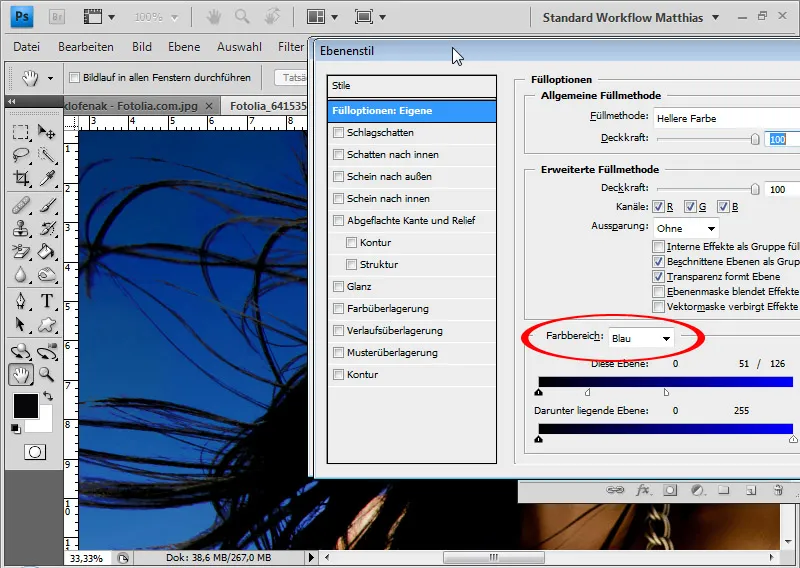
If there are any background elements left that don't belong there, I have to hide them using the layer mask.
To see exactly what happened in the last adjustment, it is advisable to show only this one layer with the new background. These are the light reflections in the hair.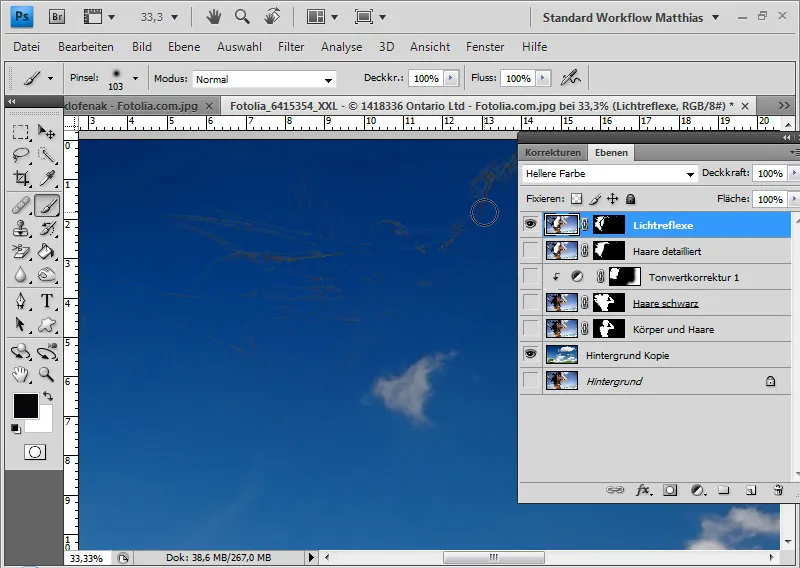
The light reflections with the detailed hair look like this: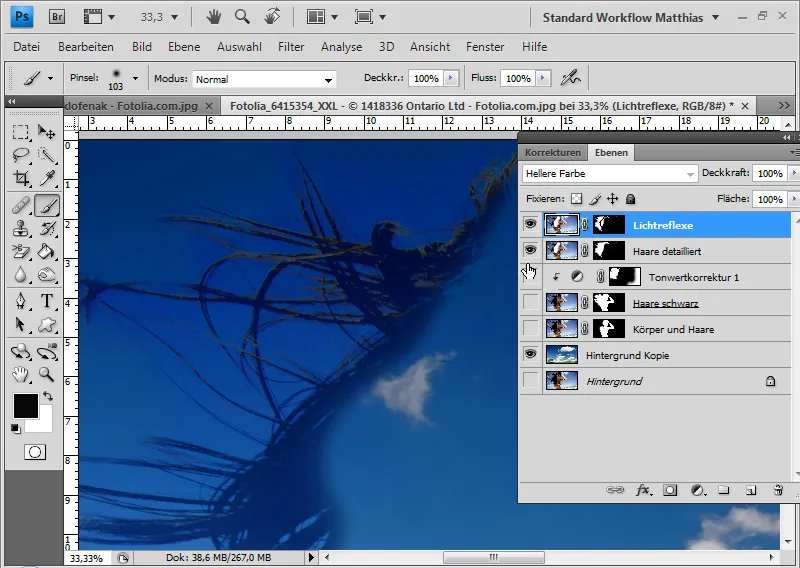
All layers blended in are then the finished offset.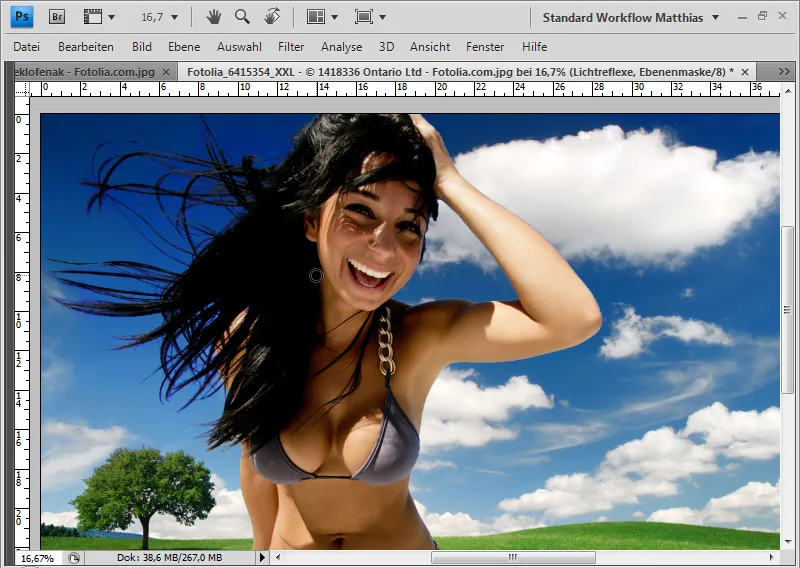
Although the last example is quite complicated, it also shows the variation possibilities and the quality of layer offsets for clipping hair.
