Let's continue with the text that we want to animate. We want this text, which is handwritten and fairly static here, to look a bit like it has been redrawn every frame.
Because that's how it used to be: if you wanted to move a text from left to right, you had to draw the images individually for each position.
If you want the text to be drawn in the animation, then you have to draw the first stroke of the A, take the photo, then draw the second stroke of the A, take the photo, and so on. This then becomes a little irregular, which is what gives it that stop-motion look: it's as if you're shaking the camera a little, moving the page a little et cetera.
And that's exactly what we want to simulate here. We want to imitate this old-school cartoon look and add this text wobble.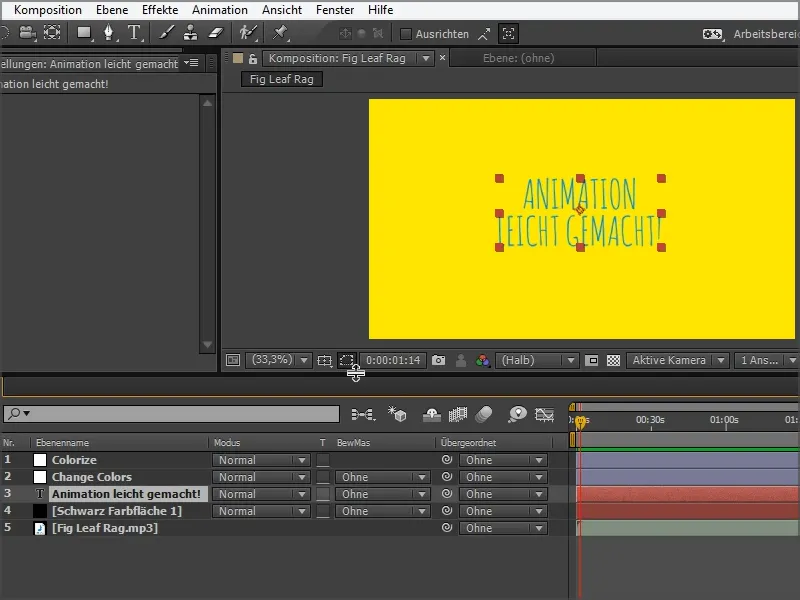
Step 1
I'm going to use an effect that I can search for in Effects and Presets: Turbulent Offset.
I click on this option and, holding down the mouse button, drag it onto the "Animation made easy" text layer.
It then looks like this: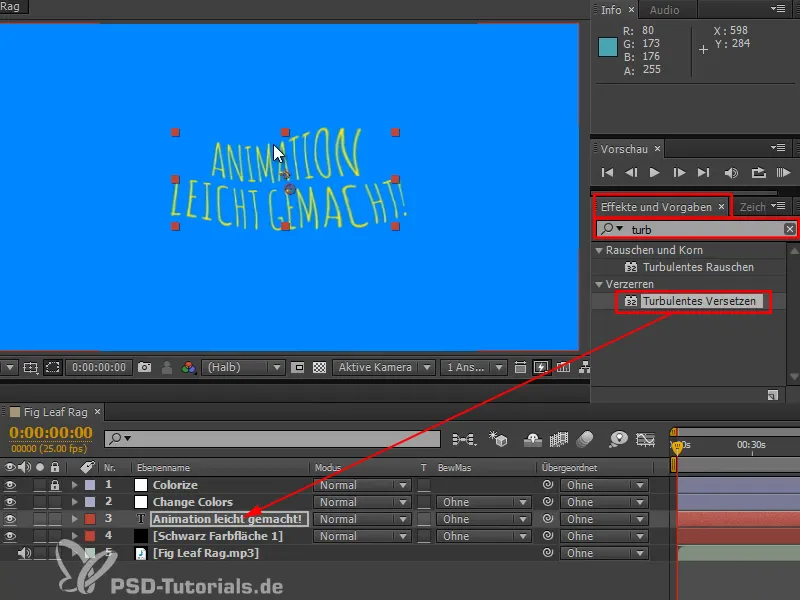
Step 2
What is really happening?
I'll add an adjustment layer to show you exactly what this effect does.
We take a turbulent noise and drag it into the image. It turns into a noise, a cloud pattern - in Photoshop this filter is called Cloud Filter.
The default setting is relatively low complexity. We can increase the contrast and brightness a little, then you can see what happens.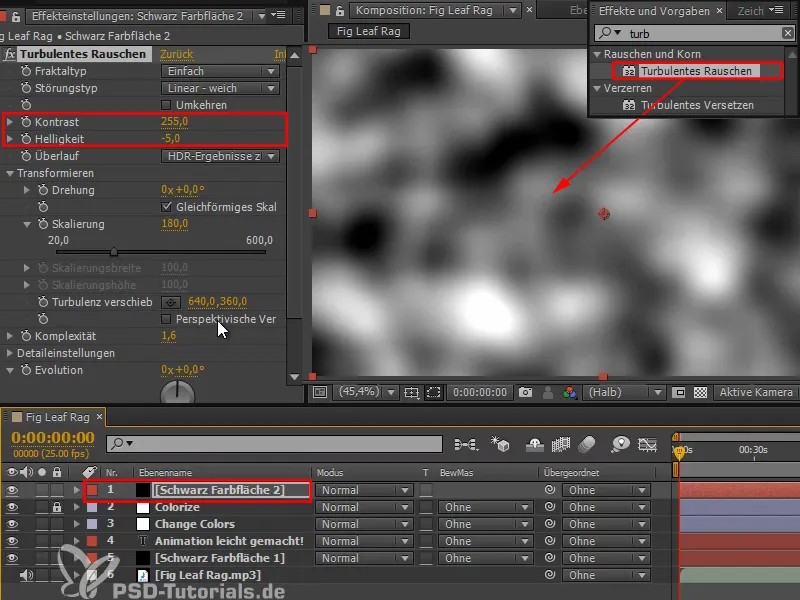
If we now look at this in comparison with the text, it is clear what is happening:
The text is shifted according to these black and white values. Everything that is black means I move it to the left. Everything that is white means I move it to the right or up or down.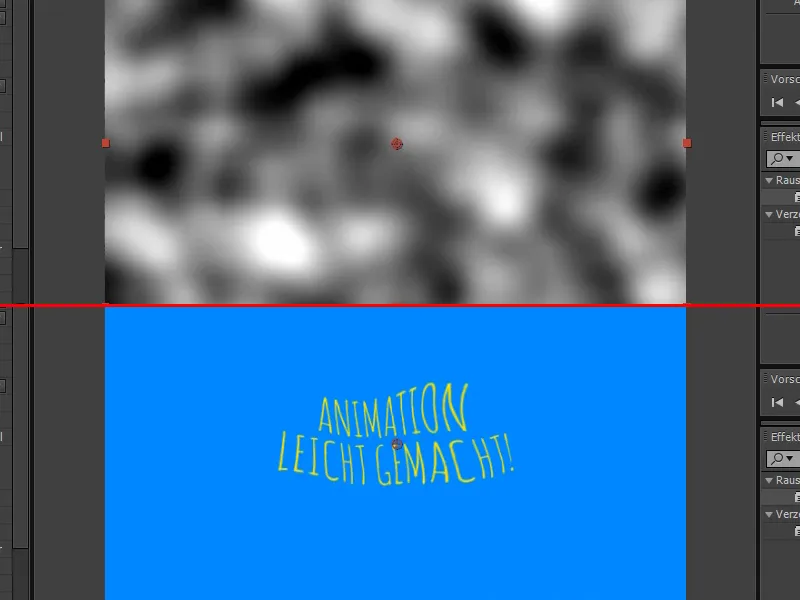
Step 3
If we wanted to do this by hand, we would need the source as a sub-composition, and then I could take my text and drag the displacement effectinto the image by right-clicking or, ideally, using the search again. This is basically a displacement mapping ...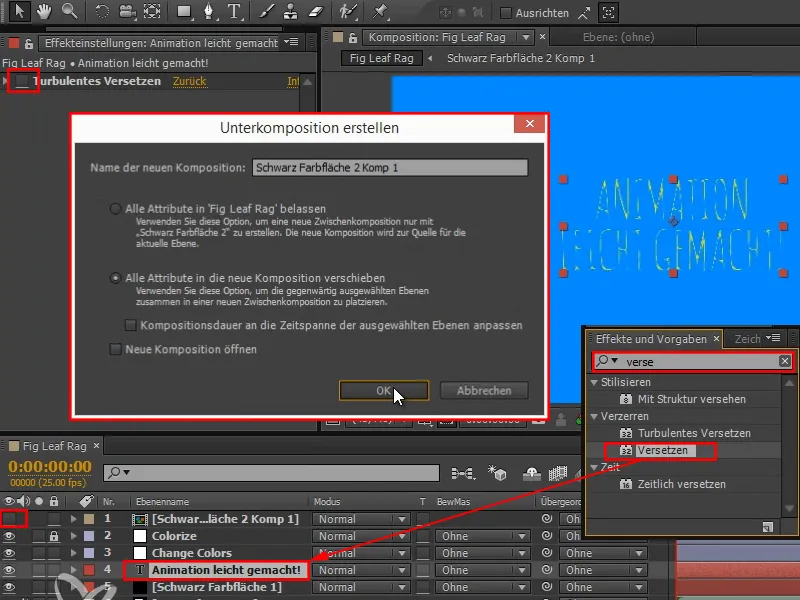
Step 4
... then white comes in a certain direction and black too, for example, so exactly the same thing happens as before.
We set the correct displacement plane and then move it a little horizontally and vertically.
So what happens is exactly what happened with the turbulent displacement: it takes this noise that is in here, which you can then also animate with the evolution, it takes this noise and displaces the text with it.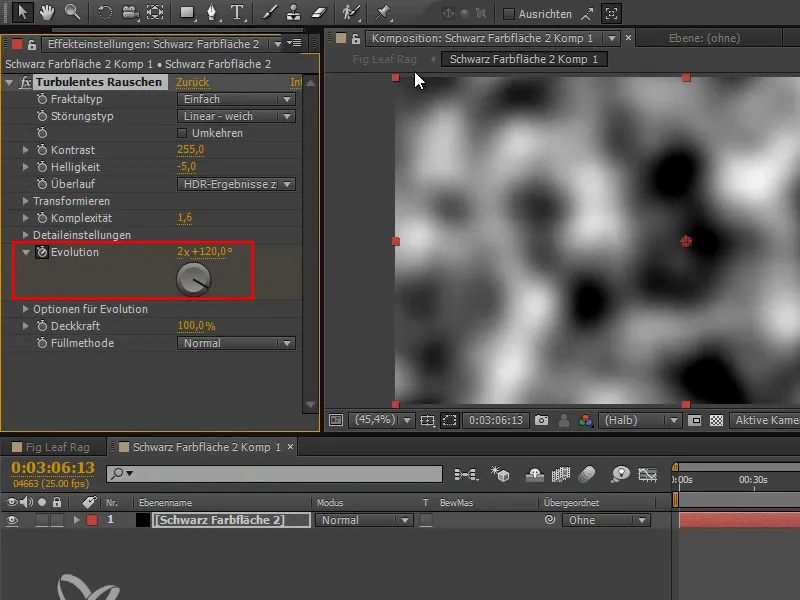
Step 5
I delete this color layer again in the Projects tab.
Much more practical and without additional effort, we get both at the same time via the effect: both the displacement and this noise are compactly combined in this effect.
You can do very interesting things with this effect if you increase the strength. This can go as far as very abstract patterns, but I would only set the strength here very subtly to a value of around 7 and the size to around 13.
This gives me a slight wobble that I can look at when I switch the fx on and off.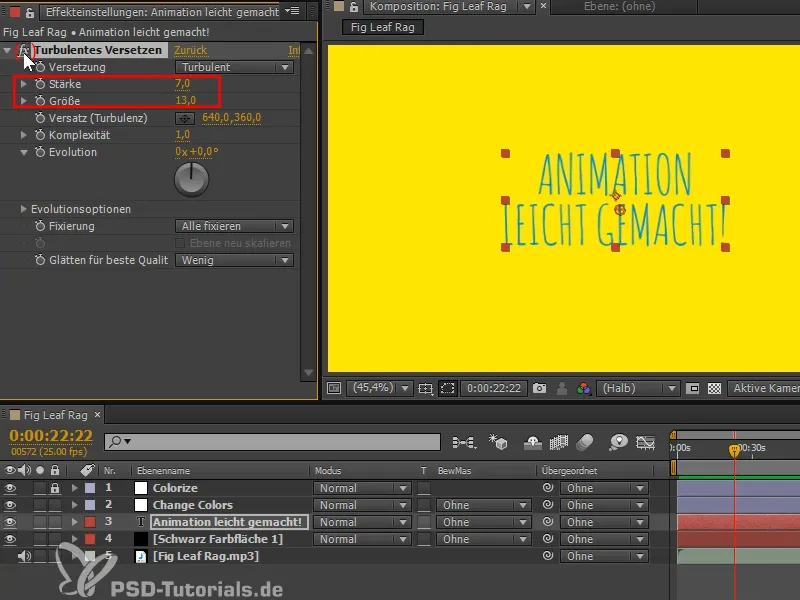
Step 6
How do I get it to look different every frame? We have already seen that the evolution has something to do with how I influence the noise. I move the evolution and then the text morphs or wobbles, but it's still too fluid for me, I'd like it to jump. It won't be enough to animate it with another keyframe. That's why I Alt-click on the evolution and add an expression. It's very simple - it's a random number.
I don't want to go for the wiggle, which some of you may already know. I want to use an even more random function: the random command. The wiggle command also uses noise to generate random movement and smooth transitions between the individual randomly selected poses. But that's not what I want here. I want random values that are truly independent of each other.
We enter "random (-9999,9999)" and it has a completely free choice of what it takes as a random value.
If we look at this in detail, we can see that each frame has a completely different value and therefore a completely different typeface. Now the text wobbles slightly.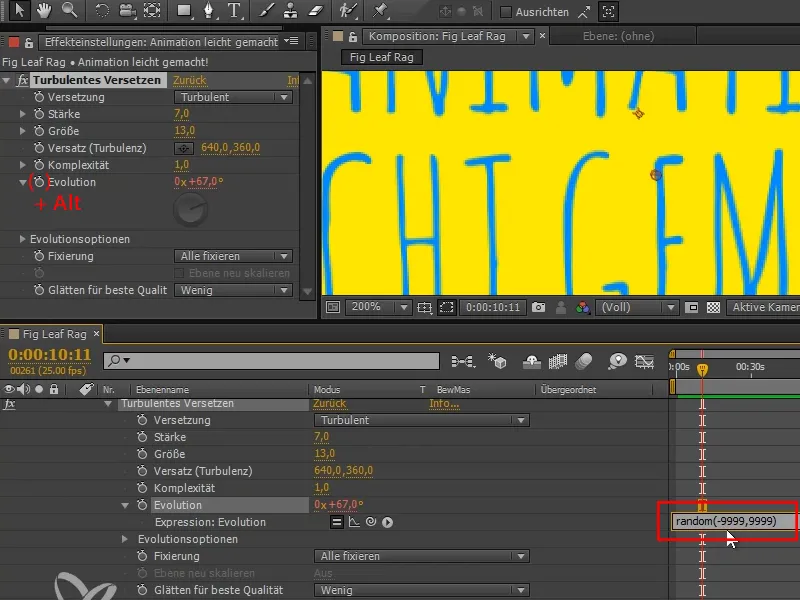
Step 7
I let this run and notice that the flickering is quite hectic. Why is it so hectic and why is the effect we wanted not quite there yet?
In cartoons, we usually worked with 24 frames per second because that's the movie frame rate. They didn't draw all 24 frames, but perhaps only 12 frames per second, and simply showed each frame twice. This is much less work, especially for the inbetweener, and the viewer doesn't even notice it.
We don't necessarily have to save work here, because most of it is automatic. But I'd like to do the same gradation so that we get this effect.
I search for " posterize " in the effects and select posterize time. I drag this effect onto the text layer.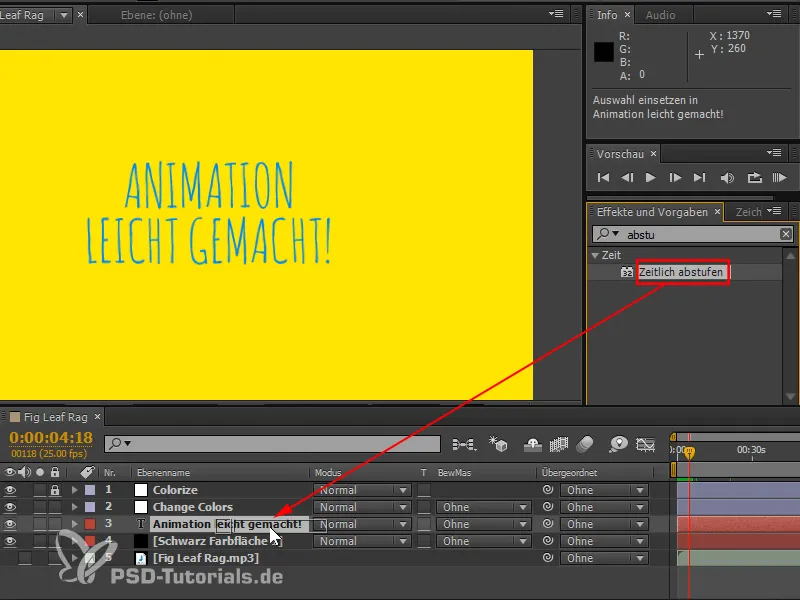
Step 8
Now we get the whole thing graded to a frame rate of 24 and this should not change anything for every frame. There are frames in between where nothing changes.
I'll set it to "25/10" and it will only change every ten frames. I let it run - but it's too slow for me.
So I set it to "25/3", which might look good. Now the text changes every three frames. That way we get a nice feeding in.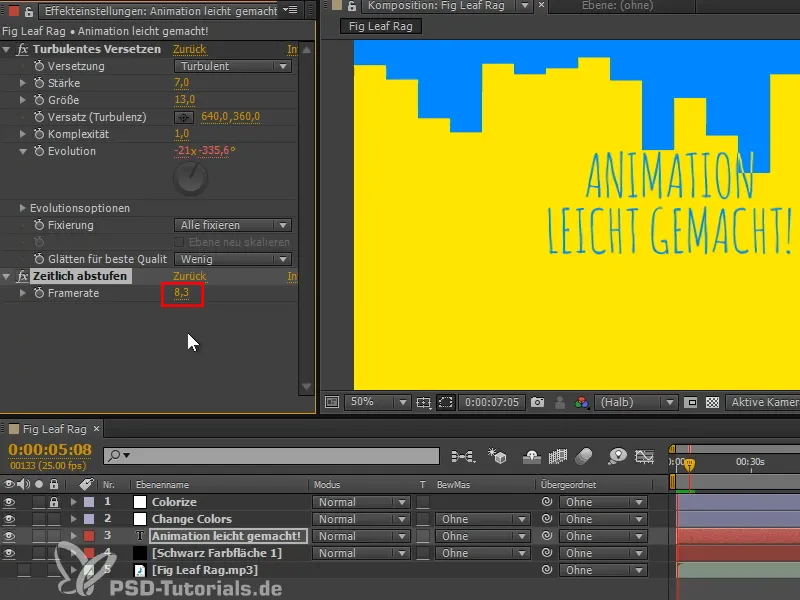
These two effects can easily be applied to any text.
Step 9
One way to do without the time gradation effectis to write the expression differently. I have prepared one that only changes the evolution value every 3 frames. This is a bit more performant, because with the effects it first calculates all 25 frames and then steps this down in time to the desired value. This is the simplest solution, but not the best. I therefore insert the expression that I have already prepared.
Quick tip: From the CC onwards, existing expressions are unfolded with the shortcut "EE".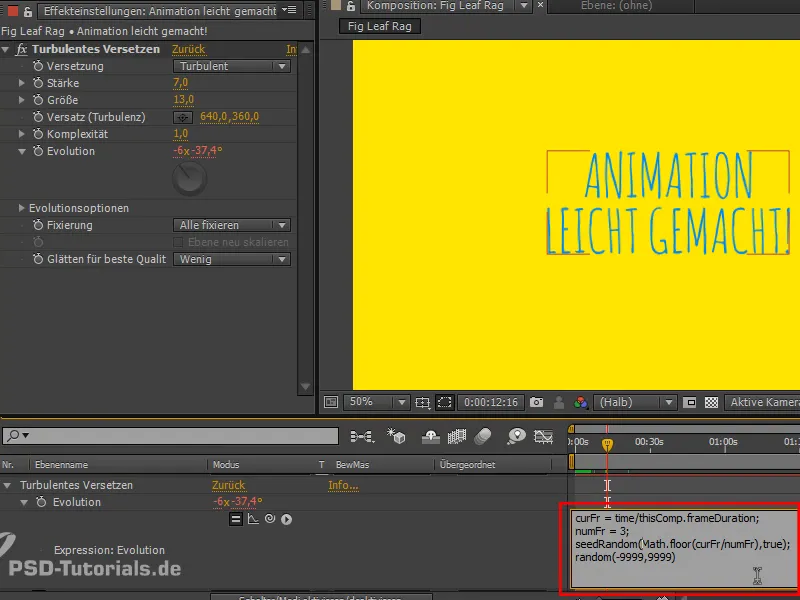
For people who are interested in expressions:
"seedRandom" selects the random list for the random command and it only changes when the first value of the command changes, (assuming the second value, timeless, is set to true ).
The numFrames control after how many frames the value should change. We therefore need a number that changes every 3 frames in order to get a new random value every 3 frames. To do this, the current time is divided by numFrames and the result is rounded down. So the number increases by 1 every 3 frames and we have a new evolution value every 3 frames. That is the principle.
With numFrames we could just as well set every 10 frames, but I'll leave it at 3.
This solution is a bit more performant - you can do it, but you don't have to.
