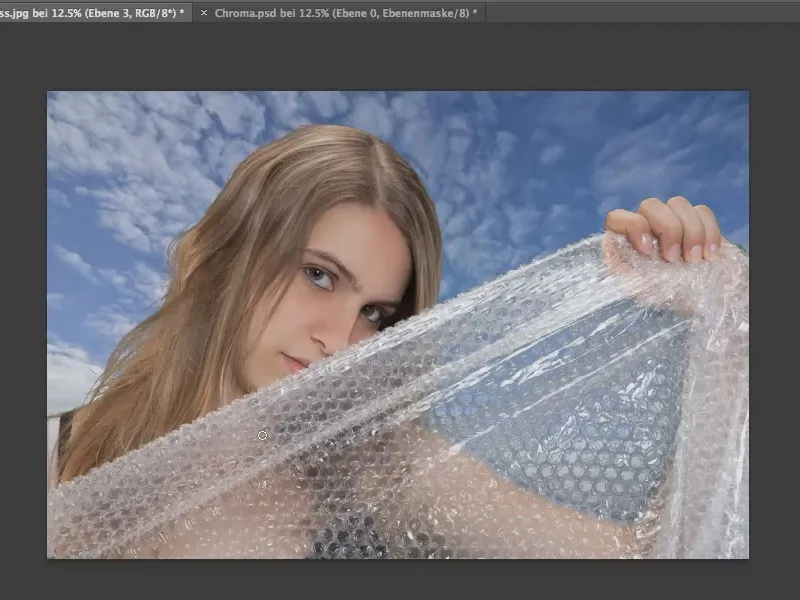
In the following tutorial, we would like to use the green screen method to crop objects with Photoshop. There are many different ways to do this, but this tutorial will only show you how to use the color range.
Why green exactly? Theoretically, this method also works with any other color, but the color green is as far away from the skin color as possible and therefore minimizes the risk of unintentionally clipping other objects or parts of objects.
Step 1
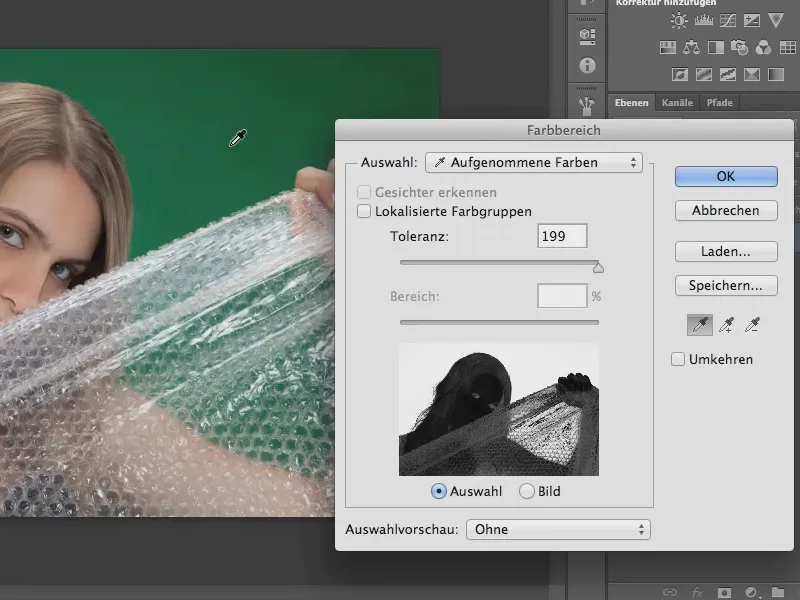
First we create a color range selection. We do this via Selection>Color range...
I recommend a very high tolerance. If the tolerance is reduced to a lower value, e.g. 71, some green tones would not be included.
We then simply click with the eyedropper in the green area that we want to remove.
Step 2
In the next step, we want to remove the pixels from the selection that we have selected due to the high tolerance of our model. To do this, we reduce the tolerance, whereby we can play around a little here to achieve the best individual result.
We can also use the eyedropper tool to extend the spectrum of our selection by clicking on the different shades of green in the image and adding them to the selection.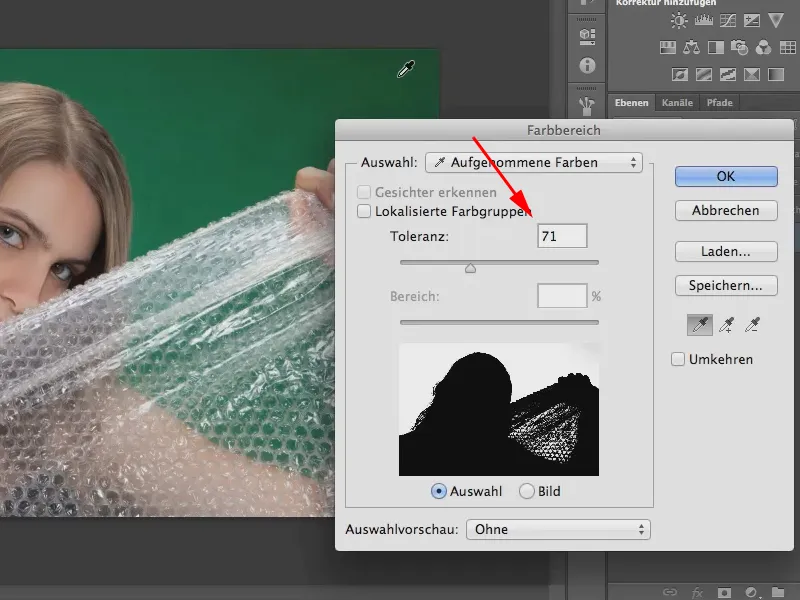
Step 3
If we now close the color range window with OK, we get a selection of our model without the green background. We can now remove this by clicking on the symbol at the bottom right to create a layer mask.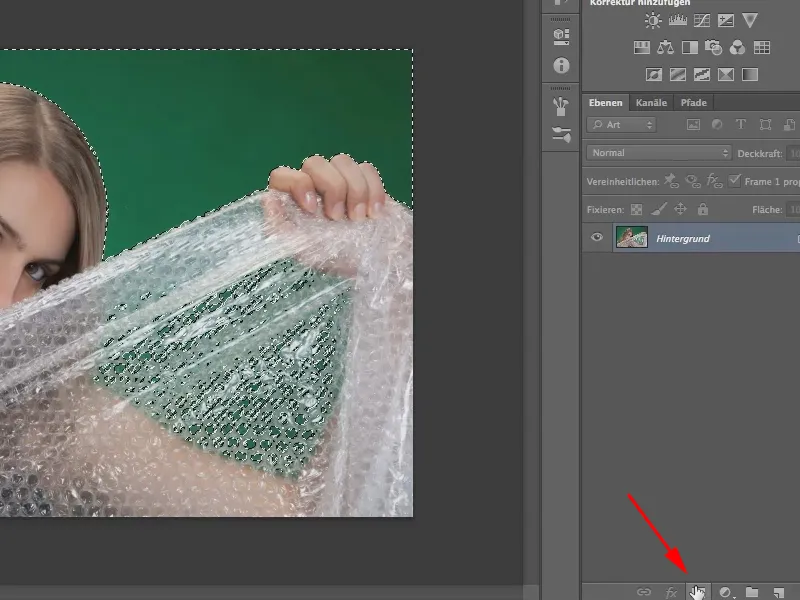
Important: Before creating the layer mask, you must invert the selection via Selection>Invert selection, otherwise you will remove the model and not the background.
Alternatively, you can invert the selection at any time afterwards. To do this, click on the Properties paneland then on Invert.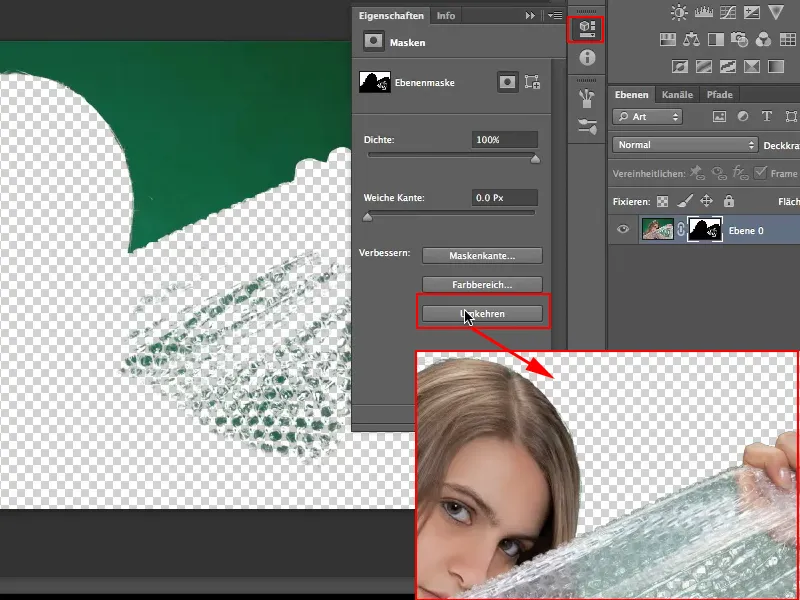
Step 4
Of course, we have not yet cropped our model so perfectly that we can continue working with it. The best way to see this is to place the model in front of a different background. I have already opened an image called "Blauweiss.jpg" in the other tab for this purpose.
Using the Move tool, I drag the cropped model up to the "Blue and white.jpg" tab and release it again by holding down the Shift key. This centers the model in the other image.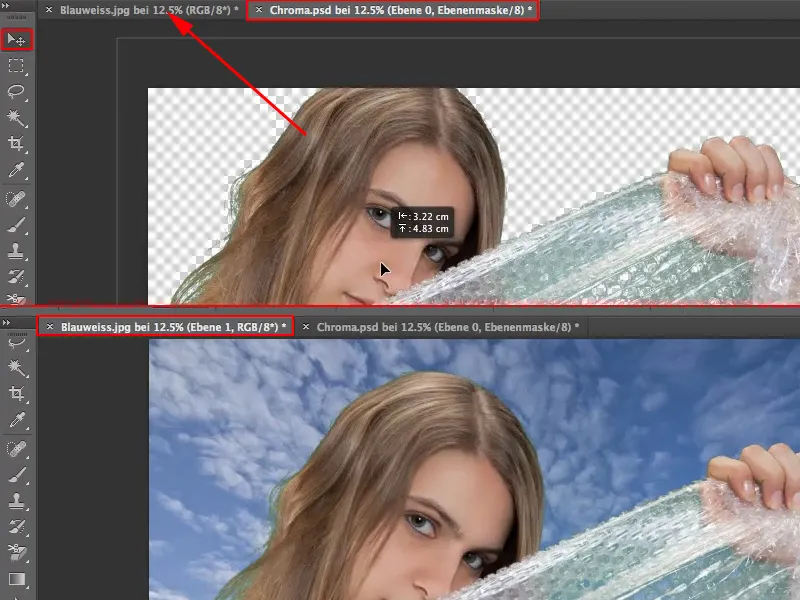
Against the blue sky, the inaccuracies, these remaining green tones in the foil and on the hair, stand out particularly negatively. I will explain how to remove them in the next step.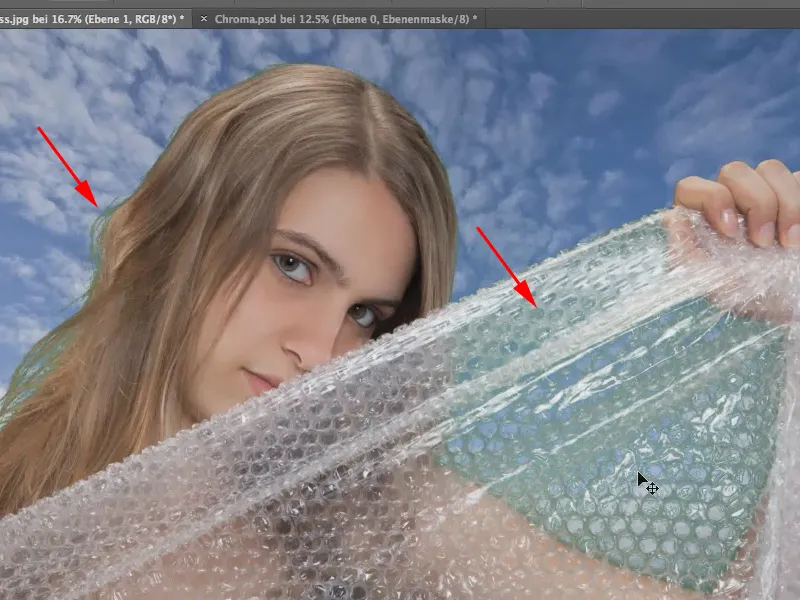
Step 5
First we create a new layer. Then we pick up the background color with the pipette (in our case the blue of the sky) and paint over the affected area of the foil with the brush.
Tip: We can also pick up the color of the sky more easily and directly from the image by going into the sky with the brush tooland pressing the Alt key. This briefly transforms the brush into an eyedropper and enables us to select the color of the sky as the foreground color.
We release the Alt keyagain and paint over the foil with the brush and the blue color. Of course, the transparency is then missing and it looks a bit nasty. Simply reducing the opacity won't help us here, because the reflections in the foil will be missing. So we leave that and look for another option ...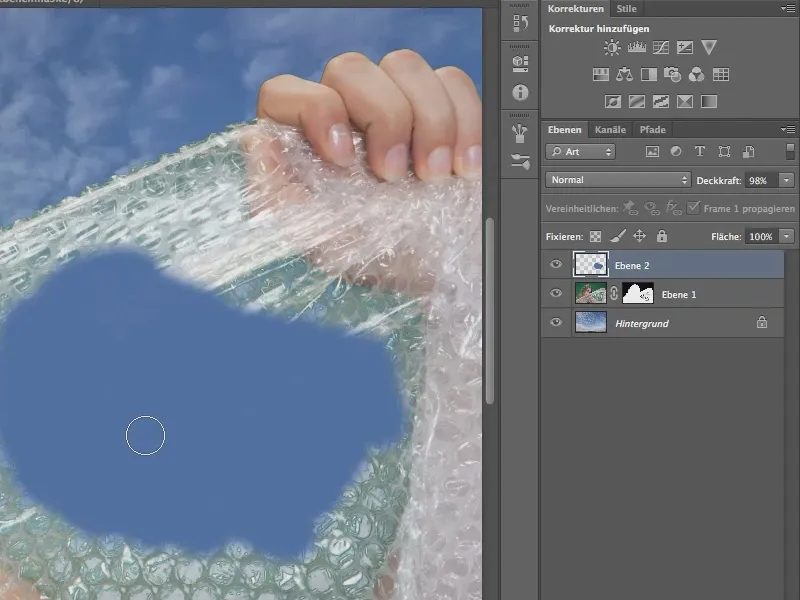
Step 6
The key to success in this case, as in many others in Photoshop, is called: Blending mode!
All we need to do now is offset the color tone, and we can achieve this by setting the blending mode, which is set to Normal by default, to Color tone.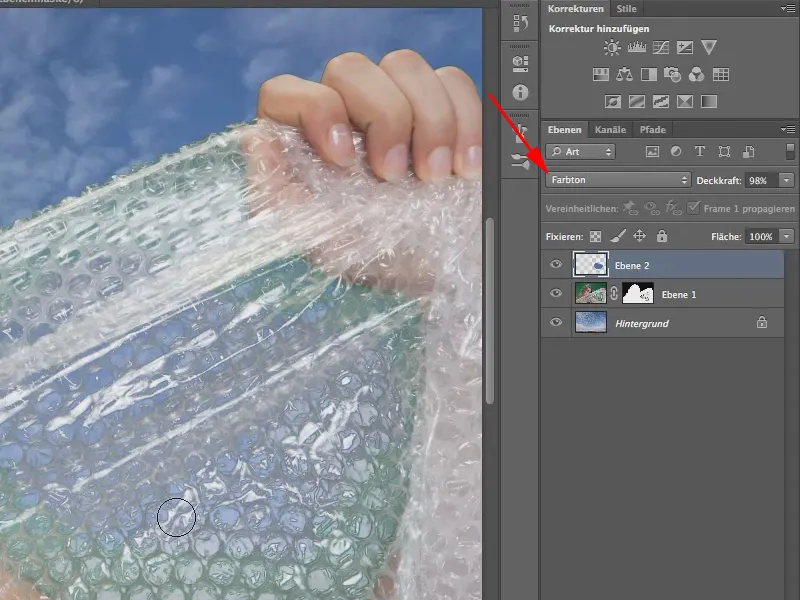
That looks pretty good, doesn't it? So I paint over everything with blue where I want the sky to show through instead of the green.
With a blurred tool tip, you can paint very close to the model, as the edges between the model and the sky are naturally a bit "washed out" by the edge. But if you go too far, you will paint blue skin on the model - so be careful.
There is another method instead of the Tint mode. You can also select the Color mode. But then you should reduce the opacity a little.
In individual cases, I would rather try both and see which works better.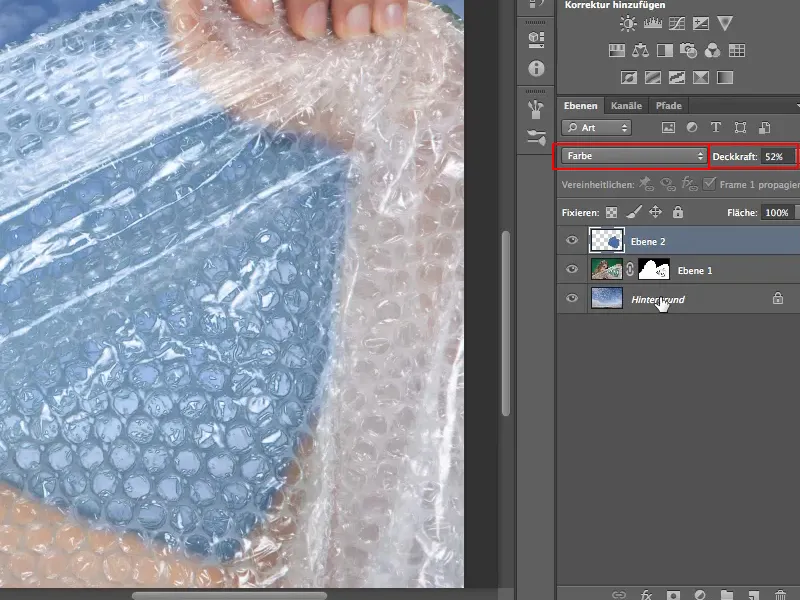
In our case, I like the Color mode with 100% opacity better, so I'll change it back.
Step 7
Finally, we need to remove the green pixels from the hair. This works in a similar way.
We create a new layer directly above the layer with the cropped model. I then set the mode back to Tint and use the eyedropper tool (hold down the Alt key) to pick up the hair color as the foreground color.
I now paint over the green strands with a small brush.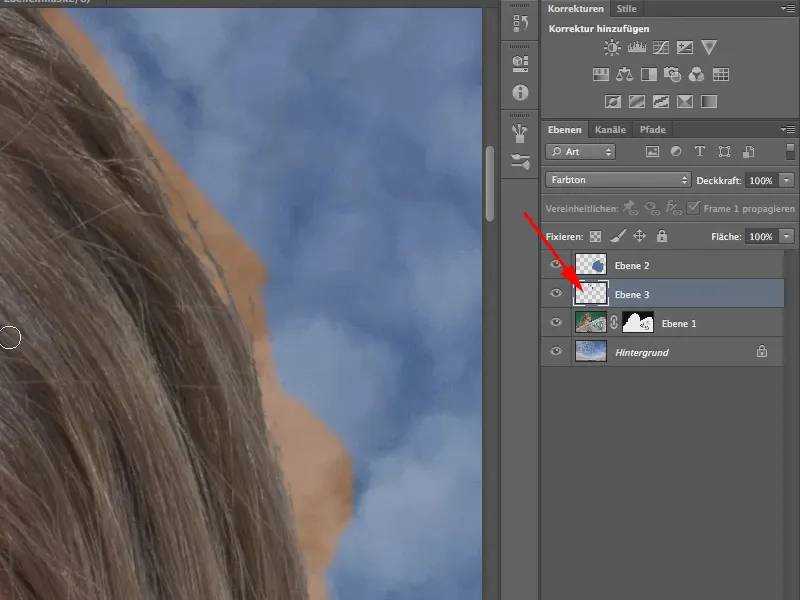
We can easily avoid the unwanted side effect of the hair color rubbing off onto the background...
Step 8
To do this, we select Layer>Create clipping mask. The clipping mask means that we only paint with our brush on the underlying pixel layer.
Even if the pixels are actually still there and are only hidden by the mask. So it doesn't even have to be the case that the mask is applied and the pixels are deleted for the clipping mask to work. You can simply leave the mask in place.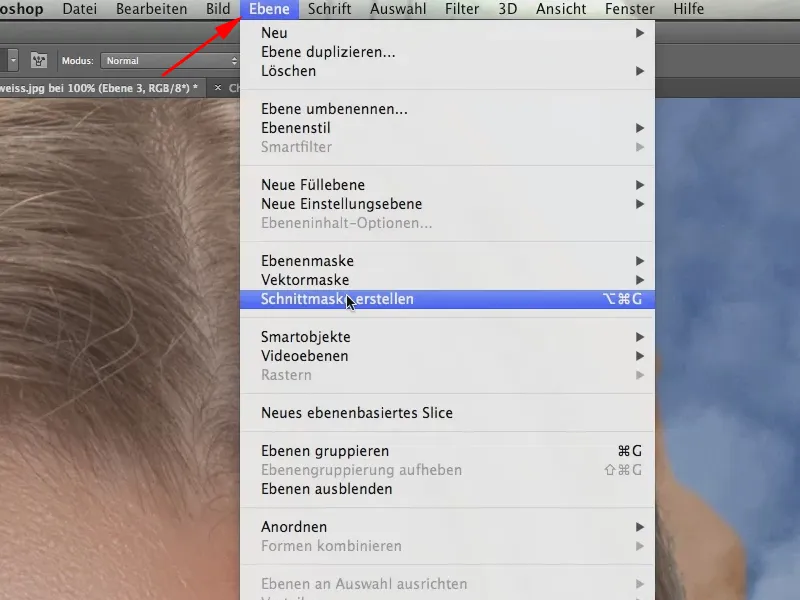
Step 9
If we finish painting over the hair on the left-hand side too, we've already done it. However, the hair color on the left has to be picked up again as it is slightly lighter there.
If necessary, you could also improve the selection, but we won't do that here.
Here is the finished picture again: