There are different ways to create a PDF file within Acrobat 11 from another file format such as Word or Excel or even JPG, which I would like to describe below.
If you have only opened the program but not a document, you can either click on Create PDF in the start screen under Select task or click on Create>PDF from file in the top left of the toolbar. The file explorer will then open, in which you can select the desired source file. After clicking on Open, Acrobat converts the file to PDF format.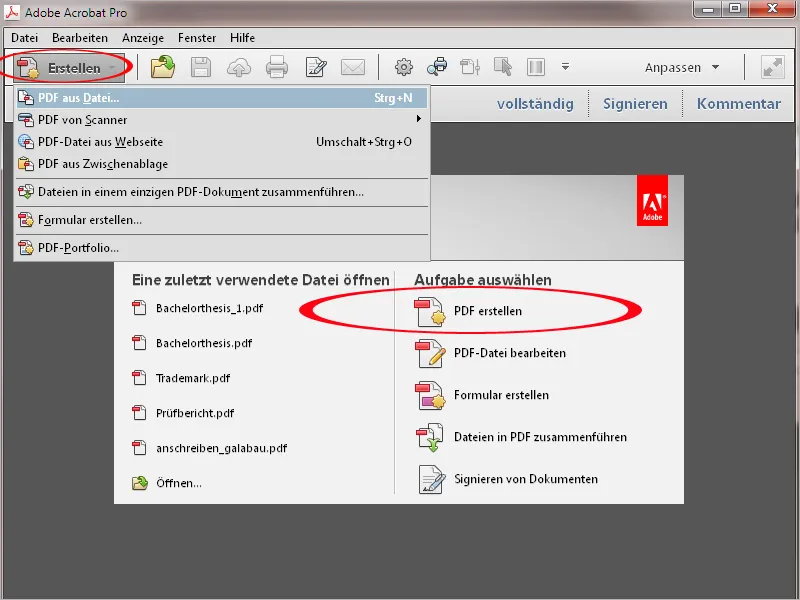
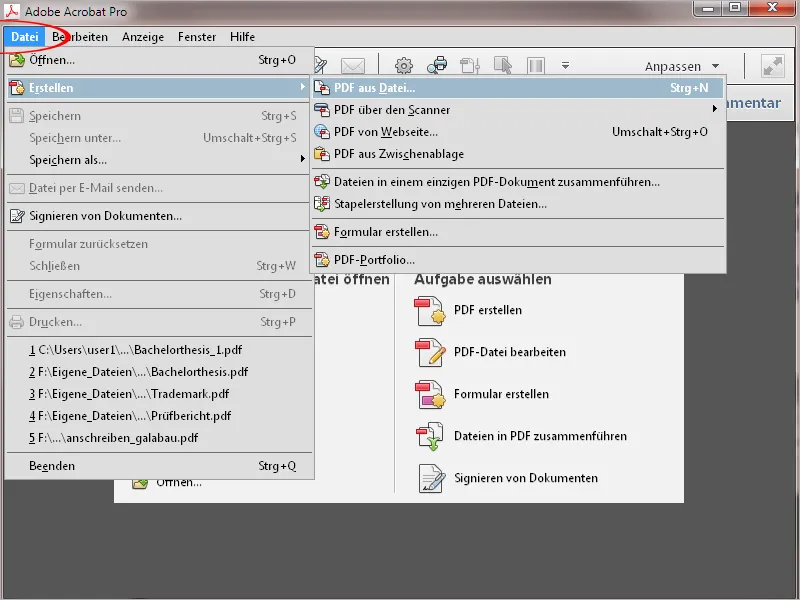
You can do the same via the File>Create>PDF from file menu.
It is even faster with the shortcut for File>Open. Here you will initially only see PDF files in the file explorer. Therefore, click on the button behind File name and change the file type from PDF to All files.
If you now double-click on a Word or JPG file, for example, it will be converted to PDF format in no time at all and opened in Acrobat.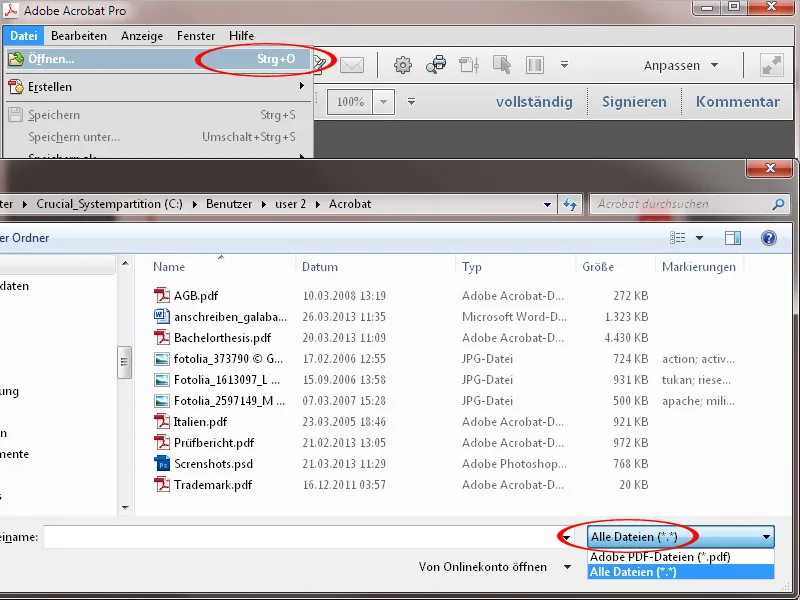
Another way to convert a file to PDF format is to use the drag & drop technique. Simply hold down the left mouse button and drag a file from an Explorer window into the Acrobat window. When you release the mouse button, Acrobat converts and opens the file, which then needs to be saved.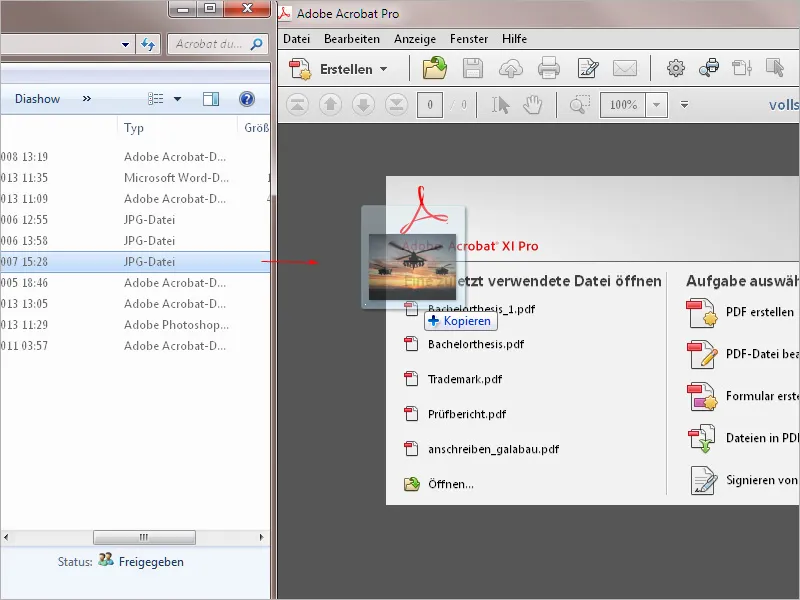
In the file manager, you can also convert a file to PDF format simply by right-clicking in the context menu.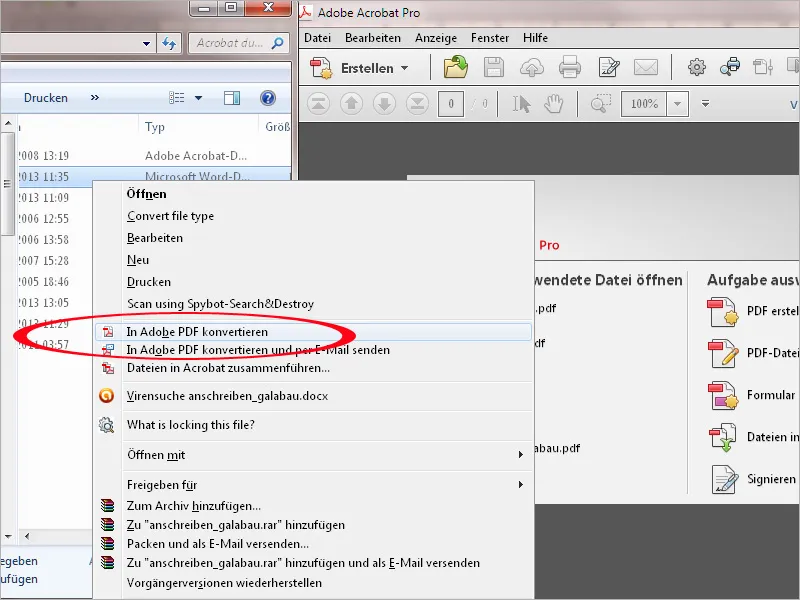
The Office programs receive a new tab when Acrobat is installed with the PDF Maker add-in. You can also use this to create a PDF file from the document.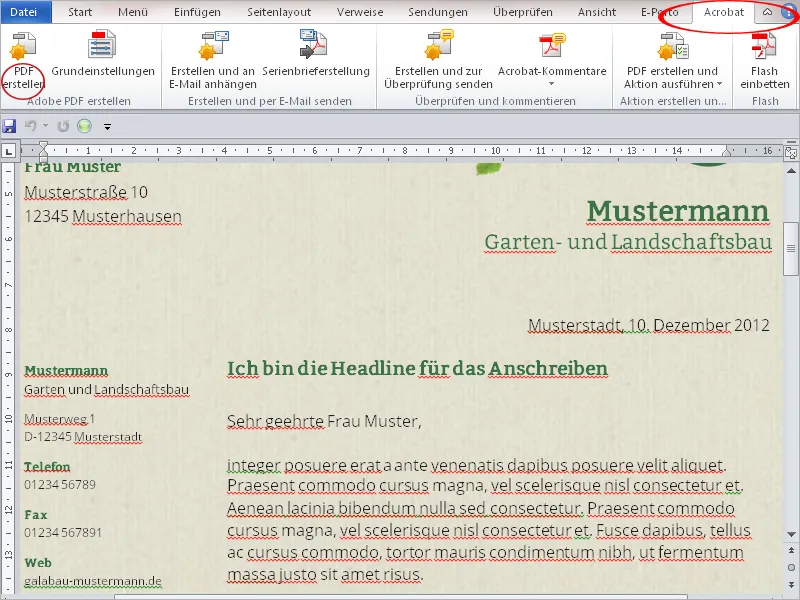
You can define the algorithms used for conversion in the basic settings. In addition to selecting an output profile, by ticking the relevant checkboxes you can also create bookmarks from the headings stored in the format templates, make links available in the PDF file or attach the source file to the PDF file so that the recipient can also continue working on the original.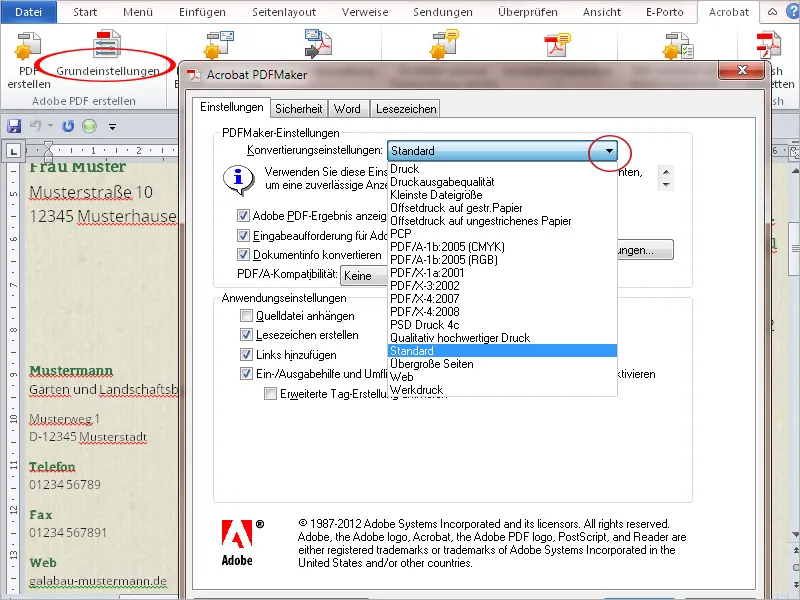
Users of Microsoft Outlook have the option of saving individual emails or entire folders to a PDF file using the PDF Maker add-in. This gives you the option of conveniently making this correspondence available to other users who do not have Outlook, e.g. to document all communication relating to a specific project across platforms.
To do this, click on the Adobe PDF tab in the Outlook menu bar and then on Selected messages>Create new PDF file.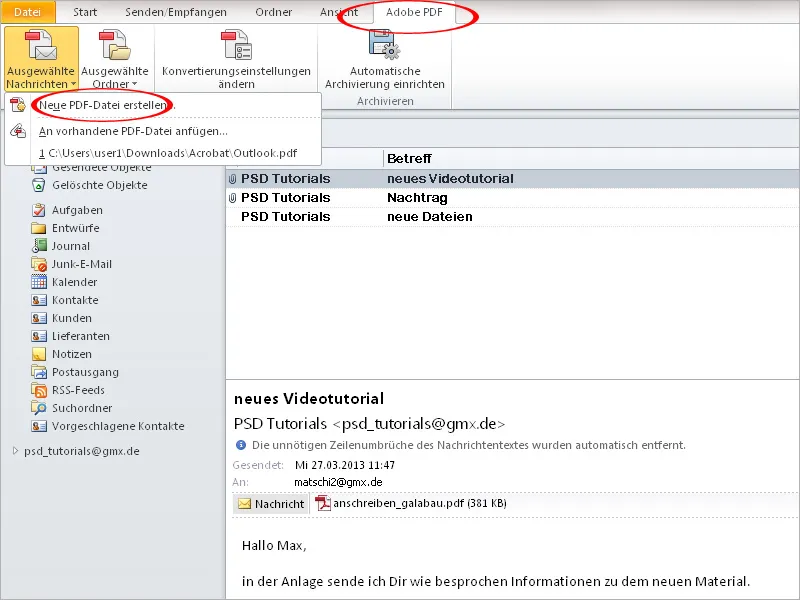
After selecting a file name and storage location, a PDF file is created and displayed. At the top of the file, the key data of the email such as sender, subject, date, attachments etc. are listed in tabular form.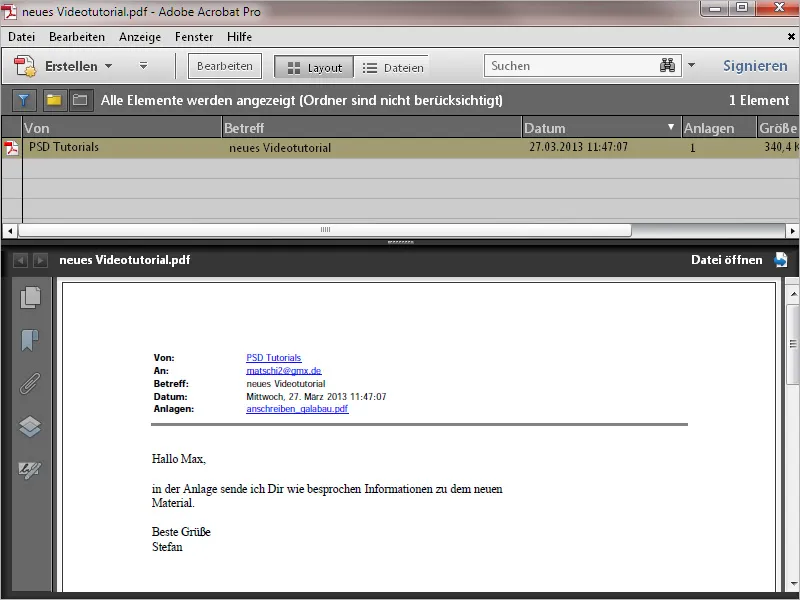
If several emails have been saved in such a file, they are listed in the table and can be sorted by clicking on the corresponding column heading. The entire portfolio can also be searched by keyword, which makes it much easier to find specific emails in a larger portfolio.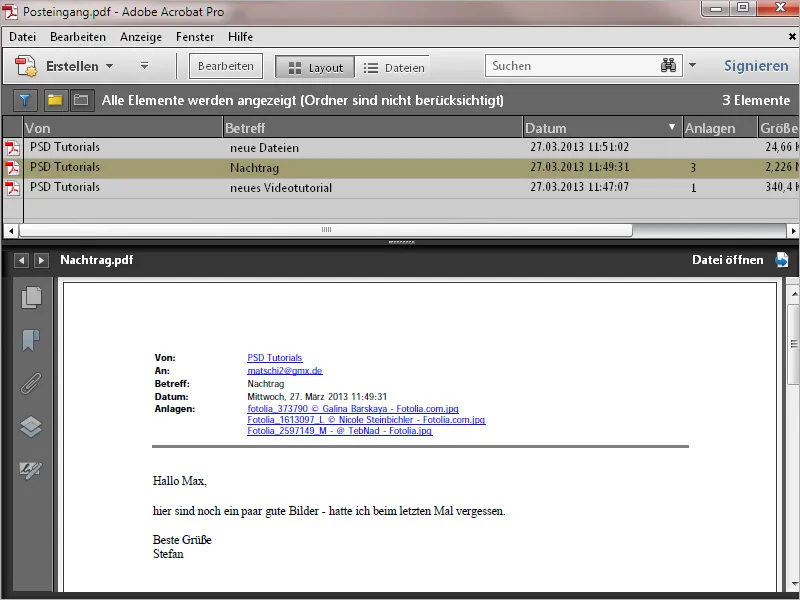
As not only the texts but also the attachments of the emails have been saved in the PDF, you can display them by clicking on the attachments buttonin the navigation bar and open them by double-clicking.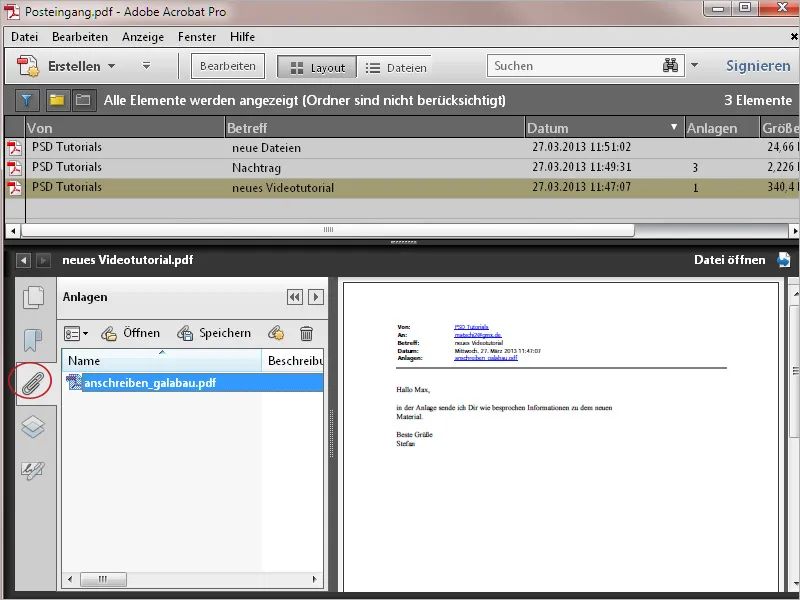
You can also automate the backup of selected folders and have it run automatically in the background at set times.
To do this, click on Set up automatic backup in the PDF tab , activate the Enable automatic backup checkbox in the window that opens , specify a cycle and then click on the Add button.
After selecting the desired folder to be archived, all you have to do is enter a file name and storage location and the process will be carried out automatically in the background and can no longer be forgotten.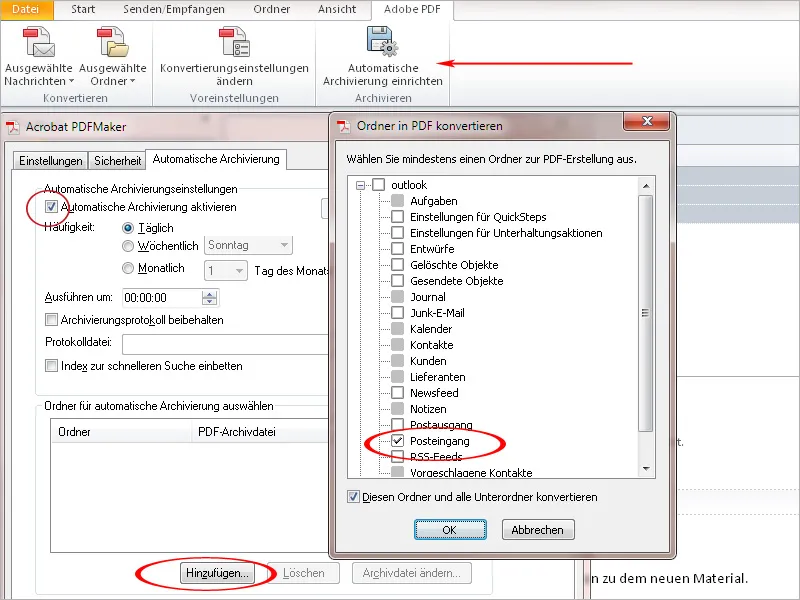
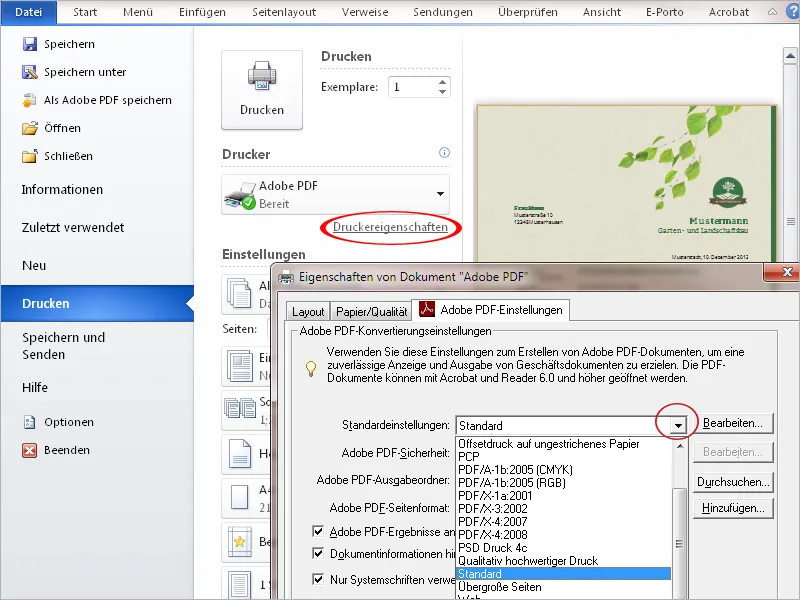
Finally, it is possible to print the corresponding file as a PDF from any application. Acrobat also installs a corresponding printer driver (PDF Maker), which can be selected from the list of available printers in the print dialogor set as the default printer. Here too, it is important to adjust the print properties to the desired output quality.