This tutorial consists of a total of three workshops in which I have tried to incorporate as many new features from Cinema 4D Release 18 as possible. As always, all source files and final results can be found in the package with the working files.
Avoiding overlaps with the displace effector
The basis for the first two workshops is a Lego brick that we already know from previous tutorials. You will find it together with a small scene structure in this working file: "PSD_C4D_R18_Verdraengen_start.c4d".
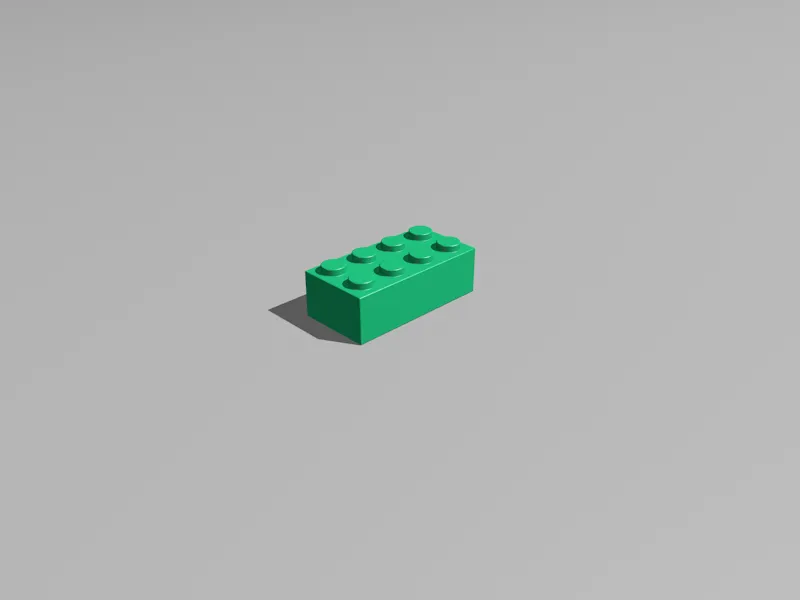
The color of the Lego brick currently happens to be green. As we will soon be making around 200 clones of the Lego brick, the Lego brick has a variation shaderin its color channel. This saves us having to create and assign the colors of the bricks individually.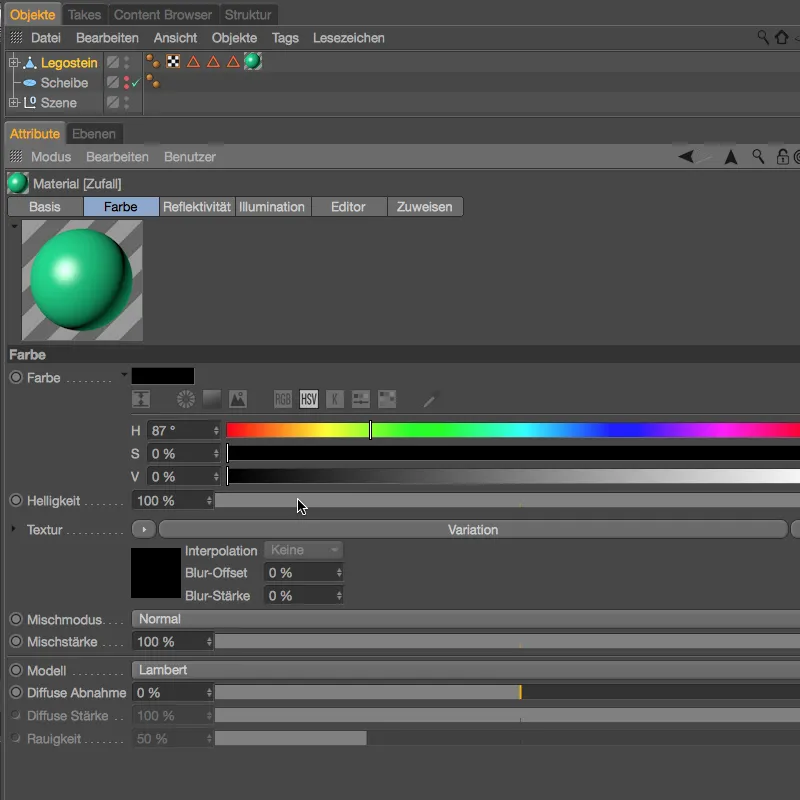
In the settings dialog of the variation shader, you can see that the variations are made up of a black base color and purely random colors . I have also increased the saturation to 70 % in order to achieve a stronger, richer color impression.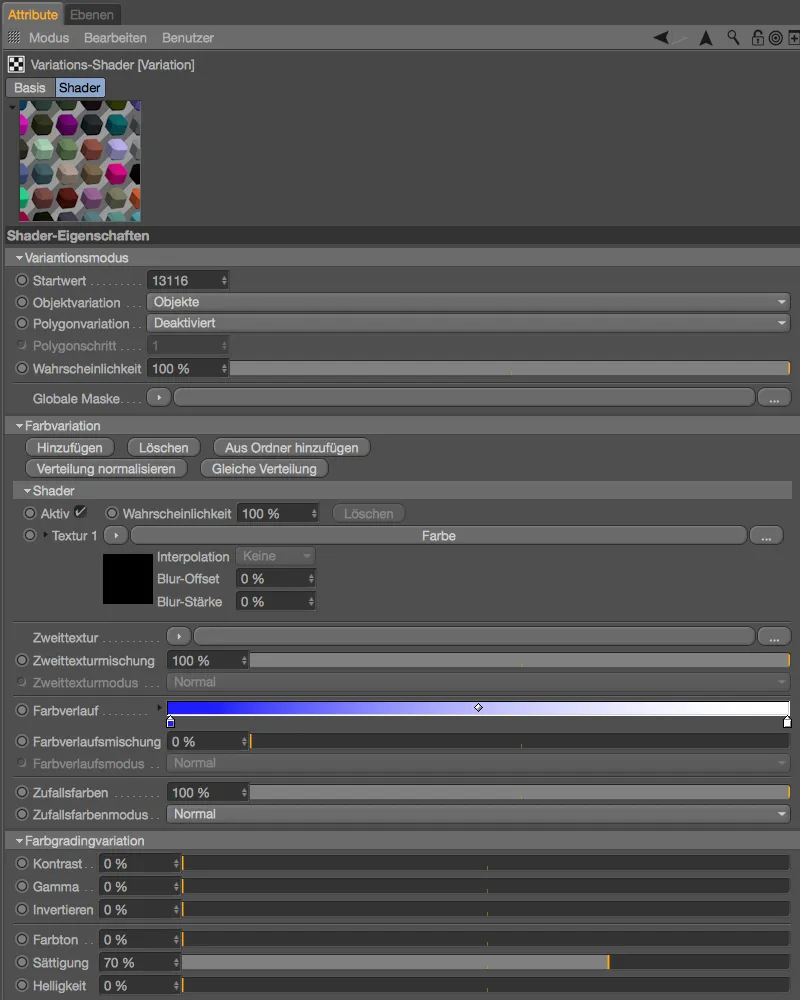
To create the Lego brick clones, we need a clone objectfrom the MoGraph menu. By selecting the Lego brick in the Object Managerand calling up the clone objectby holding down the Alt key, ...
... we achieve that the Lego brick is automatically subordinated to the newly created clone object. In the settings dialog of the clone object, we set the mode to grid and assign a number of 10 rows in the X direction and 20 rows in the Z direction. This total of 200 clones is distributed over the 200 x 200 cm specified in the Size parameters. Now we could of course calculate the total size we would need to place the clones next to each other in rows. In Release 18 there is a much simpler way to do this. At the bottom left you can see the size of the Lego brick in the coordinate manager.
We change the mode for the distribution from Endpoint to Per Step and simply enter the dimensions of our Lego brick in the X and Z fields.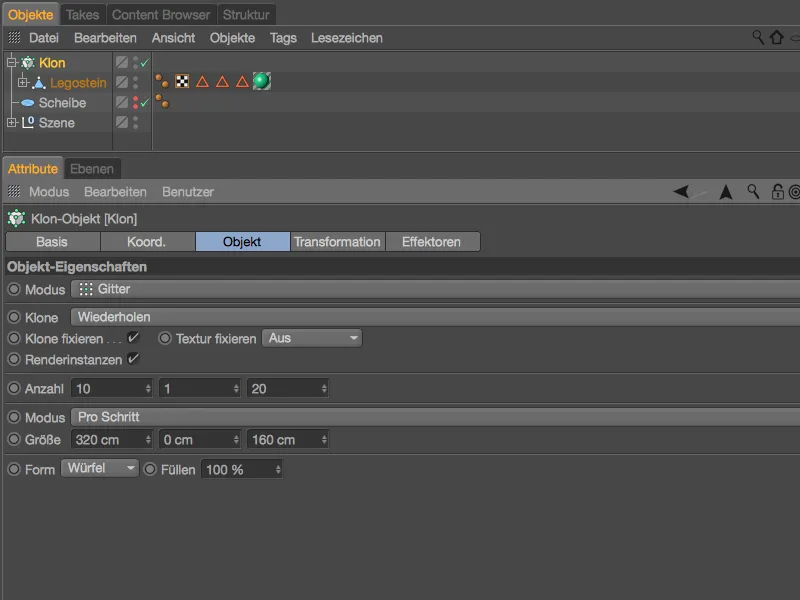
We have now distributed the 200 Lego bricks directly next to each other on a surface without any calculation effort.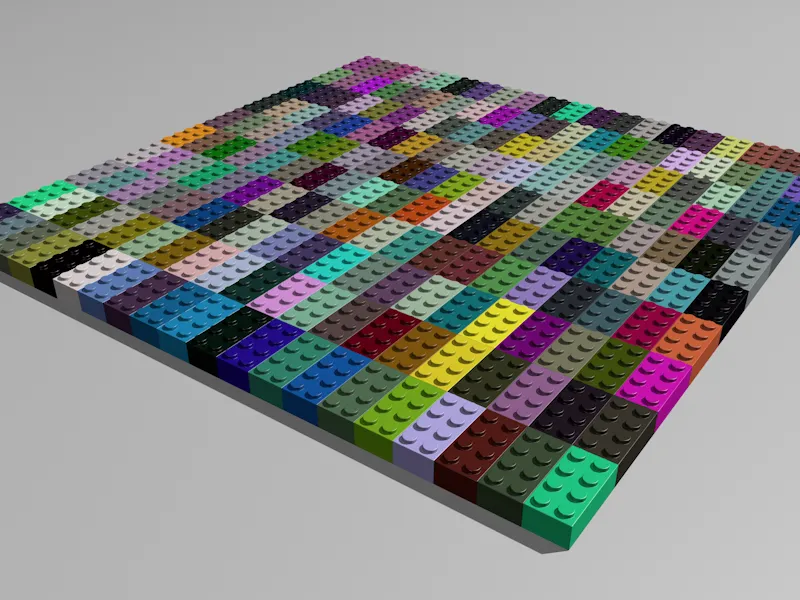
Before we move on to the next new feature in Release 18, let's distribute the 200 Lego bricks on the slice provided in the Object Managerinstead of using a grid arrangement. To do this, we change the clone mode to Object and drag the disk objectfrom the Object Managerinto the Object field of the clone object. For the distribution, we select the surface of the slice; as far as the number is concerned, we stick to 200 pieces.
To keep the influence of this clone number on our system performance within limits, we activate the Render instances option.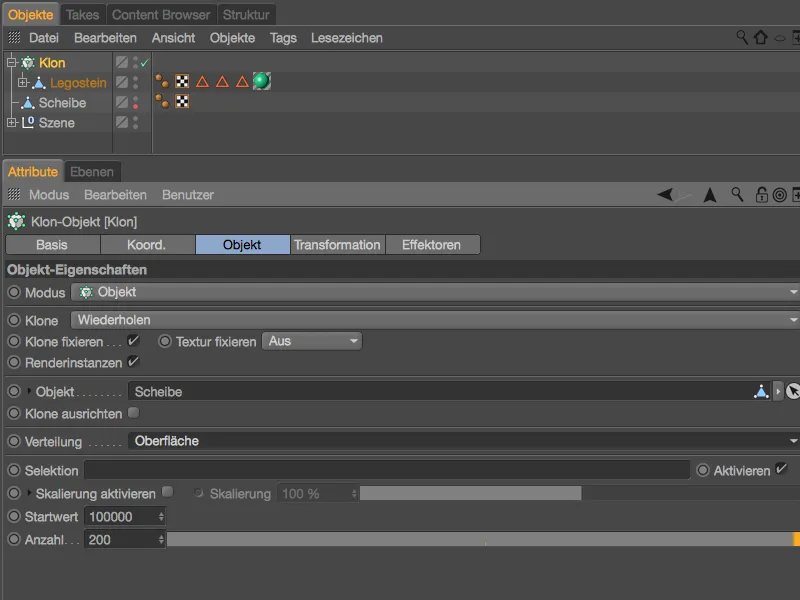
To distribute the Lego bricks randomly on the disk, we use a random effectorfrom the Mograph>Effector menu. First select the clone objectin the Object Managerto assign the effector to it.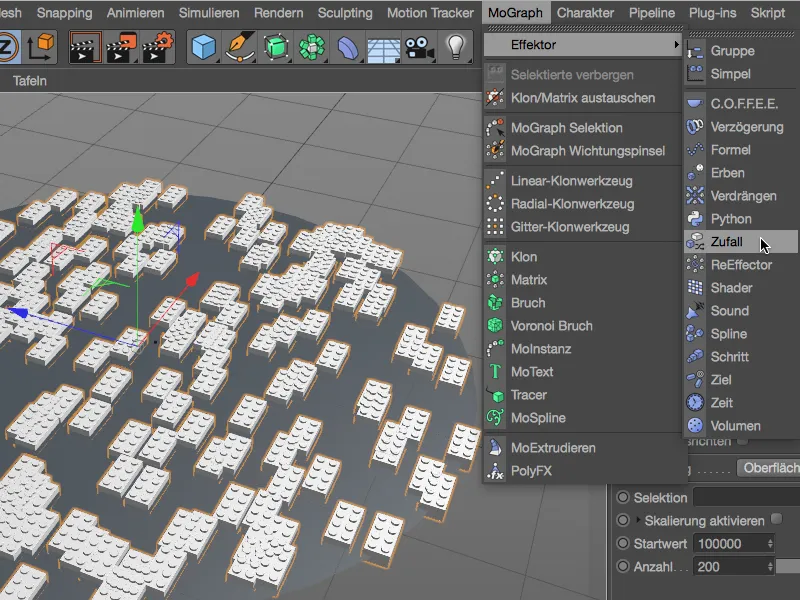
In the settings dialog of the random effector, we are only interested in the parameters page. There we only leave Position and Angle activated for the transformation and assign a margin of 10 cm in the X and Z direction for the offset and a heading angle of 360° for the rotation.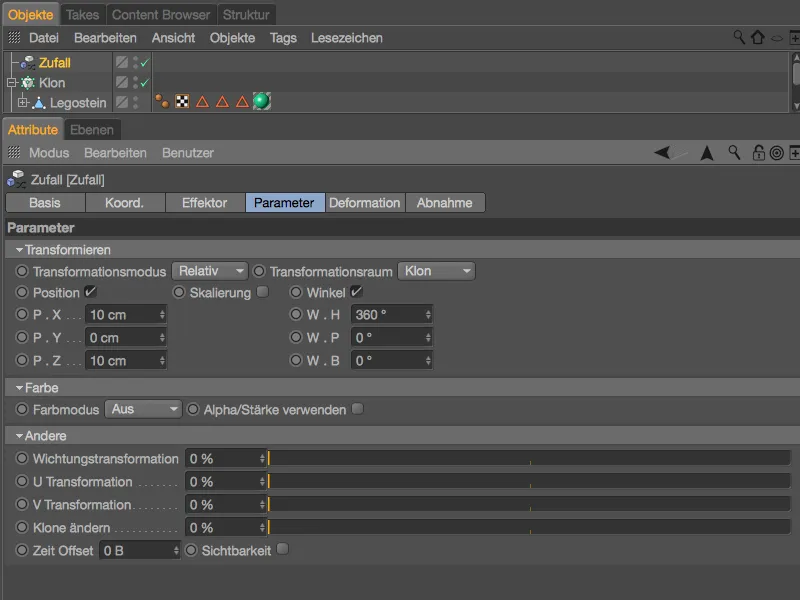
The random effectnow ensures that the Lego bricks are placed on the disk in a completely random order. The problem with this is obvious: there are numerous overlaps, which of course cannot remain as they are.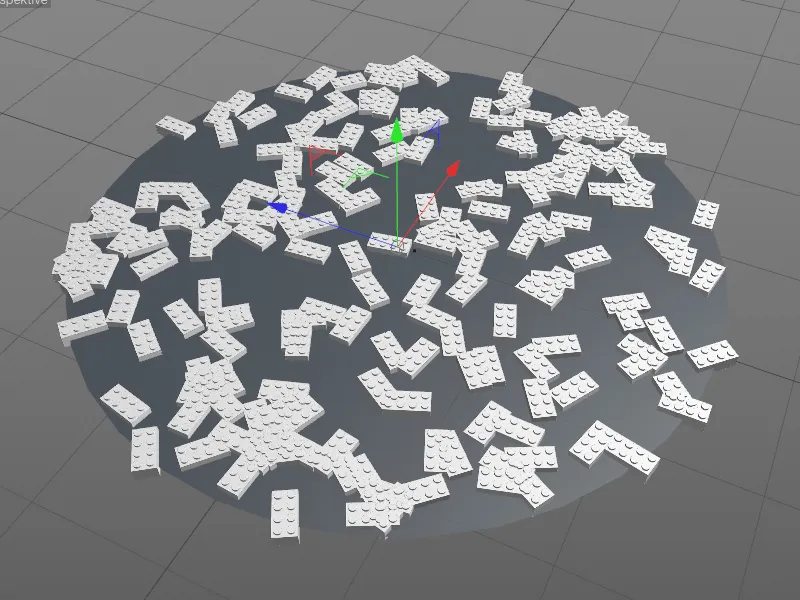
Instead of collecting the cloned Lego bricks again and letting them tumble onto the disk animated by Dynamics, it is better to use the Displace effector, another new feature from Release 18. Again, make sure that the clone objectis selected in the Object Managerwhen you get the effector from the MoGraph>Effector menu.
In the settings dialog of the Displace effector, we find the relevant parameters on the effector page. The radius specifies the area that each clone should ideally have around it as free space. We use the iterations to specify the number of attempts that the effector makes to achieve the desired free space. It is worth testing the interaction between the two parameters.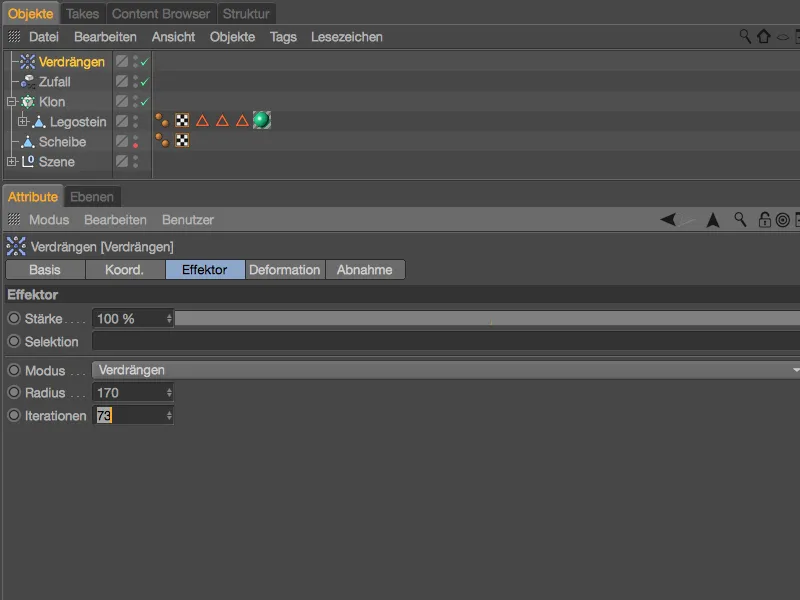
The settings shown successfully prevent the unsightly overlapping of the Lego bricks without having to do without a single one of the bricks.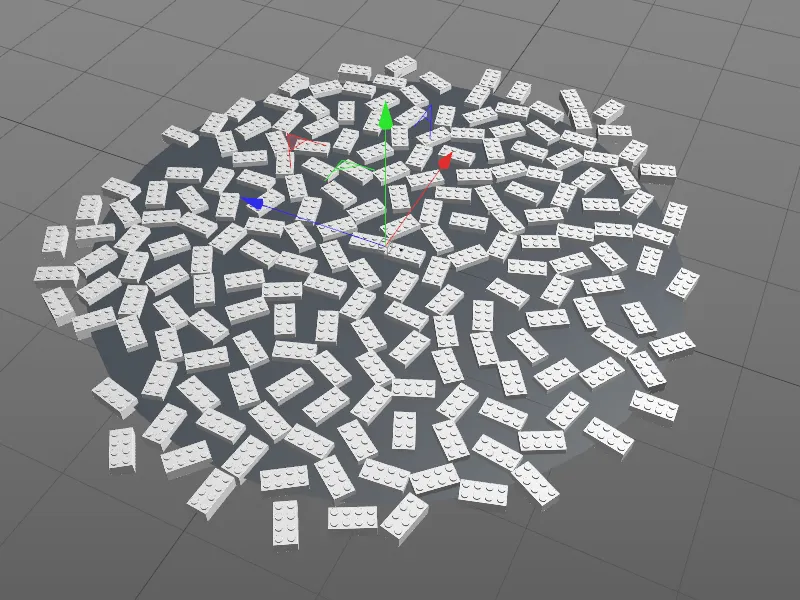
However, the displace effectoffers even more options for eliminating overlapping geometry. For example, we can simply move the clones along an axis or scale them to a suitable size. For our Lego brick scene, the conceal mode would be more of an option here. In contrast to displacement, disruptive clones are rigorously removed.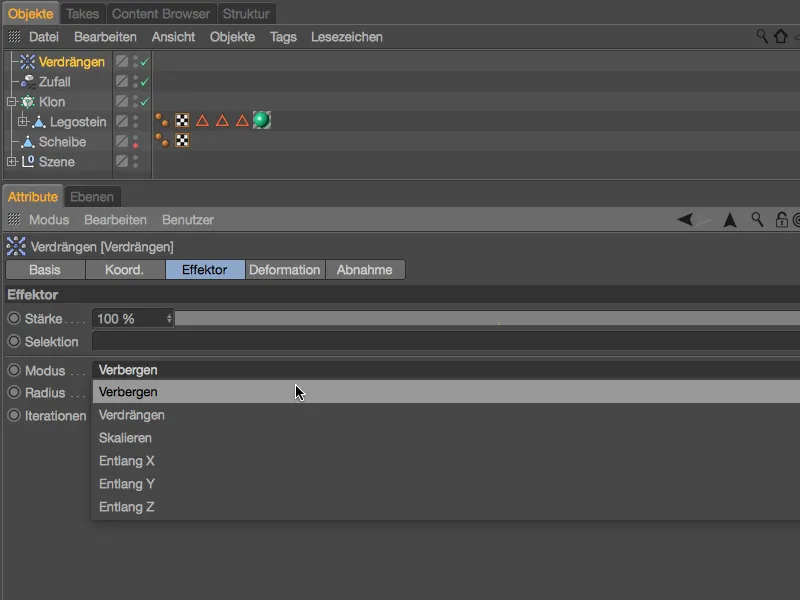
If you don't need to strictly adhere to the specified number of clones, Hide mode is probably the easiest way to eliminate overlaps.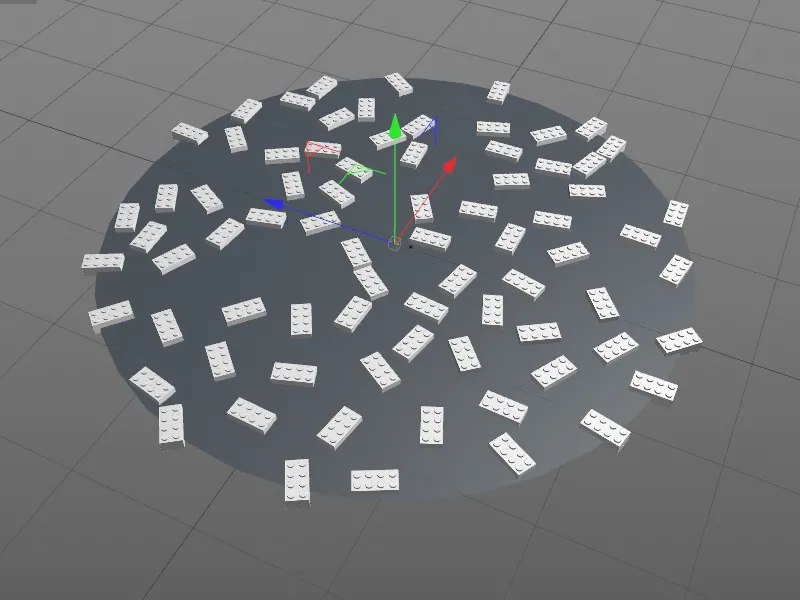
With the rendering of the disordered collection of tiles, we end the first workshop and turn to new possibilities in Cinema 4D Release 18 for building clones in an orderly fashion.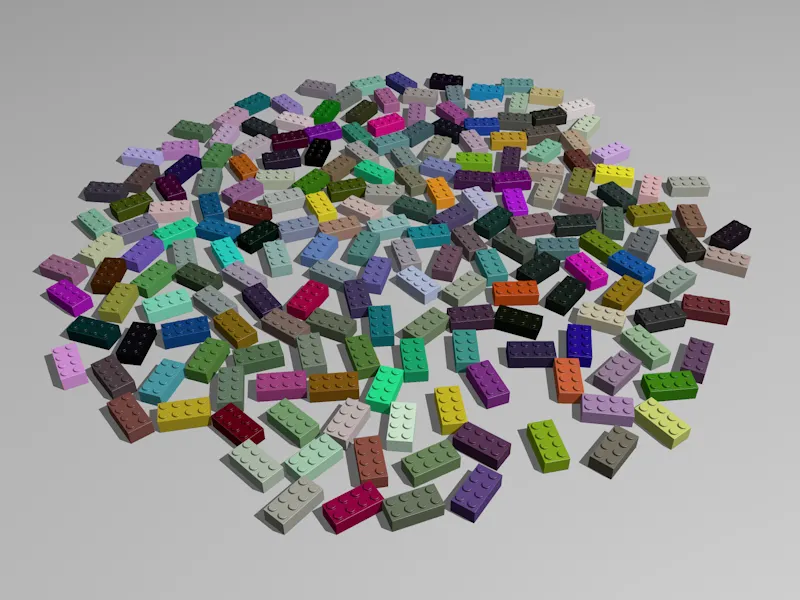
Honeycomb arrangement and shapes
As a contrast to the rather chaotic conditions in the first workshop, we will now try to use the new functions in MoGraph to create a lettering with our Lego bricks. You will find the file "PSD_C4D_R18_Waben_start.c4d" in the package of working files as a starting point.
In addition to the obligatory first building block, I have also provided the "PSD" lettering using a text object.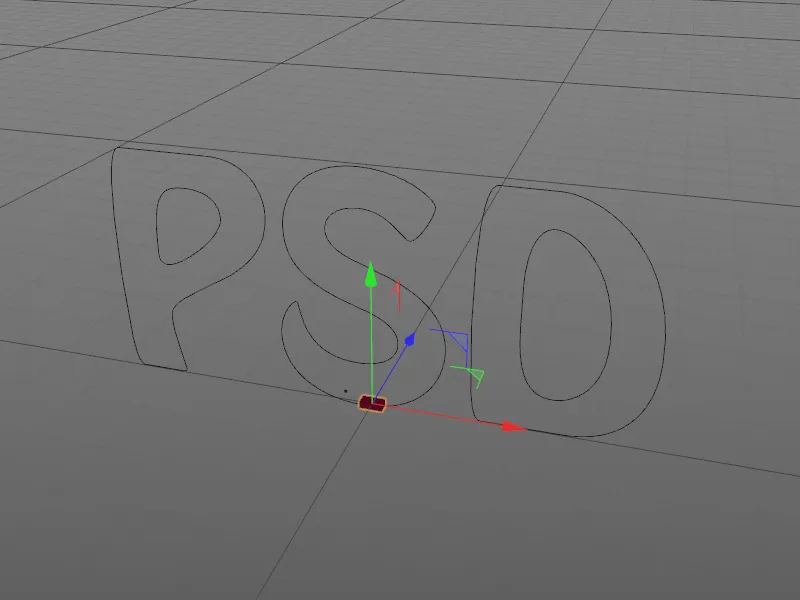
You can use a different font or select a different font via the settings dialog of the text object. Just in case, my PSD font is also available as a spline path called "Textspline" if you don't have the font I used installed on your system.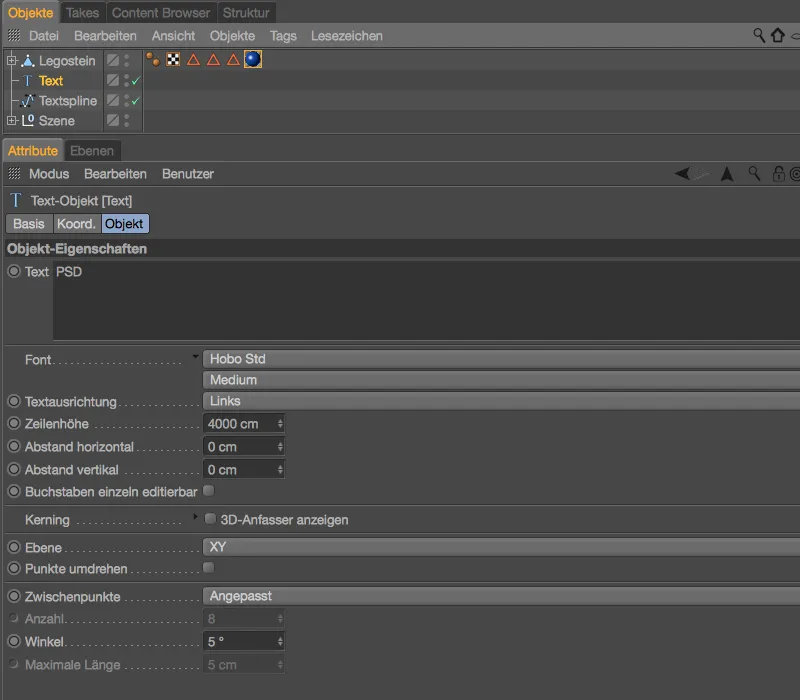
So that the clones of the Lego brick also automatically get different colors, the brick has the proven variation shaderin the color channel. In order to stay in the red/blue color range as far as possible, the clones vary from a light red as the base color in combination with a color gradient ranging from blue to black.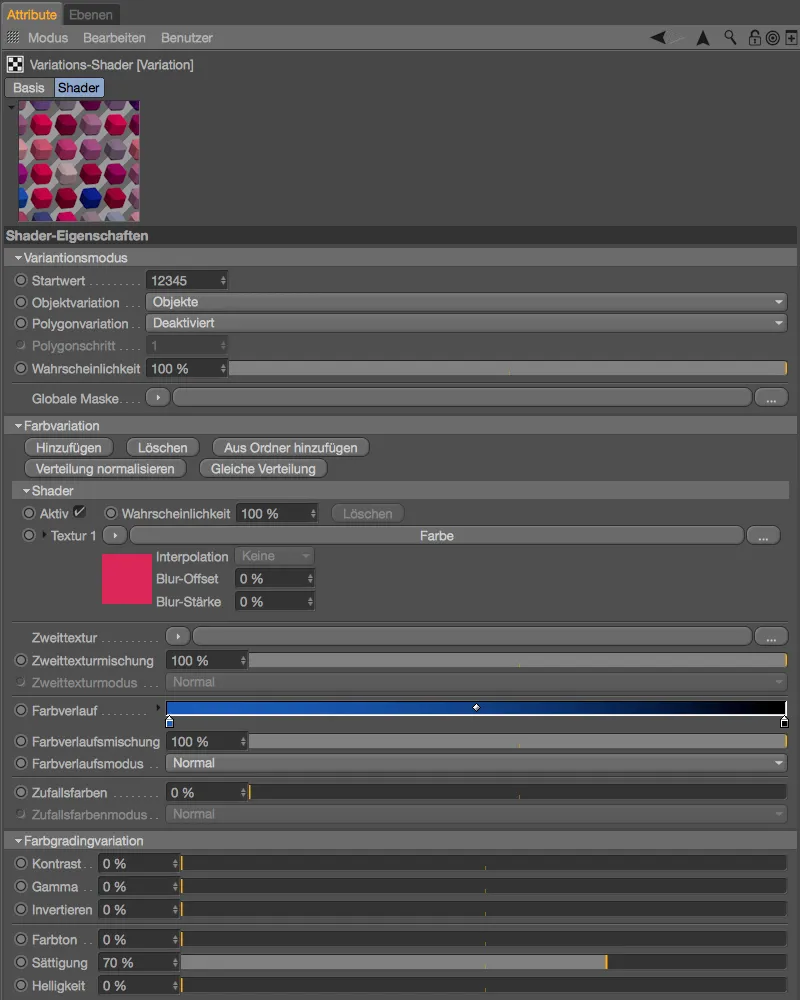
We start with a clone object, which we create via the MoGraph menu with the Lego brick previously selected and the Alt keyheld down.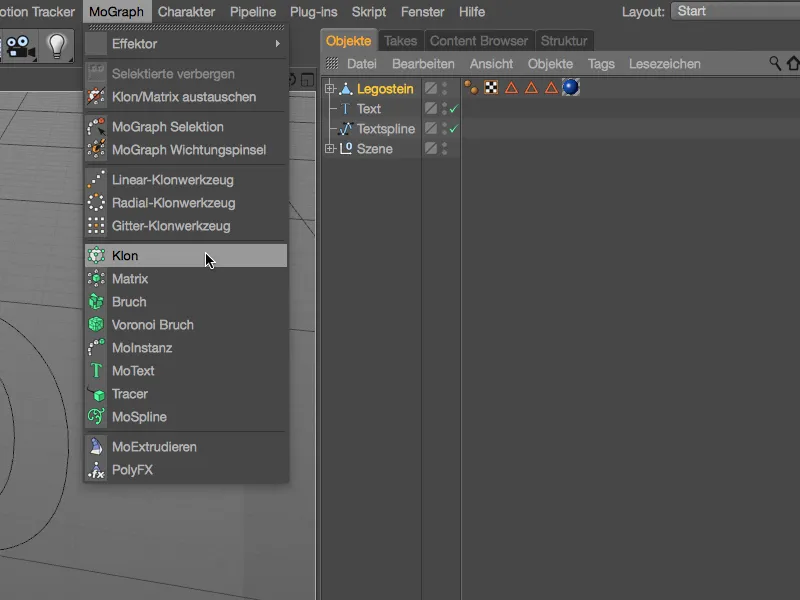
The Lego brick has thus automatically become a sub-object of the clone object. In the settings dialog of the clone object, we find the next new feature from Release 18 on the object pagein the mode menu: the honeycomb arrangement. This allows us to arrange the clones in a staggered brick structure, and the default offset of 50% is adjusted accordingly. The clones should be aligned along the XY plane, i.e. parallel to our lettering.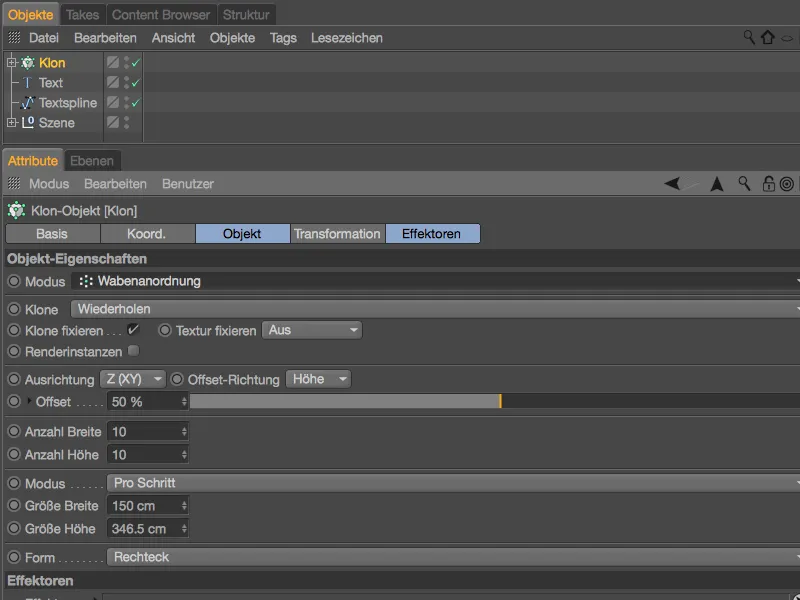
We do not yet know how many clones will be created this time. However, as it is likely to be a lot, we activate the Render instances option in advance to reduce the load on our computer.
While the specified number of clones in width and height are pure estimates, we can make precise specifications for the width and height sizes in Pro Step mode. For the width, we need half the Lego brick dimensions, the height corresponds to the height of the Lego brick minus the studs at the top.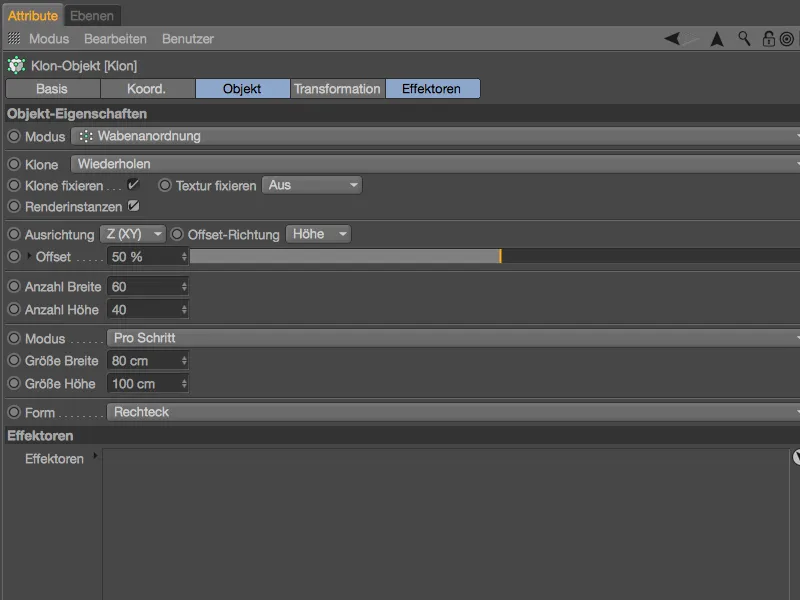
In the editor view, we have now created a wall made of Lego bricks - with the desired offset. Before we remove the clones not required for the lettering from the Lego brick wall, we move the entire clone objectin the Y direction using the orange gripper so that nothing of the text objectis visible.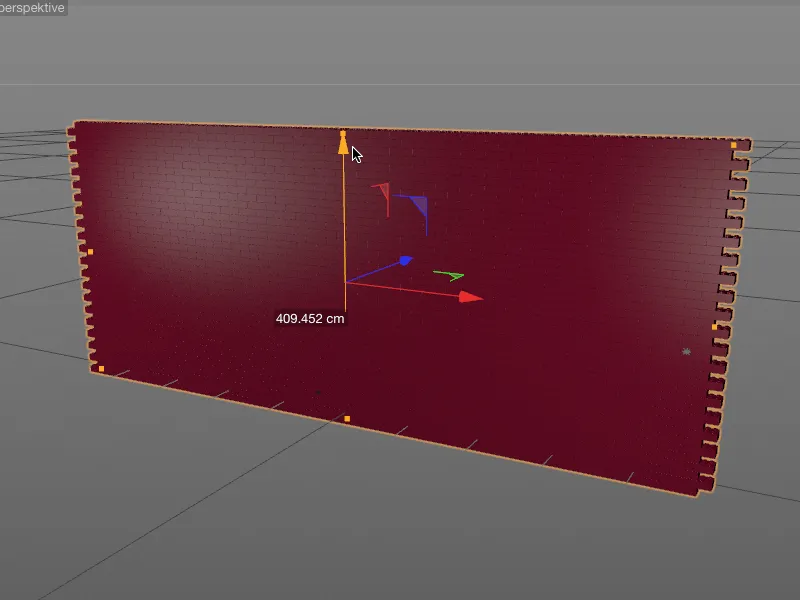
Back in the settings dialog of the clone object, we select the Spline option from the shape menuat the bottom of the object page. With this new feature from Release 18, the honeycomb arrangement can be further customized. With a spline objectas a shape , we have a completely free hand.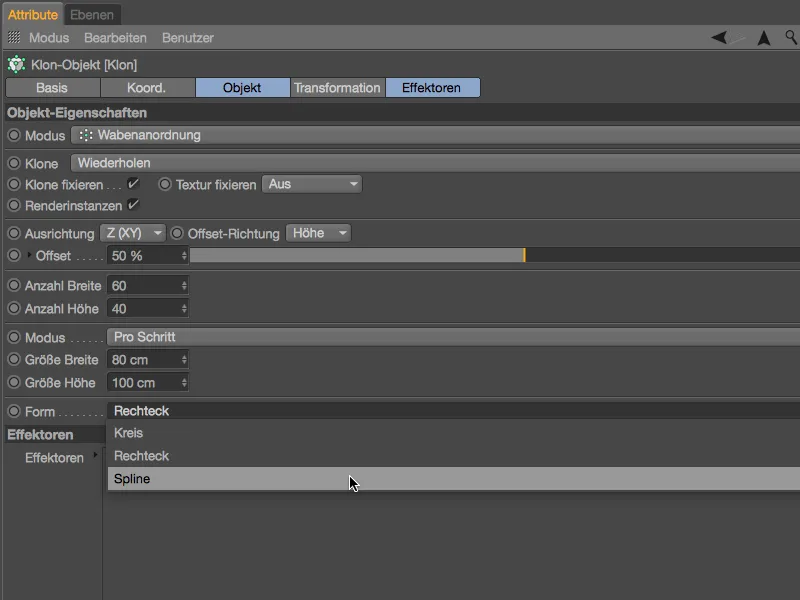
All we have to do is drag and drop the text object(or the converted spline path "Text spline") from the object managerinto the Spline field in the settings dialog of the clone objecton the object page.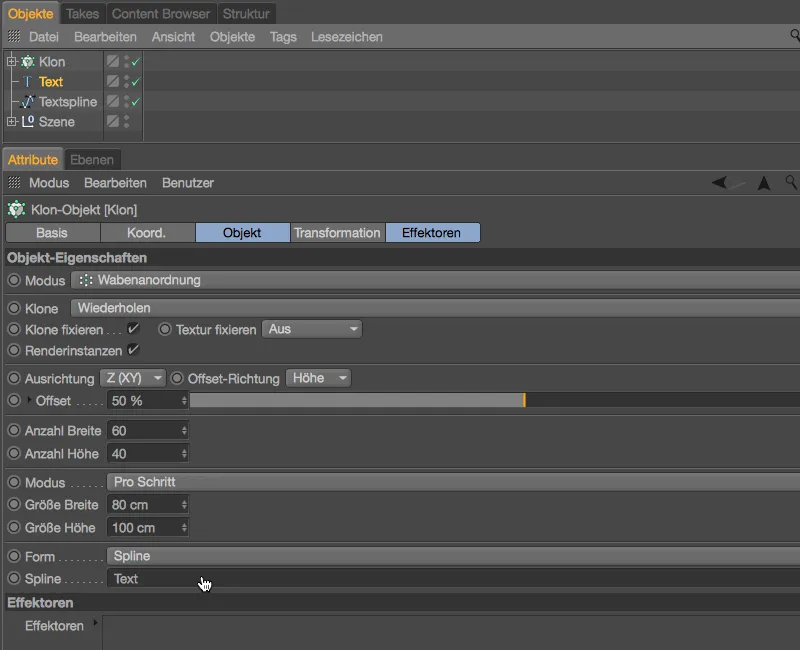
Now all the excess Lego bricks of the wall, which has a total of 2400 clones, have disappeared. Only the Lego bricks needed to build the lettering are left. Now let's take care of fine-tuning the structure. The best way to do this is to switch to the front view by pressing the F4 key.
So that no Lego bricks are floating in the air, all three letters are on the same row and the letters are filled in as well as possible, we move the clone objectslowly with the axis grippers until we are satisfied with the construction.
We could optimize the structure a little by removing a few annoying clones. Each clone can be edited individually, and since release 18 we can even display the corresponding index number for each clone. In the settings dialog of the clone object, all we have to do is set the display to Index on the transformation page.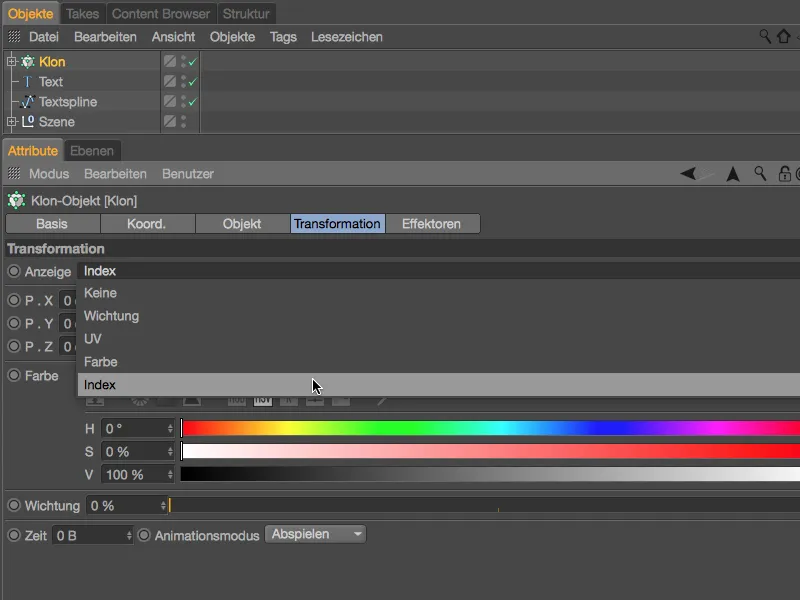
To make it easier to read the index numbers that are now displayed, we zoom in a little closer to the lettering. At the top curve of the "S", the bottom stone with the index number 634 disturbs me.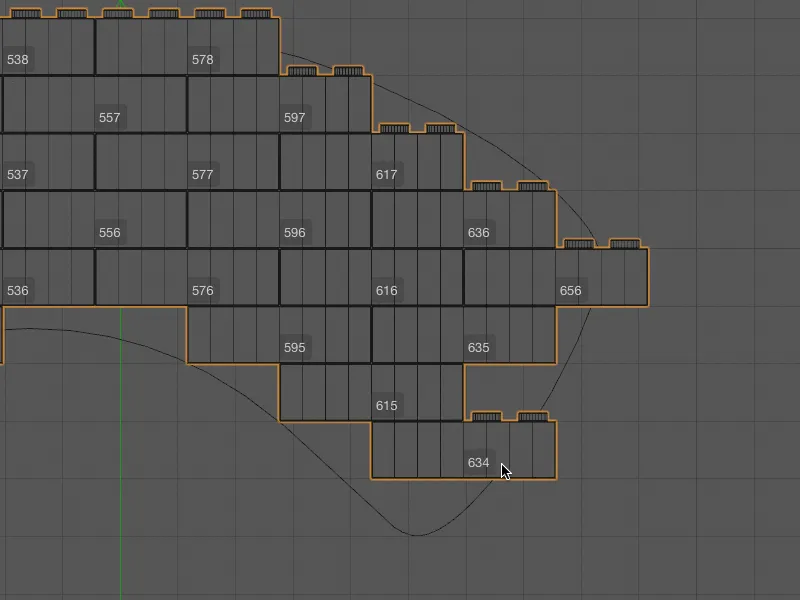
We don't have to explicitly delete this and other possibly disturbing Lego bricks, because since version 18, clone selections can be hidden very easily. To do this, we activate the MoGraph selection tool from the MoGraph menu and select this Lego brick clone first. Our clone objectnow has a MoGraph selection tag in which the selected clones are saved.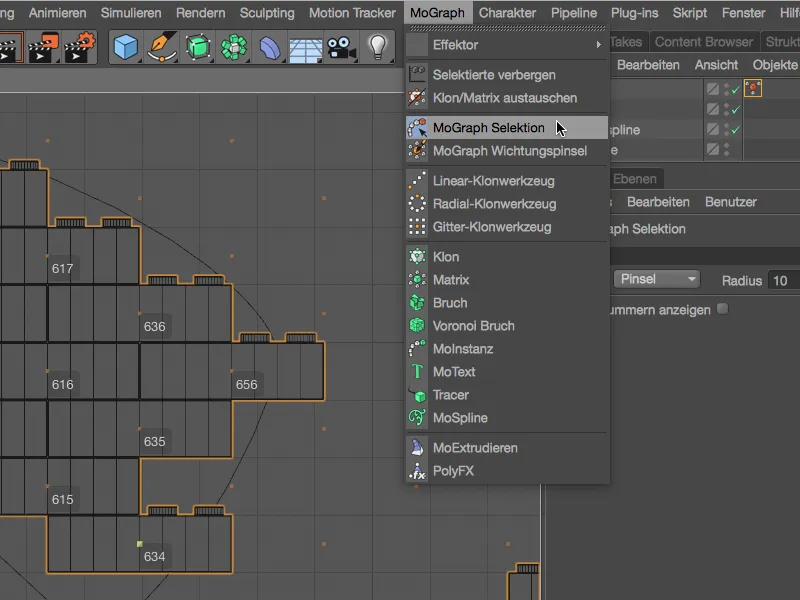
In addition to the aforementioned clone at the upper arc of the "S", I also add the lowest left-hand Lego brick at the "D" to the selection. In this illustration, the small orange boxes clearly show where the clones of the former Lego brick wall are located.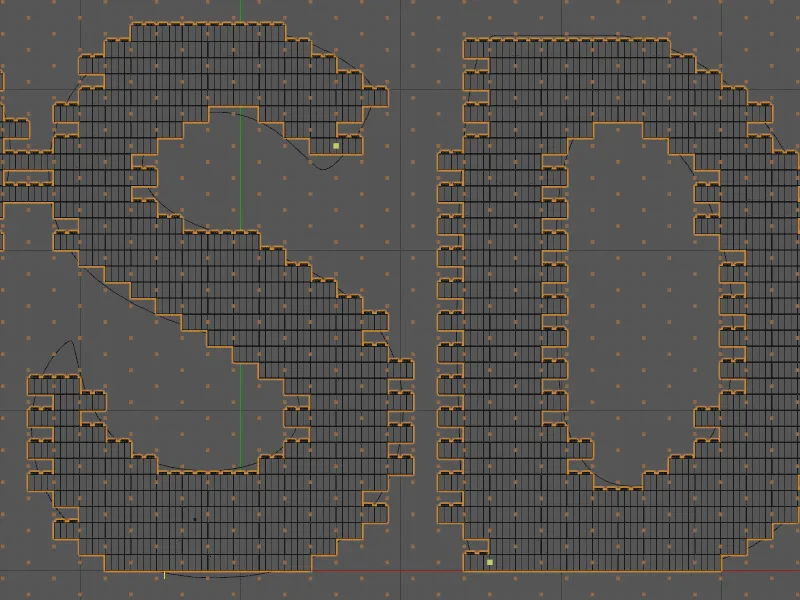
As soon as the clones to be hidden have been selected, we call up the Hide selected command from the MoGraph menu.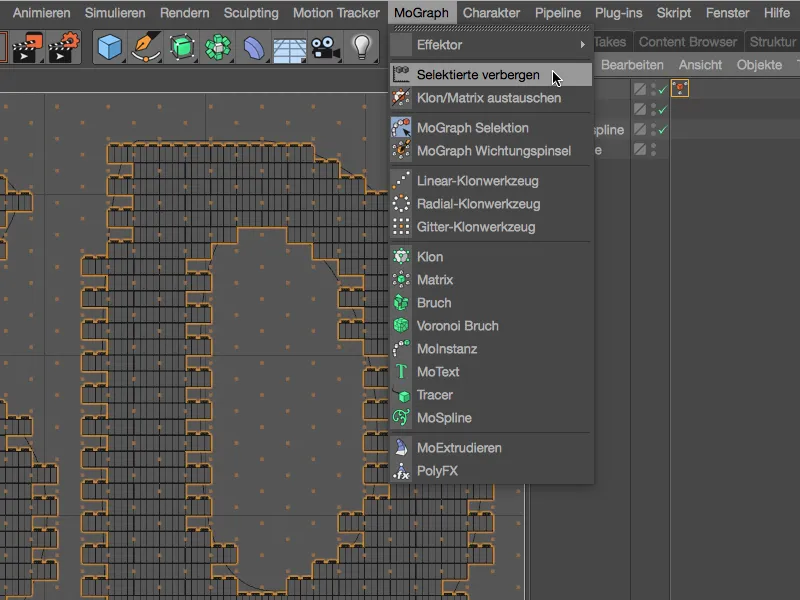
The disturbing Lego bricks have now disappeared or been hidden. Incidentally, this is done using a Simpel effector, which ensures that the clones saved in the MoGraph selection tag are invisible in the editor and rendering.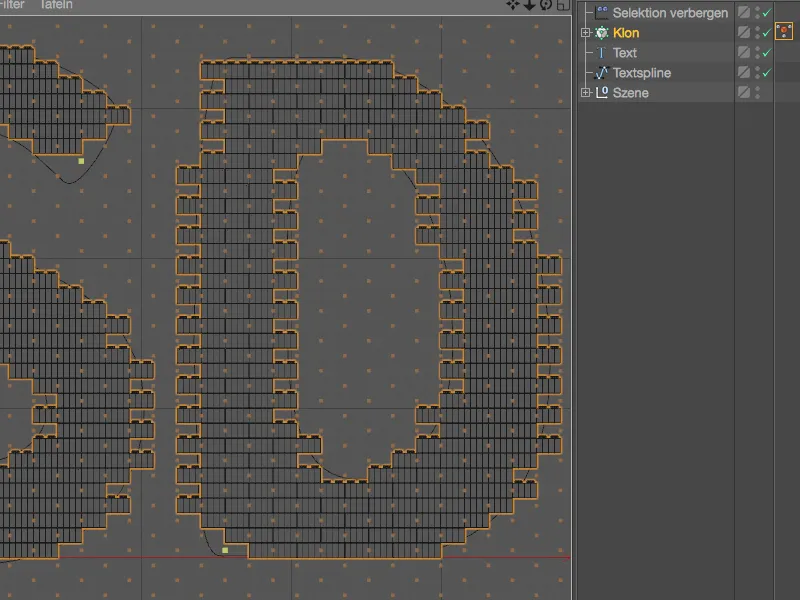
To conclude this workshop, I would like to introduce you to a new way of keeping the editor view performant even in scenes with a high number of clones. The Swap clone/matrix command in the MoGraph menu can be used to convert clone objectsinto matrix objects- and back again.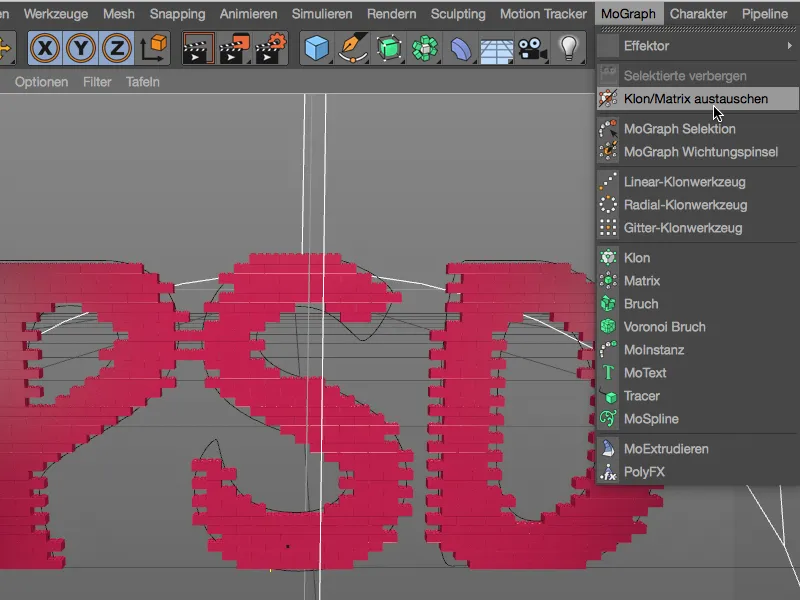
Matrix objectsoffer the advantage that only small cubes are displayed instead of the cloned objects and therefore require considerably less computing power.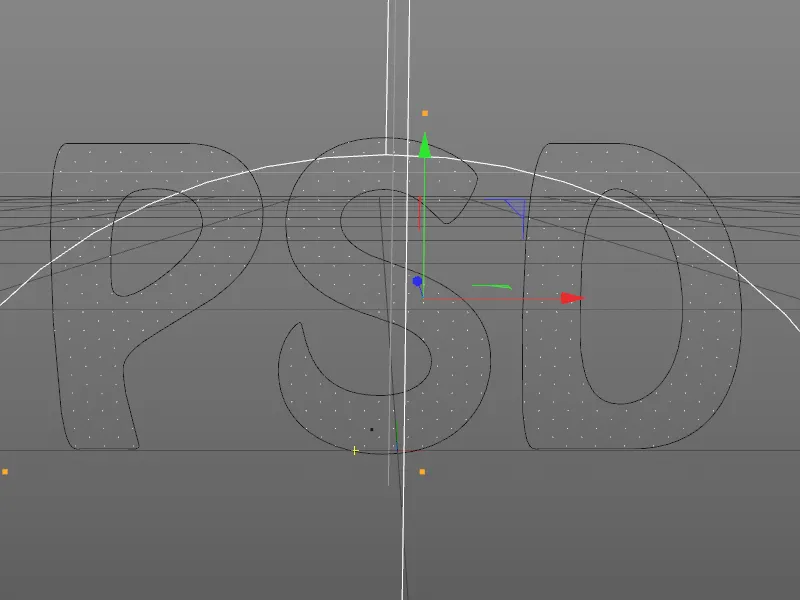
Before rendering, the matrix objectmust be converted back into a clone objectusing the same command.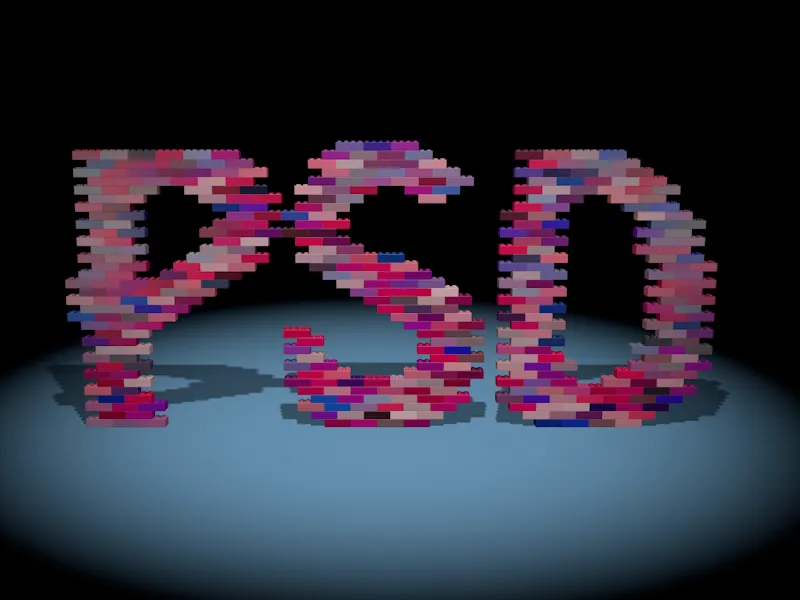
MoGraph weightings
Let's move on to the third and final part of the MoGraph highlights in this tutorial. Because we are now dealing with effector-animated clones, this time we will use a lettering consisting of cylinder objects. The source file named "PSD_C4D_R18_Weightmap_start.c4d" can be found in the working files for this tutorial. Let's take a quick look at the structure of the relatively simple lettering animation.
Similar to our Lego brick wall, the cylinder clonesare also layered using the honeycomb arrangement mode and shaped using a text object. A formula effectoris used to animate the wave-like flow of the clones.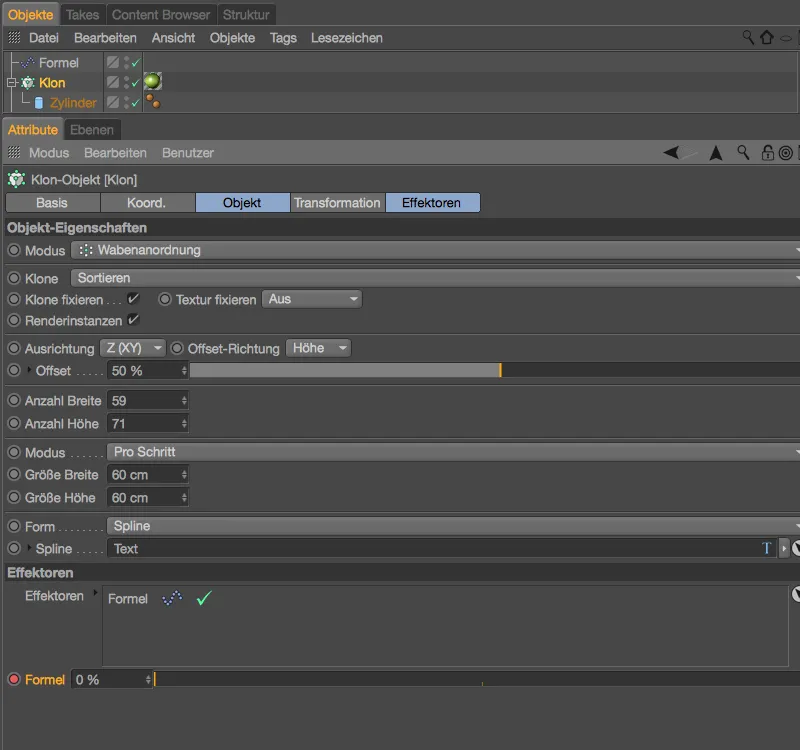
In the settings dialog of the formula effector, we find the parameters for the transformation in addition to the formula for the wave. The position change and scaling are limited to the Z direction; in the case of scaling, the value < 1 also ensures that a small piece of cylinder still remains when the extreme value is reached.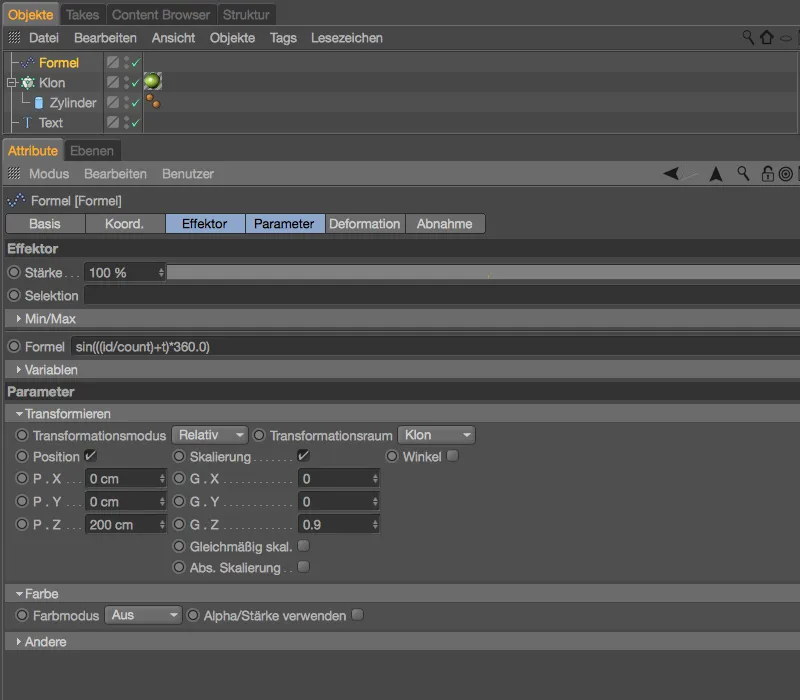
If you haven't already done so, you should watch the animation by clicking on the play button.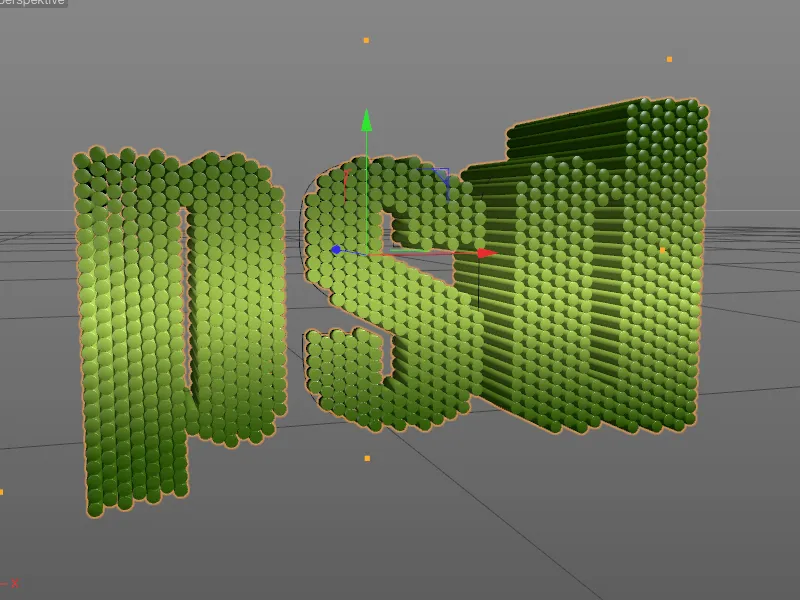
In this short workshop, we want to individualize the animation, which currently still affects all clones. We will use MoGraph weighting to tell the clones how strongly they can react to the transformation triggered by the effector. The best way to do this is to switch to the front view using the F4 key and call up the MoGraph weighting brush from the MoGraph menu.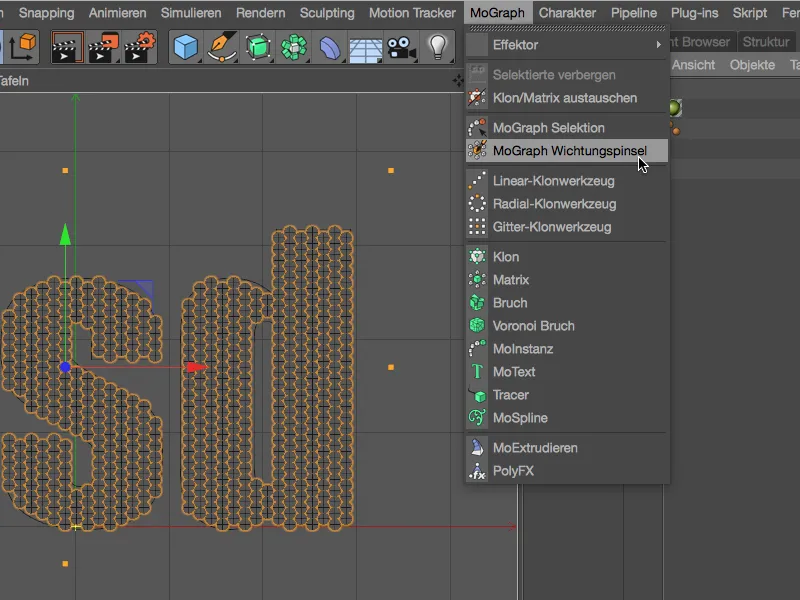
Like every other brush in Cinema 4D, the MoGraph weighting brush also has its own settings dialog in which we can specify the type of application, its radius , etc. The weighting brush I am using works in Absolute mode, the Add mode will of course also work for our purposes.
Armed with the MoGraph weighting brush, we now paint all the clones in the editor viewthat are allowed to be affected by the formula effector. The yellow color indicates 100% influence, while the red color indicates 0% influence.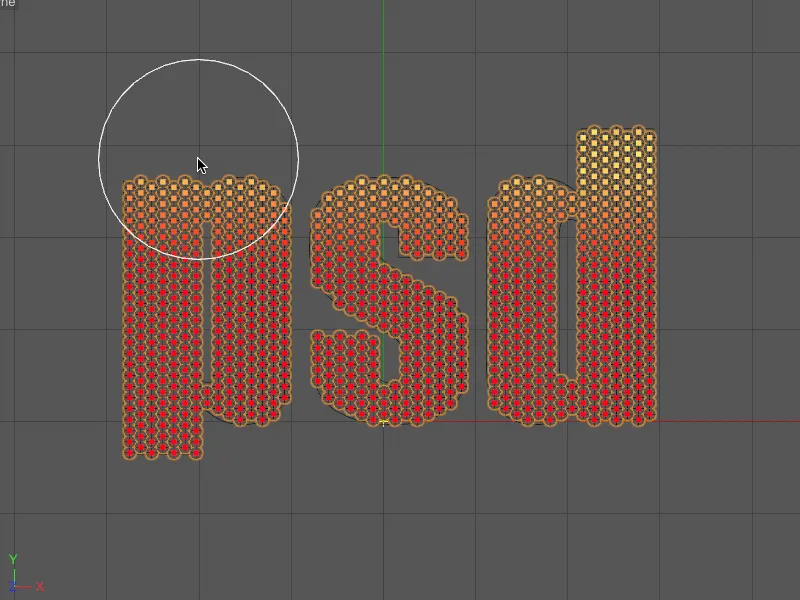
As you can see, I have ignored the clones in the vertical center when painting, while the letter areas extending upwards and downwards are fully weighted. The clones in the middle height should therefore react little or not at all to the effector.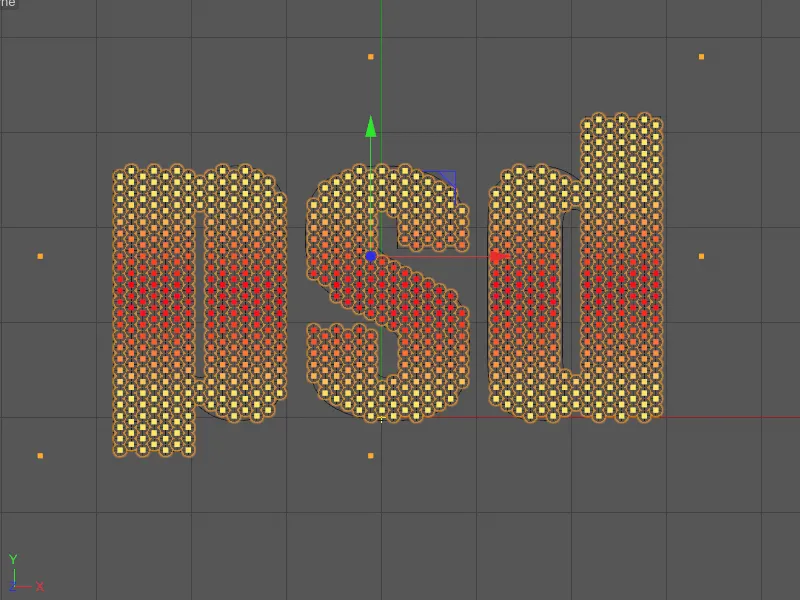
At this point in time, however, no clones react to the effector at all. This is because our clone objecthas a MoGraph weighting tag with a corresponding weighting map, but we have not yet assigned this to the formula effector.
In the settings dialog of the formula effector, we find the Selection field on the effector page. We drag and drop the MoGraph weighting tag from the Object Managerinto this field.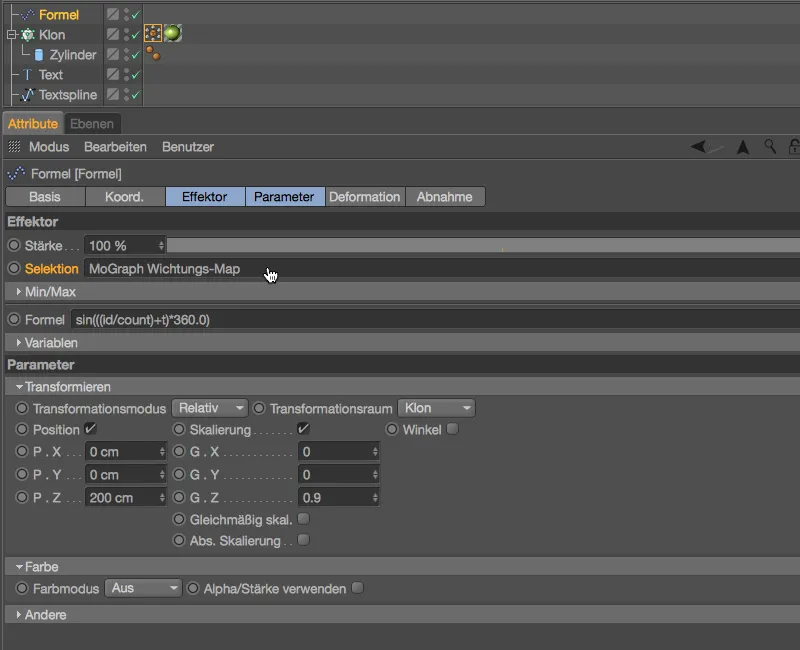
Now we can start the animation of the lettering again by clicking on the play button and see that the formula effectornow leaves the areas in the middle height untouched as desired.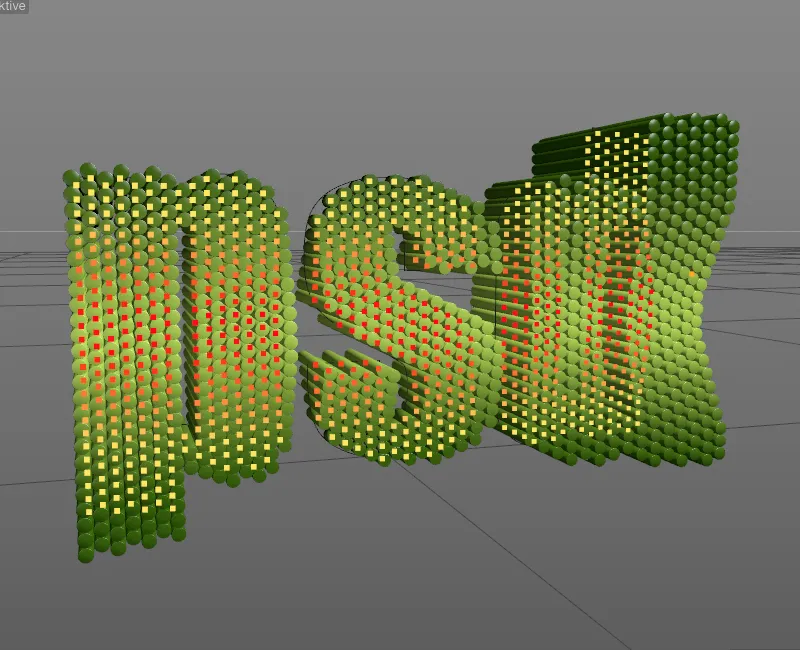
MoGraph Cache
Cinema 4D has always offered the option of baking MoGraph animations and saving them in a cache. This makes simulations reliably reproducible, reduces the load on editor performance and makes network rendering via Team Render usable in the first place. The MoGraph cache tag can still be found in the Tags>MoGraph Tags menu of the Object Manageror in the context menu using the right mouse button.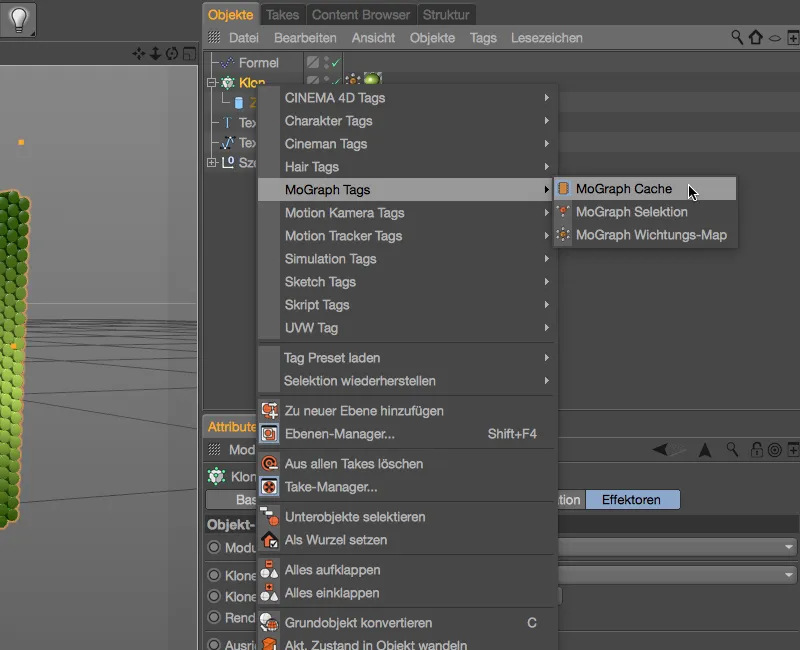
If the MoGraph cache tag is assigned to the clone object, the baking of the animation or simulation can be started in the corresponding settings dialog of the tag.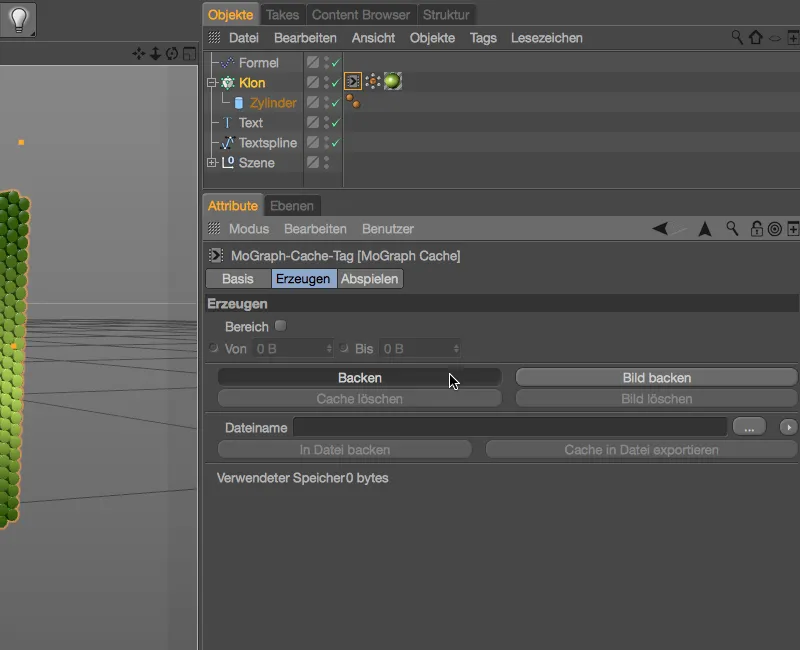
After a short wait, the animation for the clone objecthas been baked.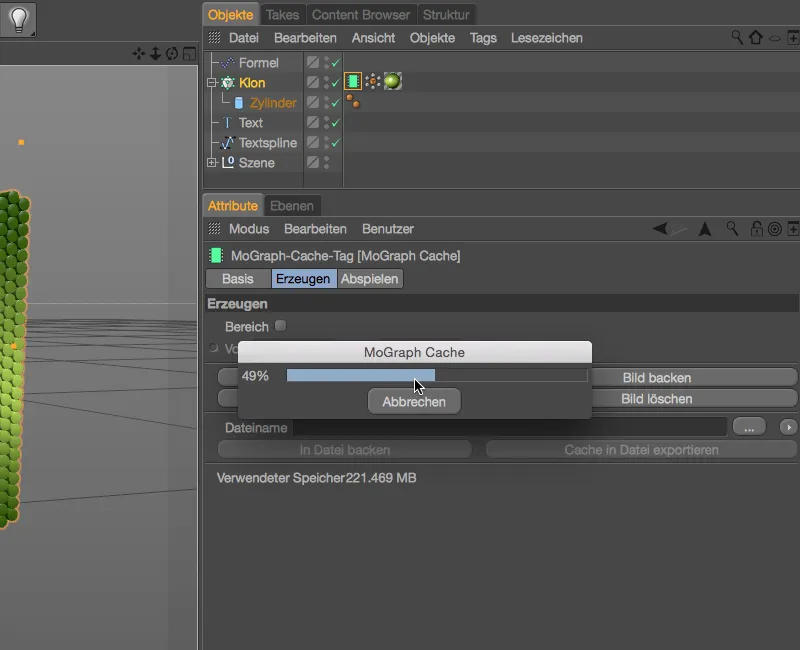
The MoGraph cache tag shows us the valid, saved cache by means of a green-colored memory symbol in the tag. In the bottom line of the settings dialog, we can also see the memory size of the cache that the Cinema 4D project now has to carry around with it. New in Release 18 is the option of saving this cache in external file sequences. As soon as we specify a storage path in the File name field for the cache files, we can reduce the size of our project file by clicking on the Export cache to file button.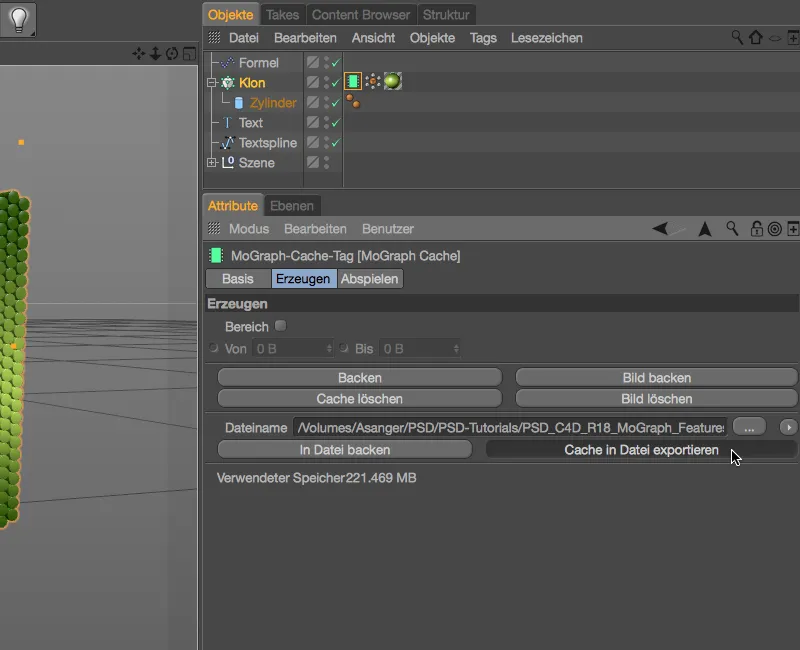
From over 220 MB, only approx. 750 kB are left. Opening and saving our project file is now correspondingly faster. The fact that the cache is now external is also indicated by the small arrow in the green memory symbol of the MoGraph cache tag.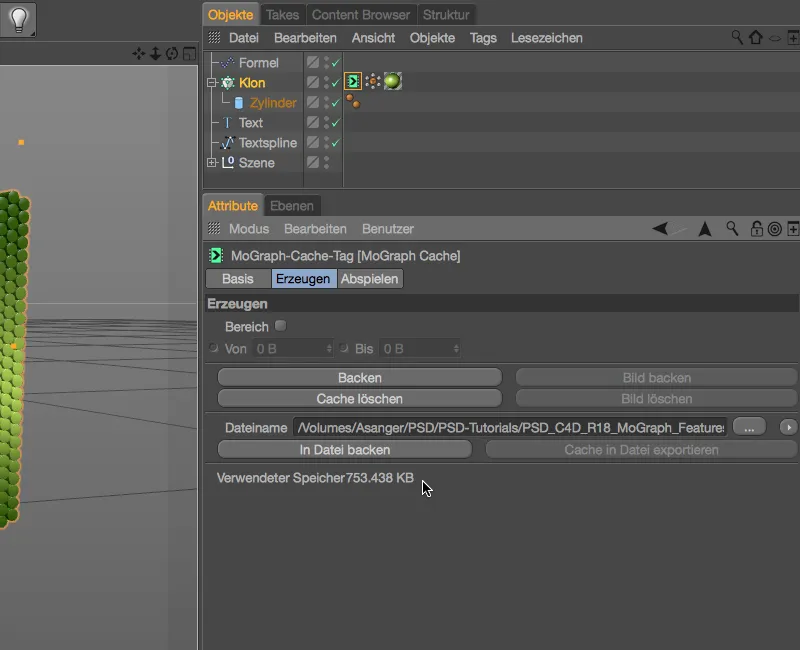
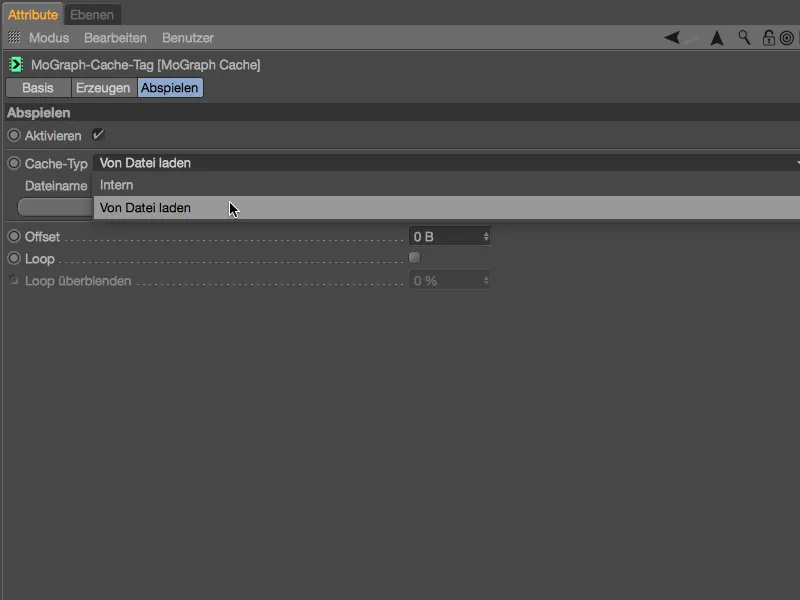
Importing and thus sharing the external cache is also possible without any problems. On the playback pageof the MoGraph cache tag, we can specify in the cache type selection menu whether an internal or external cache should be used for playback. If desired, we can of course also retrieve the external cache internally.