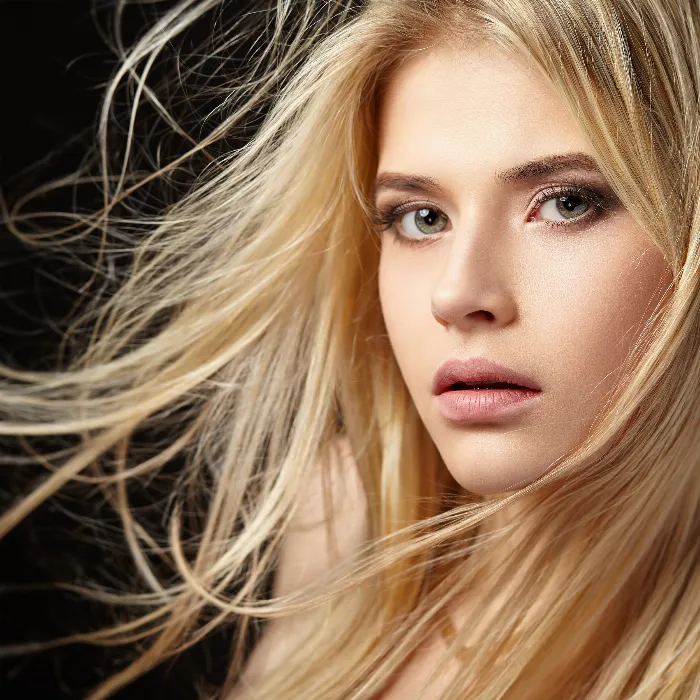
In the following, I don't want to talk about exact clipping per se, but about simulated clipping so that the result is perfect in the end despite difficult starting conditions.
This is about brushing, drawing and wiping hair, tricky clipping using a hair simulation selection, creating hair brush presets and copy sources to correct clipping errors, destructive and non-destructive techniques for eliminating color fringes and accentuating hair edges using clipping duplicates in modified layer modes.
Image sources: Giorgio Gruizza, Aleksey Ignatenko, Trout, Sorin Popa, Uschi Hering, Can Balcioglu, T.Tulic
Reworking difficult coat structures with the wiping finger
These two dogs have fur structures that cannot be cropped without loss due to the multicolored background. First, I place the new background under my duplicated background layer.
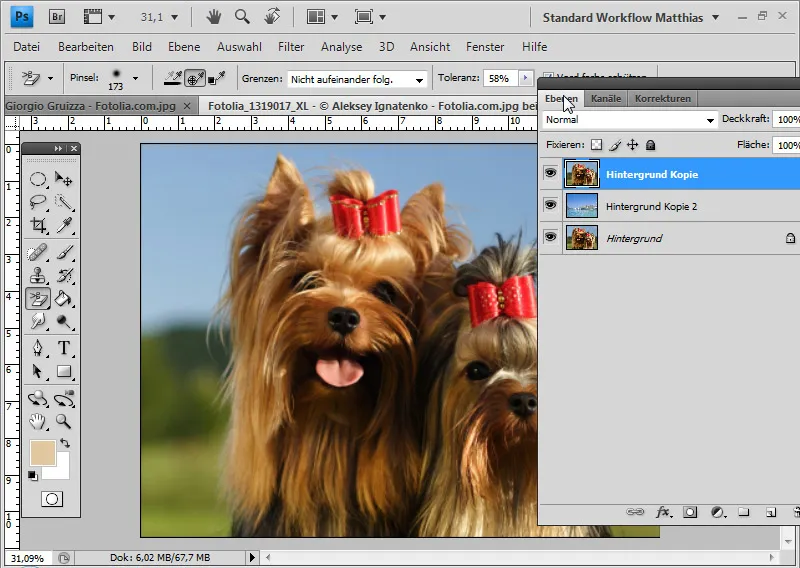
I use the background eraser to cut out the background. The tolerance has a medium value for a single shot and non-consecutive borders. I set the fur color to be protected as the foreground color with Alt and click and set the background free.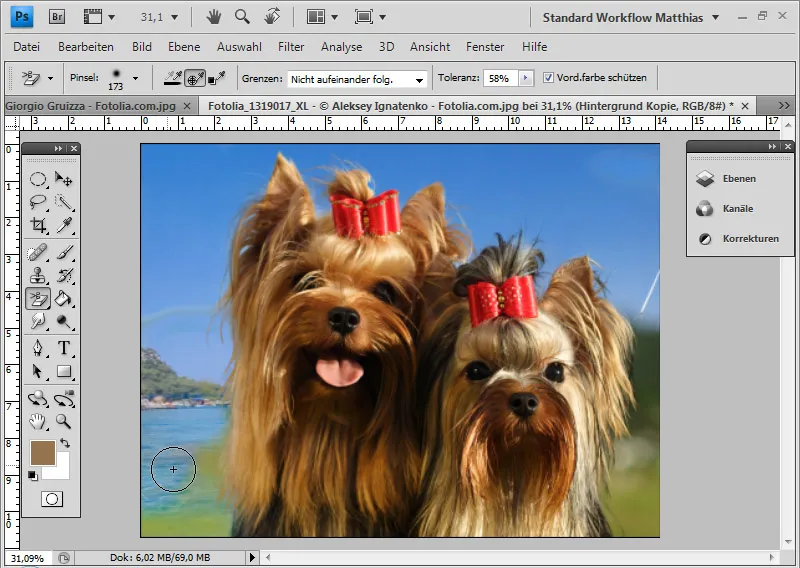
With a black layer below the clipping layer, I can better assess the clipping and delete the superfluous background areas down to the last detail.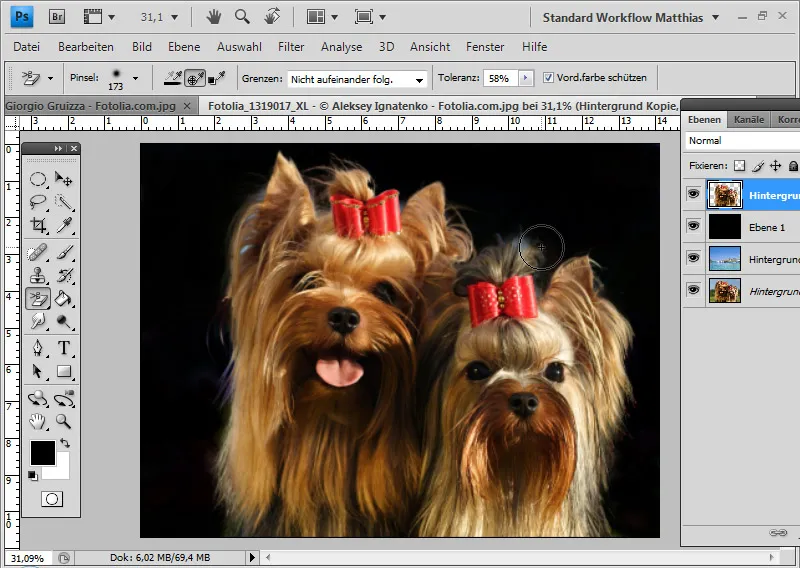
Some of the fur structures have become somewhat transparent, others have disappeared completely.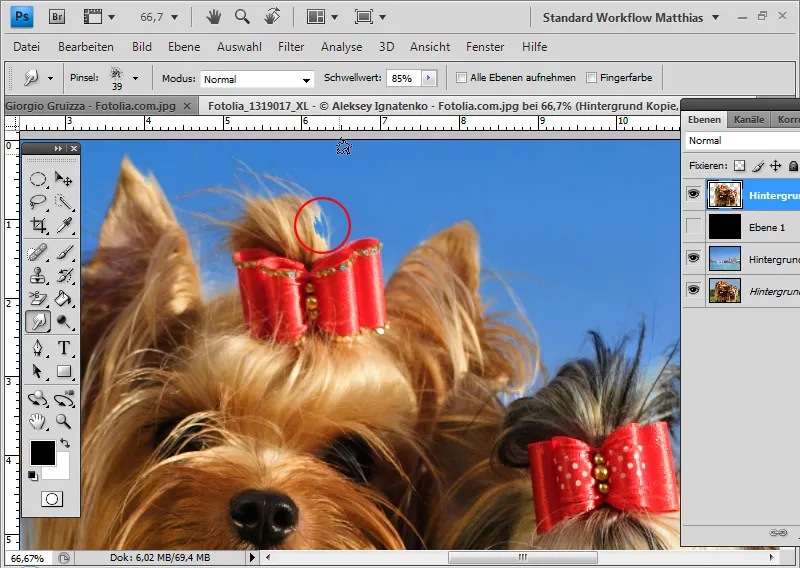
I want to bring the deleted fur structures back into the picture. I can do this very easily with the wipe finger tool. The smudge finger tool works in a similar way to dragging a finger through undried paint in the picture. The starting color for the wiping effect is the point where you start dragging through the image.
I can use the threshold value to set the outline thickness of the brush. In my example, I choose a high threshold value of 85 percent. The tool tip is unstructured. Grunge brushes, for example, are very suitable for hair simulations with the smudge finger tool.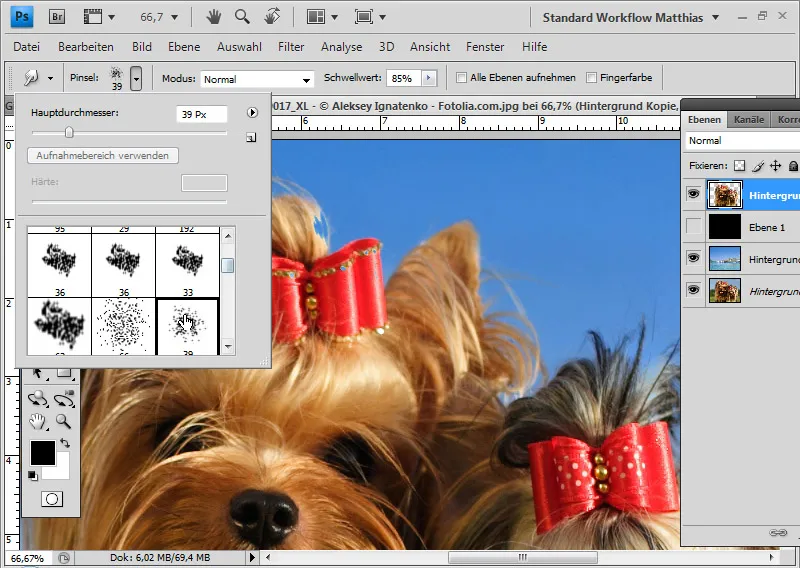
Starting at the edge of the dog, which is still colored, I wipe outwards into the new background. In particular, I redraw the parts of the image that have lost some of their opacity due to the background eraser.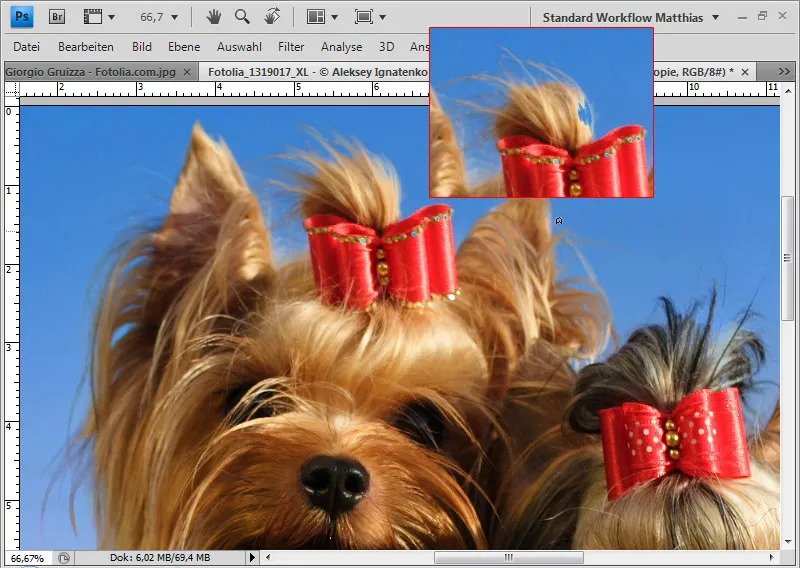
I can also simulate additional fur in certain areas of the image and strengthen the hair structures.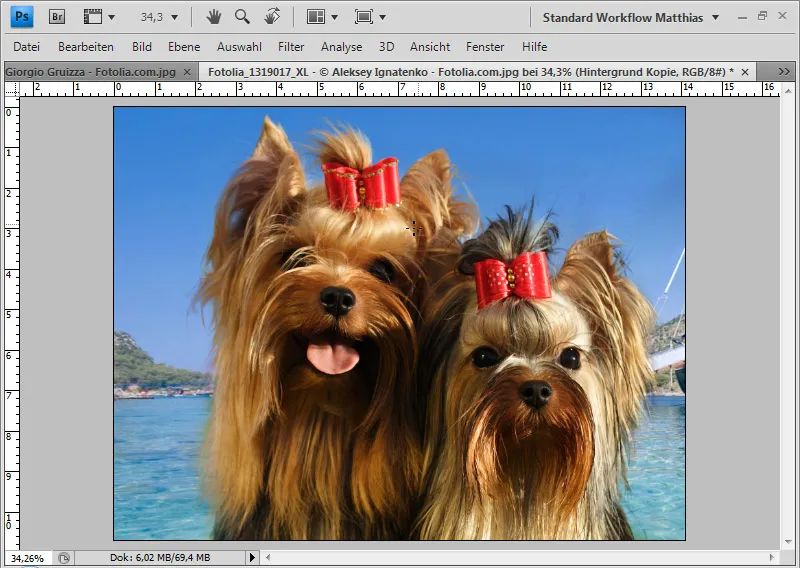
My post-processing with the smudge finger tool is finished.
Brushing hair if the contrast between hair and background is too low
If the hair is very difficult to distinguish from the background in terms of color and contrast and cropping does not produce good results, you can crop the main part of the hair as normal with a selection and simply paint or brush the fine structures yourself.
In this picture, the left side in particular is the problem area when cropping. The hair blends into the background in almost the same color. Proper cropping would take a considerable amount of time.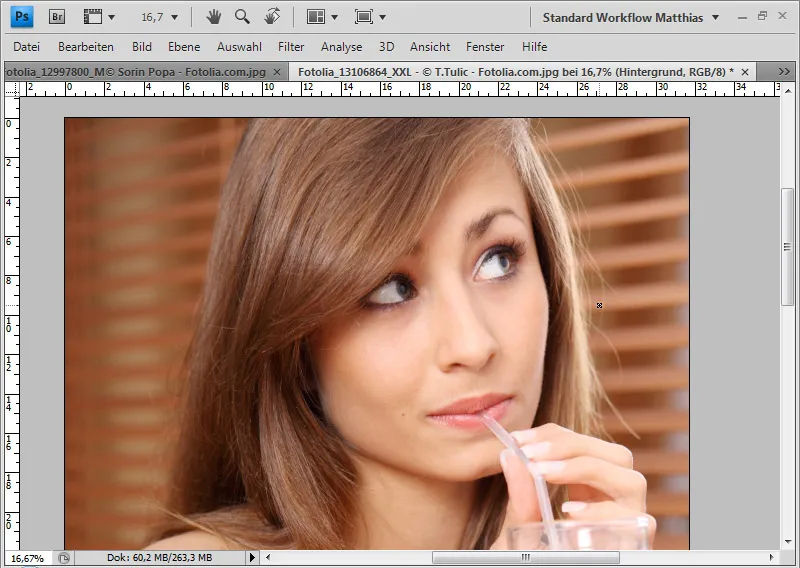
First of all, I crop my subject except for the border areas between the hair and the background and place these over the layer with the new background.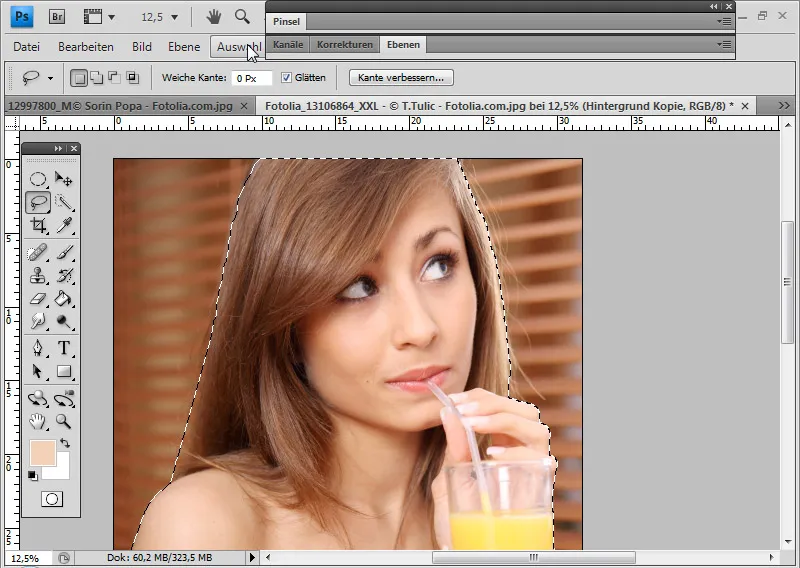
The selection was made for the body area with the quick selection tool and for the head area with the lasso tool. I can then add the selection as a layer mask to the clipping layer.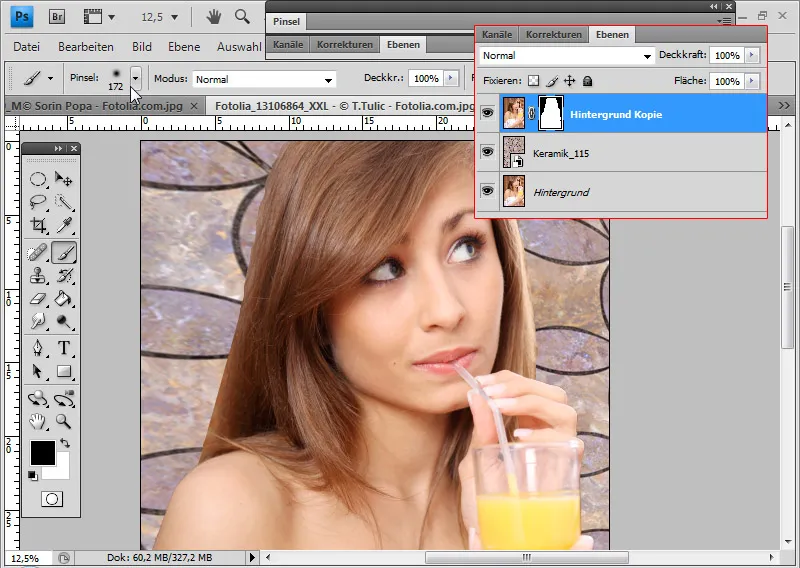
The head now looks unnaturally cropped from the background because the small, structured hair details are missing from the transitions. These are very difficult to crop under these initial conditions. I can therefore either paint the hair directly into the picture or brush it in.
When painting, it makes sense to use a graphics tablet, as the thickness of the hair corresponds to the thickness of the stroke and the transparency. And so I can draw hairs that are about 2-3 px thick.
If you don't have a graphics tablet, you can work just as well with brushes. There are numerous hair brushes on the Internet. A good selection can be downloaded from PSD-Tutorials.de.
Tip: Hair brushes can sometimes be too pre-shaped and not leave enough room for your own brushes. It is therefore a good idea to use plant or spiral brushes that depict blades of grass or curved lines. A good selection of these can be downloaded from PSD-Tutorials.de.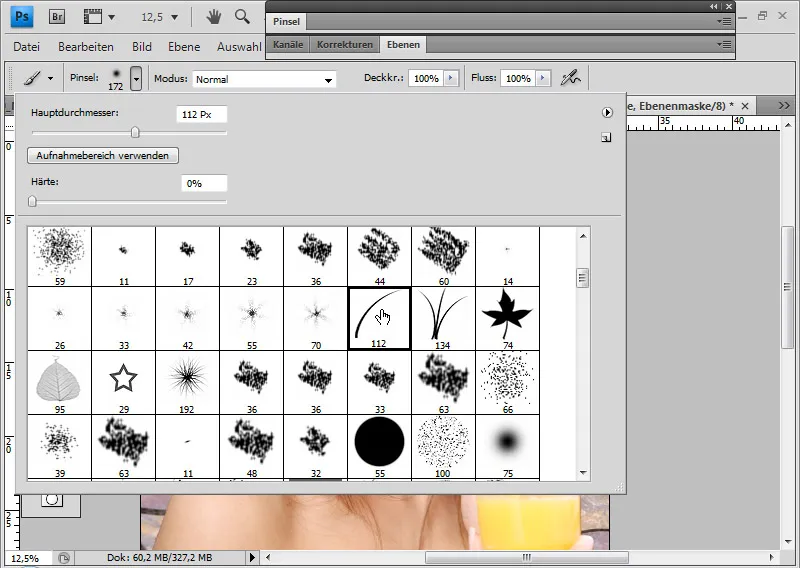
I select a simple grass tool tip and open the brush window (F5). Now I can set exactly how the brush should behave in continuous use.
The hair should move from the top left to the right and away from the head. I therefore change the angle under Brush shape to about -125 degrees.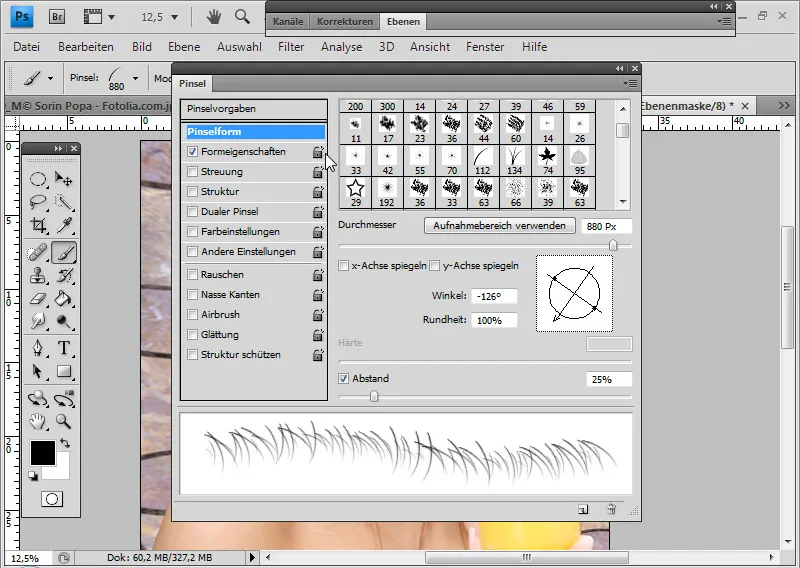
To ensure that these are also set somewhat unevenly, I set an angle jitter of 10 percent under the shape properties.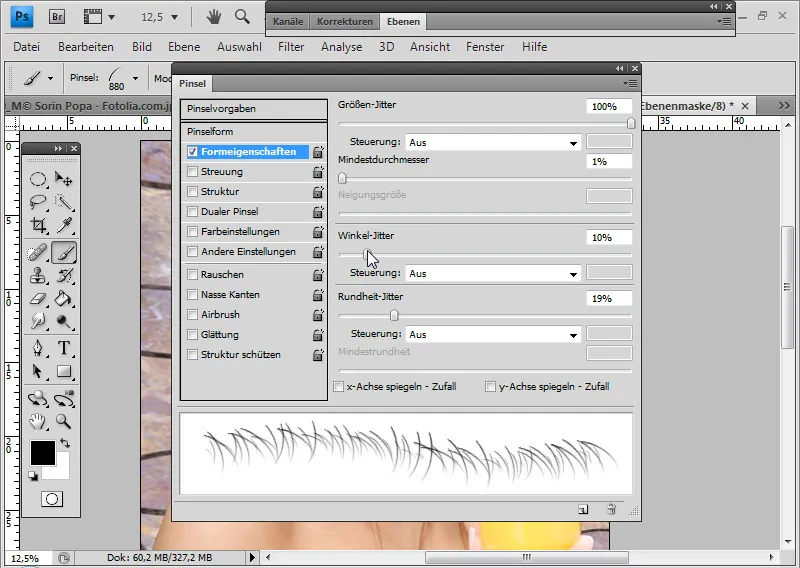
The right-hand side becomes very light and monochrome in the transition to the background. I therefore select this color as the foreground color using the Alt key.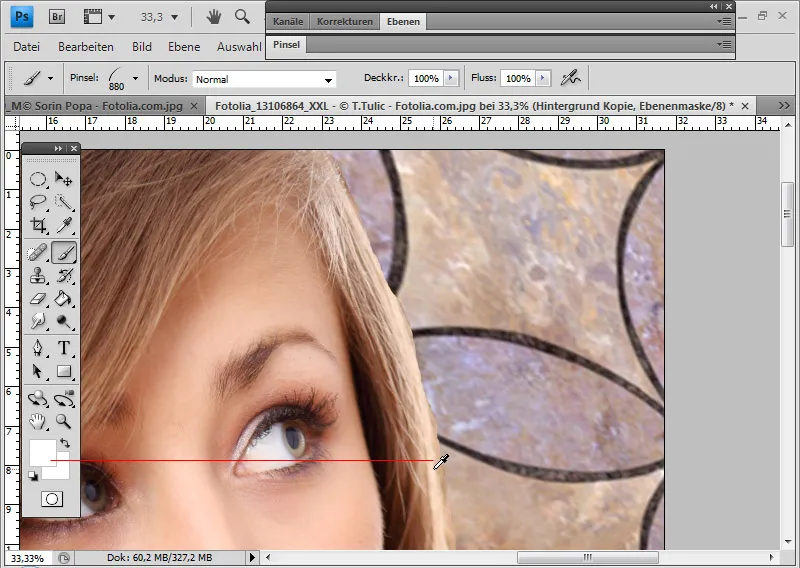
Now I can brush my desired hair from top to bottom in a new layer.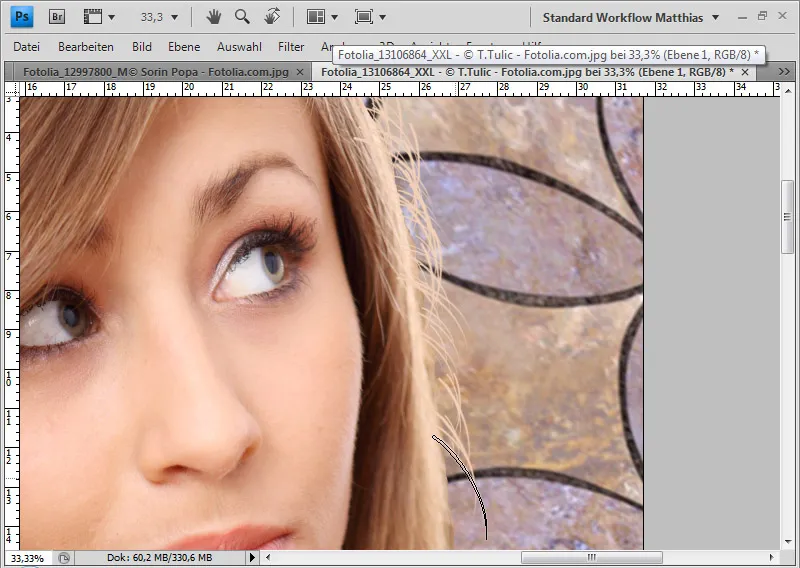
The hair still looks a little unrealistic. I reduce the opacity to around 60 percent and can hide any protruding hair in an added layer mask with black color.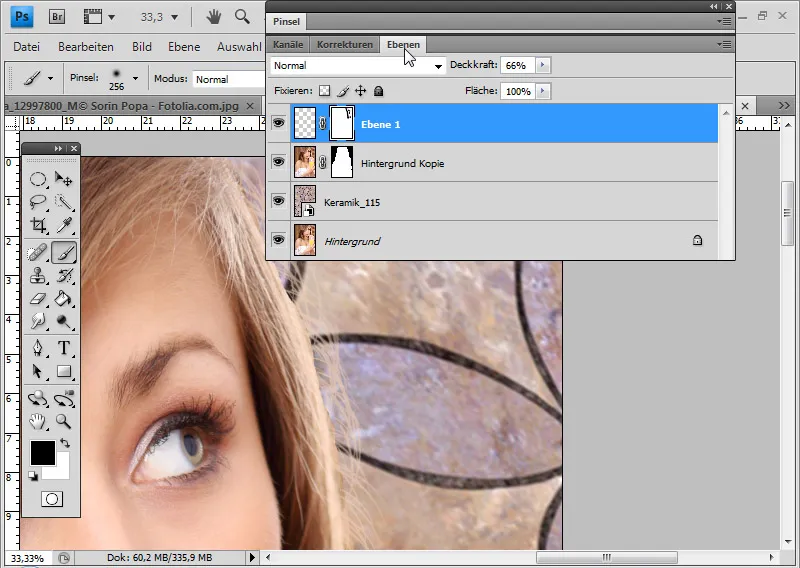
For a more elegant transition, I can select the right-hand area of the original layer, copy it with a soft edge and paste it a little to the right so that the brushed hair and the copied hair complement each other perfectly.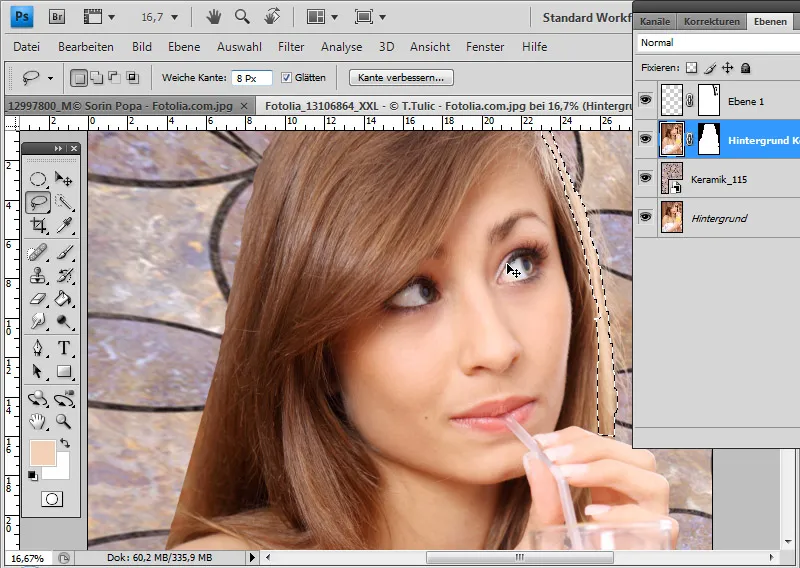
I reduce the opacity of the hair copy to 75 percent. The right side is finished.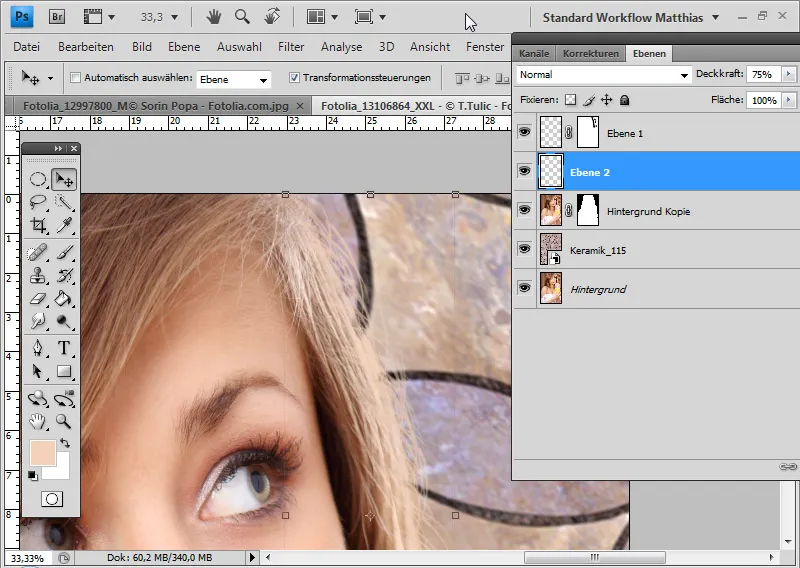
I don't need to paint the left side again as I have already worked out a good solution for the right side.
First, I apply the layer mask and then select all the pixels of the brushed hair by pressing Ctrl and clicking on the layer thumbnail orright-clicking>Select pixels.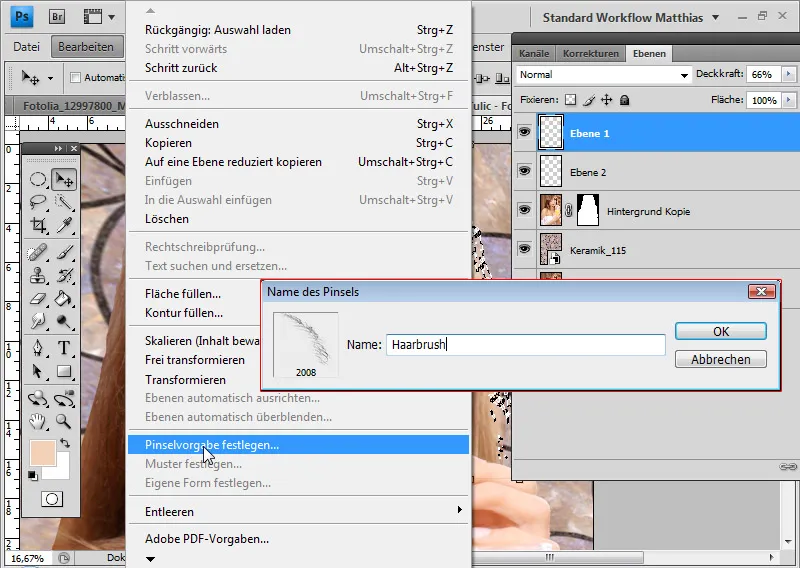
In the Edit menu, I can set my selection as a brush preset. I call the tool tip "Hairbrush".
My brushed hair has now become a tool tip itself and I can use it again and again in such cases.
But instead of brushing with a brush, I use the copy stamp. I use the copy stamp because with the brush the hairs would have a uniform color - depending on the foreground color chosen. This doesn't matter on the right-hand side because everything is very light and the natural color is taken up by the light in the hair. On the left-hand side, however, I can see the hair color with all its nuances and shades. The trick is to simply use the copy stamp to copy the color of the hair at the appropriate height. This gives me an authentic result.
I select the tool tip and adjust it to my requirements for the left-hand side in the brush window (F5). In concrete terms, this means that the tool tip is simply mirrored on the x-axis. The name of the brush window is probably a little misleading because I am only changing the tool tip for my use with the copy stamp. It would be better if this window were called the tool window or tool tip window. Nevertheless, I can still adjust my tool tip for the copy stamp in the brush window.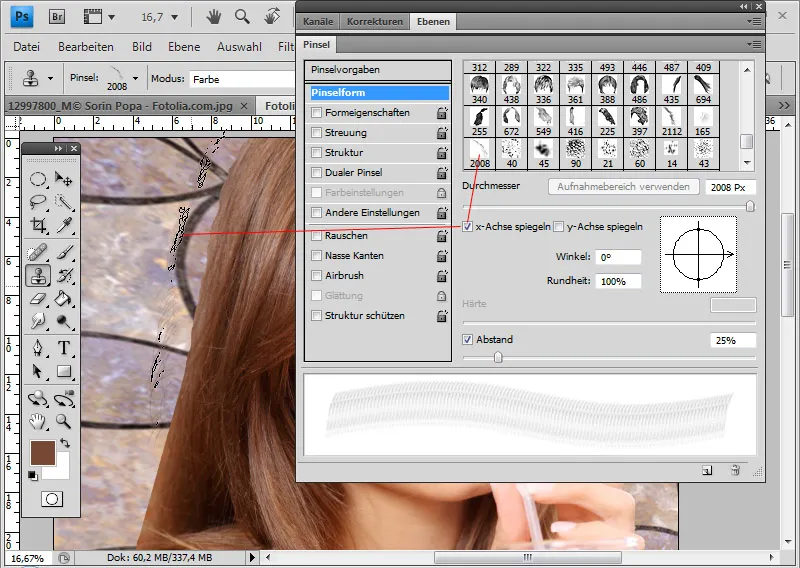
I use Alt to select the color area in the main hair approximately in the middle and now brush one to three times so that the transition is filled with the new hair. The copy stamp has transferred the color information of the correct hair to my new hair, both upwards and downwards.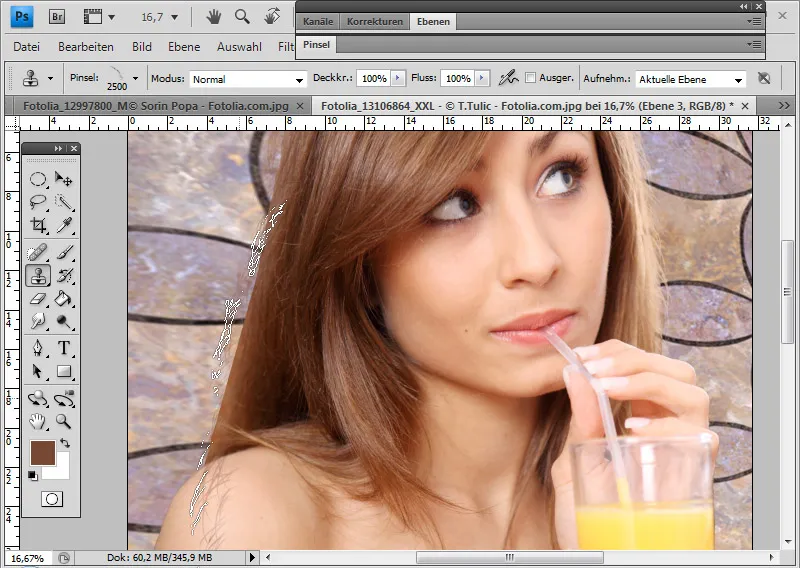
Here, too, I reduce the opacity to about 75 percent and can hide any excess hair details with a layer mask. If the transition is still too sharp, I can also copy an area of the main hair with the lasso and insert it with a soft edge in a separate layer in the transition from main hair to brushed hair.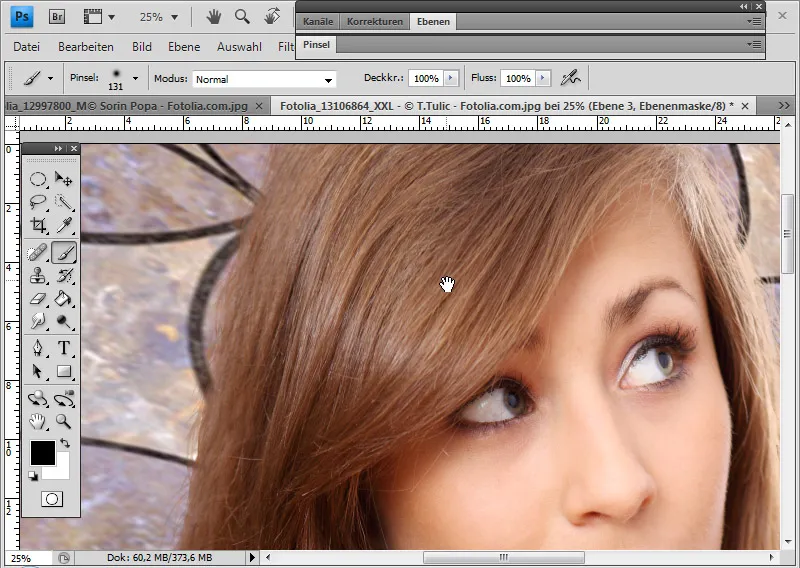
Cut out complex hair structures with a hair simulation selection
I'd like to show you a great trick for selecting complex hair textures, first introduced by Russell Brown from Adobe:
The starting point is hair that is difficult to crop accurately.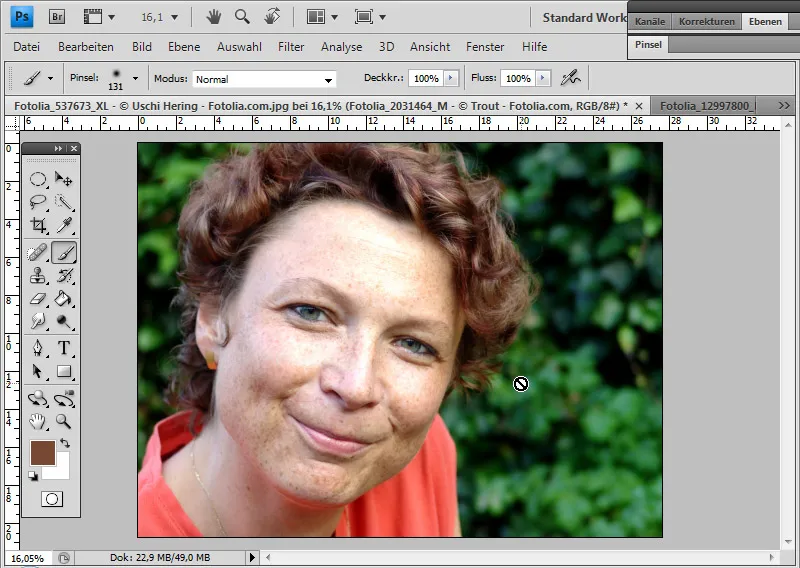
I switch to masking mode. In this mode, I can mask areas of the image that are omitted from a selection after switching to standard mode. This selects all areas in the image that are not covered by the masking.
Normally, masking is done with a soft or hard round brush. And I can also do this for the inner area of the subject.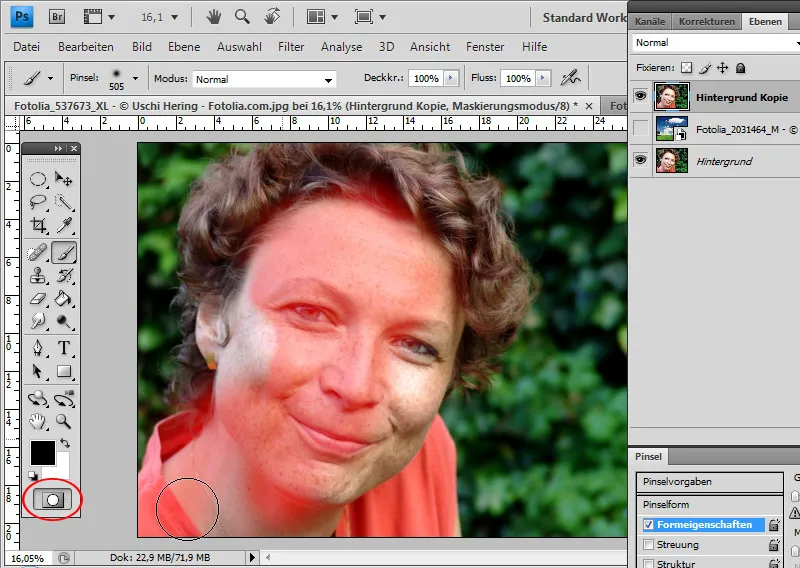
In this trick, instead of a round brush , a tool tip is used in the transition area of the hair to the background, which already looks like hair structures. The transition to the background will be very irregular due to the irregular brush tip. The selection should look like the outline of the hair - a selection that is not possible with the lasso tool, for example.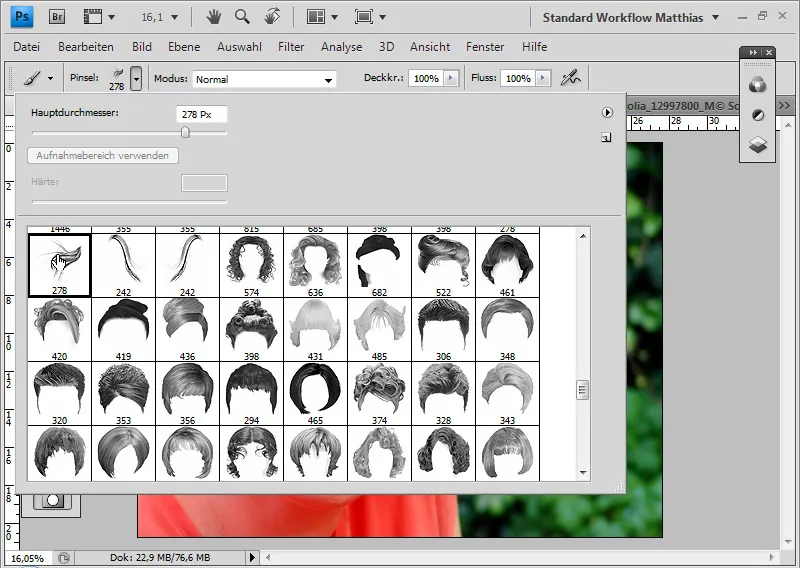
It is important to set the tool tip optimally for this application in the brush window. In the shape properties, I adjust the angle jitter so that the tool tip row in the preview window has a shape similar to the hair outline.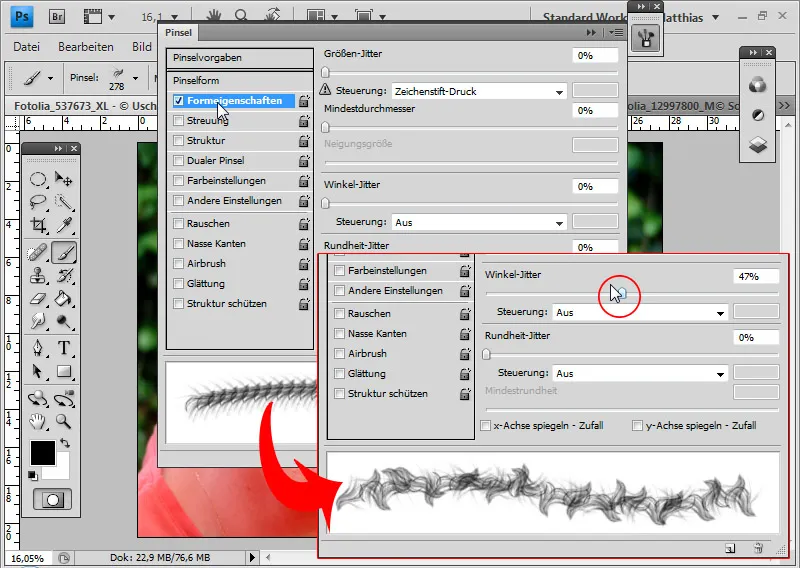
Now I mask the entire outer hair area in masking mode.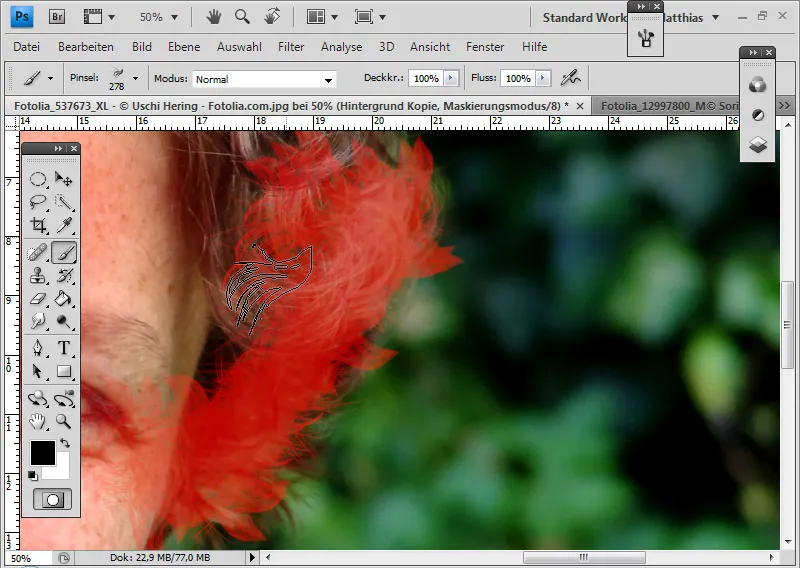
The mask is finished and although it doesn't exactly capture the hair structure at the edge, it simulates it almost identically.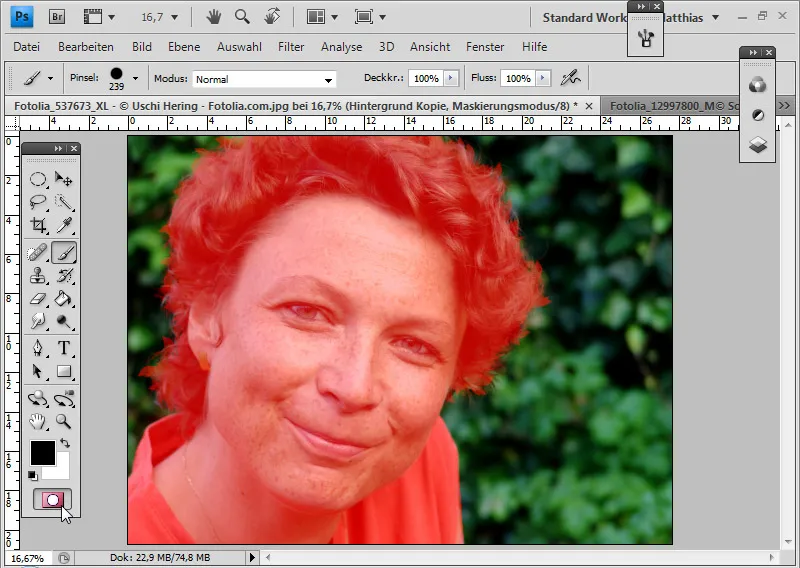
I switch back to standard mode, invert the selection with Ctrl+Shift+I and call up the Enhance Edge dialog with the selection tool activated. I can check whether my selection has become neat and check with a white and black background.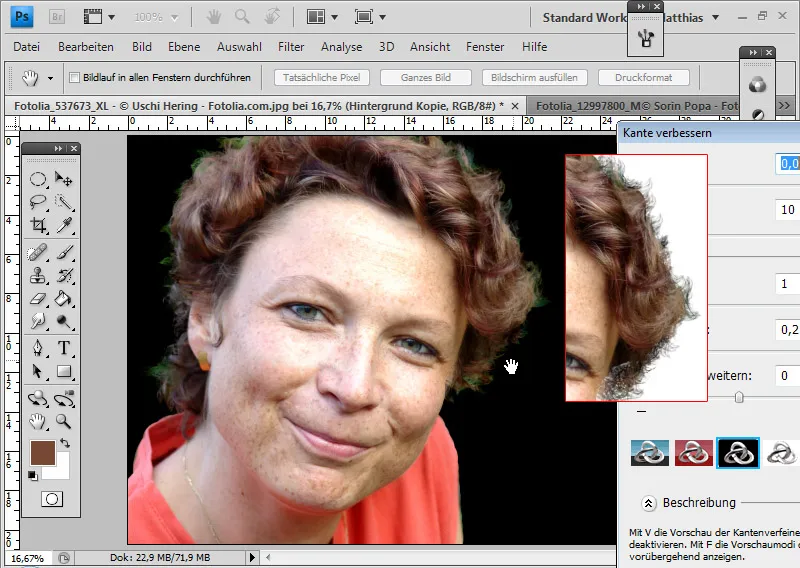
If there are still irregularities in the selection, I switch back to masking mode and correct them.
Once the desired area is fully selected, I can add a layer mask to my layer with the existing inverted selection.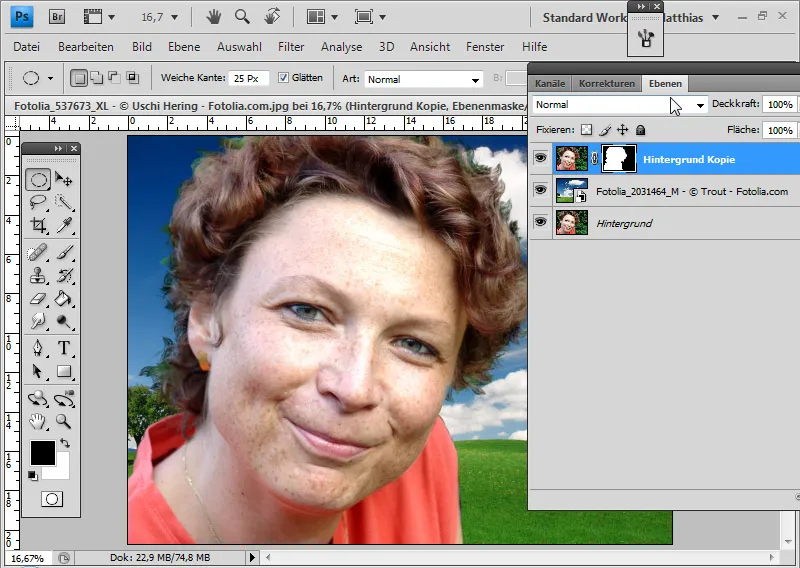
I correct the color fringe by using the copy stamp to select the color in the hair area as the source and activating Color mode. The Color mode ensures that only the color information from my source is applied to the existing pixels. This allows me to easily color the color fringe in the color of the hair.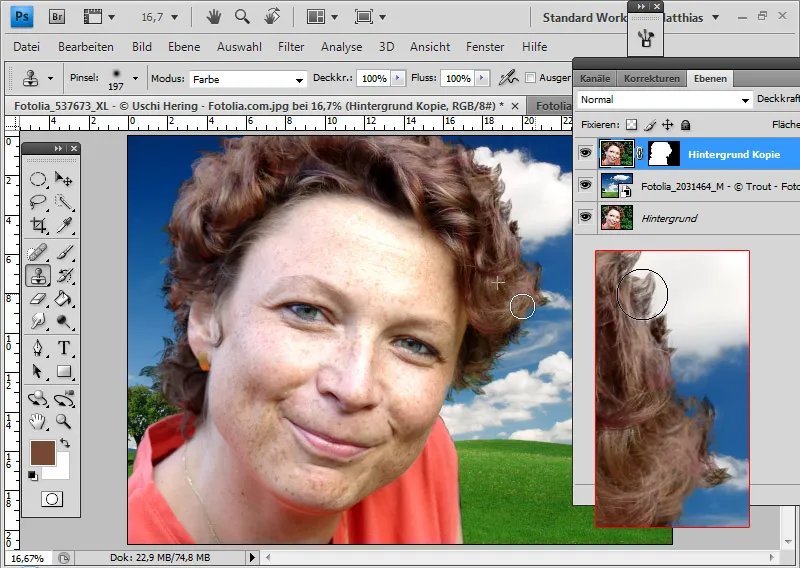
Copying hair areas in the case of opacity, blurring and problem areas
If, after cropping, some hairs are well separated from the background and others are not, it is a good idea to simply copy the clean hairs instead of brushing them. The copy stamp can solve most problem areas well thanks to the change in angle of the tool tip.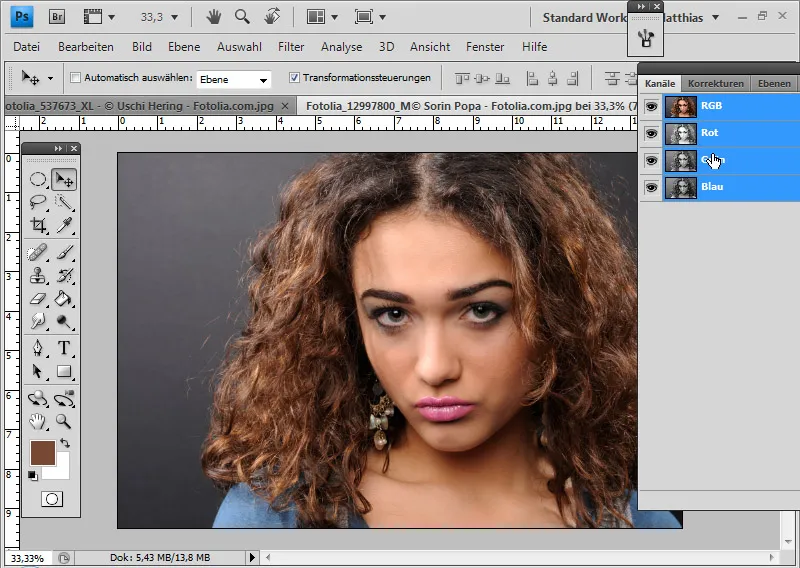
This image cannot be cropped without loss due to the very detailed hair structures and the gray background. The best result can be achieved in comparison to channel selection, color selection and extraction with the background eraser . Nevertheless, the best result is not good enough in this case - it must be reworked.
Tip: To evaluate clipping, it is useful to place a white/black layer under the clipped hair. This makes all the resulting transparencies in the image clearly visible.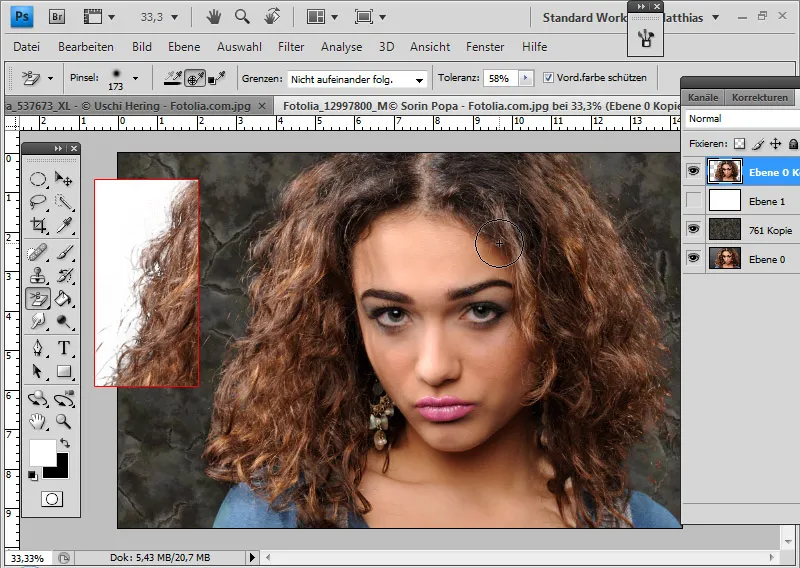
The right-hand edge of the hair has good details that will serve as a copy source.
I open the Copy source window. Now I press the Alt and left mouse buttons in the source area. It is important to uncheck the Aligned checkbox in the menu bar. This keeps the source area fixed and prevents it from moving.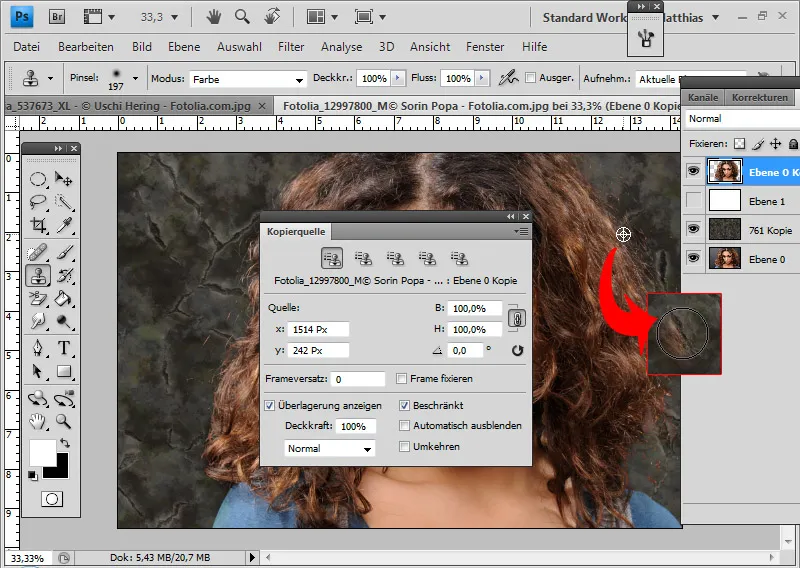
I introduced this technique in the section on extracting hair. As already described, I can rotate the tool tip in the copy source. If I have clicked in the number field, I can also use the mouse wheel to further determine the inclination. In normal mode, this is in 0.1 increments. If I hold down the Shift key, I can determine the inclination in 1.0 steps. To adjust the right-hand sharp area for the left-hand one, I select an angle of 220 degrees.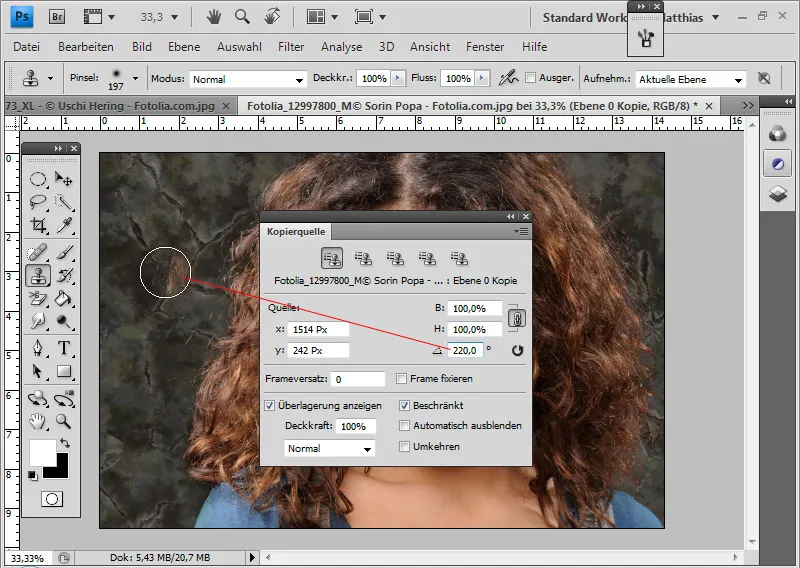
It can be useful to create several source areas that differ slightly from each other in terms of color and structure. These only need to be rotated accordingly and can then be stored in the five copy source presets in the Copy source window.
I can then use the individual rotated source presets to stamp my left problematic side with the sharp copies of the left side. I also stamp in hair copies on the lower right hairline.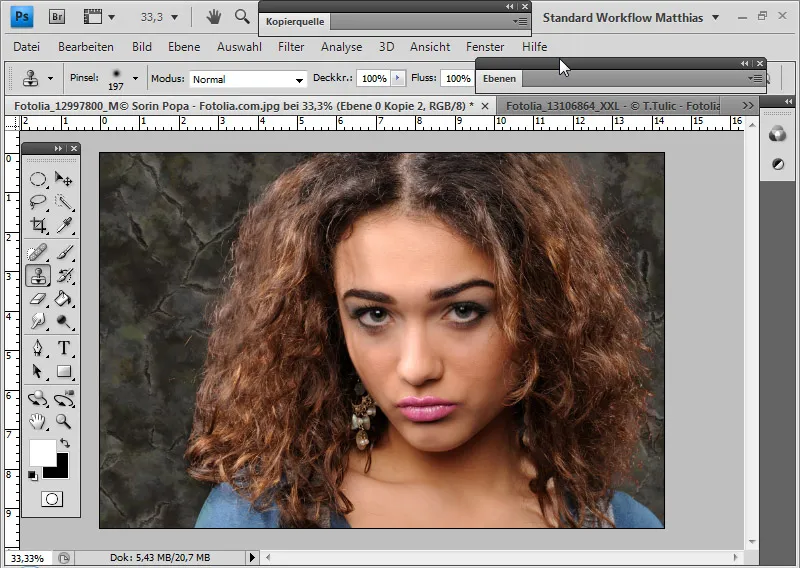
Accentuating the hairline with filling methods
It is always a good idea to duplicate the finished clipped layer and, if necessary, apply a different blending mode to the lower of the two. This makes sense because the hair is not always 100 percent blended in. Due to the fine hair structures and the clipping, transparency may have appeared in the image. A duplicate of the clipped layer can easily enhance the expression at the edge of the hair.
In this example, I have selected Multiply negative for the lower layer. This gives the edge of the hair better contrast.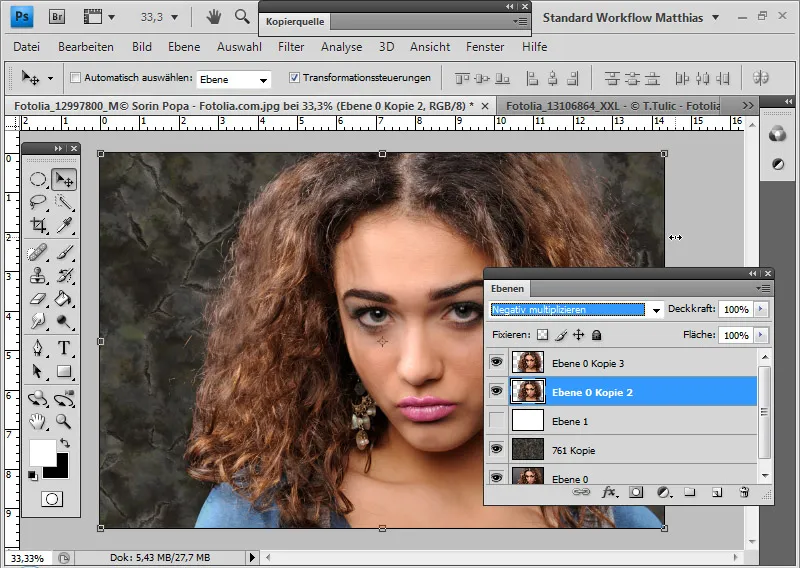
I can also use the Multiply blending mode for the duplicated hair layer on the left-hand side in the hair brushing example. If the effect becomes too strong, I simply reduce the opacity a little.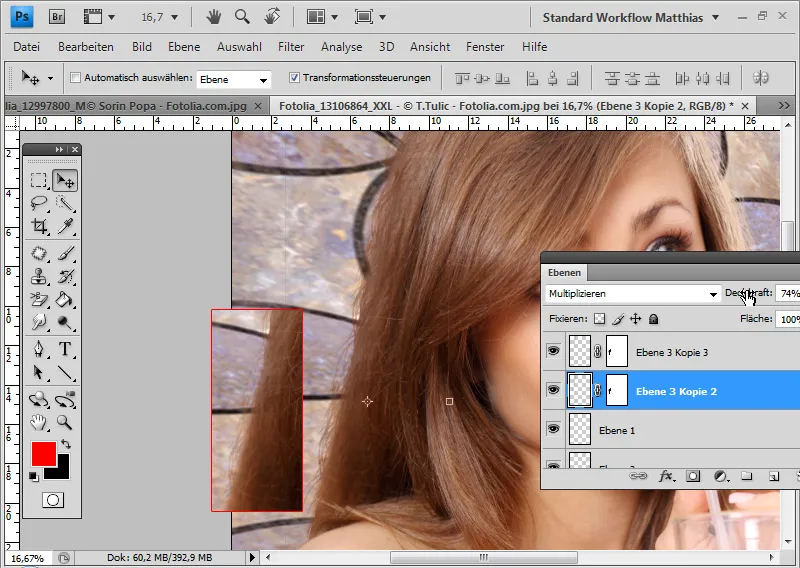
In the image with the hair simulation selection, the duplicated layer in Normal layer mode is already sufficient.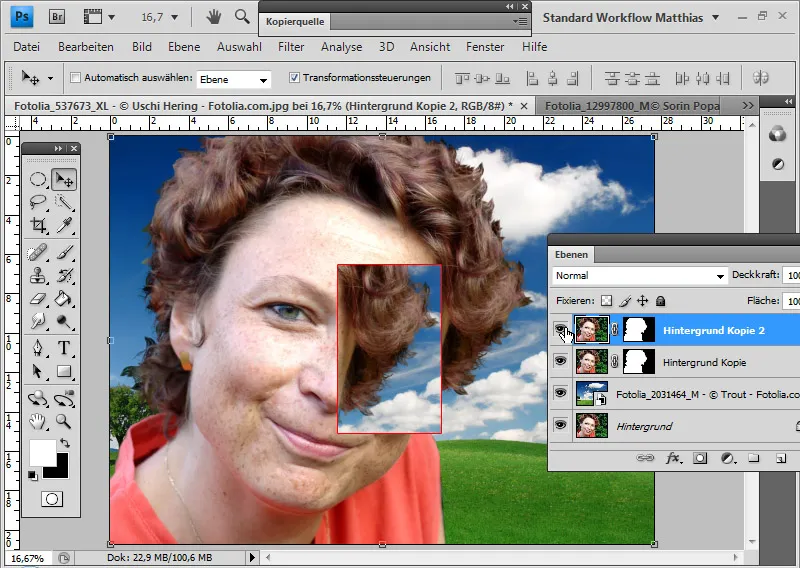
Similarly, a duplicate of the layer in Normal mode is enough to further accentuate the hair in the dog picture.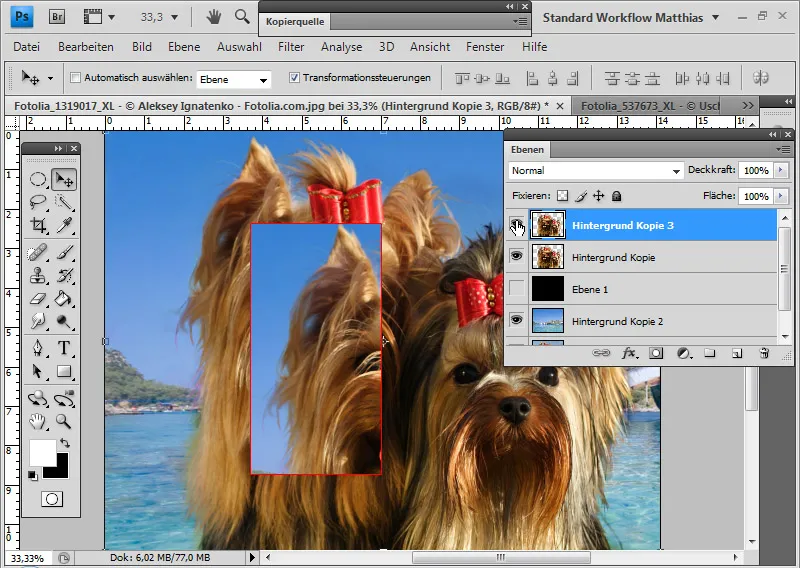
Tip: In the video tutorial for this section, the effects become more visible by hiding and showing the duplicated layers.
Color fringes
Color or light fringes occur with most clipping techniques with selections. Hair can rarely be cropped in such detail that the color information of the adjacent background is not also transferred.
One way to avoid color fringing from the outset is to use the background eraser for clipping techniques. Here, all pixels that do not correspond approximately to the protected hair color - the previously defined foreground color - are deleted. This also deletes the color information of the background.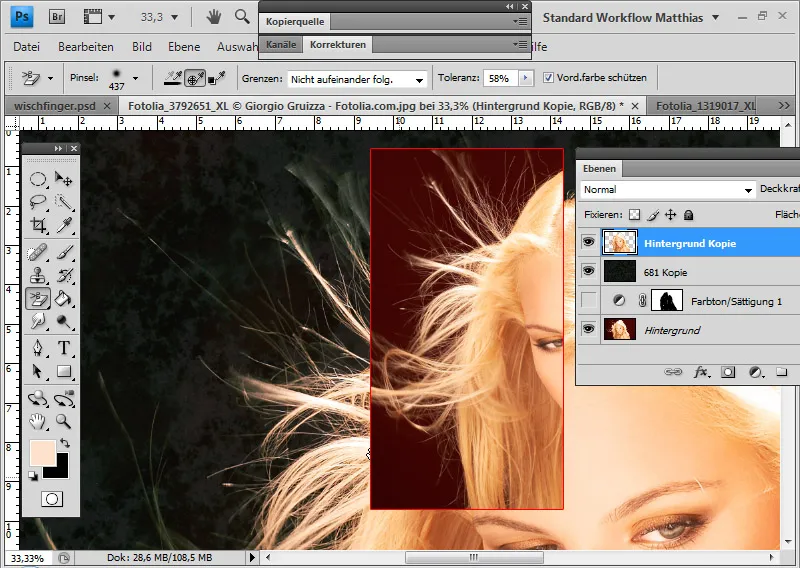
Another way to prevent color fringing is with layer mode offsets. Here, the background tones are offset against the tonal values of the new background. Ideally, only the new background remains.
In this example, I select the Lighter color layer mode. I also darken the red background with a Hue/Saturation adjustment layer so that the new background comes through fully. In the layer mask of the adjustment layer, I limit the area to the fine hair contours in the image.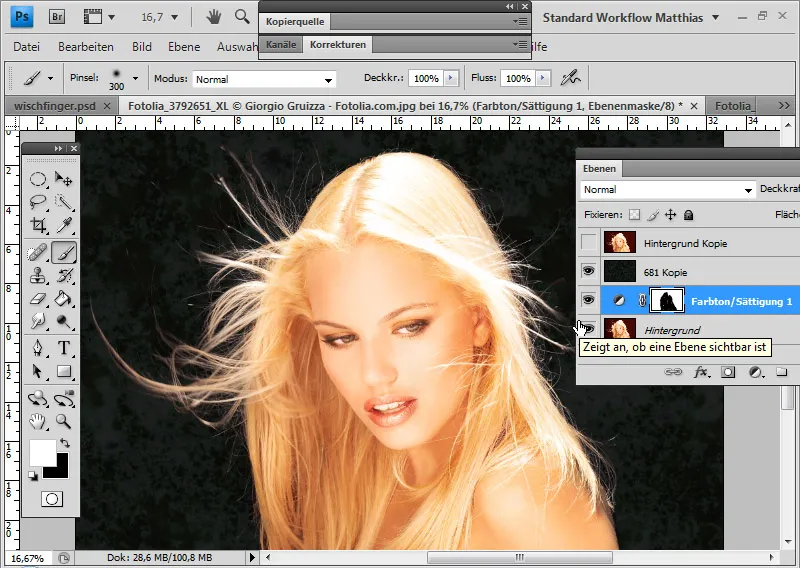
As clipping using layer mode offsets or the background eraser does not always work perfectly, I will show you some ways of correcting color fringing if the subject has been clipped in other ways. Unfortunately, color fringes often remain when using selection techniques for cropping.
This is the result of cropping using a color range selection. A selection from a channel would produce an almost identical result.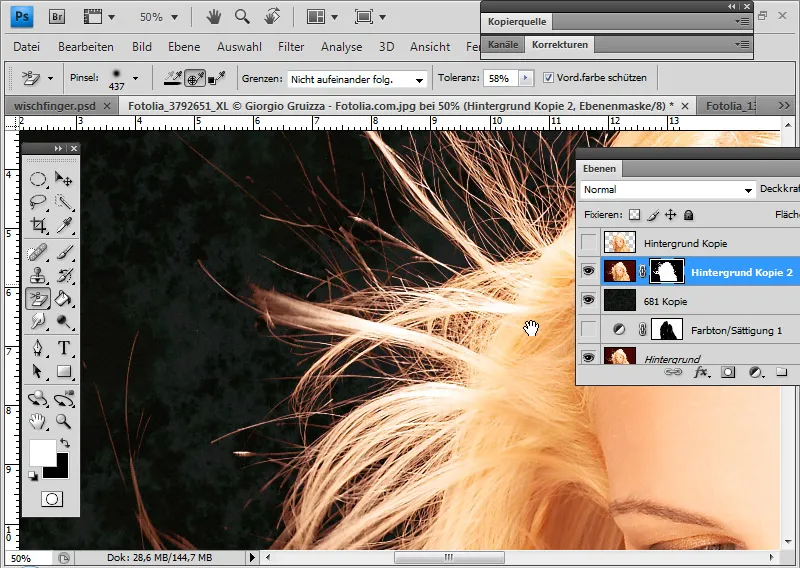
Using this example, I would like to demonstrate several methods for correcting color fringes, some of which have been addressed in the previous parts.
Correcting color fringing with a copy stamp/brush in Color mode:
I correct the color fringing by using the copy stamp/brush to select the color in the hair area as the source/foreground color and activating Color mode. The Color mode ensures that only the color information of my source/foreground color is applied to the existing pixels.
In the transparency layer, I paint directly into the areas of the color fringe with the copy stamp and thus copy the color information of the remaining hair onto the fringe.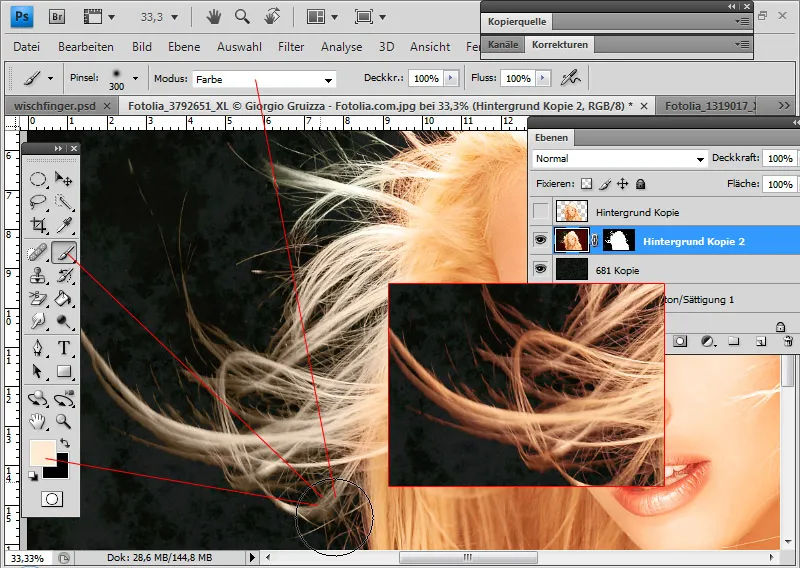
However, I paint directly into the transparency layer and thus change the pixels. If the layer mask is deactivated, the intervention in the pixels can be seen.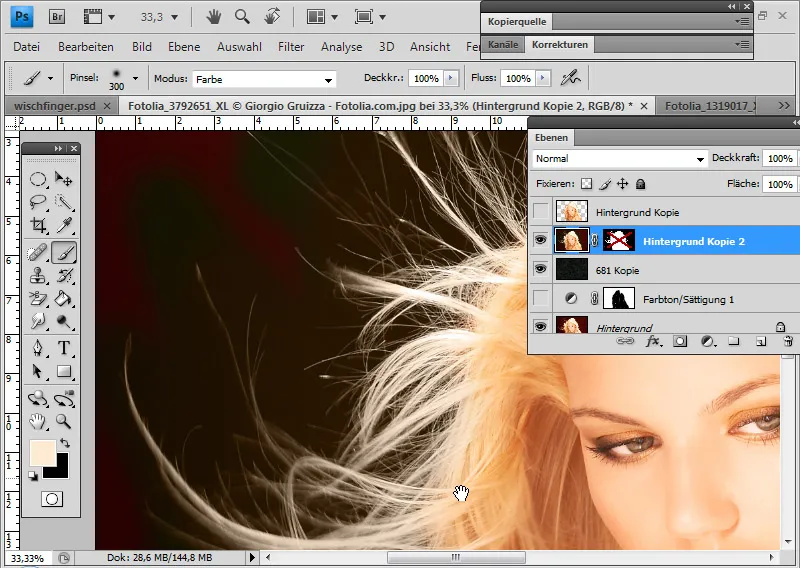
Remove color fringing with the Hue/Saturation adjustment layer:
I add the Hue/Saturation adjustment layer as a clipping mask to the layer with the cropped hair.
I target the color tones of the background - the red tones - and color them into the color tone of the hair by moving the slider for the color tone slightly to the right. I also reduce the saturation and increase the brightness so that the outer hair is the same shade as the original color.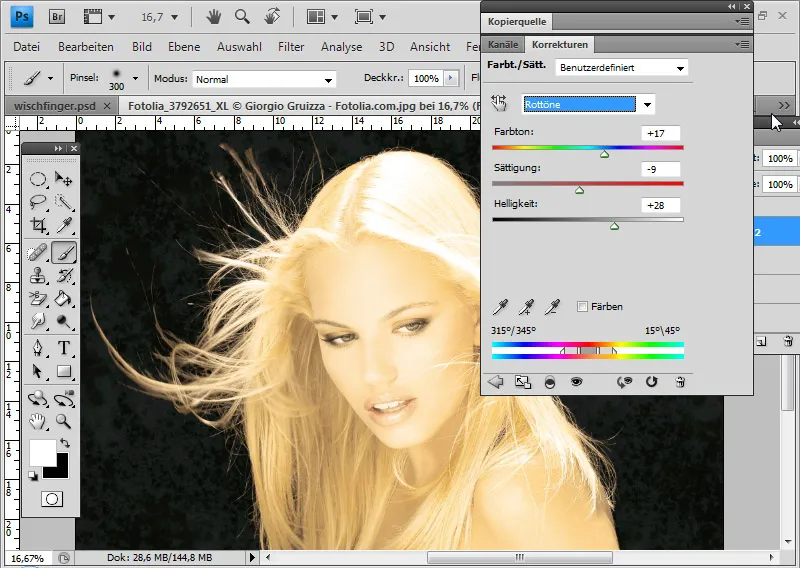
I use a layer mask to precisely adjust the effect of the adjustment layer so that the area of the original color fringe remains in the colors of the hair at the end. To do this, I paint in all the areas without color fringing with black paint.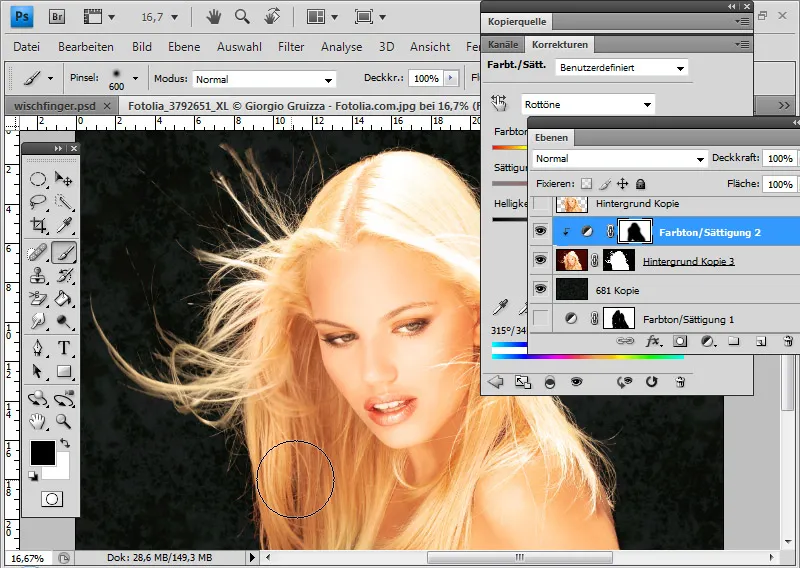
Correct color fringing with the solid color fill layer:
In Color mode, I can add a solid color fill layer as a clipping mask to the layer with the clipped hair.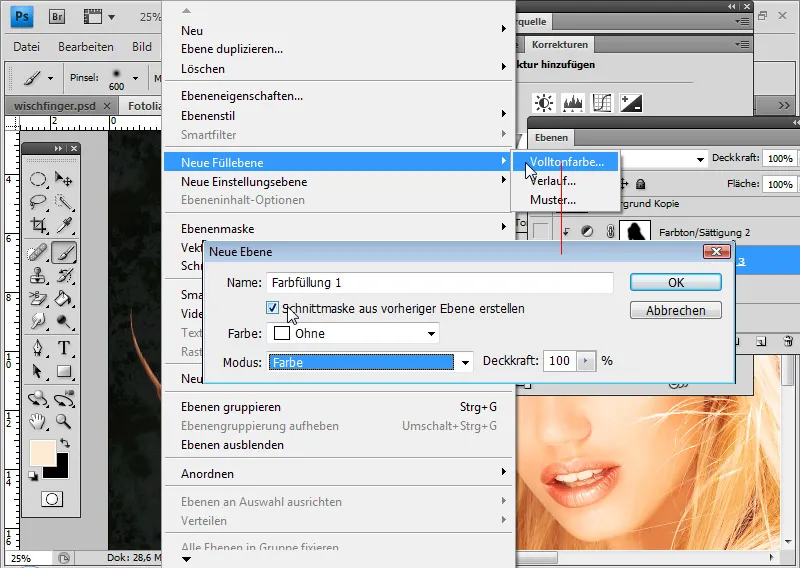
The color tone of the fill layer is determined according to the hair tone. As a result, the color fringe is offset against the color of the fill layer and takes on the tone of the remaining hair. In the color selector that opens, I select a color to offset against the existing colors.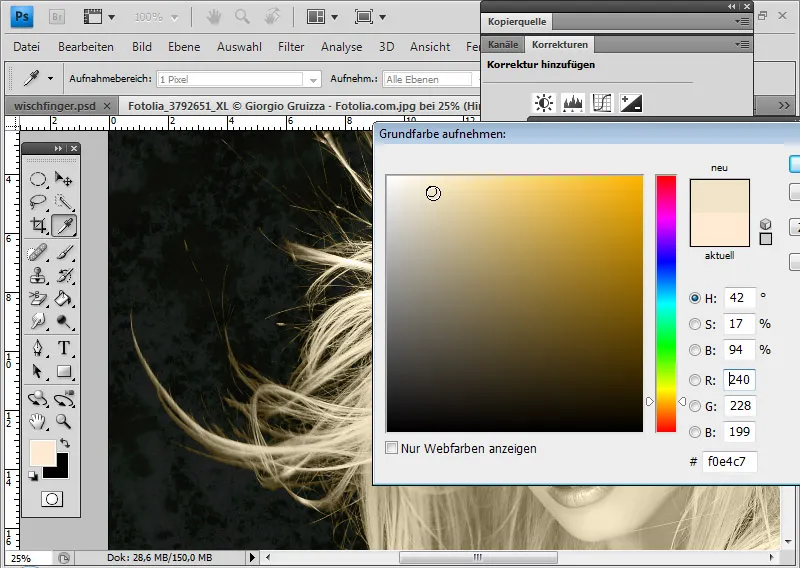
Using a layer mask, I again limit the effect of the fill layer for the area of the hair in which the fringe appears. As the layer mask from the hidden Hue/Saturation adjustment layer is already matched exactly to this area, I use Alt and drag & drop to replace the layer mask of the fill layer with that of the adjustment layer.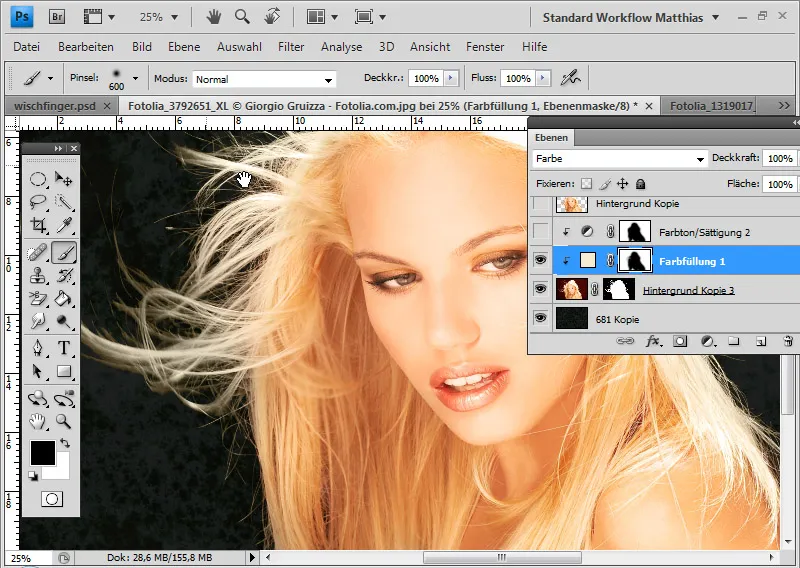
Remove color fringing with the photo filter adjustment layer:
I add the Photo filter adjustment layer as a clipping mask to the layer with the cropped hair.
Instead of a filter preset, I select a filter color for offsetting. It makes sense to increase the density before selecting the filter color. In this example, I select a value of around 85 percent. I then click on the color field and select a dark color for offsetting.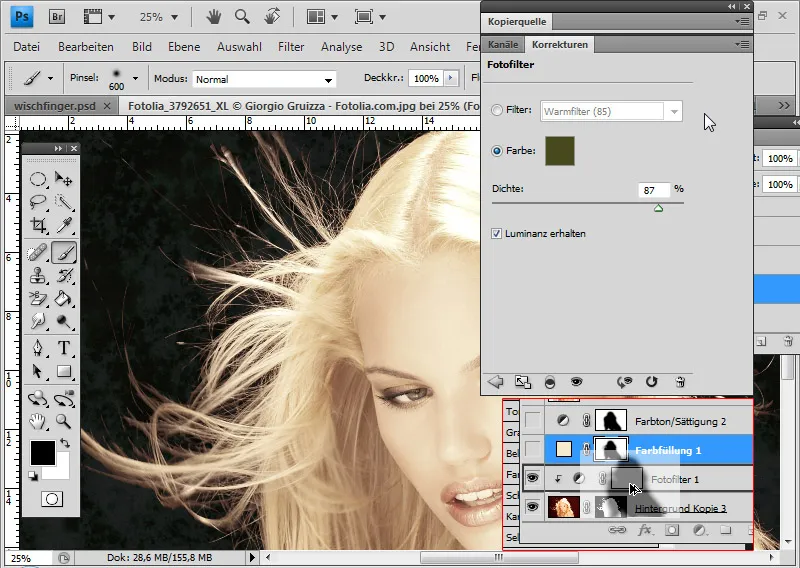
Again, I can use the existing layer mask of the Hue/Saturation adjustment layer to limit the Photo filter adjustment layer.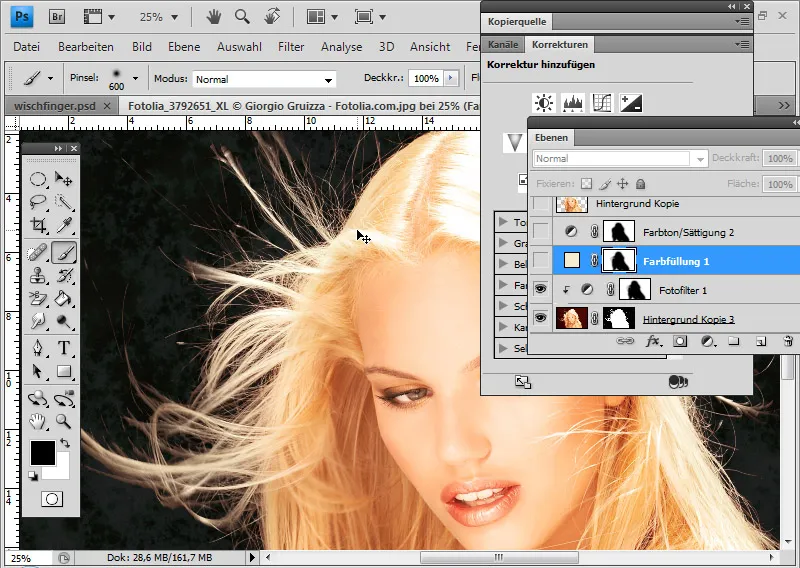
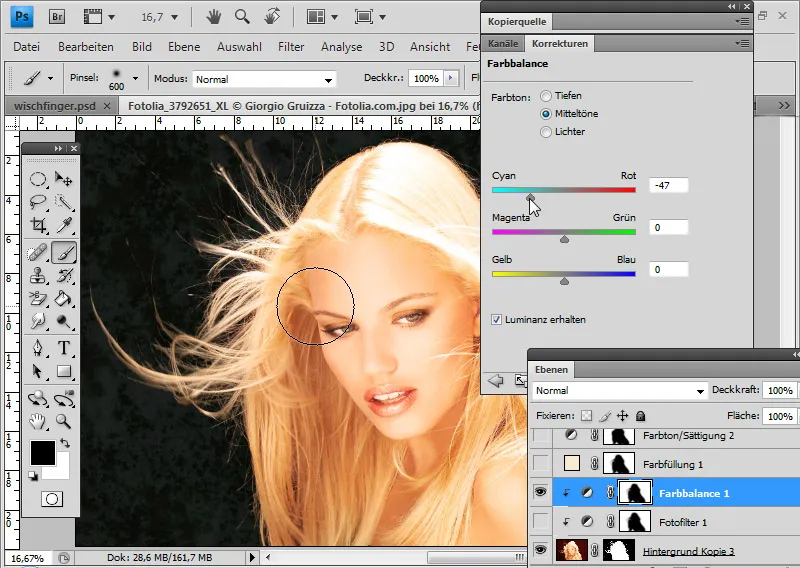
Remove color fringing with the Color Balance adjustment layer:
I add a Color Balance adjustment layer as a clipping mask to the layer with the cropped hair.
I move the red slider to around -45 in the cyan color range. As if by magic, the red color areas in the image disappear. Using a layer mask, I can define the exact area of the color fringe where the adjustment layer should take effect.