Plastic text is a versatile effect that gives your design a unique and modern touch. With Photoshop, you can create different variations of plastic text – from glossy and realistic to matte and abstract. In this tutorial, I'll show you step by step how to create five different plastic text effects. Whether you're working on logos, banners, or digital artworks – these techniques will make your texts shine and produce impressive results.
Variant 1 – Plastic text using only fill options
Step 1:
I create a document with a size of 800x600 pixels, where the size is actually unimportant. Next, I create text with very large letters and a bold font style.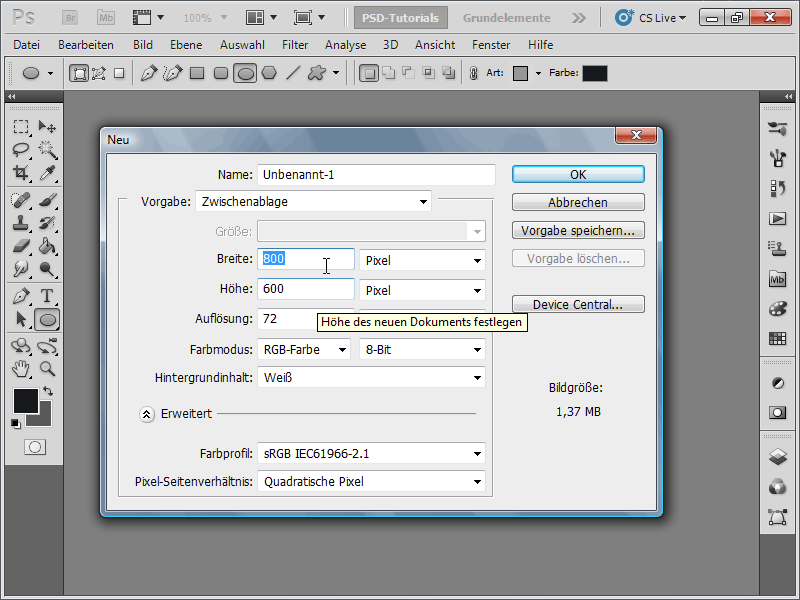
Step 2:
Now I open my Layers panel with F7 and apply the following fill options to the text (right-click->Fill options):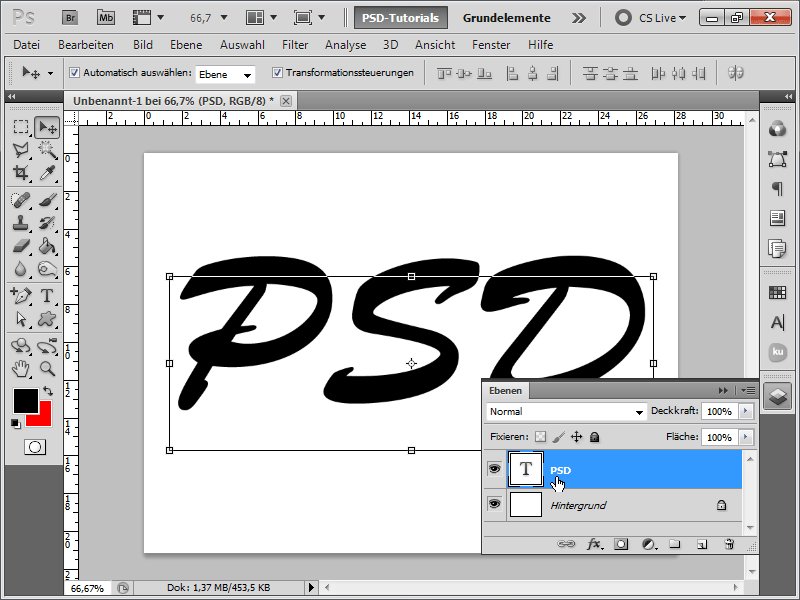
Step 3:
• For Drop Shadow, I set the blending mode to Multiply with 75% opacity and the color to black. Distance 9 pixels, Spread 0%, Size 18 pixels. Tip: I can also move the drop shadow directly on the workspace by dragging and dropping.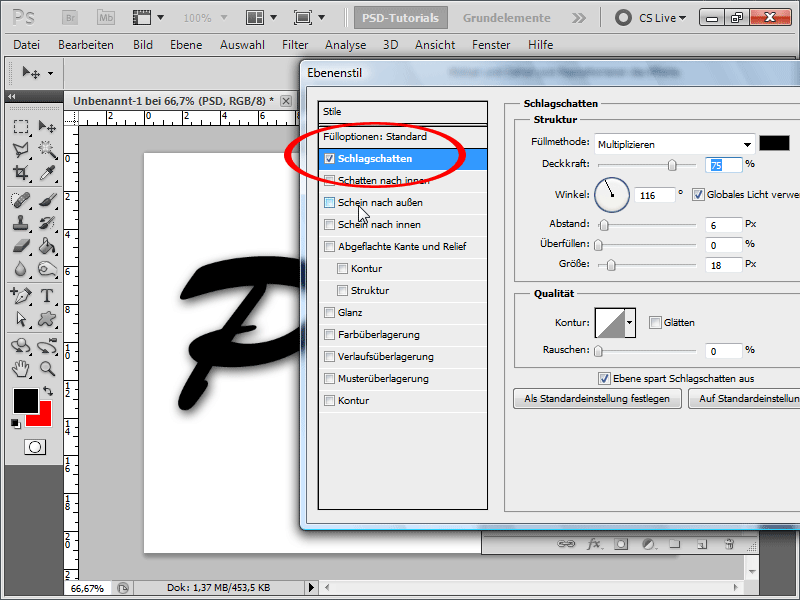
Step 4:
• For Inner Glow, I set it as follows: blending mode to Multiply, opacity 40%, color black, technique "Softer", size 3 pixels.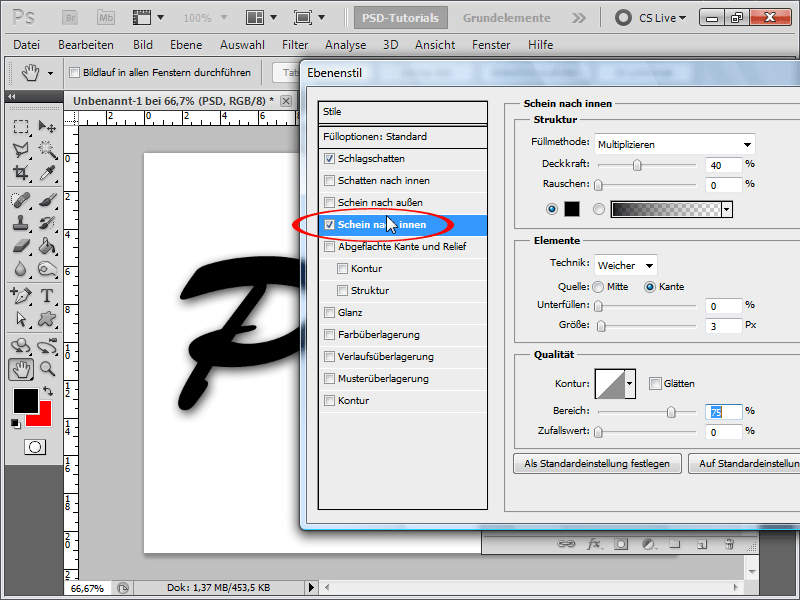
Step 5:
• For Bevel and Emboss, the key is to change the technique to Chisel Hard and depth to about 600%. Set the size to around 30px and soften to about 10 pixels. Keep other values as shown in the image.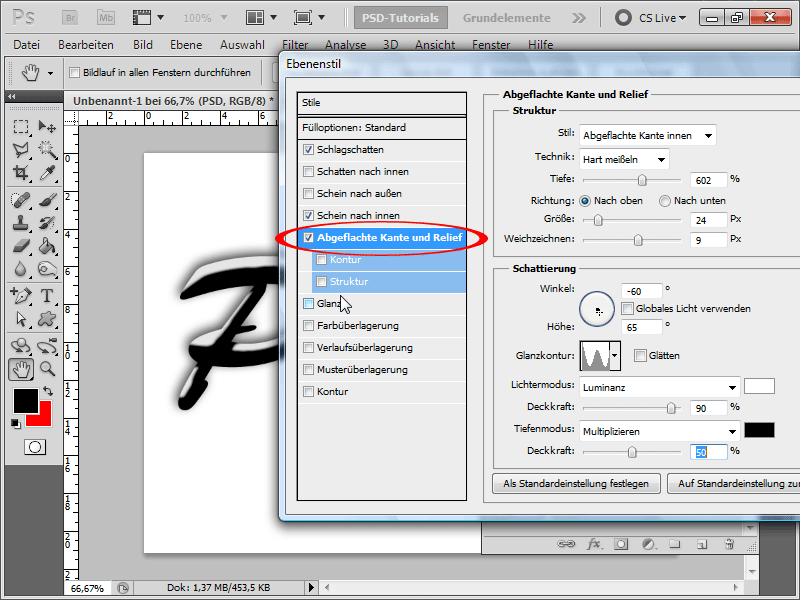
Step 6:
• Activate Contour right below Bevel and Emboss. Tip: By slightly adjusting the curve (simply click on the contour icon, then touch and move the curve), I can perfect the gloss effect.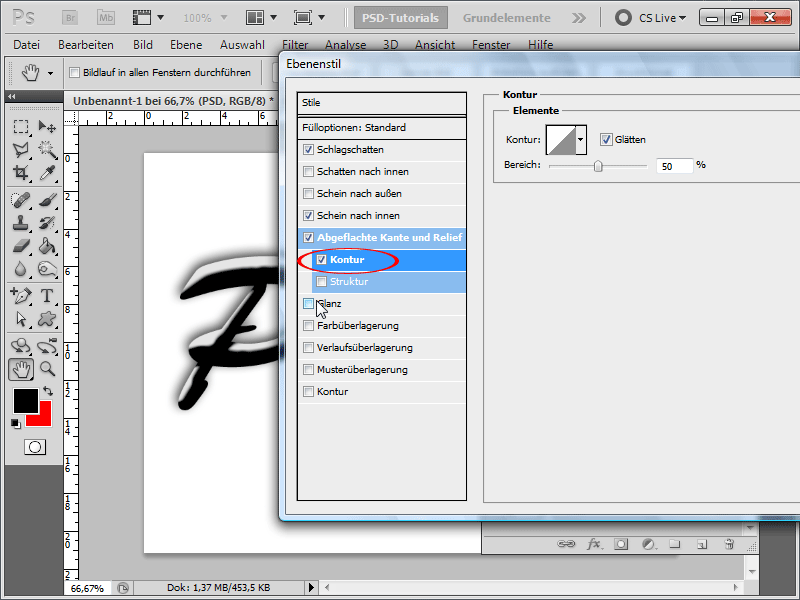
Step 7:
• I also activate Satin, with the following settings: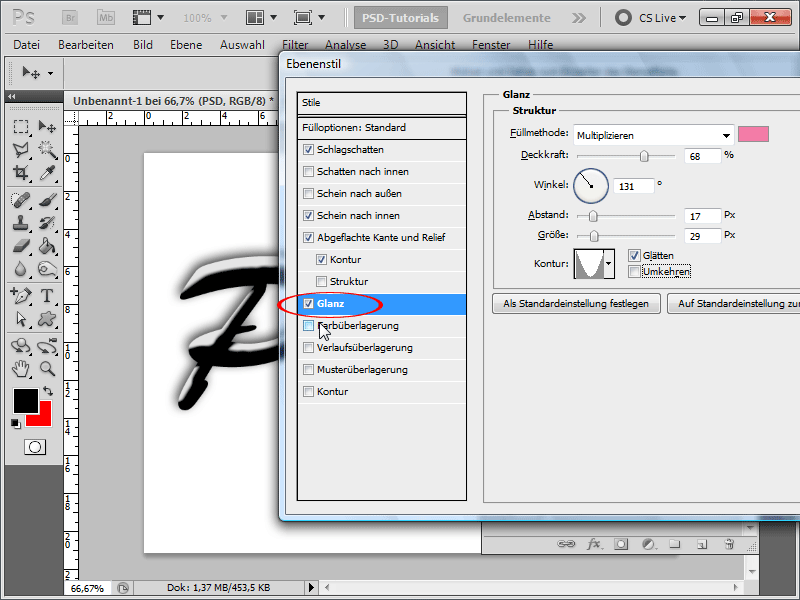
Step 8:
To perfectly adjust the color of the text, I finally enable Color Overlay.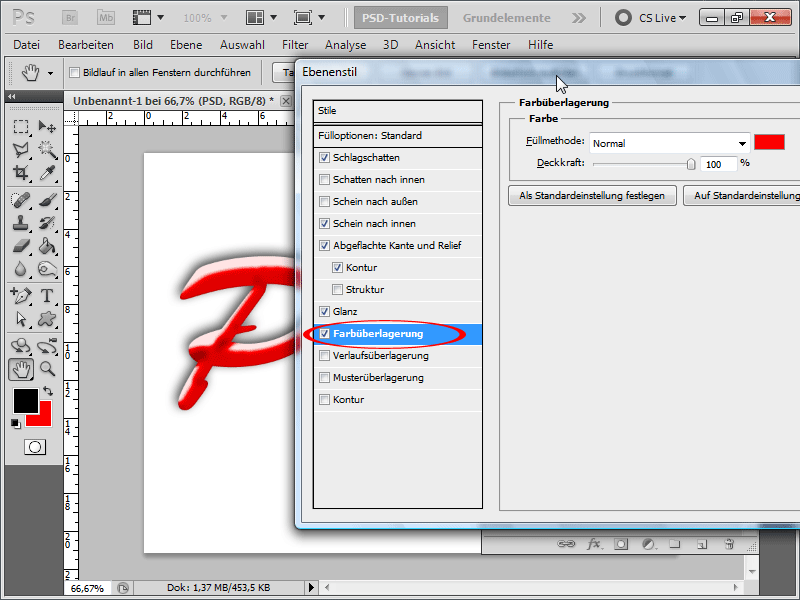
Step 9:
Tip: I can save the style right away and apply it to all other objects such as a circle. If the effect doesn't look perfect there, I recommend scaling the layer effect accordingly (right-click on the arrow in the Fill options and then scale layer effects).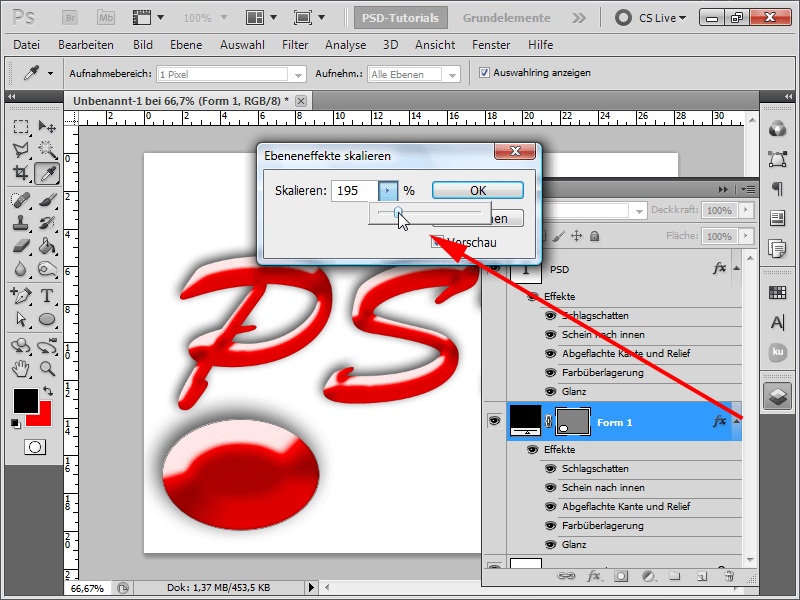
And here is the end result: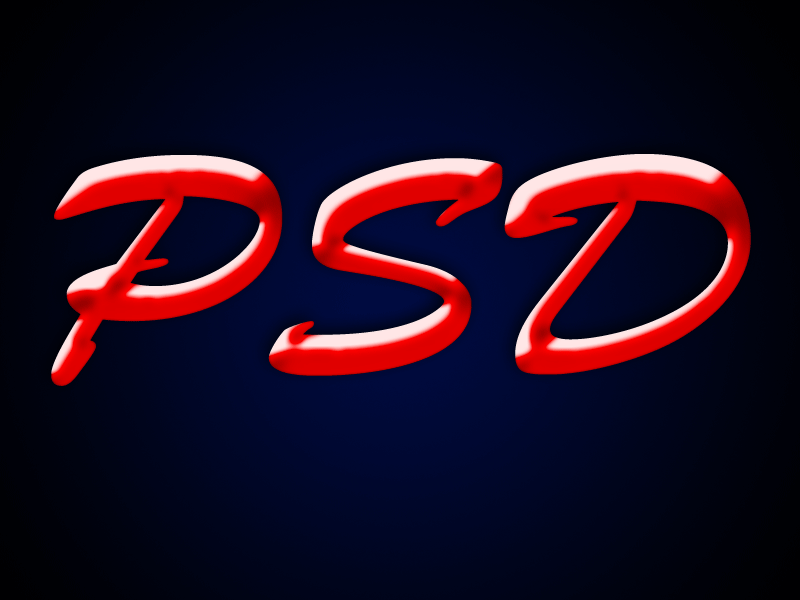
Variant 2 – Plastic text using filters and fill options
Step 1:
First, I create a text, duplicate it, and press Ctrl on the text layer in the Layers panel. This creates a selection, which I reduce by 10 pixels.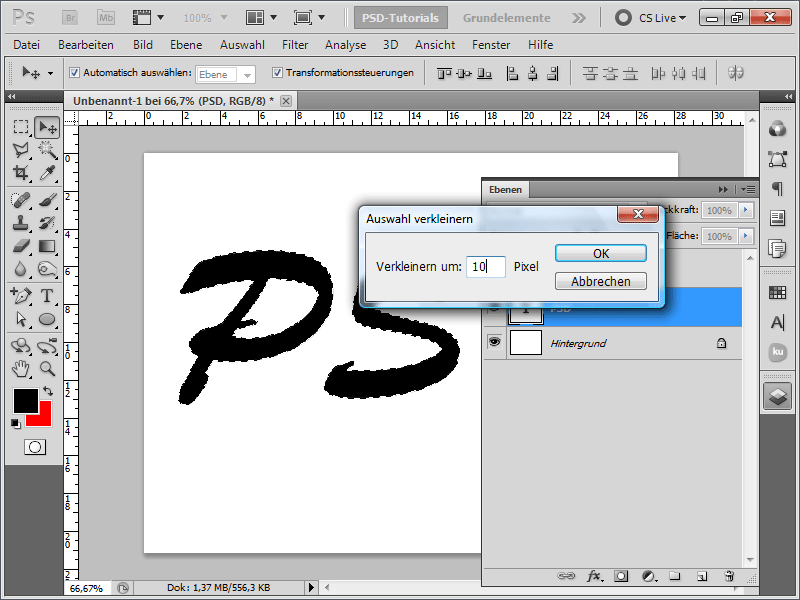
Step 2:
Next, I will soften the selection by about 5 pixels.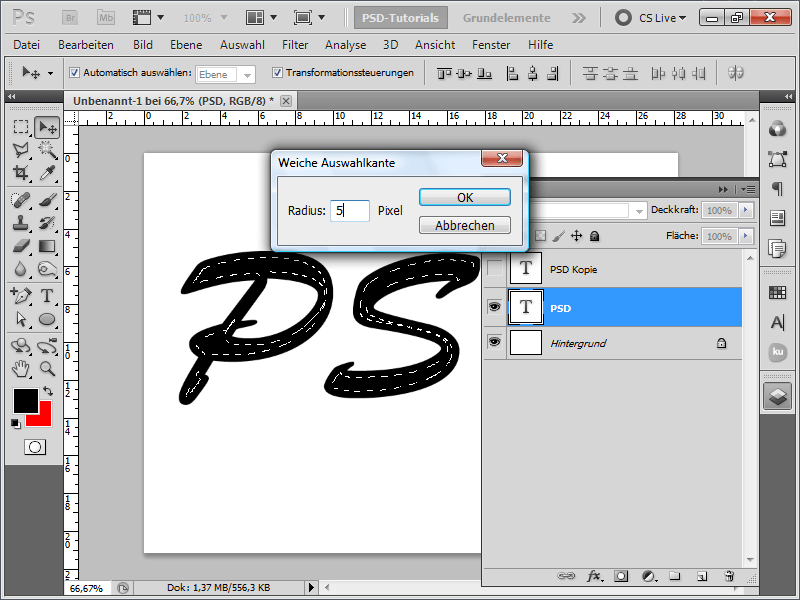
Step 3:
I save the selection under Menu->Select->Save Selection.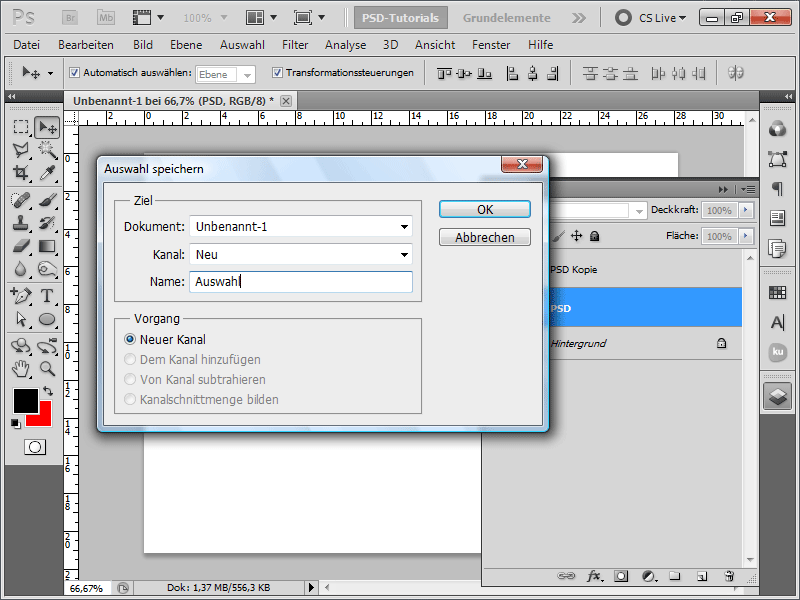
Step 4:
Next, I apply the Lighting Effects under Menu->Filter->Render with the settings Spotlight and 100% Intensity, -100 Plasticity, and the light from the top left, selecting Selection as the Relief Channel.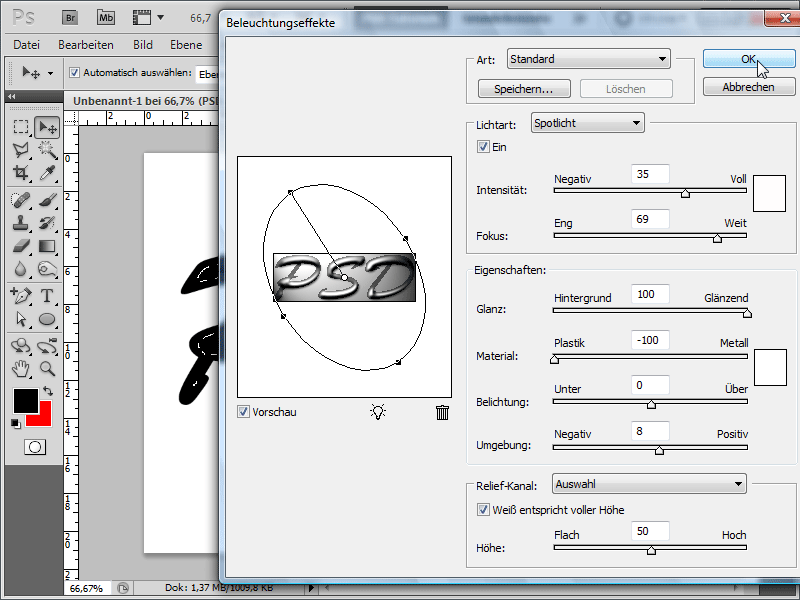
Step 5:
After that, I call up the plastic film under Menu->Filter->Artistic Filters. I set all the values to the maximum.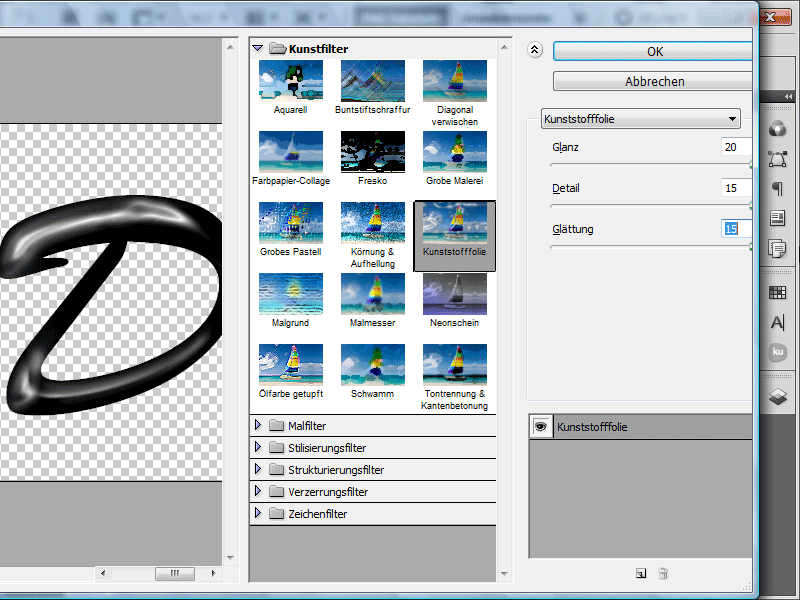
Step 6:
Now I call up the fill options. I enter the following values under Drop Shadow: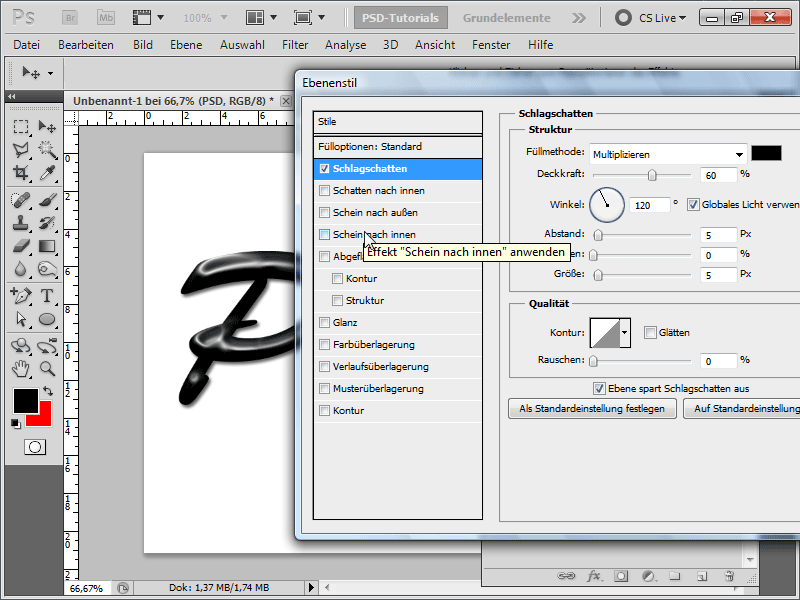
Step 7:
Under Bevel and Emboss, I set these values: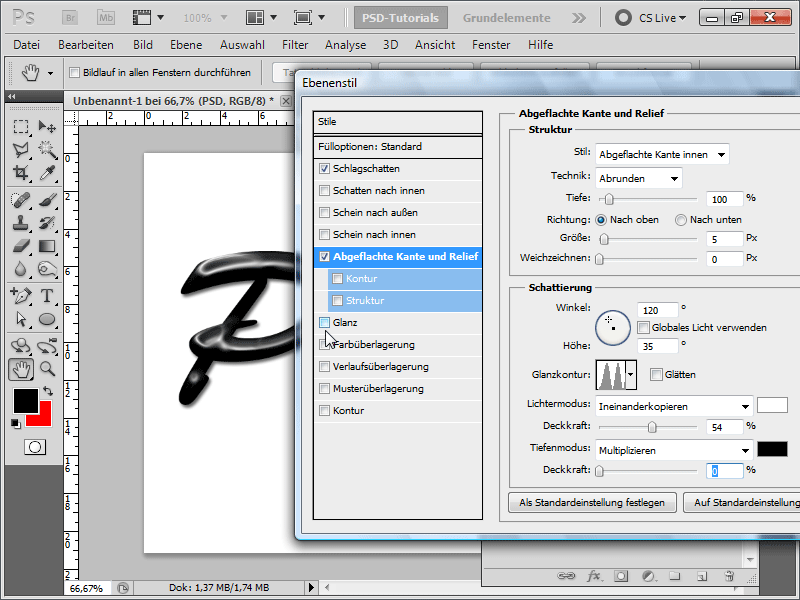
Step 8:
For Gloss, I can try out several blending modes, many of which look good.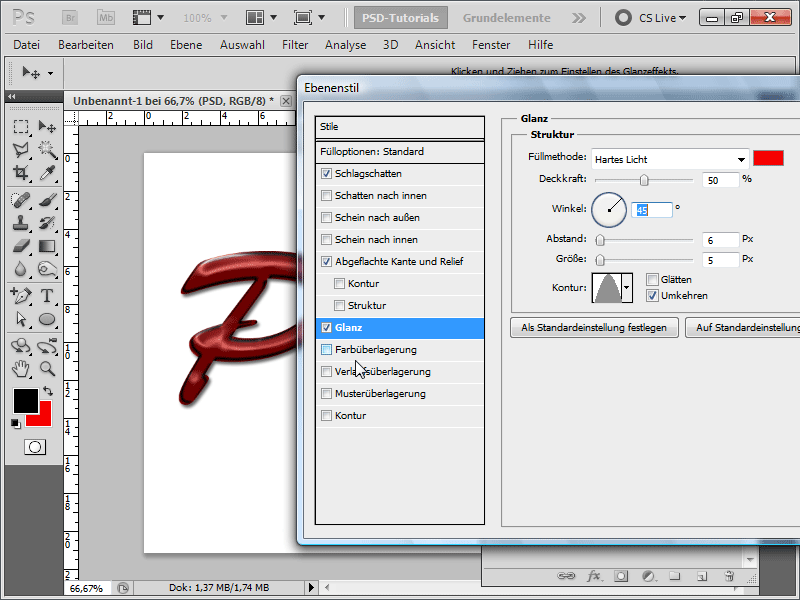
Step 9:
I don't necessarily have to activate the gradient overlay, but if you like, you can adjust it as follows: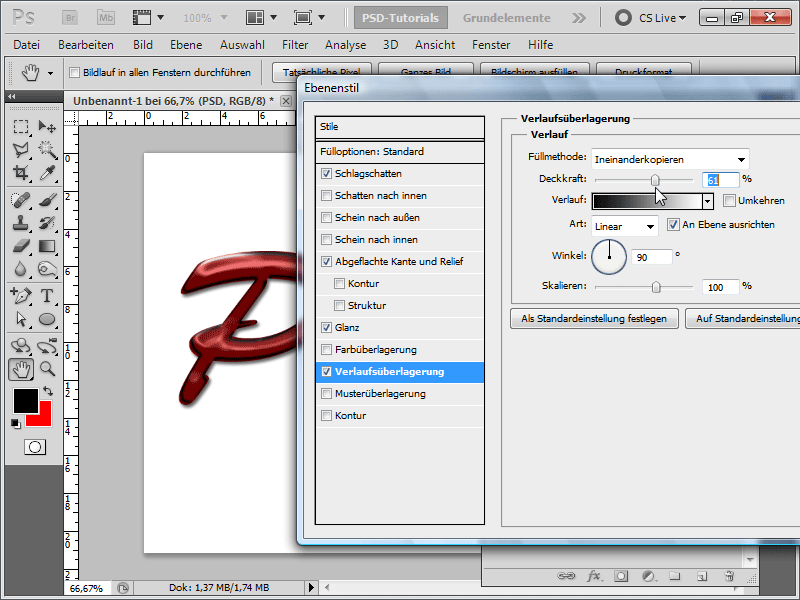
Step 10:
With my second text layer, which is at the very top, I can set the fill opacity to 0 and then the opacity to around 70–90%. Then enter the following value for the bevel: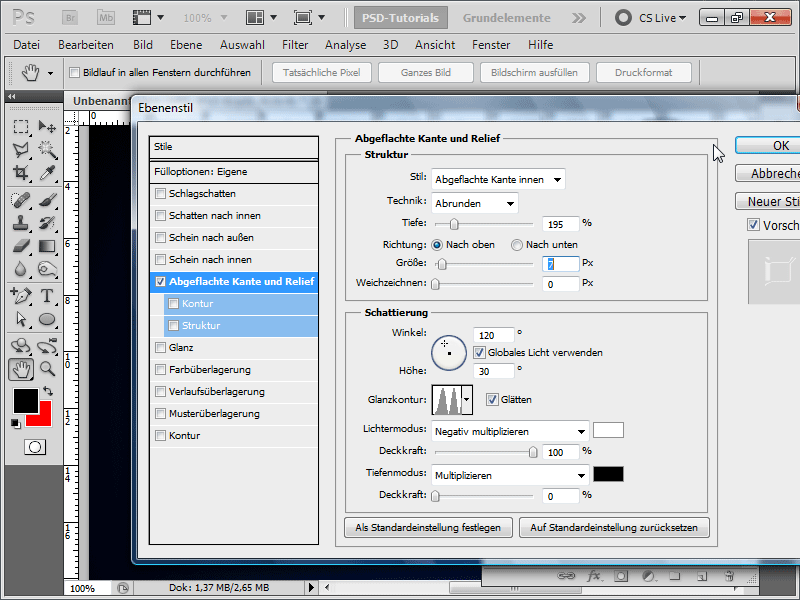
Step 11:
The result will look as follows: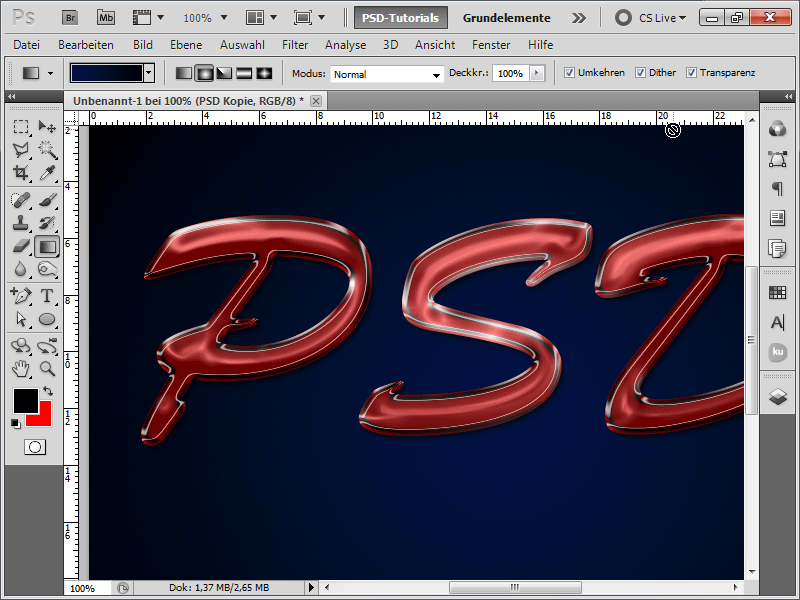
Step 12:
You can achieve a different result by deselecting the selection before applying the lighting effect and then setting the blending mode to, for example, Color Dodge at the very end.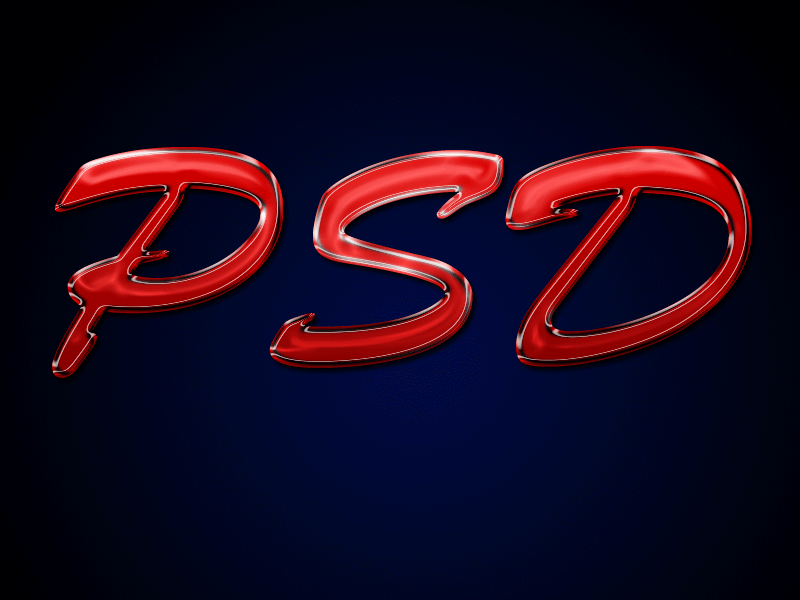
Variant 3 – Creating Plastic Text Using Filters, Channels, and Fill Options
Step 1:
I create a text again and immediately duplicate it with Ctrl+J.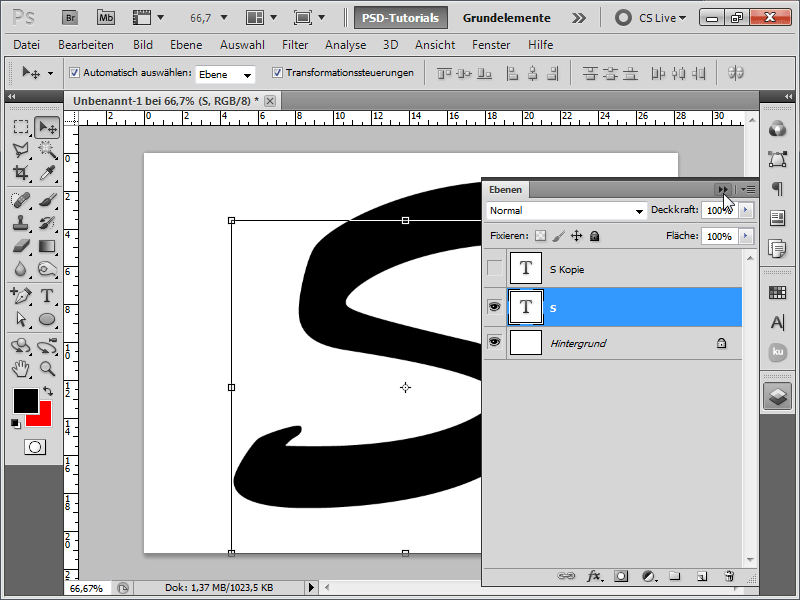
Step 2:
I go to the channels, duplicate the strongest channel (usually Blue), invert it with Ctrl+I, and blur it slightly with the Gaussian Blur.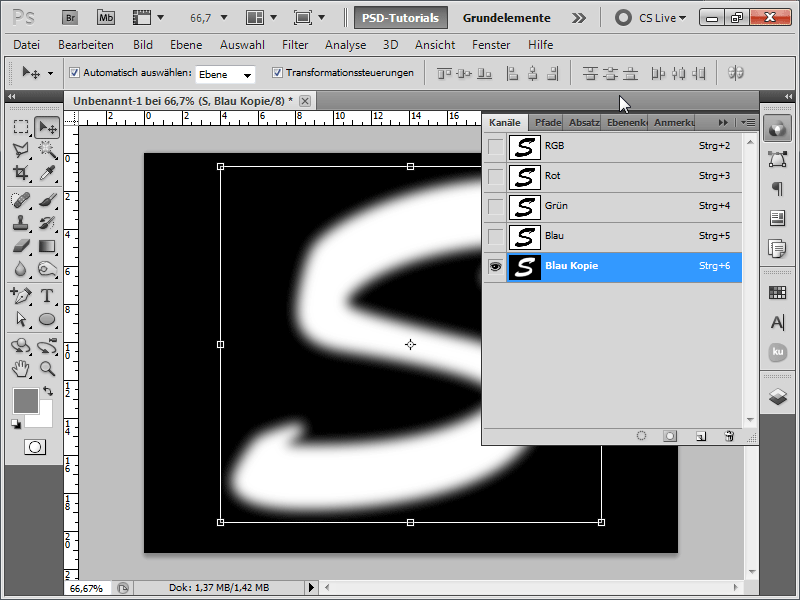
Step 3:
Next, I call up the Lighting Effects Filter and set the new channel at the bottom for Relief Channel.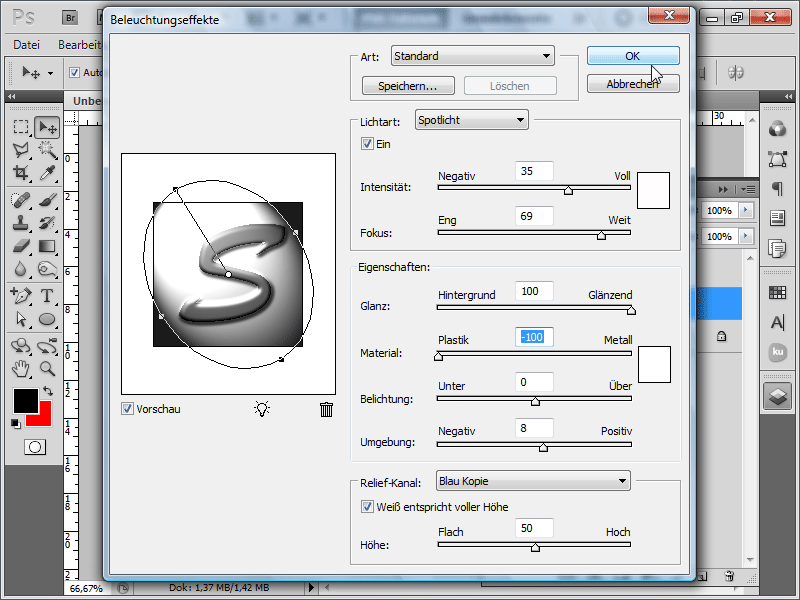
Step 4:
Now I add various layer styles. The Drop Shadow receives the following settings: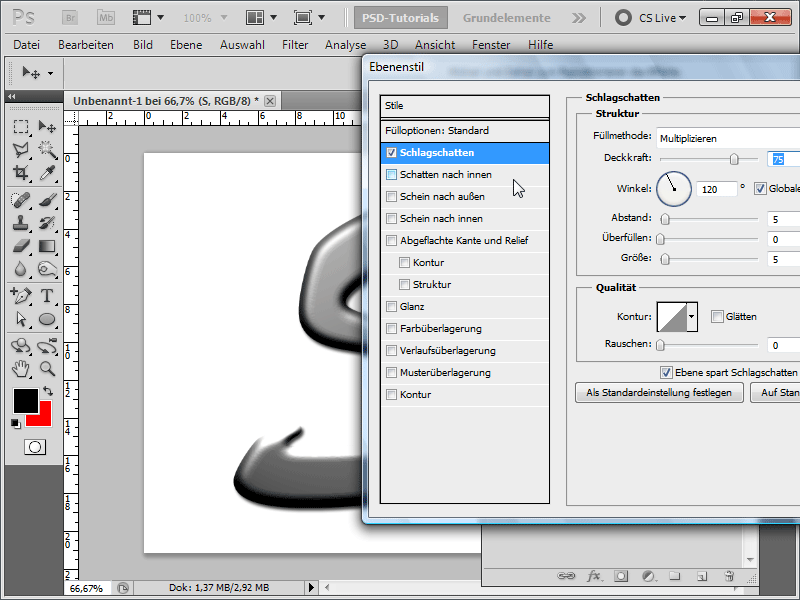
Step 5:
I apply the following settings to the Inner Shadow: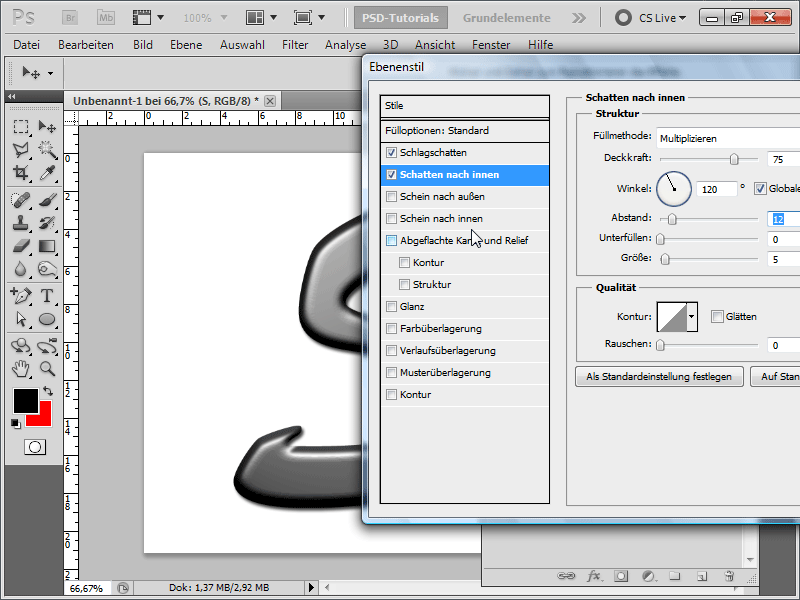
Step 6:
The Outer Glow receives these settings: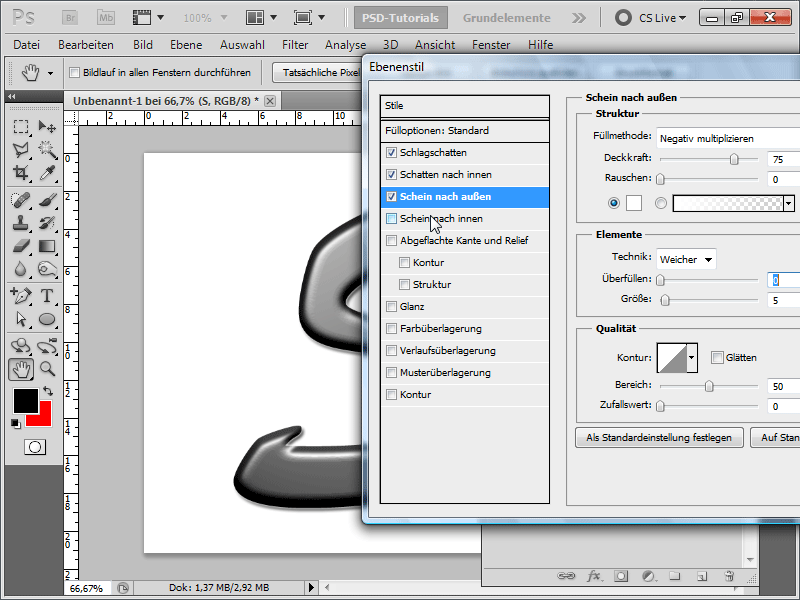
Step 7:
And the Inner Glow these: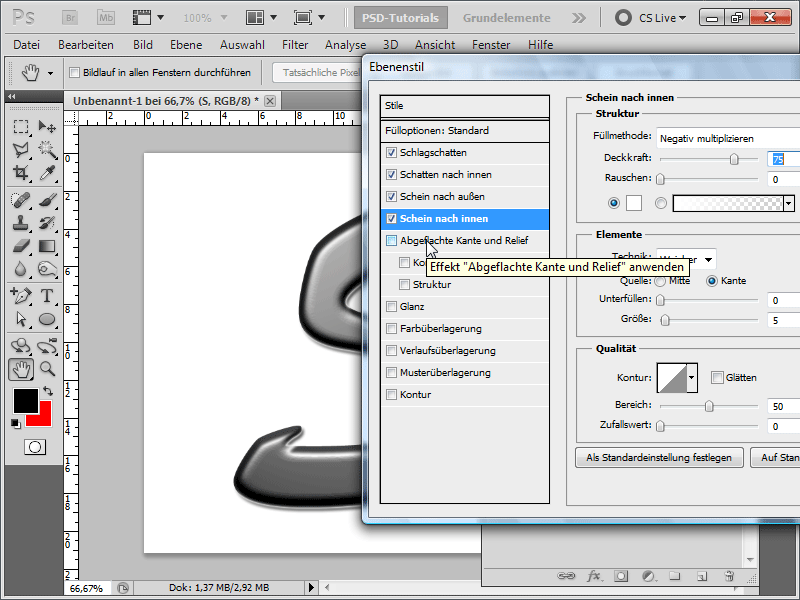
Step 8:
Then the Bevel Feature: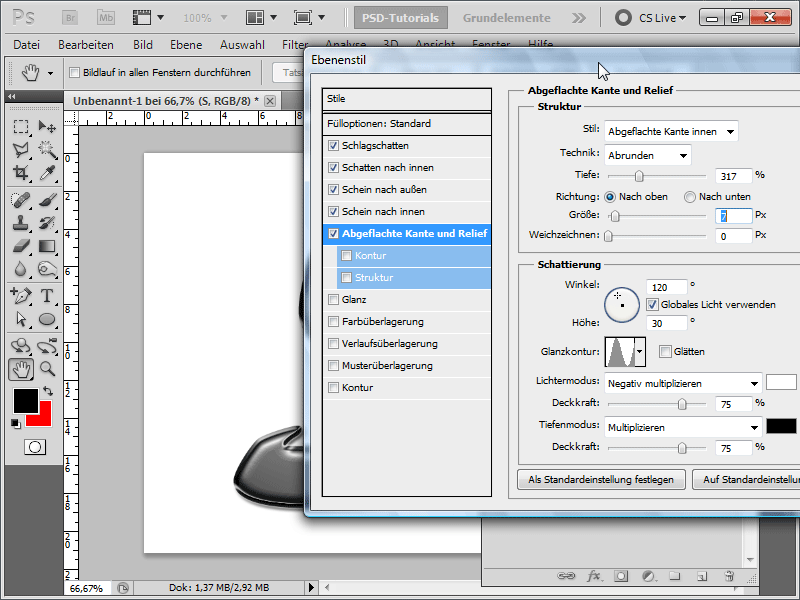
Step 9:
The Gloss: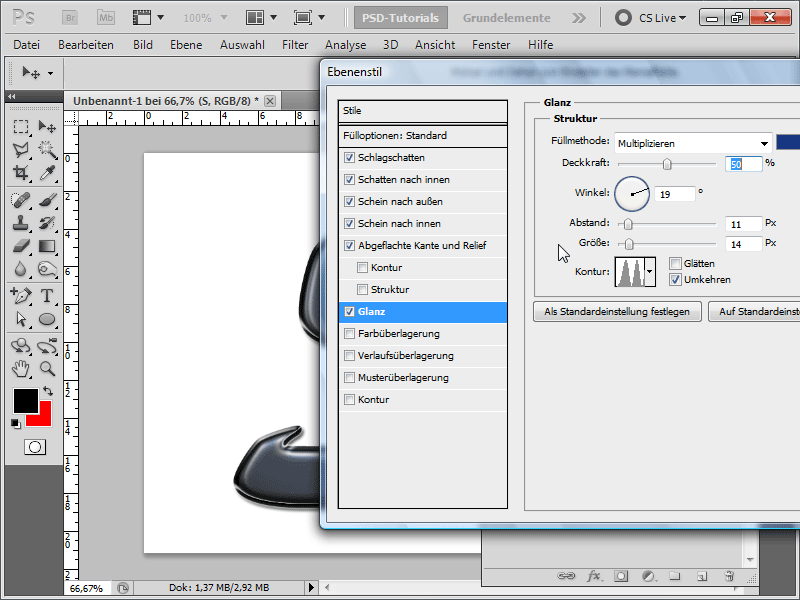
Step 10:
And the Color Overlay: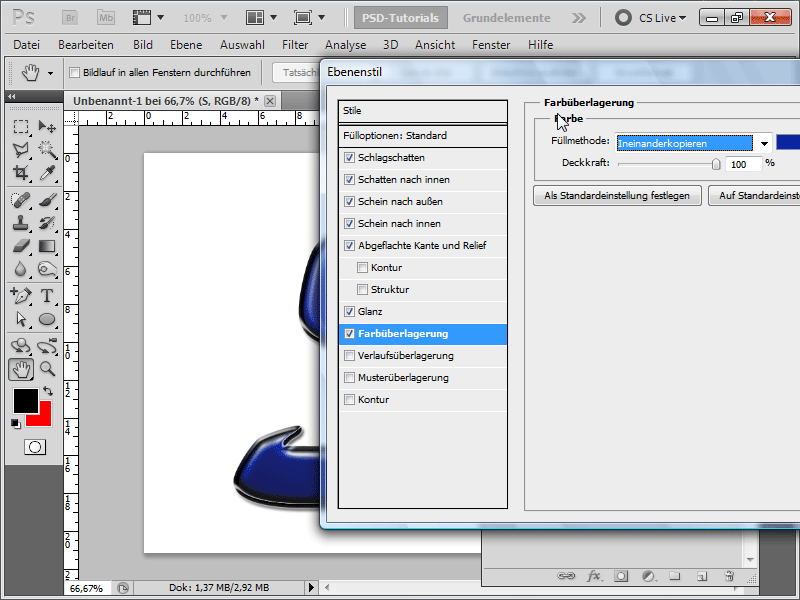
Step 11:
I could now copy the layer and apply a Gaussian blur to the top one: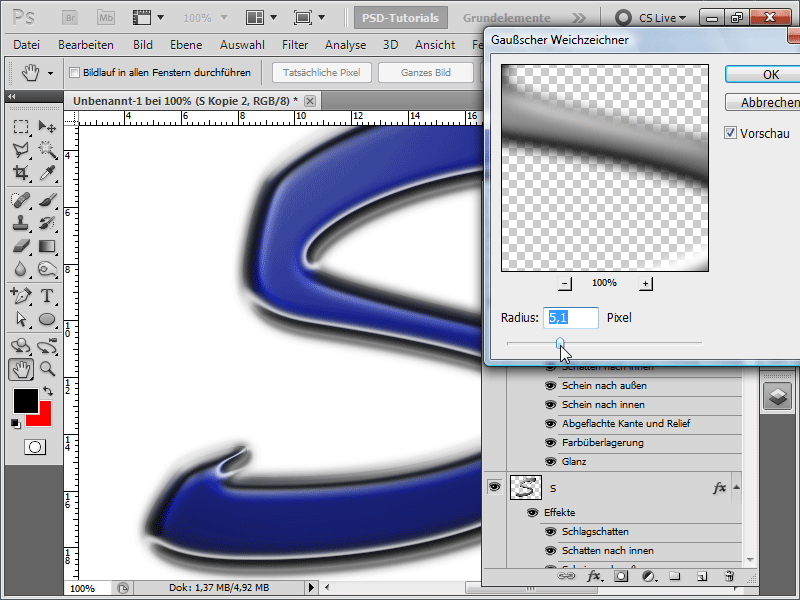
Step 12:
Alternatively, I could use the plastic wrap effect again at the end. And the effect will look even better (for better visualization, I've added a radial gradient in the background):
Variant 4 - Plastic Text with Layer Effects Only
Step 1:
I create a letter - for example, W - using the Georgia font.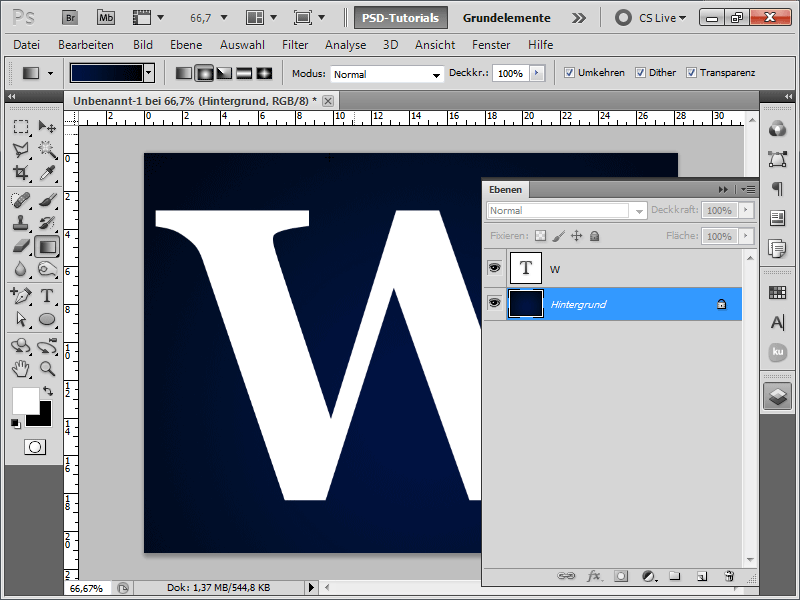
Step 2:
I add a drop shadow: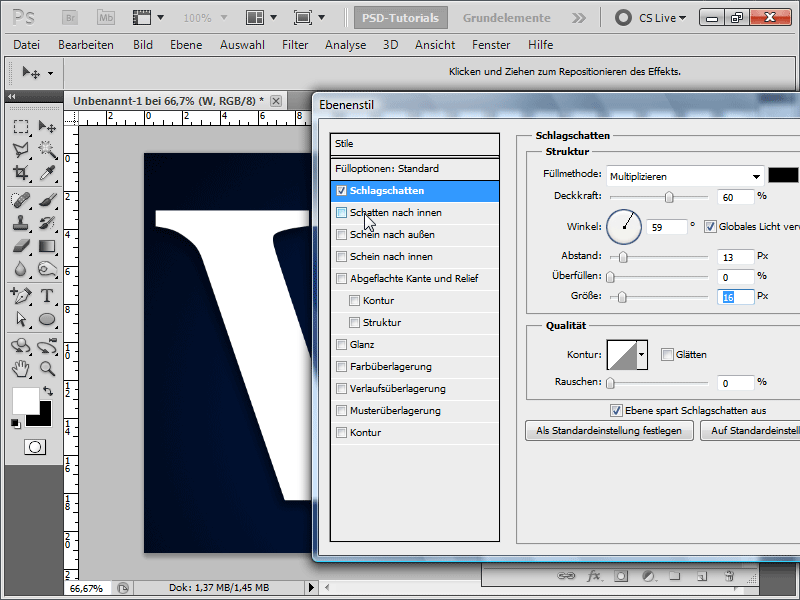
Step 3:
And an inner shadow: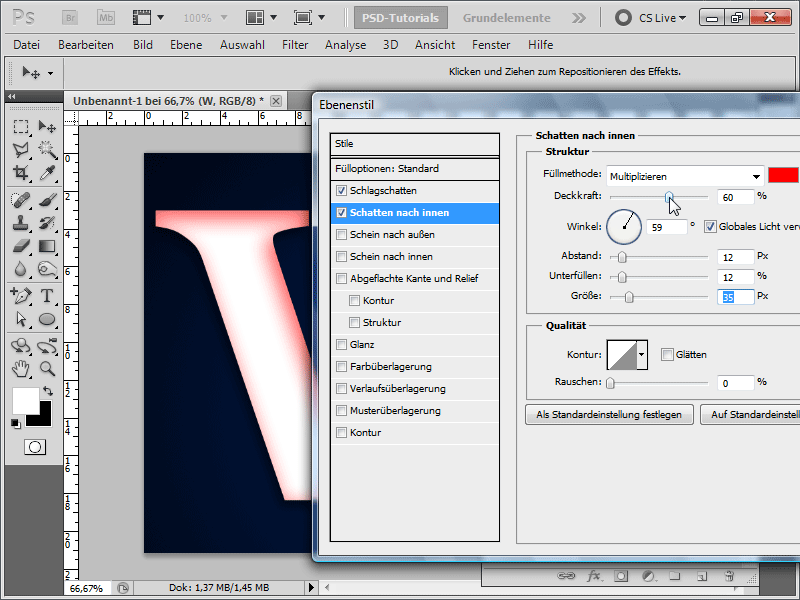
Step 4:
An inner glow: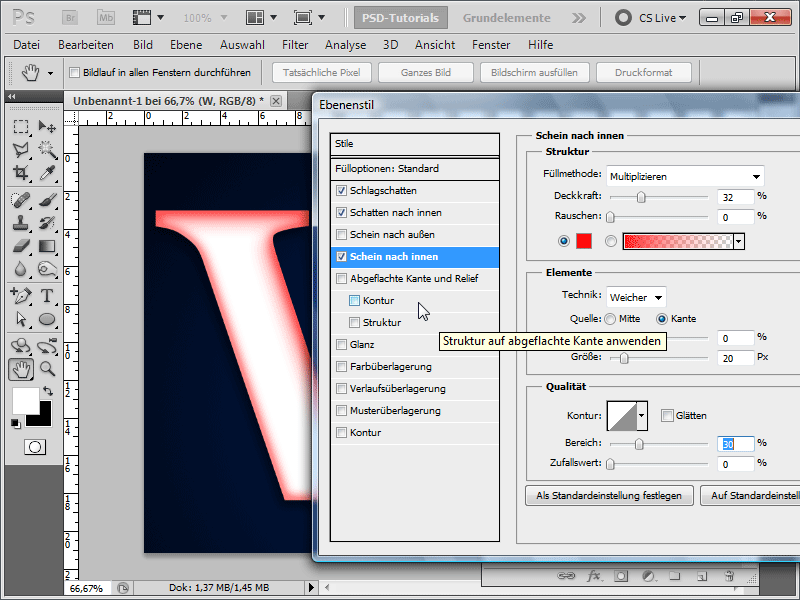
Step 5:
A bevel edge: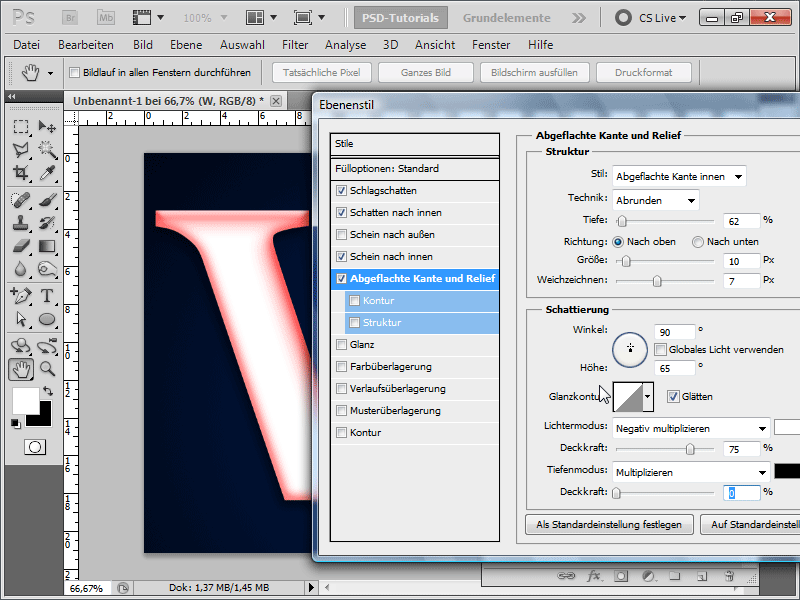
Step 6:
And below bevel edge the contour: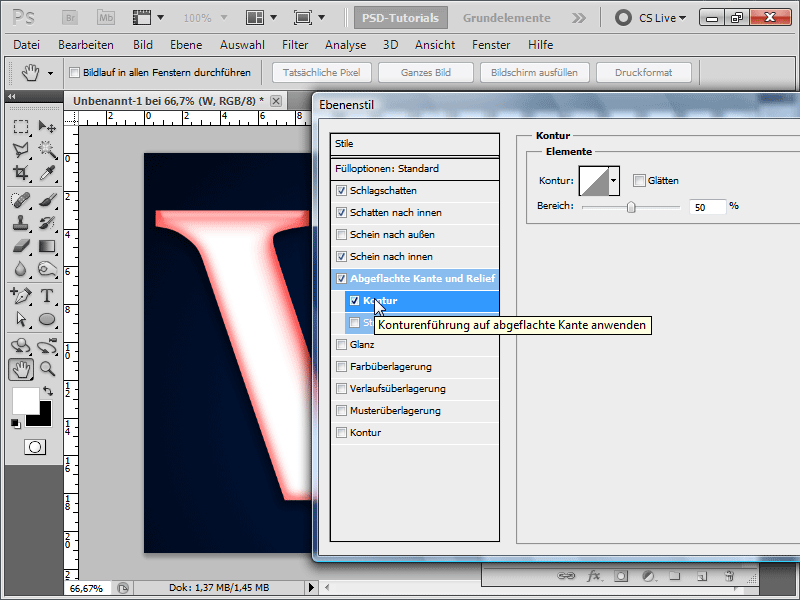
Step 7:
The result already looks good. But I can enhance it further.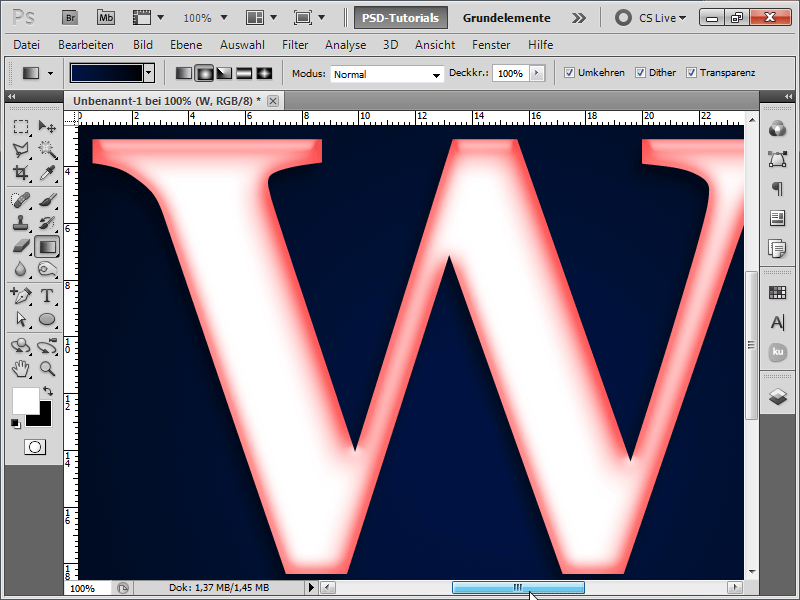
Step 8:
To do this, I just need to increase the opacity of the bevel edge in the light mode.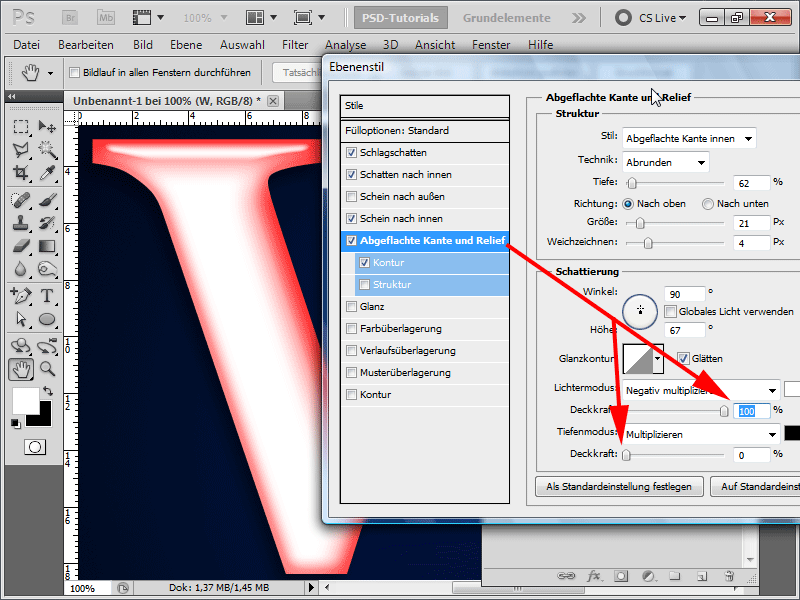
Step 9:
I can now apply the effect to every letter or area.
Step 10:
Using the tonal correction, I can further enhance the glossy effect.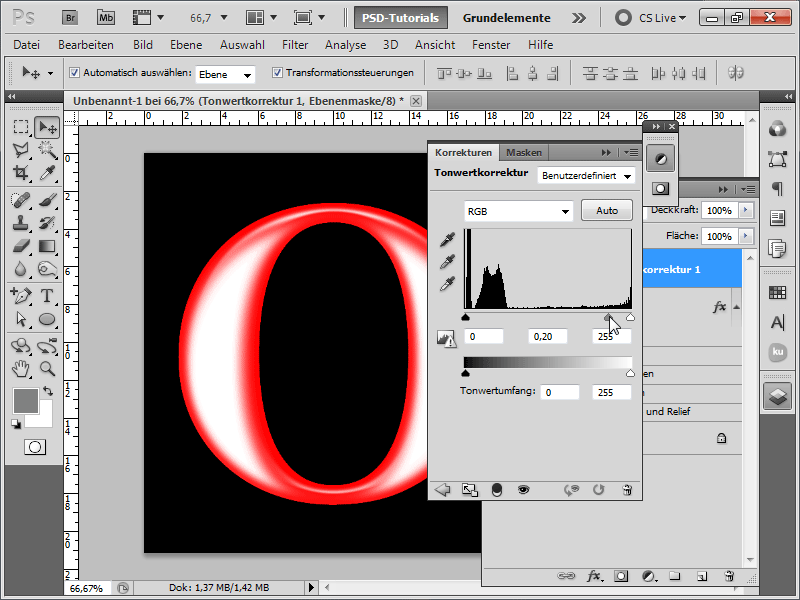
Variant 5 - Plastic Text Using Filters and Channels
Step 1:
I create a document and insert the letters psd, for instance. The font used is irrelevant. I choose a nice blue color.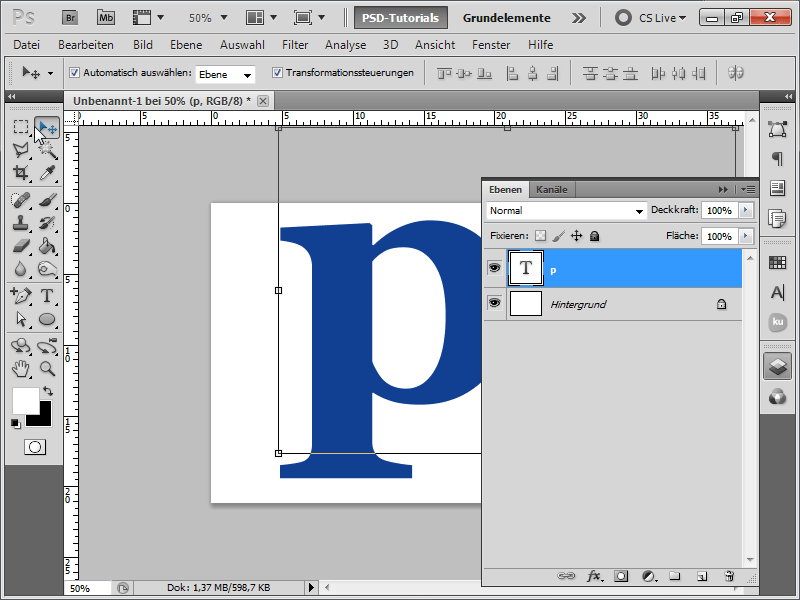
Step 2:
I hold Ctrl and click on the text layer to create a selection. Then I create a new layer. I reduce the selection by about 12-15 pixels. I fill the selection with white.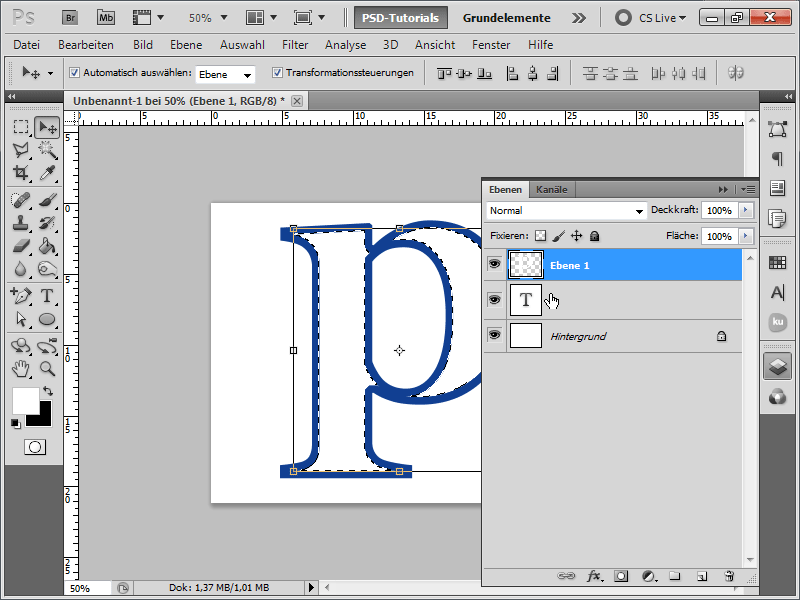
Step 3:
Next, I grab the Gaussian blur with a radius of about 15 pixels. Then I press Ctrl+Alt+F and blur it again with, for example, 4 pixels.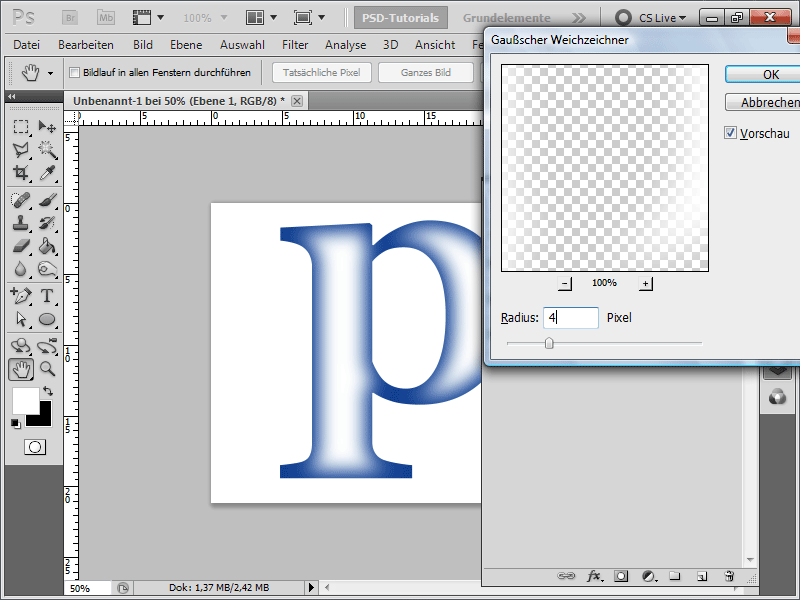
Step 4:
I set the fill method in the layer effects to color dodge and deactivate the red channel.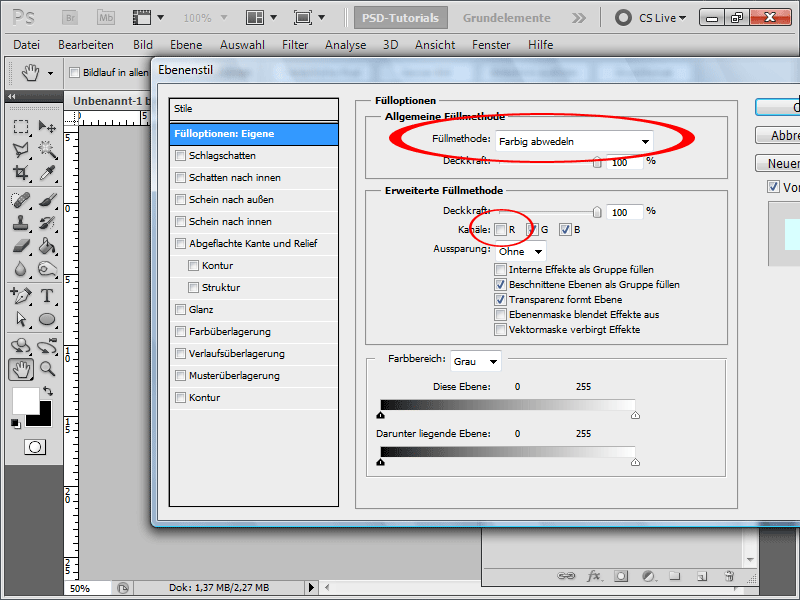
Step 5: I create a selection again on the text layer with Ctrl+Click, go to the channels, and click on the selection icon to save my selection.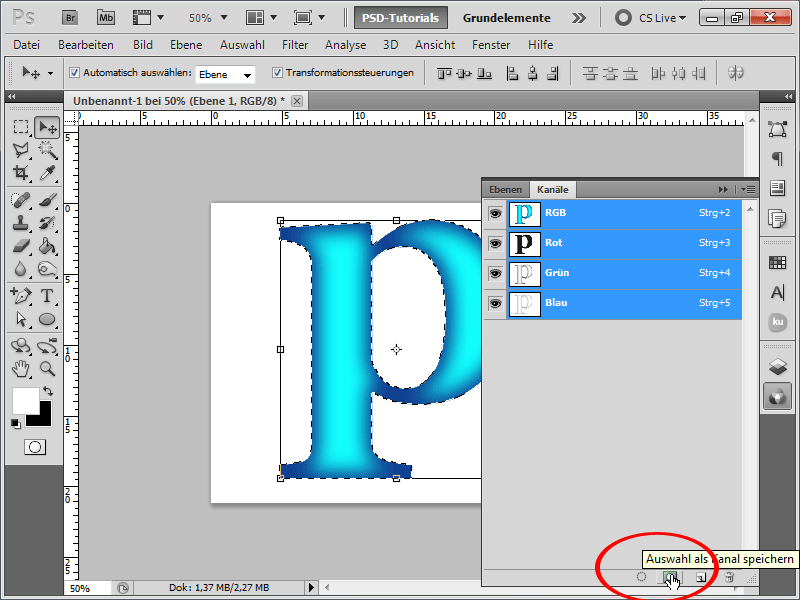
Step 6:
Again the Gaussian blur with 15 pixel radius and about 4 pixels more. Now I press Ctrl+Shift+I to invert the selection, then the Delete key and then Ctrl+D to deselect.
Step 7:
Now I create a new layer and click with the Ctrl key pressed on the p-layer, creating a selection, and fill it with black.
Step 8:
I change the fill method of the black layer to Negative multiply.
Step 9:
Next, I call up the lighting effect again, which is used in many of my variations and provides good service. Most importantly, I select Alpha 1 in the relief channel and adjust the settings as shown in the image.
Step 10:
After confirming the lighting effect, I call up the Gaussian blur to further enhance the effect.
Step 11:
Using Ctrl+M, I bring up the curve tool and can further enhance the effect with it.
Step 12:
For example, if I choose the fill method Hard Light, the effect becomes even more contrasting. I can also further enhance the effect by using the curve tool on layer 2.
The final result with a background gradient looks like this:


