One excellent tool for this is the Bar Growth Tool. In this guide, you will learn how to create such a tool with Facebook Marketing. Whether you are a sole proprietor or work in a larger company, this step-by-step guide will help you get more out of your online marketing.
Key Insights
- A Bar Growth Tool allows you to easily build contact with customers.
- The design and positioning of the tool are crucial for user-friendliness.
- You should ensure that the tool does not appear intrusive to your customers.
- Emojis can increase the visibility and attractiveness of your messages.
Step-by-Step Guide
Step 1: Access to Growth Tools
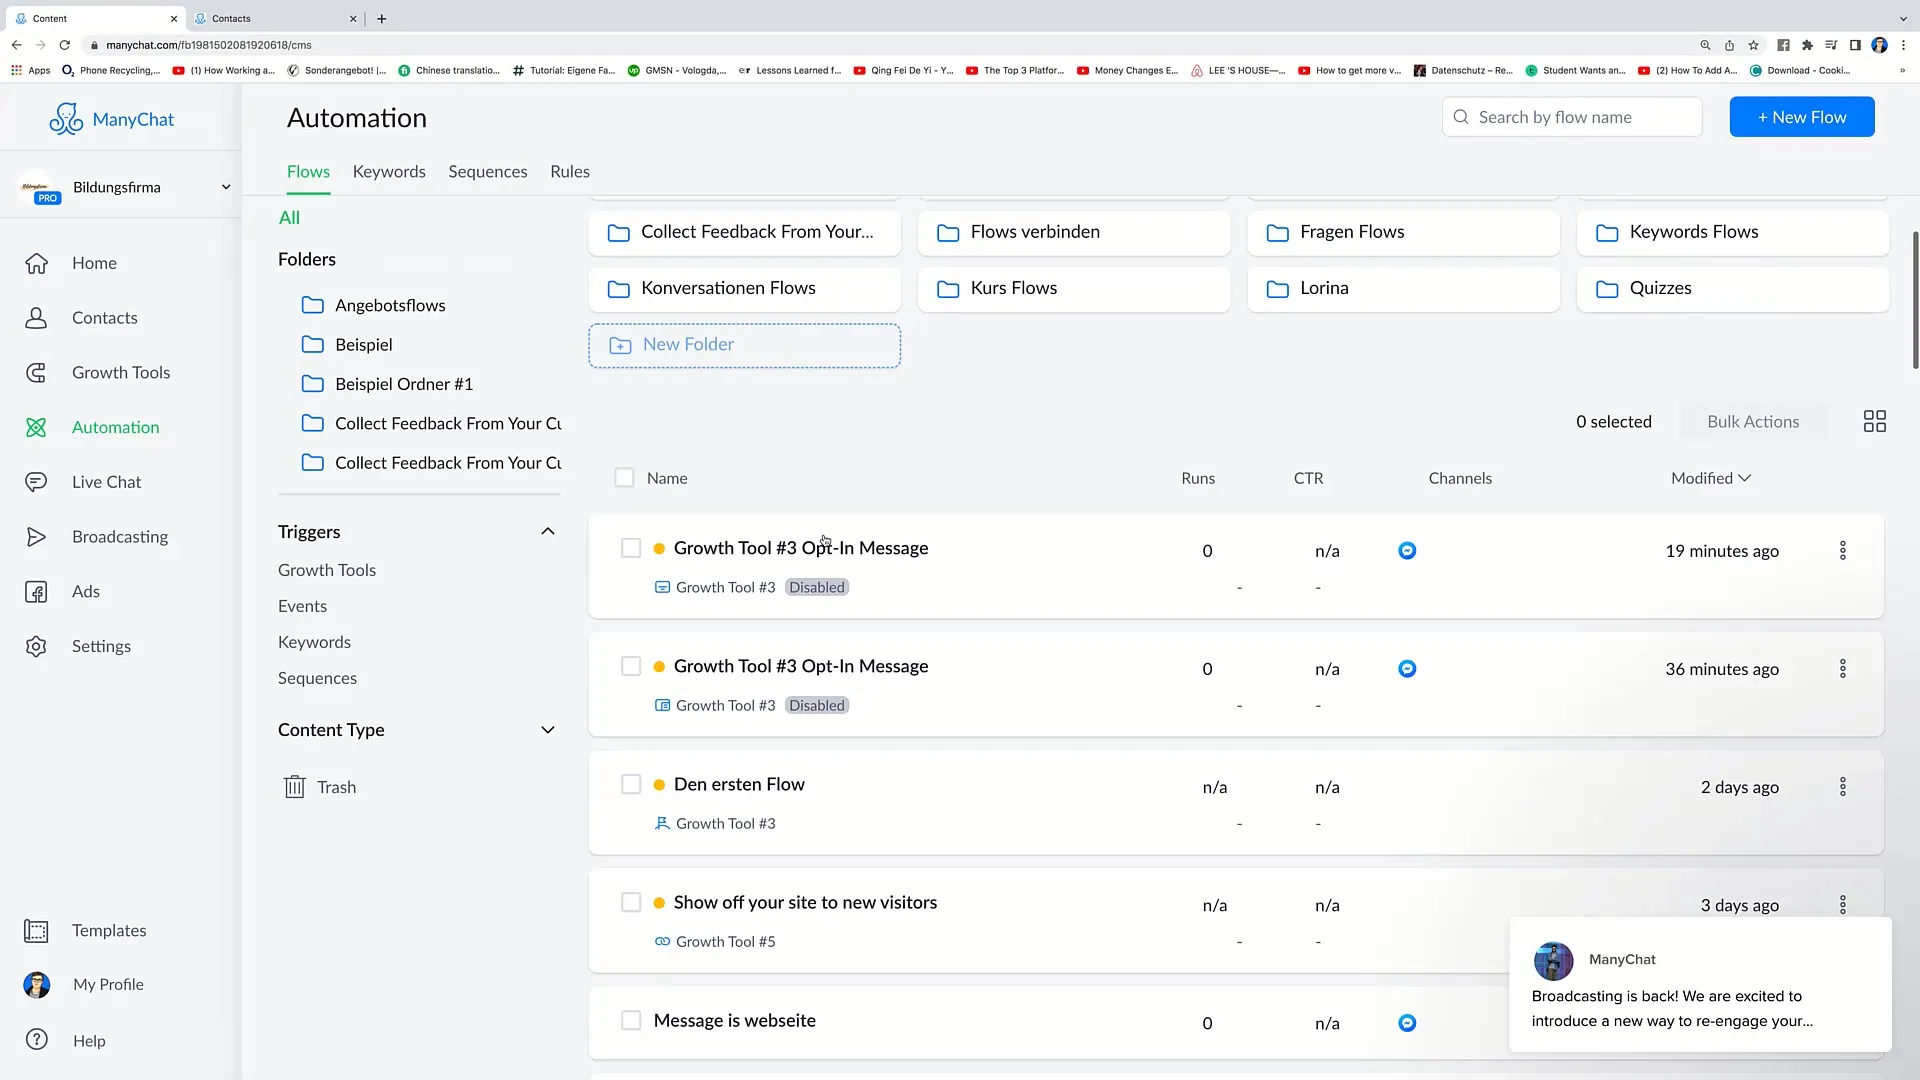
Start by accessing the "Automation" section in your Facebook Business Manager. Then click on "Flow". Here you can view the various messages that are sent once someone has signed up to your bot via the Growth Tool. Note the different steps the flow goes through and what is sent when the user enters.
Step 2: Choosing the Right Growth Tools
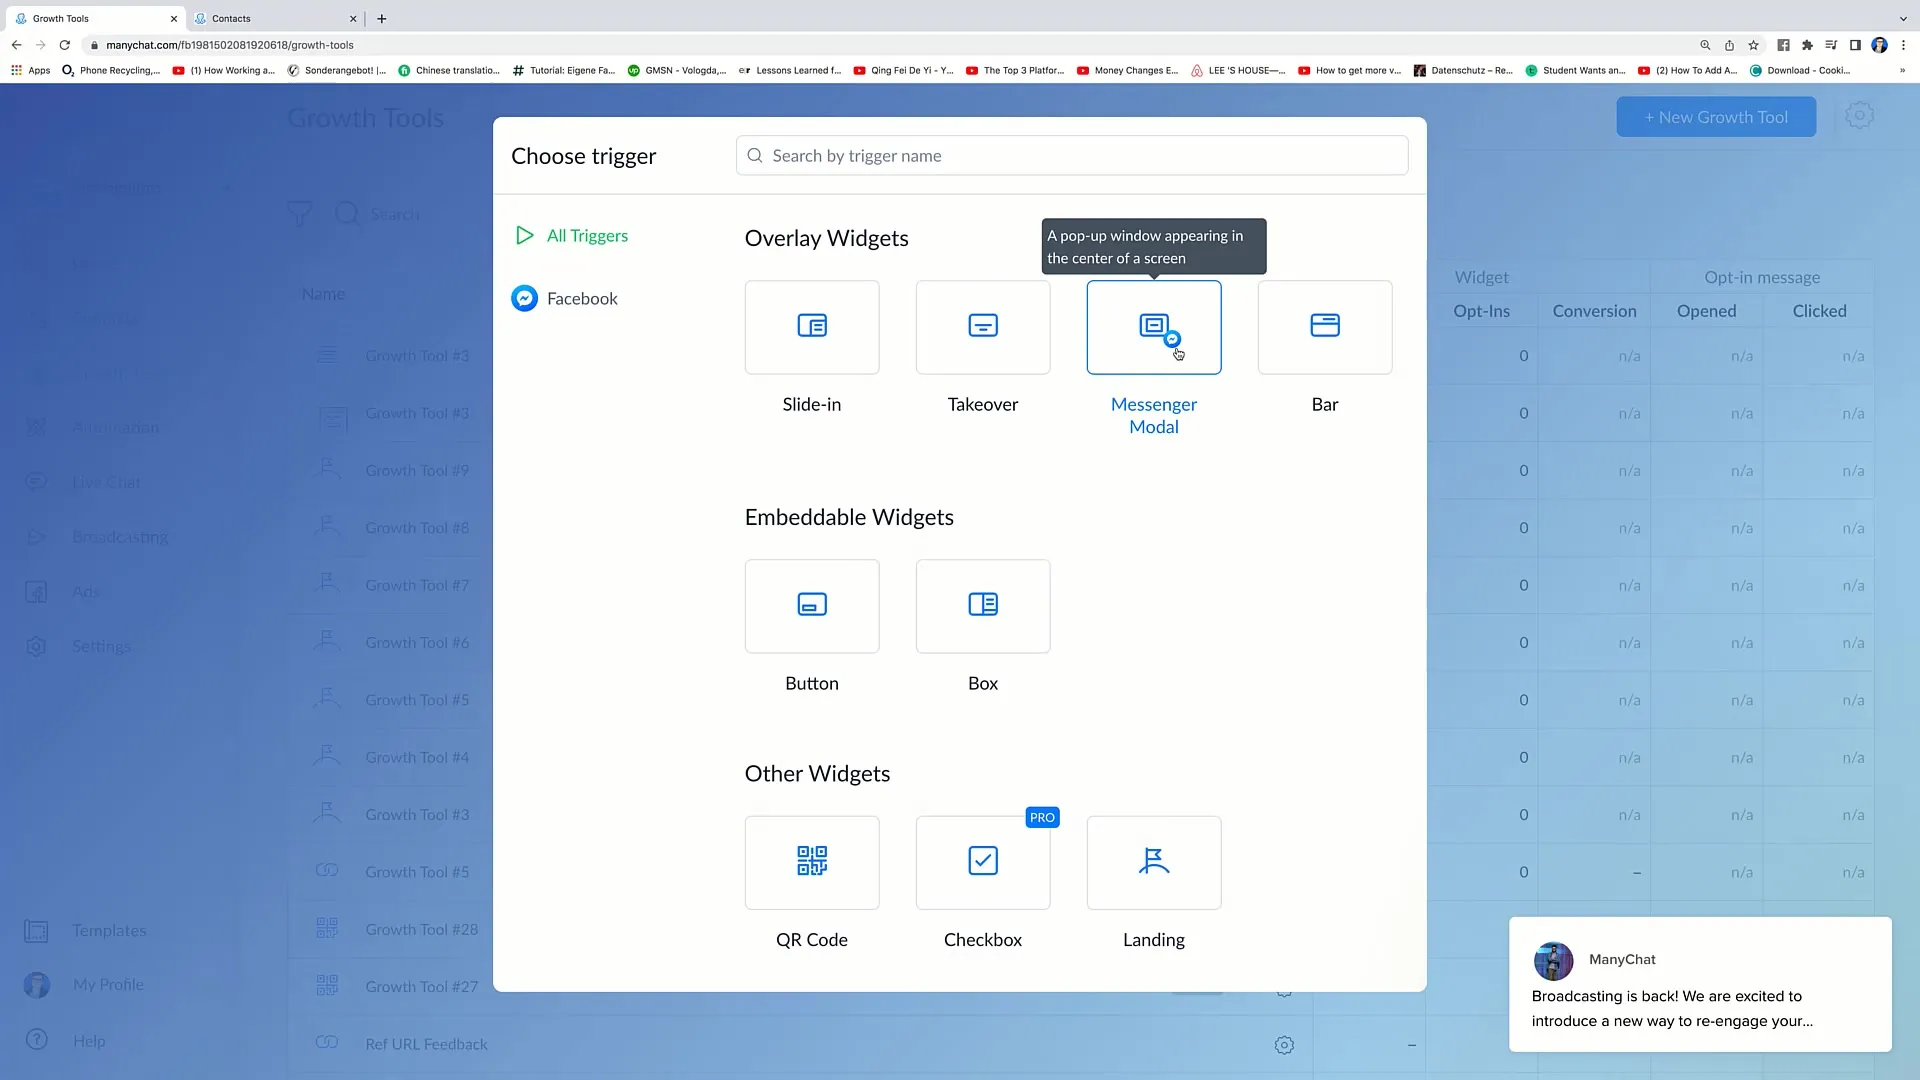
Click on the upper right corner to select the "Messenger Modal". This tool works similar to the Takeover Tool but has some differences. Look at the preview to understand how it looks without the white background. The background is more transparent here, allowing for a subtle integration into your website.
Step 3: Setting up the Bar Option
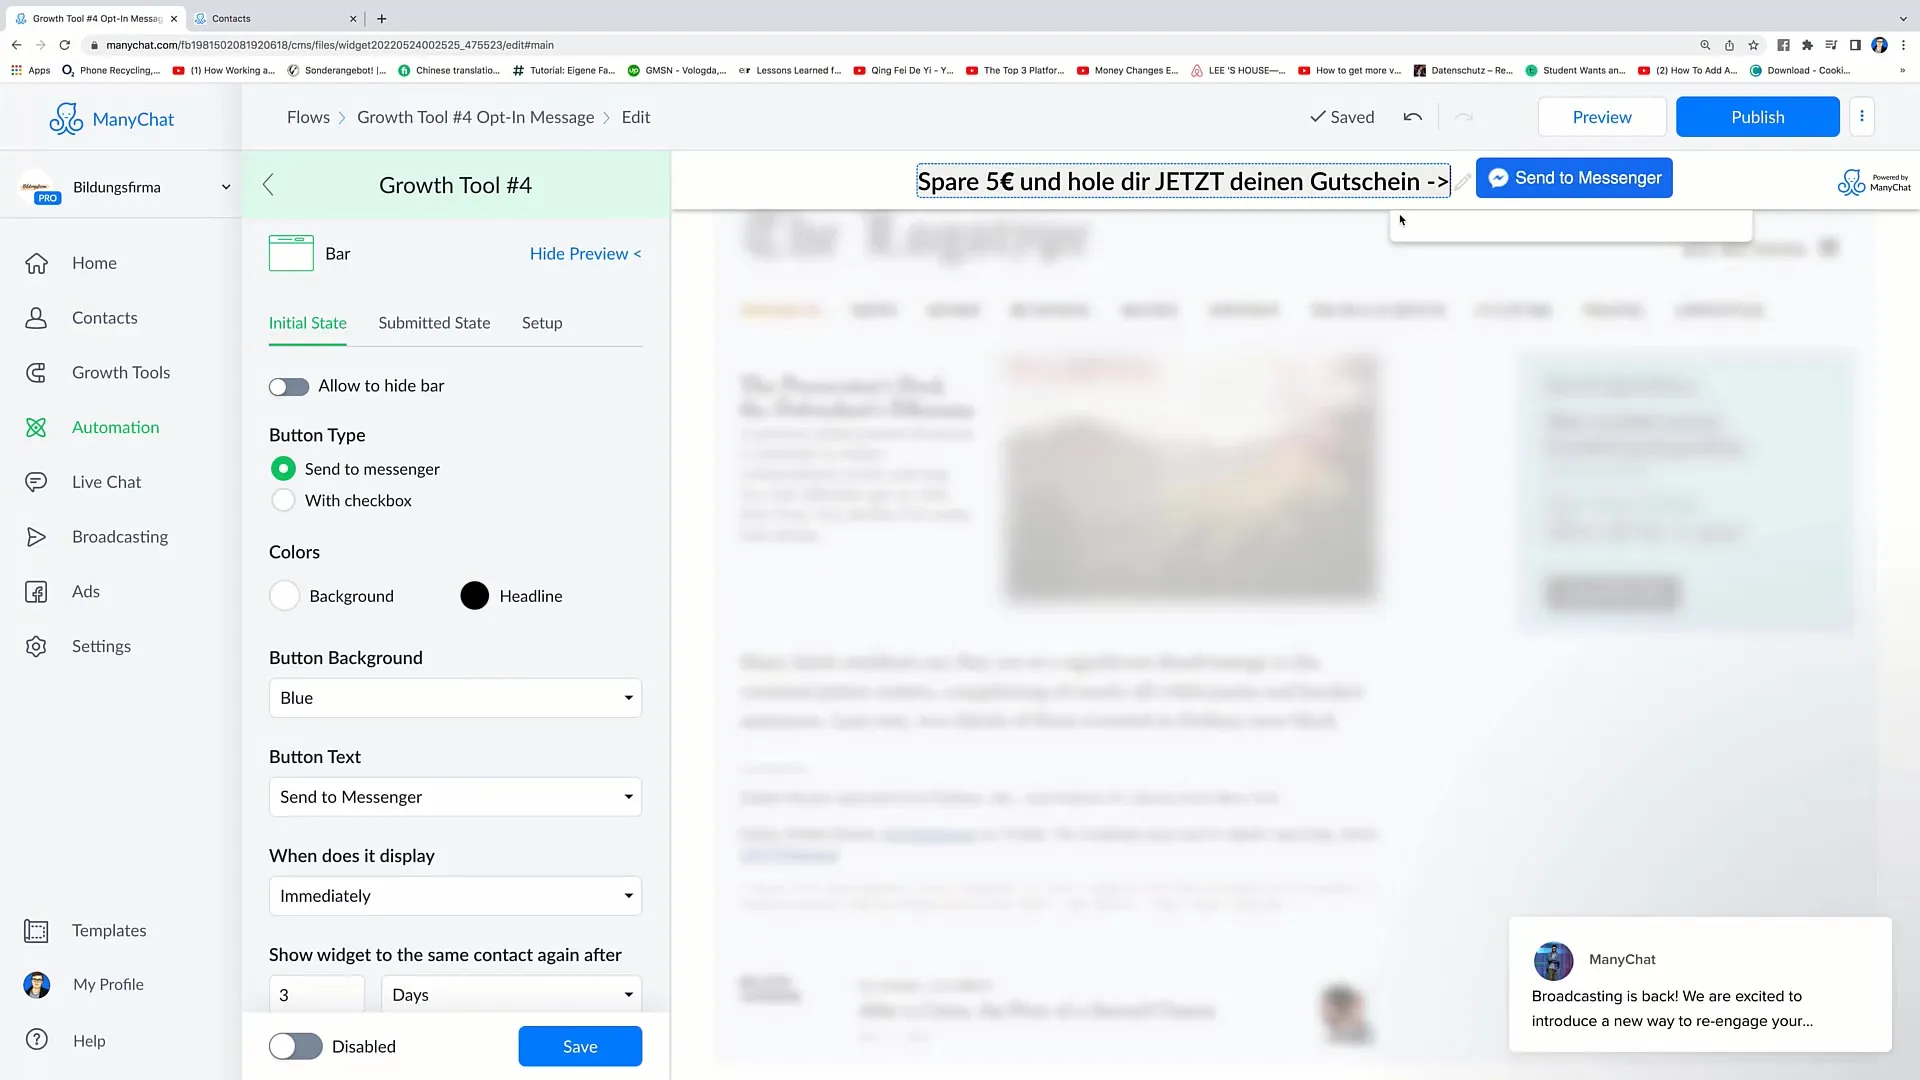
Go back to Growth Tools to view the Bar Option. When you select "Show Preview", you will see the bar displayed at the top of your webpage. You can set individual messages here, such as "Save 5 €!" to attract prospects.
Step 4: Using Emojis
To make your message more noticeable, you can use emojis. Consider whether you want to insert an emoji like an arrow to increase user attention. Remember that users are attracted by visual elements, increasing the likelihood that they will navigate along the bar.
Step 5: Adjusting Ad Options
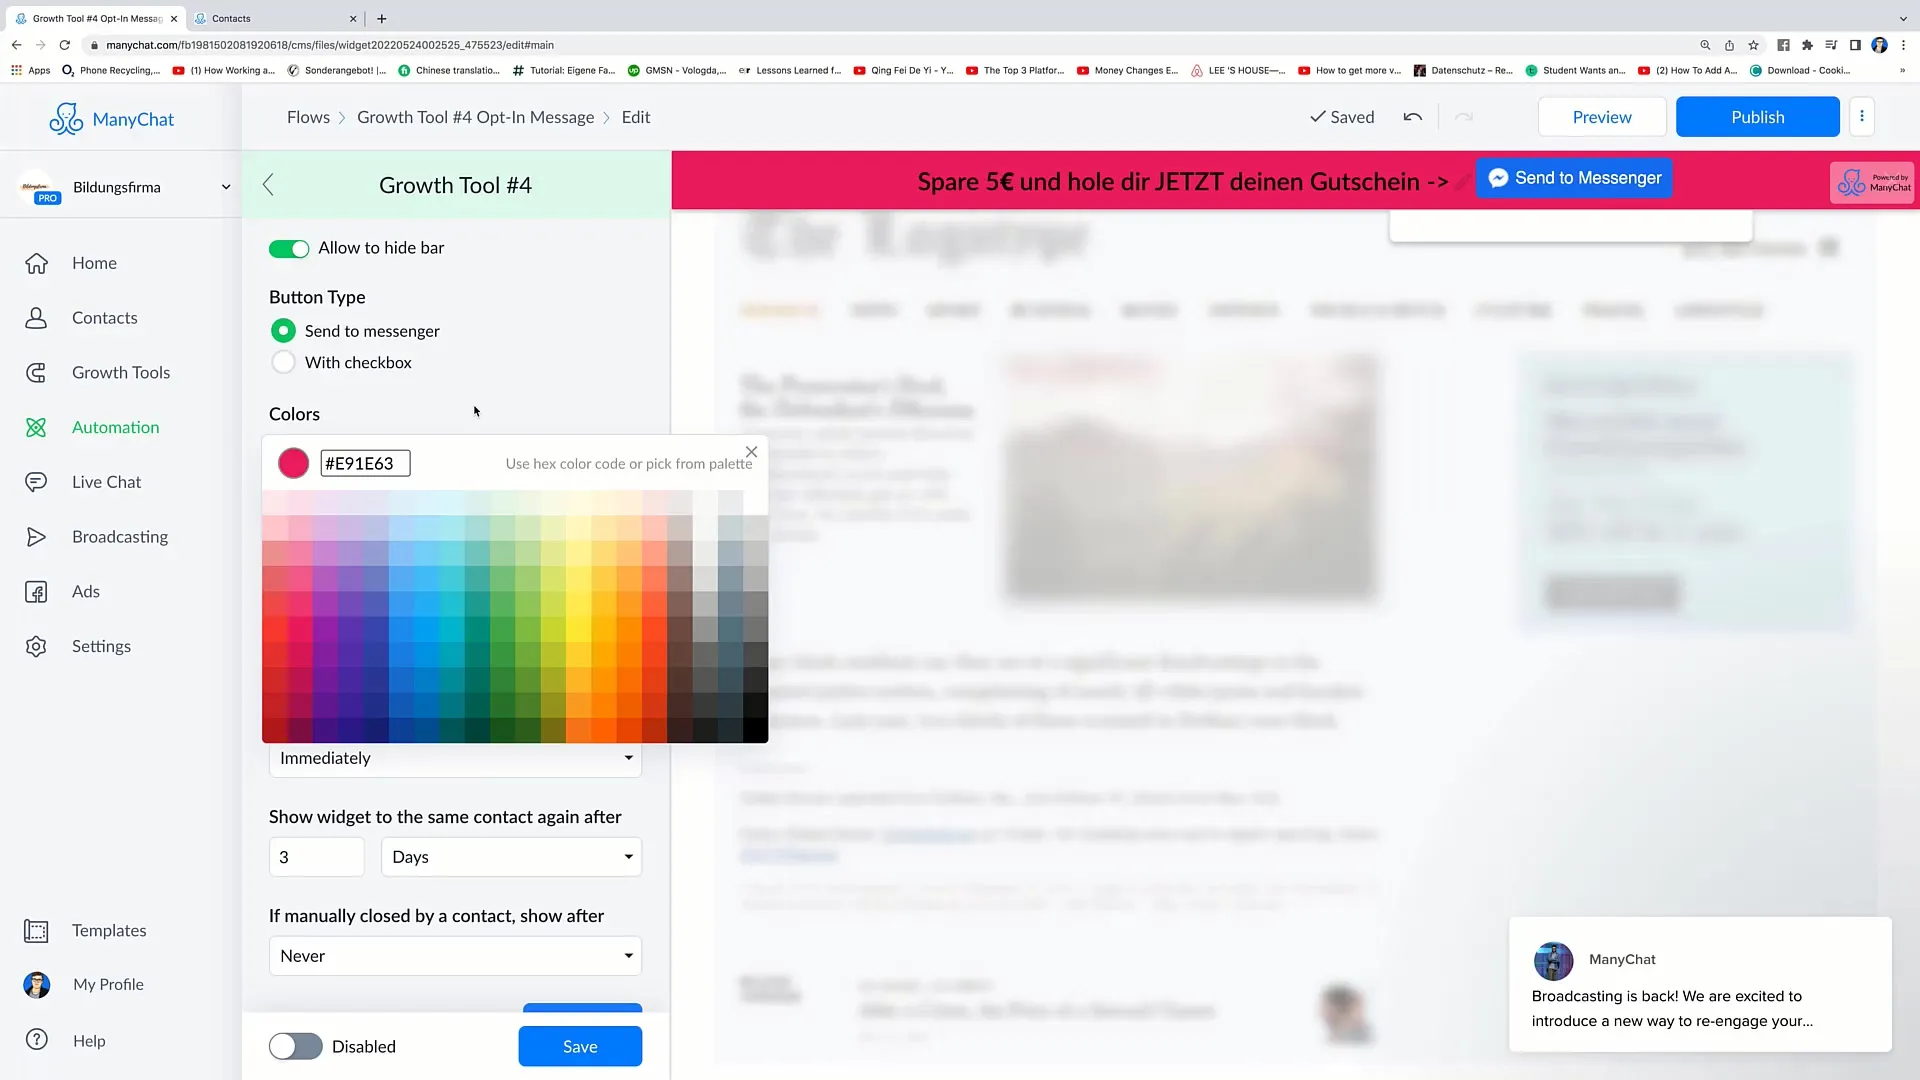
In the tool settings, there is an "allow to hide" option that allows users to close the bar if they wish. I recommend activating this option to provide users with a better experience. The goal is to increase convenience without bothering customers.
Step 6: Color and Text Adjustments
Now you can customize the colors of the bar. For example, you could make the background color eye-catching red and the font color white to create a clear contrast. Adjust both the font and the button text to generate a cohesive and appealing look.
Step 7: Setting Trigger Options
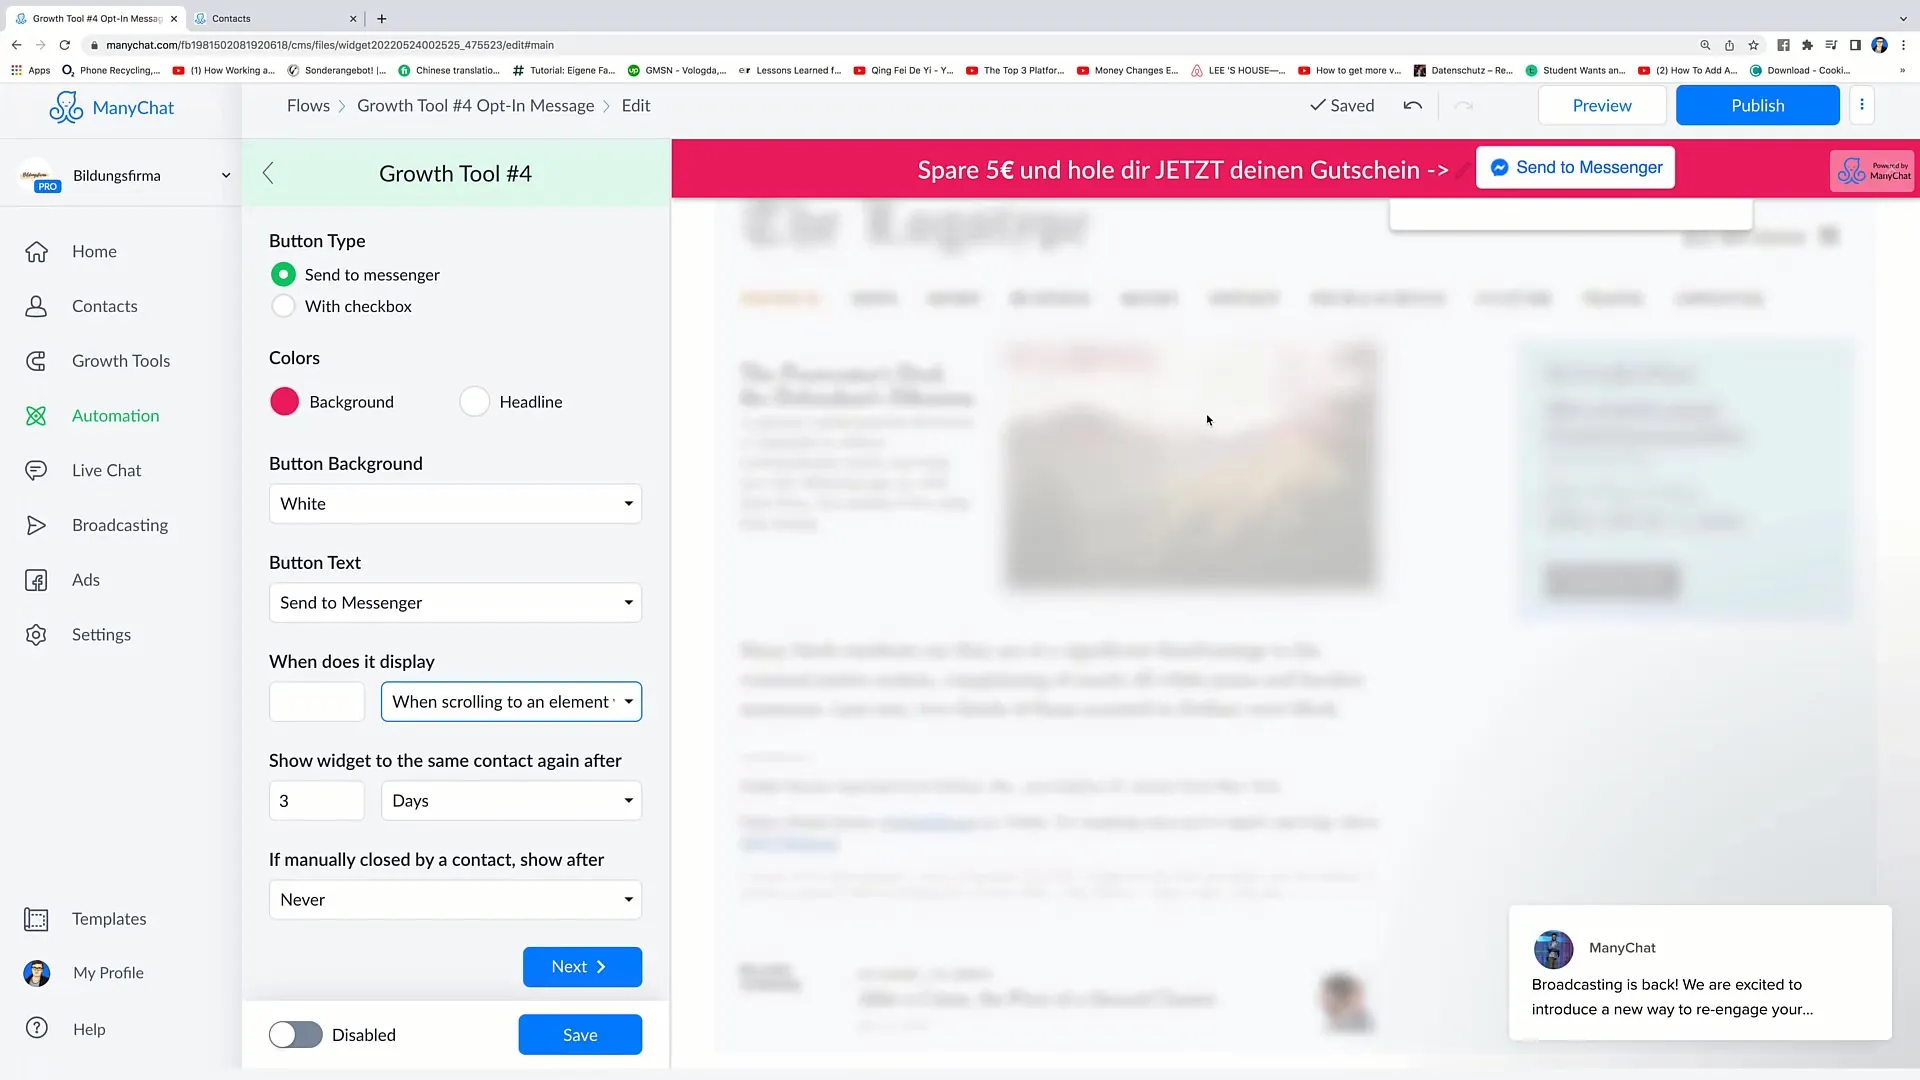
You have several options for when the tool should be displayed. Choose whether the tool should appear immediately, after a certain scroll, or after a certain time has passed on the website. I recommend showing the tool after about 10 seconds to give the person time to familiarize themselves with your website before being contacted.
Step 8: Customizing "Submitted State"
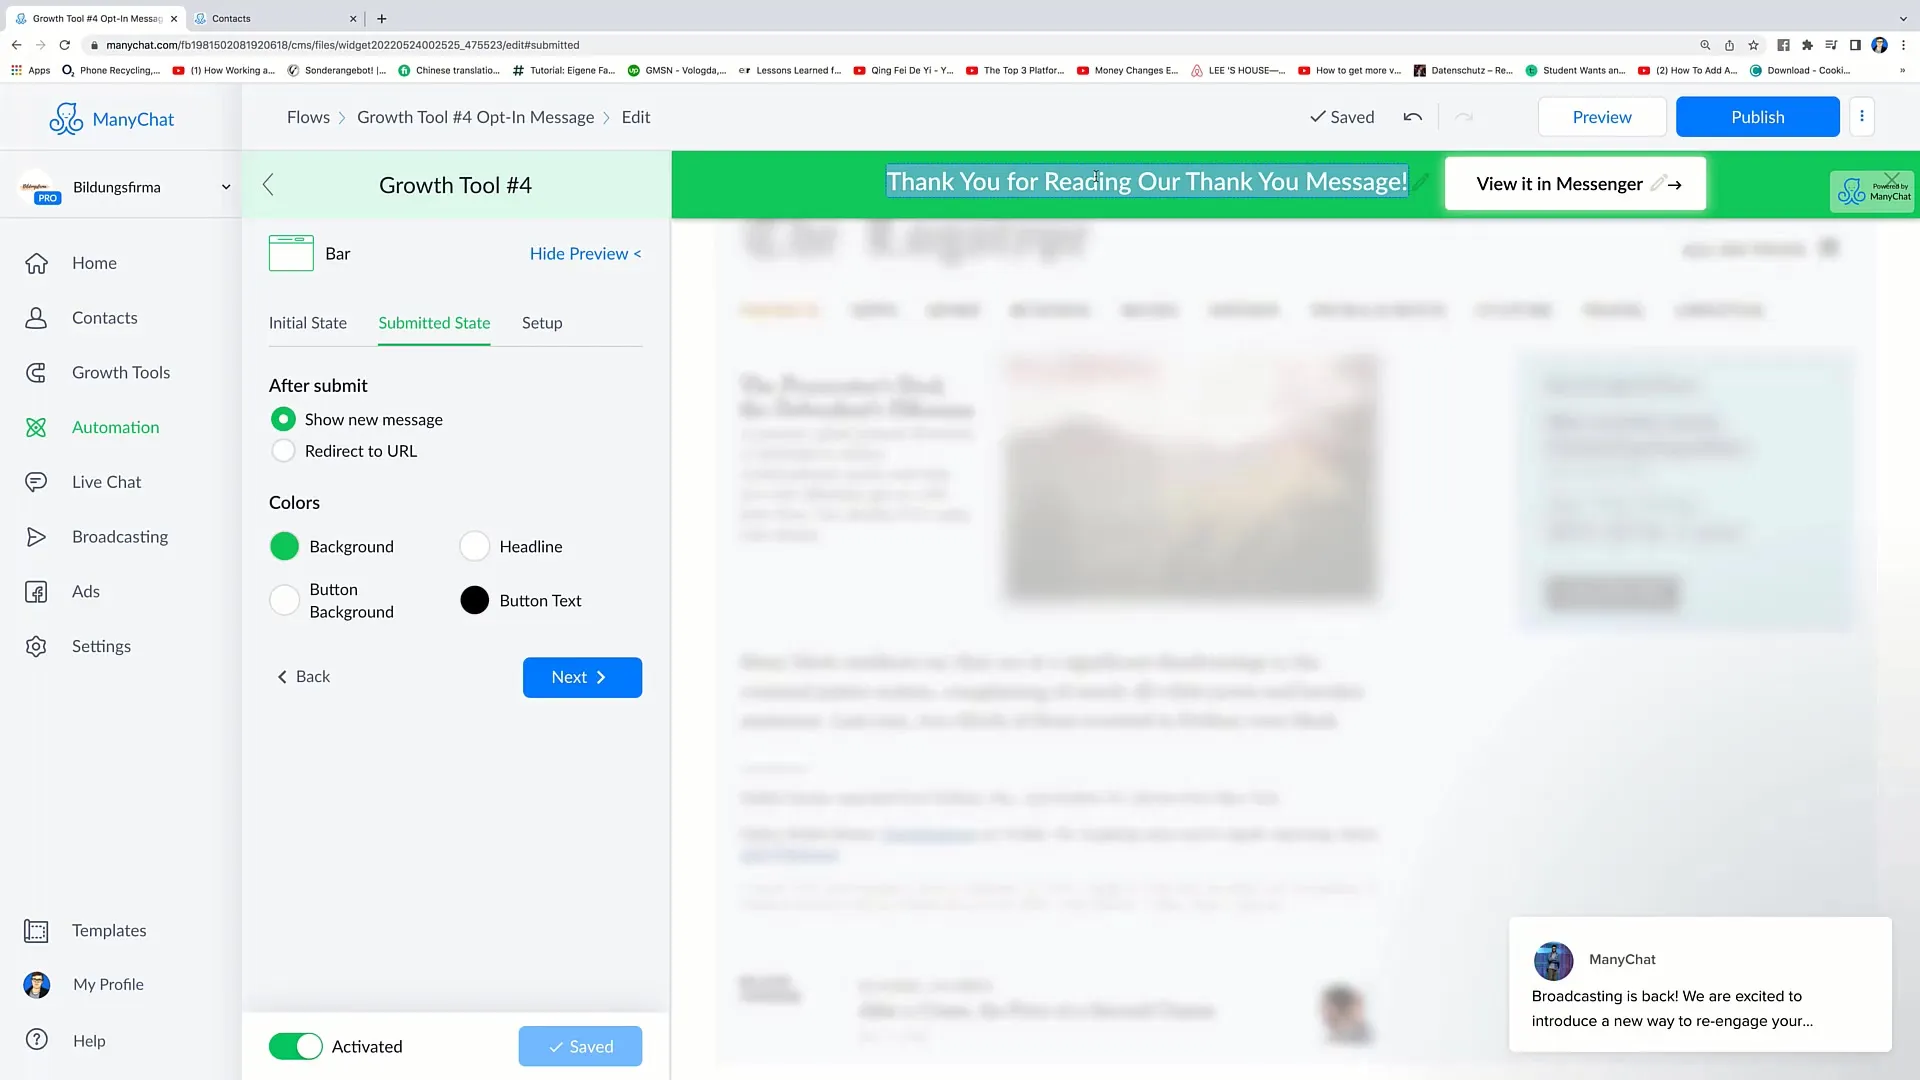
Once the user interacts with the tool, you can customize the "Submitted State". You have the option to add a thank you message or a button that takes the user back to Messenger. Remember to word the messages clearly and invitingly.
Step 9: Setting up URL Redirects
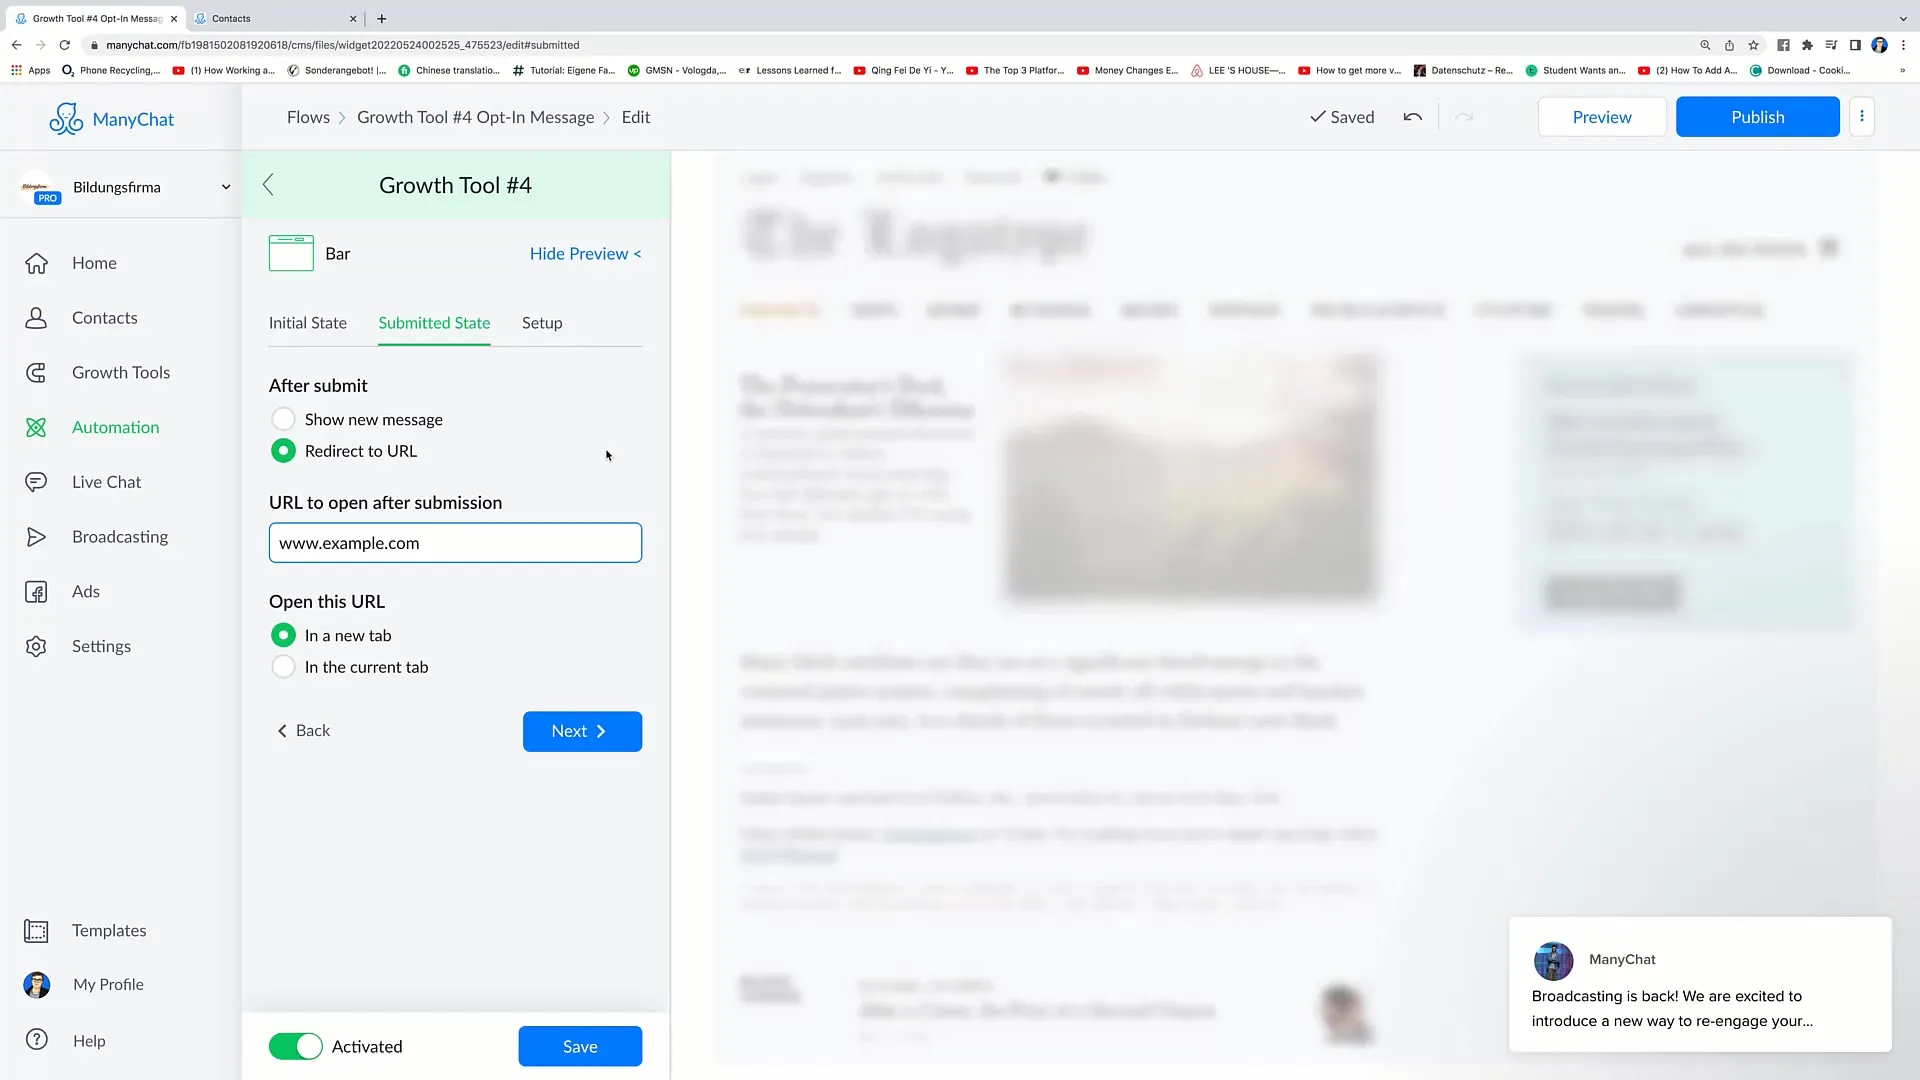
If you want to insert a specific URL that the user will reach upon interaction, you can also do that. This is especially useful if you have special discount promotions or offers. Link to a page that is relevant to the user to promote conversions.
Step 10: Code Integration
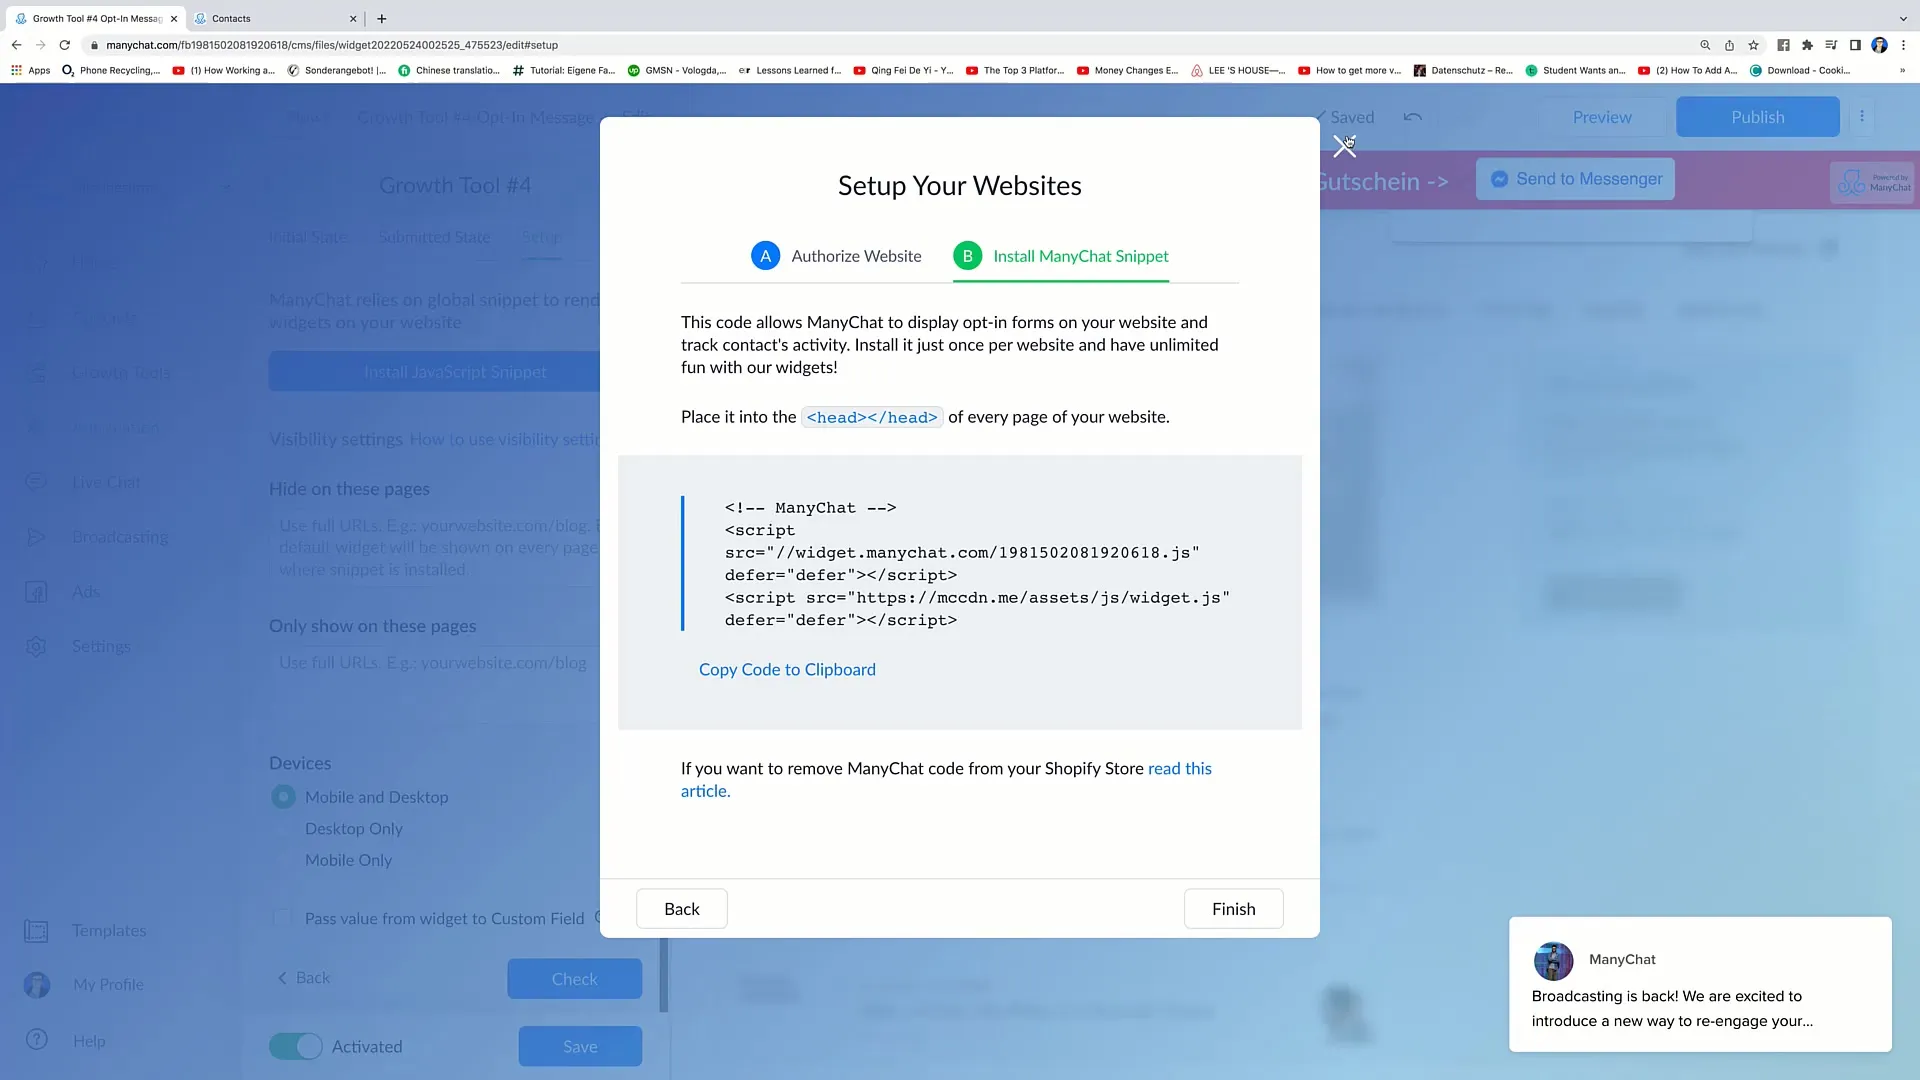
One of the final steps is integrating the code on your website. Once you have completed all settings, you will receive a code that you can insert at the desired location. This will activate the bar on your website, allowing users to interact with your messenger.
Summary
In this guide, you have learned how to create an effective Bar Growth Tool for your Facebook marketing. In several simple steps, you have successfully gone through the selection, customization, and implementation of the tool. Remember to always prioritize customer experience to ensure a positive user experience.
Frequently Asked Questions
What is a Bar Growth Tool?A Bar Growth Tool is a means to interact with users in real-time and draw their attention to offers.
How can I integrate emojis into my messages?You can simply insert emojis into the textbox while creating your messages.
Where can I find the right settings for displaying the bar?You can find these settings under the Growth Tools section, where you can select triggers for visibility.
Can I still customize the bar after set up?Yes, all settings can be adjusted at any time to optimize the user experience.
How long will the bar be displayed on the website?You can set this yourself, depending on the trigger settings you choose.
