In today's digital marketing world, it is more important than ever to reach the right target audiences. Facebook offers you the opportunity to create a Custom Audience to communicate specifically with the people who have already shown interest in your offering. In this guide, I will explain step by step how you can create your own Custom Audience.
Key Insights
- A Custom Audience allows you to target ads to people who have already interacted with your company.
- The use of the Facebook Pixel is crucial to track visitors' behavior on your website.
- You can set various criteria to further define your target audience.
Step-by-Step Guide
Step 1: Accessing the Facebook Events Manager
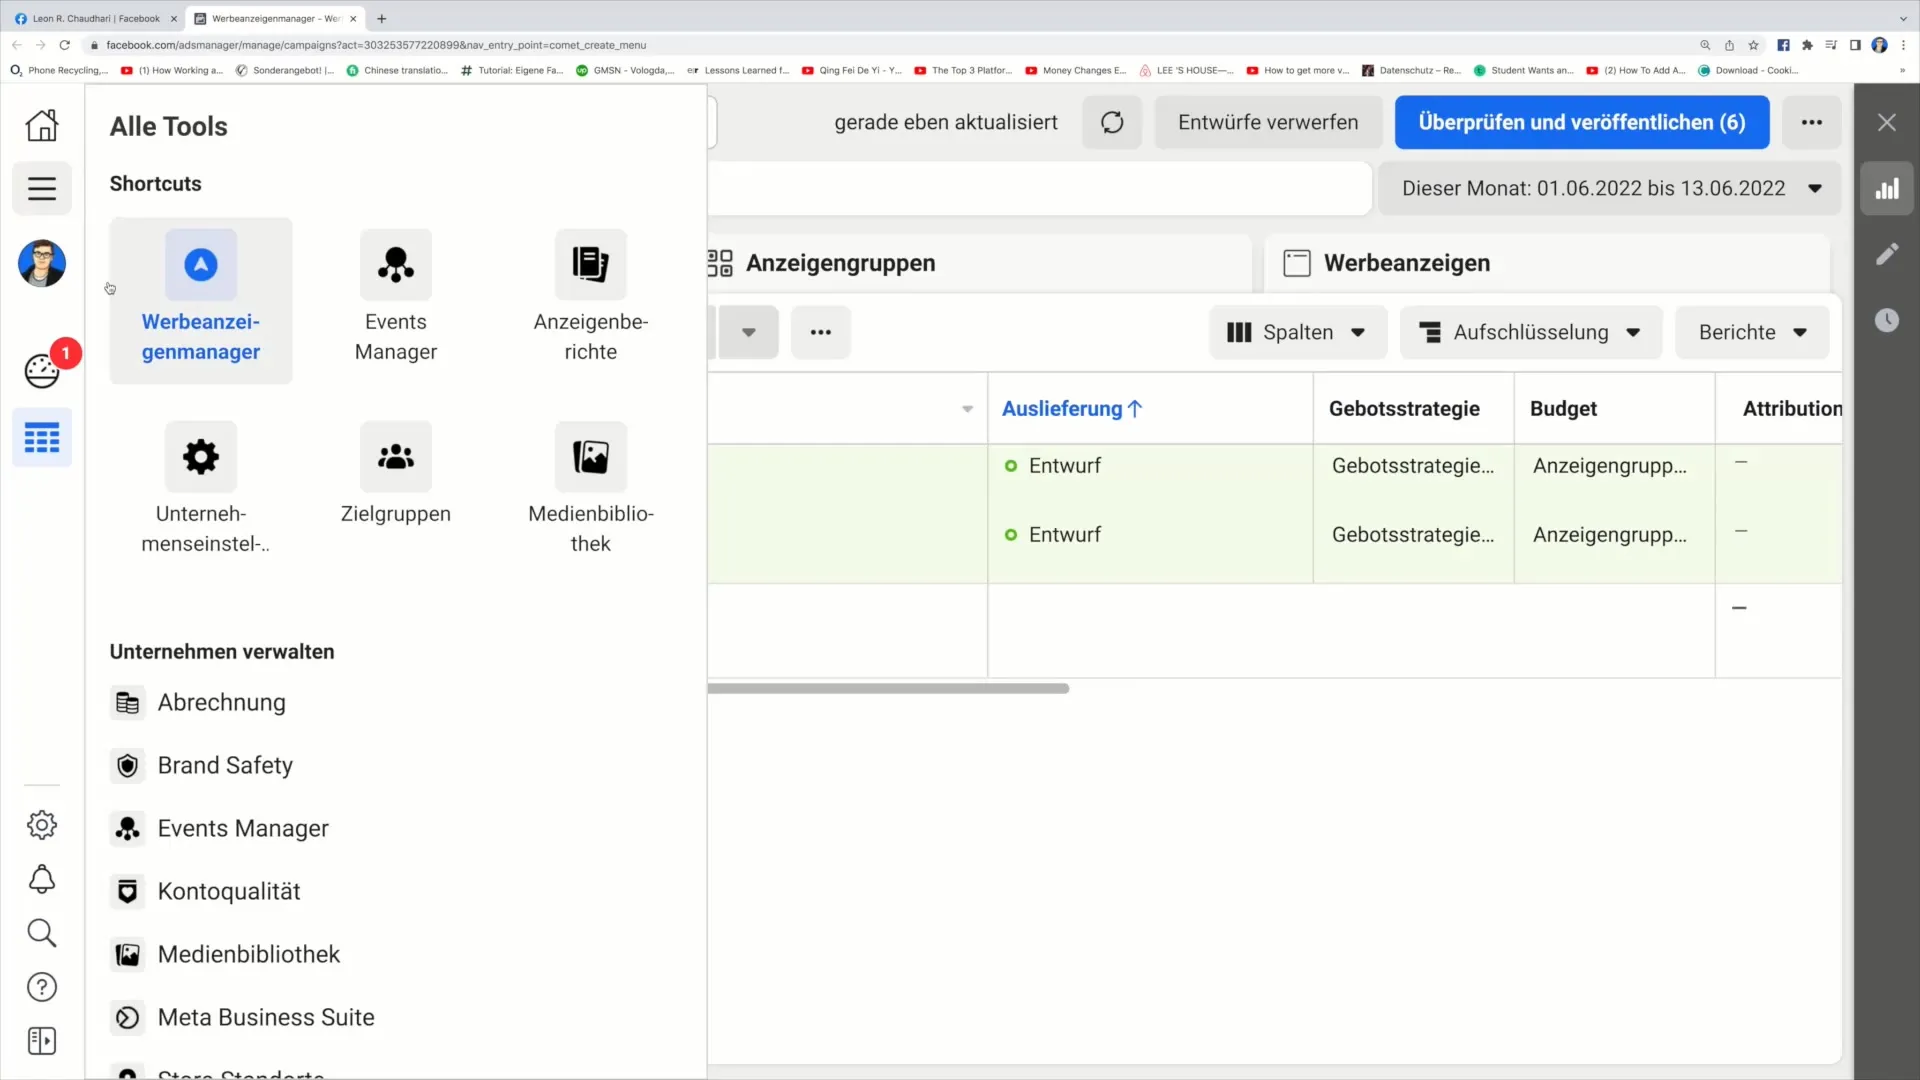
First, you need to open the menu on the left side of your Facebook account. You will find the three small bars (☰) there as access to various functions. Click on it and then select "Events Manager".
Step 2: Creating a Custom Audience
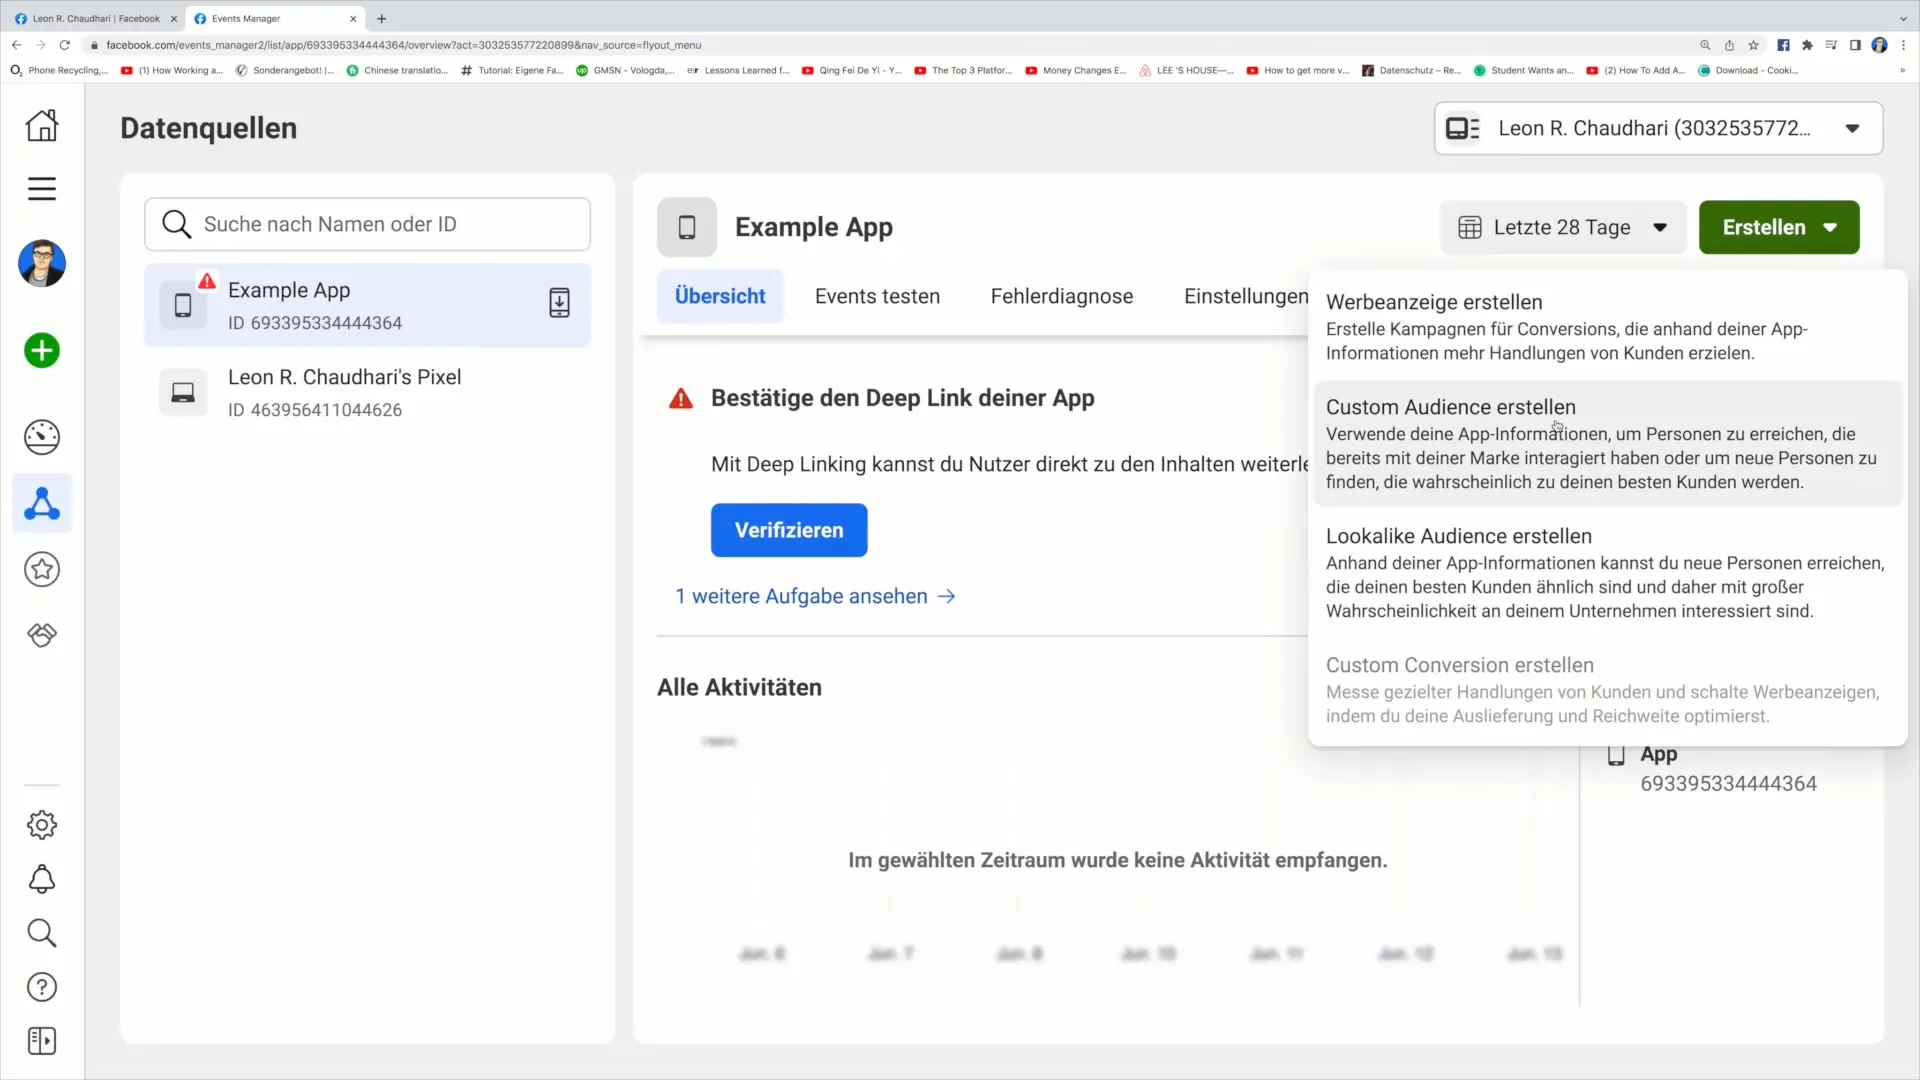
In the Events Manager, you will now see the "Create" button in the upper right corner. Click on it to start the process of creating your Custom Audience.
Step 3: Selection of Audience Type
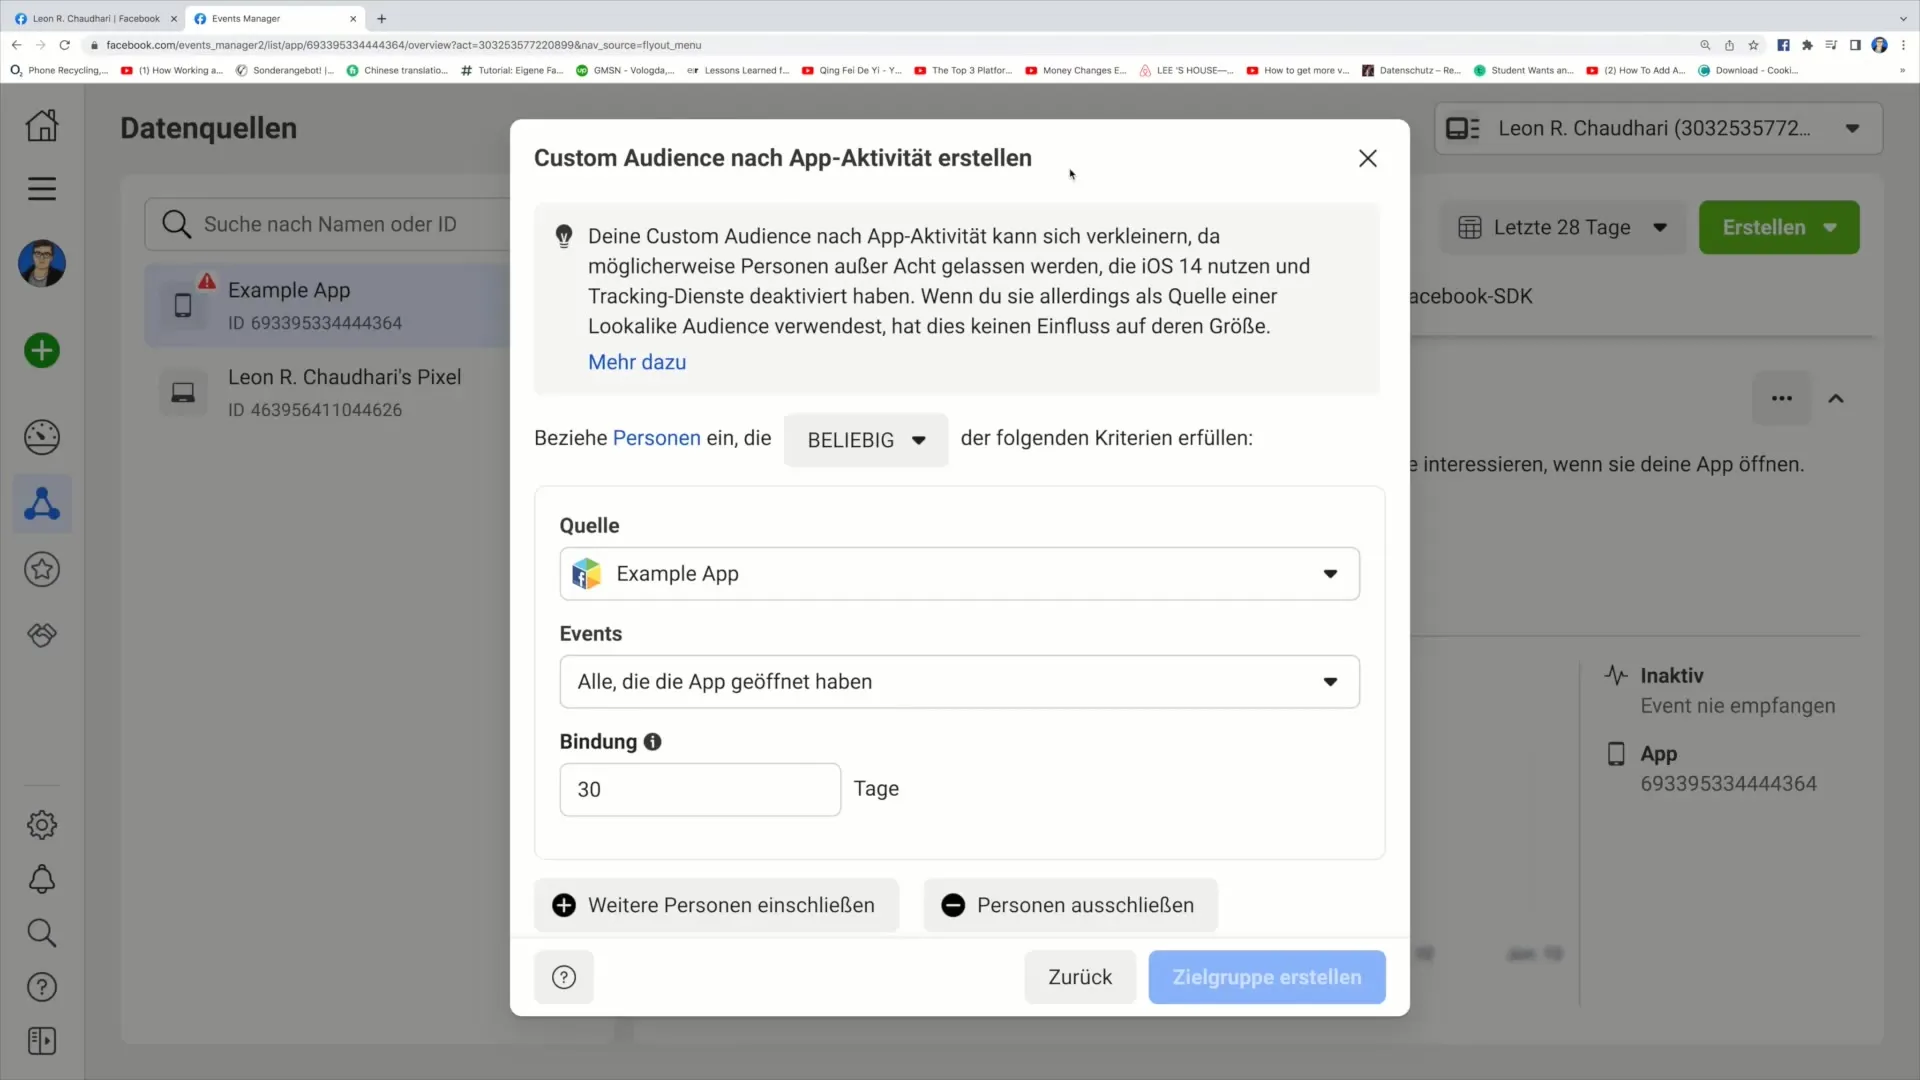
You will be prompted to create a Custom Audience. The option you must choose in this step is "Custom Audience from Website Data" if you want to use the Facebook Pixel for the website.
Step 4: Selection of Facebook Pixel
If you have correctly installed the Facebook Pixel, you should be able to select your Pixel source. Make sure the dot here is green, indicating that the Pixel is active.
Step 5: Definition of Audience Criteria
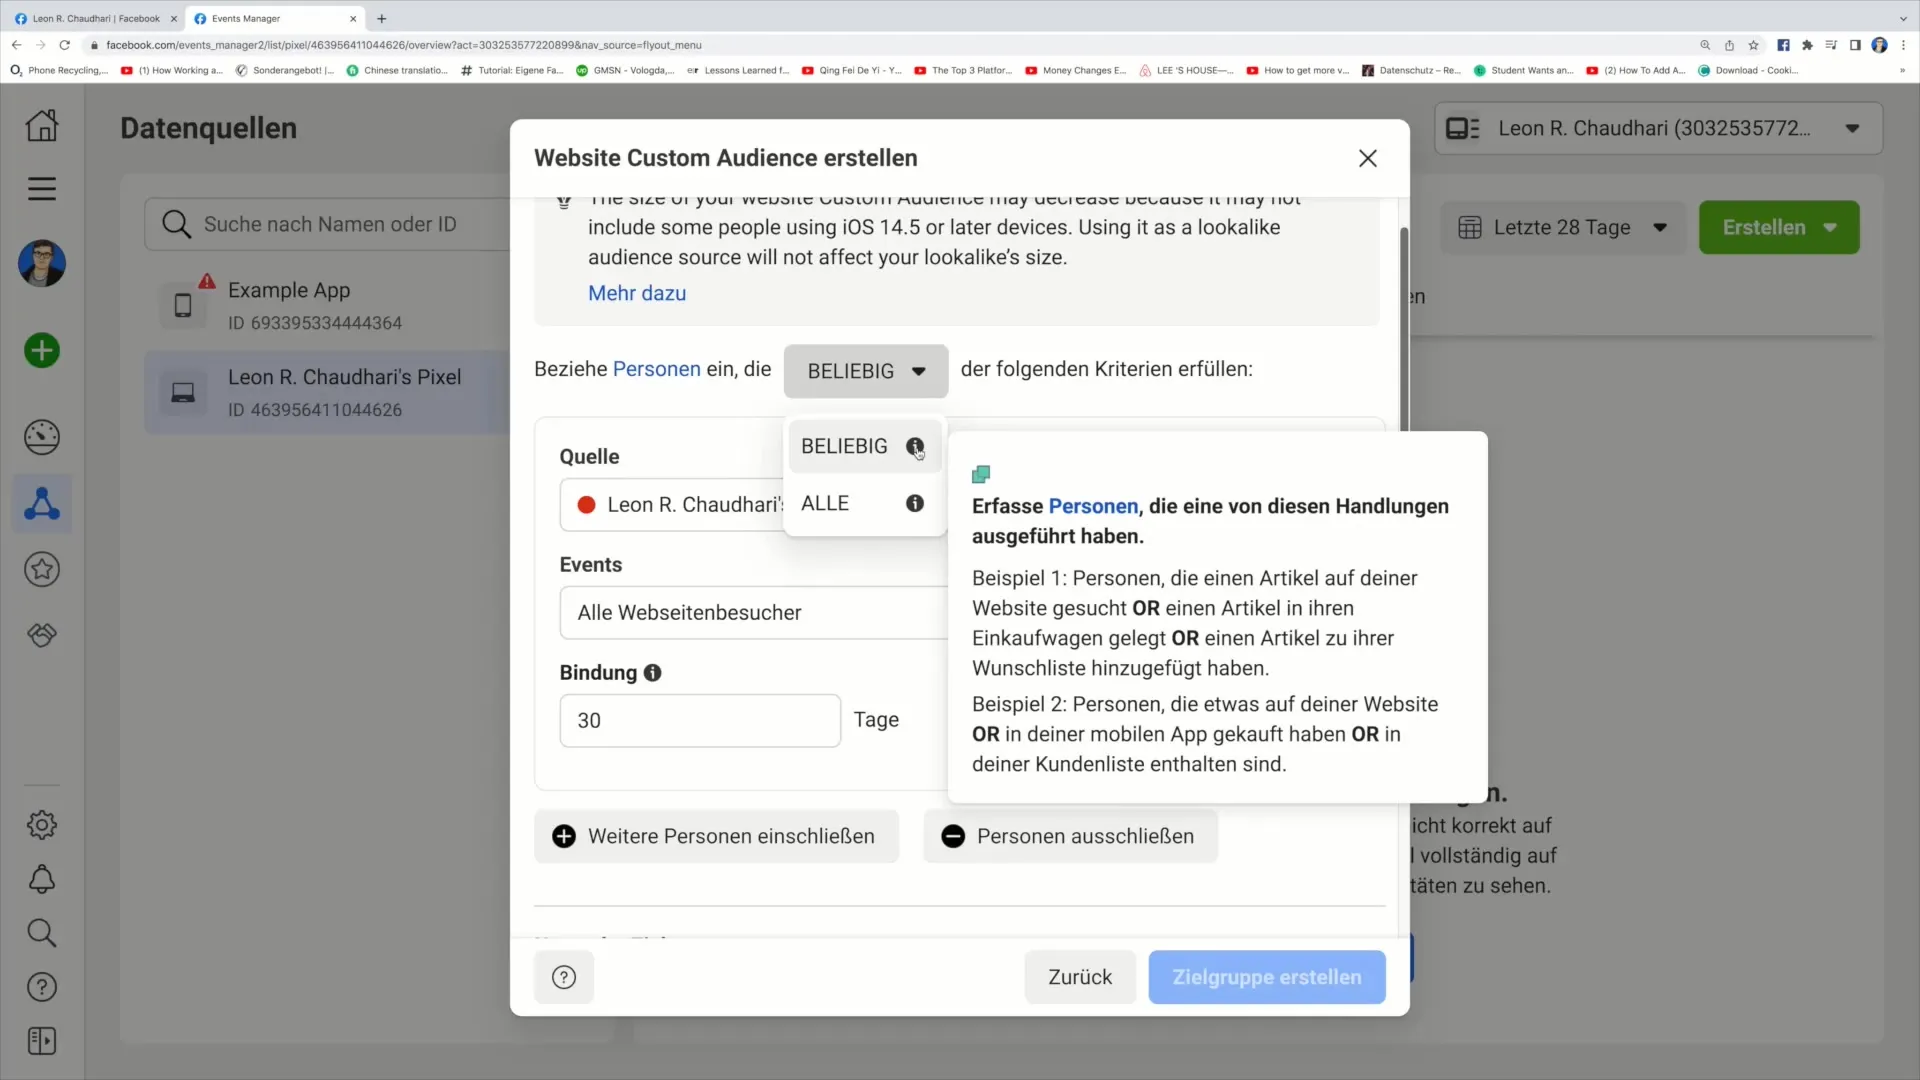
Now you can set the criteria for selecting the people to be included in your Custom Audience. You have the option to choose specific actions that users have taken on your website.
Step 6: Selection of Specific Actions
For example, you can capture all individuals who have taken a specific action in the last 30 days, such as searching for an item or adding a product to the cart. Choose the appropriate option that best fits your goal.
Step 7: Setting the Timeframe
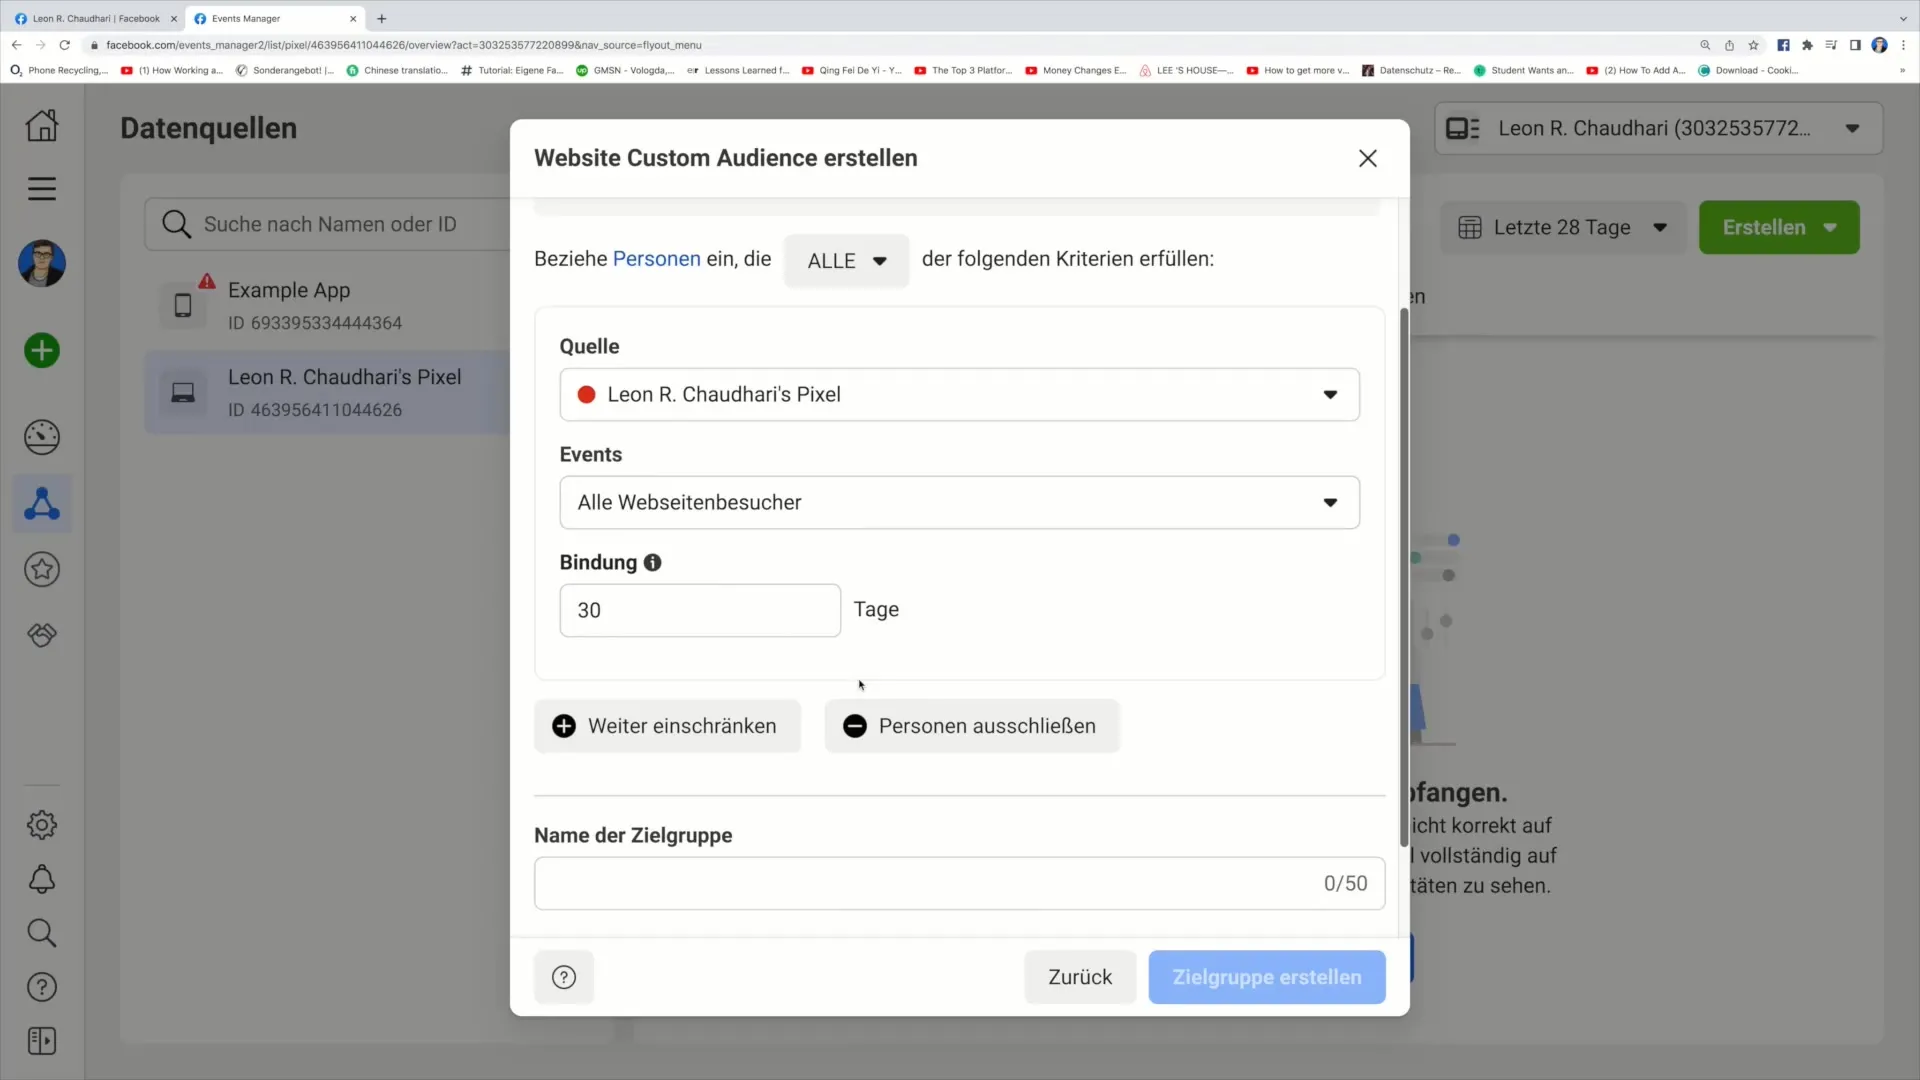
Now determine the period during which visitors were active on your website. Here you can choose the last 7, 20, or 30 days. In this tutorial, we will use the last 30 days as an example.
Step 8: Naming the Custom Audience
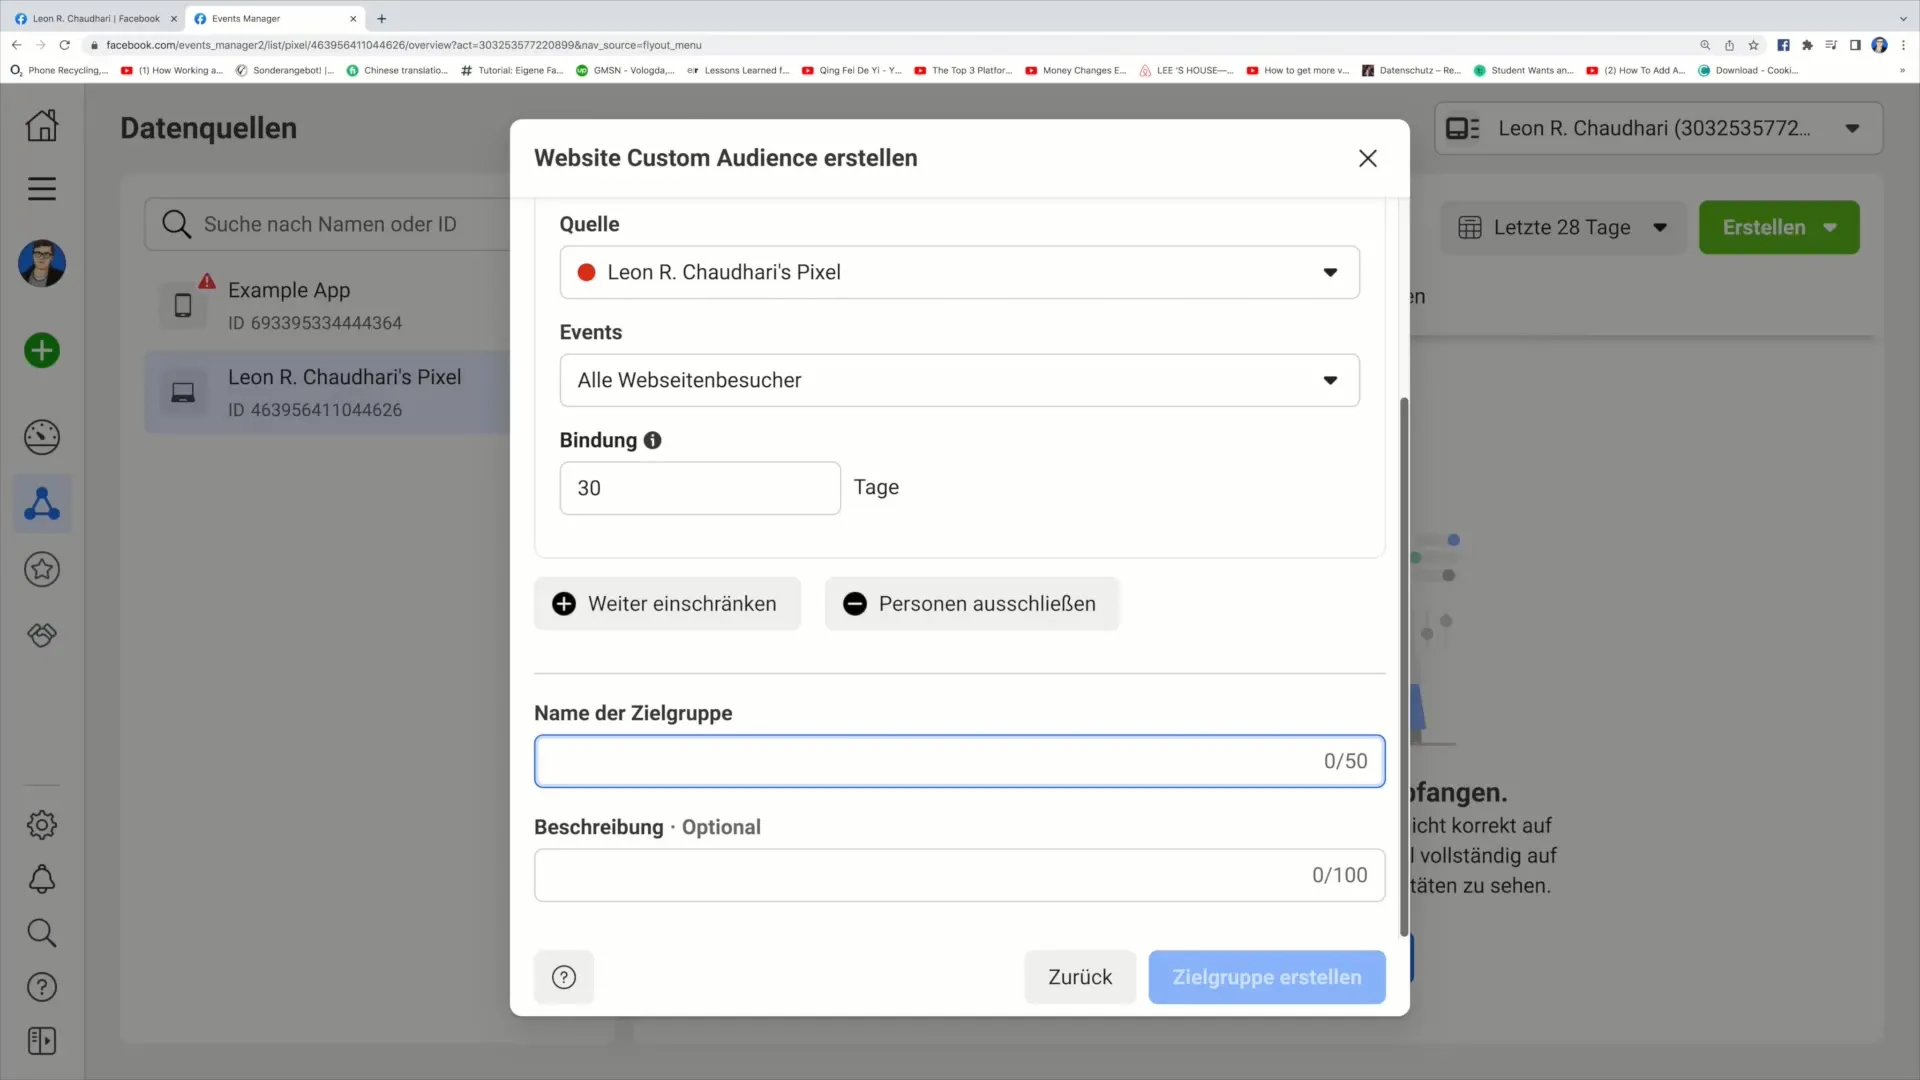
Now it's time to give your Custom Audience a name. You could choose something like "Custom Audience Number 1" and add a description that describes the content of the target audience, for example, "All website visitors, last 30 days".
Step 9: Adding Description and Creating Audience
You can also specify a subject or category for later identification. After entering all the necessary information, click on "Create Audience".
Step 10: Using the Custom Audience
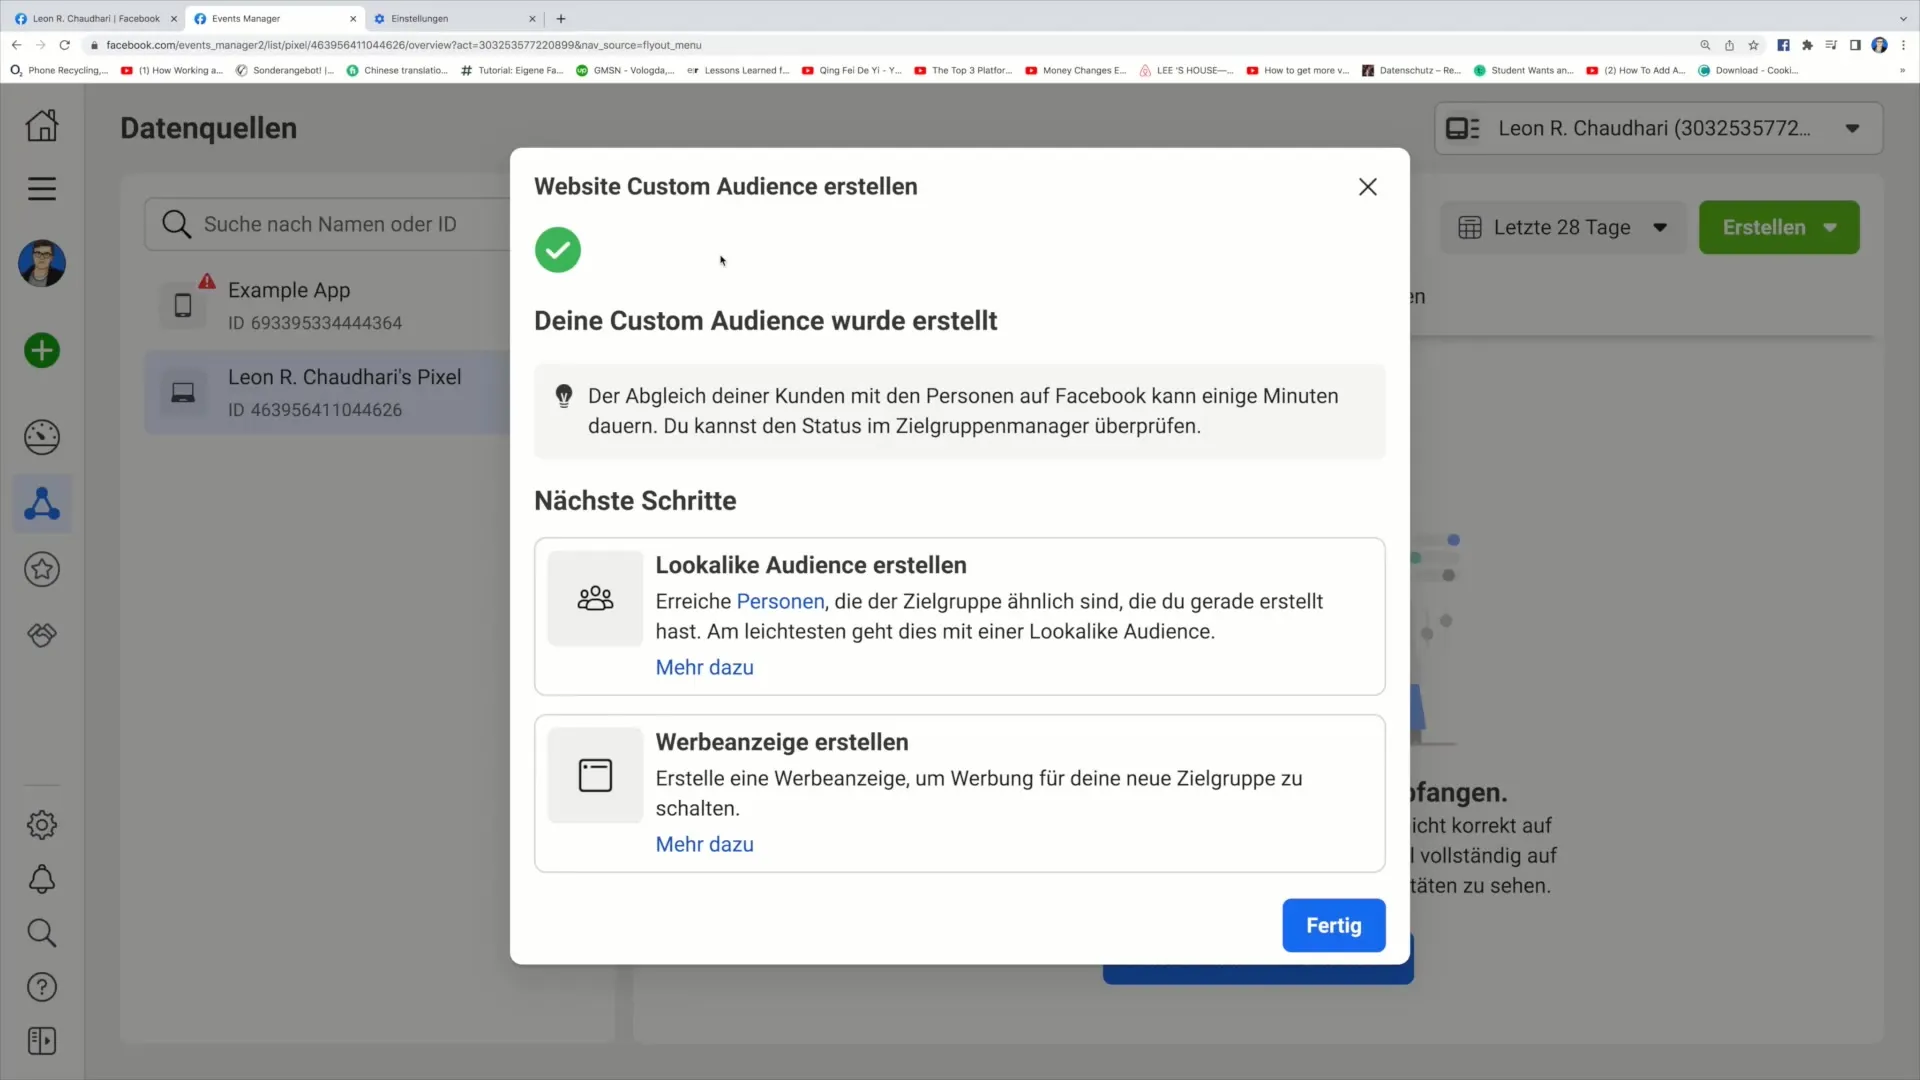
Once you have created your Custom Audience, you can use it directly in your Facebook ad campaigns to effectively target your audience.
Summary
Creating a Custom Audience on Facebook is an essential step to optimize your marketing strategy. You can specifically target people who have already shown interest in your offer and encourage them to make a purchase decision. By using the Facebook Pixel and defining clear audience criteria, you significantly increase the effectiveness of your advertisements.
Frequently Asked Questions
How do I create a Custom Audience on Facebook?To create a Custom Audience, go to the Events Manager, click on "Create," and follow the instructions to select your target audience.
What is the Facebook Pixel?The Facebook Pixel is a code that you install on your website to track the behavior of your visitors and display targeted ads.
How long can I define my Custom Audience?You can define a Custom Audience for different time periods, such as the last 7, 20, or 30 days, depending on your marketing goals.
