Note: This tutorial is a text version of the accompanying video training by Marco Kolditz. The texts may therefore also have a colloquial style.
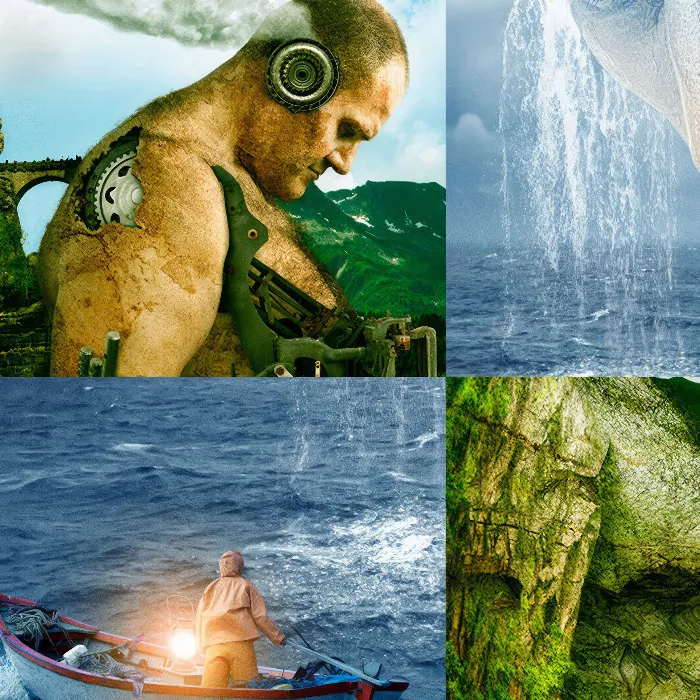
Water should now flow out of the mask like a waterfall.
Steps 1-10
Step 1
Open the "Waterfall" image via File>Open..webp?tutkfid=63002)
Step 2
Click on the hand tool to enlarge the image.
Which part of the image should now be used for the composing? Marco explains that it will only be the middle part of the waterfall, as the lower third is too soft and he doesn't like the transition as a break. Furthermore, the upper waterfall makes just as little sense as the entire vegetation at the edge.
This middle section should now be cut out.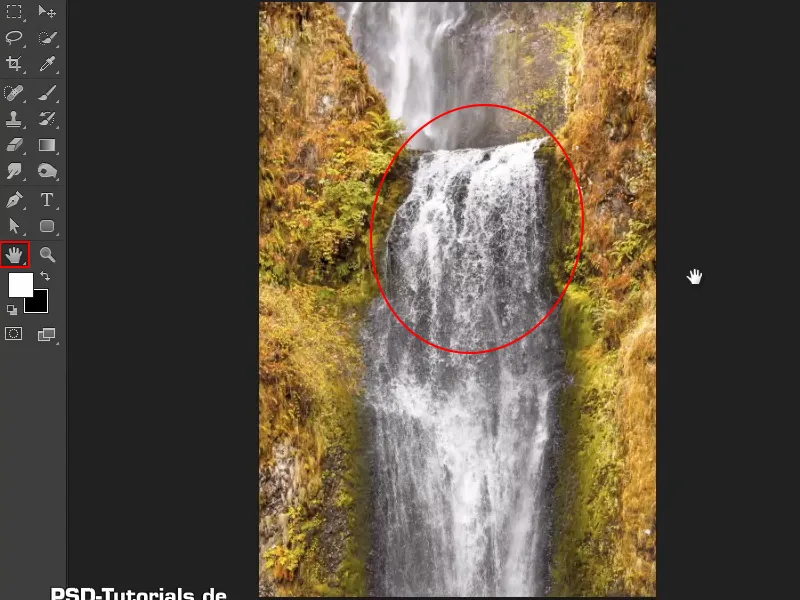
Step 3
First select the cropping tool and generally make the file smaller. This ensures smaller file sizes and less frustration later in the editing process.
Because sometimes you may want to deform an image - as is the case here - in order to integrate it better into another one. And if you then tackle it at the edges and start deforming it from there, you may not be able to work in such detail.
That's why Marco cuts the section so that the image is as small as possible.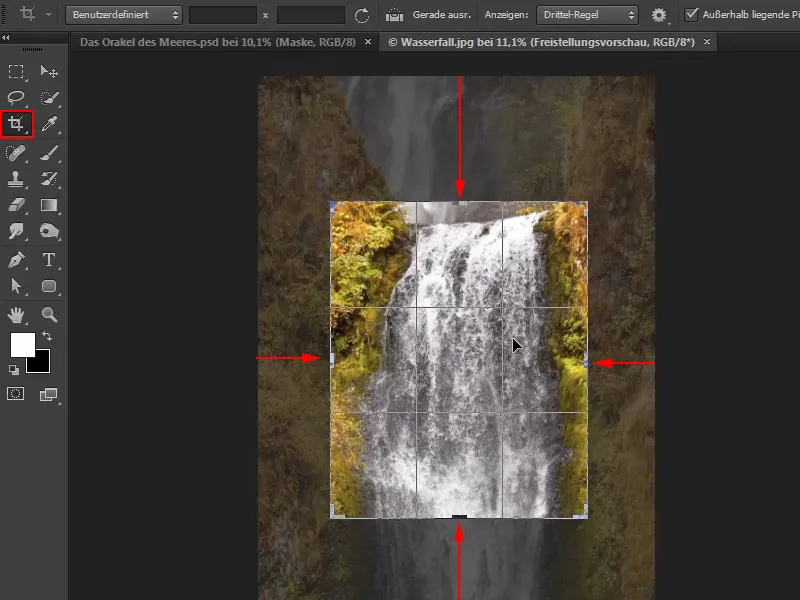
And the image can now be edited further on this basis.
In this case, it is important that the checkbox for Delete pixels outside the crop tool is ticked. This means that what has just been cropped is really cropped and completely deleted.
If the check mark was not set, the border areas would remain, but would not be visible. However, the image could still be moved to the left and right and then these areas would reappear. That would be the non-destructive way of working.
But if it is quite clear that the surroundings are no longer to be used later, then you can also do it this way and delete the pixels.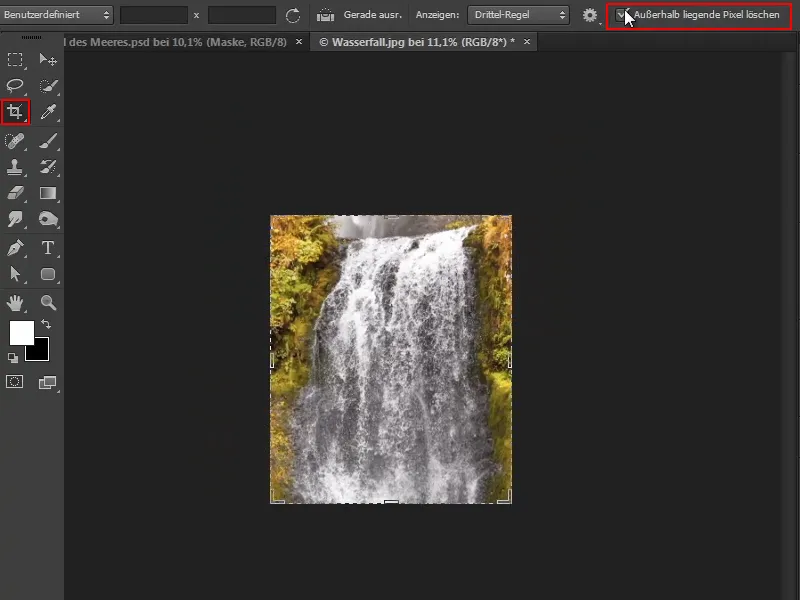
Step 4
The water area should now be cropped.
To do this, Marco looks at the channels individually to find the one that provides the highest contrast. In this game, the blue channel is the clear winner..webp?tutkfid=63006)
Step 5
A mask is now to be created based on the blue channel.
Before he gets to the actual procedure, Marco shows two alternatives and demonstrates that they are not so successful in this case:
Firstly, you could go back to Image>Channel Calculations. So the channel: Blue with itself in the Soft light mixing mode, for example.
By checking and unchecking the Preview box, you can see the before and after comparison.
The contrast is already increasing.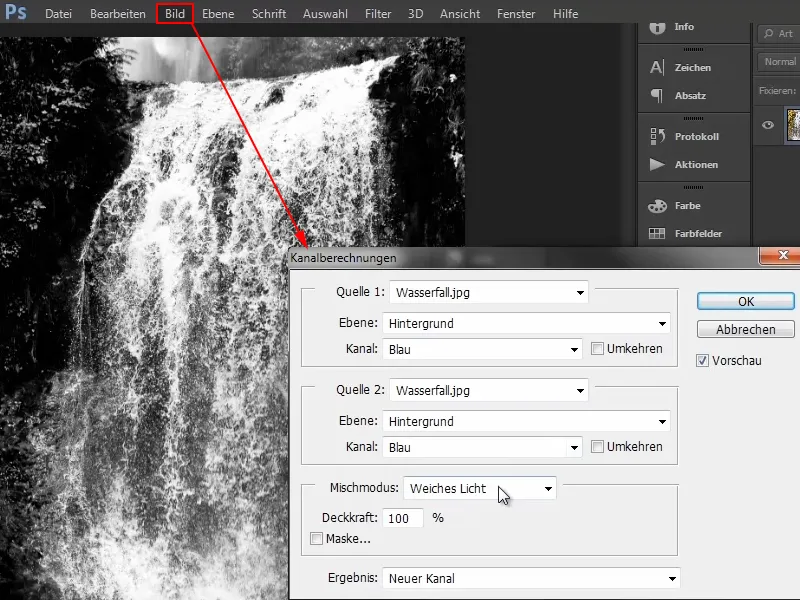
On the other hand, it would be even more striking with the blend mode Copy one into the other. However, the white then eats away at the top.
However, the gray values should also be retained because these are the semi-transparencies through which the mask will later shine through.
Marco therefore clicks on Cancel.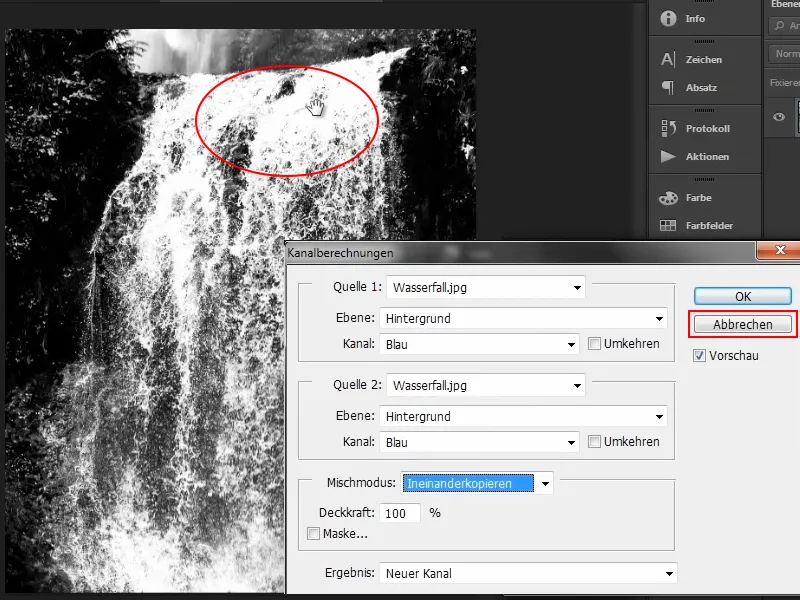
The blue channel, as it is, is ideal for what is to be done here. This means that you don't need to calculate the channel in this case, but can use the blue channel directly and create a mask from it.
To do this, hold down the Ctrl keyand click on the blue channel to create a luminance selection.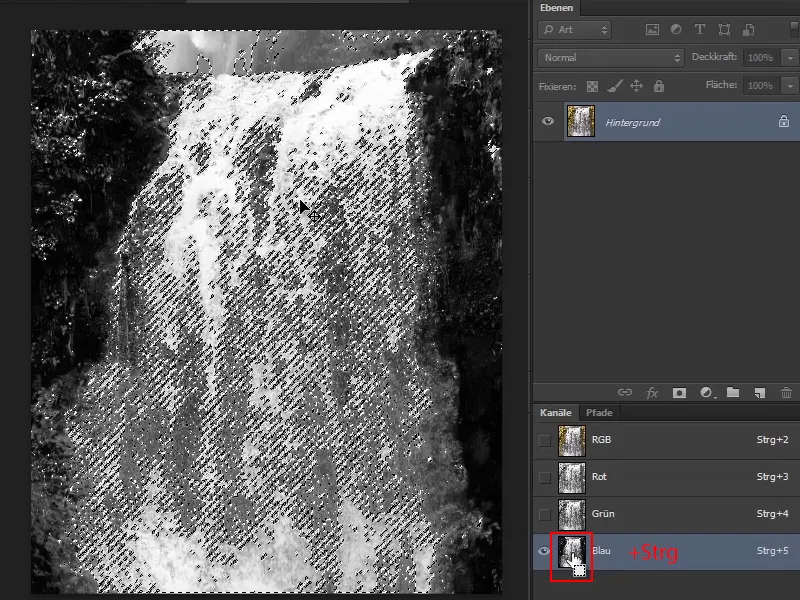
Step 6
Now click on the mask symbol on the "Background" layer, which cannot be moved. This turns the "Background" layer into a moving layer and a mask is created immediately.
Rename this layer to "Waterfall".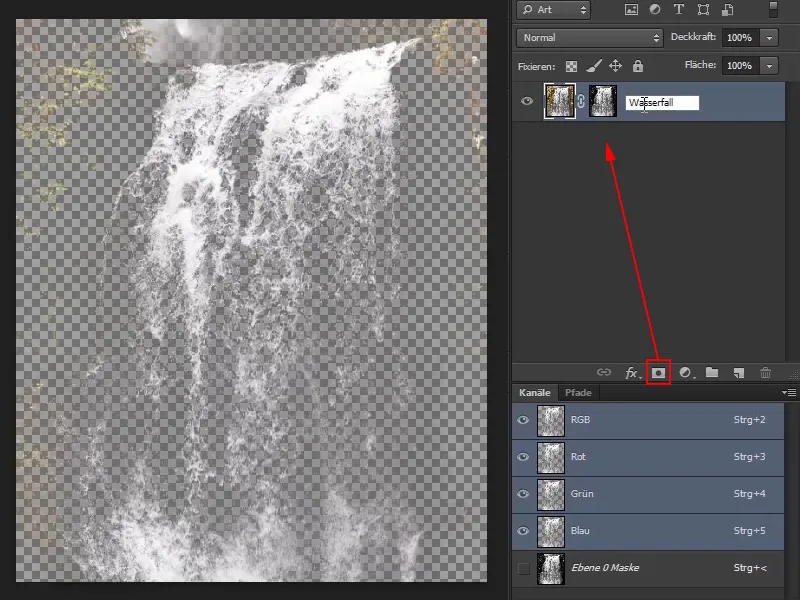
Step 7
Some parts of the vegetation are still visible in the image and are still colored. You can now remove all of this. To do this, hold down the Alt keyand click on the mask so that you are directly in the mask. This is similar to the channel calculations, where you later move to the alpha mask and retouch something there.
Now take a brush, black foreground color and retouch out these colored areas or mask them with black. Everything that is white will still be visible later.
And in this case, you don't have to work too precisely, i.e. you don't have to cut out every single drop of water.
That's quite enough:.webp?tutkfid=63011)
Marco points out that he also likes to work very precisely himself, but points out that you should always ask yourself whether this is efficient and what the goal is or where you want to use the image later. And here it is simply not necessary to invest a lot of time and really crop every single drop of water. It would be different with beauty retouching, however, if you were to crop individual hairs and eyelashes. It really always depends on the intended use.
Step 8
Click on the image to see the finished result.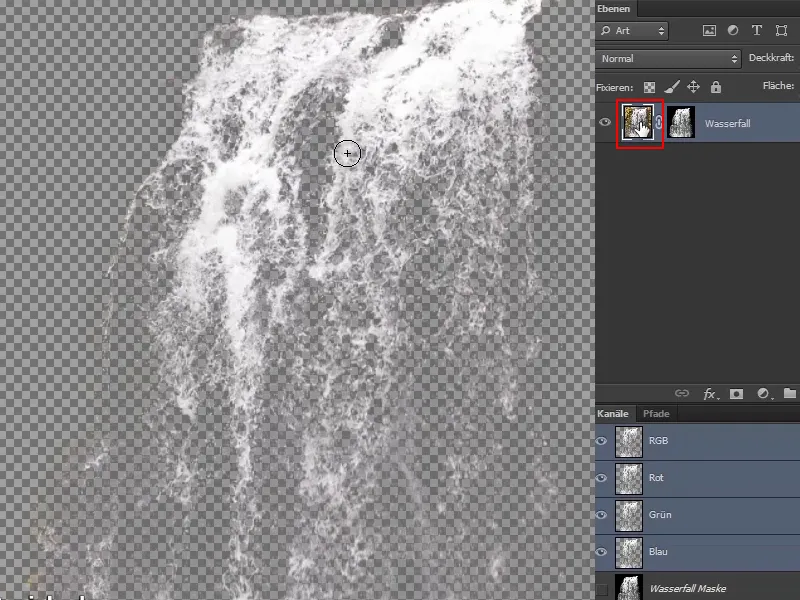
Step 9
If there is any vegetation left, you can remove these colored areas by clicking on the mask again and painting over it once more with a brush and black foreground paint.
You don't need to go to too much trouble here either. Go around once and remove the rough areas of vegetation.
When the mask is active, you won't be able to see this very well because everything is black and white.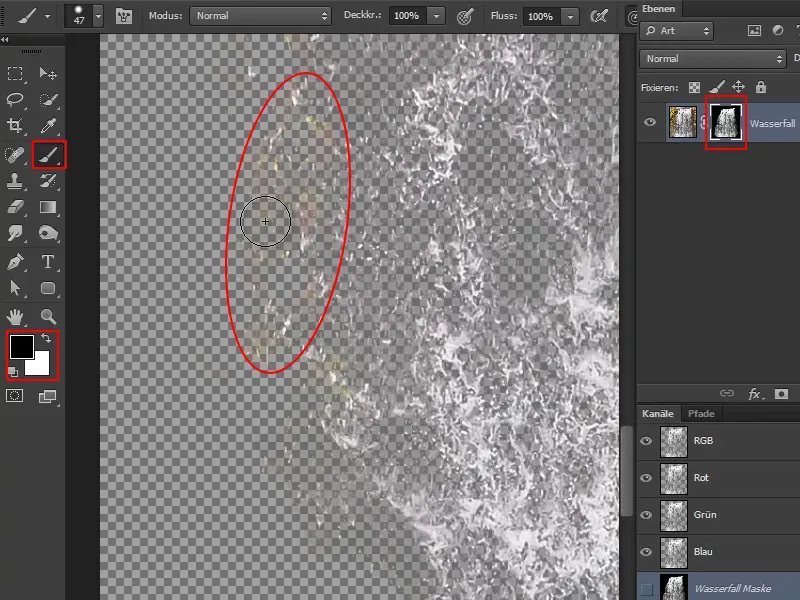
Step 10
The next step is to get rid of the remaining color. You can easily do this by clicking on the image layer and pressing Ctrl+Shift+U at the same time.
This completely desaturates the entire image and removes all color information. It should be black and white, you don't need anything else at the moment.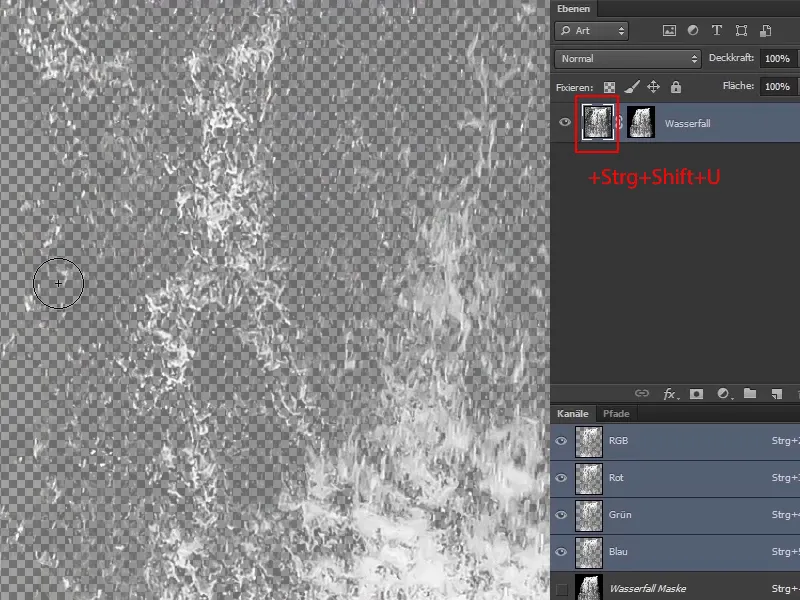
Now it goes on: Steps 11-20
Step 11
Now grab the waterfall and drag it onto the other image.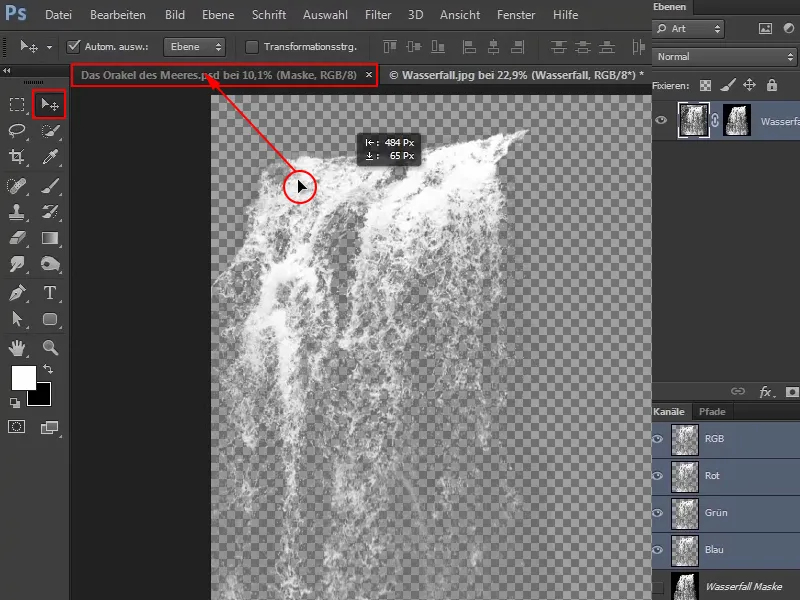
Step 12
You have now dragged an image into an image - in this case, right-click on the layer and select Convert to Smart Object.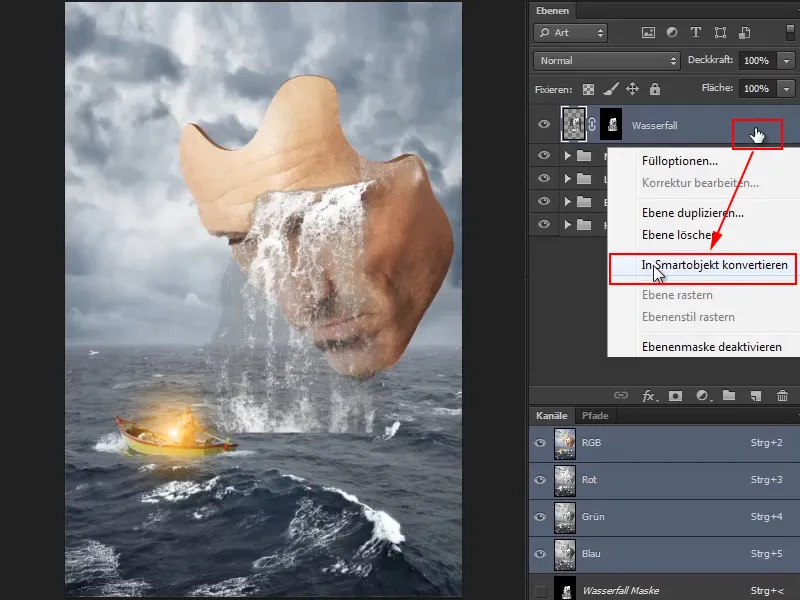
Step 13
In the video, Marco reassures those who may be worried that the mask has disappeared.
Double-click on the icon to open a new tab in the smart object and you will have exactly the same image information that you just put into the smart object: the layer thumbnail and the mask.
You can of course change these at any time, save them, then close the tab again and the changes will be visible in the main image.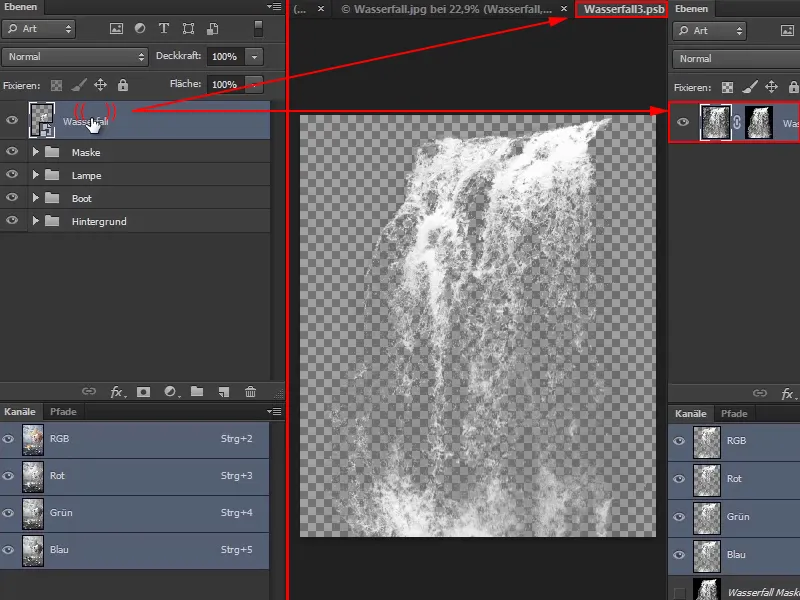
So don't worry, a smart object is actually comparable to a kind of group.
Step 14
If you now look at the waterfall in the picture, you will see that it is actually the wrong way round in terms of perspective. It is flowing from top right to bottom left, whereas it should actually be flowing from top left to bottom right.
You can mirror the waterfall using Edit>Transform>Flip Horizontal.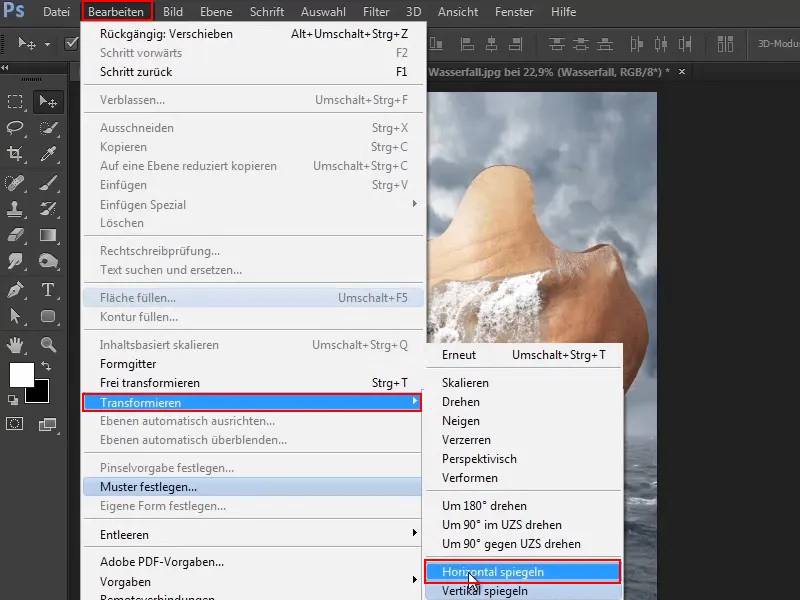
Of course, you could also mirror the waterfall by pressing Ctrl+T and then grabbing a point and dragging it to the opposite side.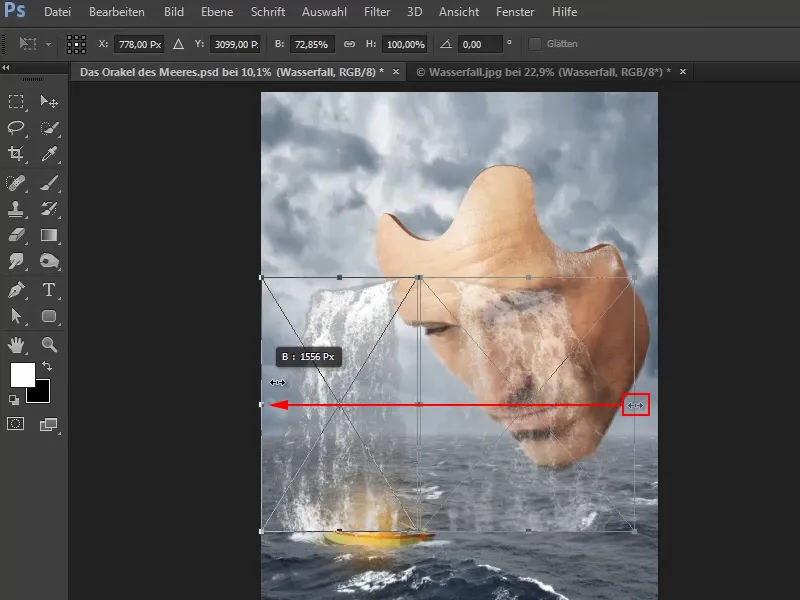
Mirroring would also work vertically, i.e. from top to bottom and vice versa.
Step 15
Now place the waterfall as you want it to be.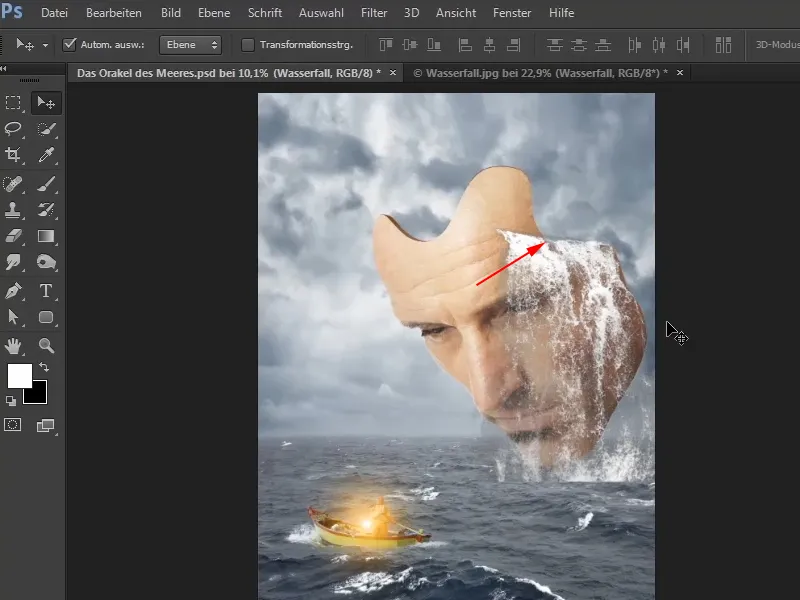
Step 16
With Ctrl+T you can compress the waterfall a little and make it longer.
However, if it gets stuck and lines snap somewhere, hold down the Ctrl keywhile dragging. This will then no longer happen and you can adjust everything as you like.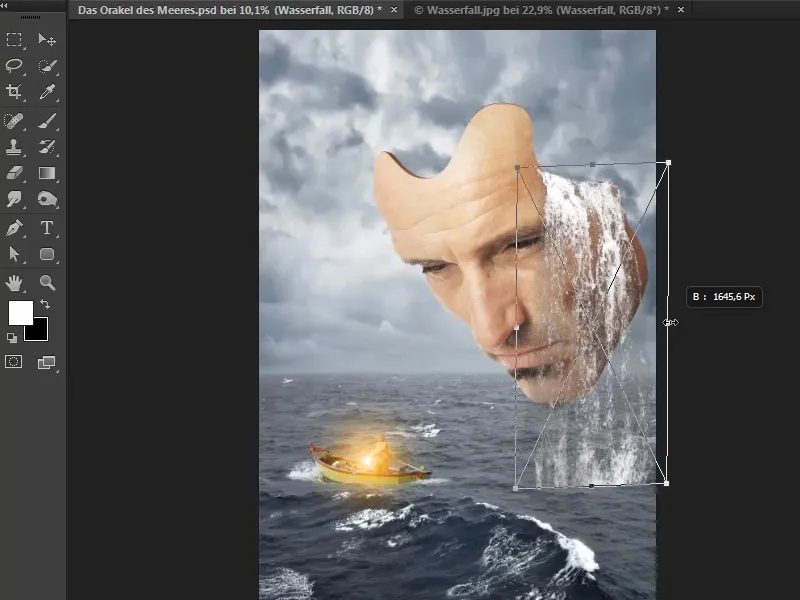
If it fits, confirm with Enter.
Step 17
The top edge of the waterfall is not yet to your liking because it is still very straight. Like the mask, it should be curved.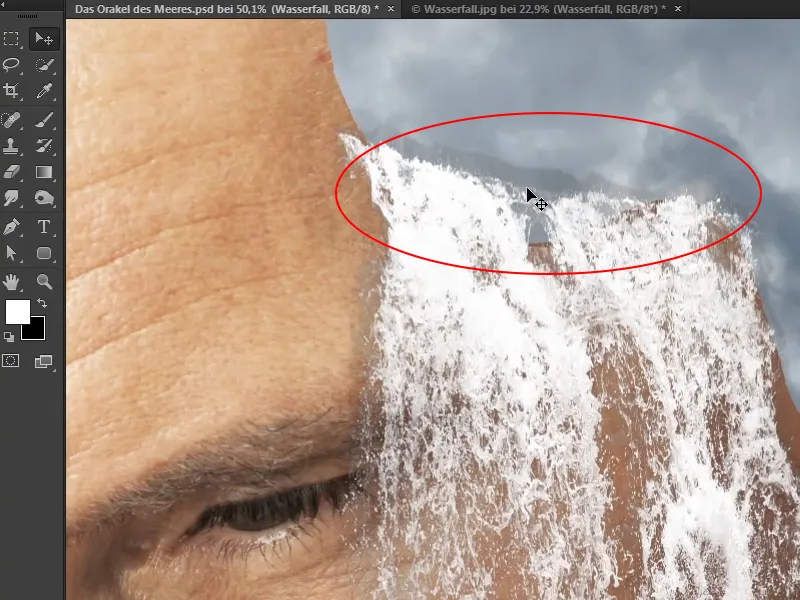
Step 18
The edge can be edited via Edit>Transform>Deform.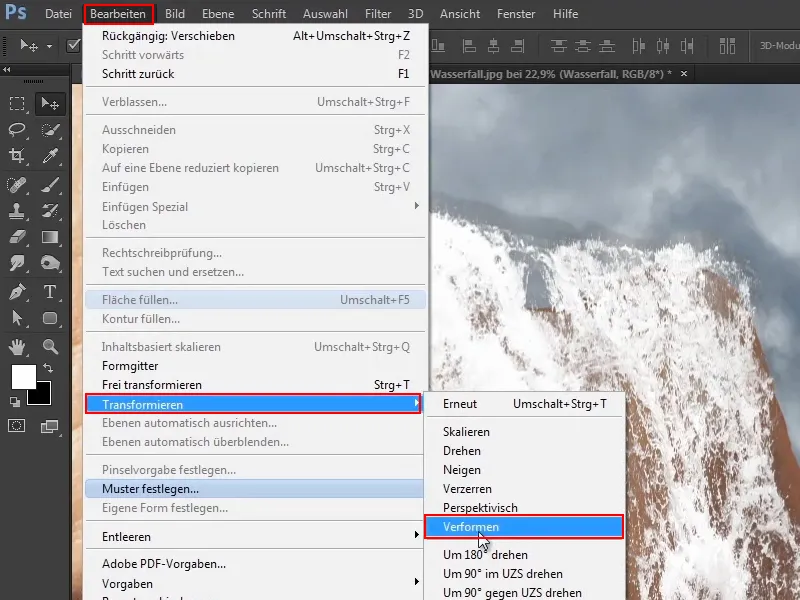
The deformation filter or this function is activated and works.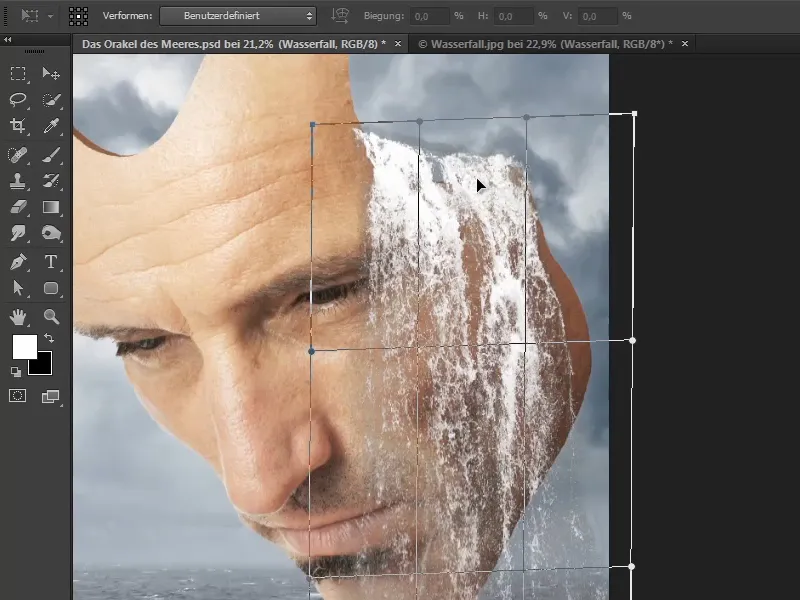
At this point, Marco points out that an error message may appear during this step.
This is if the smart object is linked to a layer mask. In this case, you would simply have to remove the link symbol and you could start the deform mode as normal.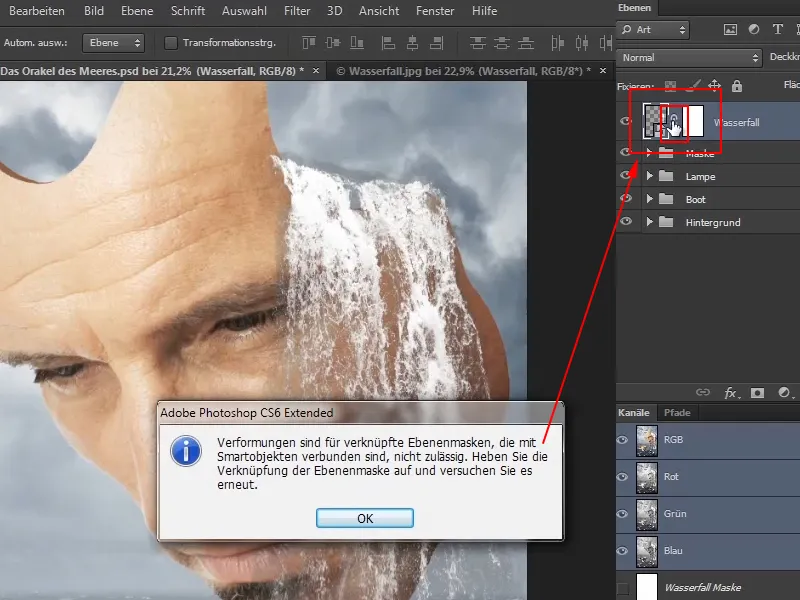
Step 19
Now drag the handles and deform the waterfall until it fits exactly. You can take your time to make sure it looks really good. For example, make sure that the eye is not covered too much.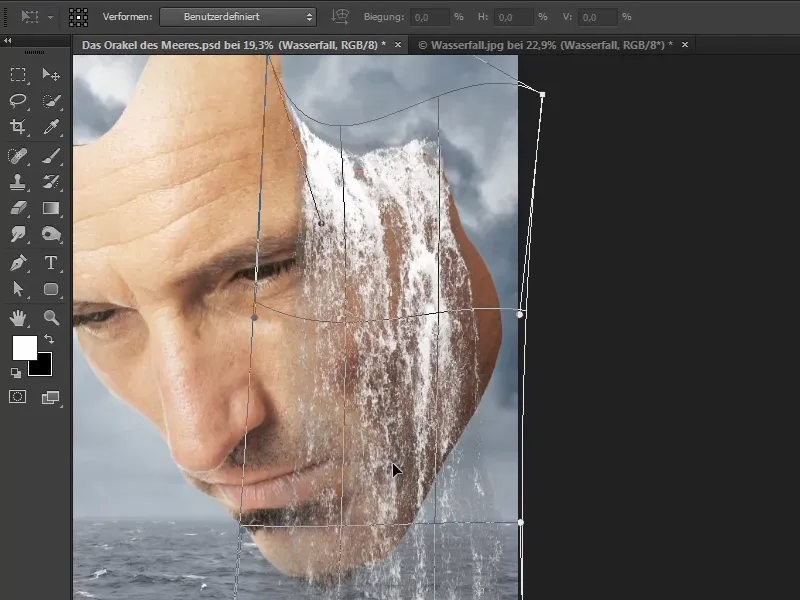
Now you can understand why Marco cropped the waterfall before cropping it. If he hadn't done this, the handles would now be a good deal further away from the waterfall and you wouldn't be able to work so precisely on the waterfall. That would have been rather frustrating. That's why Marco cuts off everything that he won't be using in the pictures he's cropping anyway.
Step 20
Next, the lower edge of the waterfall, where it meets the sea, needs to be edited and removed in places.
To do this, Marco creates a layer mask in the video training and selects a Photoshop brush or Photoshop brush. He explains that you can find these brushes for free or for a fee on the Internet.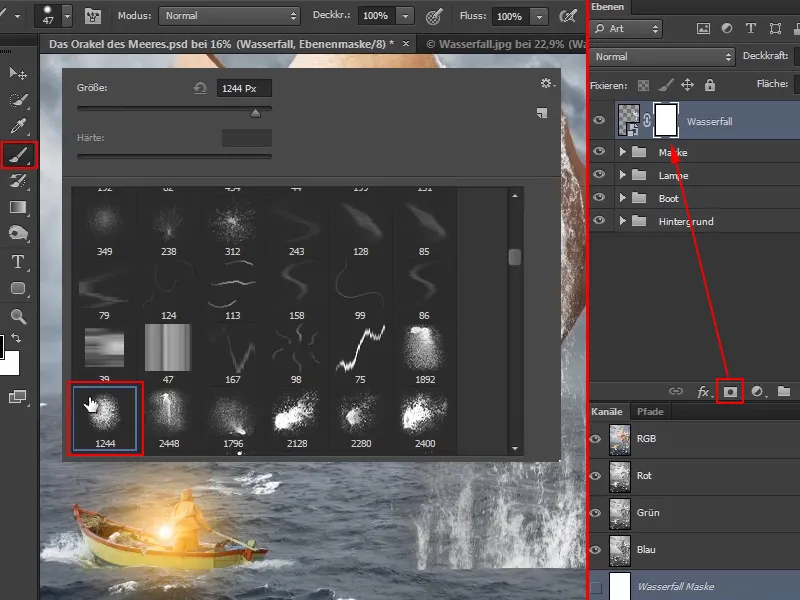
On a new "Layer 1" and with a black foreground color, Marco briefly shows how this brush he has selected works:
This speckled shape is particularly suitable for masking out the area of the water's edge. This is because it does not create too soft a transition, as would be the case with the normal brush.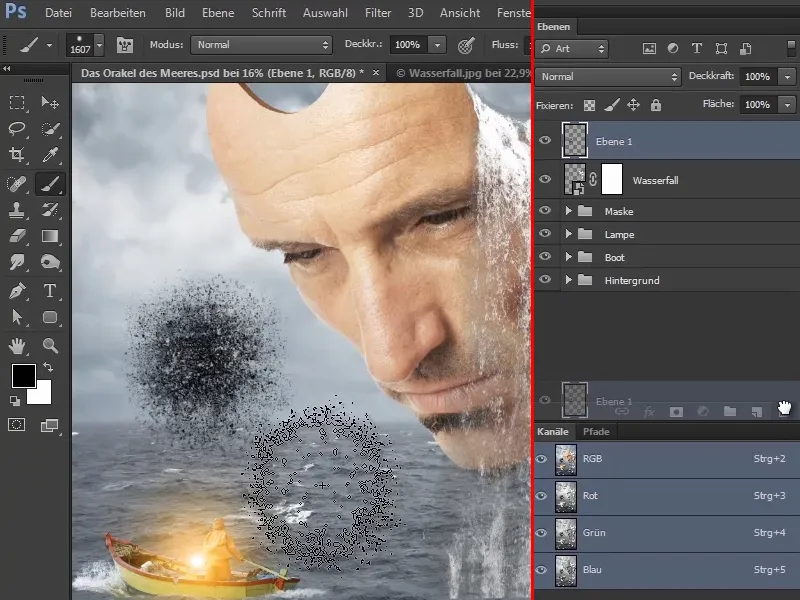
Marco now deletes the layer created for demonstration purposes.
You can either download brushes from the Internet or create them yourself. Marco shows you how to do this in his video training Create texture brushes in Photoshop on PSD-Tutorials.de.
Stay tuned now: Steps 21-24
Step 21
Marco now reduces the opacity of the brush to 77% and clicks a few times over the edge of the water. This masks out this area.
Because the brush is speckled like this, the transition is not soft or hard, but a little speckled - just like water generally is.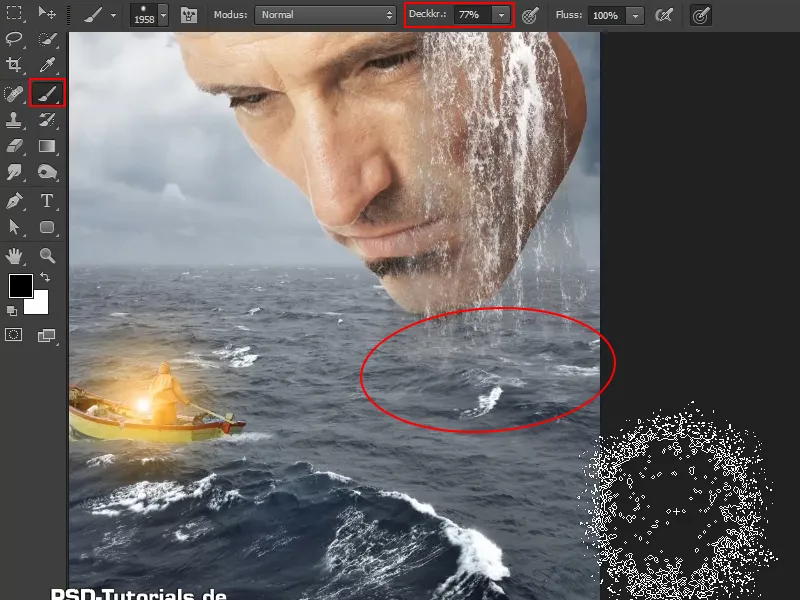
Step 22
If you zoom into the picture again, you can see that the waterfall is not perfectly cropped in places and that there are still some gray veils. These should now be removed.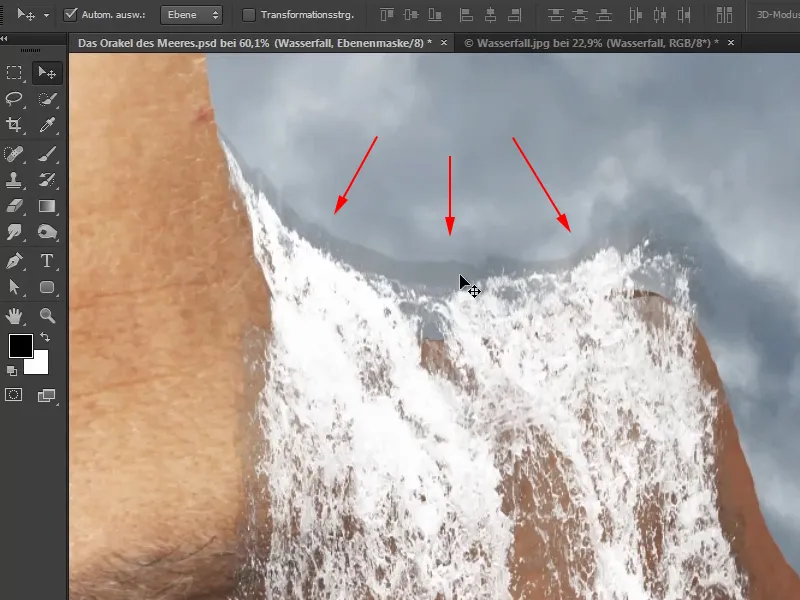
Activate the "Waterfall" layer and take a look at the layer modes. As already mentioned earlier in this tutorial series, the first group darkens, the third group is responsible for the contrast and the second brightens. Lightening means that the light components of the image are affected, while the dark components are not.
Select Multiply negative and it looks much more realistic. All the gray haze is gone..webp?tutkfid=63031)
However, you can still see some haziness. But you can also counteract this, ...
Step 23
... in a very simple way.
Double-click on the free area of the layer to open the Layer style settings window.
In the last example, where Marco removed the blue color, you saw that blue color can be removed in Lab mode. In this case, you are in RGB mode and you can remove everything from black to white.
So if you drag the slider to the right, the haze in the image disappears. Of course with a hard contour, so hold down the Alt keyto open the slider and it looks really great.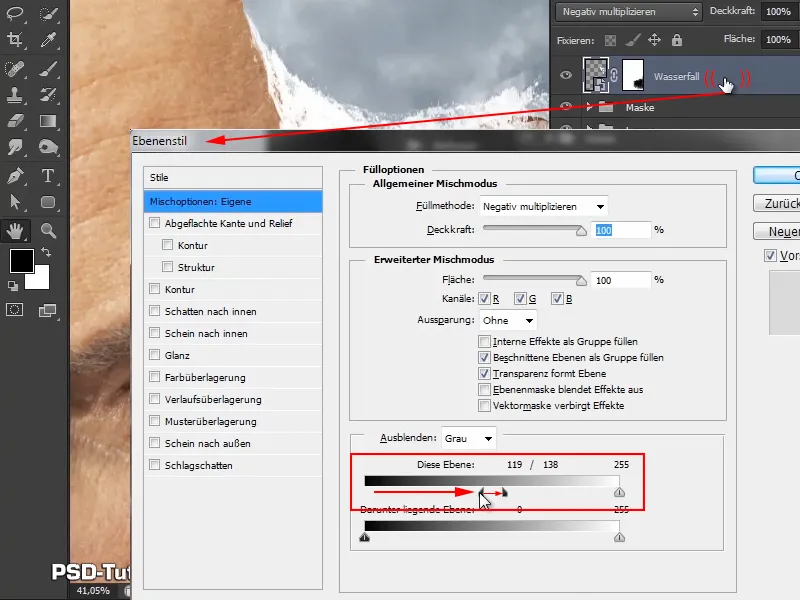
You can retouch out the small piece of veil at the top right in the next step.
Step 24
Reduce the size of the brush to around 59 and paint over the remaining veil until it has completely disappeared.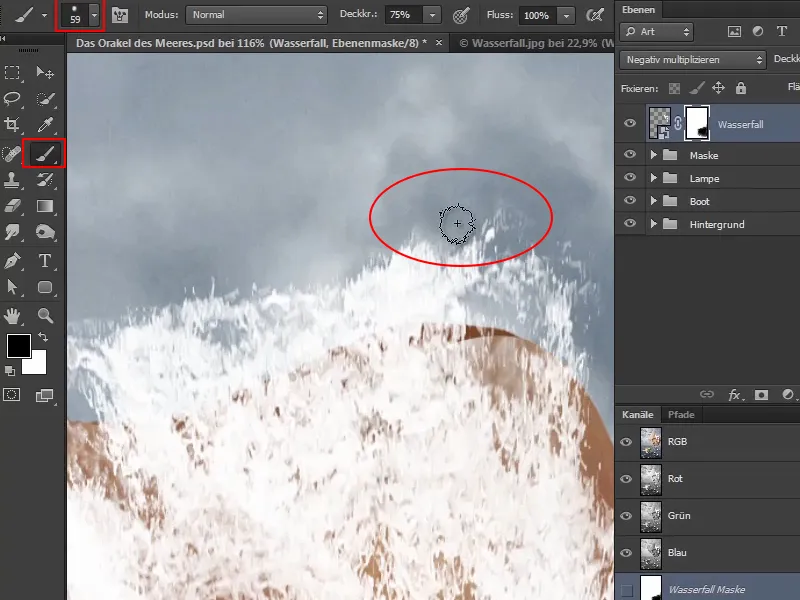
It looks as if the water is running out of the mask.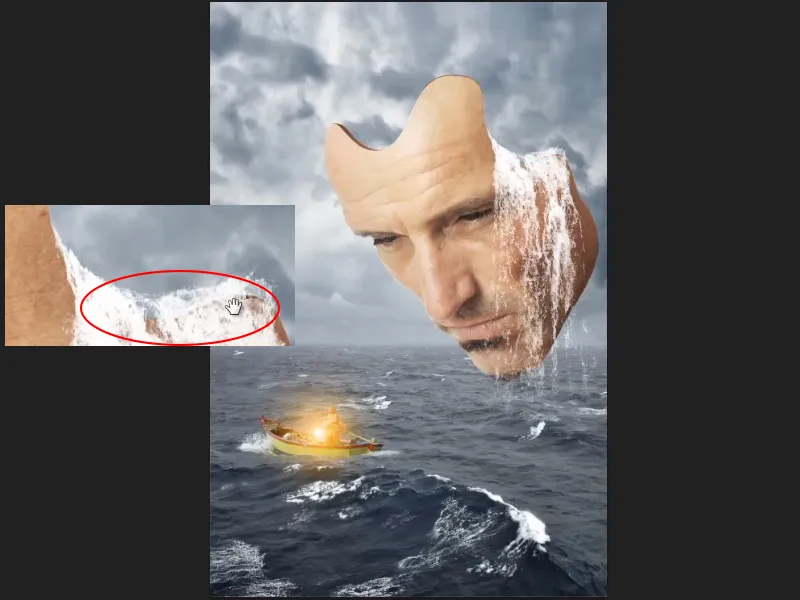
In the next part of the tutorial series, Marco will show how a waterfall can also be created on the left-hand side and how the upper areas of the current waterfall, which are still a little too transparent, can be filled with water.
