Nowadays, it is important to use various Growth Tools to maximize interaction with your users. One of these tools is the Slide-in, which serves as an effective means to capture users' attention. In this guide, you will learn step by step how to create a Slide-in that not only looks good but also ensures higher conversion rates. Let's dive right in!
Main Insights
- The Slide-in is a powerful Growth Tool to acquire users.
- You can customize the design of the Slide-in individually.
- It is important to strategically place and customize the Slide-in to motivate users to interact.
Step-by-Step Guide
To create a Slide-in for your website, follow these simple steps:
1. Access the Growth Tools
First, you need to access your Growth Tools. To do this, go to the left side of the user interface and click on "Growth Tools." Here you will find all the available tools for user acquisition.

2. Create a New Growth Tool
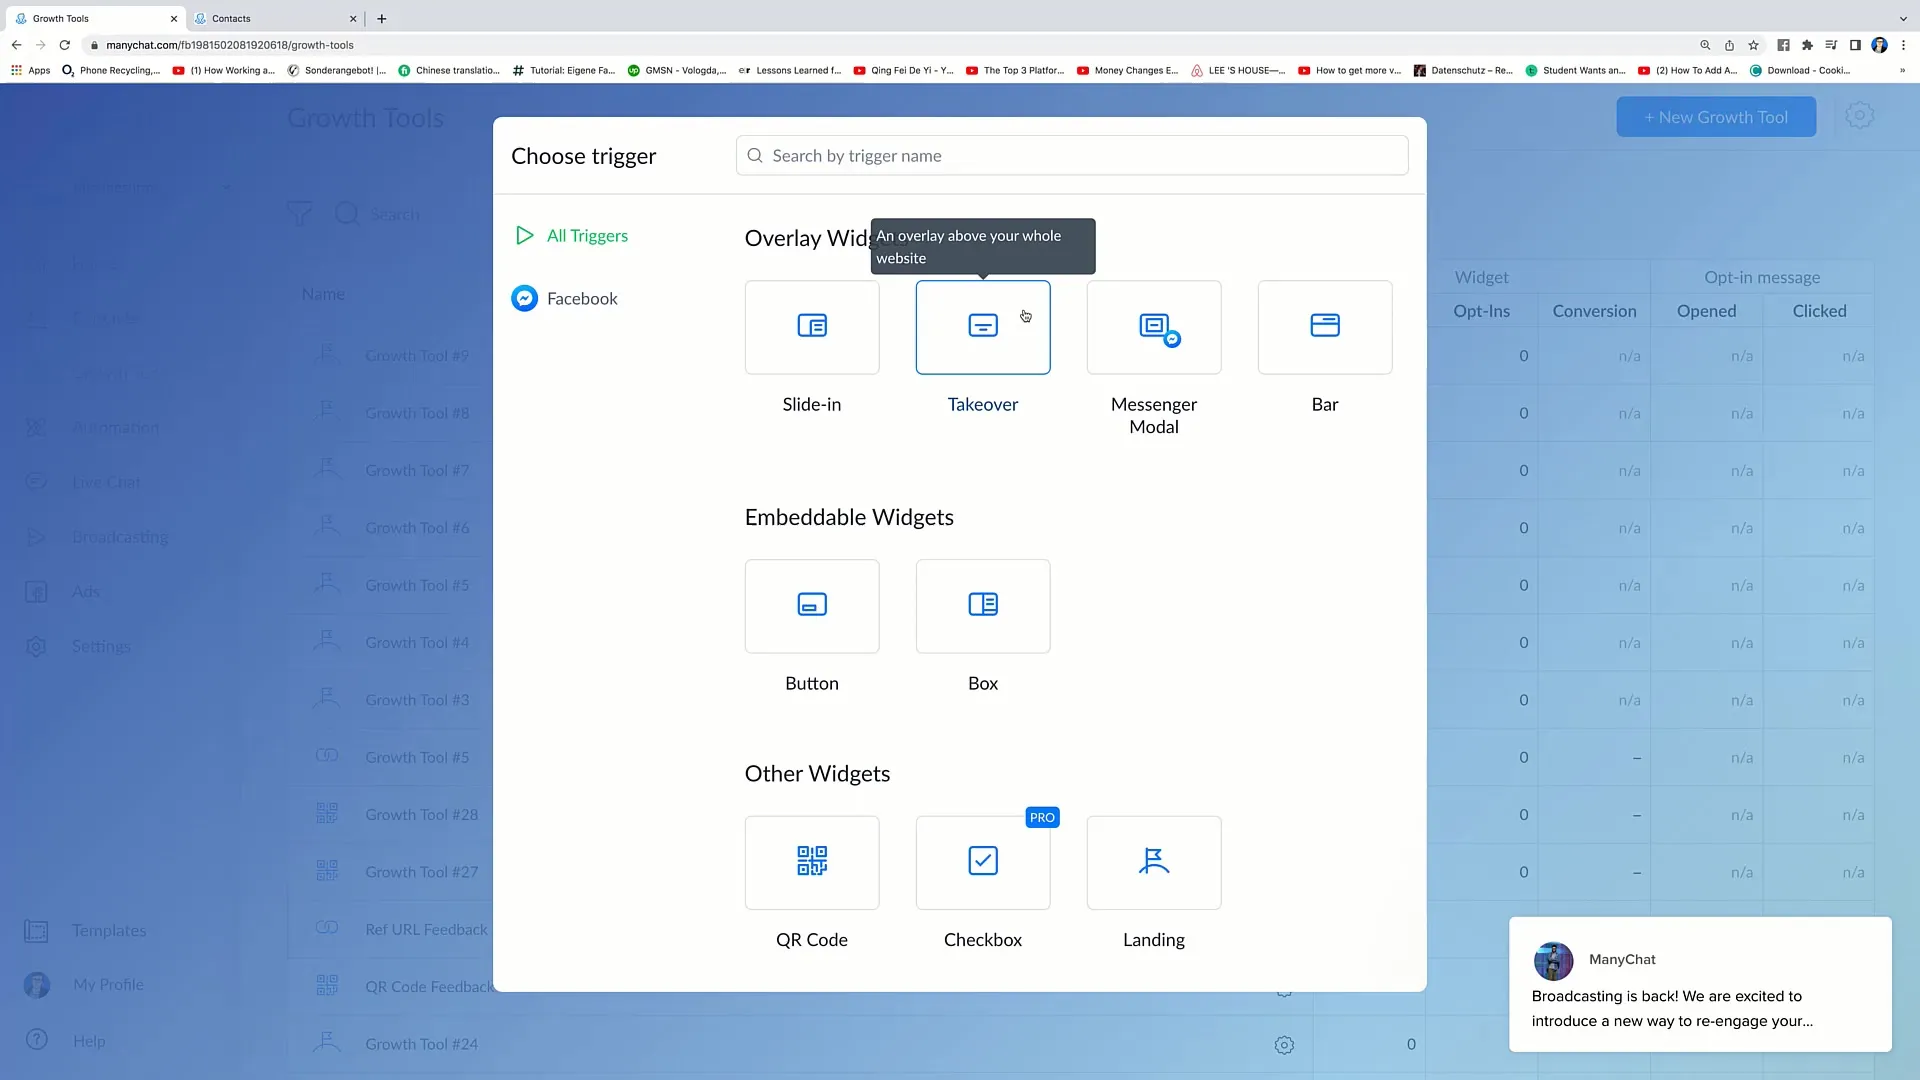
To create a new Slide-in, click on "New Growth Tool" in the upper right corner. Here you have the choice between various options, including Overlay Widgets, Slide-ins, and more.
3. Select the Slide-in Option
Choose the "Slide-in" option from the available tools. A Slide-in appears on the side of your website, attracting users' attention.
4. Customize the Slide-in Design
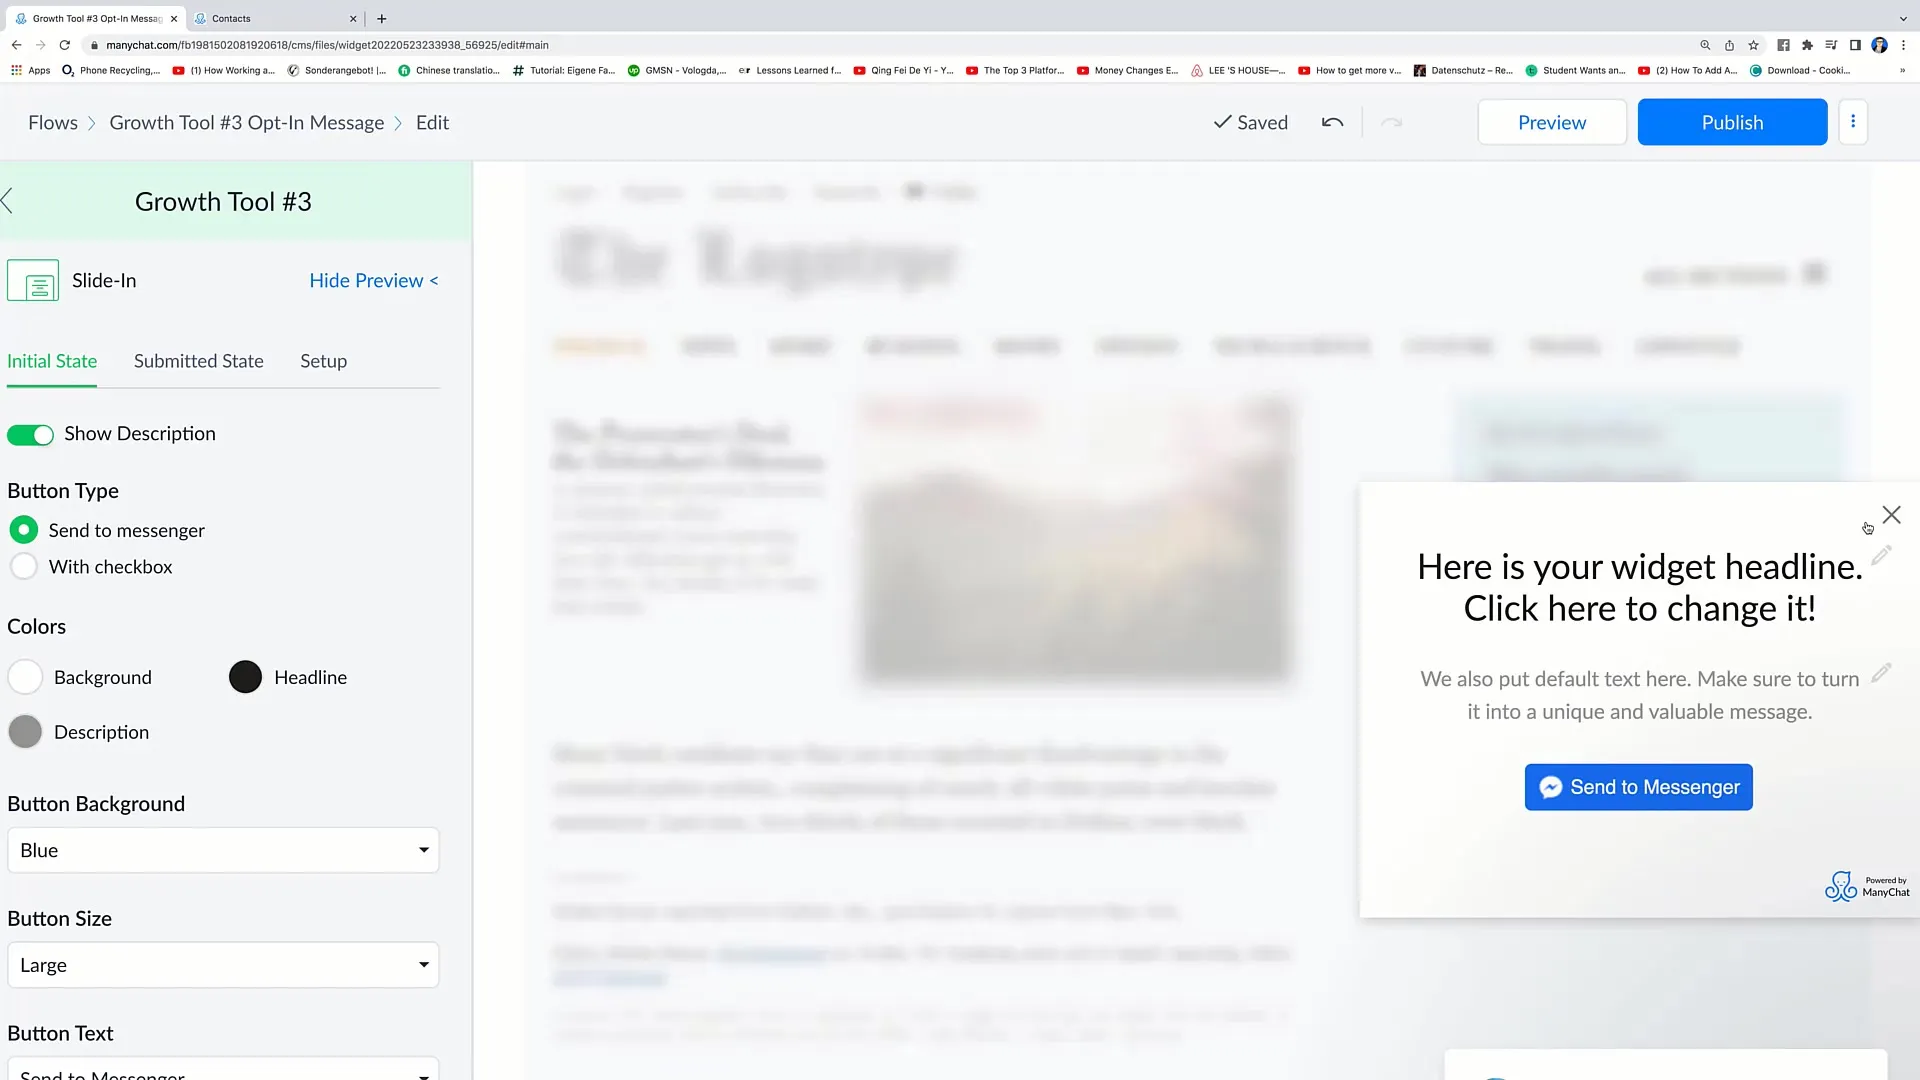
Here you can start customizing your Slide-in. You will be shown a design that you can modify as you like. For example, you could add the text "Write us a message" to encourage users to interact with you.

5. Adjust the Colors
Adjust the colors of the Slide-in. Here you can modify both background and text colors. Click "Show Preview" for a preview of how the Slide-in will look in practice.
6. Edit the Header and Description
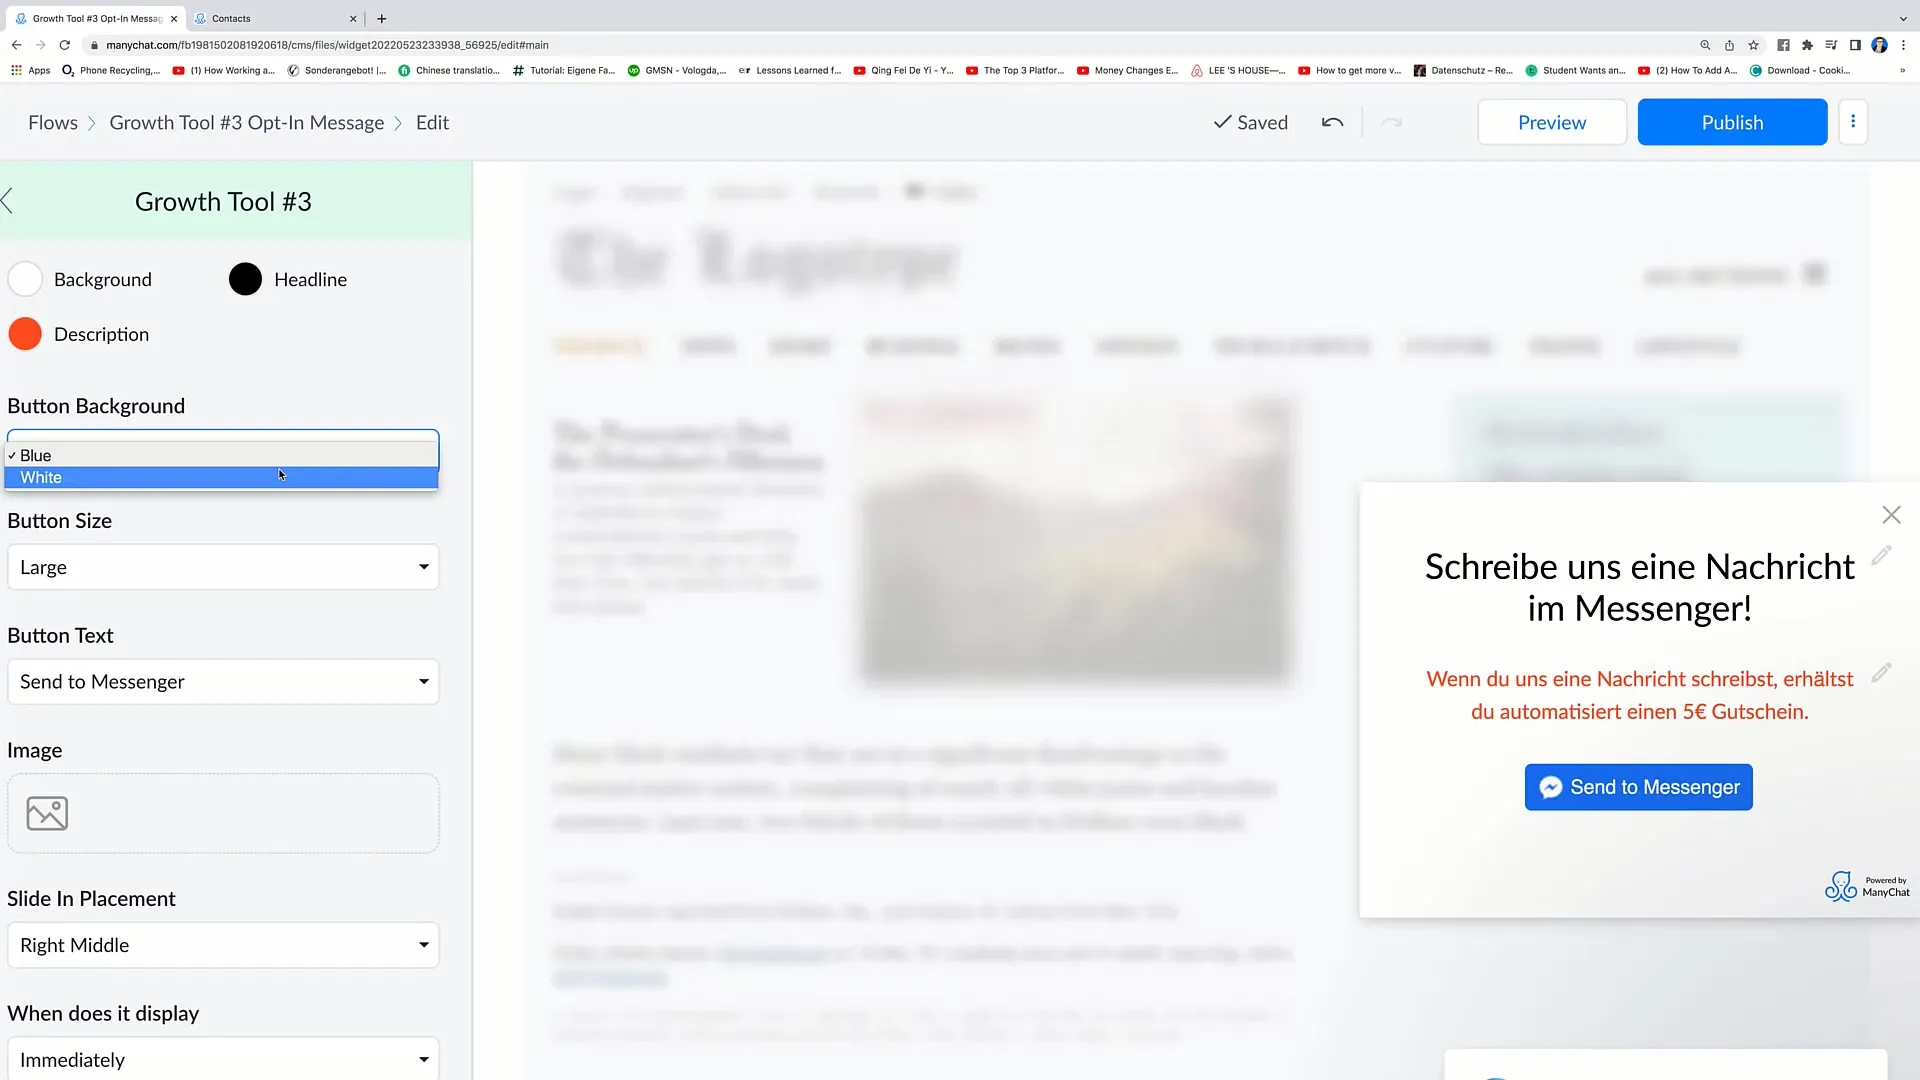
The next step is to edit the header and description texts. For example, you could add a description that informs users they will receive a coupon upon interaction.
7. Customize the Button
Also, make sure the Call-to-Action button is prominently visible. You can adjust the size, color, and text of the button to ensure it stands out. Choose text that encourages users to click.
8. Placement of the Slide-in
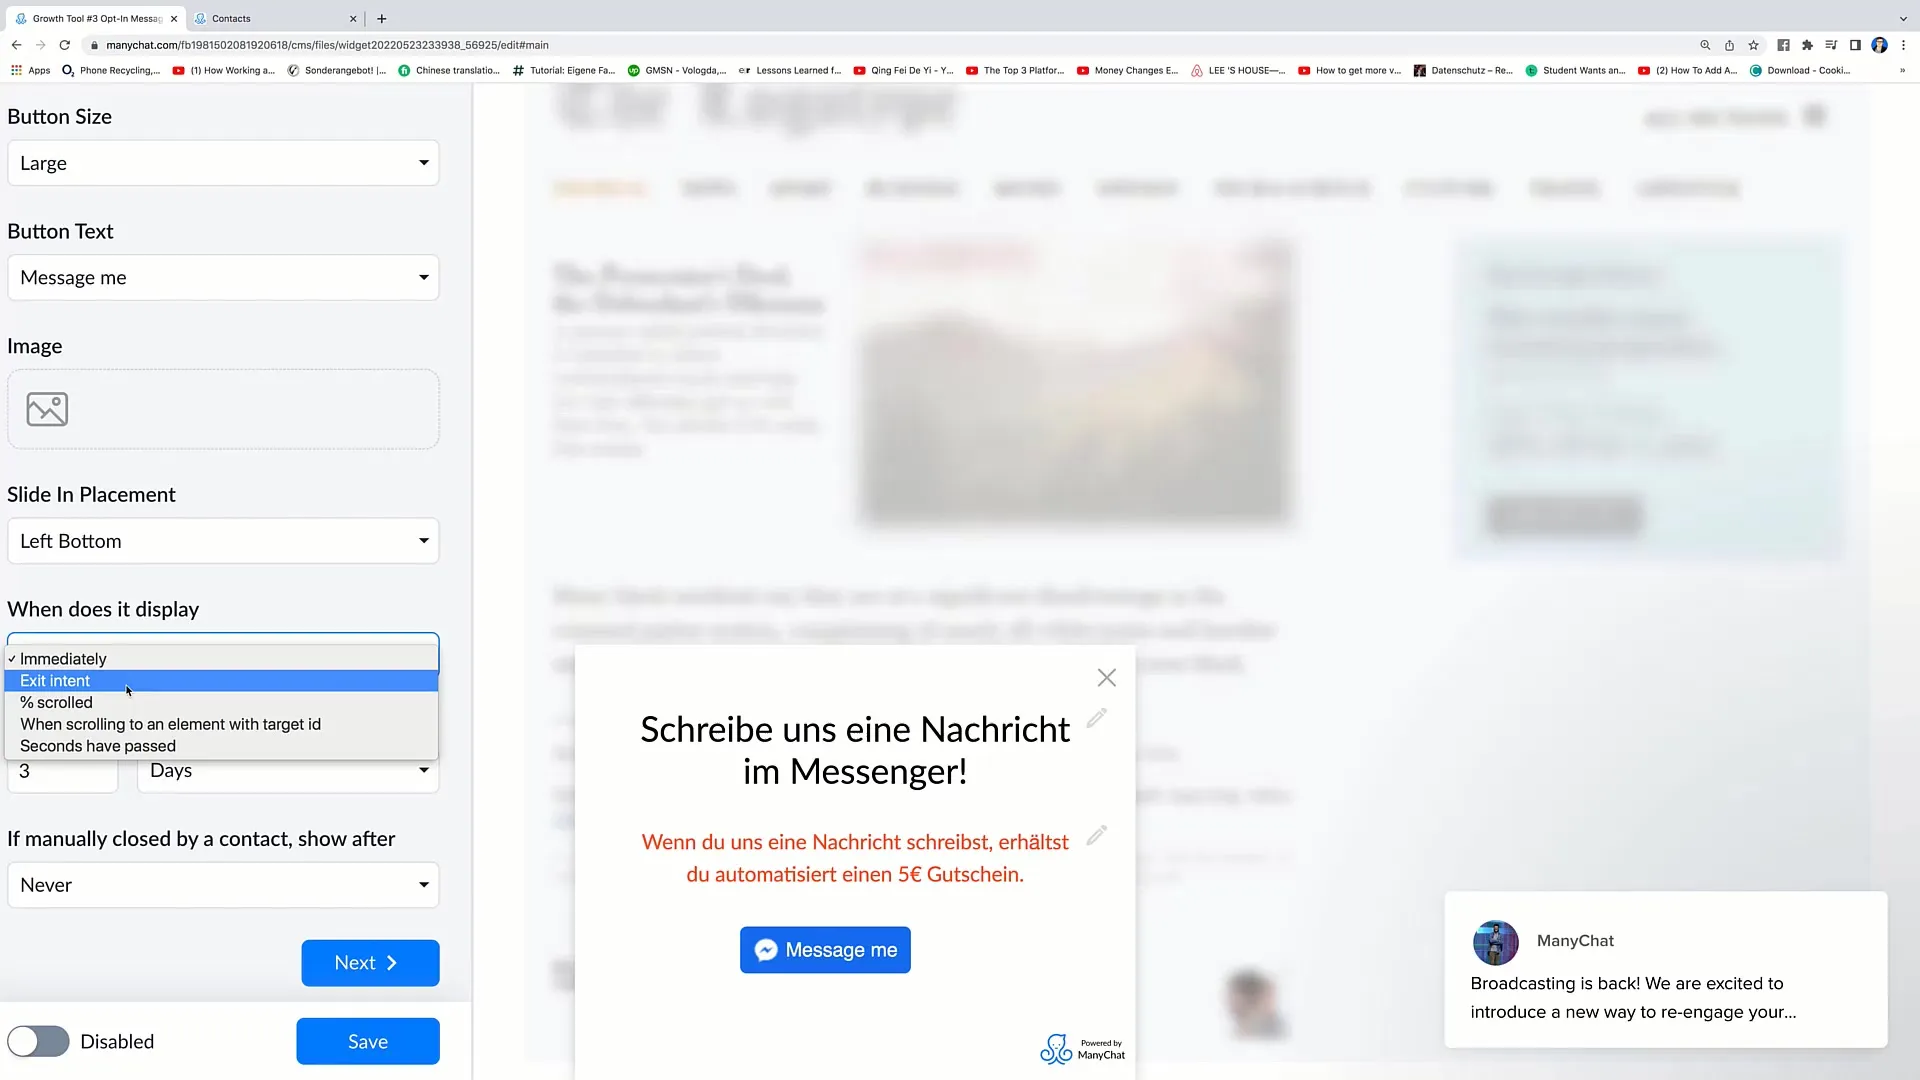
Choose the placement of the Slide-in on your website. You can decide whether it should appear from the right or left side, at the top or bottom. The placement options are crucial for the visibility of your Slide-in.
9. Set Display Conditions
Now you need to decide when the Slide-in should be displayed. You can set it to appear immediately after the page loads or secondarily when the user is about to leave the page.
10. Set Repeat Options
You have the option to specify how many times the Slide-in should be shown to a user after they have initially closed it. This is important for effectively communicating your messages.
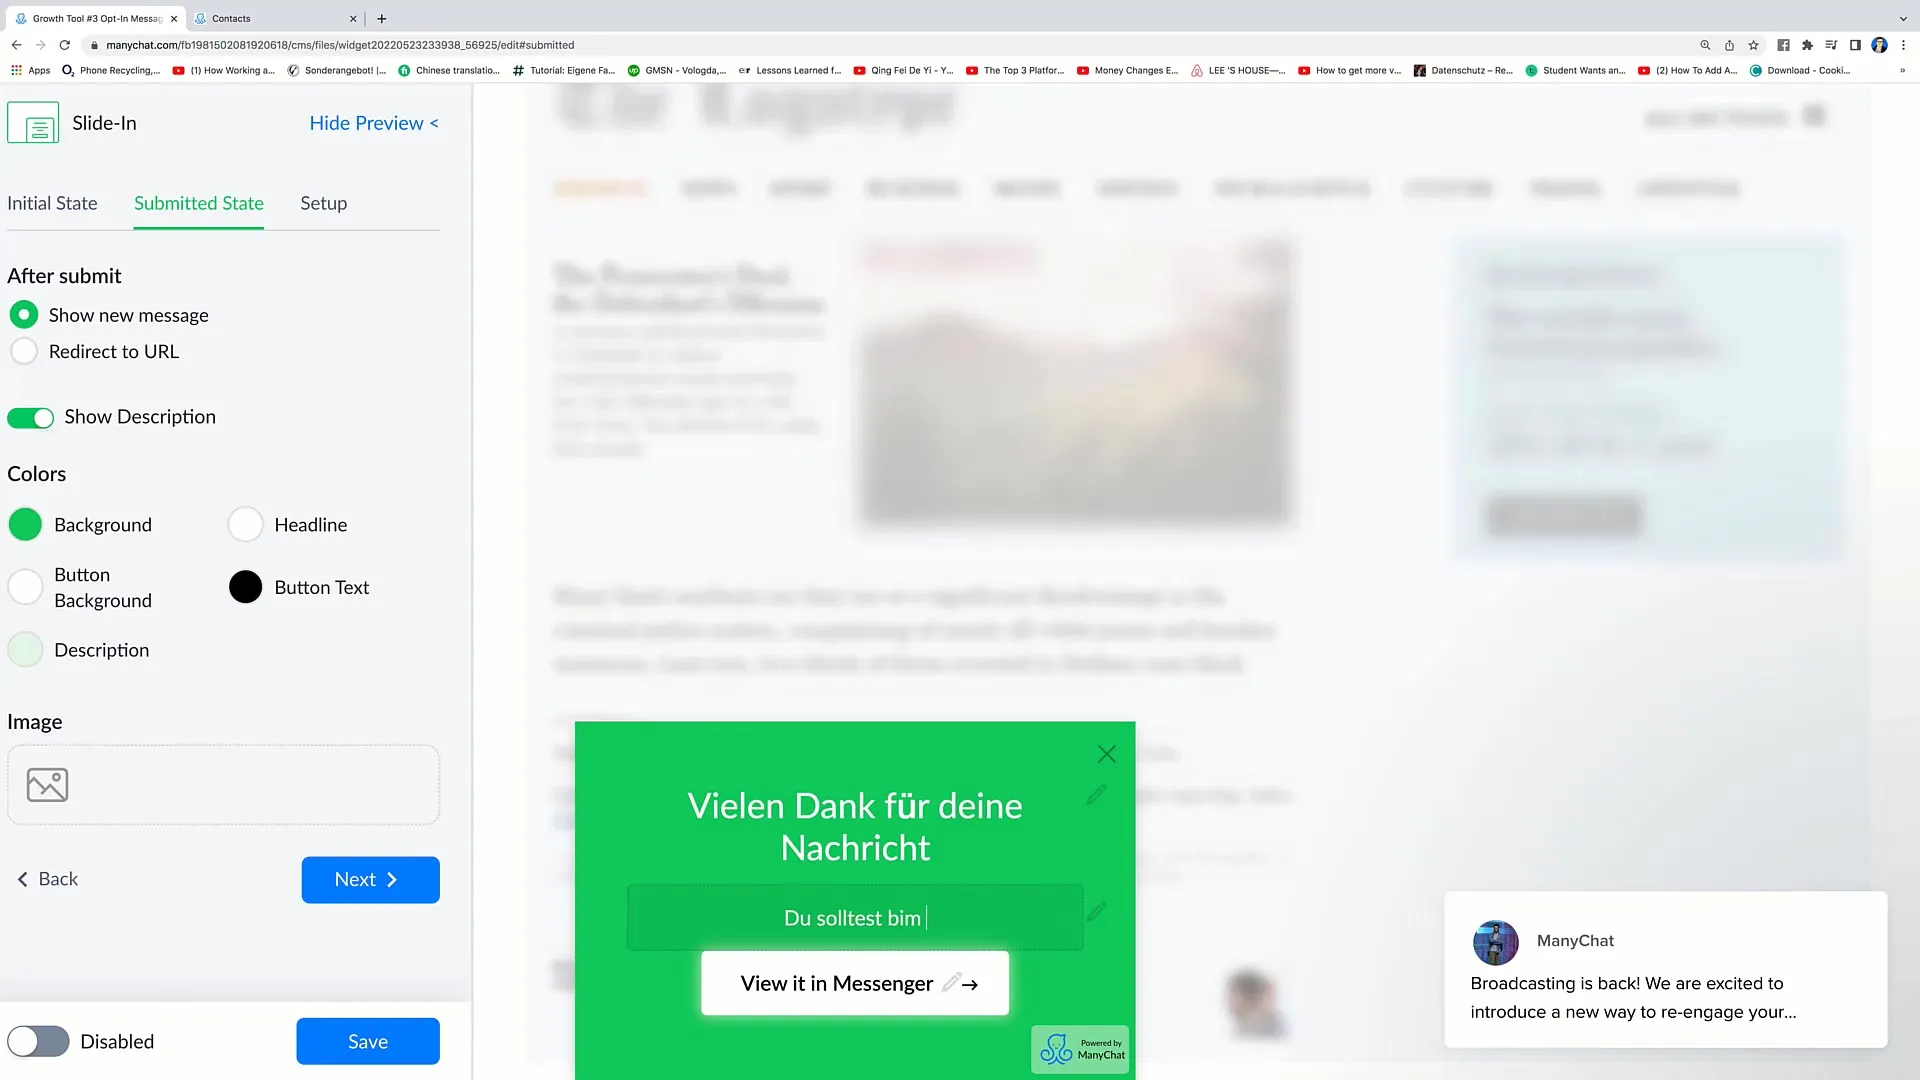
11. Configure Thank-You Message
Prepare a thank-you message for the users who interact with your slide-in. This message should be clear and welcoming, informing users that they have now received their voucher.
12. Installation of the Code
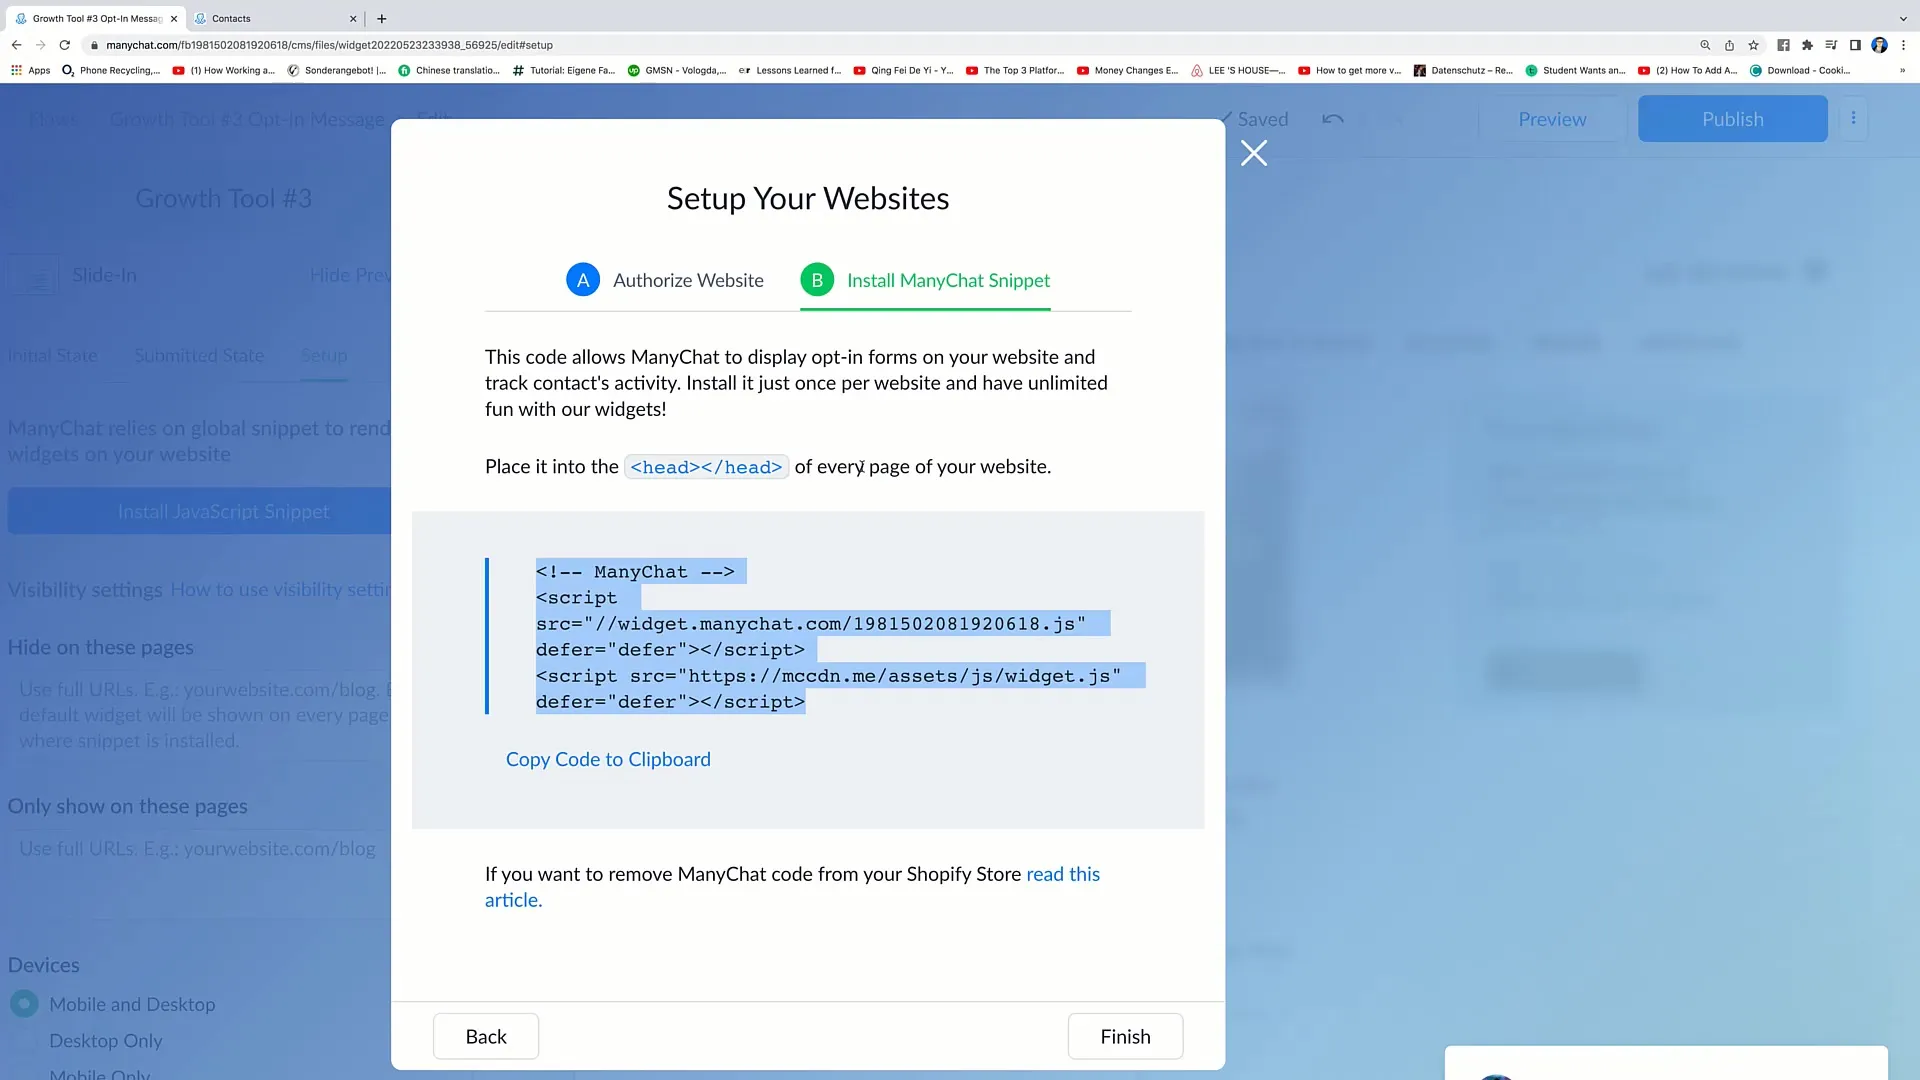
Once everything is ready, you need to integrate the installation code for the slide-in on your website. Copy the provided snippet and paste it into the header of your website. For example, if you are using WordPress, you can do this in the Customizer.
13. Completing and Testing
Click on "Finish" to complete the process. Then, verify if the slide-in is working correctly on your website and is encouraging users to get in touch with you.

Summary
In this tutorial, you have learned how to create an effective slide-in for your Facebook marketing. You now know how to customize the design, determine the placement, and set the right triggers to increase user interaction.
Frequently Asked Questions
What is a Slide-in?A slide-in is a popup that appears from the side on a webpage to attract users' attention.
How can I customize the design of my slide-in?You can easily configure colors, texts, and the position of the slide-in through the user interface.
When should the slide-in be displayed?You can decide whether it should be displayed immediately or when the user leaves the page.
Can I also insert an image into the slide-in?Yes, you can add an image to make the slide-in visually more appealing.
How do I install the slide-in on my website?Copy the provided installation code into the header of your website.


