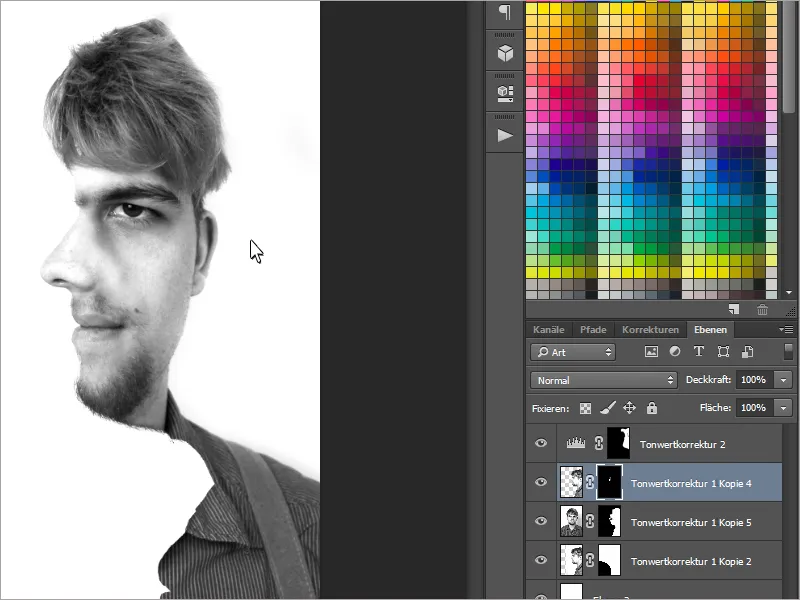
Are you a fan of optical illusions? - Then you'll love this tutorial! Today I'm going to show you how to create the two-faced effect with a front and side shot of yourself (or a person of your choice). Finally, the days of having to choose just one chocolate side are over. And the best part? I'll show you how quickly and easily the effect works..webp?tutkfid=63044)
Step 1 - Taking the photos
First of all, we need - who would have thought it - two photos of one person.
To be more precise, we need a frontal shot and a side shot.
Ideally, a tripod should be used when taking the photos so that the shots are taken at the same height..webp?tutkfid=63045)
Step 2 - Editing the photos
We pick out the two best shots and load them into Photoshop. In this example, I have converted my pictures into black and white images, retouched out unnecessary spots and brightened everything up a little with tone correction.
When editing, we have to make sure that the colors and brightness of the faces are very similar.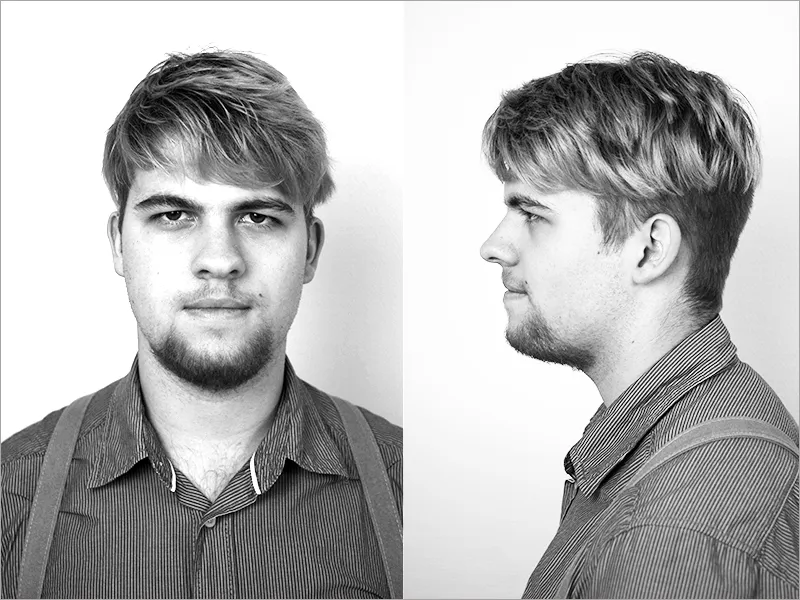
Now we merge both images into one file. To do this, we simply click on one of the photos and select everything with Ctrl+A and can copy it with Ctrl+C. We paste the image into the file with Ctrl+V.
We also need to pay attention to a few details for the effect: Firstly, we need the side photo as a mask for the front photo. In addition, only the frontal image is shown for the most part. This should give the impression that you are standing sideways.
To begin with, it is important that we first reduce the opacity of the side photo to 50% and then position it with the Move tool (V) so that the tip of the nose is directly on the nose wing of the frontal photo, depending on the selected side.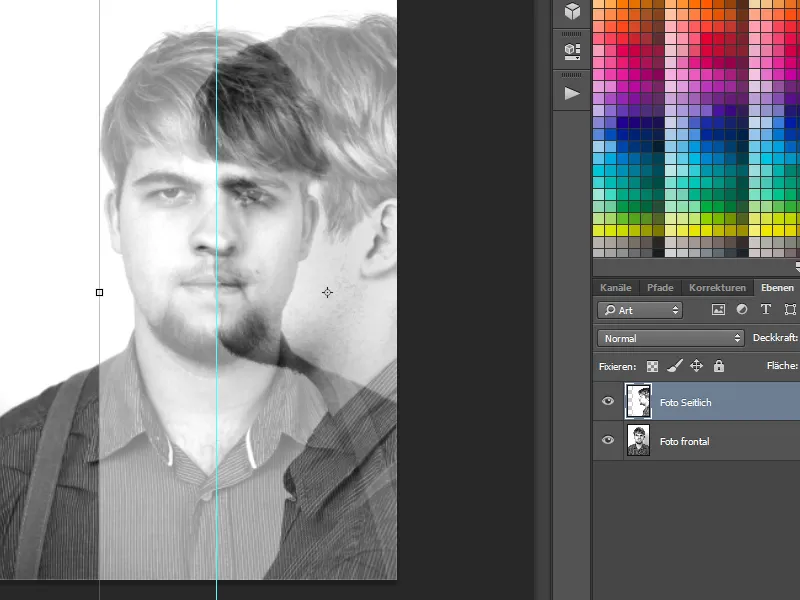
We will now start with a layer mask. To do this, we first need to create a selection from the side photo. For the black and white photo, the magic wand tool is ideal for low tolerance.
By holding down the Shift key, we can select additional points to refine our selection.
However, the type of clipping also depends on the background. If it is a heavier background, the pencil tool is also ideal for this.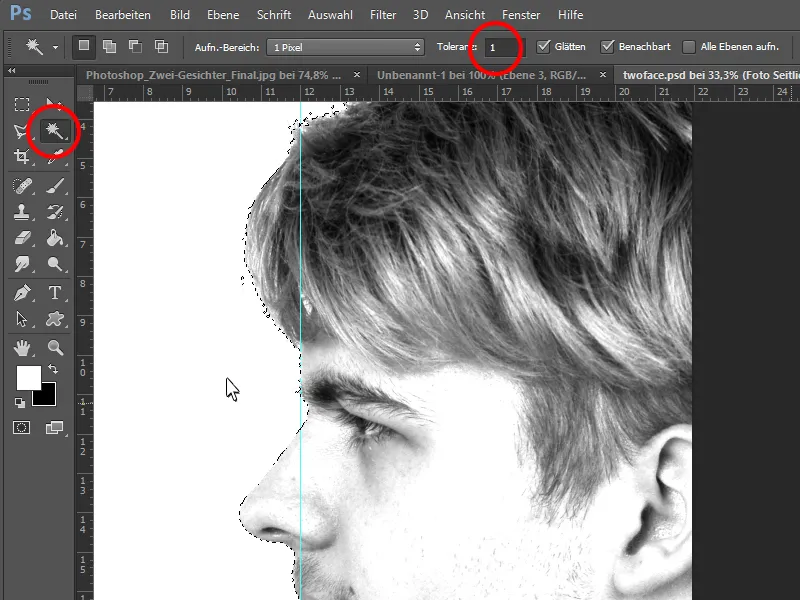
We can now create a layer mask in the frontal photo and fill it so that only all areas of the side shot are visible.
This completes the frontal shot.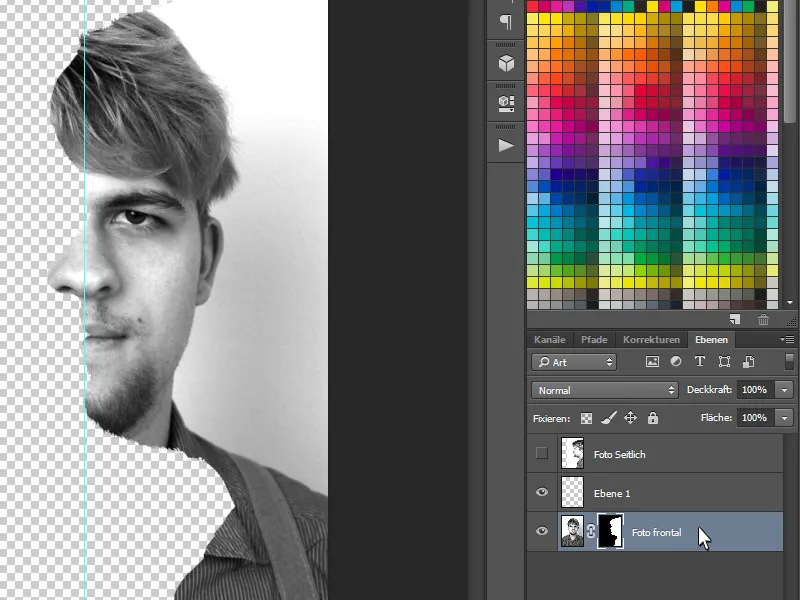
So that we can see everything better, I will now create another layer, fill it with white using the fill tool and place it at the bottom.
We now need some elements from the side image, such as the nose, the lips and some other details. To do this, we will unhide the side image and create a layer mask. Press Ctrl+I to invert the colors and make the mask black.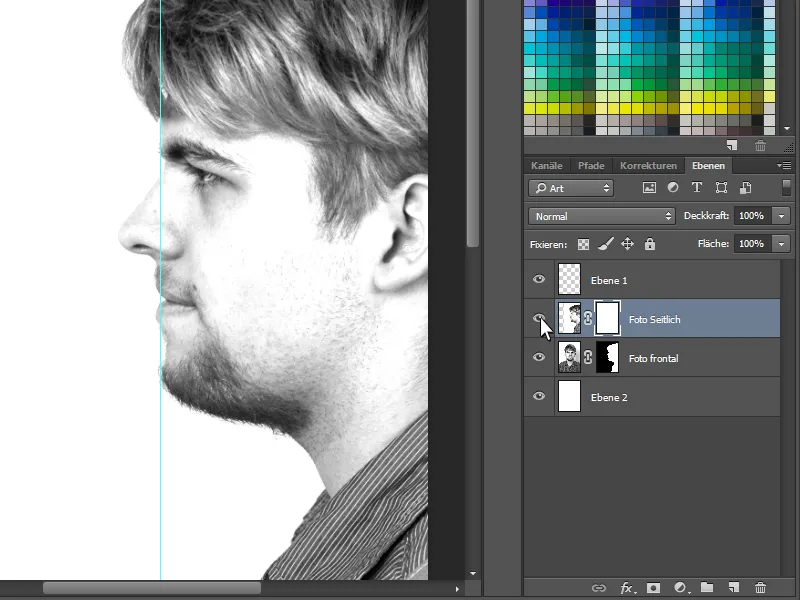
Now we can paint the following elements into the layer mask with a soft, white brush:
First, we start by bringing the nose from the side completely into the picture. Lips and hair from the side are also important. This will make the illusion perfect later on. You will have to think for a moment whether the person is standing to the side or looking directly at you from the front.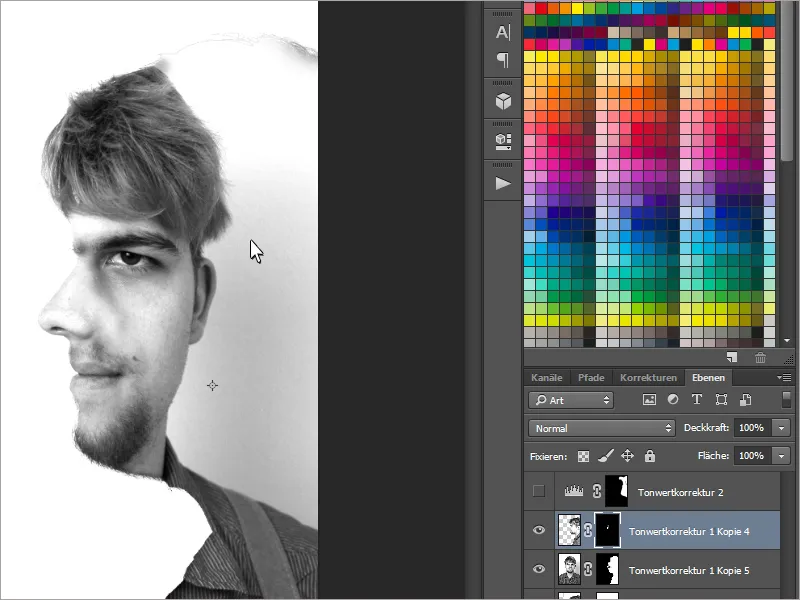
Finally, I correct the unattractive background at the back by lightening it a little with a tone correction.
The optical illusion is now complete!
Have fun with the illusion!