Skillfully lighting models
Figure 8.1: At my photo workshops abroad (here is a snapshot from the Ibiza workshop in May 2013), participants learn how to achieve optimum results in a wide variety of lighting situations. Many different paths lead to the goal: the perfect model photo. Here, Stefan has used his system flash indirectly against the Sunbounce brightener to brighten up the shadows on the model's face in backlit conditions in order to achieve a more beautiful, softer light (due to the larger reflective surface). The side lighting also looks less "flat" and provides more plasticity than would have been the case with a direct flash.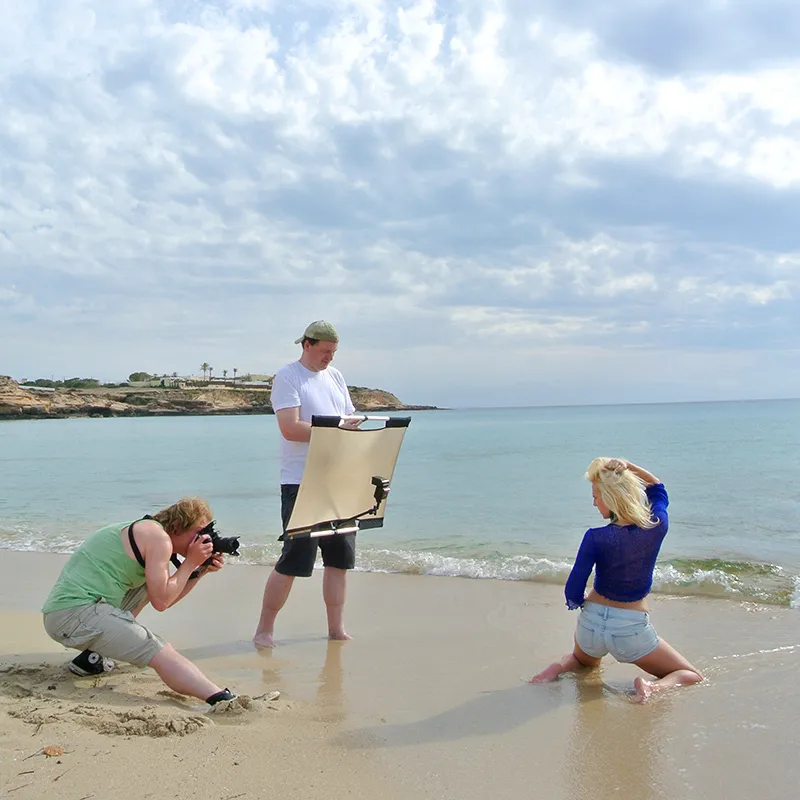
(Photo © 2013: Jens Brüggemann - www.jensbrueggemann.de)
8.1.1 Brightening and shading
Fill lights and shading are among the easiest lighting equipment to use. Their mode of operation is self-explanatory:
The shade is held between the sun and the model in order to soften the light (light attenuation of approx. 1-2 f-stops depending on the reference). It also diffuses the harsh sunlight, which has the pleasant effect of softening the light falling on the model.
The brightener reflects the sunlight or, alternatively, flash light (or in the case of film: artificial continuous light). According to the principle "light entry angle = light exit angle", the brightener is held by an assistant or mounted on a tripod in the correct position.
Figure 8.2: Little help - big effect! Here, one of the participants in my Ibiza photo workshop 2013 is holding the brightener ("Sunbounce Mini") to cast a beautiful light accent on the model's skin. The gold-silver "zebra covering" is ideal for model photography (but not for fashion or product photography). This provides a pleasantly warm skin tone without appearing directly color cast.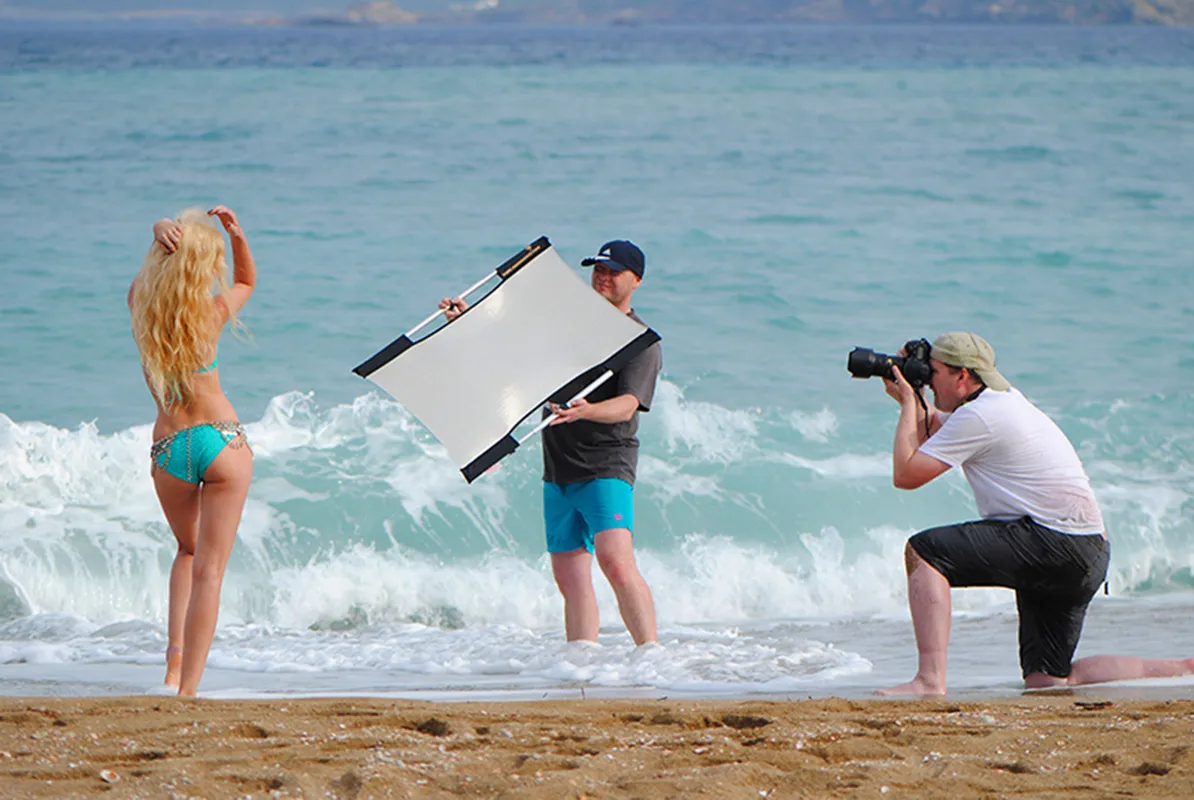
(Photo © 2013: Jens Brüggemann - www.jensbrueggemann.de)
Figure 8.3: I prefer to use California Sunbounce brighteners and darkeners for both my photo work and my photo workshops (here a making-of photo from the Andalusia workshop in 2012) because they are very functional and of high quality. Here at the shoot in Malaga, one workshop participant helps the other. The strong sun would have shone so strongly on the model's shoulders that the contrast range (here: too bright shoulders) would have been too great to be captured by the camera. Brighteners and shading are therefore primarily used to soften the contrast range in the subject so that the photos are technically flawless.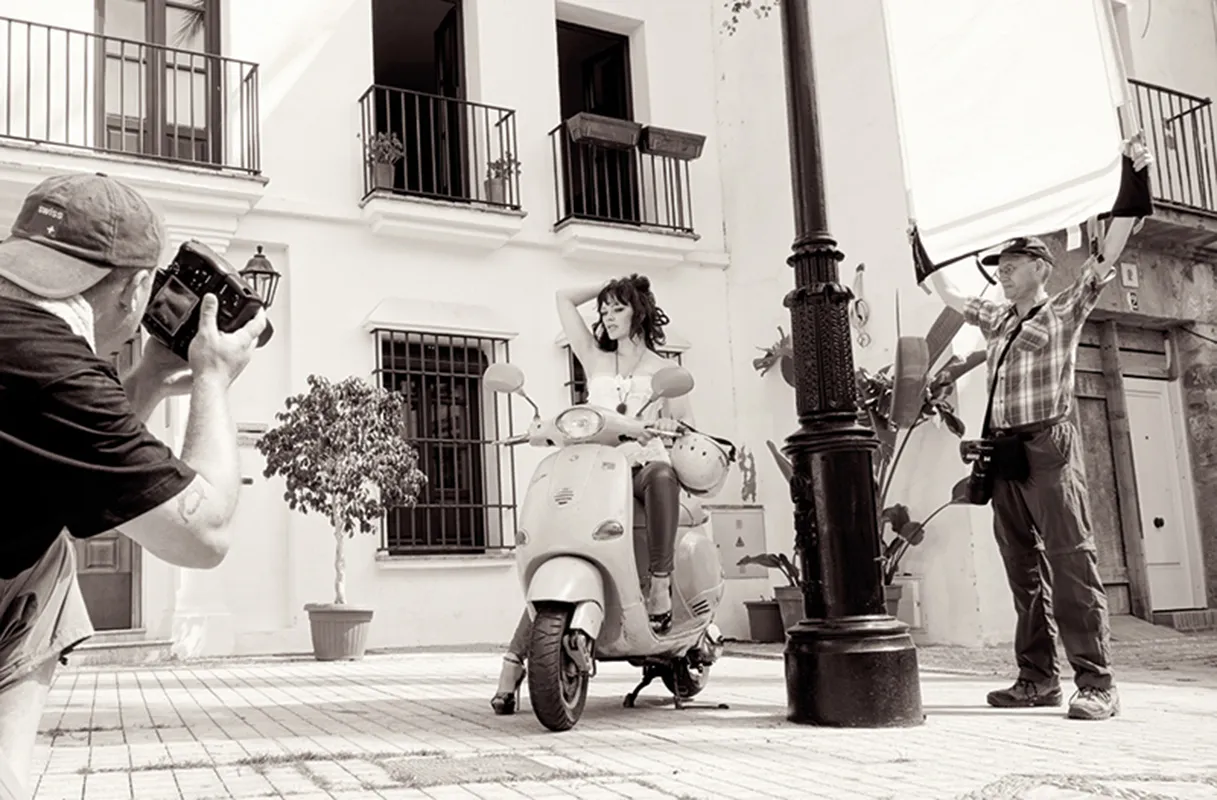
(Photo © 2012: Jens Brüggemann - www.jensbrueggemann.de)
Of course, brightener and shading can also be used together; this would even be the ideal case. In this case, the shading agent ensures that bright, washed-out areas, which often occur in direct sunlight, are avoided. And the brightener lightens the shadows or provides beautiful light accents.
Brighteners and shading are universally applicable and, in my opinion, are part of the standard equipment of every model photographer!
8.1.2 System flash
As long as the system flash is not pointed directly at the model, there is nothing wrong with using it. Thanks to the possibility of being able to flash unleashed ("master-slave control"), beautifully lit photos can also be taken with a system flash, as this light can now also be used from the side (for a three-dimensional effect) or as backlighting (for atmospheric pictures).
If, on the other hand, the flash is aimed directly at the model, it looks "flat". The shadows falling on the background also look unattractive and amateurish.
Figure 8.4: During my photo workshop in Ibiza, this participant skillfully placed his system flash to the side of the model. It is triggered using the master-slave function, whereby the built-in flash unit is the master and the main flash placed on a mini tripod is the slave. In this way, the photographer achieved that the soft light (the model was under trees) was "pepped up" by the system flash with slightly more accentuated light. In addition, the contrasts (shadows of the trees against the bright background) could be softened so that the sky no longer appears blown out in the photos.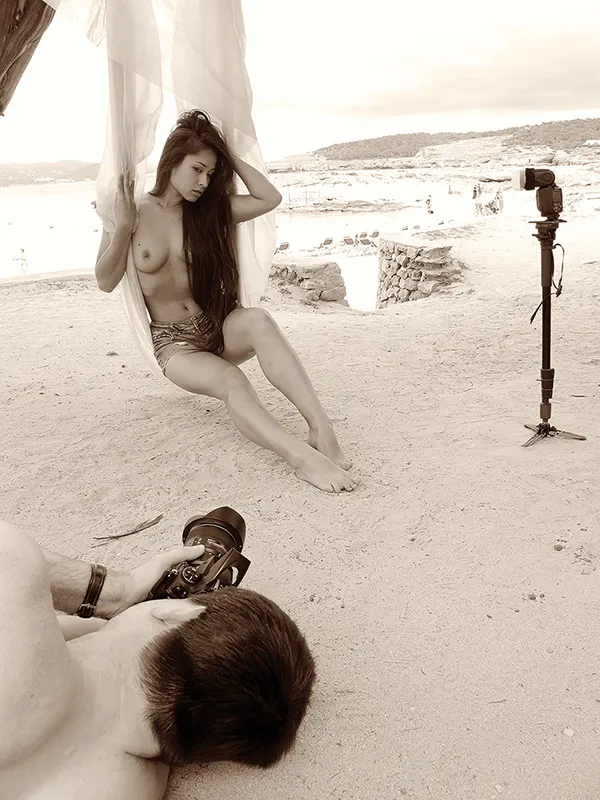
(Photo © 2011: Jens Brüggemann - www.jensbrueggemann.de)
Note: If possible, system flash units should be used indirectly, i.e. in such a way that the light first illuminates a (color-neutral) reflective surface and is then reflected onto the model. The light then appears less harsh and also illuminates the background due to the wide dispersion, resulting in more balanced lighting overall. Suitable reflective surfaces are white ceilings and walls, brighteners (e.g. from Sunbounce or Lastolite) or - if no other aid is available - a white T-shirt. (Try it out! It works brilliantly!!)
Note, however, that the principle "light entry angle = light exit angle" is applied.
8.1.3 Light control with the help of flash systems
Flash units are divided into studio and outdoor flash units. However, more recent developments are moving towards designing units that are equally suitable for both purposes.
Note: My tutorial series "Professional lighting technology and lighting control" published here on PSD-Tutorials.de (link leads to part 1) provides a detailed overview of recommended flash units (and for which purpose they are suitable in each case). It also describes exactly which camera settings are necessary when working with flash systems and which light shapers provide which light (with sample photos).
The advantage of using flash units in model photography is that, on the one hand, we can control the lighting very flexibly in terms of intensity and light characteristics and, on the other hand, we have a (hopefully sufficiently strong) modeling light at our disposal, which allows us to assess our lighting set-up before the shot is taken. However, the latter point does not apply to outdoor photography during the day, because on the one hand the modeling light is too weak to compete with daylight, and on the other hand the continuous light would exhaust the battery capacity too quickly.
Figure 8.5: In the studio or in other indoor areas, the modeling light remains on during the photo shoot. This is the only way the photographer can see the respective light-shadow effect (which is constantly changing because the models are moving and turning) and the autofocus also focuses faster and more reliably.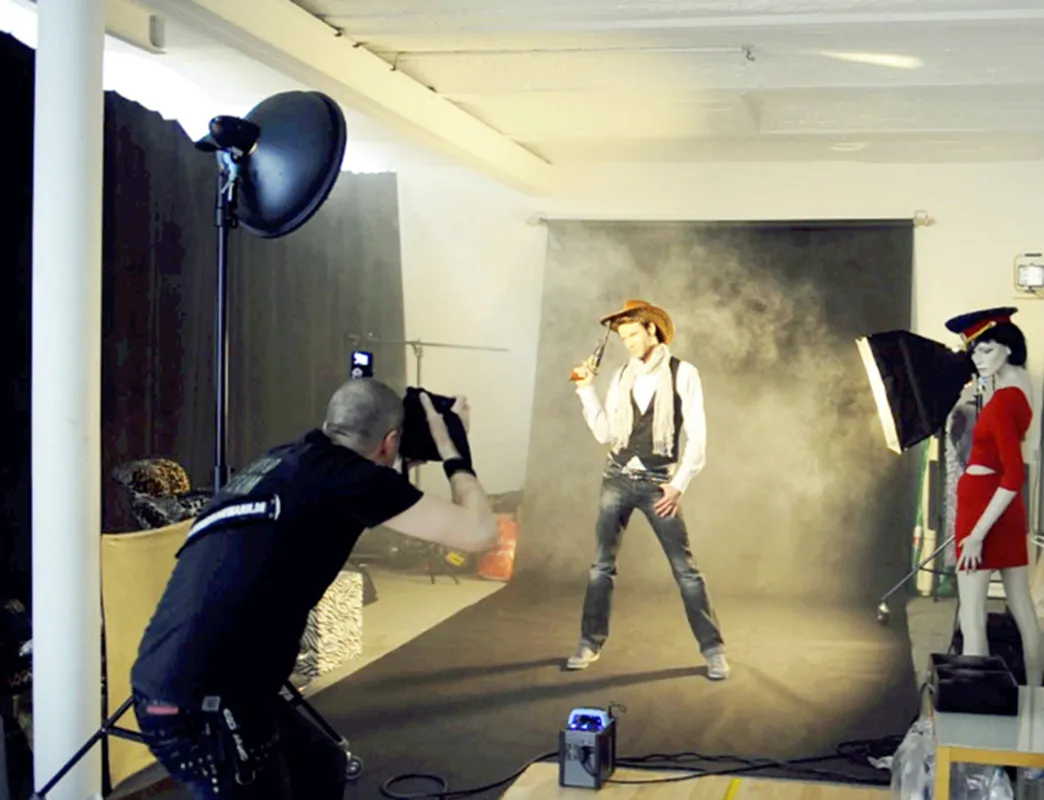
(Photo © 2012: Jens Brüggemann - www.jensbrueggemann.de)
Figure 8.6: As is so often the case, I only used 2 flash heads on my studio flash system for these shots. One as the main light on the model (with a beauty dish as a light shaper) and the second to light the fog behind the model (with a small softbox as a light shaper). Nikon D3X with 1.4/85mm Nikkor. 1/125 second, Blender 6.3, ISO 200.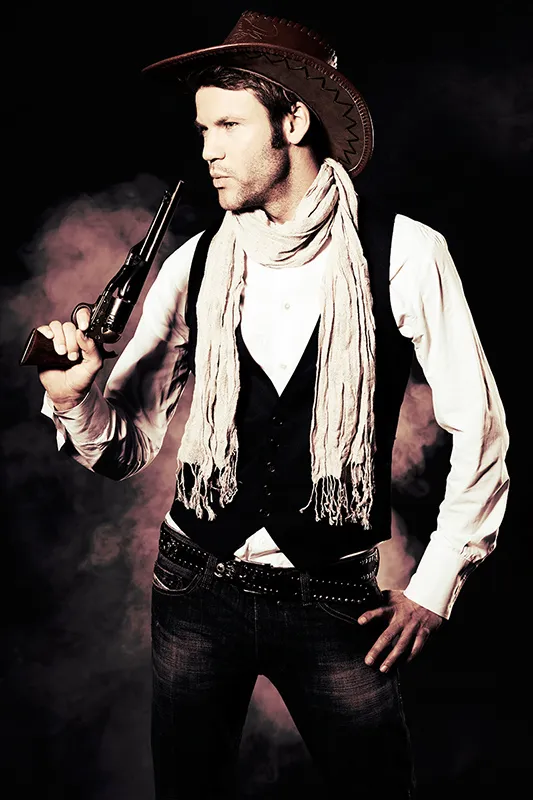
(Photo © 2012: Jens Brüggemann - www.jensbrueggemann.de)
Figure 8.7: In classic nude photography in particular, the precise setting of the light is crucial to the success of the photos. The modeling light helps us photographers to set up the lights according to our ideas. If you are photographing in a darkened room without any other light sources, the principle of "what you see is what you get" applies when working with the modeling light.
As the modeling light is designed in such a way that it roughly corresponds to the flash light in terms of light progression (only not in terms of brightness), we can judge the light progression perfectly and change everything individually according to our ideas in terms of intensity or characteristics.
Once you have started working with flash units, you will be amazed at the many creative possibilities that open up! Nikon D3X with 1.4/85mm Nikkor. 1/125 second, Blender 8, ISO 100.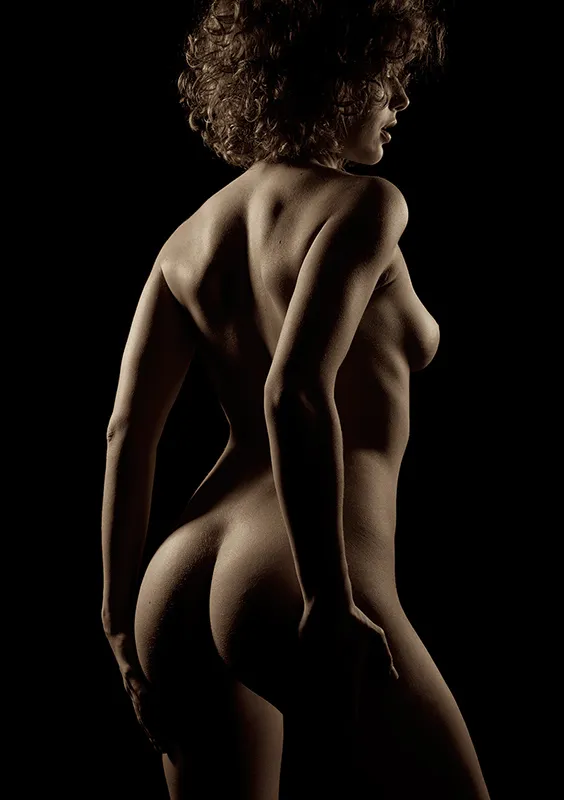
(Photo © 2012: Jens Brüggemann - www.jensbrueggemann.de)
Figure 8.8: To make the model's red hair stand out, I used two narrow softboxes from behind. In addition to the theatrical outfit, the model's red hair is therefore mainly responsible for the image effect. How strong the hair light needs to be set can be easily recognized before the shot using the modeling light. Ultimately, however, it also depends on the photographer's taste as to how strong the effect should be. I normally use more subtle hair light, but here I decided to emphasize the red hair. Nikon D4 with 2.8/105mm micro Nikkor. 1/125 second, Blender 3.2, ISO 100. (Photo © 2012: Jens Brüggemann - www.jensbrueggemann.de)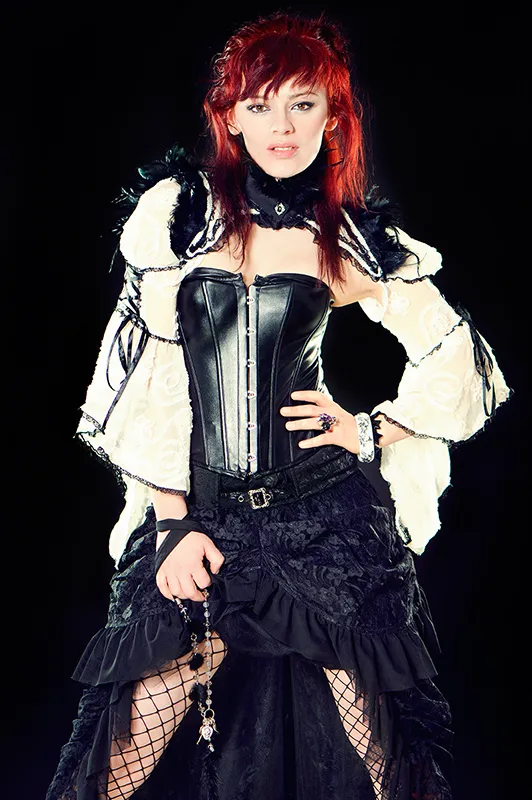
Flash units suitable for outdoor use draw their power from rechargeable batteries (either permanently installed or usually replaceable, depending on the model), which vary in weight and capacity depending on the design.
The photographer has to find a compromise between high performance and capacity on the one hand and the lowest possible weight on the other (because of the lugging involved in outdoor use, as you can't get everywhere by car).
Figure 8.9: I now use the popular Ranger Quadra RX Hybrid for my outdoor and international workshops. This is a battery-powered flash unit from Elinchrom, which is characterized by its extremely low weight (only 2kg with lithium-ion battery, plus 0.25kg for the flash head) and can therefore be carried comfortably even on longer walks.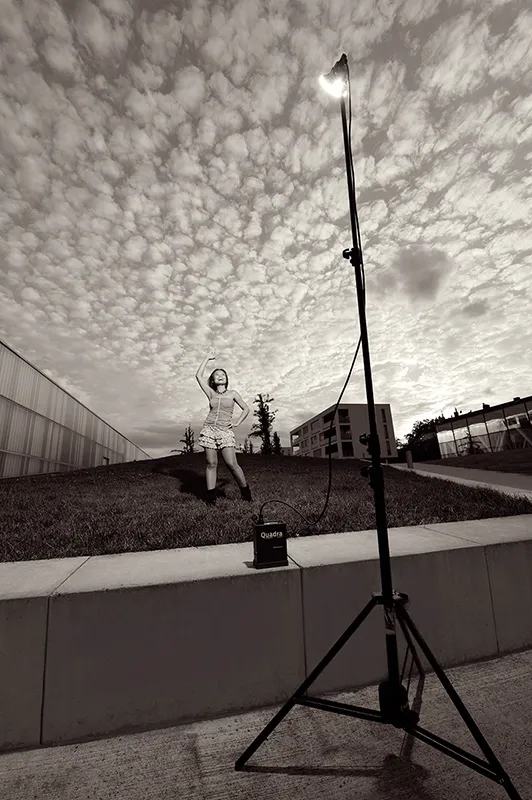
(Photo © 2013: Jens Brüggemann - www.jensbrueggemann.de)
Figure 8.10: With its maximum flash output of 400 watt seconds, the Ranger Quadra RX is ideally suited for brightening up the model in backlighting, for example, or for setting effective lighting accents, for which it also has a second flash head connection "B" with ½ power compared to connection "A" ("fixed asymmetry"). Nikon D4 with 2.8/14-24mm Nikkor. 1/160 second, Blender 9, ISO 100.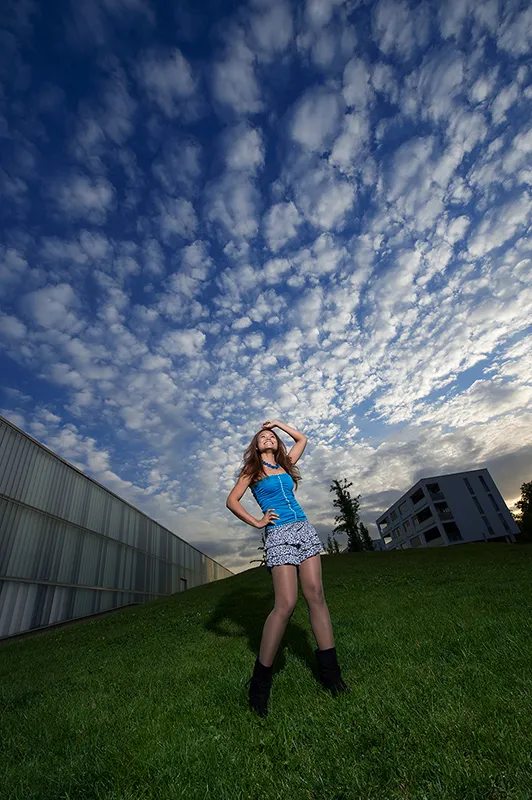
(Photo © 2013: Jens Brüggemann - www.jensbrueggemann.de)
Figure 8.11: The practical set, which is housed in a sturdy case, contains the generator, the charger, 2 batteries and 2 flash heads with corresponding connection cables, the practical radio remote control (which can also be used to remotely control the power of the generator) and, of course, the operating instructions. However, the generator, battery and flash head are also so handy that they can easily fit into a photo backpack (next to the camera and lenses) on a walk.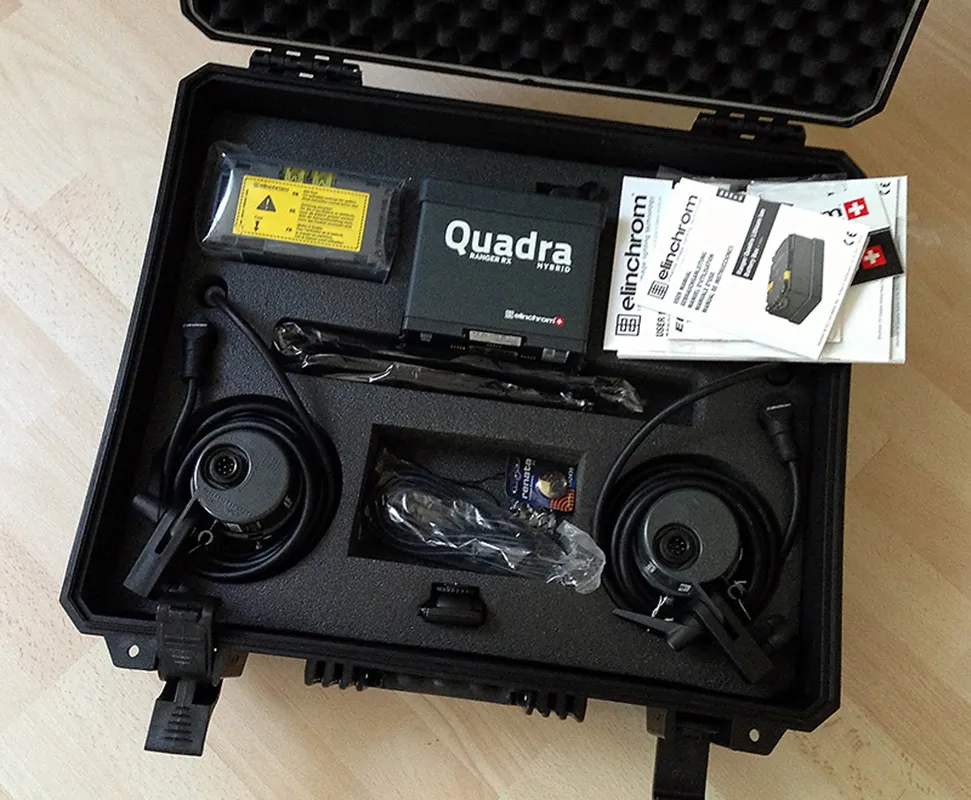
(Photo © 2013: Jens Brüggemann - www.jensbrueggemann.de)
Figure 8.12: Of course, the full range of light shaping accessories is also available outdoors when using the battery-powered flash systems. However, it should be noted that large-area light shapers such as softboxes or octa umbrellas are very susceptible to wind and there is a risk that the wind will blow the flash head, light shaper and tripod over (and possibly damage them). In this respect, an assistant to hold the tripod in place is not a luxury but a necessity in some cases with strong winds.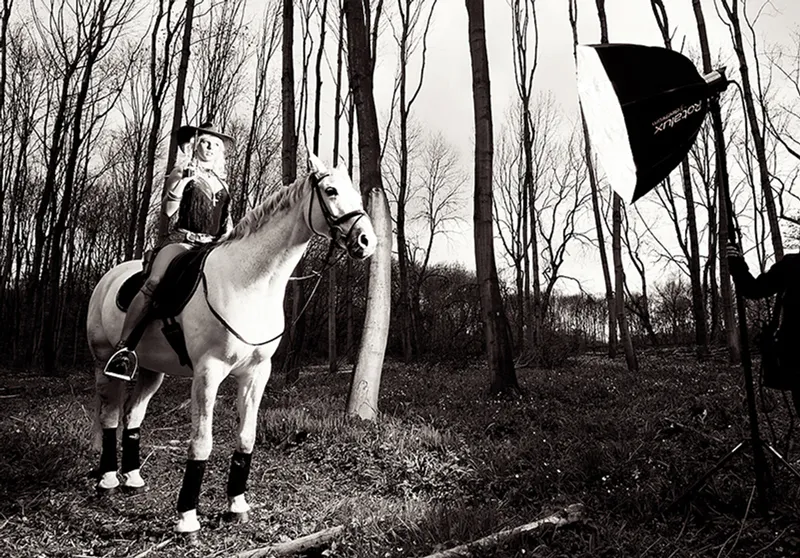
(Photo © 2012: Jens Brüggemann - www.jensbrueggemann.de)
Figure 8.13: However, it is not the technology that is important, but how it is used. Cameras, lenses and lighting technology are "only" the tools. Not an end in themselves. And even the most expensive equipment is useless if you can't use it properly and creatively. In addition to the light, the location (and of course the great model) also plays a not insignificant role in this photo. Nikon D3X with 2.8/24-70mm Nikkor at a focal length of 24mm. 1/40 second, Blender 22, ISO 100.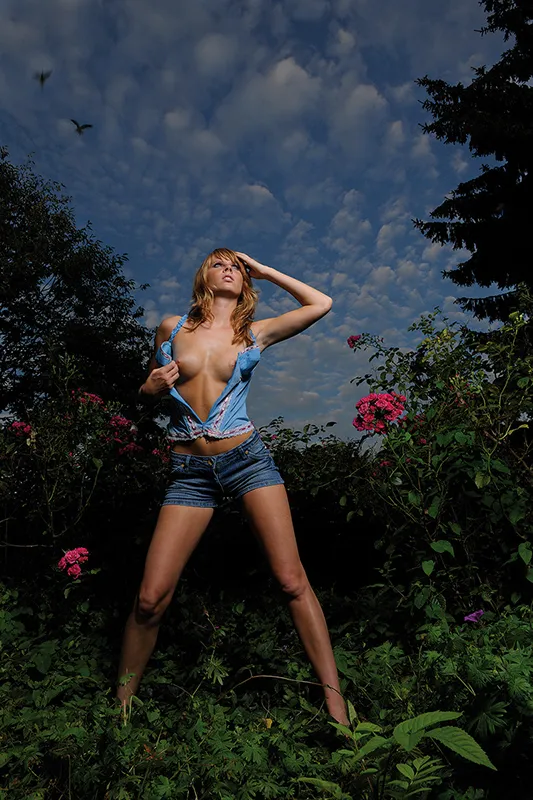
(Photo © 2009: Jens Brüggemann - www.jensbrueggemann.de)
