In this tutorial, you will learn how to create your first simple form in HTML. Forms are an essential part of web applications, allowing users to input information and send it to a server. In this step-by-step guide, you will learn the basic structure of an HTML form and understand how the different elements work together to transfer data.
Key Takeaways
- An HTML form is defined by the <form> tag.
- The attributes action and method determine where the data is sent and which method is used.
- Form fields are usually defined by <input>, <label>, and <button>.
- Data can be sent to the server either via GET or POST.
Step-by-Step Guide
1. Create HTML Skeleton
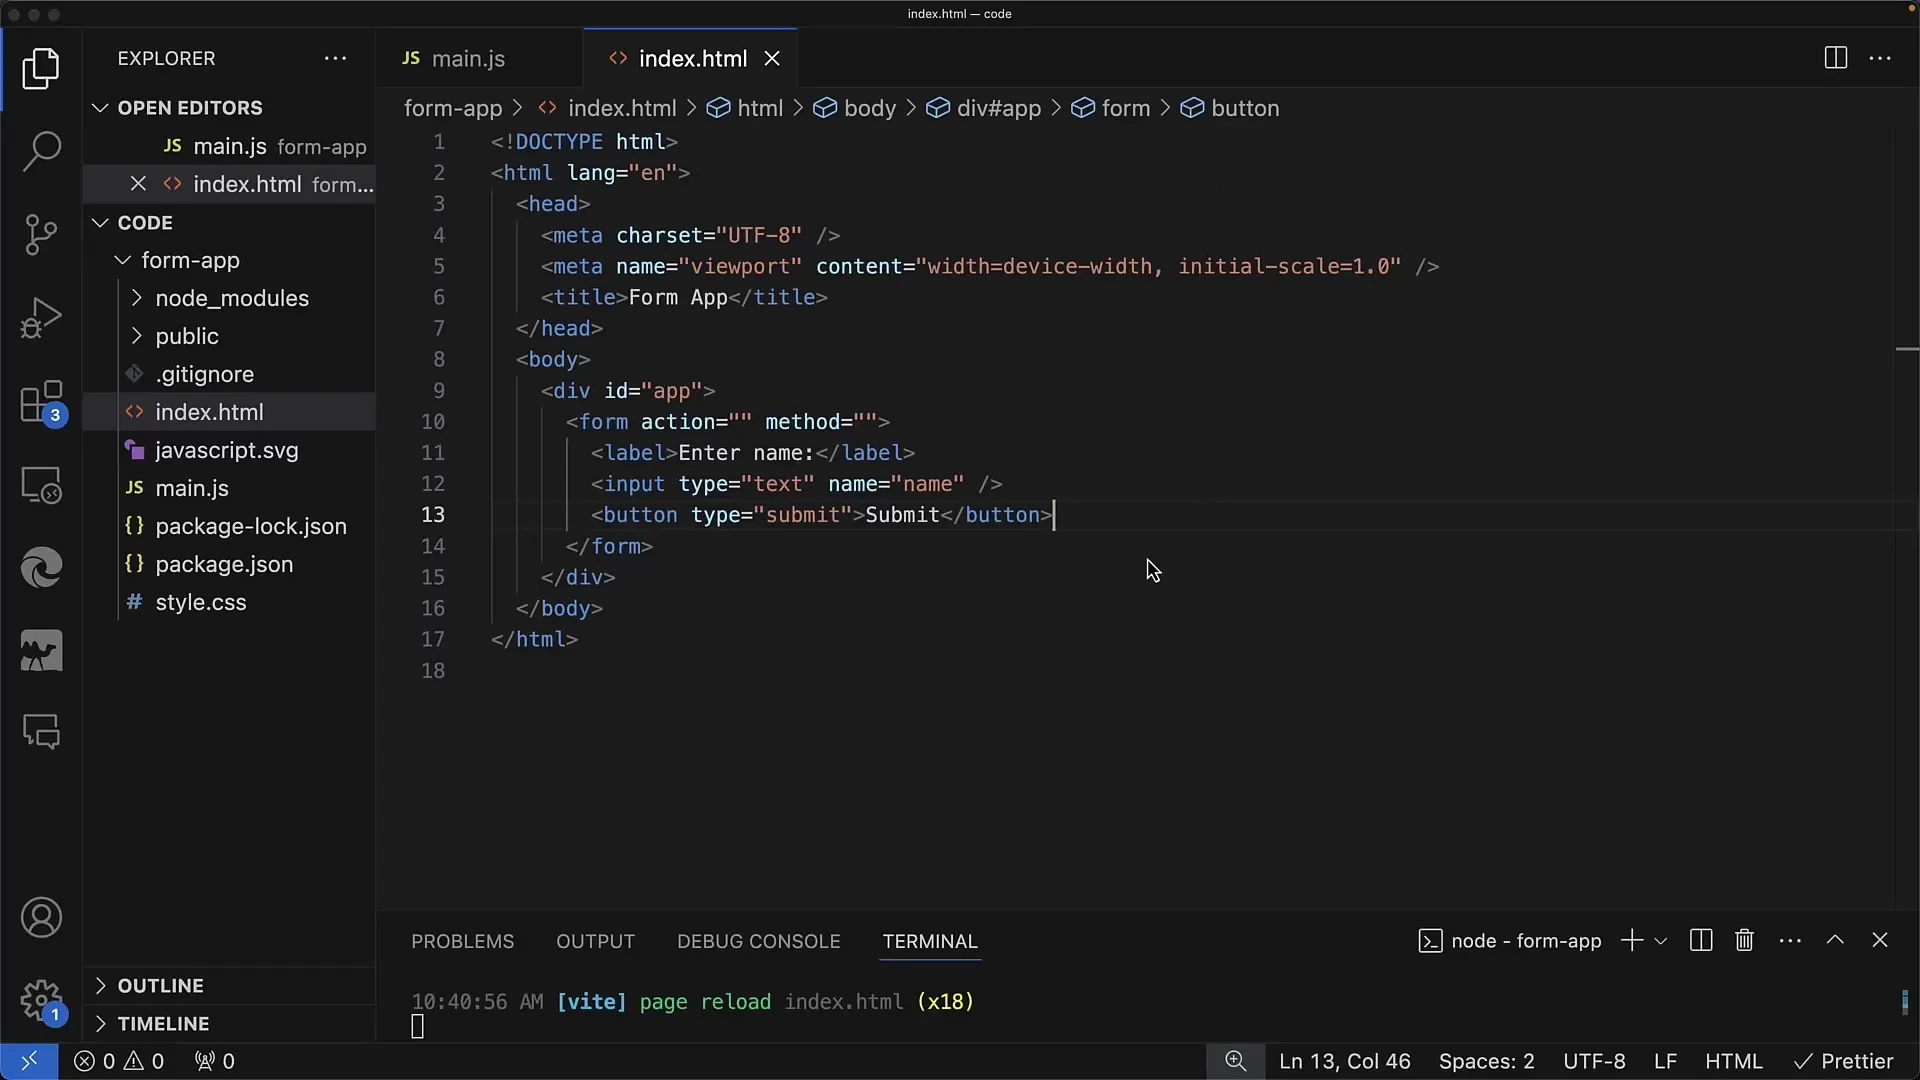
First, you need a simple HTML document as the skeleton. Make sure you have the basic structure of an HTML document:
2. Add Form Tag
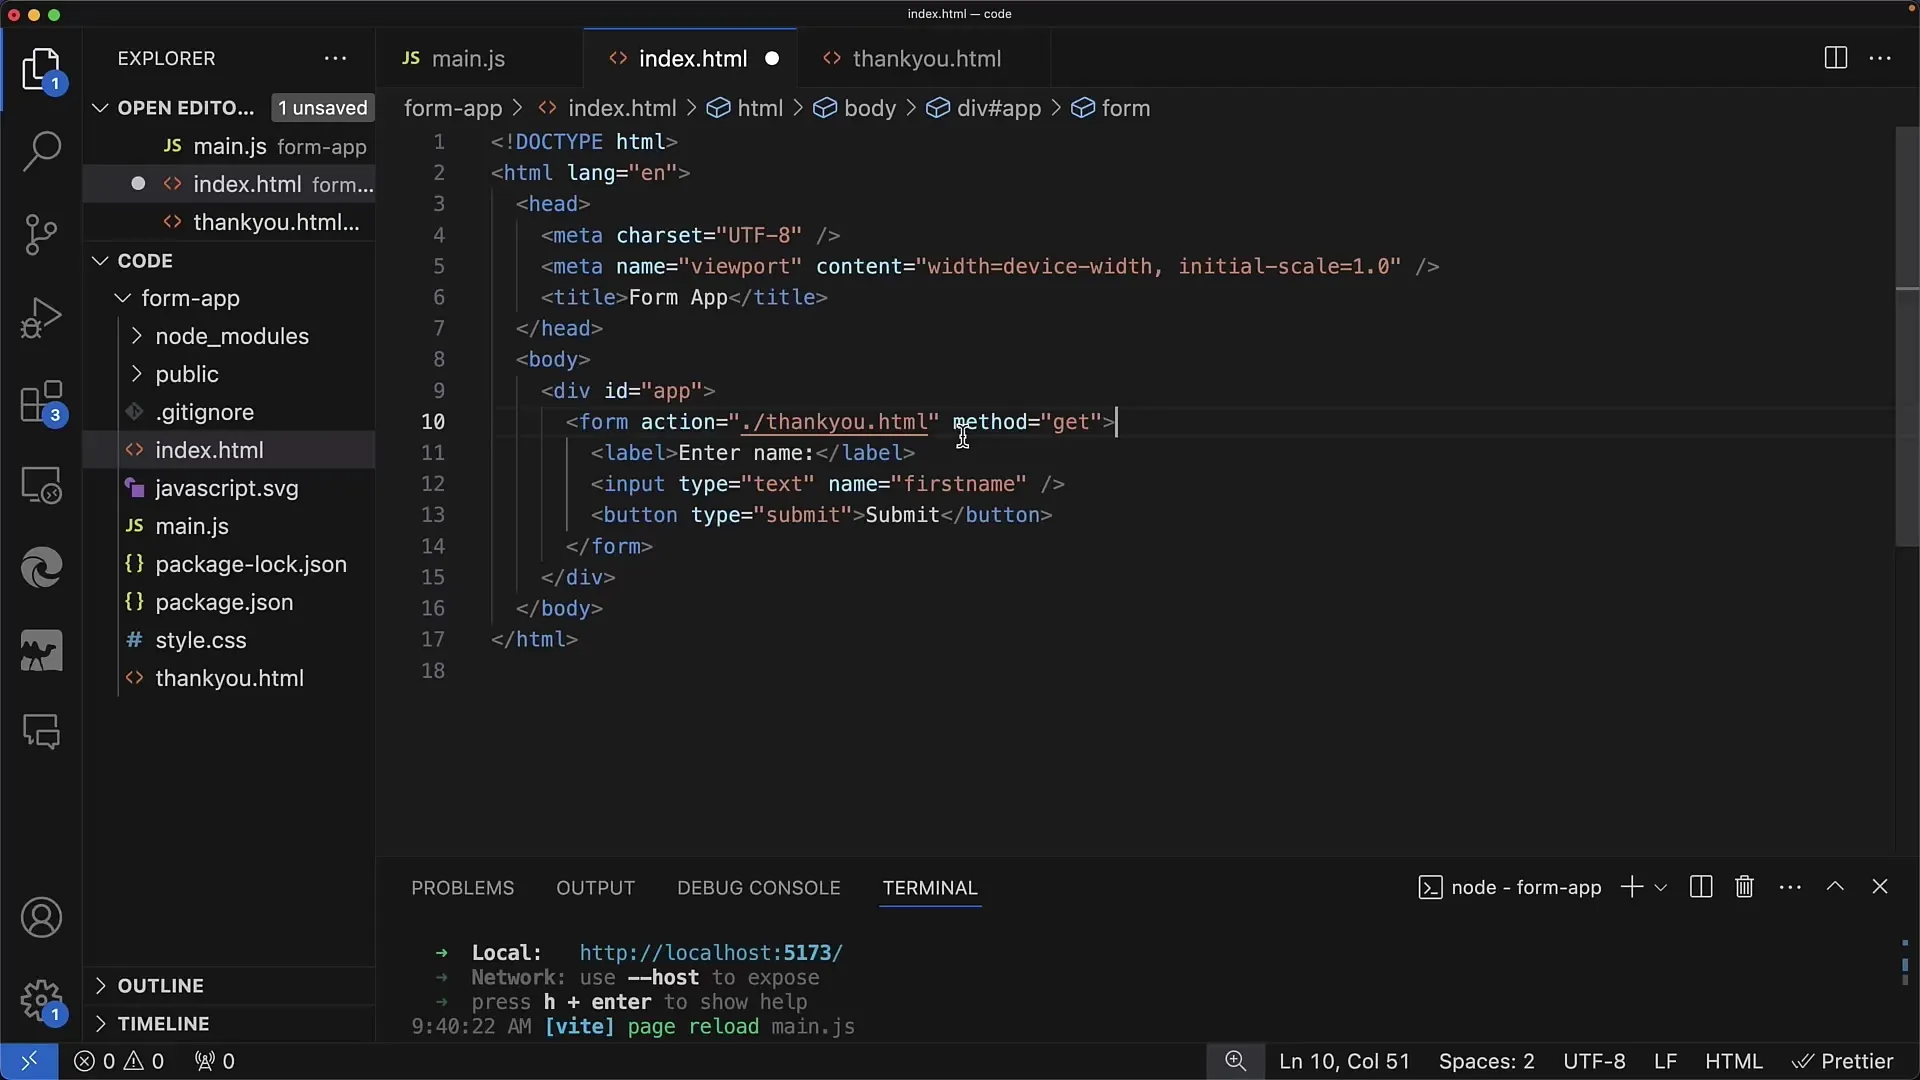
The next step is to define the form. You add the <form> tag and need the attributes action and method. Here is a simple example where action specifies the URL where the data will be sent, and method is set to GET to transfer the data through the URL.
3. Create Label and Input Field
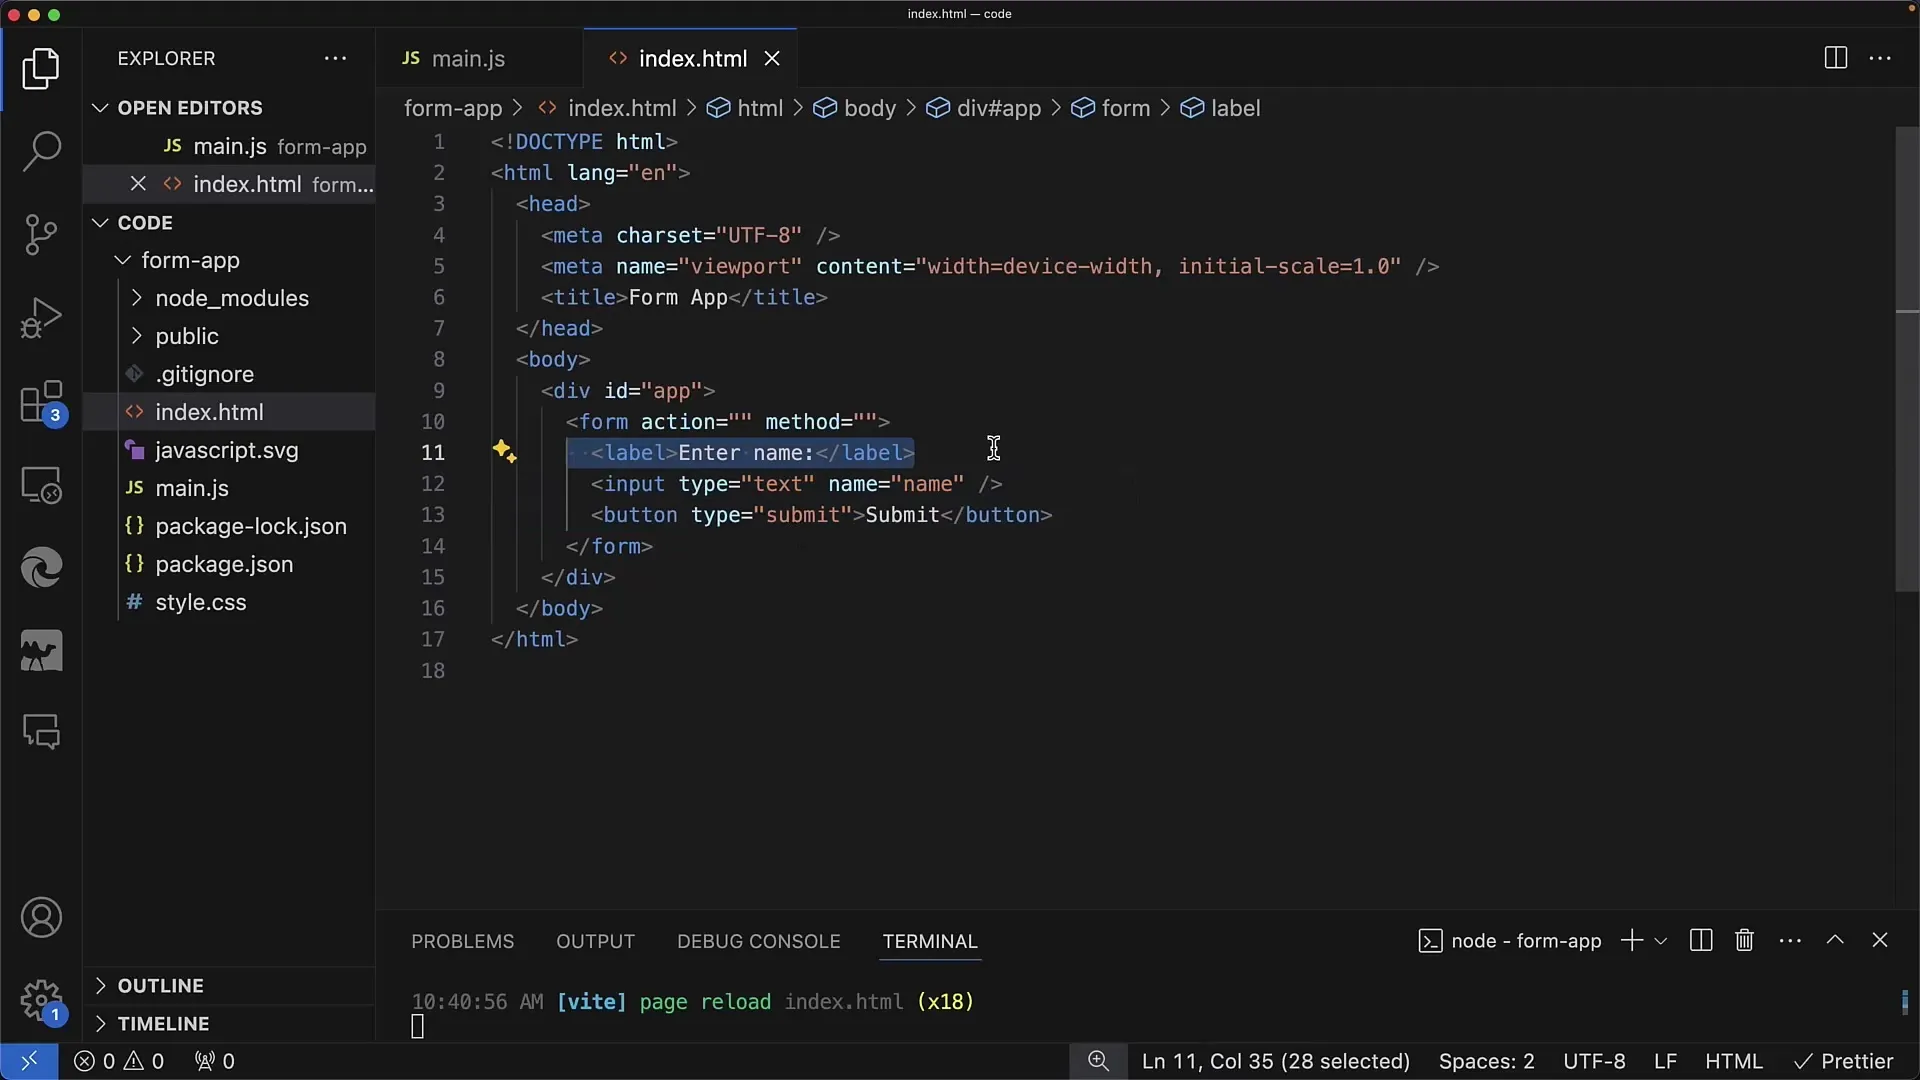
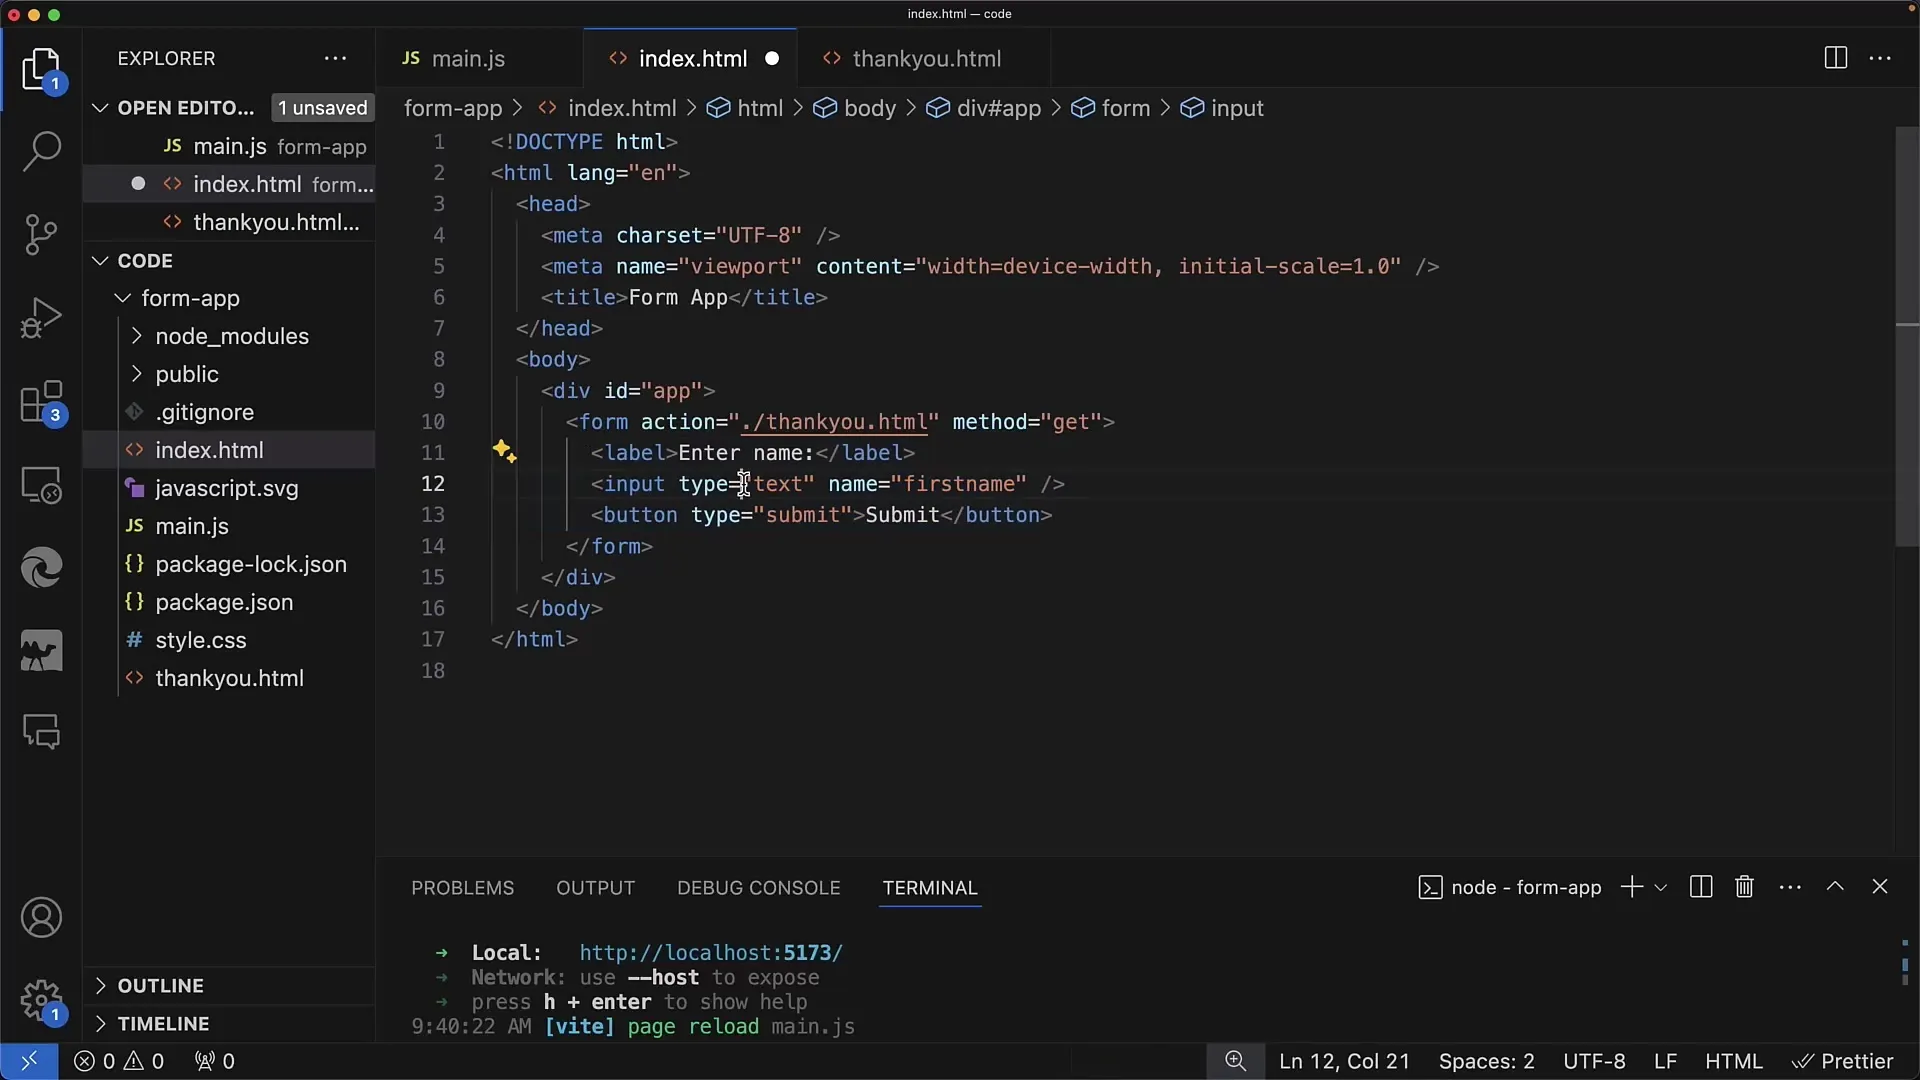
In the form, you want to create a labeled input field. To do this, use the <label> tag for the label and the <input> tag for the actual input field. Ensure that the for attribute of the label matches the id of the input field.
4. Add Submit Button
To submit the form data, you need a button. This is achieved through the <button> tag and should have the type submit so that the form is submitted when clicked.
5. Test the Form
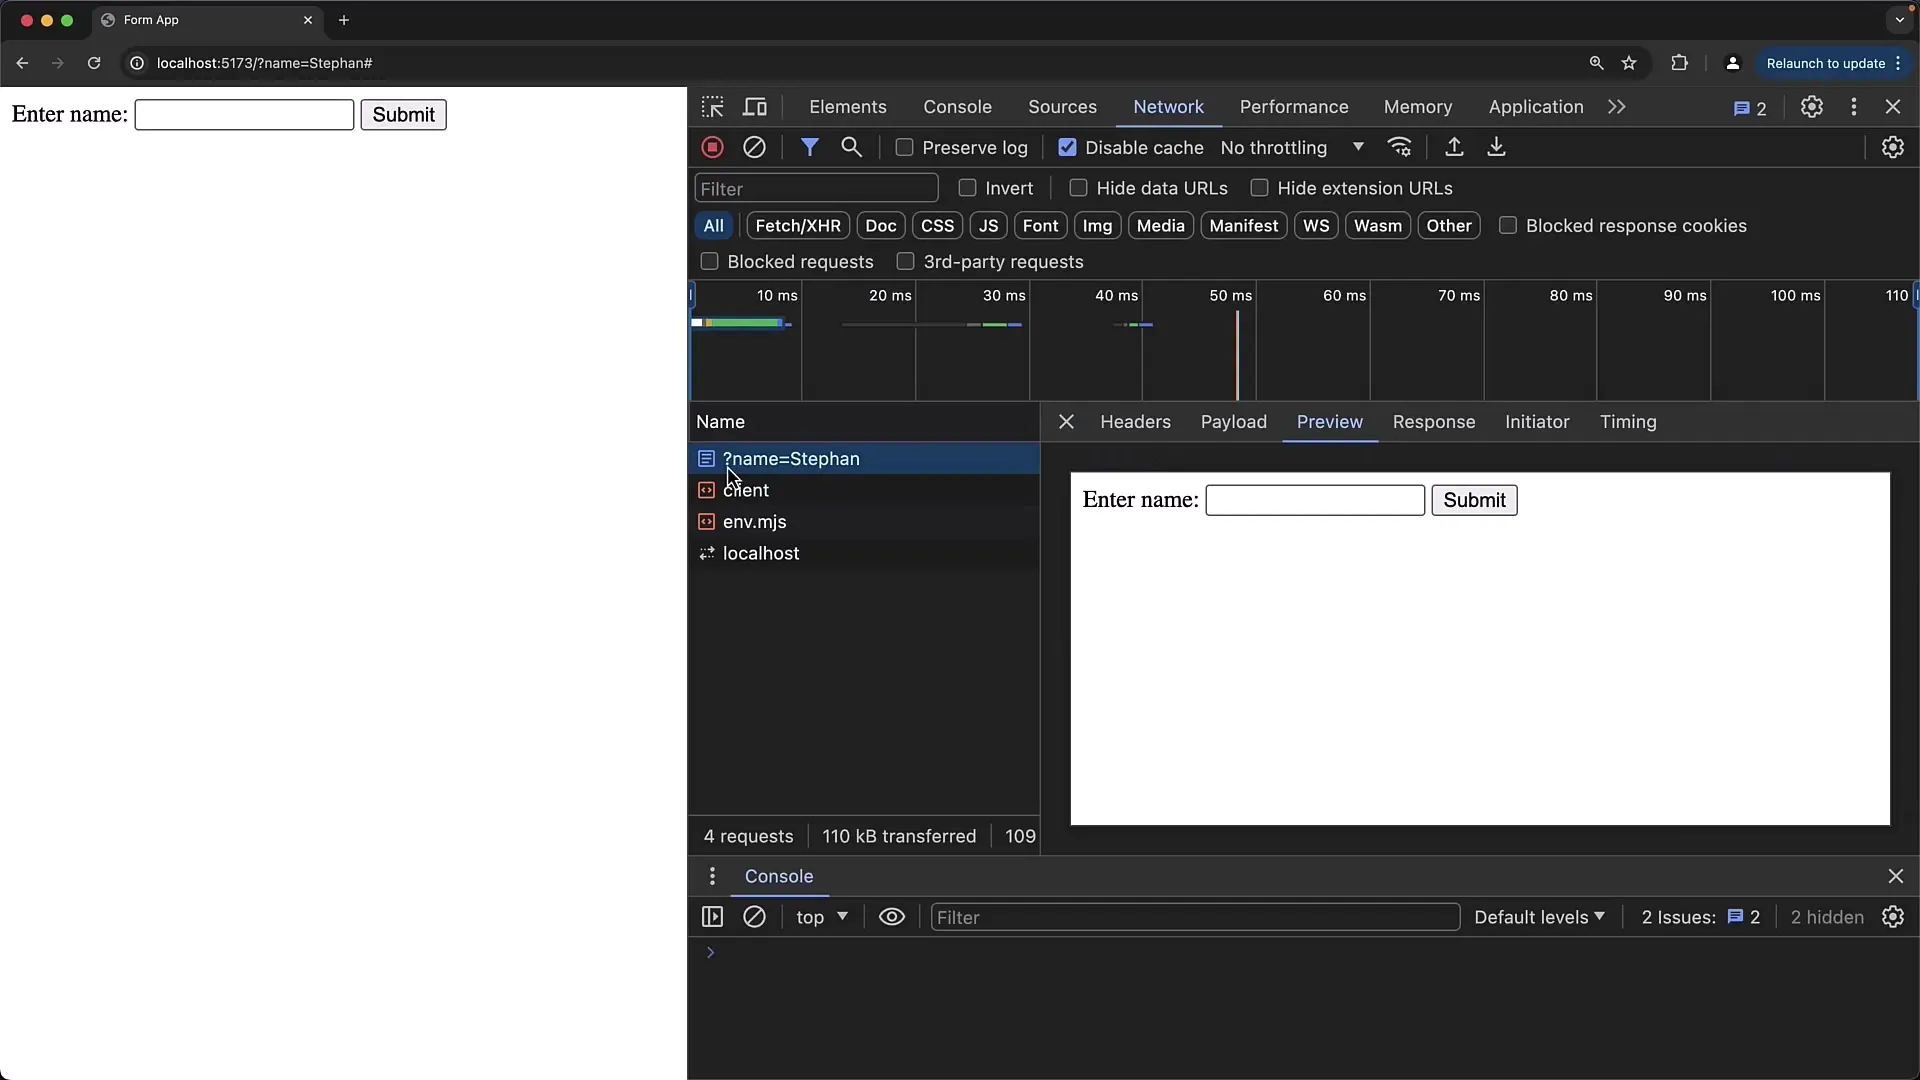
After creating the form, it's time to test it in the browser. Enter an example in the input field and click the Submit button. You should see that when the form is submitted, the entered data is sent via the URL to the specified action.
6. Modify Input Attributes
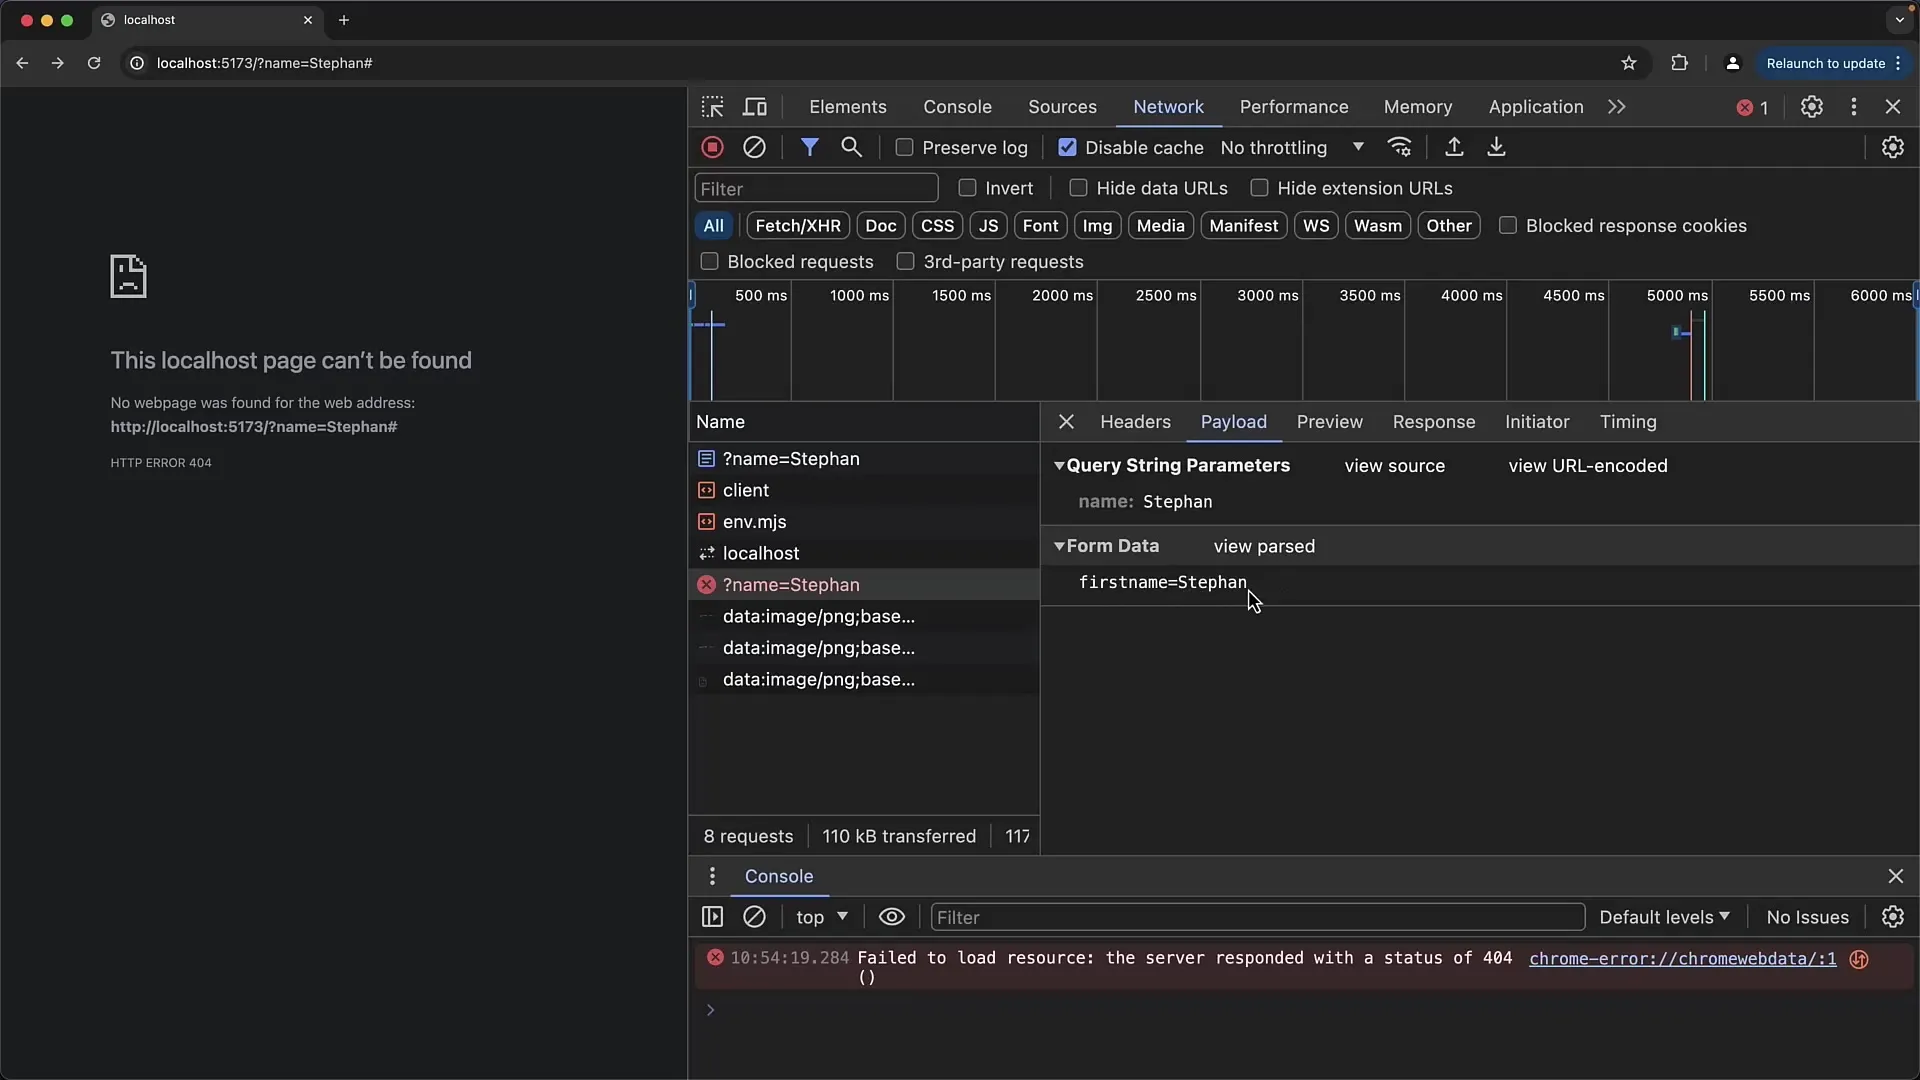
To see how the input fields change, you can adjust the attributes of the <input> tag. For example, change the name attribute to differentiate the submitted data. An example would be changing the name of the input field from name to first name.
7. Data Transmission and Request Type
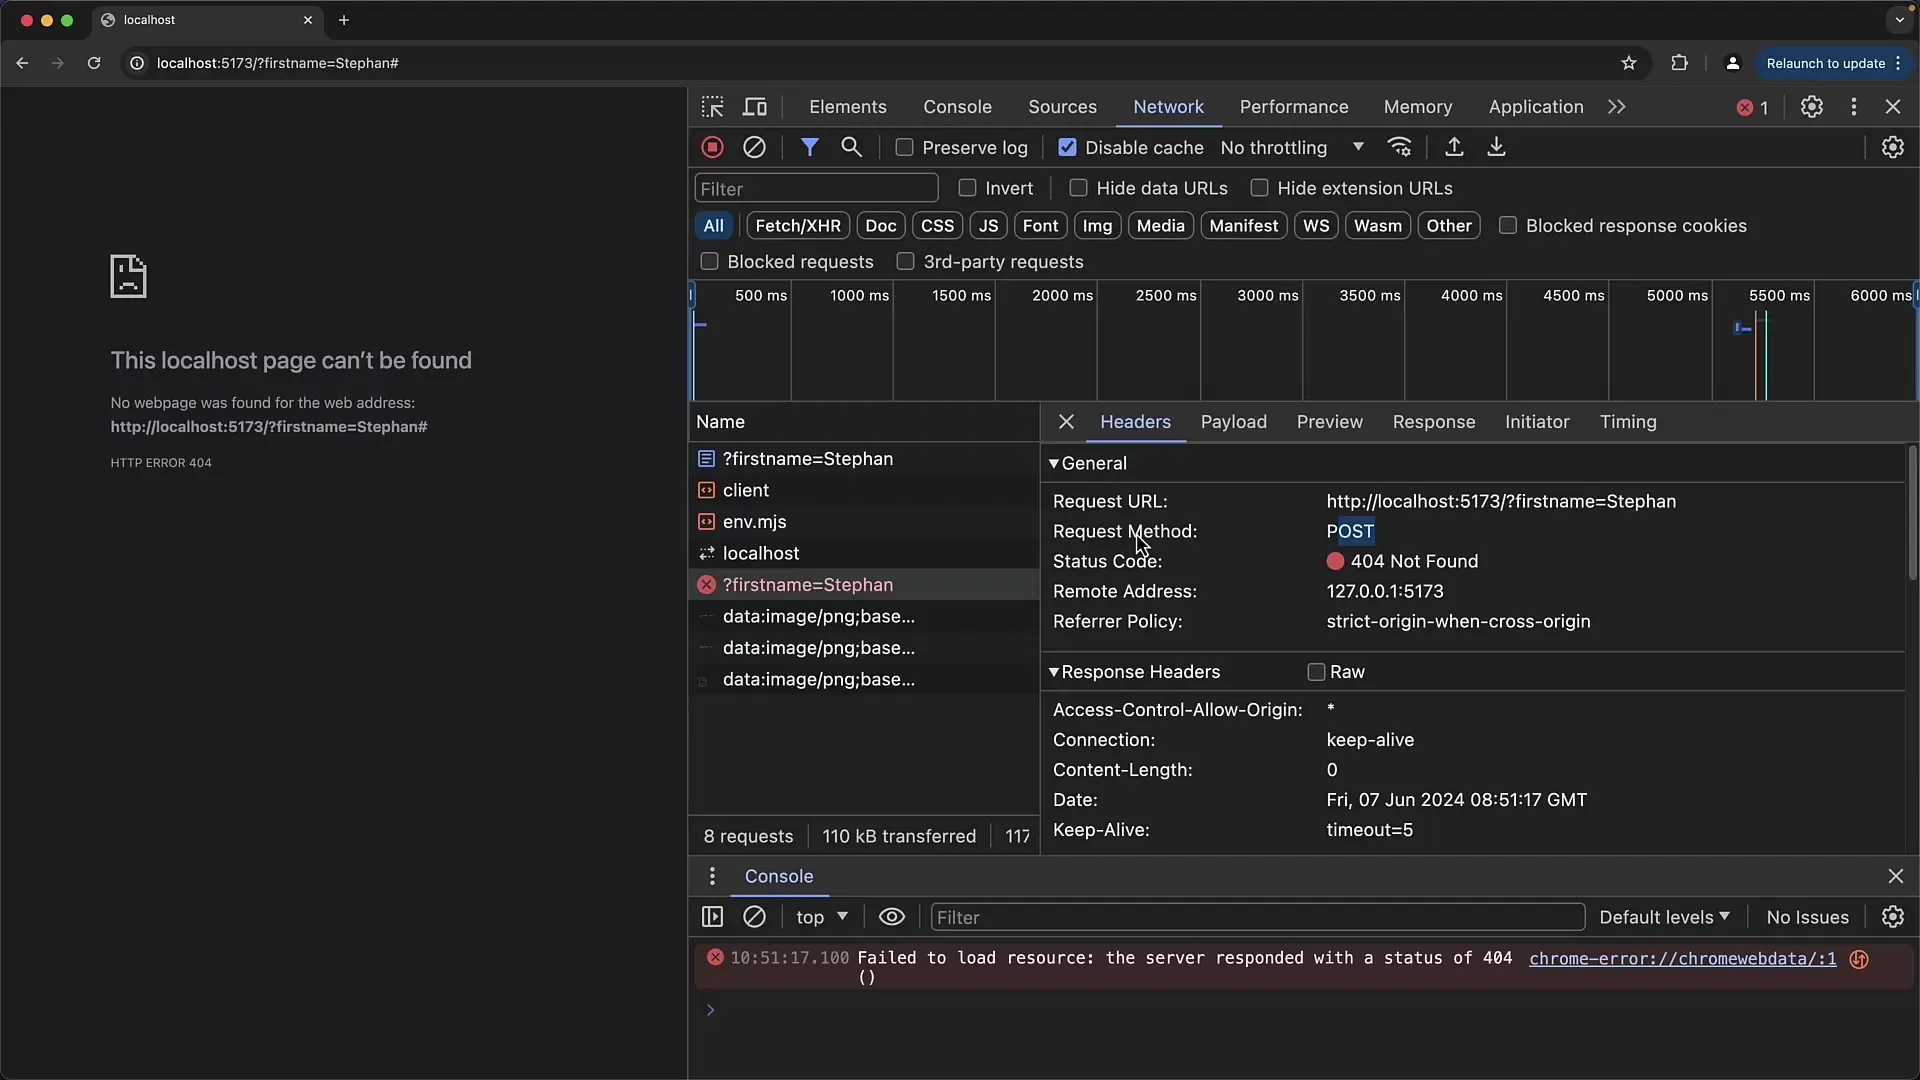
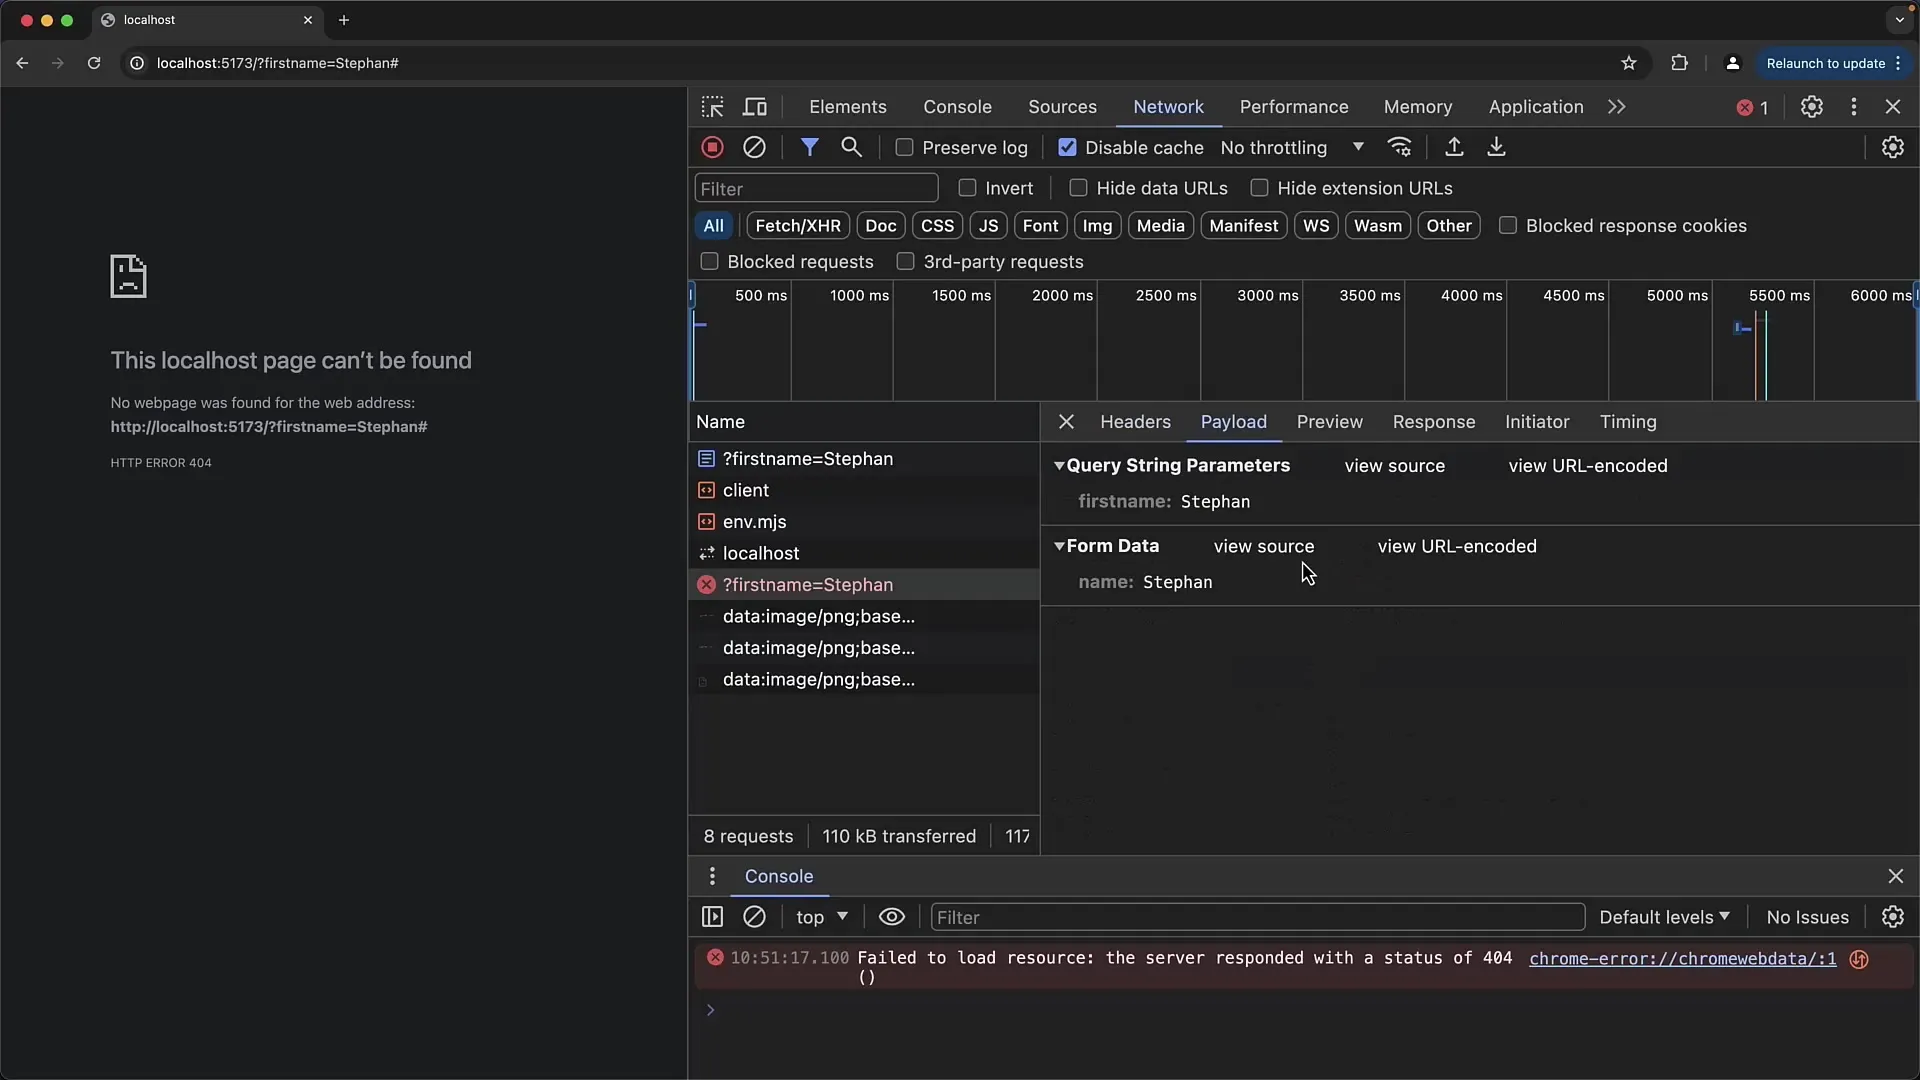
Before doing further tests, it is important to know that the GET method sends data in the URL, while POST sends data in the body of the HTTP request. You can change the request type by adjusting the method attribute in the <form> tag.
8. Simulate Server Response
Since you likely don't have a real server available when testing your form, you can adjust the action URL to simulate a different HTML page to which users will be redirected after submitting the form. Create a new HTML file that includes, for example, a thank you page.
9. Troubleshooting and Debugging
If errors occur when submitting the form, check the browser's network tools. There you can see if the form was successfully submitted and what data is being transmitted. Also, pay attention to possible 404 errors, indicating that the target URL was not found.
10. Conclusion and Outlook
Now you have a basic understanding of creating HTML forms. You can expand this technique to create more complex forms that include different input types and validations. In the next tutorial, you will learn how to react to form inputs with JavaScript and perform asynchronous data transfers.
Summary
In this tutorial, you have learned the structure and functionality of your first HTML form. You now know how to create input fields, labels, and buttons, and how the submitted data is transmitted through the URL or in the body of a POST request.
Häufig gestellte Fragen
What is the difference between GET and POST?GET transmits data via the URL, while POST sends the data in the body of the request.
What do I need to specify in the action attribute?In the action attribute, you specify the URL to which the form data should be sent.
How can I ensure that my form works?Test the form in the browser and check the network tools for the transmitted data.
How can I create multiple input fields in one form?Add more tags below the first tag and make sure to give each one a unique name attribute.
What happens after submitting the form?If a GET request is sent, the page reloads and the data appears in the URL. With a POST request, the server's response depends on the same server.


