In this tutorial, you will learn how to respond to changes in the input elements of web forms using JavaScript. It's important to use the appropriate event handlers to optimize the user experience and ensure that you receive the correct values for further processing. In particular, we will focus on the onchange and oninput events to ensure that your inputs are processed dynamically and efficiently.
Key Insights
- The onchange event is triggered when the user removes focus from an input field and changes have been made.
- The oninput event is triggered with each input, allowing direct interaction with the user.
- The values returned by input elements are originally strings and may need to be converted to the correct data type (e.g., using parseFloat or valueAsNumber).
Step-by-Step Guide
To demonstrate the concepts mentioned, we will go through various steps to register events in an input field and work with the data.
Step 1: Setting Up an Input Element
First, you need to create a simple number input element in your HTML file. Structure your HTML with an input field for entering the age.
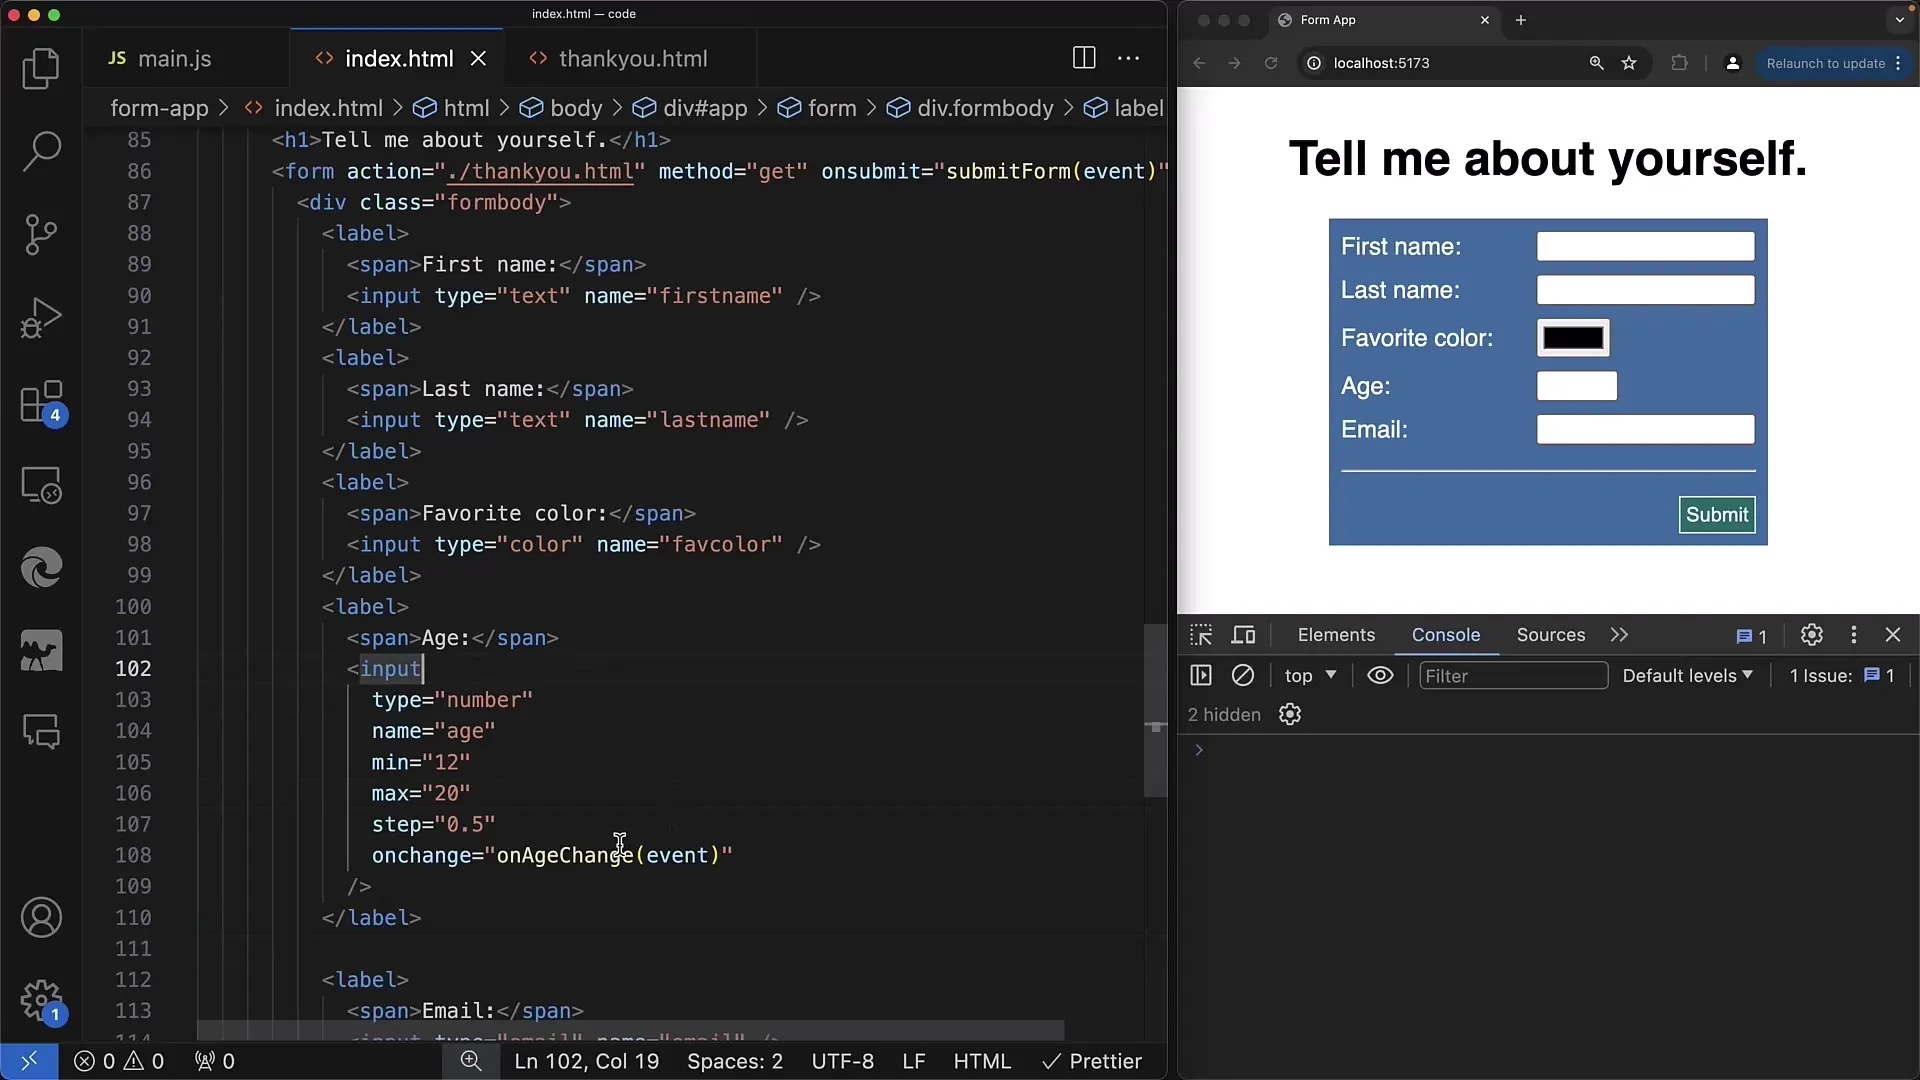
Step 2: Adding and Testing the onchange Event
Now we will add an event handler for the onchange event. We do this by creating a function that is called when the user removes focus from the input element.
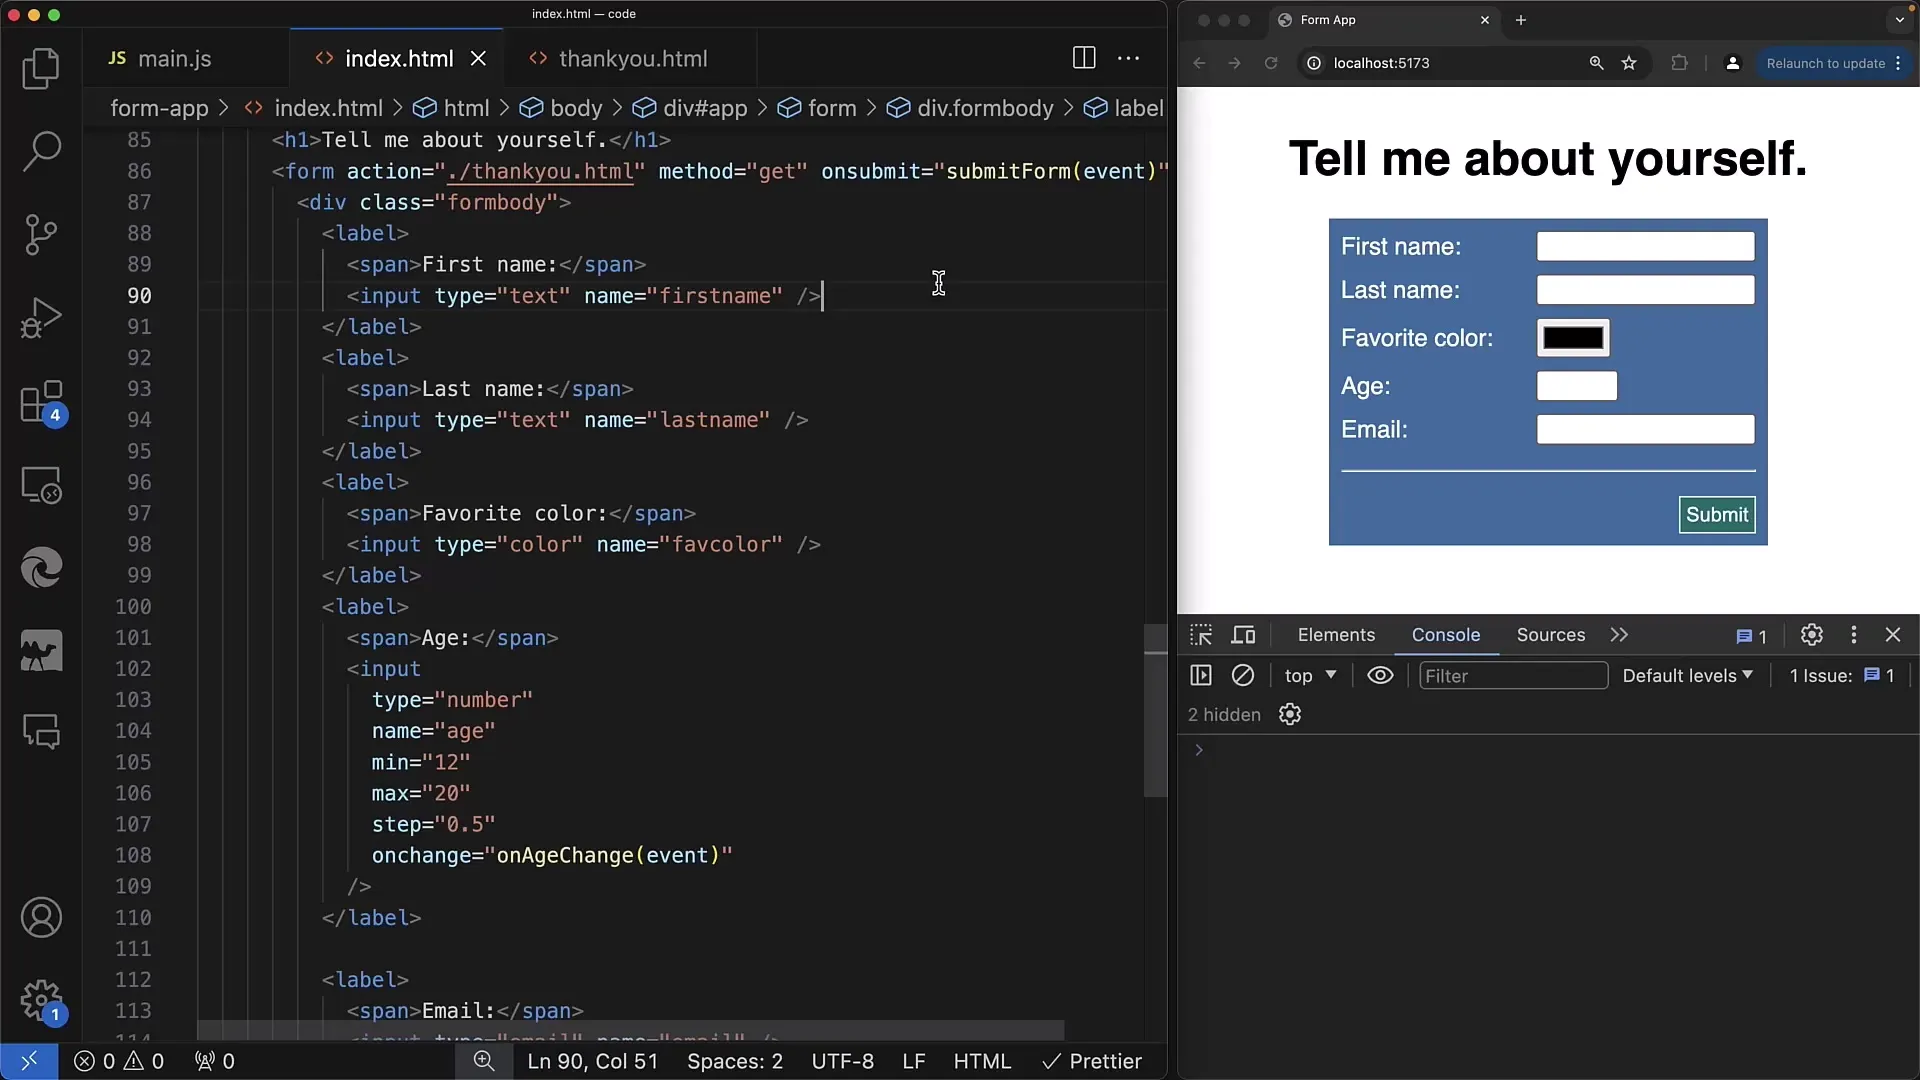
It is important to note that we can directly access the entered data of the input element when the value changes.
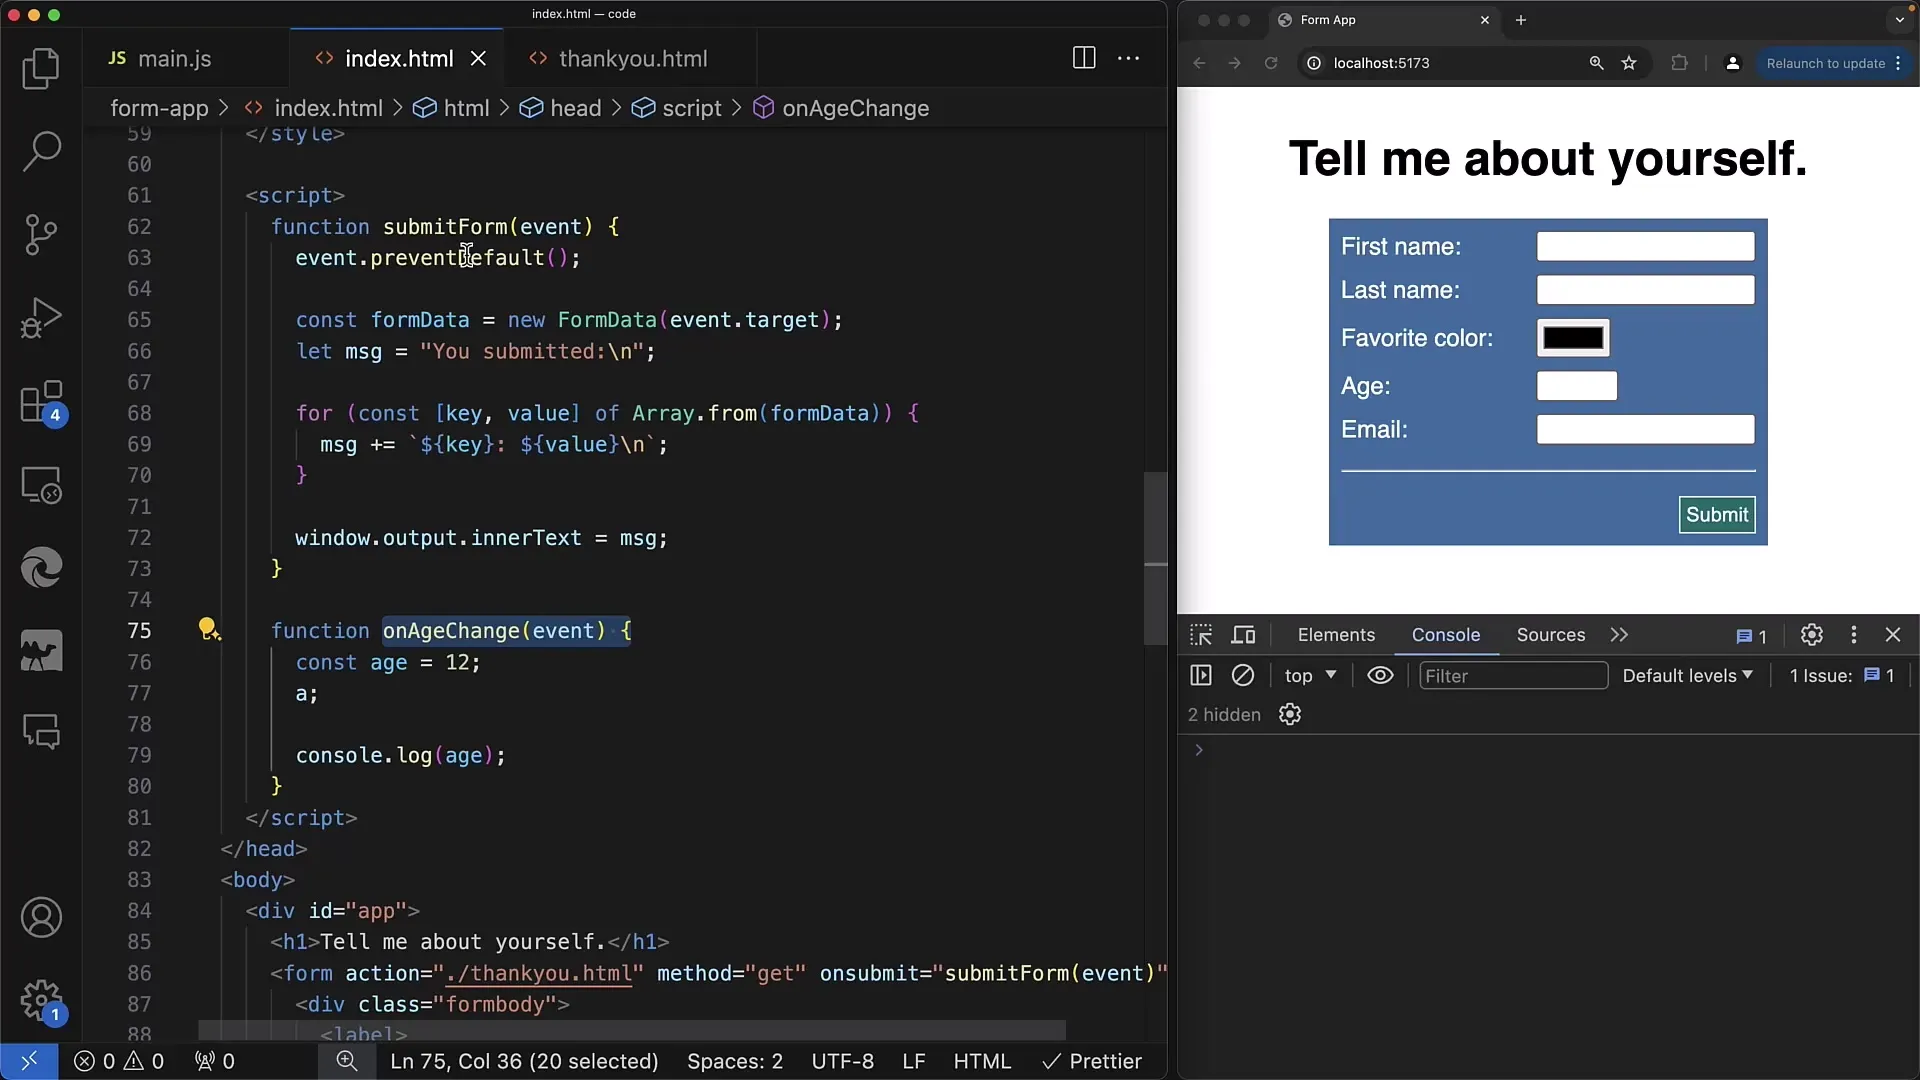
Step 3: Processing the Input Value
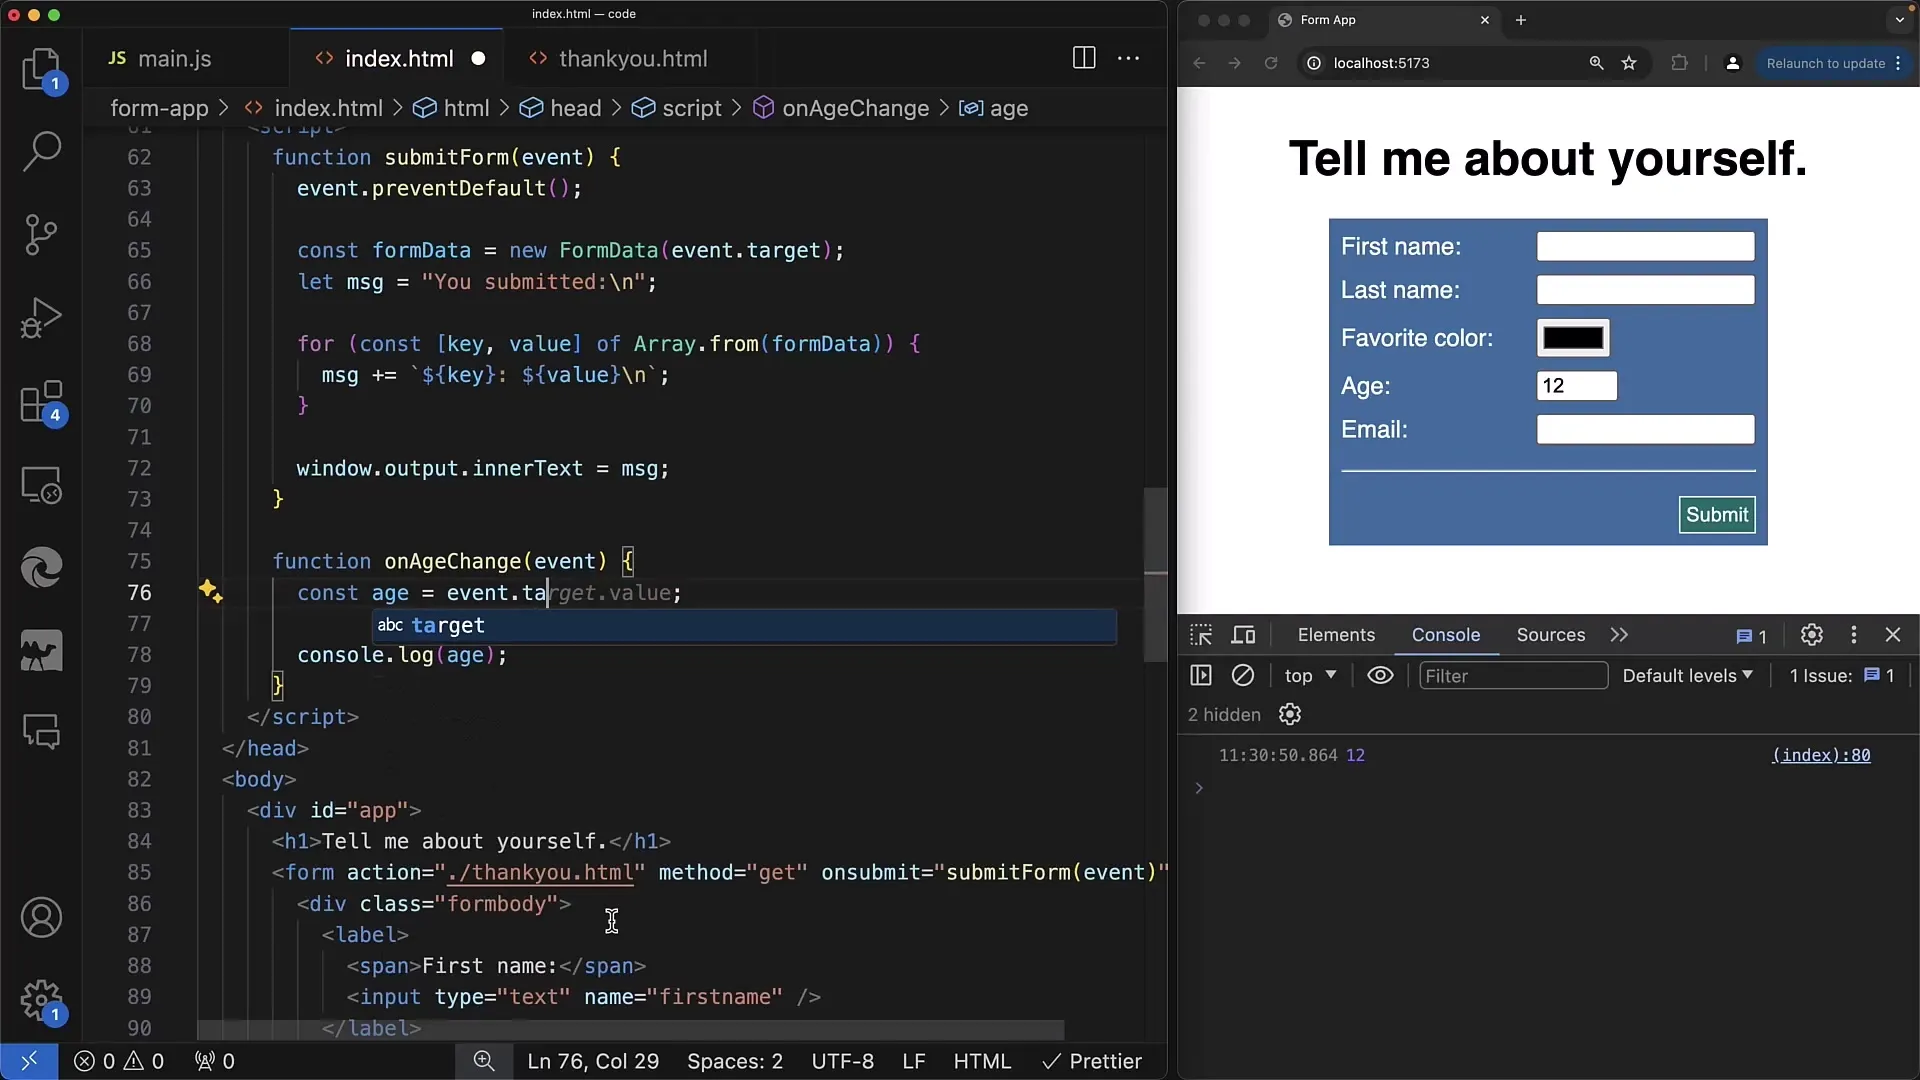
Within this function, you can obtain the value of the input element through the event object. Accessing the value should be done through event.target.value to get the current value directly.
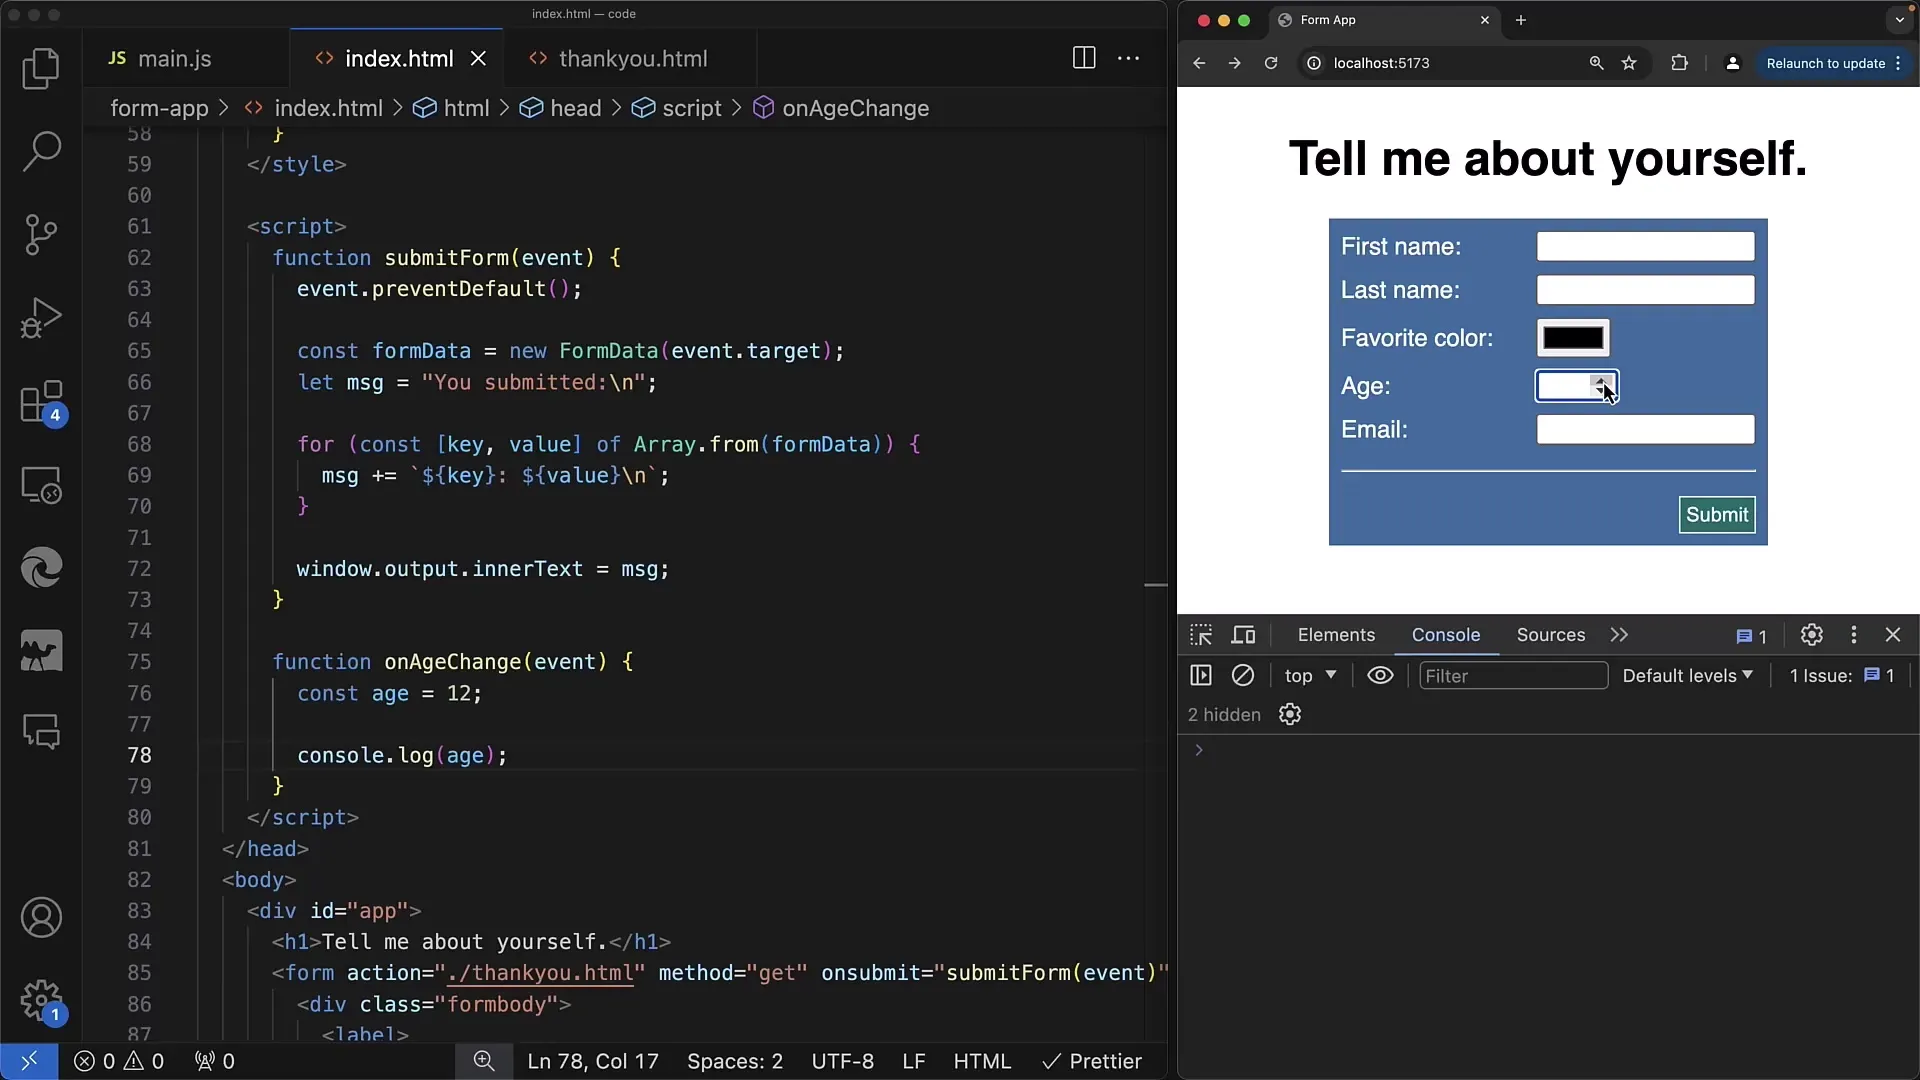
There may be situations, for example, where we want to post or process the entered value, but first need to validate it. The different types of values are crucial here, especially if you want to perform numerical calculations.
Step 4: Type Checking the Value
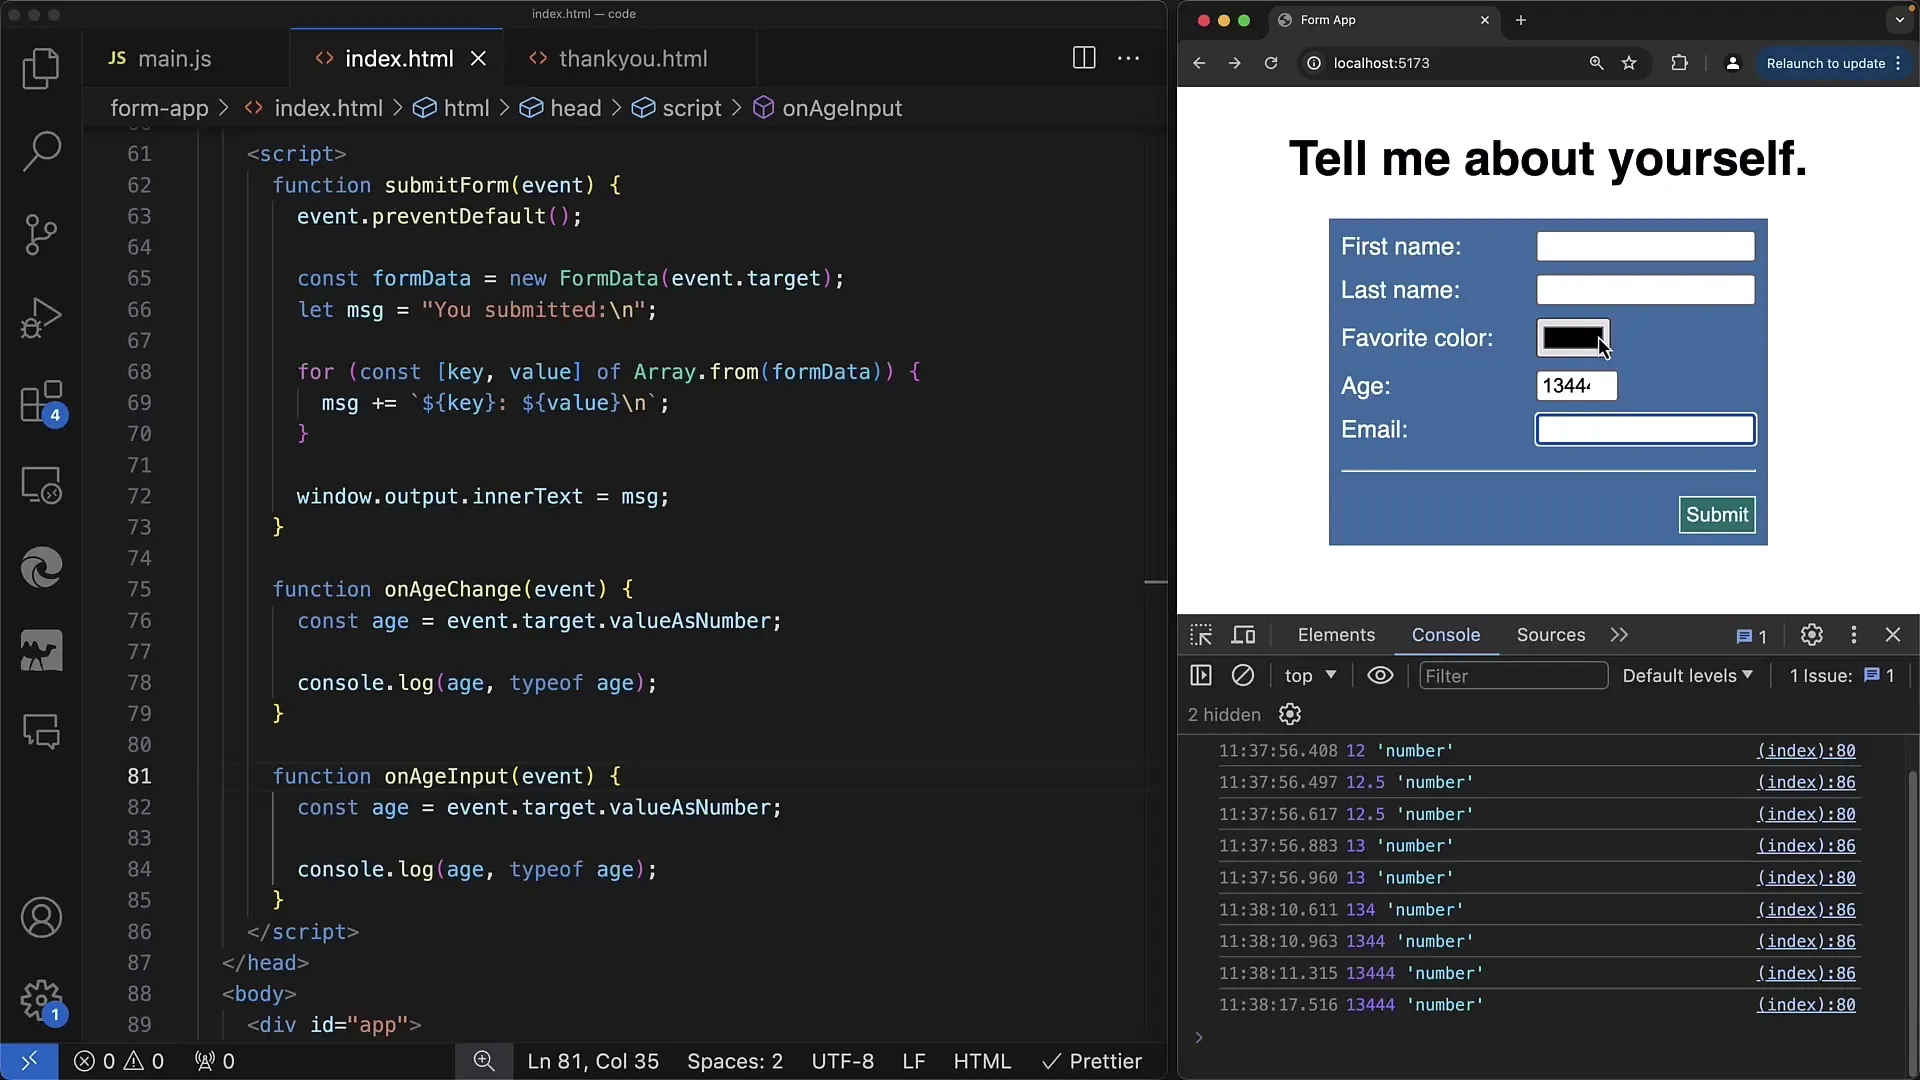
As you may have noticed, the input element always returns the value as a string. To ensure we receive a number, we can use type conversion. You can use parseFloat to ensure we are working with the correct data type.
Step 5: Implementing the oninput Event
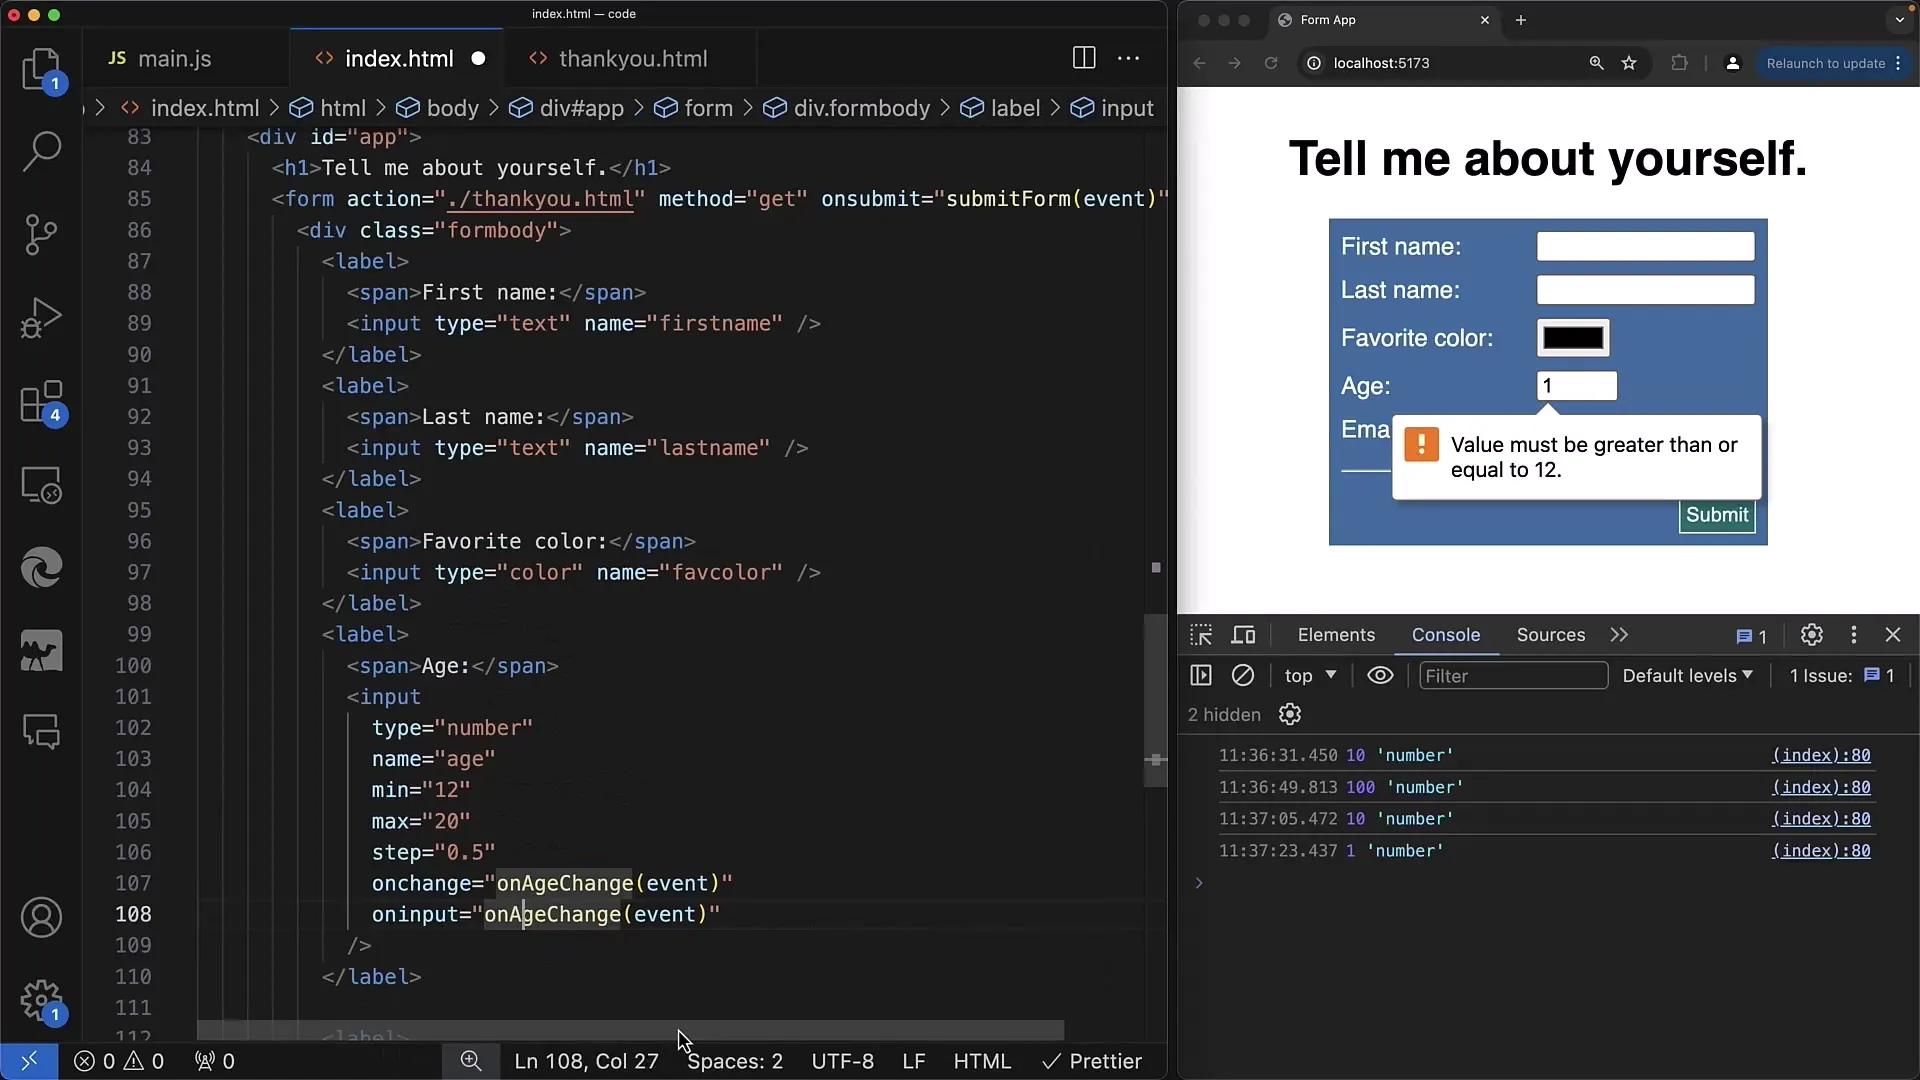
If you need a dynamic response when the user inputs something, you should use the oninput method in addition to onchange. This means that each time the user presses a key or changes the value, the function is called directly.
Step 6: Comparing the Two Events
Notice how oninput and onchange differ. oninput is triggered with each input, while onchange is only triggered when the user leaves the input field. This is particularly useful when real-time feedback is desired.
Step 7: Working with Different Input Types
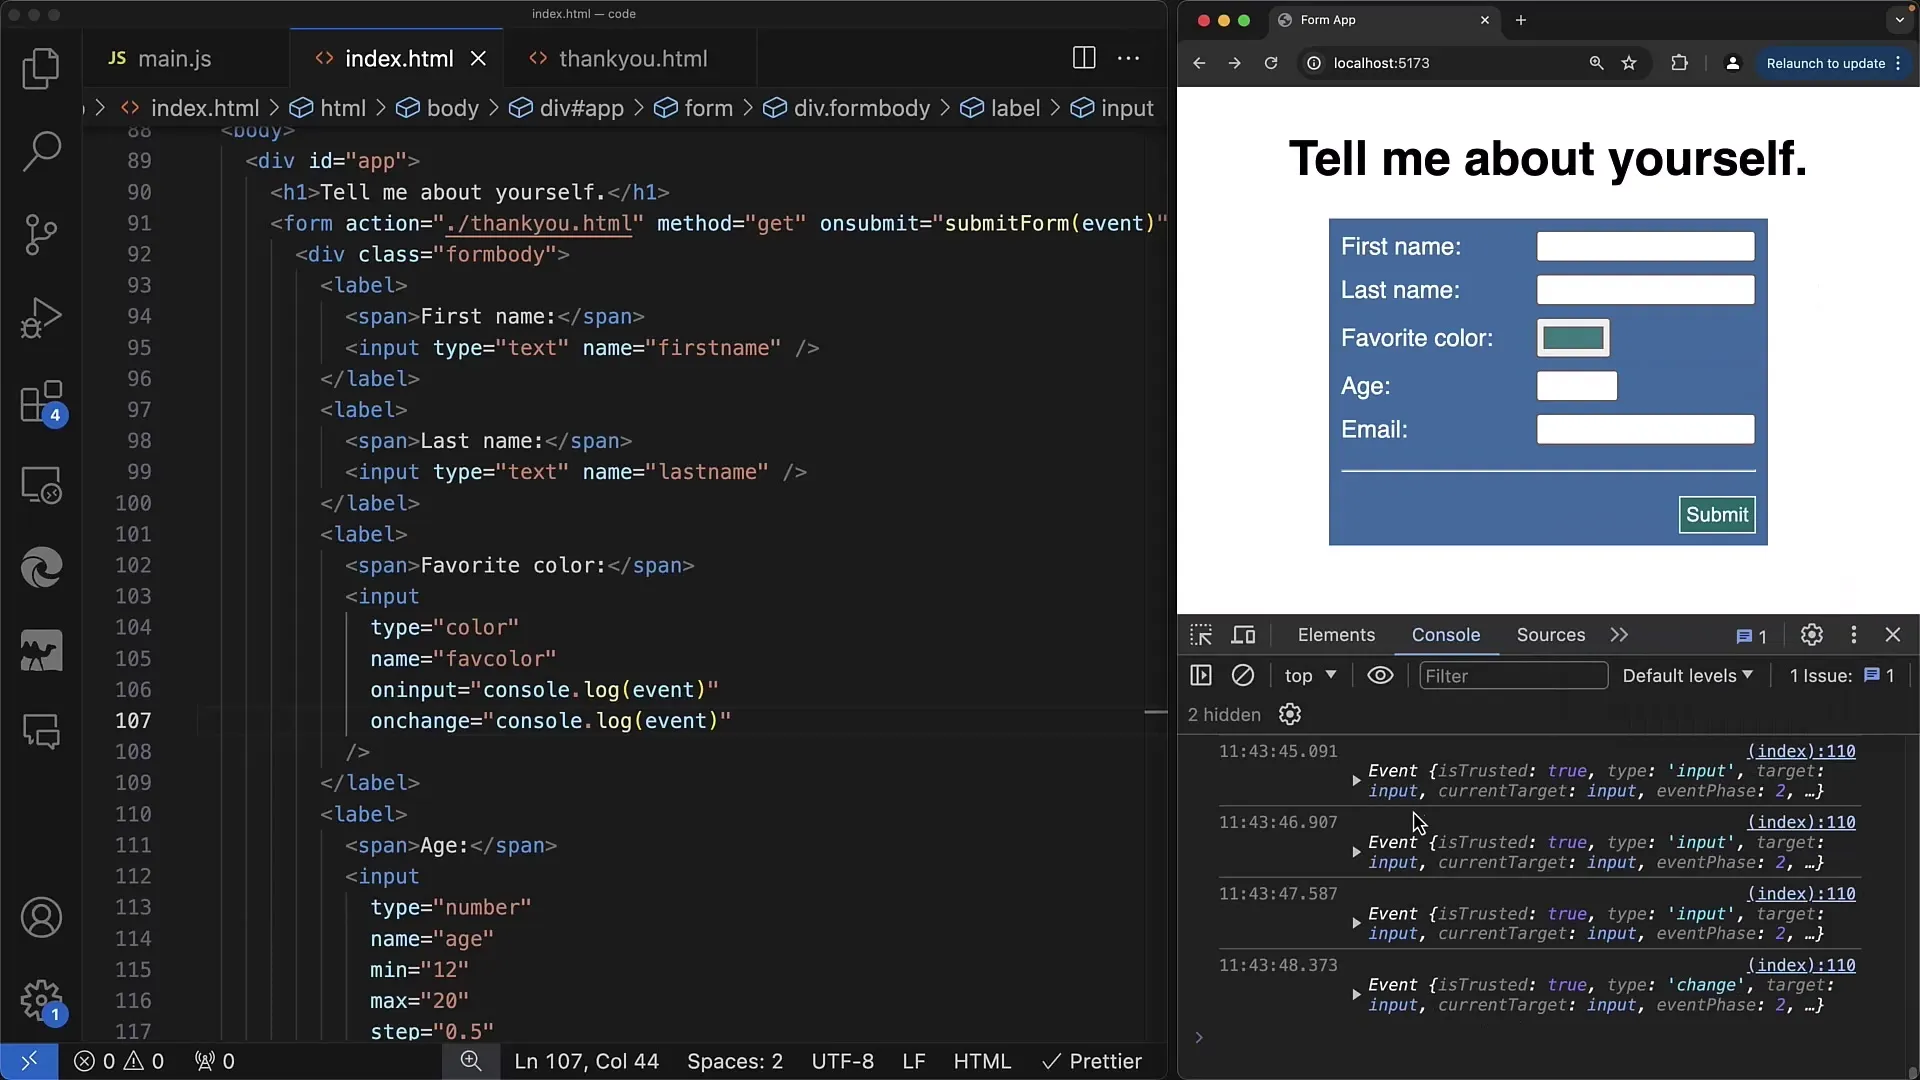
The methods you use for a number input field also apply to other types such as text or color. When using a field for color selection, you will quickly realize that the use of events should be adapted to the type.
Summary
In this tutorial, you learned how to use JavaScript to react to user interactions in input fields. You learned how onchange and oninput work and how important it is to process input values appropriately based on their type.
Frequently Asked Questions
Which events can I use for input elements?You can use onchange, oninput, as well as other events like onclick or specific keyboard events.
How do I get the current value of an input field?Use event.target.value to get the current value.
When is the onchange event triggered?The onchange event is triggered when the user moves focus away from the input field and has made changes.
How can I ensure a value is interpreted as a number?You can use parseFloat() or valueAsNumber to convert the string into a number.
Are there differences between oninput and onchange?Yes, oninput is called with every change in value, while onchange is only triggered when the focus leaves the input field.


