In this tutorial, you will learn how to effectively use various input elements in React. From creating simple forms to managing state with Controlled and Uncontrolled Inputs - we will explain the basic concepts through practical examples. As you follow the video, you will learn why React has some peculiarities when dealing with forms and how you can utilize them in your application.
Key Takeaways
- React uses Controlled and Uncontrolled Inputs.
- The state of a Controlled Input is directly controlled via the value attribute.
- OnChange is treated differently in React than in traditional HTML.
- Always provide an initial value for Controlled Inputs to avoid warnings.
Step-by-Step Guide
1. Basics of Input Components
To understand the basics, create a React component for your input field. In JSX, you can write almost the same way as in HTML, with the difference that you use curly braces for JavaScript expressions.
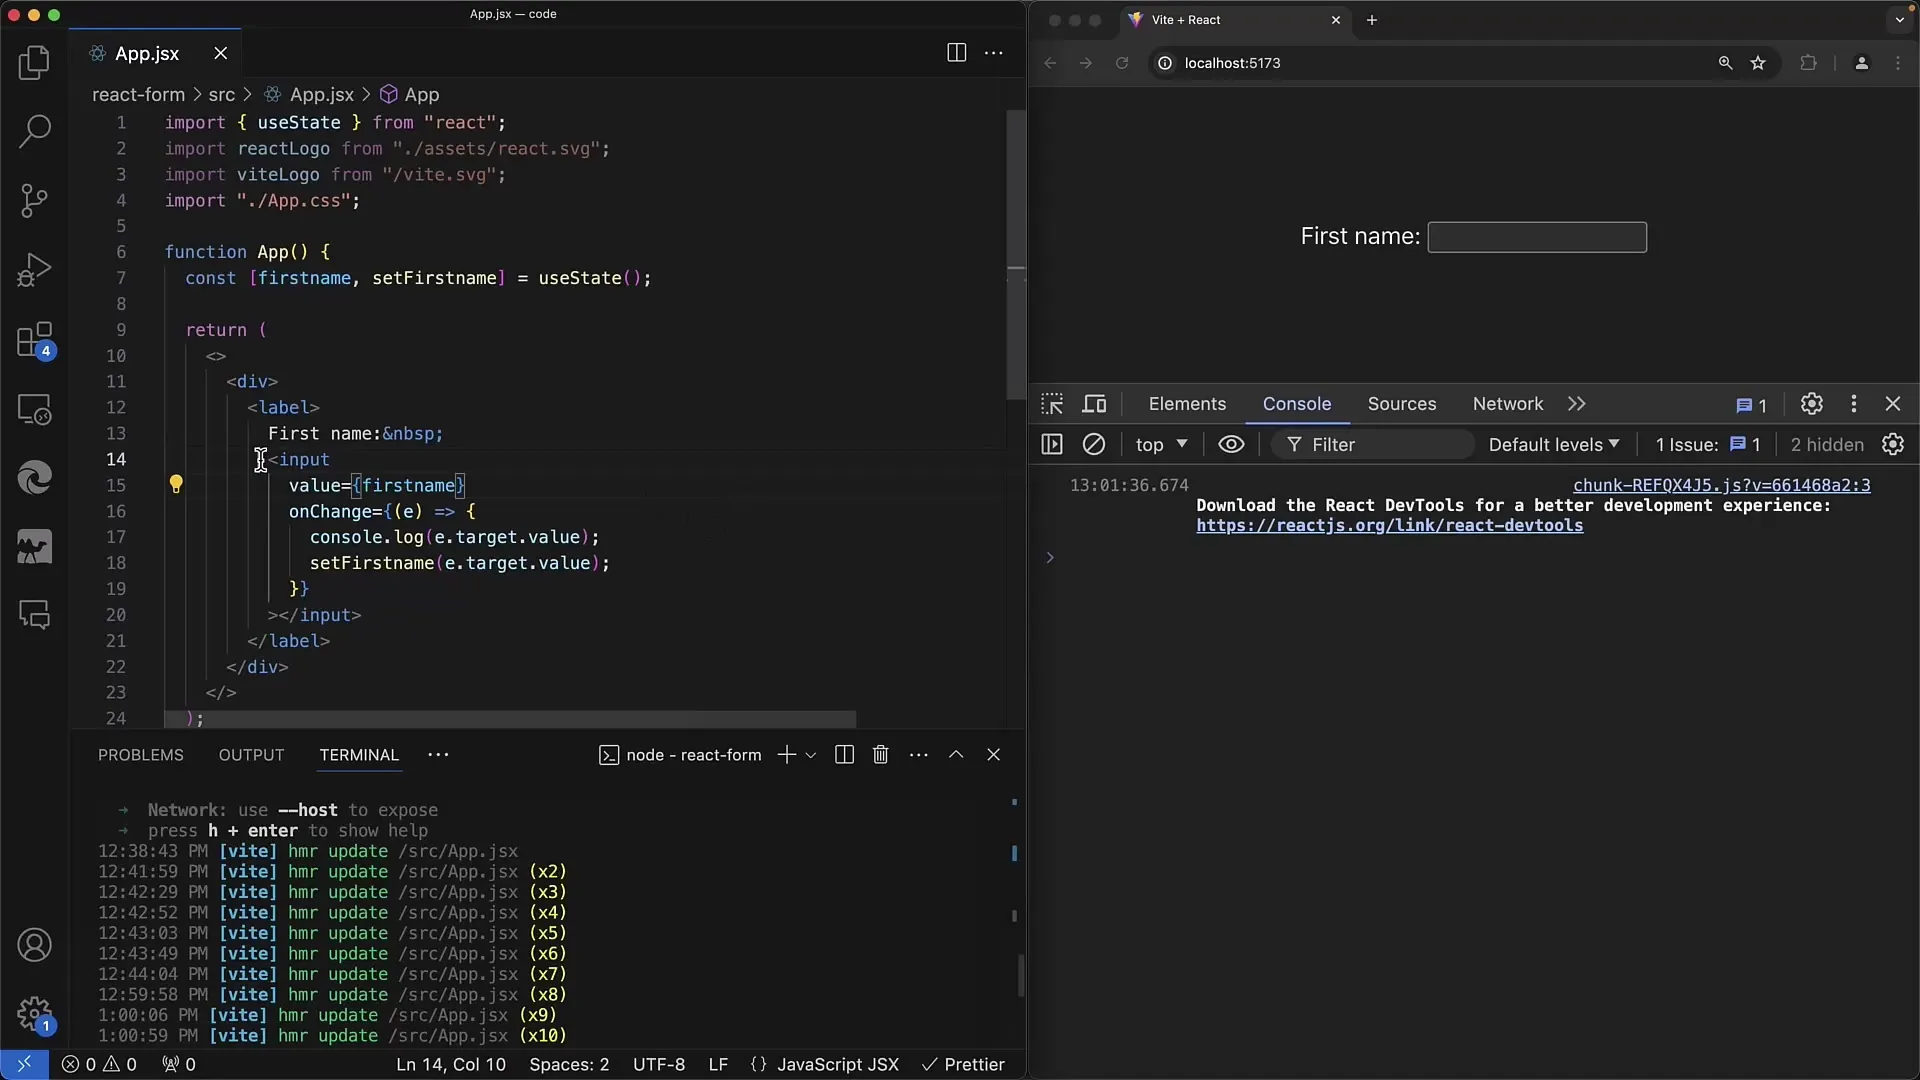
Here's a simple example of an input field expecting user interaction.
2. State Management with useState
Use the useState Hook to manage the state of your input. Define a state for the firstName and a setter for this state. This allows you to update the input value and use it for further logic in your component.
This setup is crucial to make the components reactive and ensure that changes are immediately reflected.
3. Implementing onChange
Use the onChange method to react to changes in the input field. This method is called when the value in the input changes, allowing you to handle the inputs as the user types.
You can use the event object to retrieve the current value of the input. In React, you can use event.target.value to query the current value.
4. Synchronizing State and Input
In your onChange method, write logic to update the state of the containing input and ensure that the name change is done correctly. This ensures that the input field in the UI is always in sync with the state.
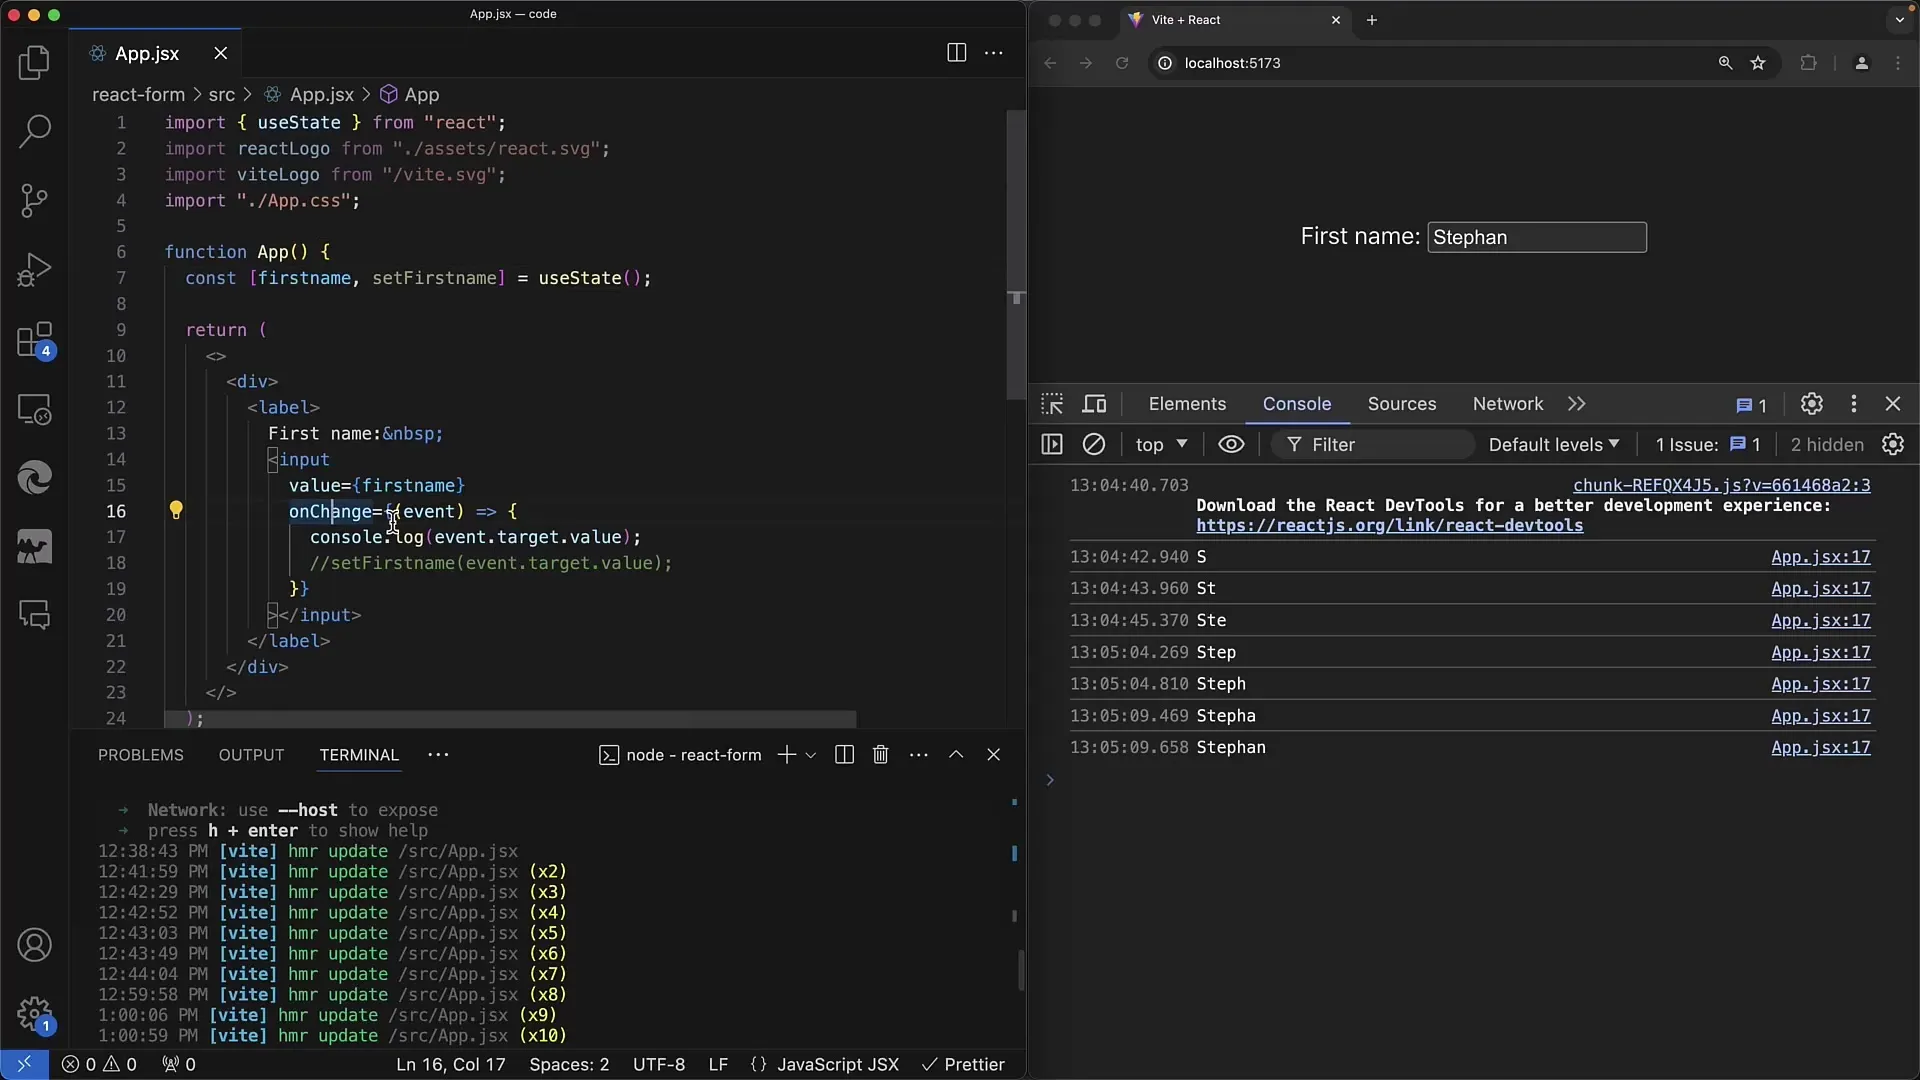
This means that every keystroke will trigger the onChange handler and update the state, ensuring reactive programming.
5. Uncontrolled vs. Controlled Inputs
An important aspect of React forms is understanding the difference between Controlled and Uncontrolled Inputs. Controlled Inputs have their state fully managed via React (using value and onChange), while Uncontrolled Inputs have their own internal state.
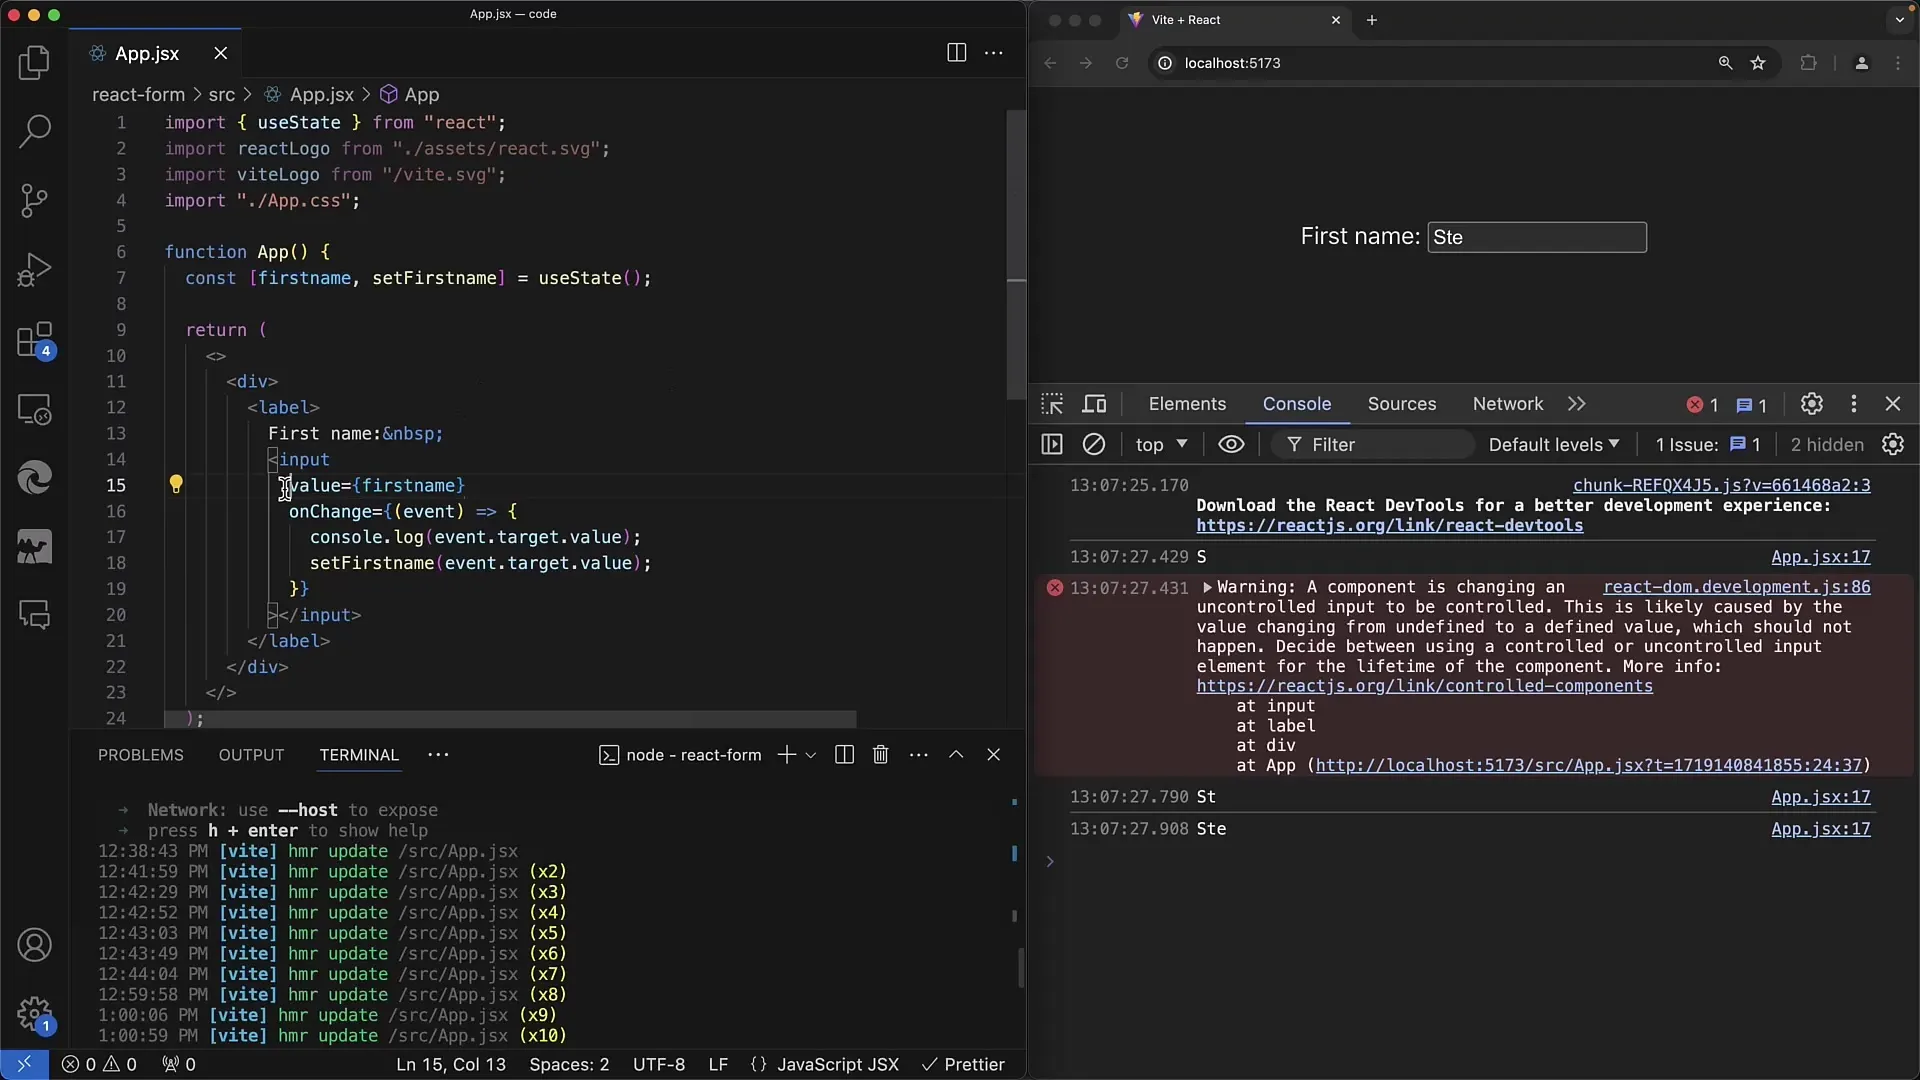
If you don't specify the initial value for value, the input is considered Uncontrolled. Make sure to set initial values to avoid warnings during runtime.
6. Form Handling
Create a form and use the onSubmit event to achieve desired behavior when submitting the form. Implement a function that prevents the default behavior of the form to ensure the page does not reload.
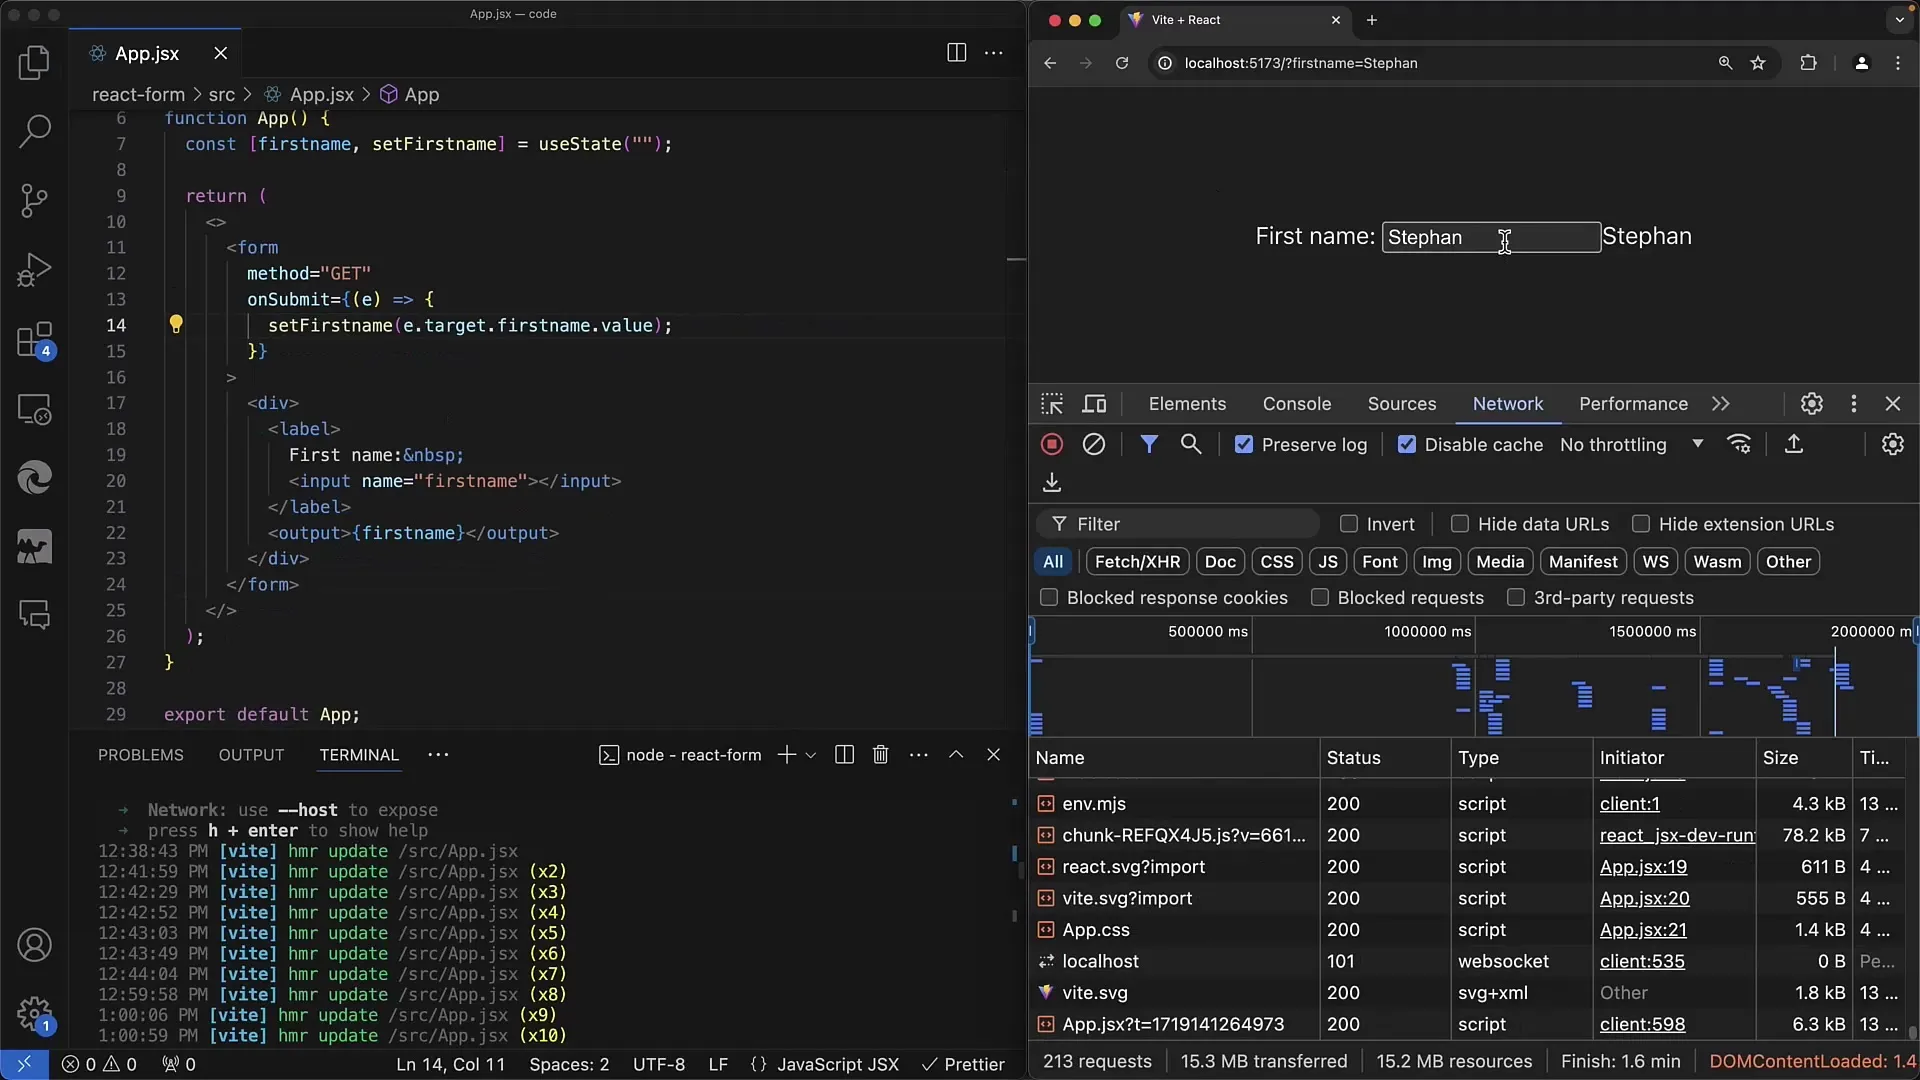
Use the state variables to handle and display the inputs within the form as needed. This allows you to manage and process the user's inputs as required.
7. Enhancing with Multiple Inputs
If you need multiple input fields, such as first name and last name, you can use additional state variables and handle them in a single function.
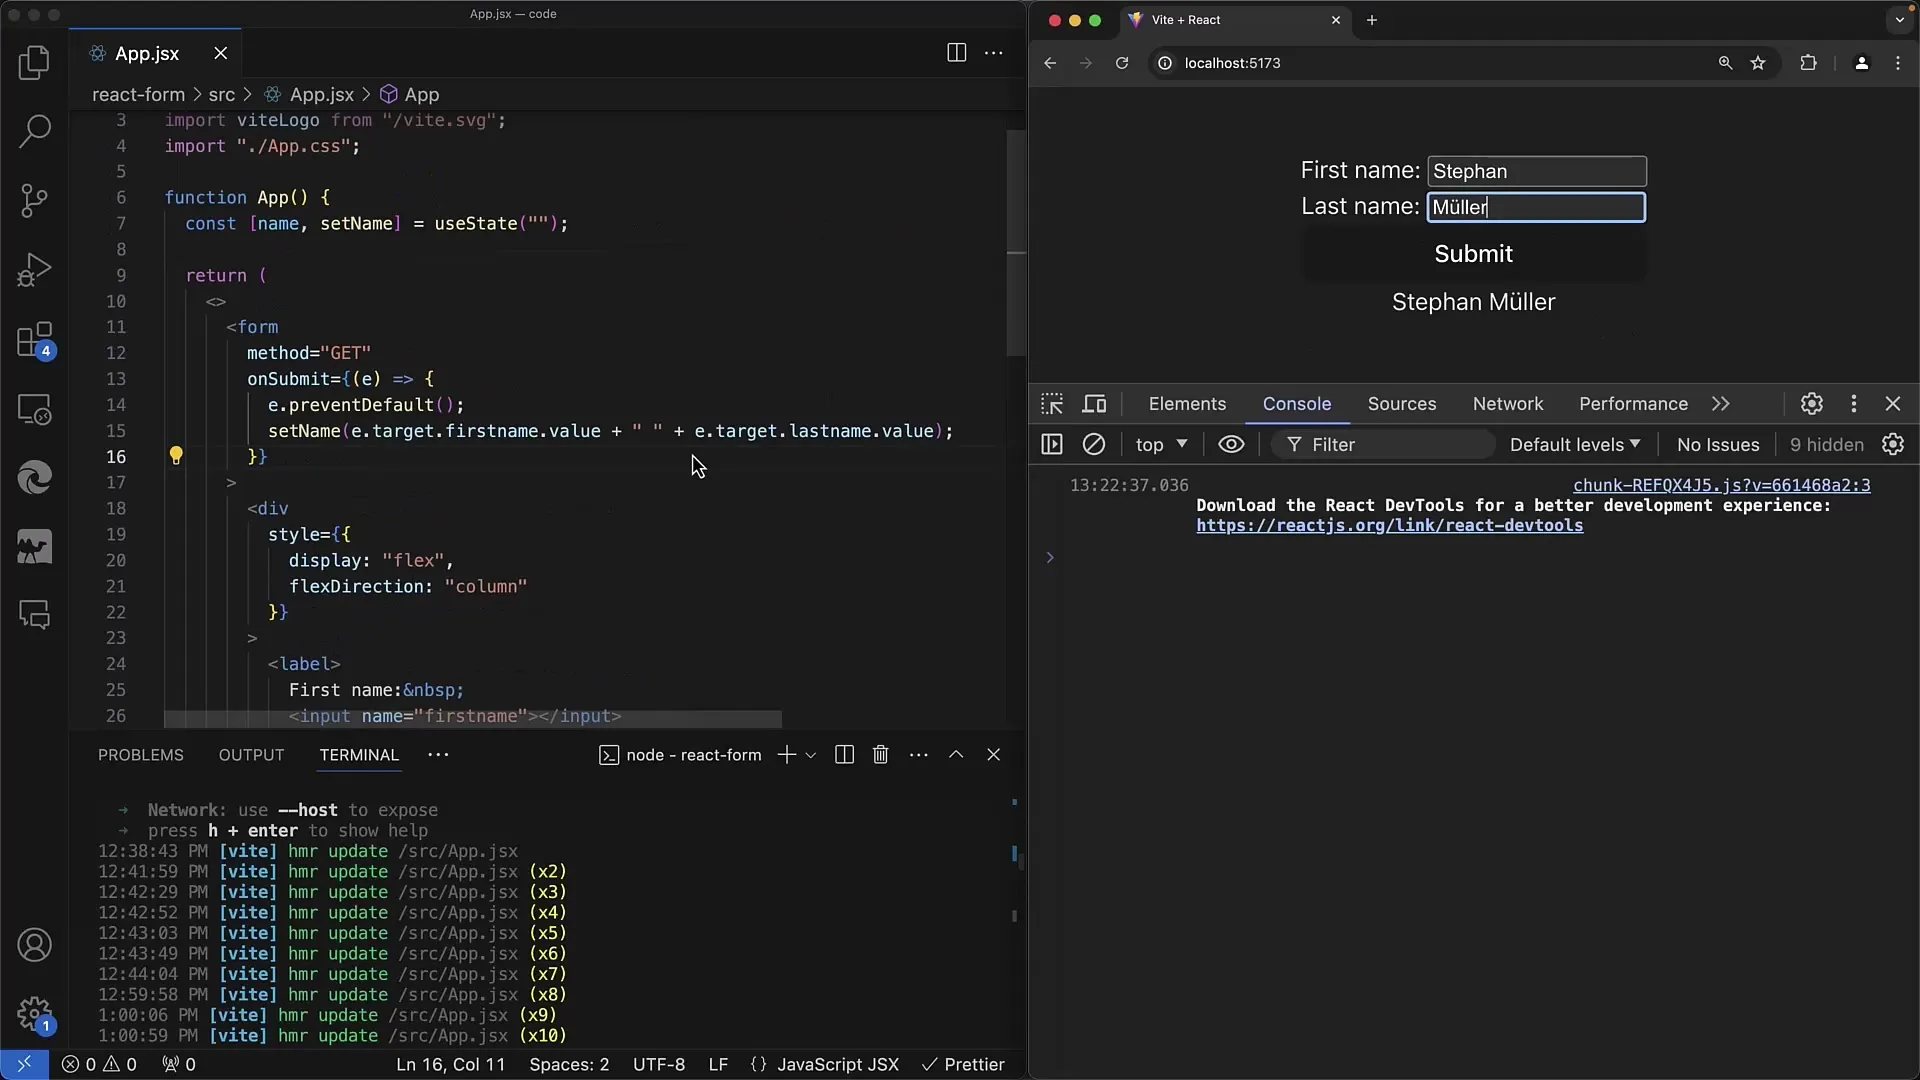
This allows for efficient management of user input values in a cohesive manner, which is particularly important when you need the inputs for validation or display purposes.
8. Summary of Implementation
Whenever you are working with forms in React, it is important to understand the differences in handling controlled and uncontrolled inputs. This will help you to make optimal use of React and ensure a responsive UI.
Summary
In this guide, you were able to learn the basic concepts of handling input elements in React. From implementing the useState hook to understanding the differences between controlled and uncontrolled inputs, you learned how to create and manage forms correctly in React.


