In this guide, you will learn how to successfully promote a Facebook group with the help of Facebook advertisements. Facebook provides you with a platform to specifically target people who are interested in your topics. In a time where social media plays a significant role in marketing, reaching the right target audience is crucial. Follow the steps below to introduce your Facebook group to a broader audience and attract new members.
Key Insights
- Interaction is the key to advertising Facebook groups.
- Targeted audience communication is essential.
- Good design and clear call-to-actions increase success rates.
Step-by-Step Guide
To promote a Facebook group, follow these steps:
Step 1: Access the Ad Manager
First, you need to log into your Facebook profile. Then click on the new items in your profile to open the Ad Manager.
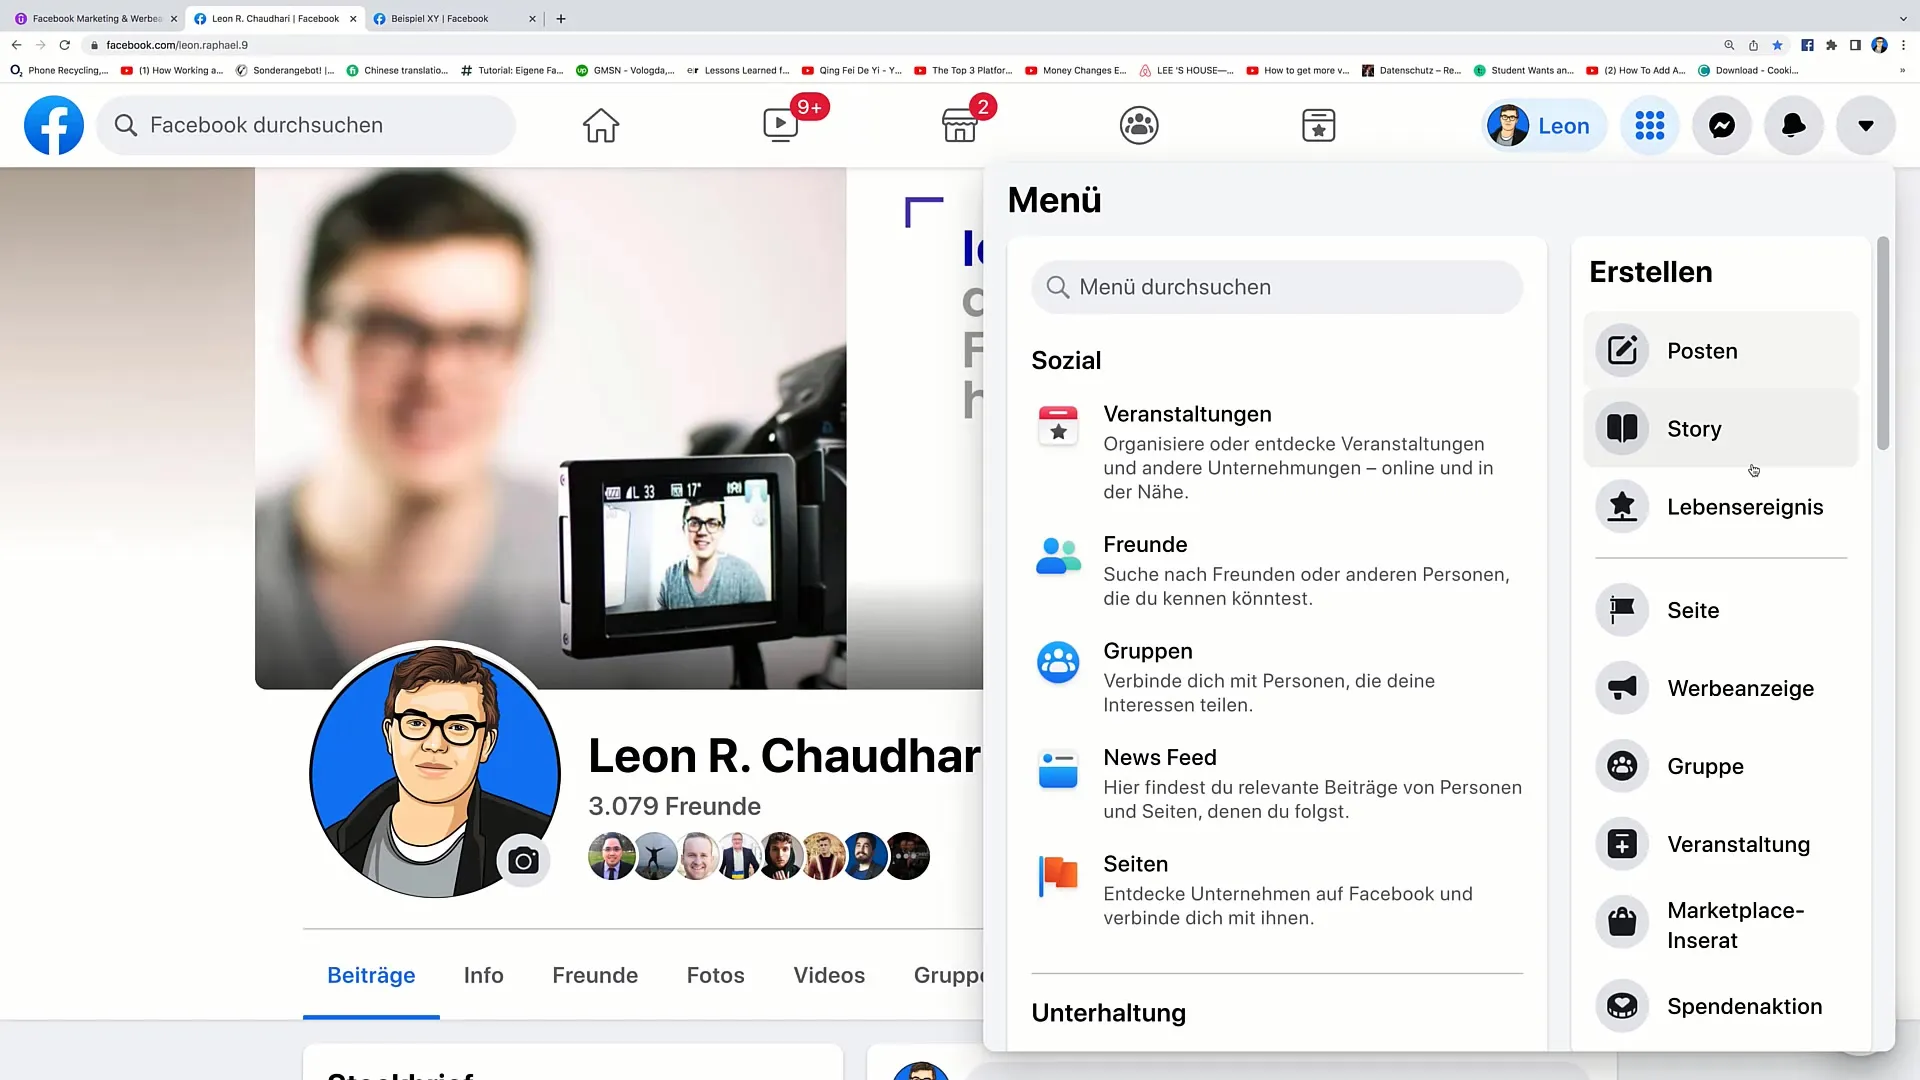
Step 2: Choose the Type of Advertisement
In the Ad Manager, you have the option to choose the type of advertisement. For promoting a group, select the "Interaction" option. This is important to generate the desired interactions with your group post.
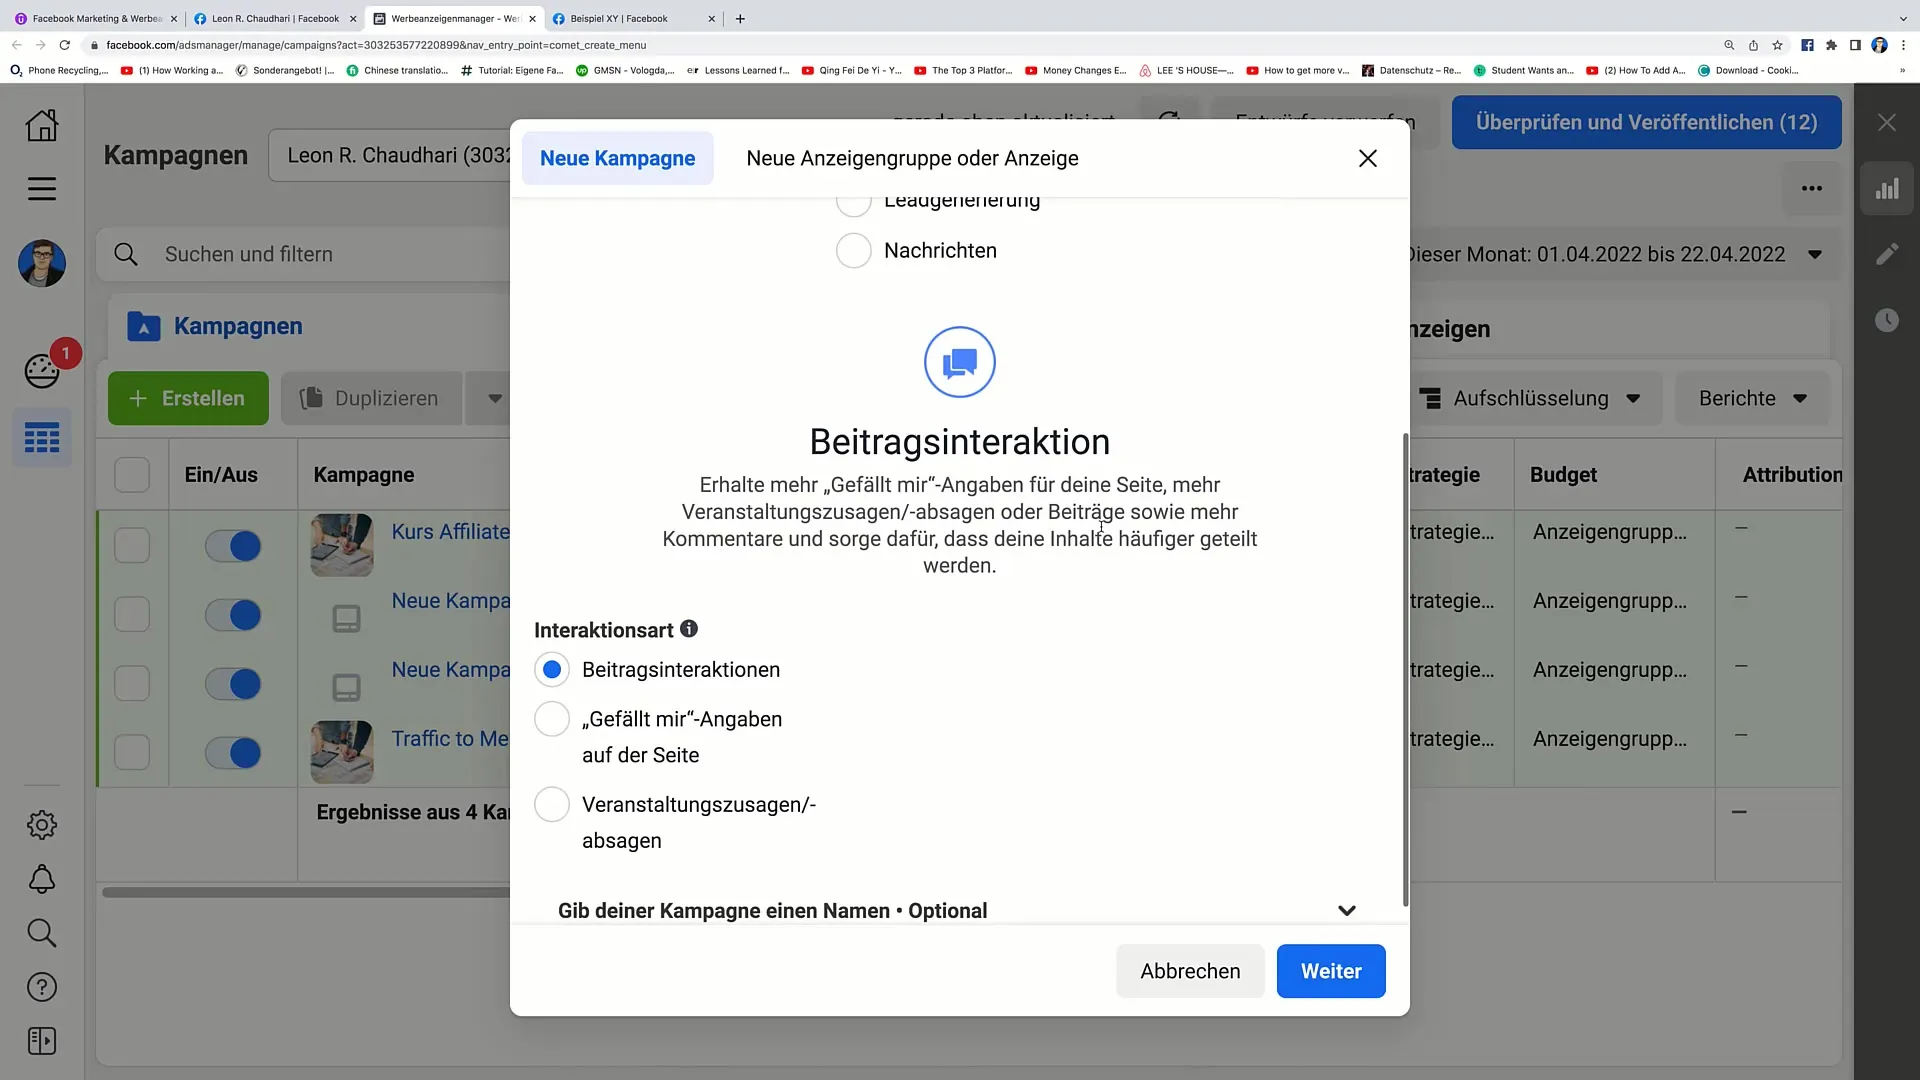
Step 3: Name Your Campaign
Now it's time to name your campaign. You could name it "Promote group," for example. Then click "Next" to proceed with configuring your campaign.
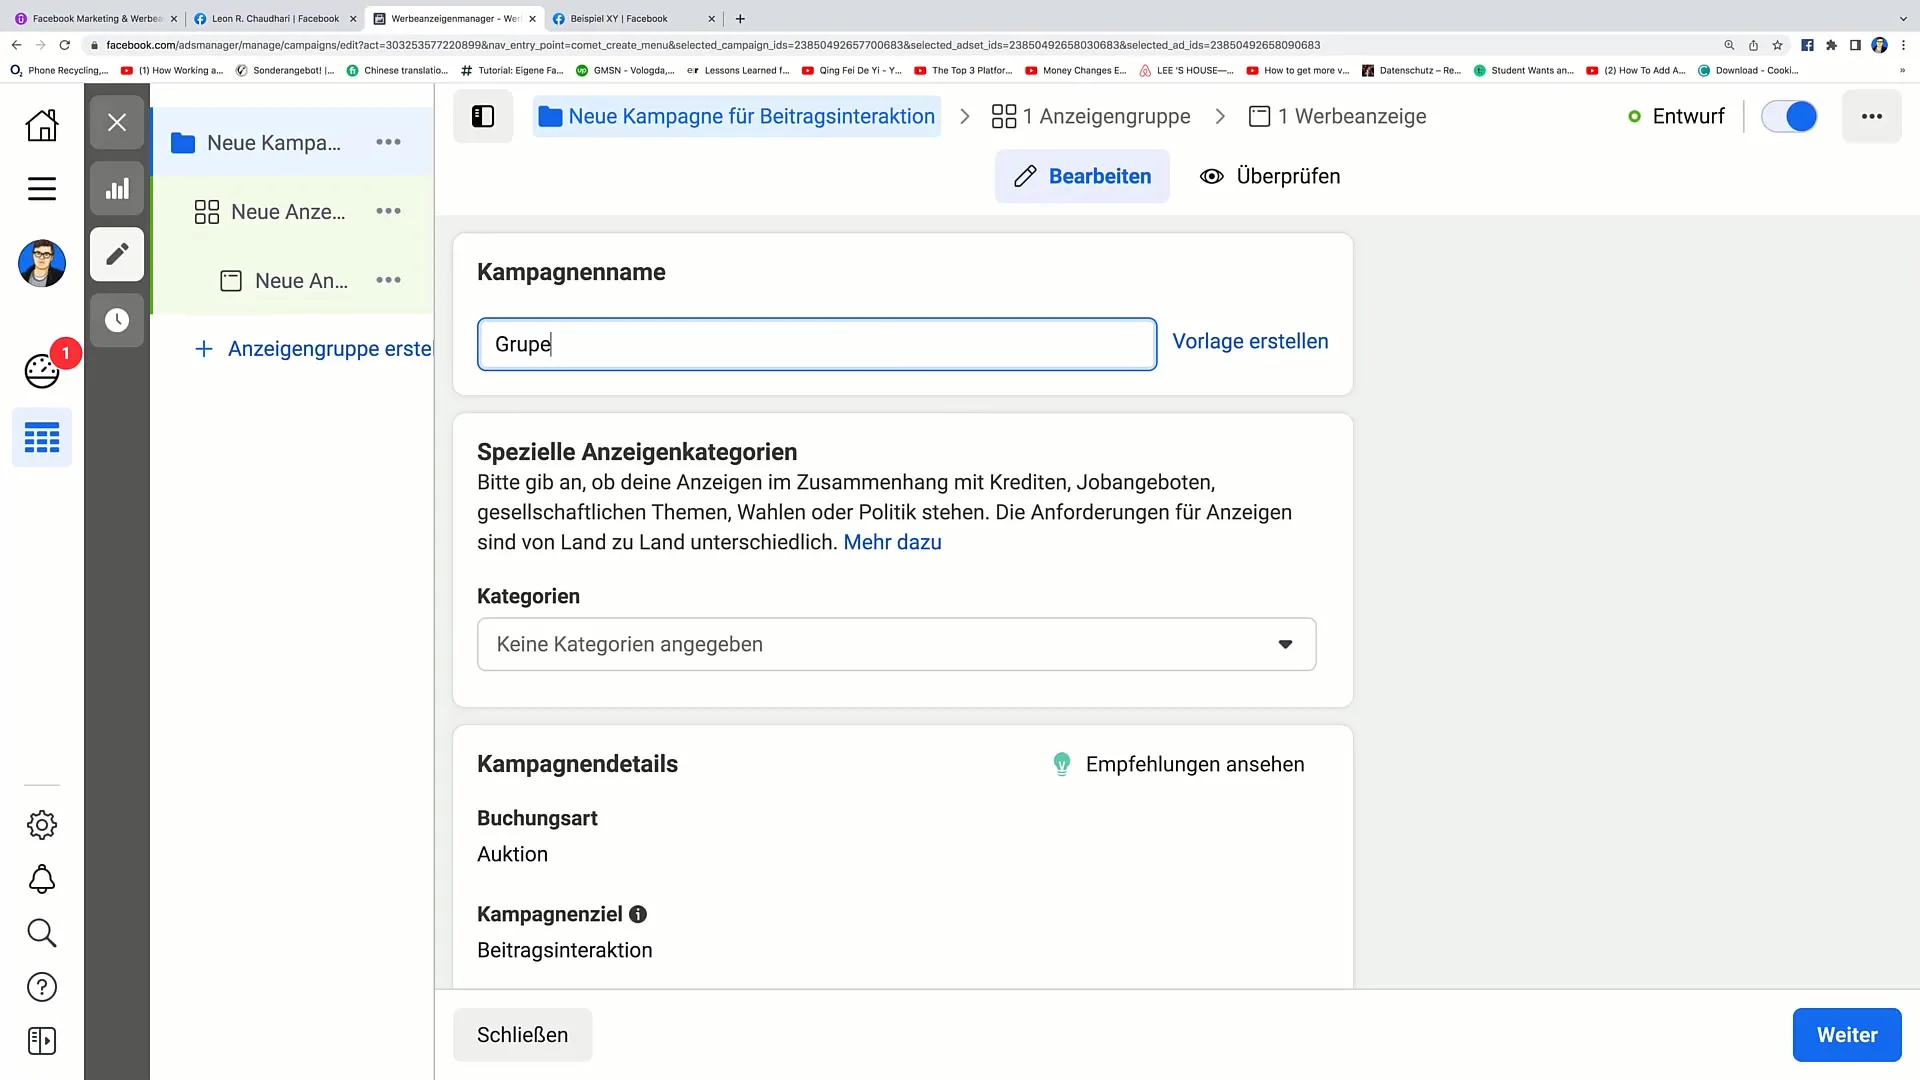
Step 4: Set Up Ad Group
Now you need to name your ad group. Choose a descriptive name, such as "Ad Group Facebook Group." Here you can also set the cost per result to effectively utilize your advertising budget.
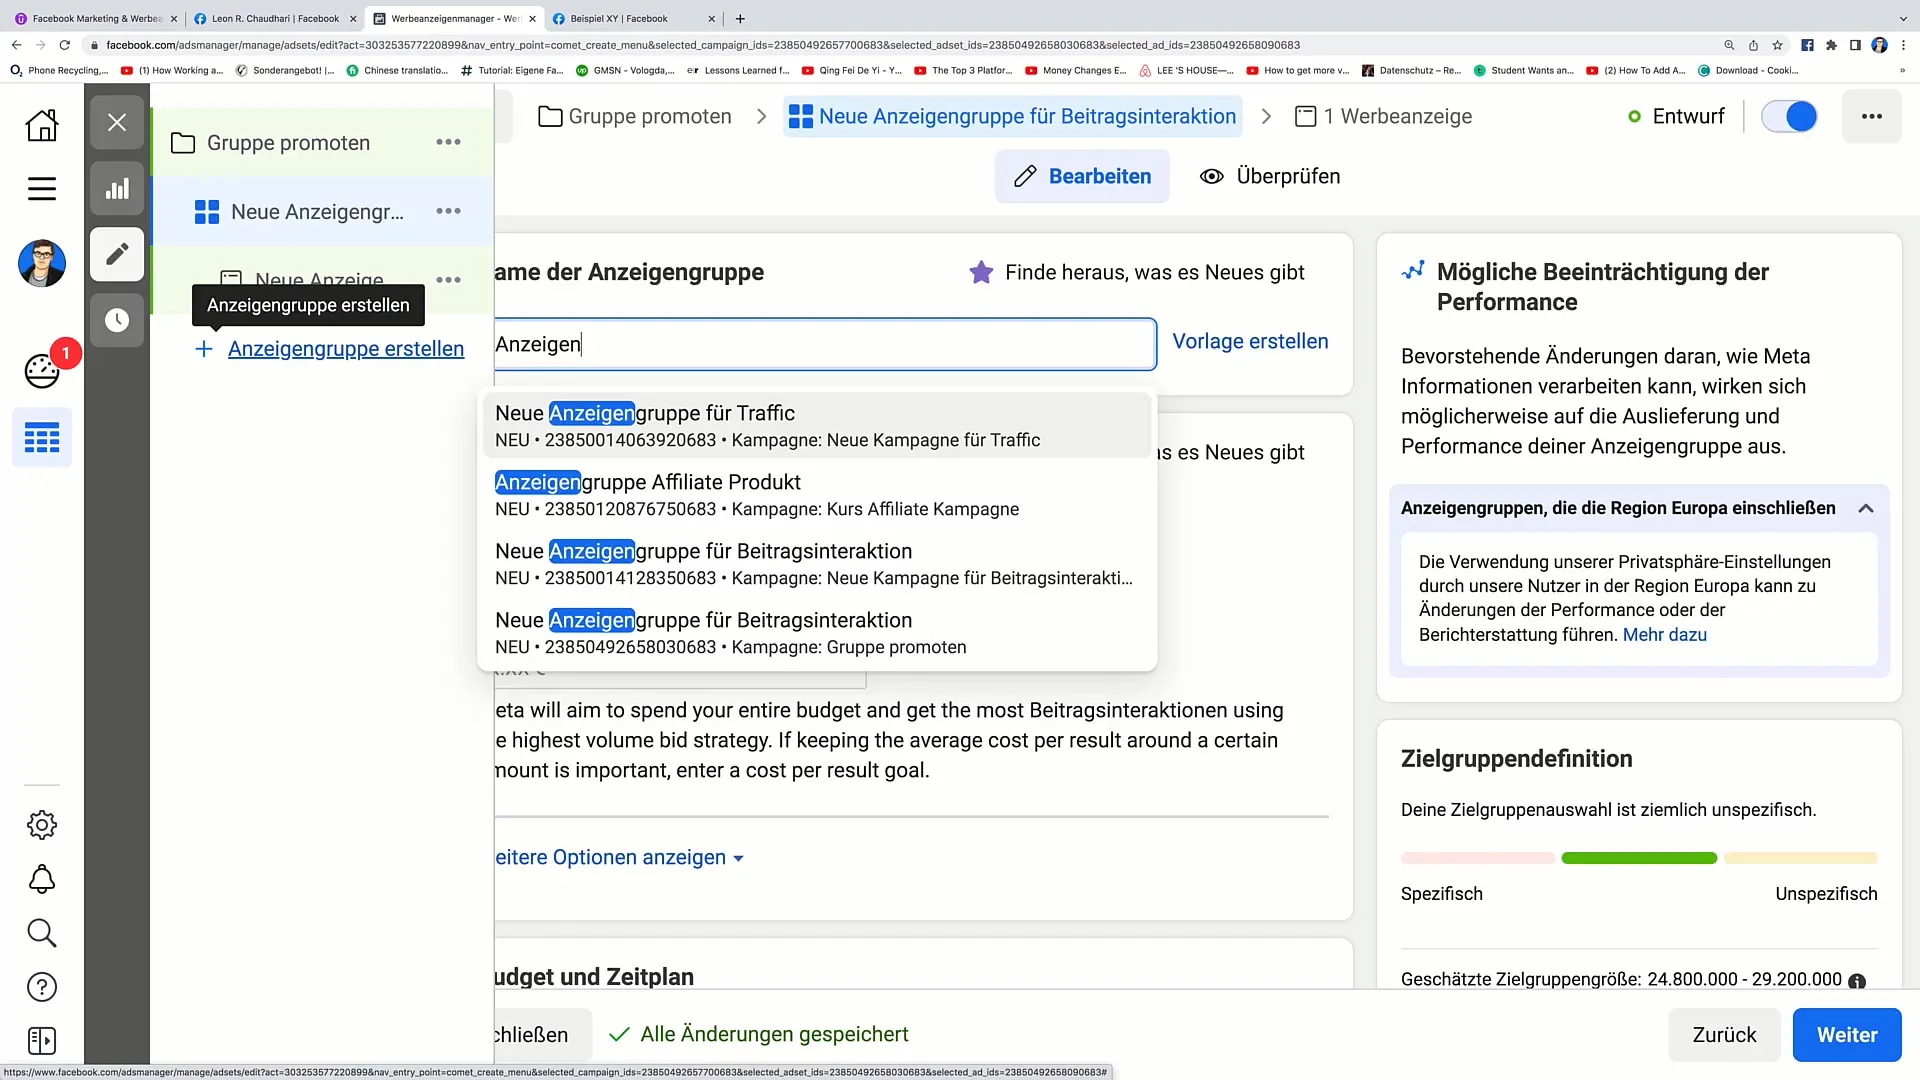
Step 5: Set Budget and Schedule
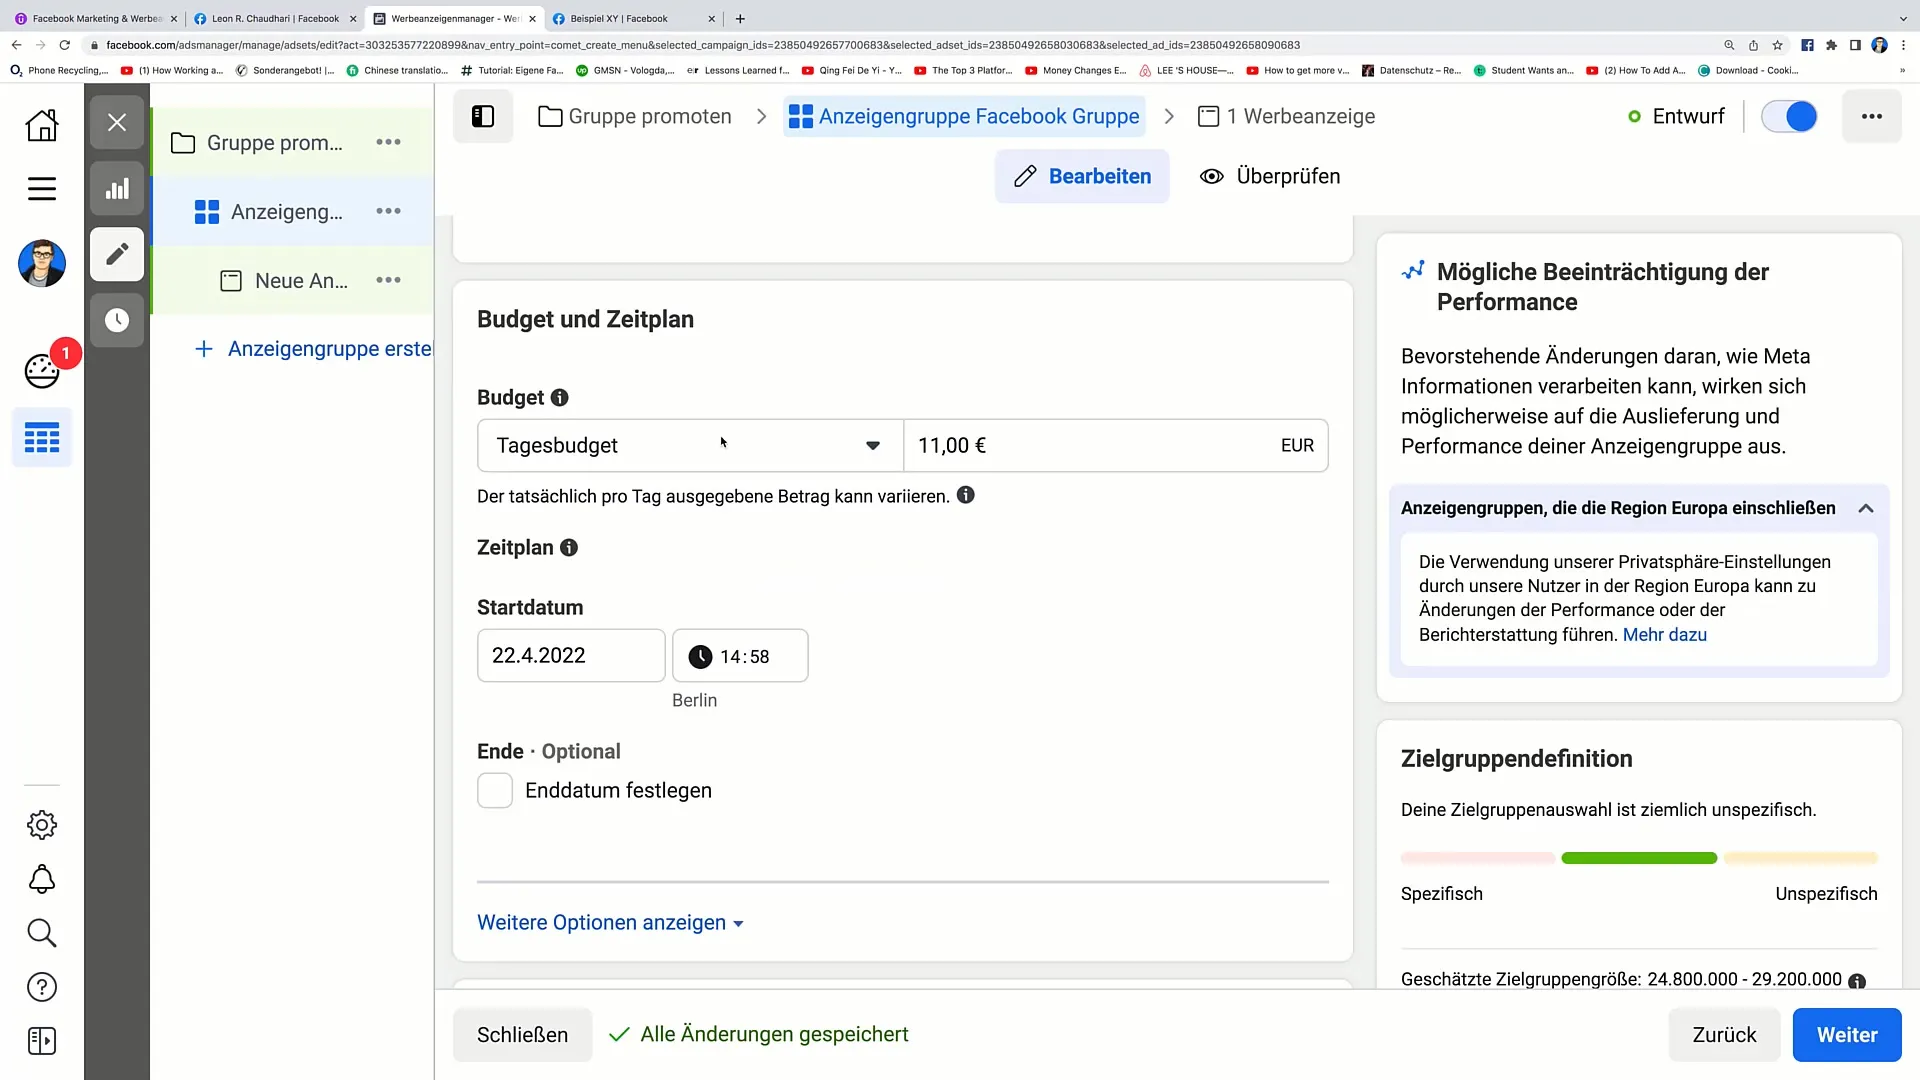
Set your daily or lifetime budget. For example, you could choose a daily budget of 5 euros. This gives you control over your expenses and ensures that you do not spend more than you are comfortable with.
Step 6: Define Target Audience
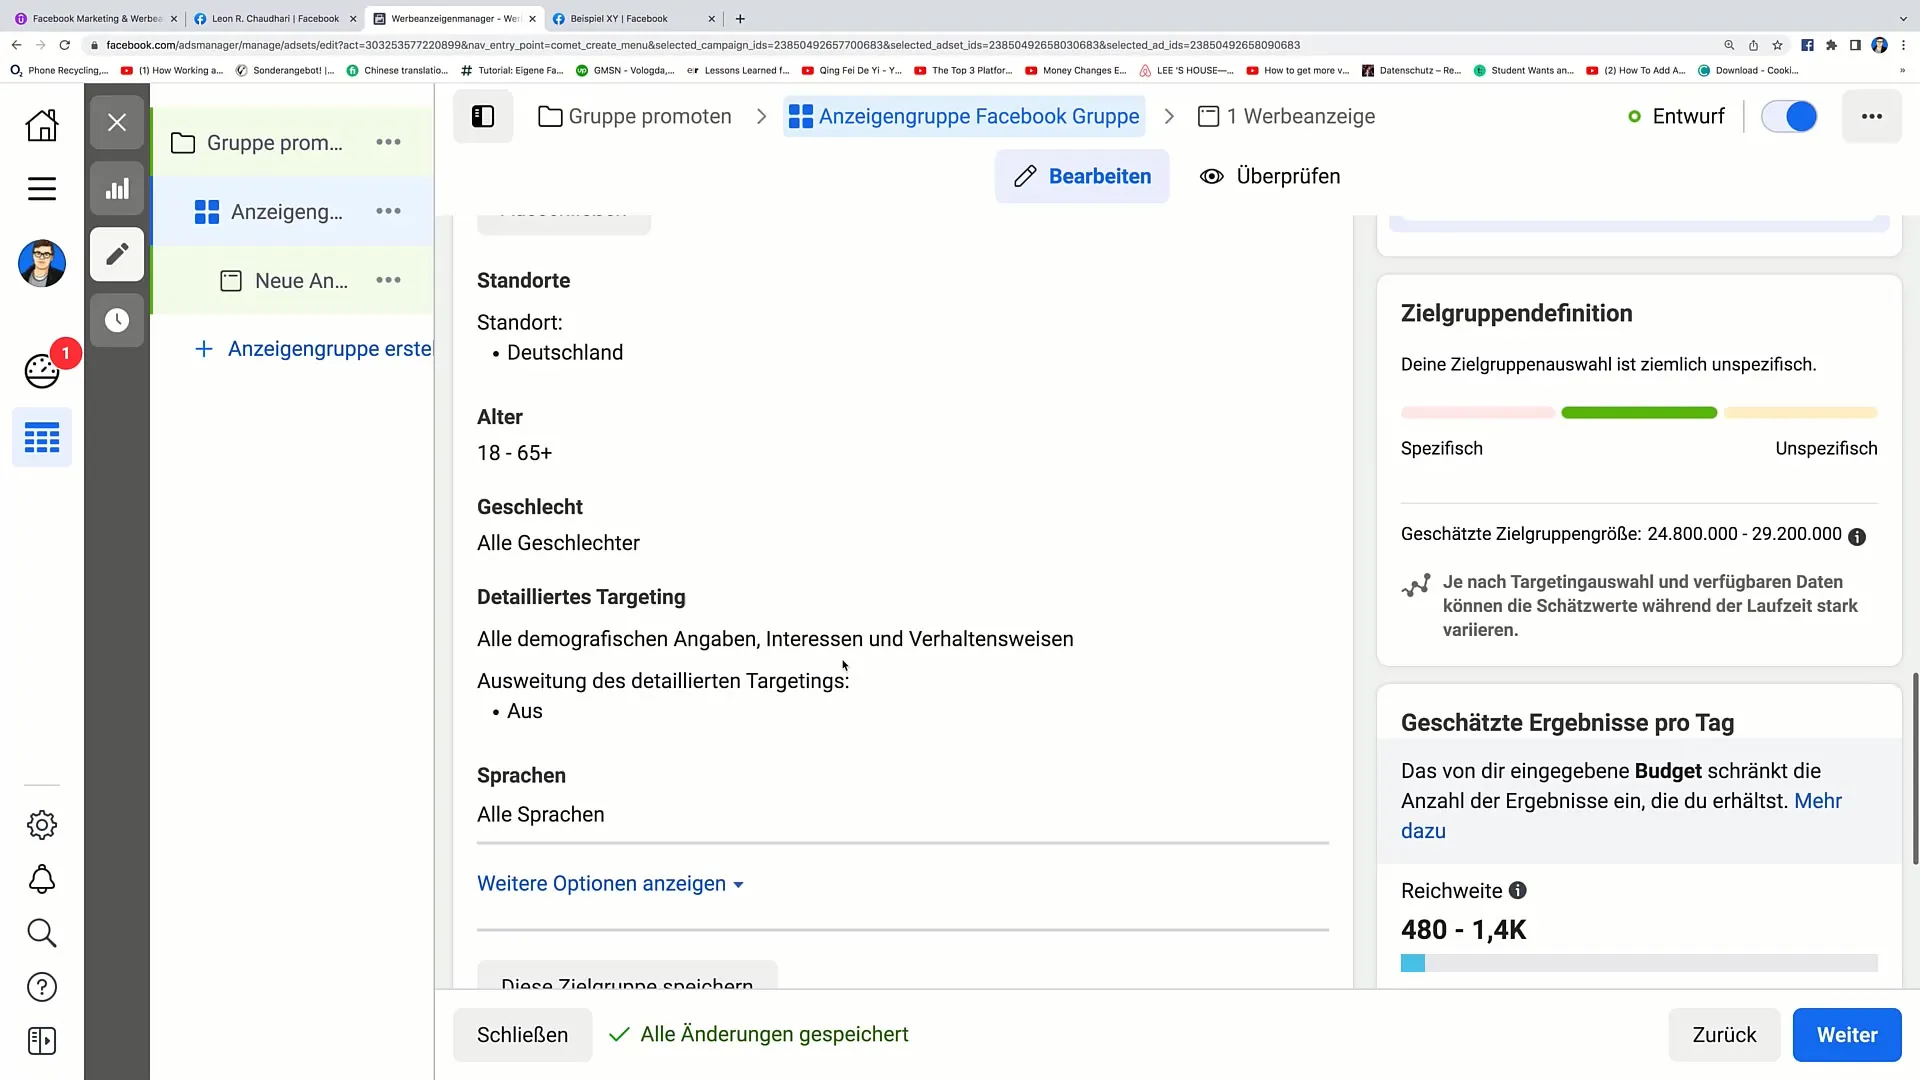
Now comes the crucial part: defining your target audience. Be as specific as possible. You can filter by locations, age groups, and interests. For example, possible locations are Germany, Austria, and Switzerland; you could set the age of your target audience to 25 to 30 years.
Step 7: Detailed Targeting
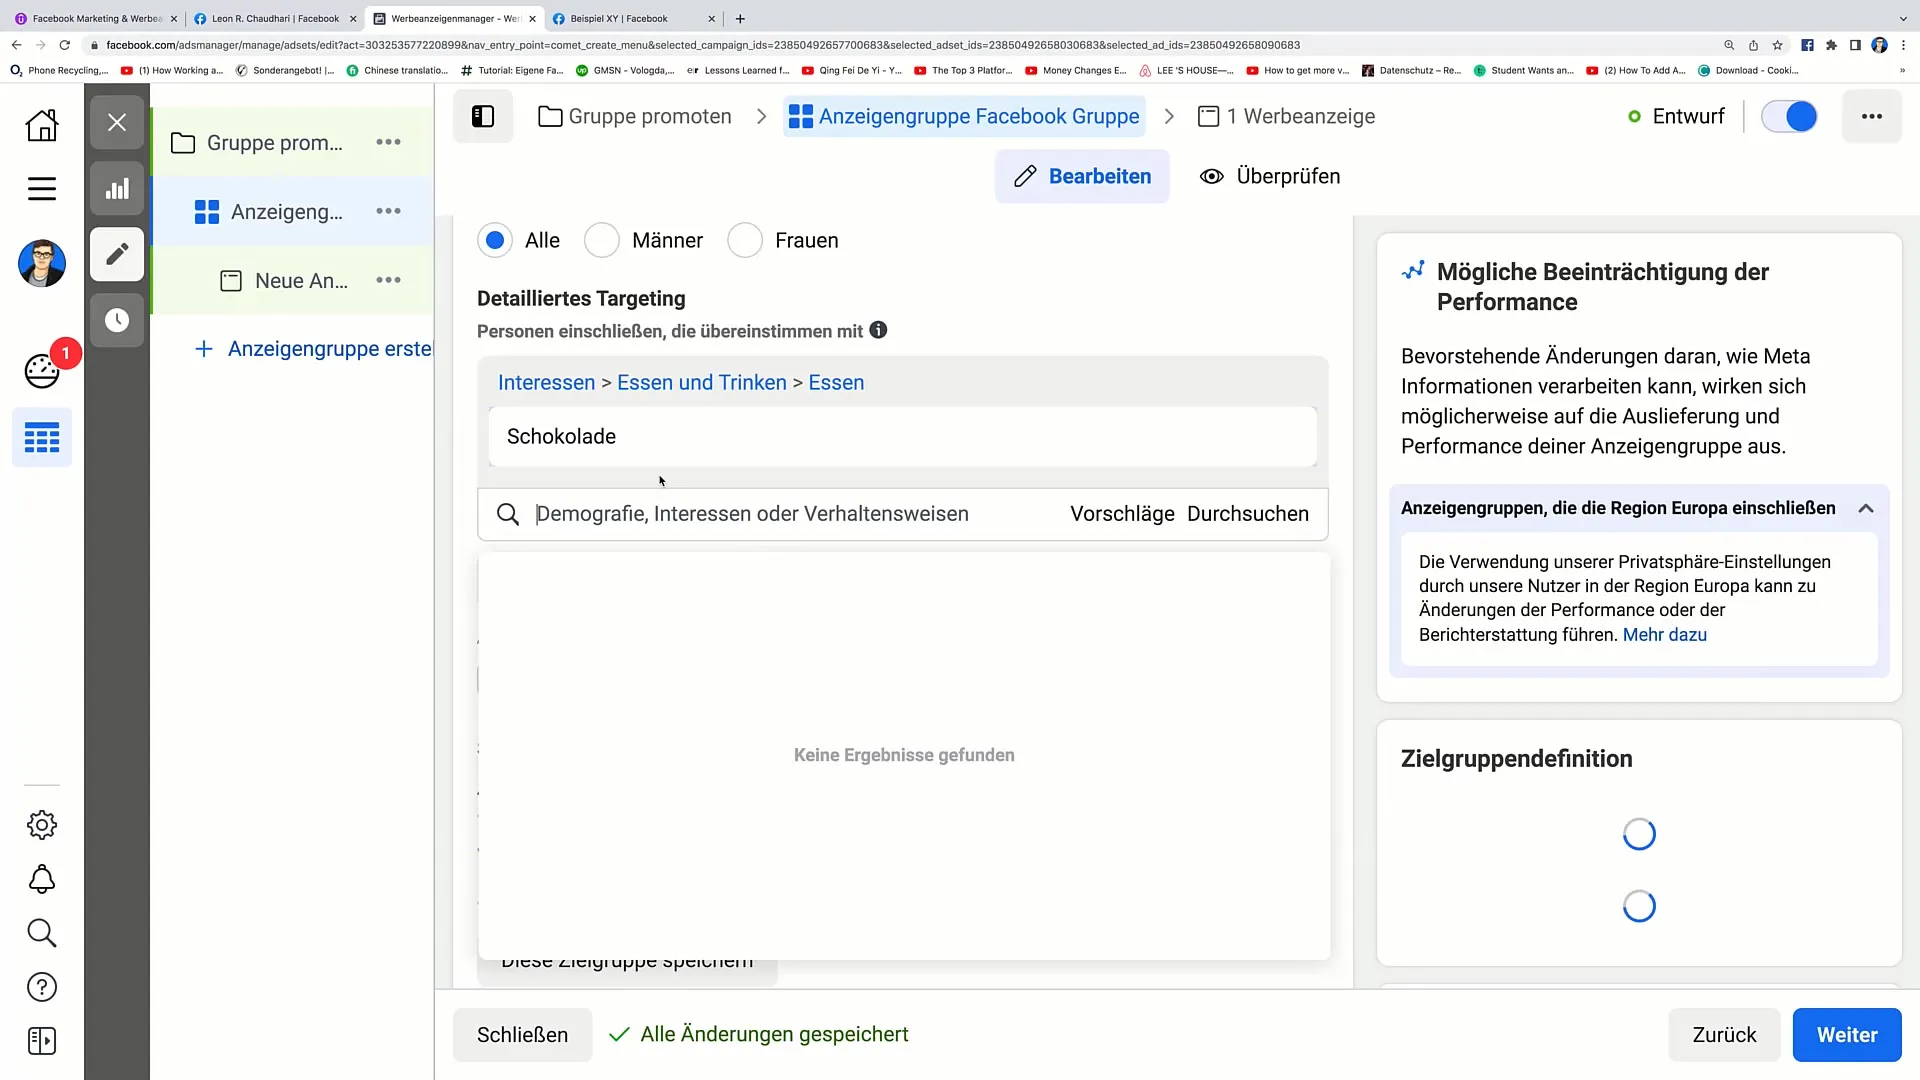
Scroll down and select the option for detailed targeting. Here you can specify certain interests. For example, if you have a group about chocolate, you could add "chocolate" as an interest and exclude "gummy bears" to reach a more precise audience.
Step 8: Choose Placements
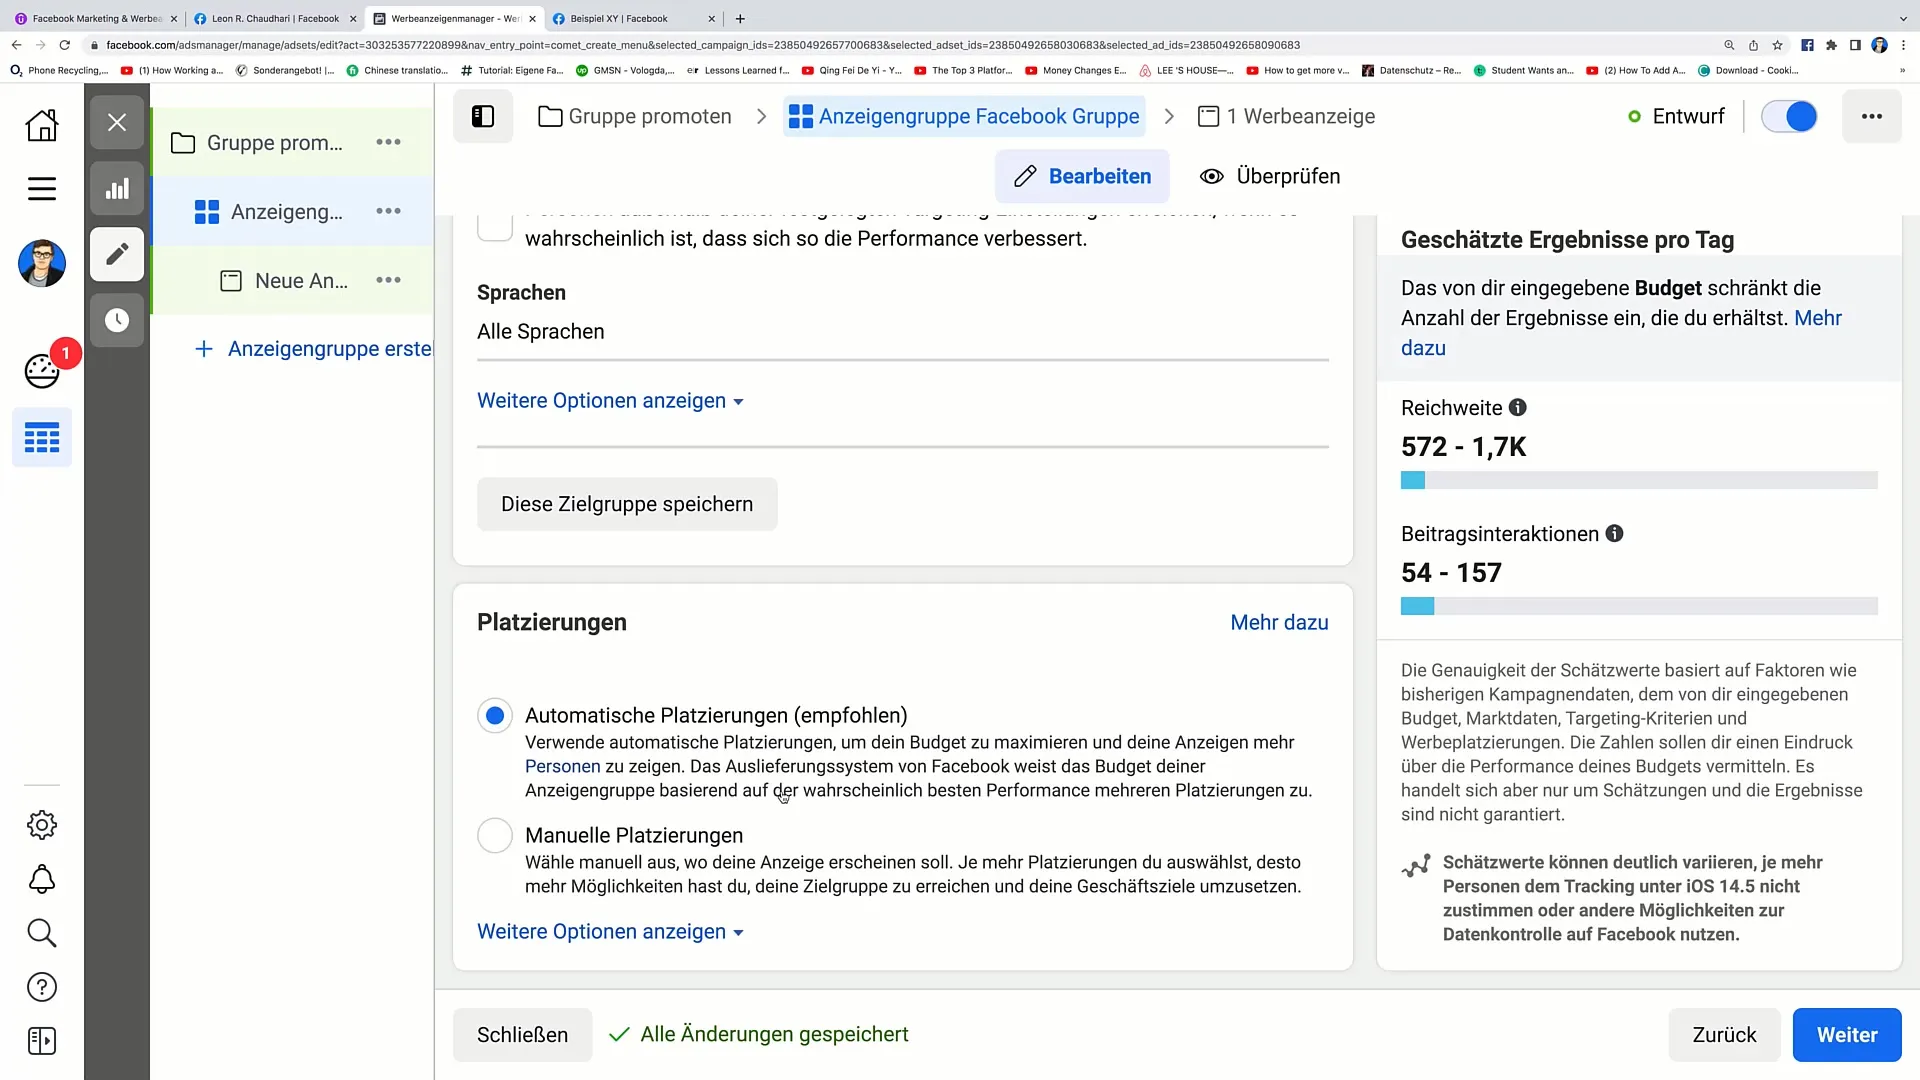
Now you have the option to select the placements for your ad. You can choose automatic placements here so that Facebook determines the best ad environment. This is especially useful if you want to link directly to the Facebook group.
Step 9: Choose Facebook Page
Now select the Facebook page from which the ad will be published. This could be a page of your company, for example. Then click on "Create post".
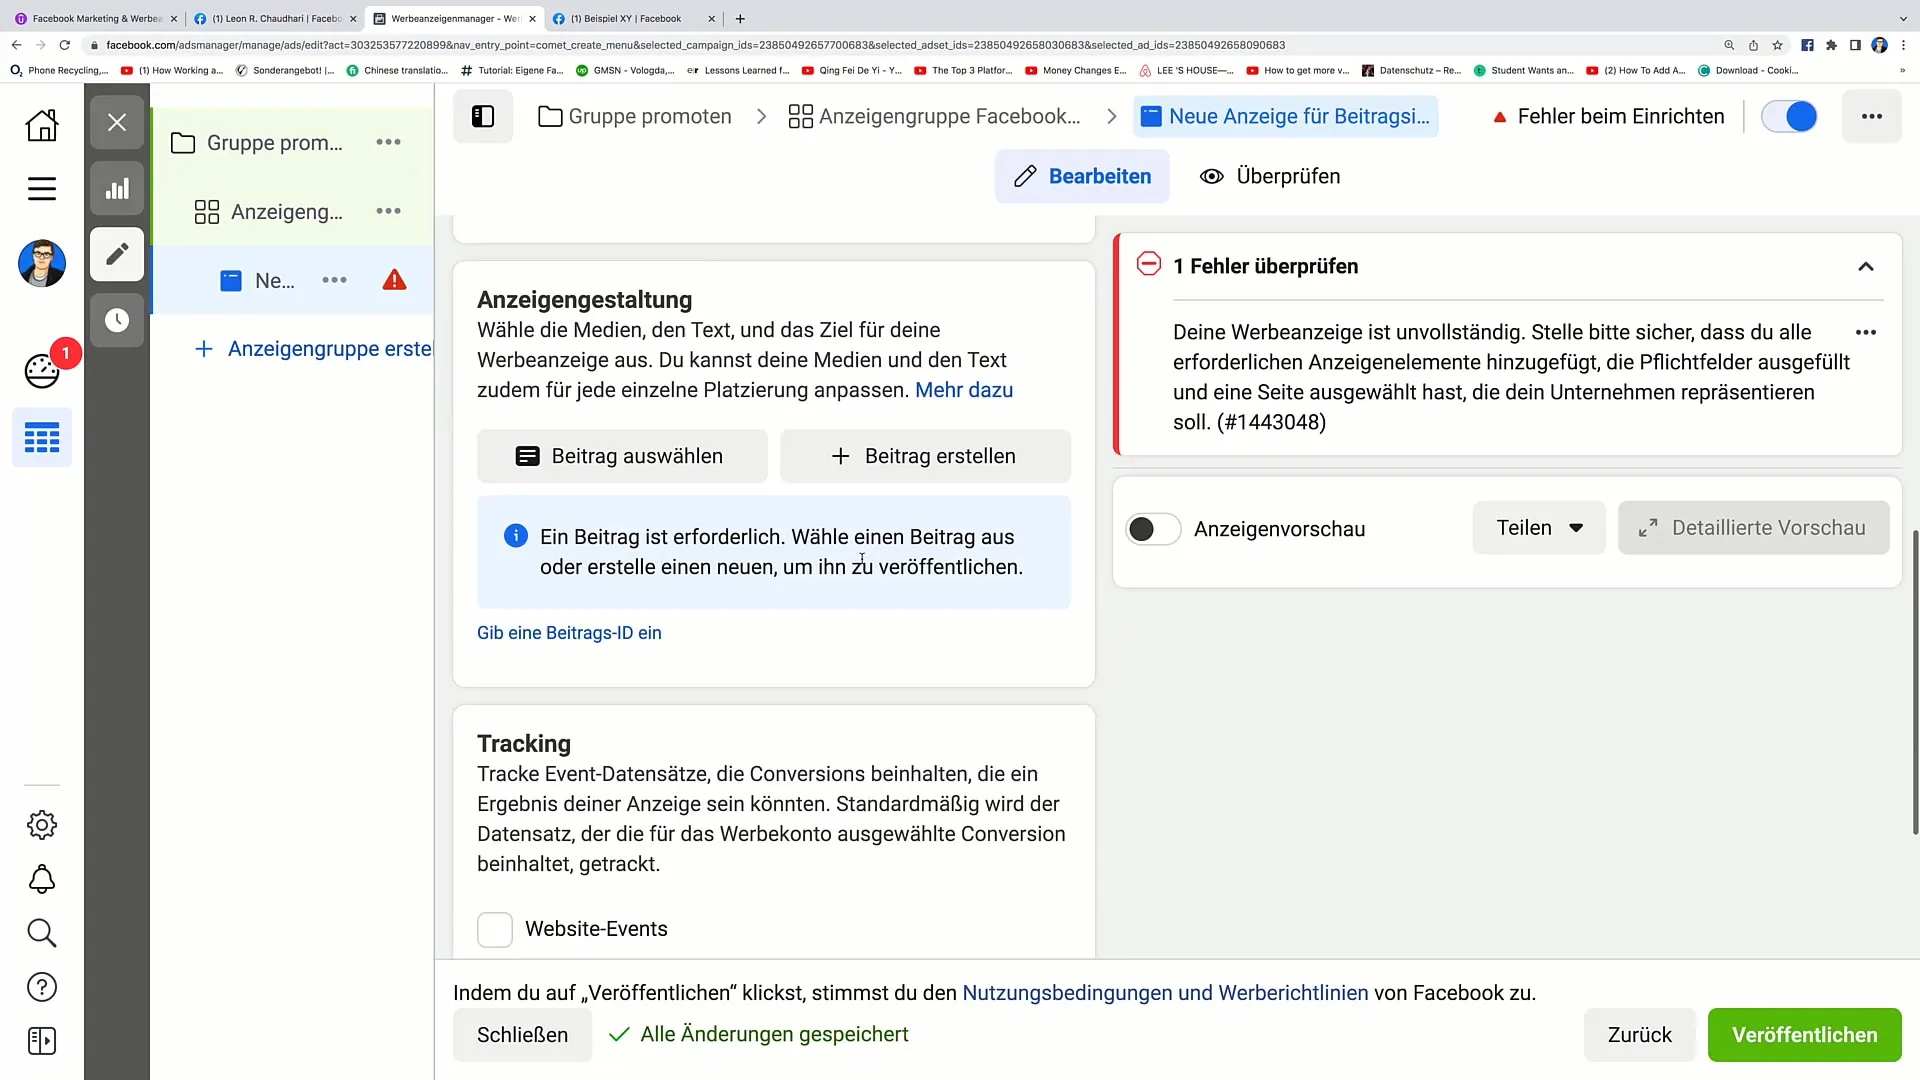
Step 10: Create Post
Now create your ad post. Here you insert a link to your Facebook group. An example text could read as follows: "Are you interested in chocolate? Then join our sample group!" Integrate emojis to make your post more engaging.
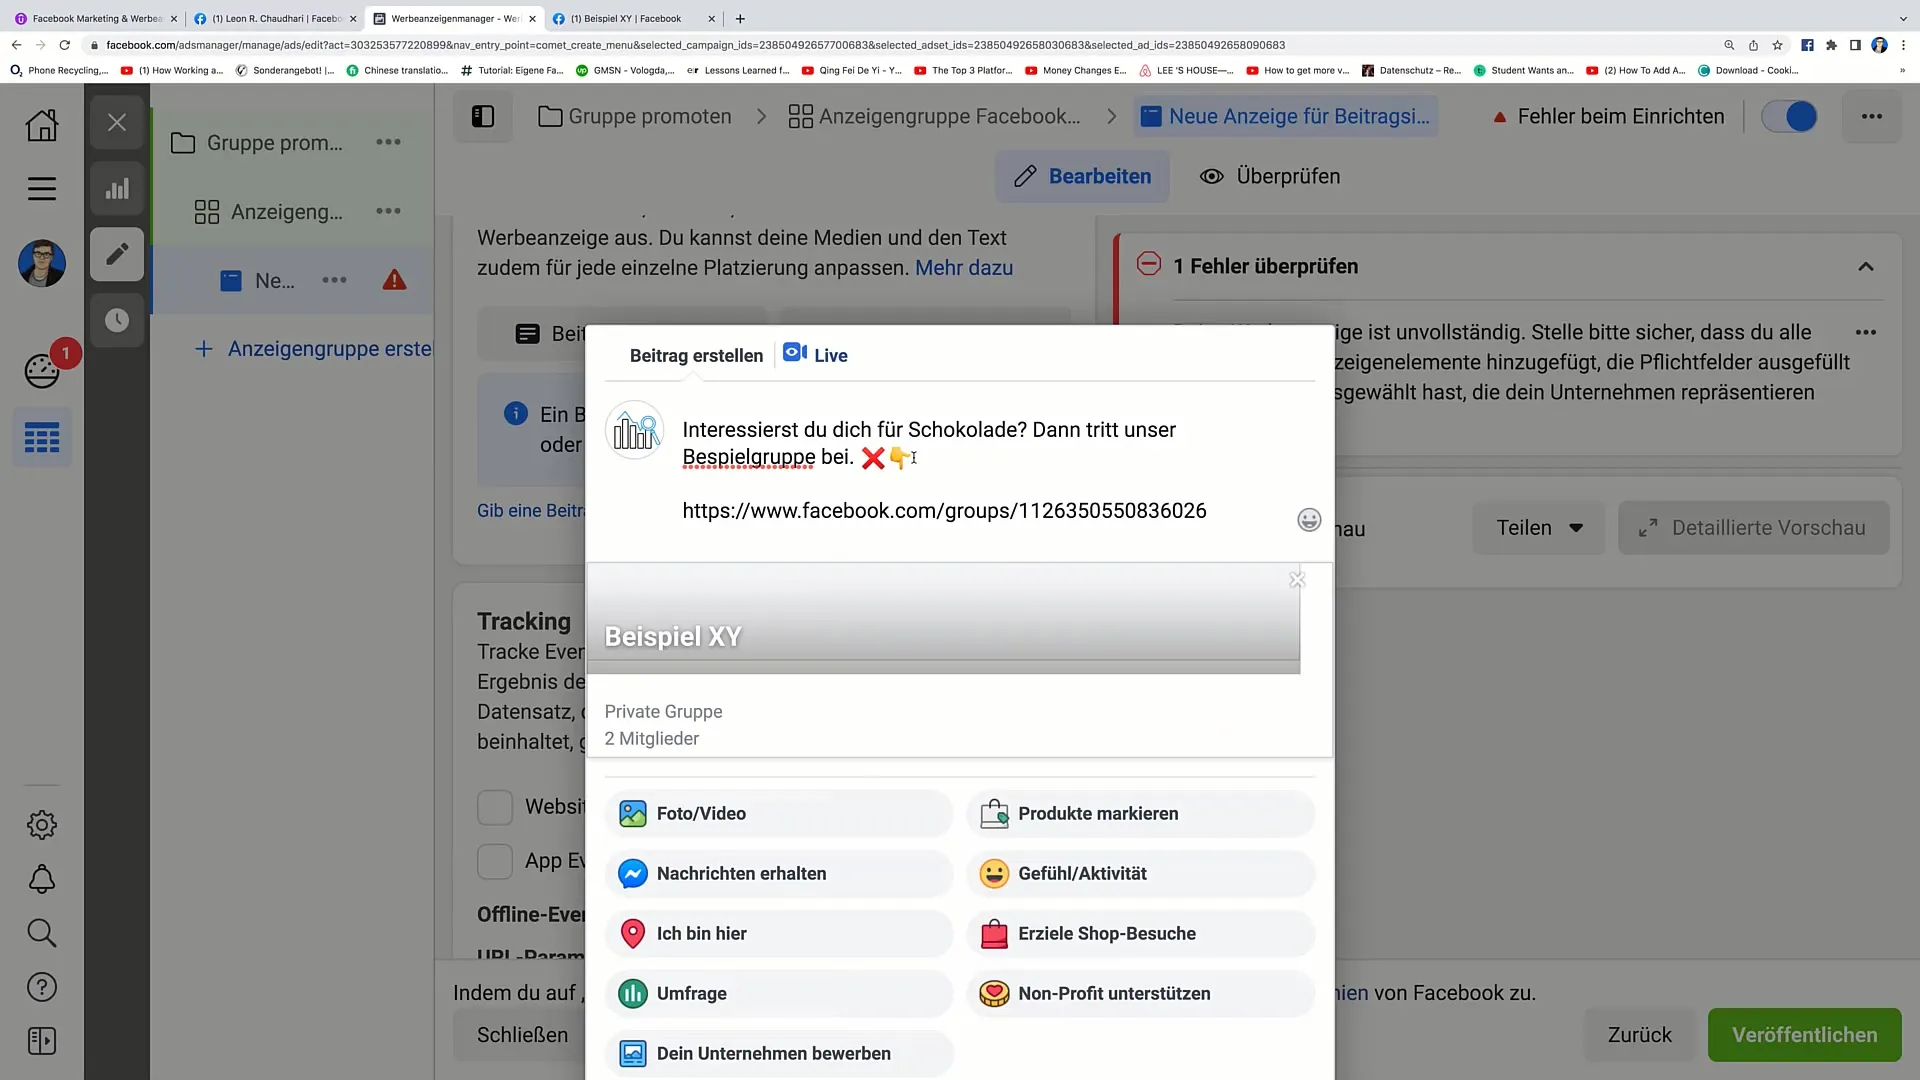
Step 11: Review and Publishing
After creating your post, click on "no longer publish" and then on "save post". Now the post will be displayed in your Ad Manager. Check all settings and click "Publish" to launch your ad.
Summary
Promoting your Facebook group through targeted ads can yield significant results if you follow the steps in this guide. Choose the right and specific target audience to reach people interested in your group's topic. An engaging post with clear call-to-actions will increase the likelihood of people joining your group.
Frequently Asked Questions
How long does it take to see results from my ad?The visibility of your ad can start within minutes after publishing, but real results may take a few days.
Can I change my budget at any time?Yes, you can adjust your budget anytime in the settings of the Ad Manager.
What is the difference between automatic and manual placement?Automatic placement allows Facebook to select the best ad placements for you, while with manual placement, you can choose where your ad appears.
