Note: This tutorial is a text version of the accompanying video training by Marco Kolditz. The texts may therefore also have a colloquial style.
It will be much quicker to create the second waterfall than the first because it no longer needs to be cut out.
Steps 1-11
Step 1
Click on the "Waterfall" layer and drag it upwards while holding down the Alt key (1). This will duplicate it (2).
Now grab the duplicated waterfall in the image and move it to its position on the left side of the mask (3).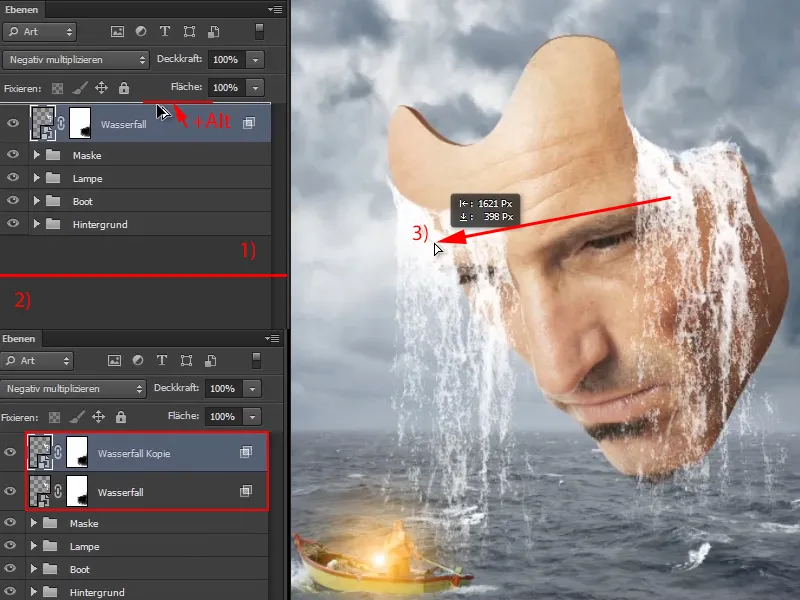
Step 2
Now go to Edit>Transform>Mirror Horizontal and mirror the new waterfall, even though hardly anyone will notice it in the finished image.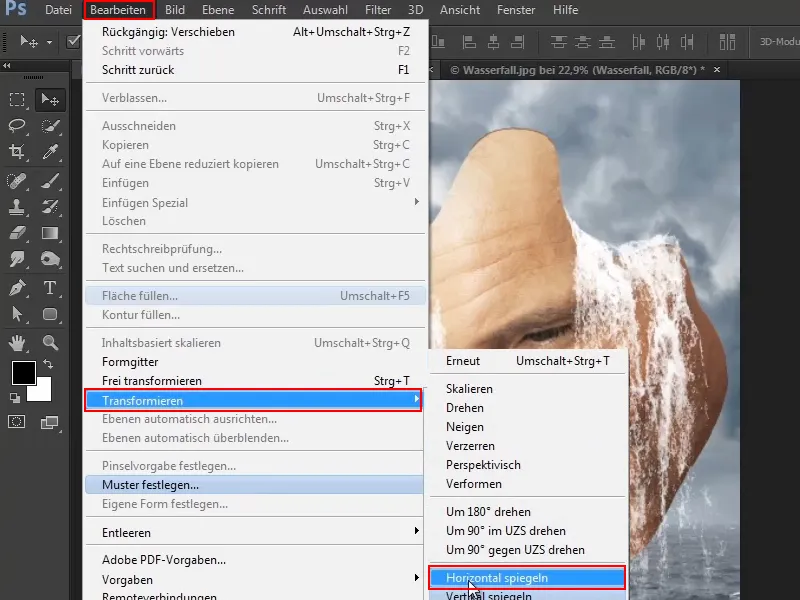
Step 3
What is noticeable, however, is that the water is still in front of the mask at the moment.
Therefore, drag the "Waterfall copy" layer between the "Mask" and "Lamp" layers.
You have to be careful not to accidentally move the layer into one of the folders. It is only positioned correctly - exactly between the two groups - when a fine line appears between the layers.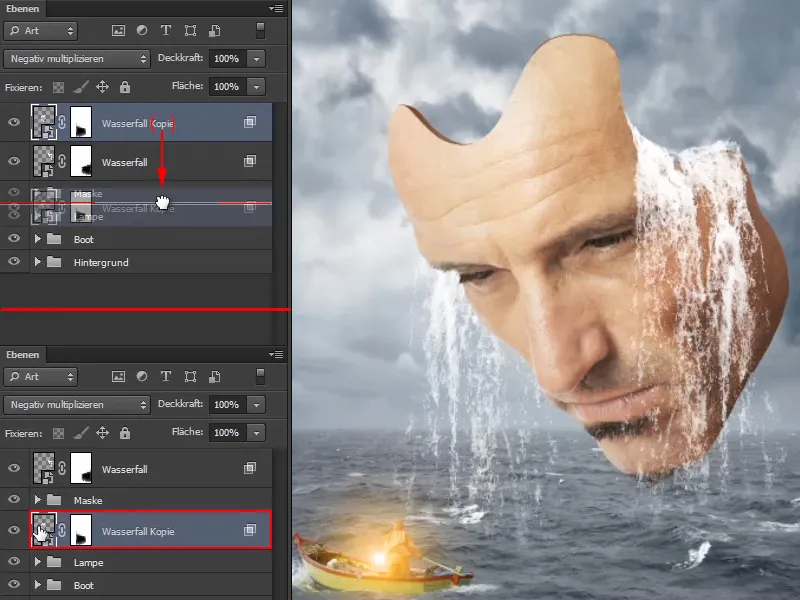
Step 4
Now rename the layers to "Waterfall, left" and "Waterfall, right" (1).
By grabbing the "Waterfall, right" layer and dragging it onto the folder icon, you put it into its own group (2).
Rename it "Waterfall" (3). So that everything is nice and clear.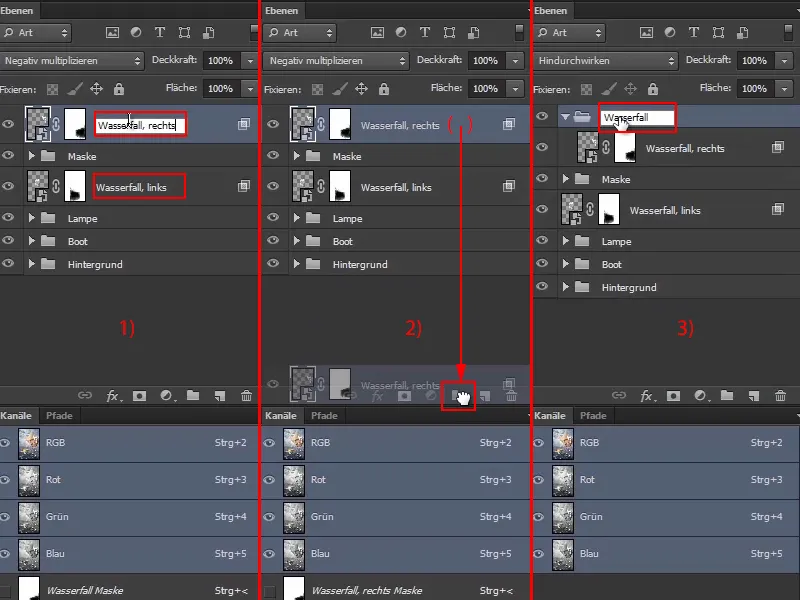
Step 5
This already looks very good. Perhaps move the waterfall around a bit until it is exactly how you want it. You can do this however you like.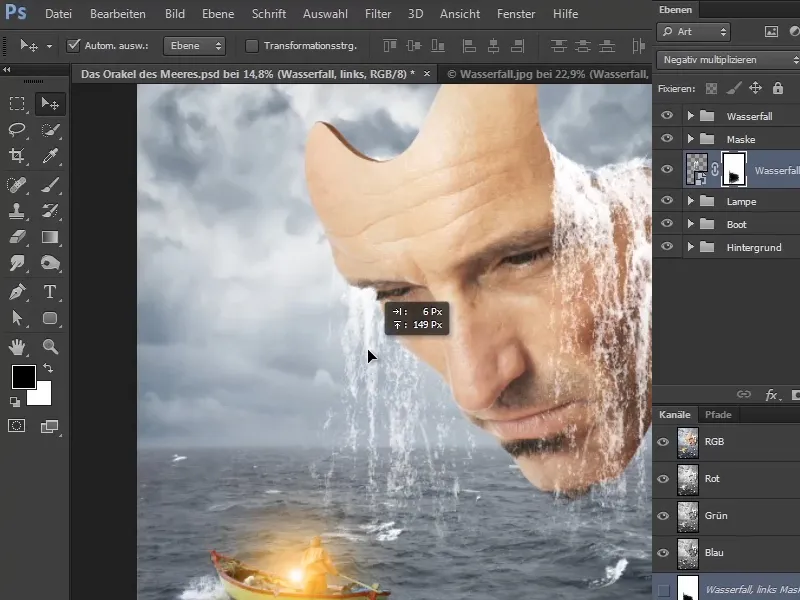
Step 6
If there is still a bit of waterfall sticking out at the top, you can simply erase it with the brush while the mask is active.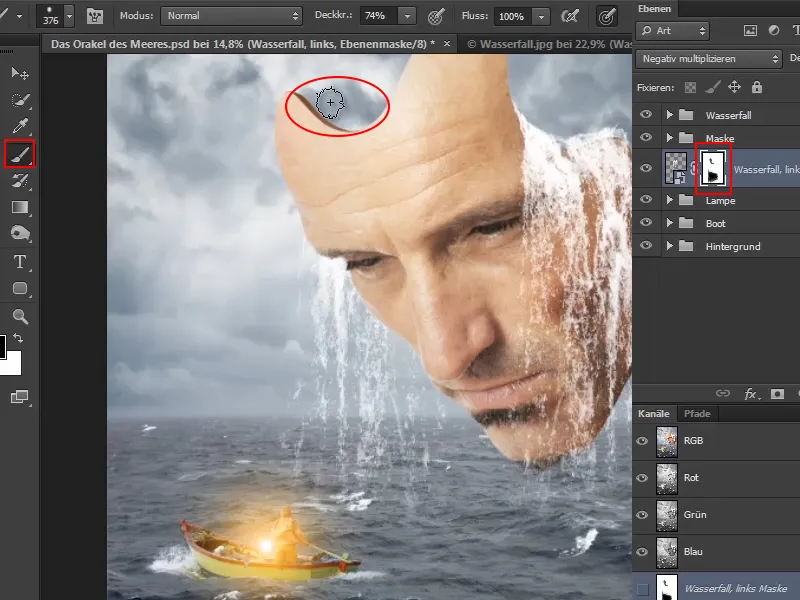
Step 7
What else is noticeable is that there are still a few areas in the "Waterfall, right" layer where you can see through the waterfall. However, this is rather illogical, because if the water flows out of the mask, you would not be able to look directly through the water to the sky.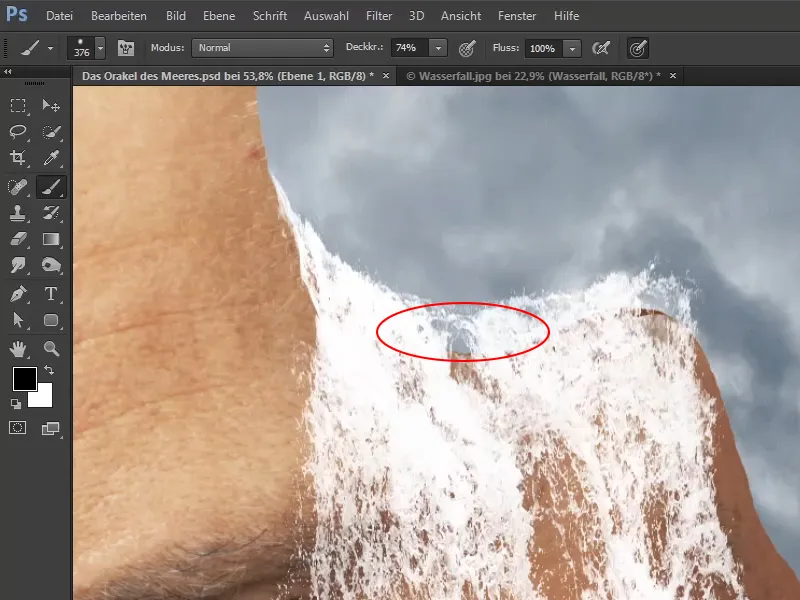
This area should now be filled.
Step 8
To do this, click on the "Waterfall, right" layer and create a new layer (1) by clicking on the Create new layer icon.
Then drag it under the "Waterfall, right" layer (2) and rename it "Waterfall correction" (3).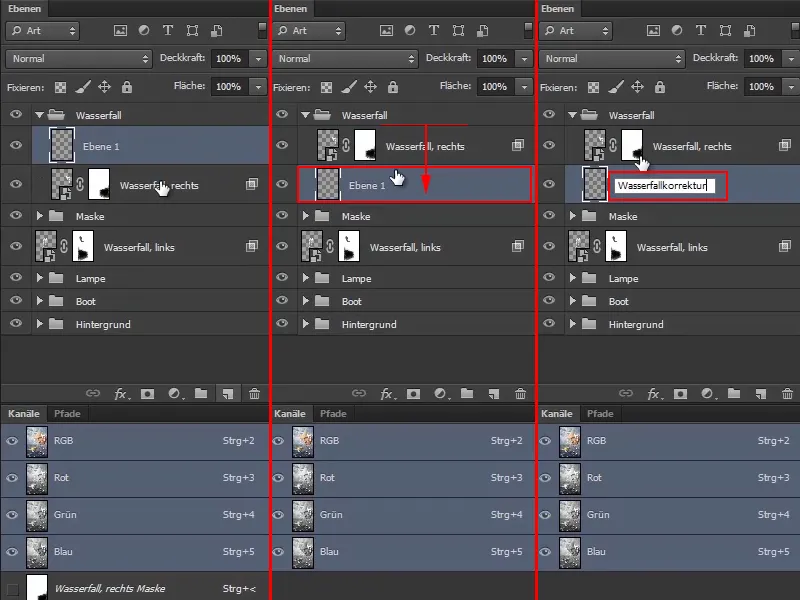
Step 9
Now click on the open area on this layer a few times with a white foreground color and this speckled brush at an opacity of about 62%.
Then you can make the brush a little smaller and reduce the opacity to 41% to close the surrounding areas a little more.
The nice thing about brushes like this is that it looks as if the water is still splashing upwards. That's why you can sometimes click over the edge. You can also increase the opacity a little for such splashes of water. Marco sets it to 68% for this.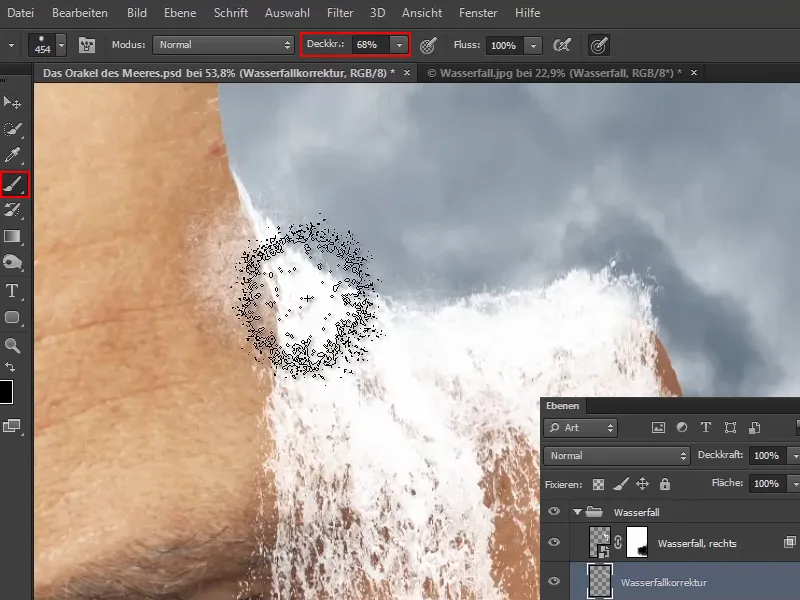
If you accidentally change the background color - as Marco did in the video training - press D to make the background color white again and then press X to bring white back to the foreground.
Step 10
If the water splashes have become too much, you can retouch them with a mask.
To do this, select a normal brush, set the foreground color to black and paint over the unsightly areas with an opacity of 100% until you are satisfied.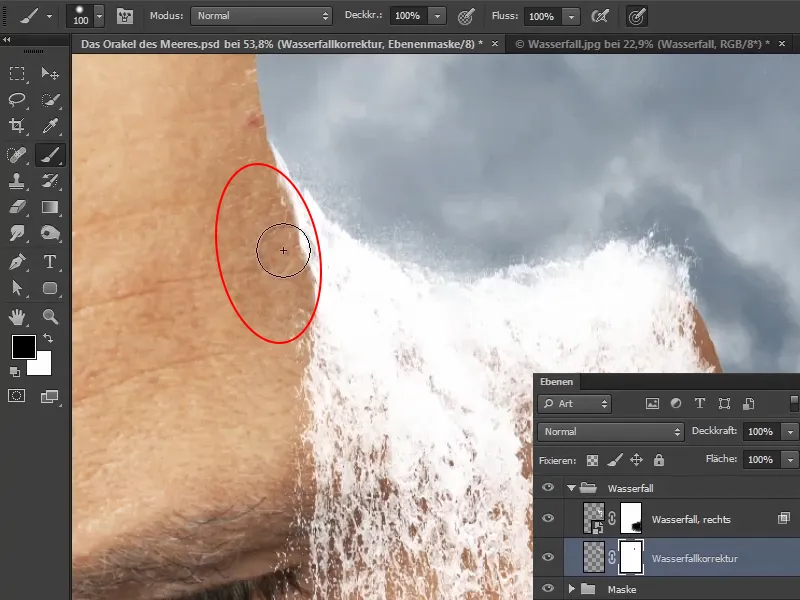
Step 11
This looks much better. In the before and after comparison, you can see that it is much more filled in.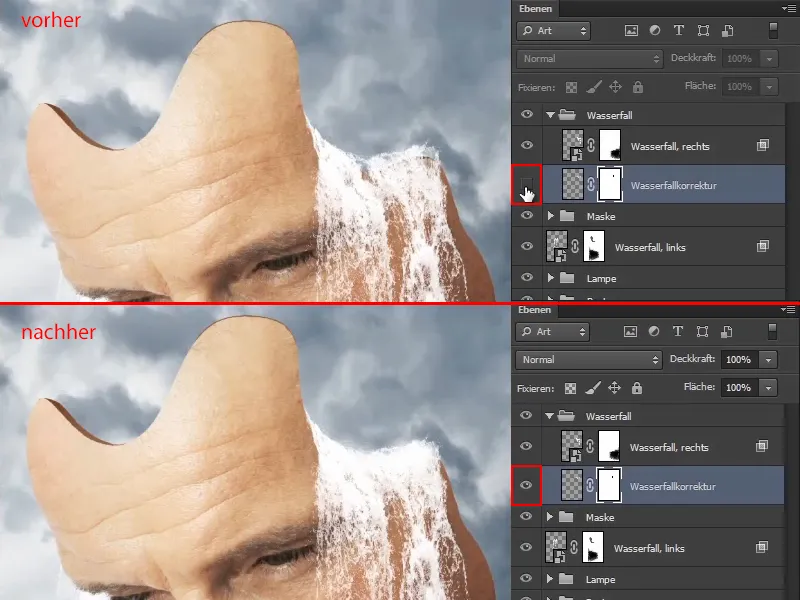
Continue with round 2: steps 12-21
Step 12
If you want, you can also reduce the opacity of this layer a little. Marco tries out 80%, 90% and 95% in the video training and decides to leave it at 95%.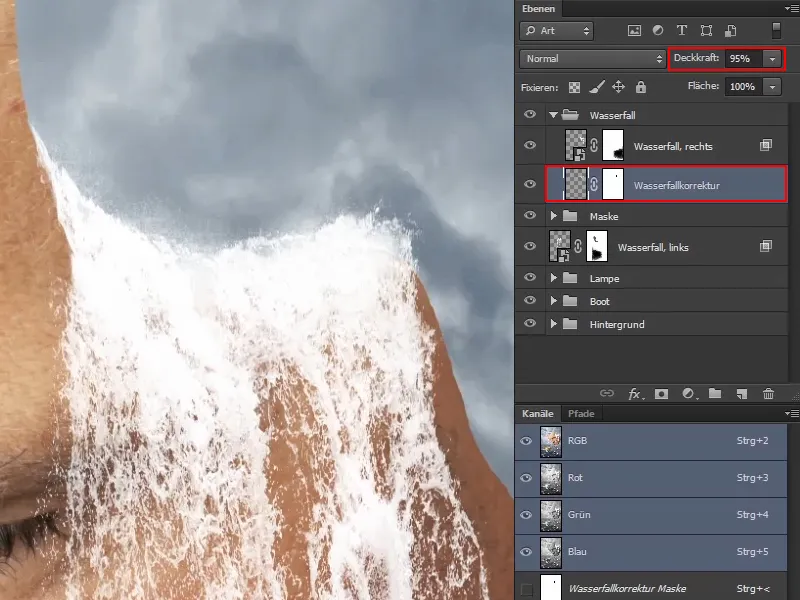
Step 13
The two waterfalls have now been created in this way.
You can now also reduce the opacity of the waterfall on the left a little. Marco sets it to 95% so that the waterfall looks a little more transparent, after all it is further away.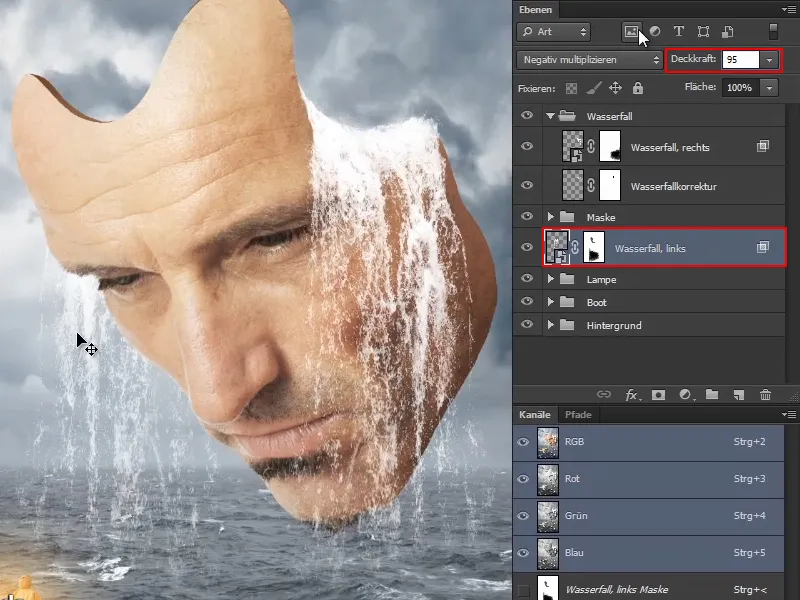
Step 14
What's still missing are the areas where the waterfalls hit the sea. And you can do something about that too:
The best way to do this is to go behind the boat layer, i.e. click on the "Boat" layer and create a new layer, which you then drag under the boat layer.
Rename this layer to "Spray", even though this is actually the case with the waves, but you can name it whatever you like.
Now select the speckled brush again.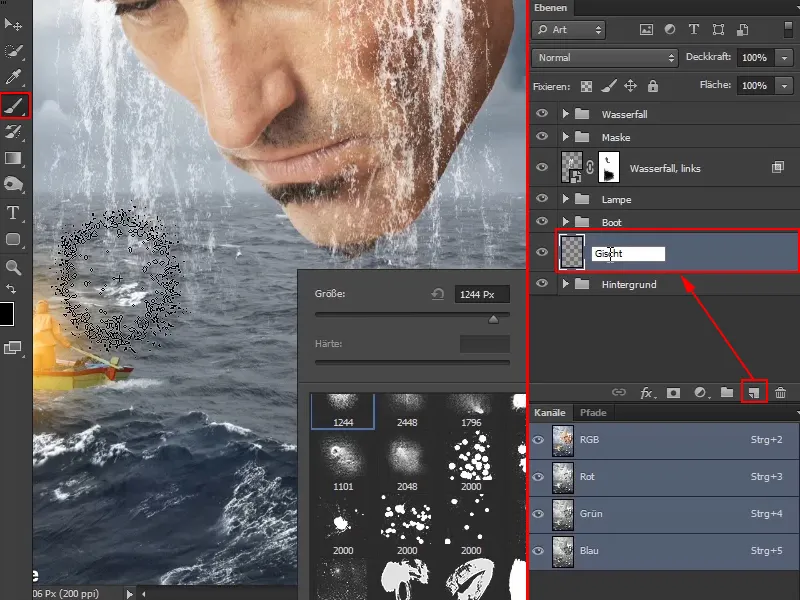
Step 15
Now make the brush slightly larger and set the opacity to 100%. Then click once on the image and create a shape like this: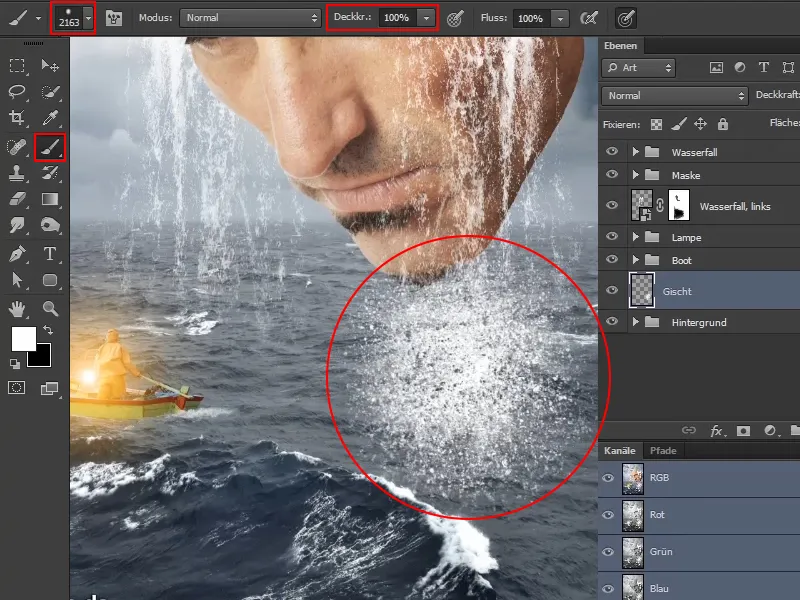
Step 16
Convert the layer into a smart object by right-clicking on the layer and selecting Convert to Smart Object. You should always do this.
Then scale the layer, compress it and stretch it a little. Move the structure roughly under the waterfall and confirm with Enter when you are satisfied.
You can also take a little more time with this step.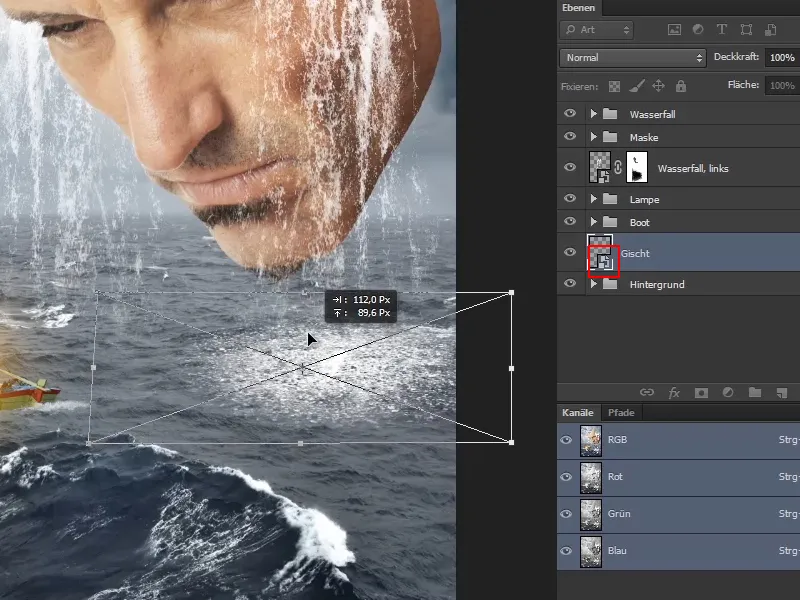
Step 17
Copy the layer again (see step 3) and drag the structure in the picture under the left waterfall.
Of course, you now have to think in perspective. Because it is a little further away, reduce the size of this copy slightly.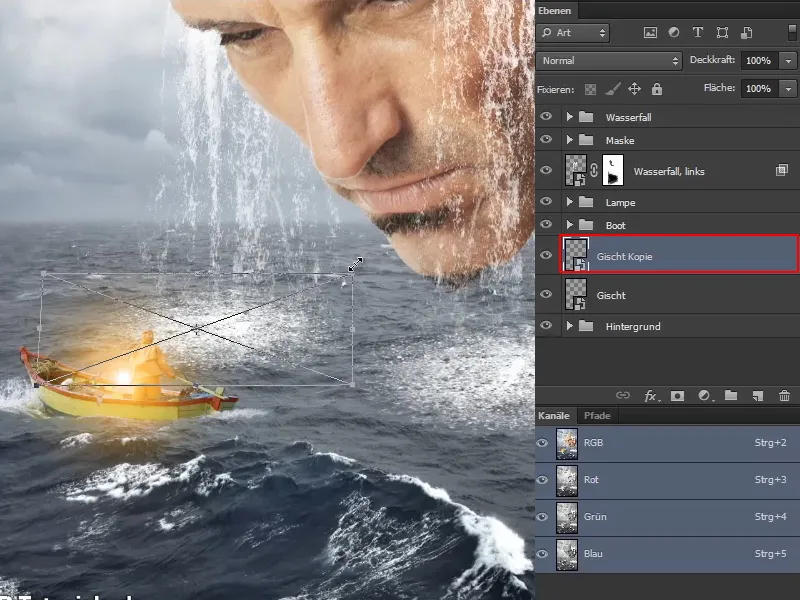
You can of course adjust this individually by rotating the brush a little at this point so that it is not a 1:1 copy.
Step 18
Reduce the opacity of the "Spray" and "Spray copy" layers slightly. In the video training, Marco sets the "Spray copy" layer to 84% and the "Spray" layer to 88%.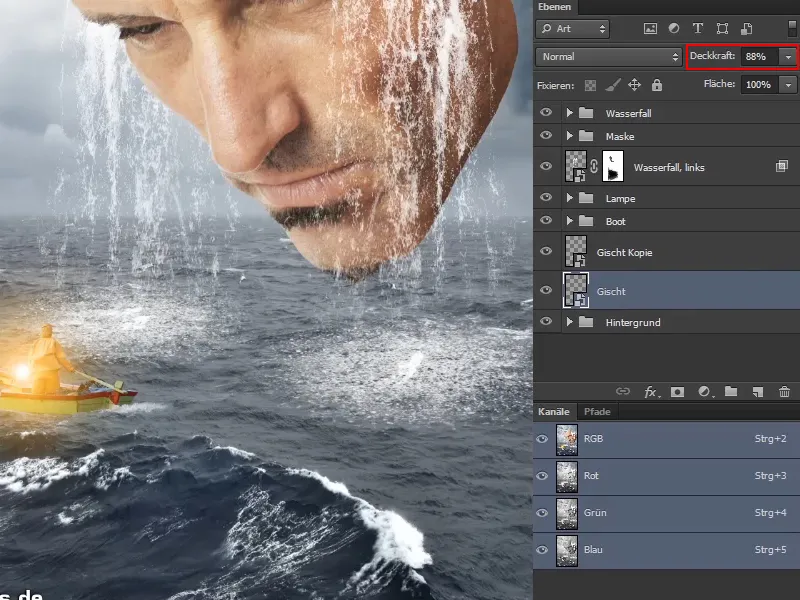
Step 19
You can of course combine several layers with each other. This way you can simulate the impact of the water with another layer, for example.
Marco creates a new layer in the video training, selects the speckled brush and adds a new shape to the image with full opacity.
This layer is then transformed back into a Smart Object. He then scales and positions the new spray in the image. Confirm with Enter.
Then reduce the opacity of the layer to 46%.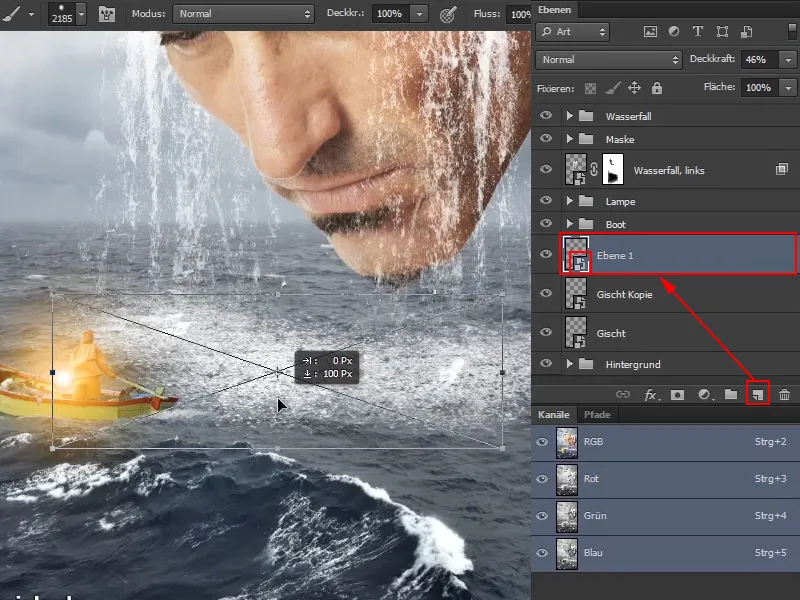
Marco emphasizes that you can play around here as much as you like and that you can take your time until it looks really good. He also gives a tip along the way ...
For example, you could double-click on the "Spray" layer to open the Layer Styles window.
There you can make the layer below shine through by playing with the slider for the layer below. Everything that is dark in the sea would then shine through. You can fine-tune this with the split arrow.
This breaks up the surface a little and makes it look a little more realistic.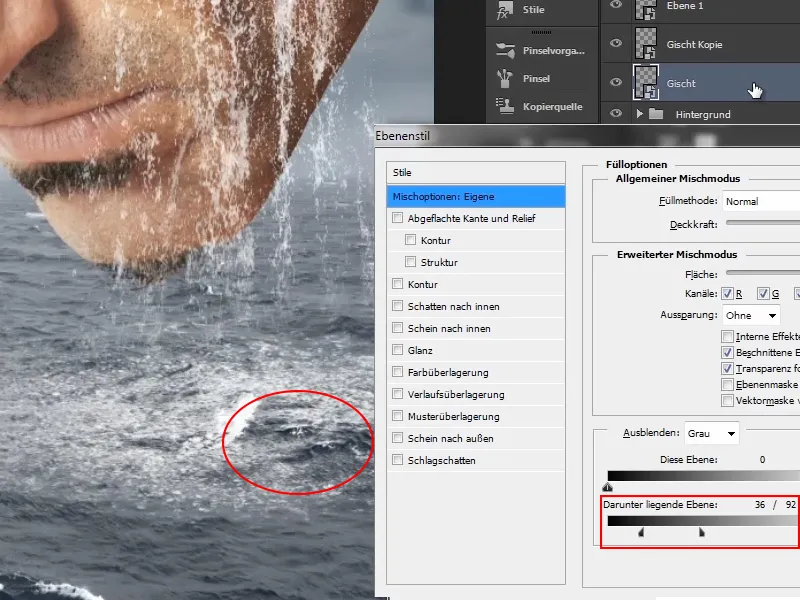
Marco then does the same for the "Spray copy" layer: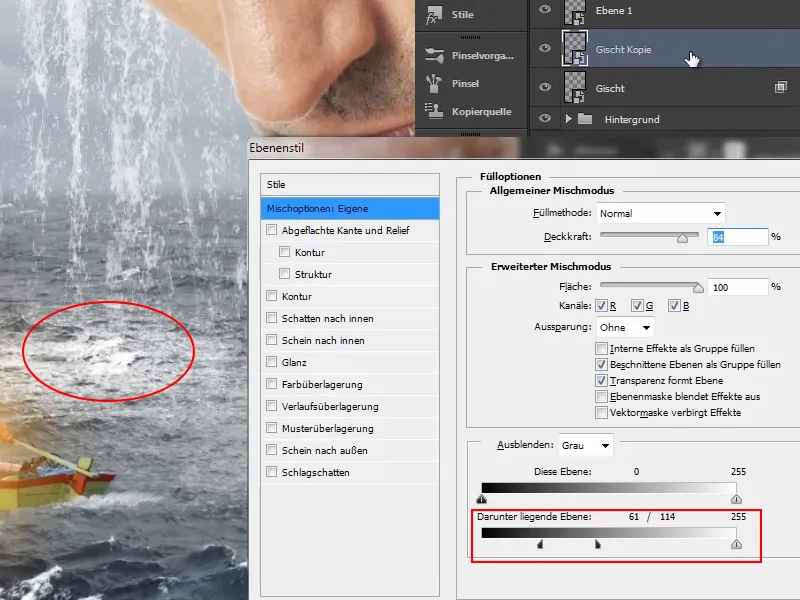
And for the semi-transparent "Layer 1", Marco proceeds accordingly in the same way: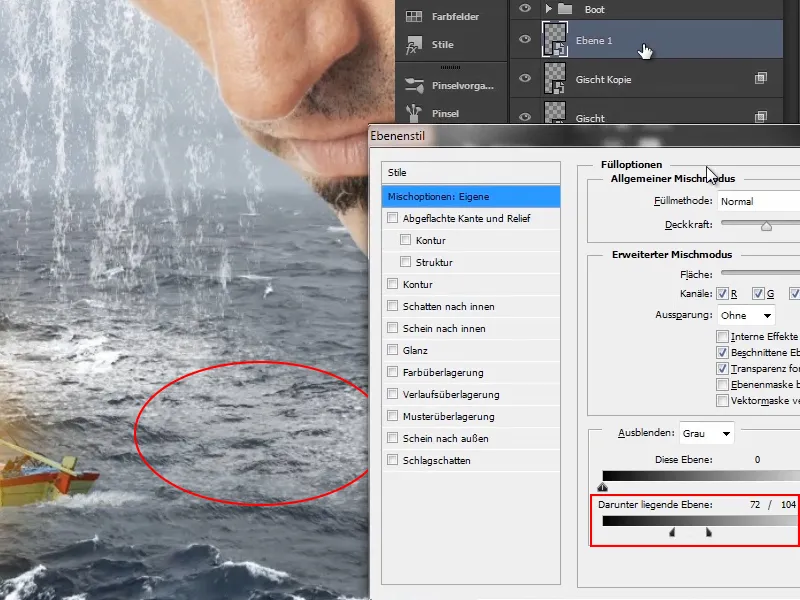
Step 20
Marco has paused the video briefly to work in detail on the spray layers and now shows what the image now looks like: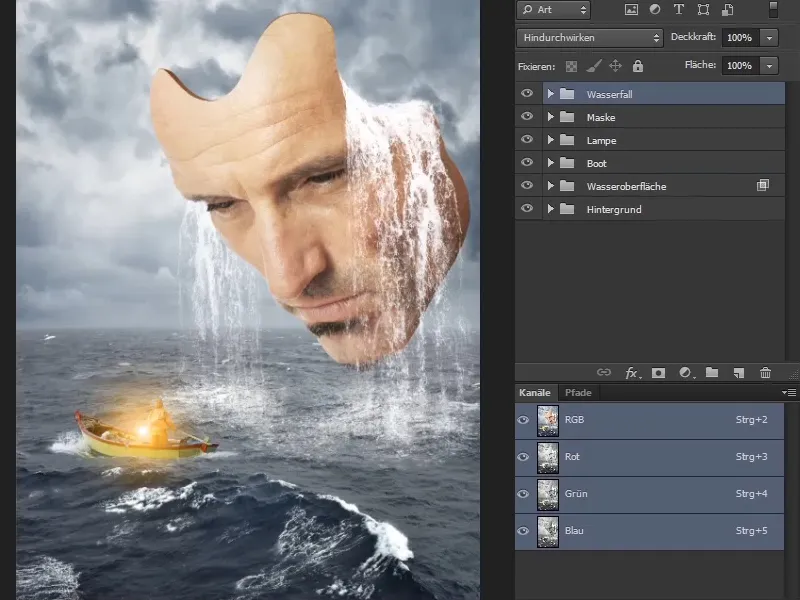
He has also restructured some of the layers, which he explains in more detail below.
Step 21
Marco no longer has the left waterfall below the mask in the layers, but together with the other waterfall in a folder.
He has also masked the left waterfall with a mask so that it is cut off along the face line.
The water surface is now also in a separate layer group.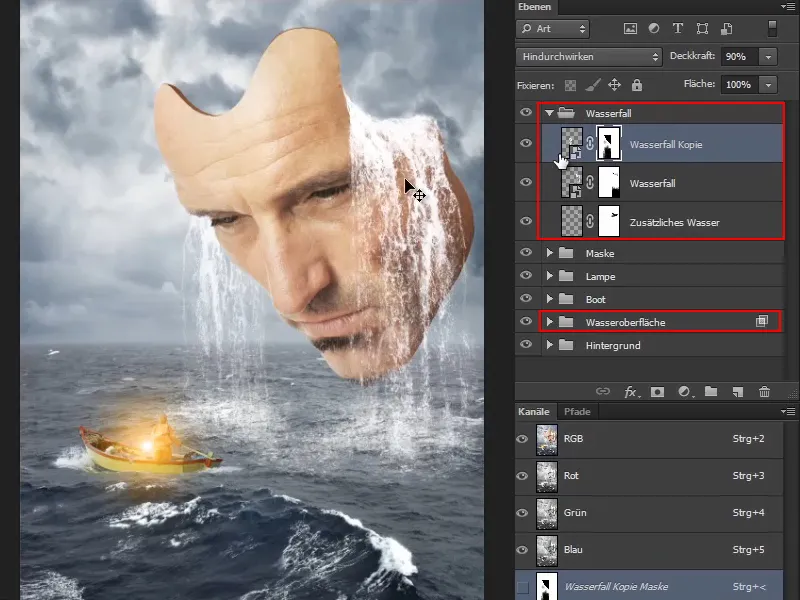
The waterfalls are now finished for the time being.
In the next part of the tutorial series, Marco will show how the skin can be optimized a little further up here. Because there are still individual hairs visible, which doesn't look nice - at least not with this mysterious mask.
He will also show you how you can draw some water into the forehead. He will show you a graphic style he created himself, which you can then use to draw water droplets very easily in the future.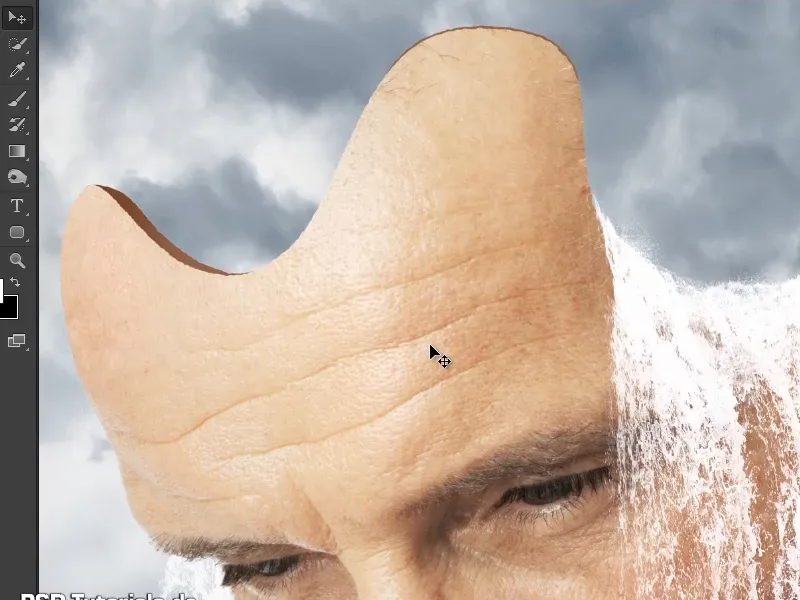
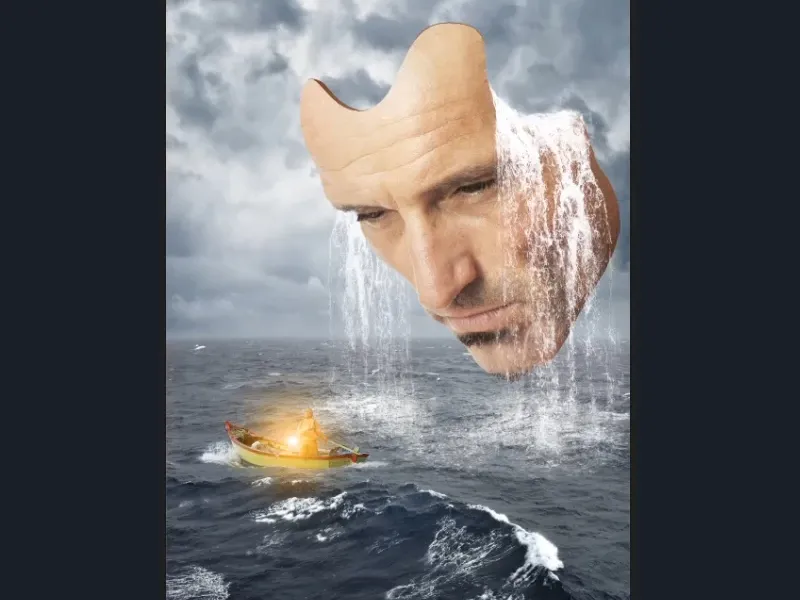
At the end of this part, the picture looks like this: