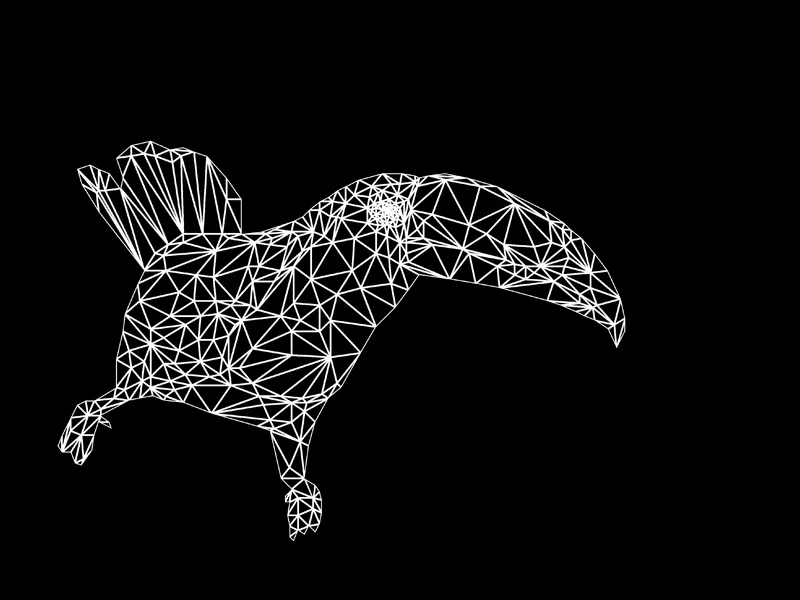
Today I would like to introduce you to the ever-popular low-poly effect in Photoshop!
3D models consist of a large number of polygons and the more polygons are used in a 3D object, the more detailed the model will be in the end. But we don't need a 3D program or a 3D function to apply this effect in Photoshop - we just need the Polygon Lasso tool, the Calculate Average filterand a great action that takes a lot of fiddly work off our hands.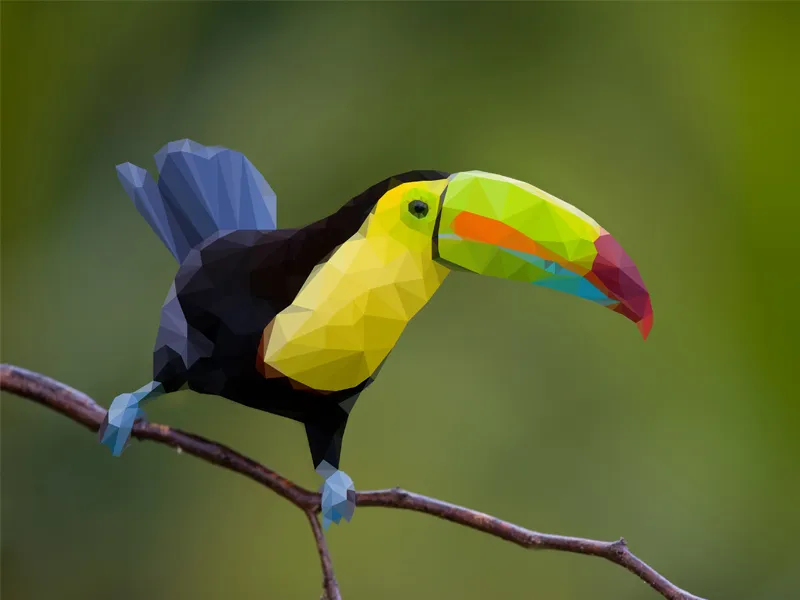
Step 1 - Modifying the grid
First, we open our desired file. I chose a shot of a toucan - a beautiful and colorful bird.
Before we can really get started with the low-poly effect, we need to set up a few things in Photoshop to make our work much easier. First, we activate the grid via View>Display>Grid to make it easier for us to arrange the polygons.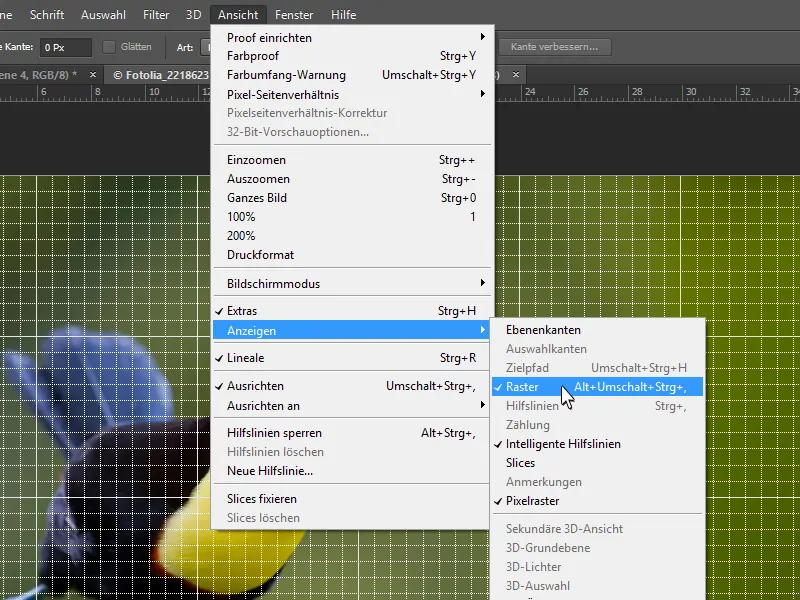
We can now edit the grid in Photoshop! To do this, simply go to Edit>Preferences>Guidelines, Grid and Slices....webp?tutkfid=64757)
A window appears and here we can now modify the grid. First, I change the dimensions from cm to pixels. I enter 10 px with a subdivision as the values.
We can also select a color and a type of grid to make our work easier.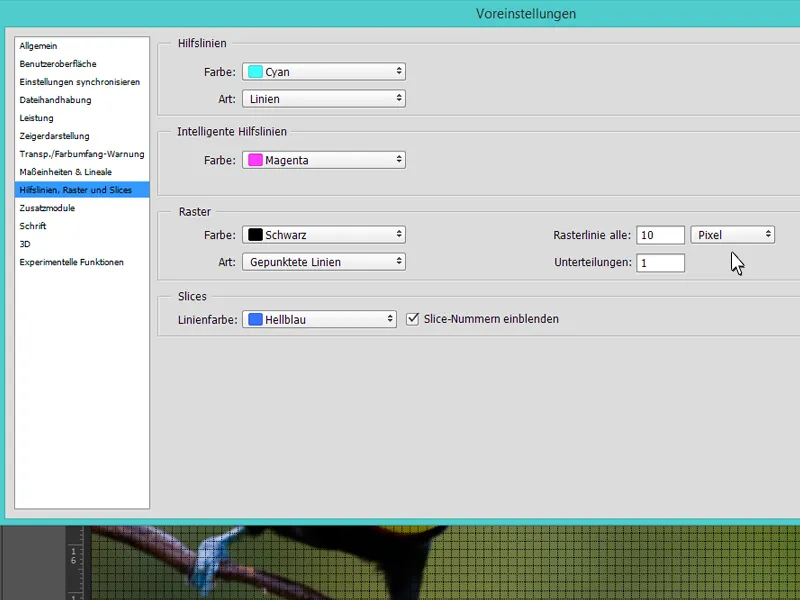
Step 2 - We write the low-poly effect action
We first need the Actions window, which we can activate via Window>Actions.
Here we can create our new action (1) and give it a name. Finally, we give our action a function key ( F4 in this example ).
To get started, however, we first need to pause the recording (2).
Now we can select the polygon lasso tool (L) and select our first triangle. Before we do this, however, we need to make sure that we uncheck the Smooth at the top - otherwise Photoshop will create a transition between all the polygons.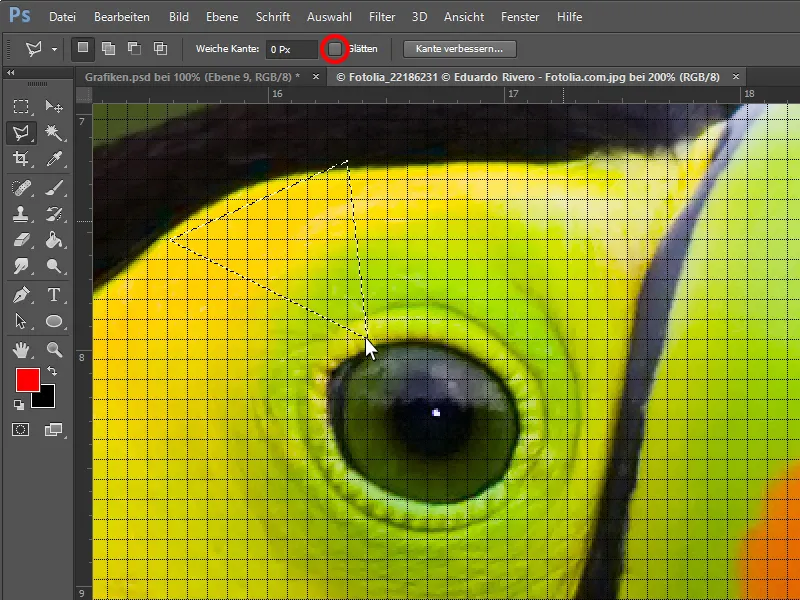
Now we can copy the selected triangle to a new layer with Ctrl+J - unfortunately, our selection will be lost.
To get it back, we can simply restore it by Ctrl+clicking on the layer thumbnail..webp?tutkfid=64761)
Now we can fill the selection with the average color. To do this, we simply go to Filter>Blur filter>Calculate average. Finally, we cancel the selection with Ctrl+D.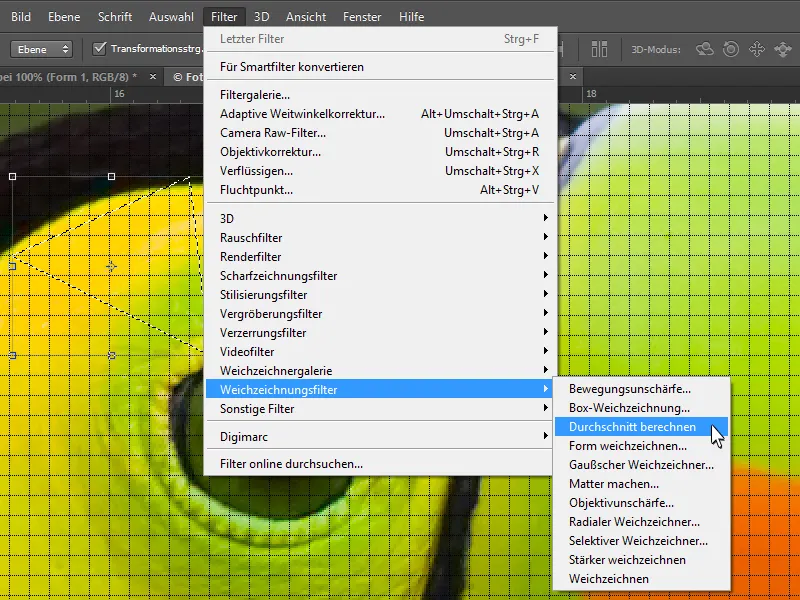
Now it's time to start our action! First we create a selection of the next triangle with the polygon tool, then go to Start Recording (1) and select the background layerwith a click (2). This is how we set the source of the selection.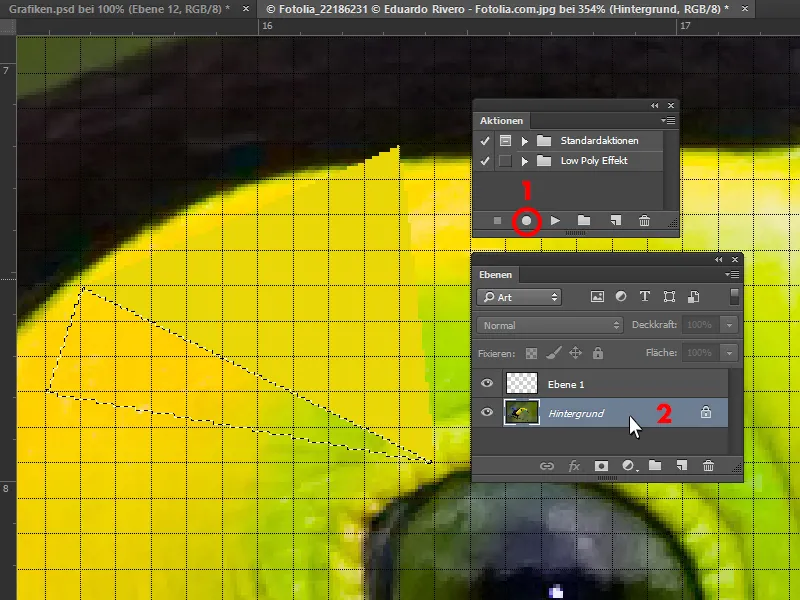
Now we can repeat all the previous steps:
1) Use Ctrl+J to copy the selection to a new layer.
2) We can now rename the layer to "Polygon".
3) Restore selection with Ctrl+click on the layer thumbnail of "Polygon"
4) Filter>Blur filter>Calculate average
5) Deselect with Ctrl+D
Done! Now we can stop the recording! Now we just need to click the F4 key every time we have selected a triangle with the polygon tool to perform the action.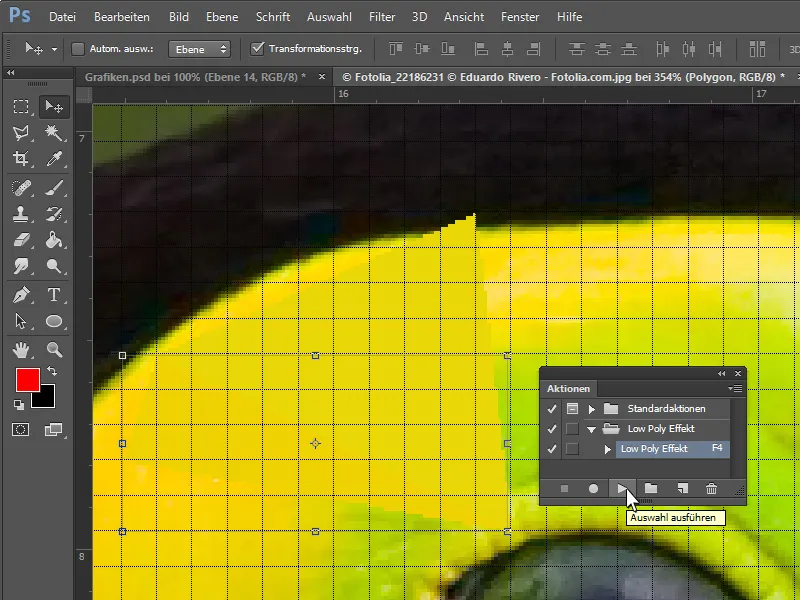
Step 3 - Some tips on the low-poly effect
When selecting triangles, we need to make sure that they connect seamlessly, so we should only use the polygon tool to connect to corners of existing polygons.
It also makes a difference how many polygons we use in total: Depending on whether we create more or fewer polygons, the more or less detailed our object will be in the end.
The size of the polygons also differs depending on where more detail is required, such as the eye or the fine color transitions on the beak. And where less detail is required - such as on the belly and back of the bird.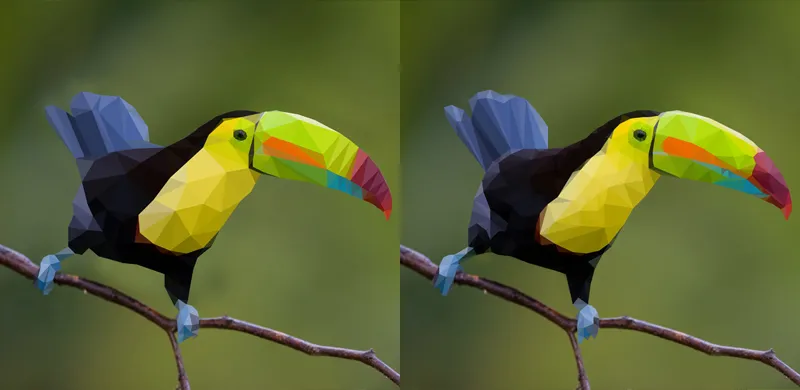
When you are finished, you can select all the polygon layers and merge them into a folder.
As we have created a new layer for each polygon, we can of course also quickly edit the polygons.
For example, we can now experiment with the layer style and quickly apply the settings to all polygons. To do this, simply right-click on the edited polygon layer and go to Copy layer style, select all other polygon layers and right-click on Paste layer style.
This gives us many more options for editing our object.