In the last tutorial, we already set the poses - very evenly distributed - and didn't pay any attention to the timing. We need to put a little more effort into this. When we play it back, we see that it's not that great and that the bouncing ball is not an easy exercise at all.
Step 1
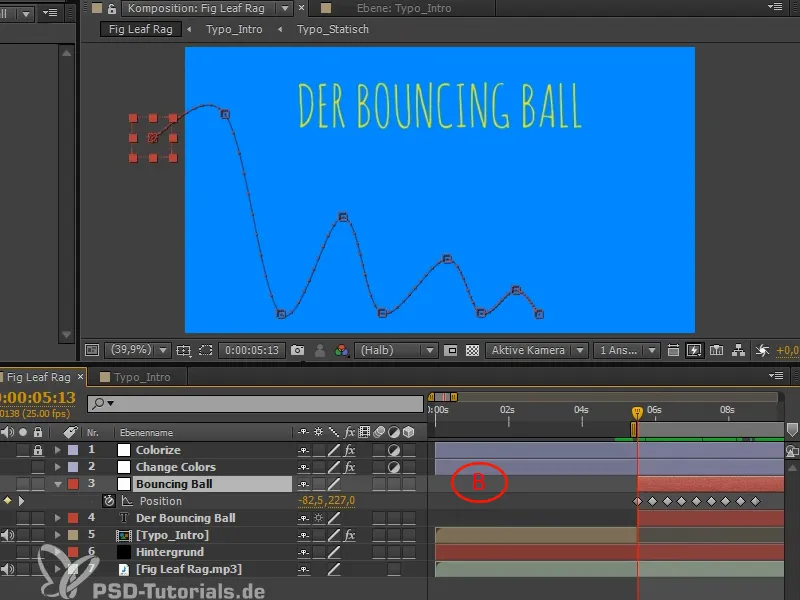
I press B to start my workspace here. It is very important that I not only set in and out points, but also always define the current work area. Otherwise, this is the biggest time-sucker when everything has to be recalculated again and again and I constantly have to look at everything from the beginning.
So use the workspace to keep cropping your composition to the current area.
Step 2
We need the curves in the diagram editor for fine-tuning and so that the ball can drop nicely. If you have a second monitor, then use the entire second monitor exclusively for the curves. Be brave and create different workspaces, change them and adjust them. Press Ü and go fullscreen into the workspace.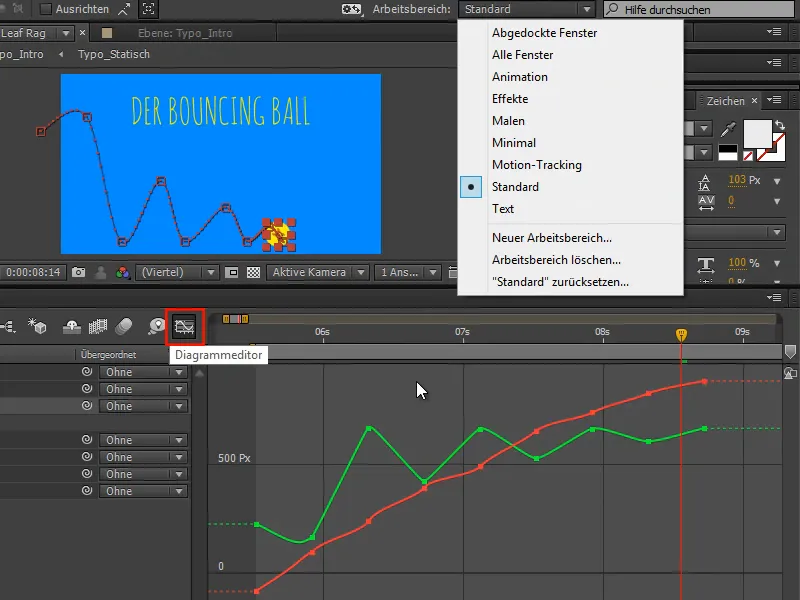
Step 3
At the moment, I can't move the two curves independently of each other because After Effects conveniently combines the X and Y positions. In 95% of cases this is also practical, but if you want to animate, this is not helpful.
In real animation, you definitely need control over the curves. You can get this by right-clicking on Separate dimensions.
This gives us the X and Y positions separately. If we select one, we also get the corresponding tangents displayed on the right and can work with the curves properly.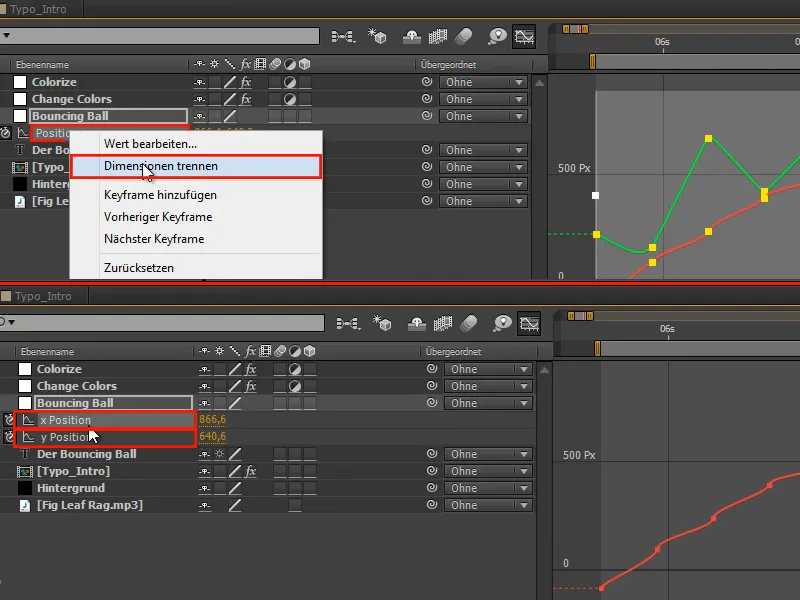
Step 4
The X position for a horizontal throw is a smooth movement. It is not hindered or stopped by anything. It therefore continues at its initial speed until it brakes out at some point.
All these keyframes can be deleted.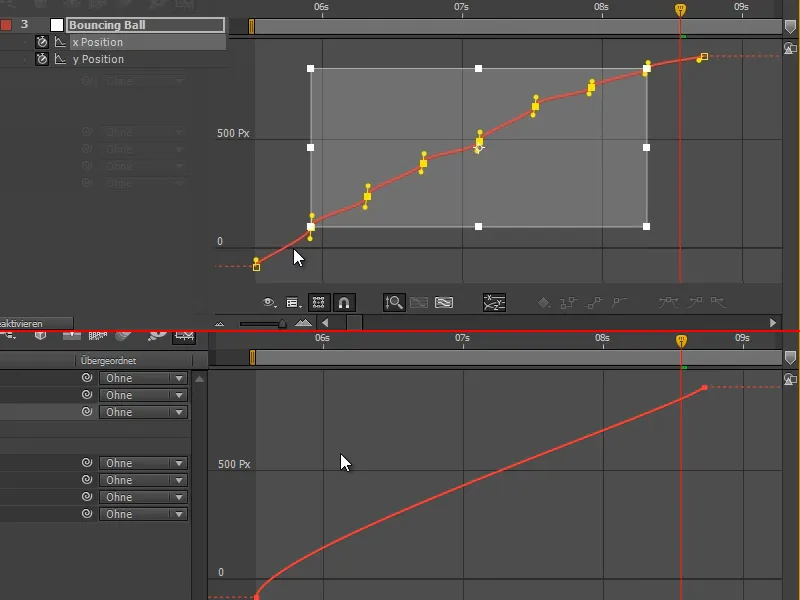
Step 5
We design this first part linearly using the buttons or manually using the tangent.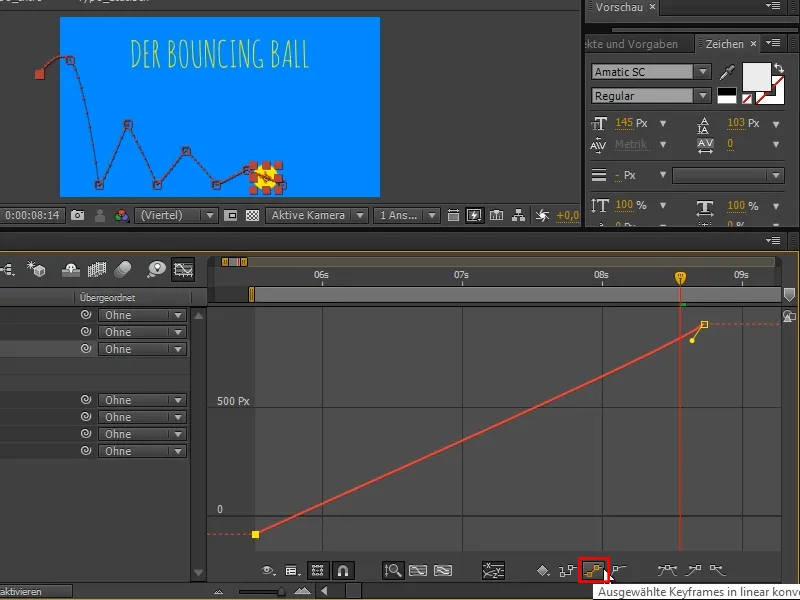
Step 6
At the end, the ball should run out. To do this, we make a straight part and let it end flat.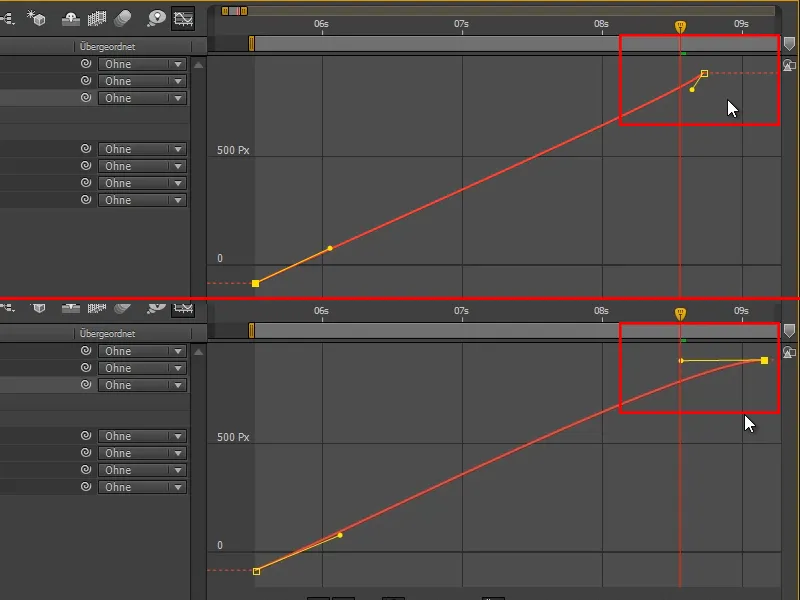
Step 7
You must be aware of the following with curves: The curve shows your value. We have already touched on curves earlier, these were the speed curves. After Effects automatically selects between these two by default.
If I right-click in the curves, I can choose between Edit Value Curve, Edit Vel ocity Curve or Select Curve Type Automatically.
Select curve type automatically is the default setting.
I use the speed curve when I am editing a lot of things at the same time.
I like to go to Edit value curve as soon as I have the opportunity. I use the value curve when I am working on individual things such as the bouncing ball.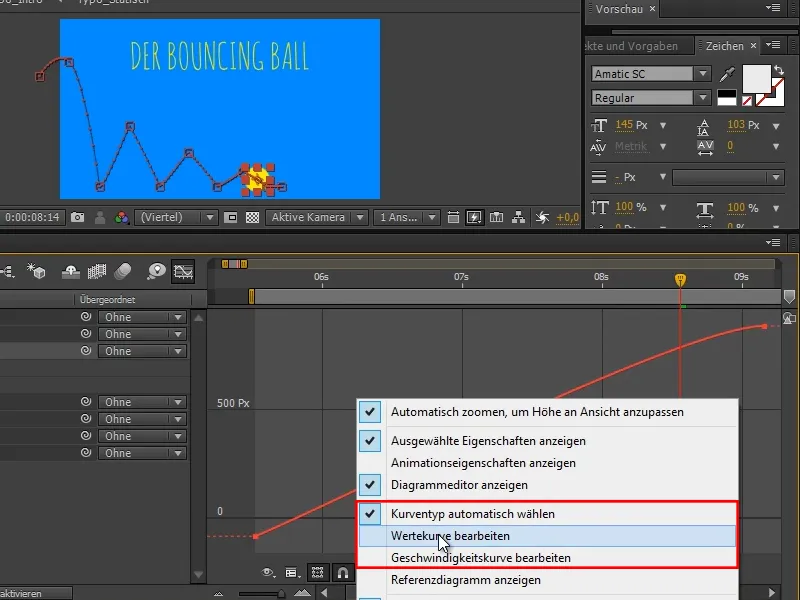
Step 8
If I influence a lot of things, such as the masks in Change Colors, then there are no value points at all, so I can't do that using the value curve.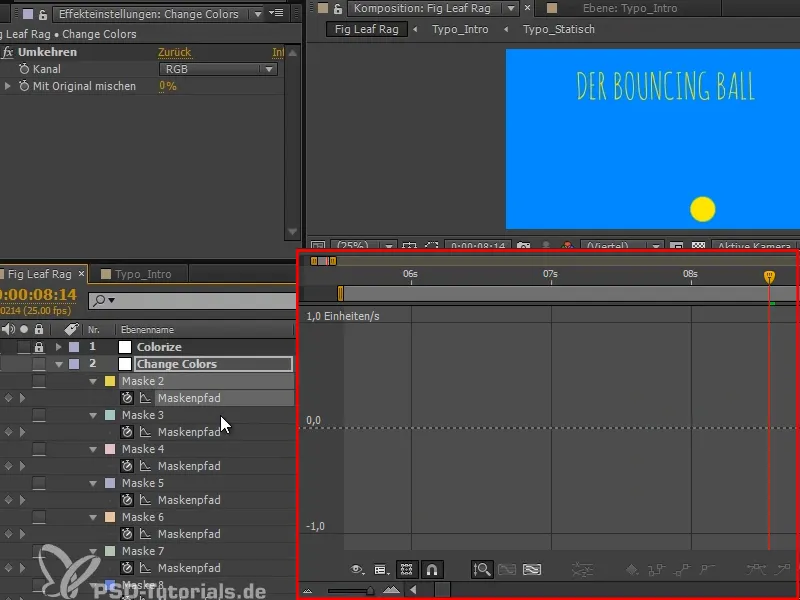
Step 9
With the value curve, you must be aware that the gradient of the curve is the speed; the derivative of the curve, so to speak.
Let's take the x-axis, which is relatively simple: if I make my curve flat, like here for example, then it goes from one value to another very quickly at the beginning and then only changes the values in very, very small steps.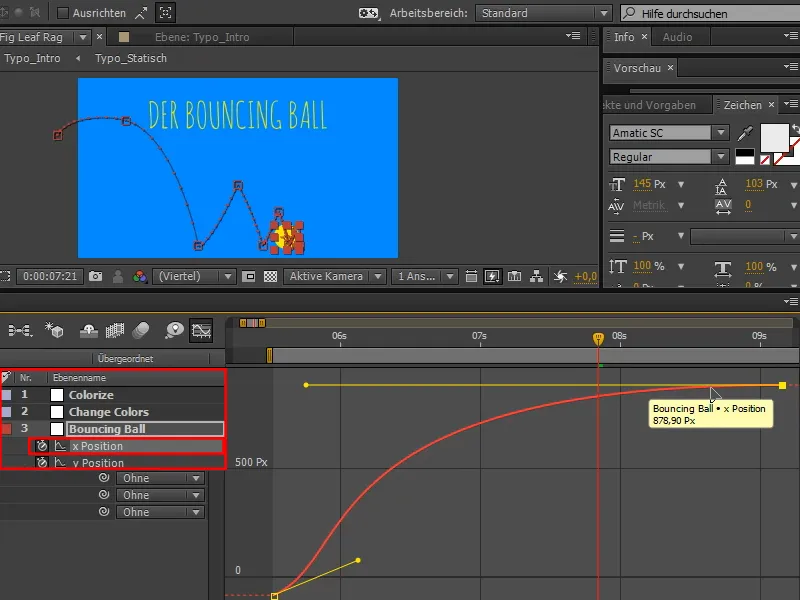
The flatter the curve, the slower the movement. The steeper the curve, the faster the movement.
This is a very important principle that you must always keep in mind. If a movement is too slow, make the curve steeper. If a movement is too fast, you make the curve flatter. You have to think a little in these curves.
Step 10
The y-curve is where it gets really exciting.
If we compare the two patterns (A and B), we can already see the similarity. If I grab a point and pull it down (B), it pulls the corresponding point (A) up.
This is because After Effects' value system is such that large y-values are at the bottom and small y-values are at the top. I always remember this with weight - if there is more y, it pulls it further down.
Normally it should be the other way around, but that's not a problem. The curve is upside down, but you get used to it and manage quite well.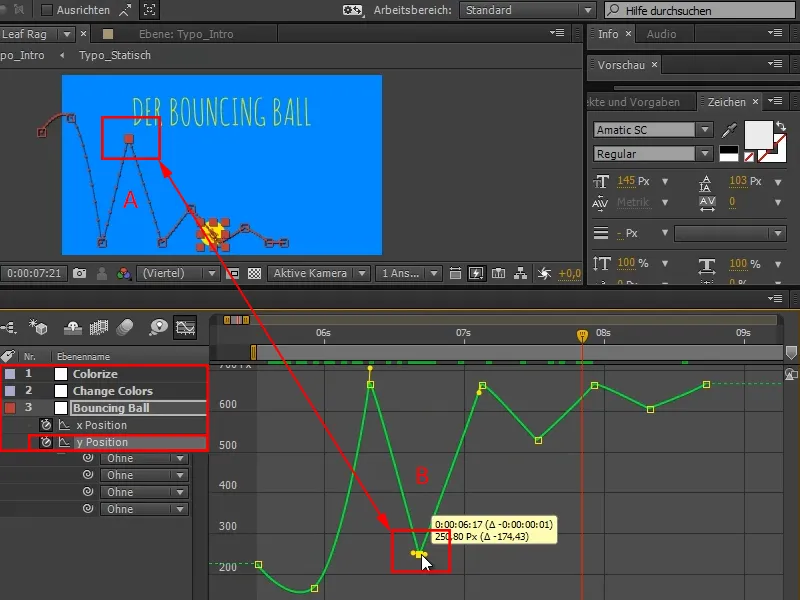
Step 11
We have already considered that there is a balance of forces at this point (1). We therefore need a flat curve.
We can achieve this by holding down the Shift key.
The animation says "Beautiful curves result in a beautiful animation." So if you see that the curve isn't quite nice, like here before, then change it until the curve is really nice.
Then I mark all my starting points and press Easy Ease (2) ...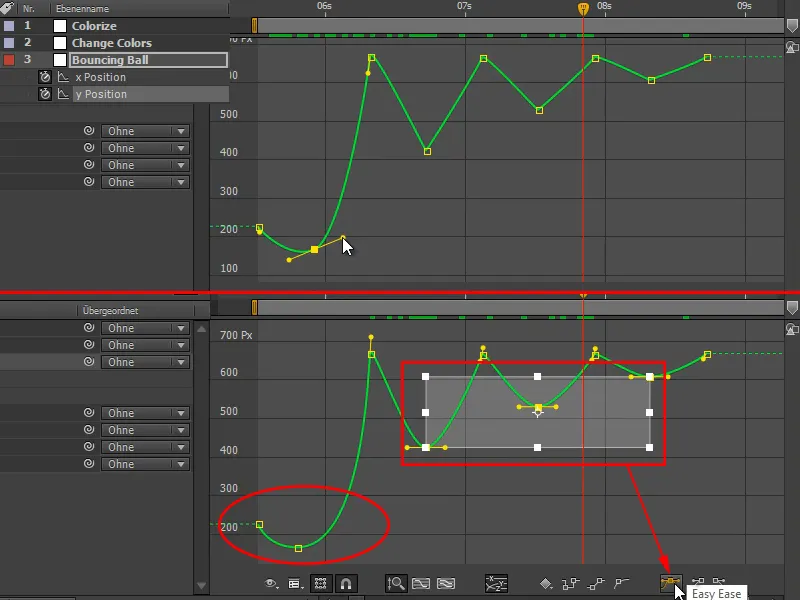
Step 12
This gives me exactly this functionality and I can also make the curves even nicer by flattening them a little.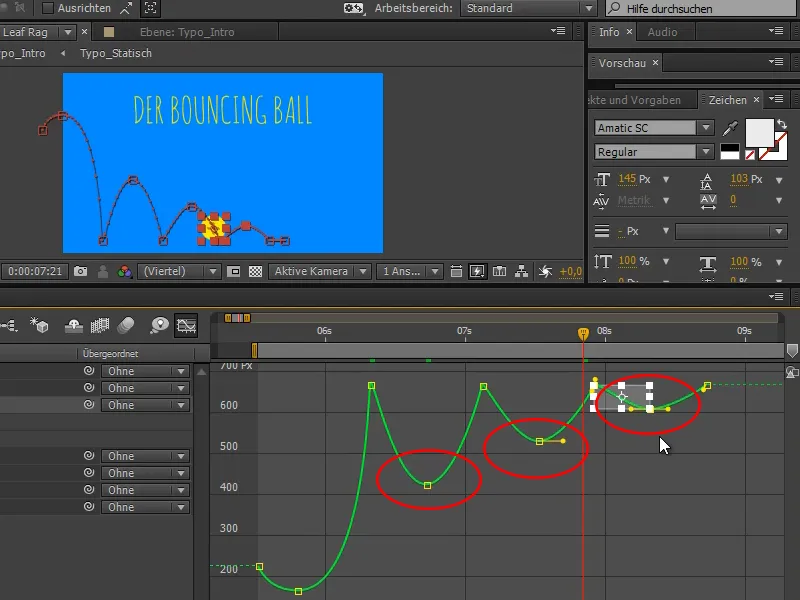
Step 13
Now up here, one force comes and fights against the other, is overpowered from one moment to the next and the ball is shot in the opposite direction.
To do this, we have to break the tangent, which we can't do with a continuous one, because the tangent makes for a nice curve and we don't want that here. We want a bite at this point.
I can separate the tangent by holding down the Alt key. Very important: You only have to break the tangent once. One Alt-clickper tangent is enough. If I move the second half and press the Alt key again, the two halves are reconnected. So: only once.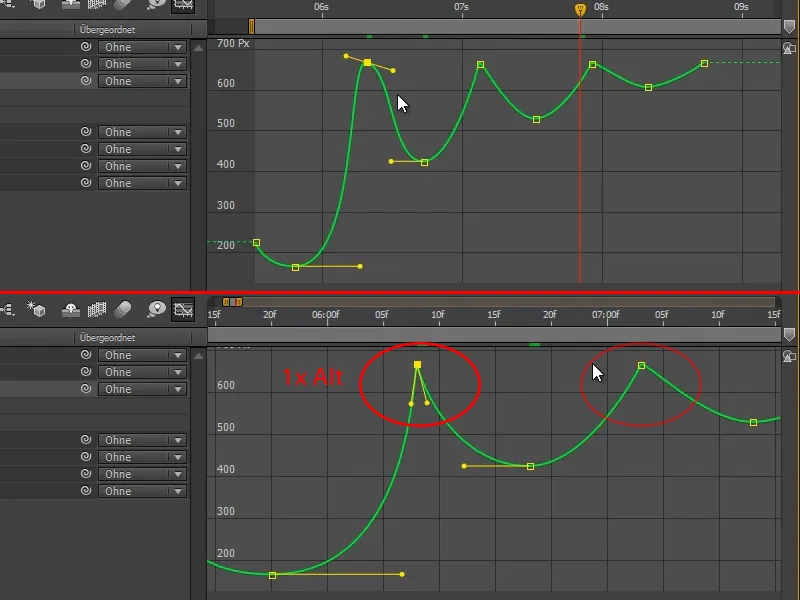
Step 14
The next one should also be like this. At first glance, it doesn't look too bad, but when you zoom in, it's something else.
If I break the tangent, it's a different curve. And you can feel these small differences.
So take your time with things like this and go in tight.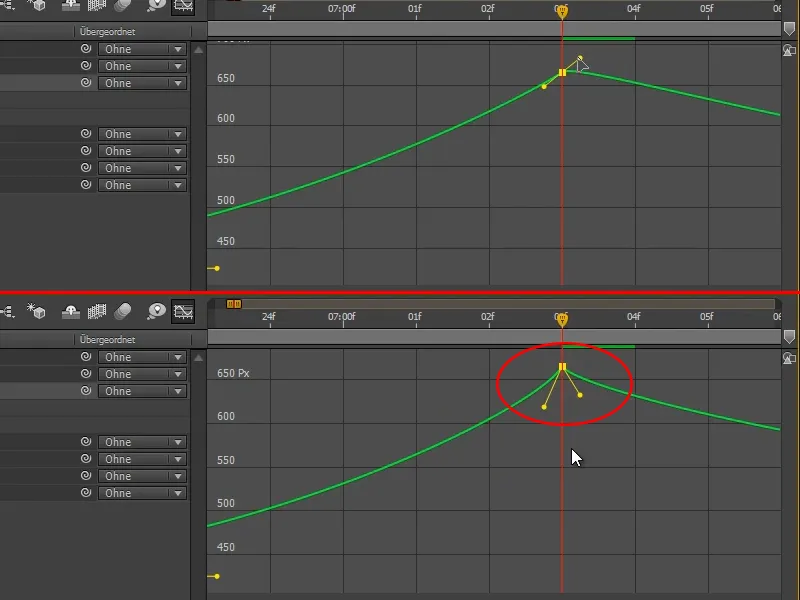
Step 15
This button here is very practical, it says Fit all diagrams in view, which means that it zooms in so far that I can see everything clearly.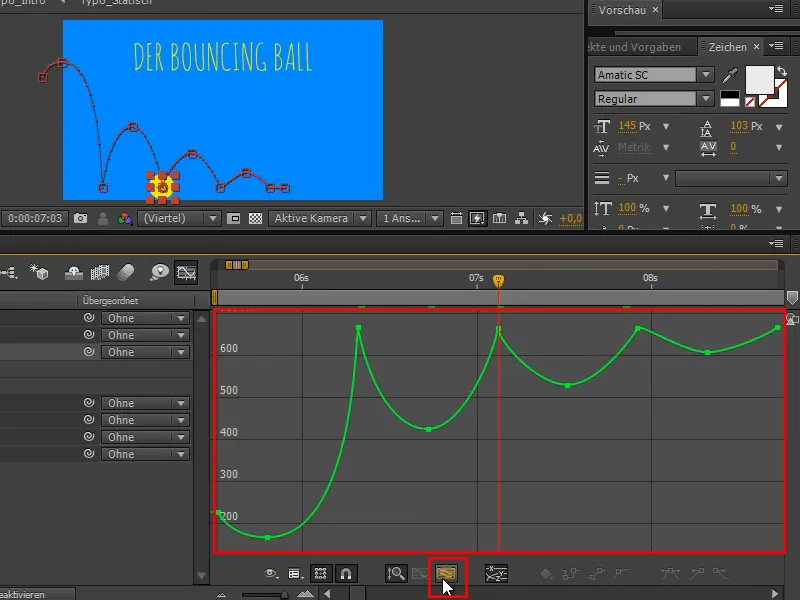
Step 16
A second important button is this one:
If you select the area of the curve that you specifically want to edit and then press Fit selection to view, it zooms in on exactly this area in the largest possible format.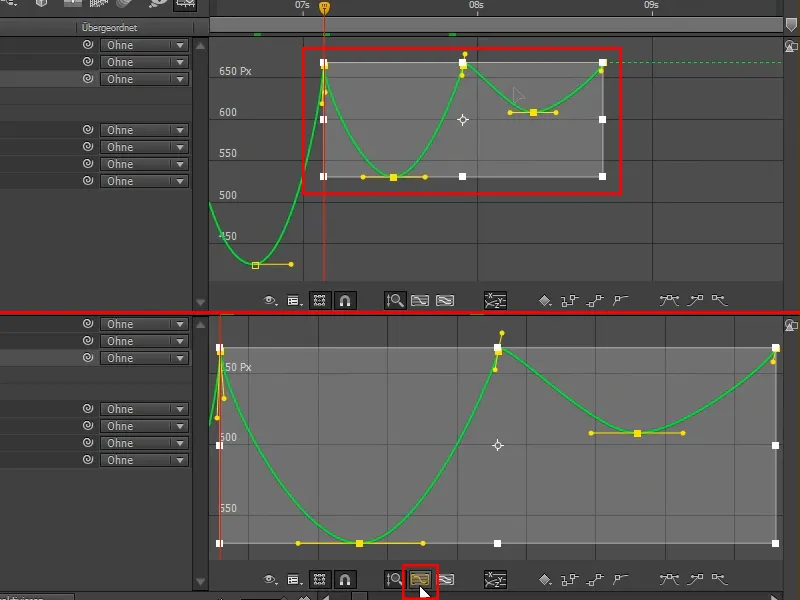
Step 17
As you can see, I haven't even looked at the animation yet. Because when I look at it, it's all about timing. This is about spacing - we're thinking very carefully about how the curves should be.
So I'm going to adjust these curves a little bit.
Now we've got the first jumps in, and if we look at the poses from before, it's already a lot better.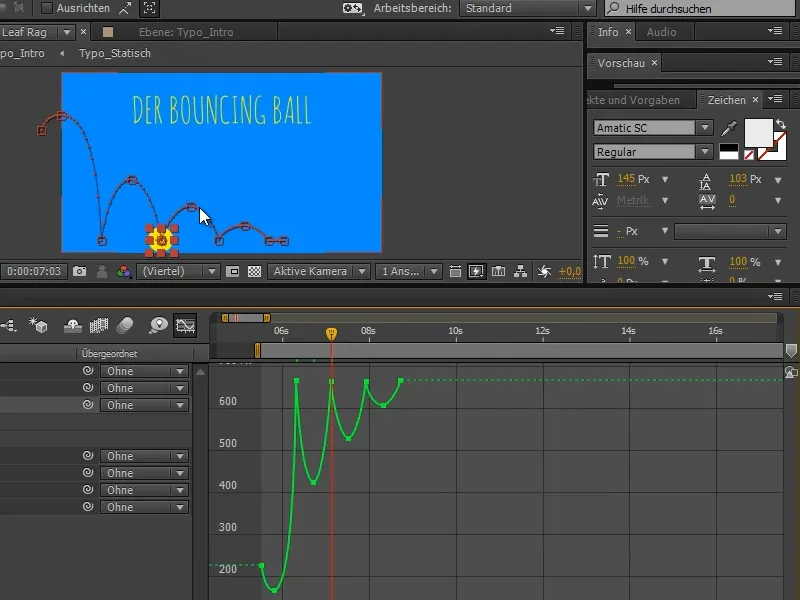
The ball is already bouncing quite well, but it's not really working yet. We still need to work on the timing and the poses.
And we'll get to the timing in the next part of the tutorial series "Bouncing ball - the timing".
