In this tutorial, you will learn how to use Google Sheets more efficiently by applying various functions and Shortcuts. When working with large amounts of data, it is crucial to know the right functions and use applicable shortcuts. We will explore the basic functions that will help you quickly identify relevant data and optimize your work. Let's get started!
Main insights
Functions are built-in formulas in Google Sheets that help you perform specific calculations. It is important to choose the right function and the correct cell references. Additionally, keyboard shortcuts enable you to navigate through your data efficiently and apply functions quickly.
Step-by-step guide
To make it easier for you to get started, let's first look at how to select and apply a function in Google Sheets.
To use a function in Google Sheets, you always start with the equal sign (=). Let's go through the steps one by one.
Step 1: Selecting the right function
First, it is important to choose the correct function. An example of calculating the mean is the function =AVERAGE(...). When you input the equal sign, you will automatically get suggestions from Google Sheets. These can help you find the appropriate function, whether it's the average, count, or sum.
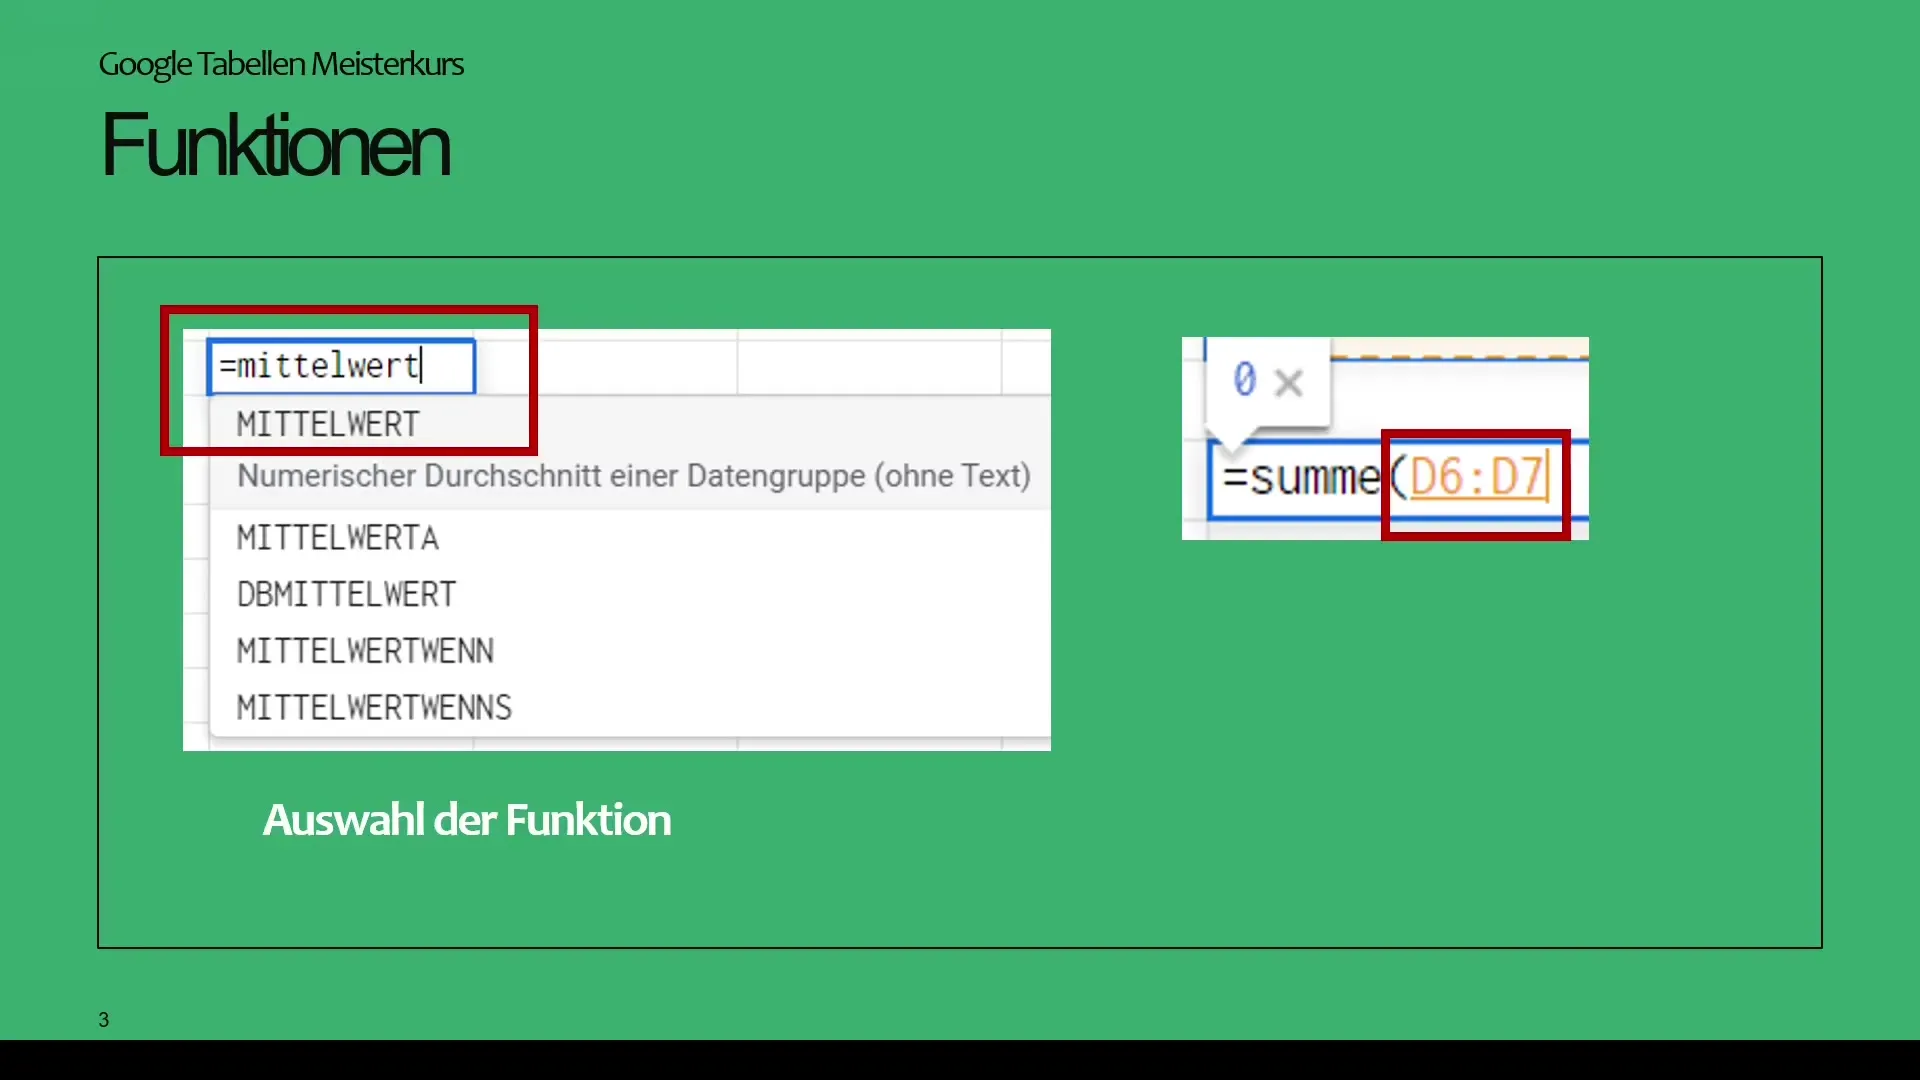
For example, in our dataset, you have an overview of revenues that we want to analyze with various aggregate functions.
Step 2: Selecting the cell range
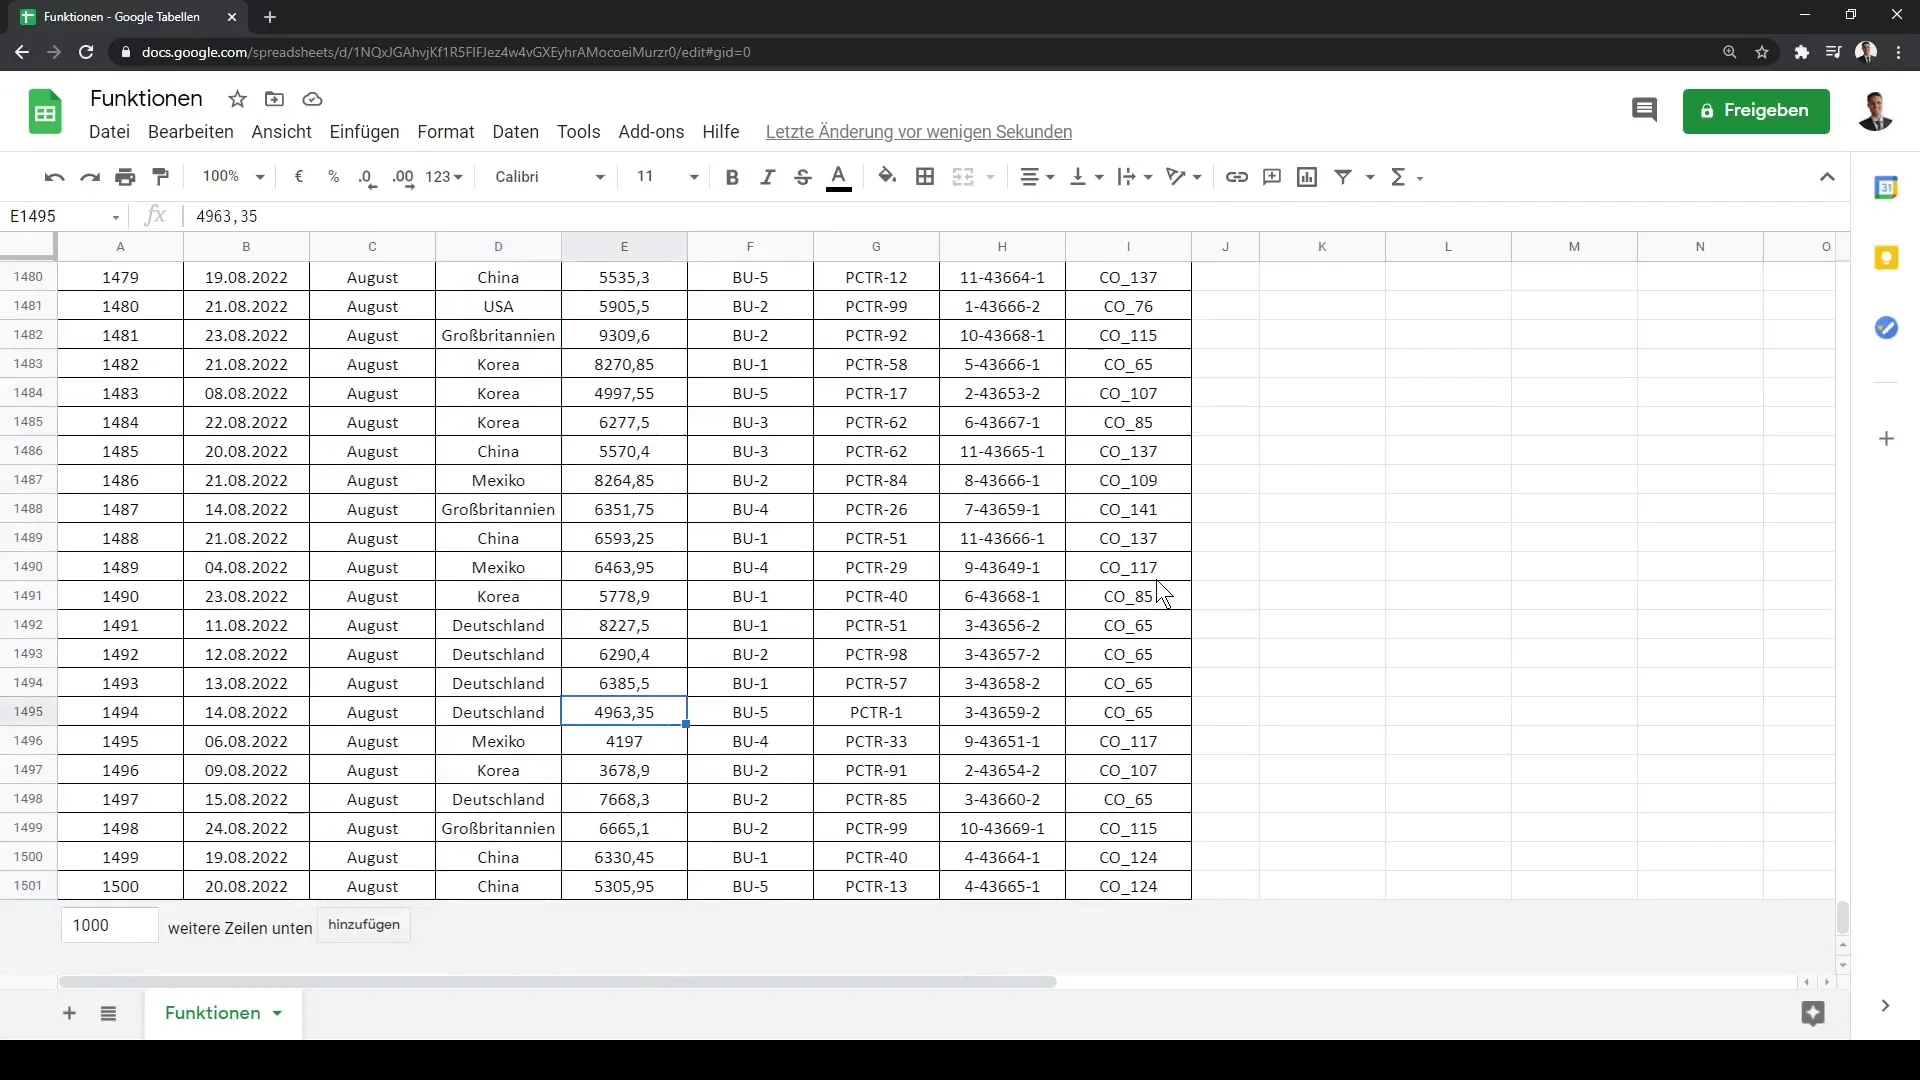
Once the correct function is chosen, you need to select the right cell range. Suppose we have a list of data from cells E2 to E1501. You can scroll with the mouse to the last cell, but there are more efficient methods.
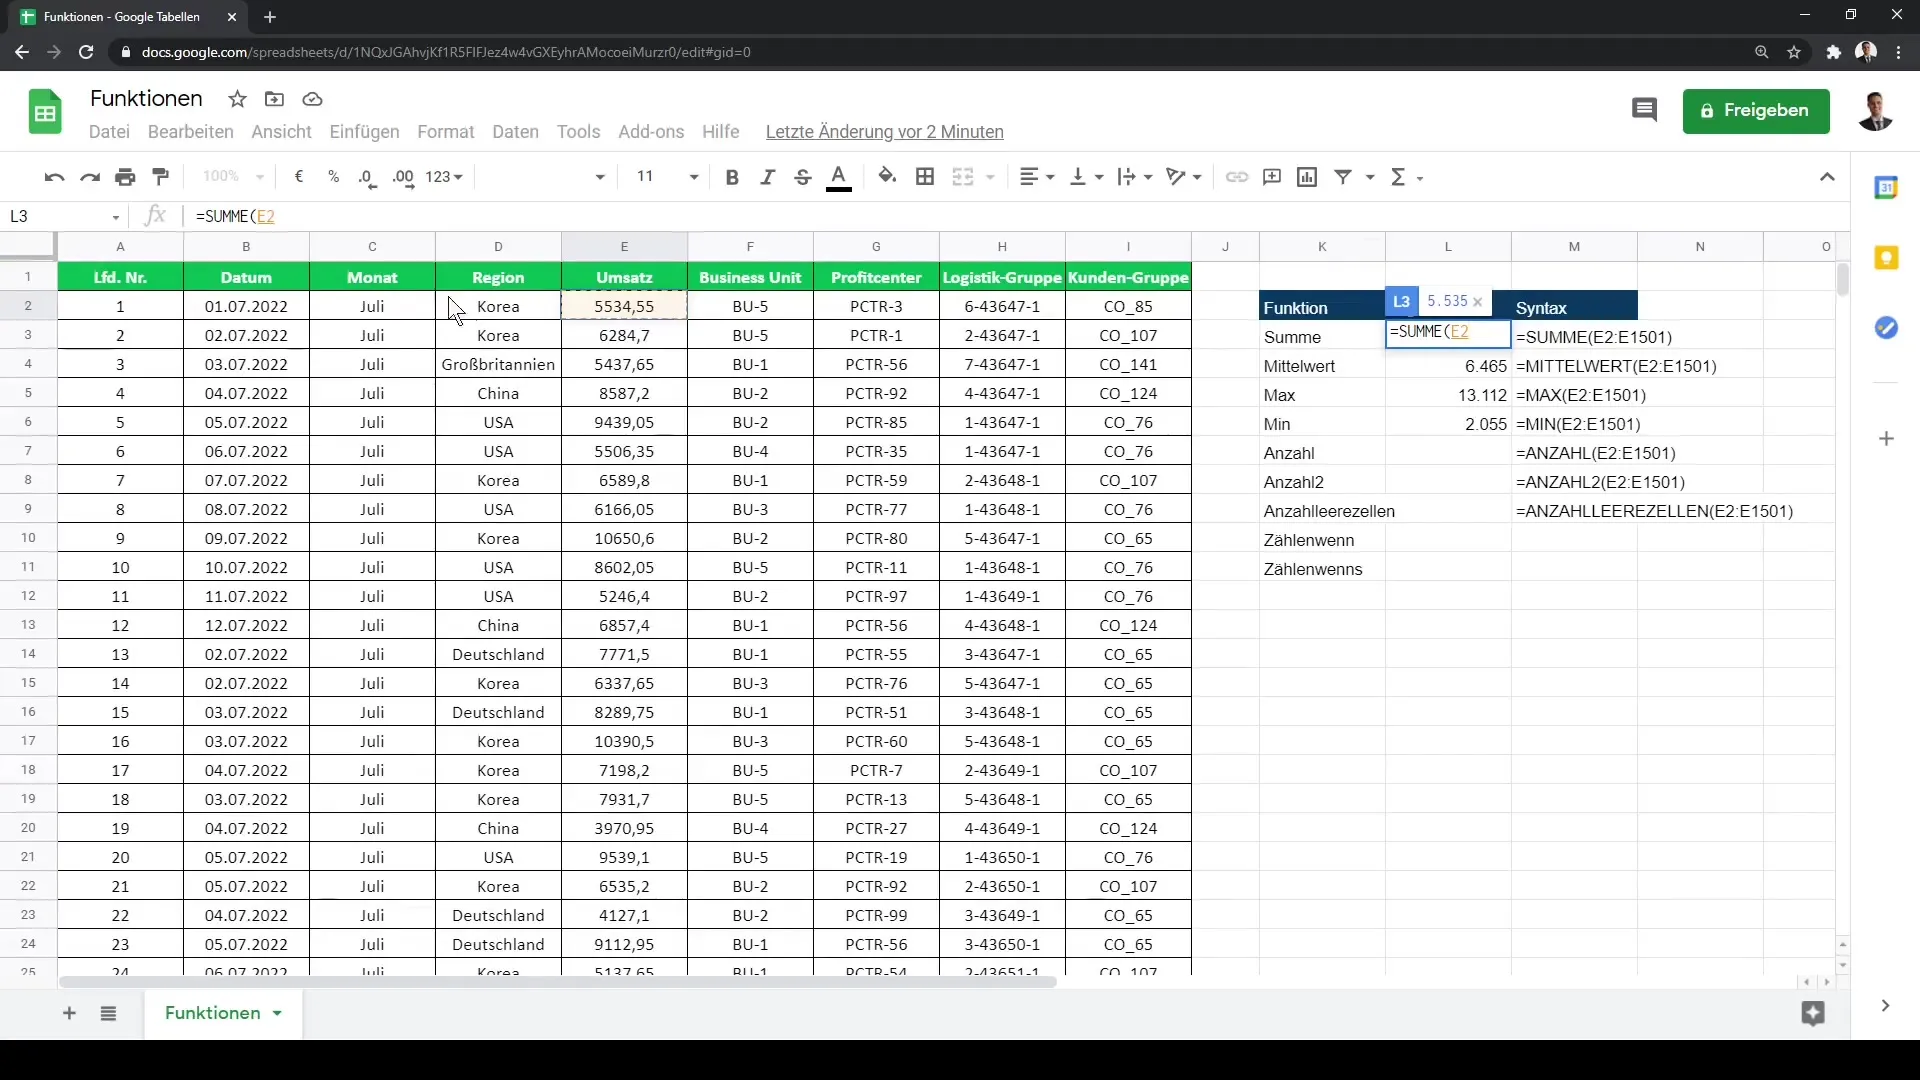
Here's a trick: Use the keyboard shortcut Ctrl + Shift + ↓ to quickly select the range up to the last filled cell. This saves time and makes the work easier, especially when dealing with large datasets.
Step 3: Using the master formula
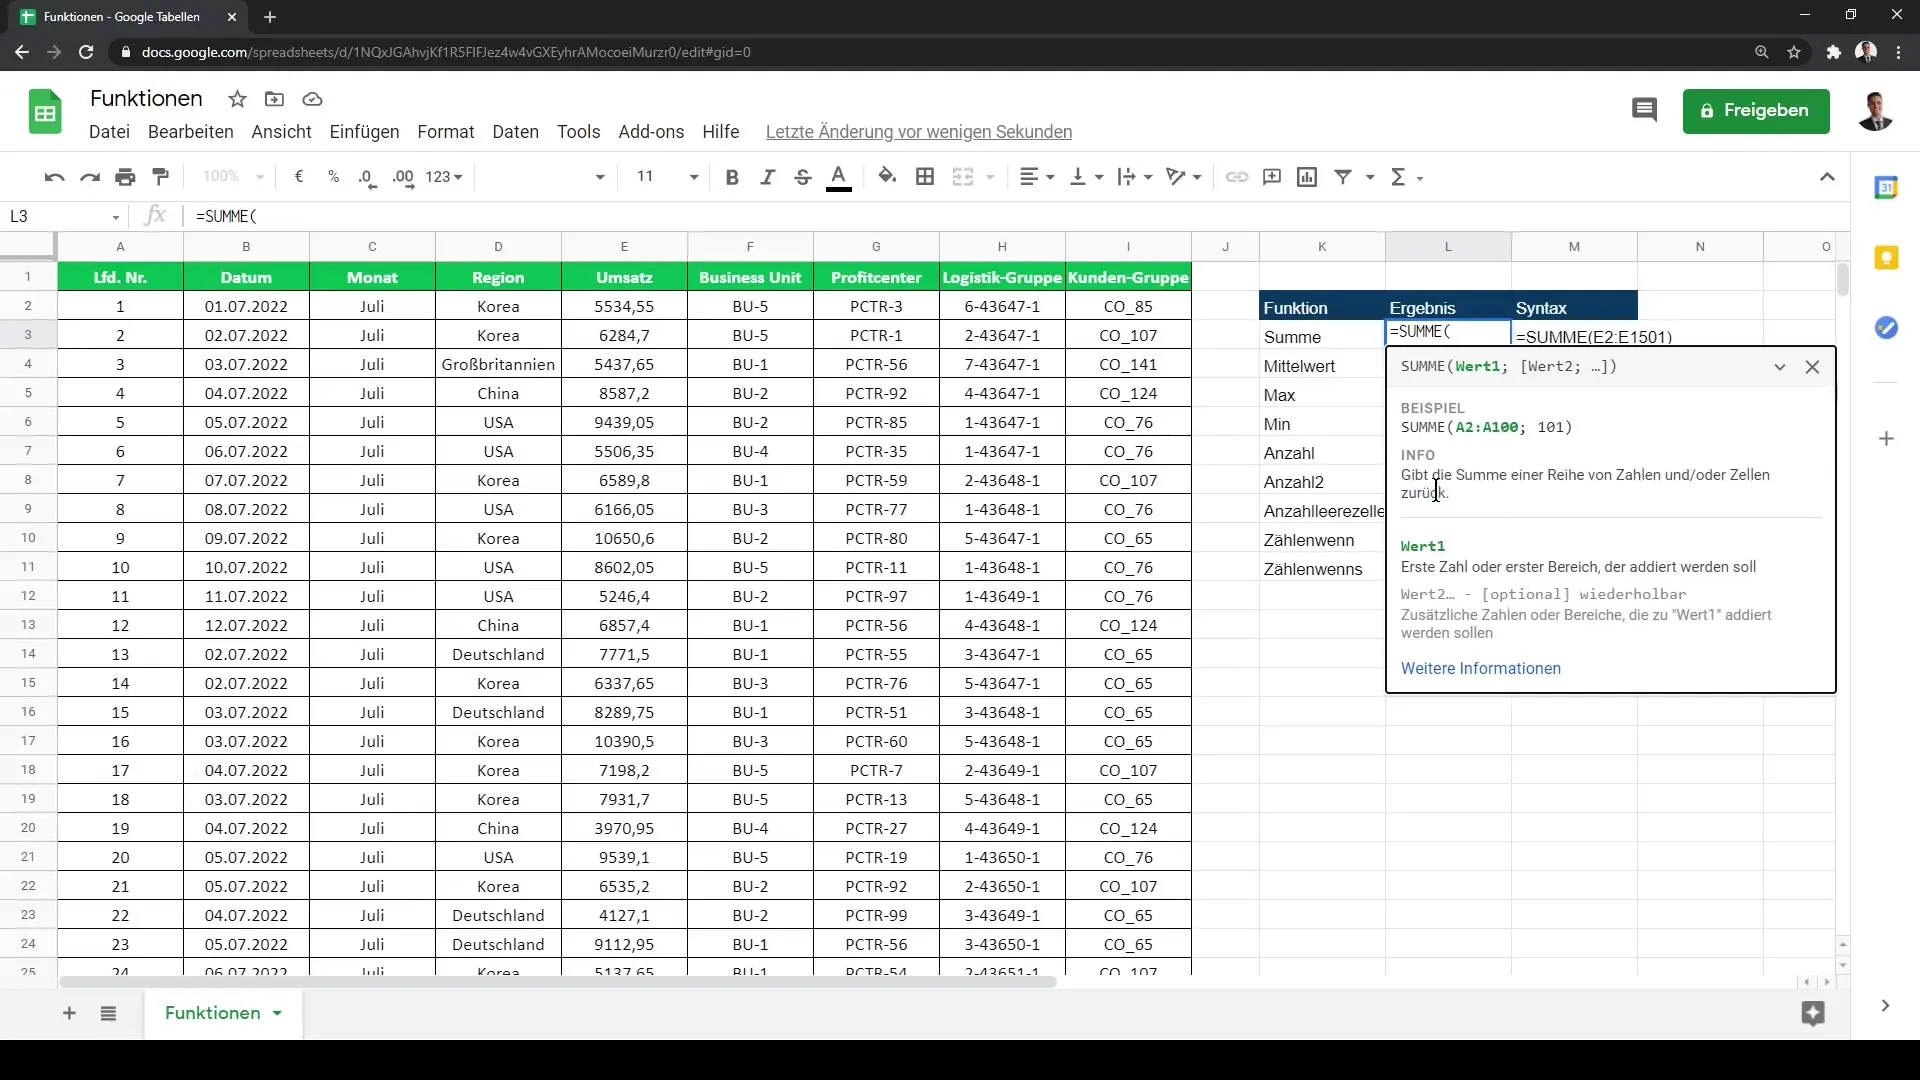
Now that you have set the range, you can press the Enter key to perform the calculation. Let's take a closer look at the =SUM(...) function.
When using the function, you often see the syntax displayed, explaining the parameters needed. You can activate the help function with F1 to learn more about the selected formula.
Step 4: Aggregate functions for analysis
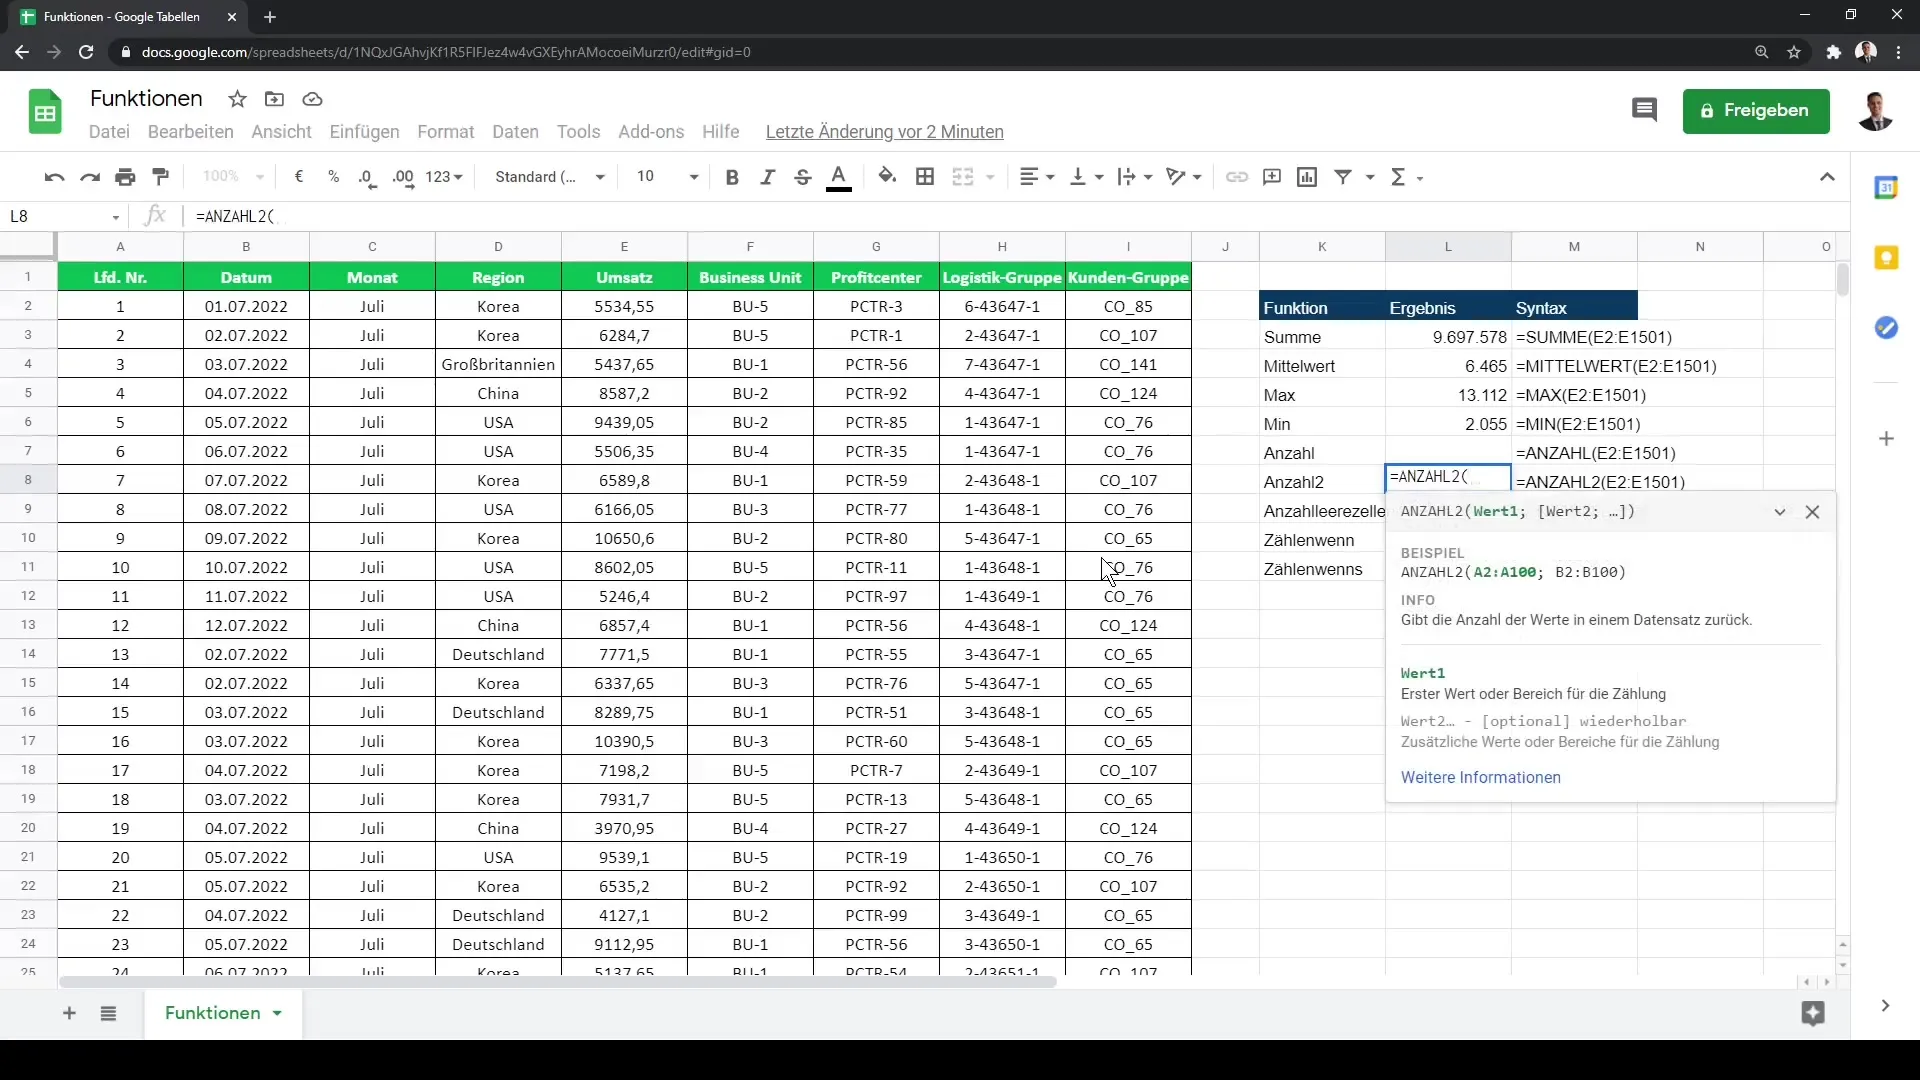
If you need an overview of a lot of data, you can use statistical functions COUNT(...), COUNTA(...), MAX(...), and MIN(...). Each of these functions has its specific area of application.
For example: COUNT(...) counts only numerical values, while COUNTA(...) counts all cells containing values, regardless of type.
Step 5: Using filter functions
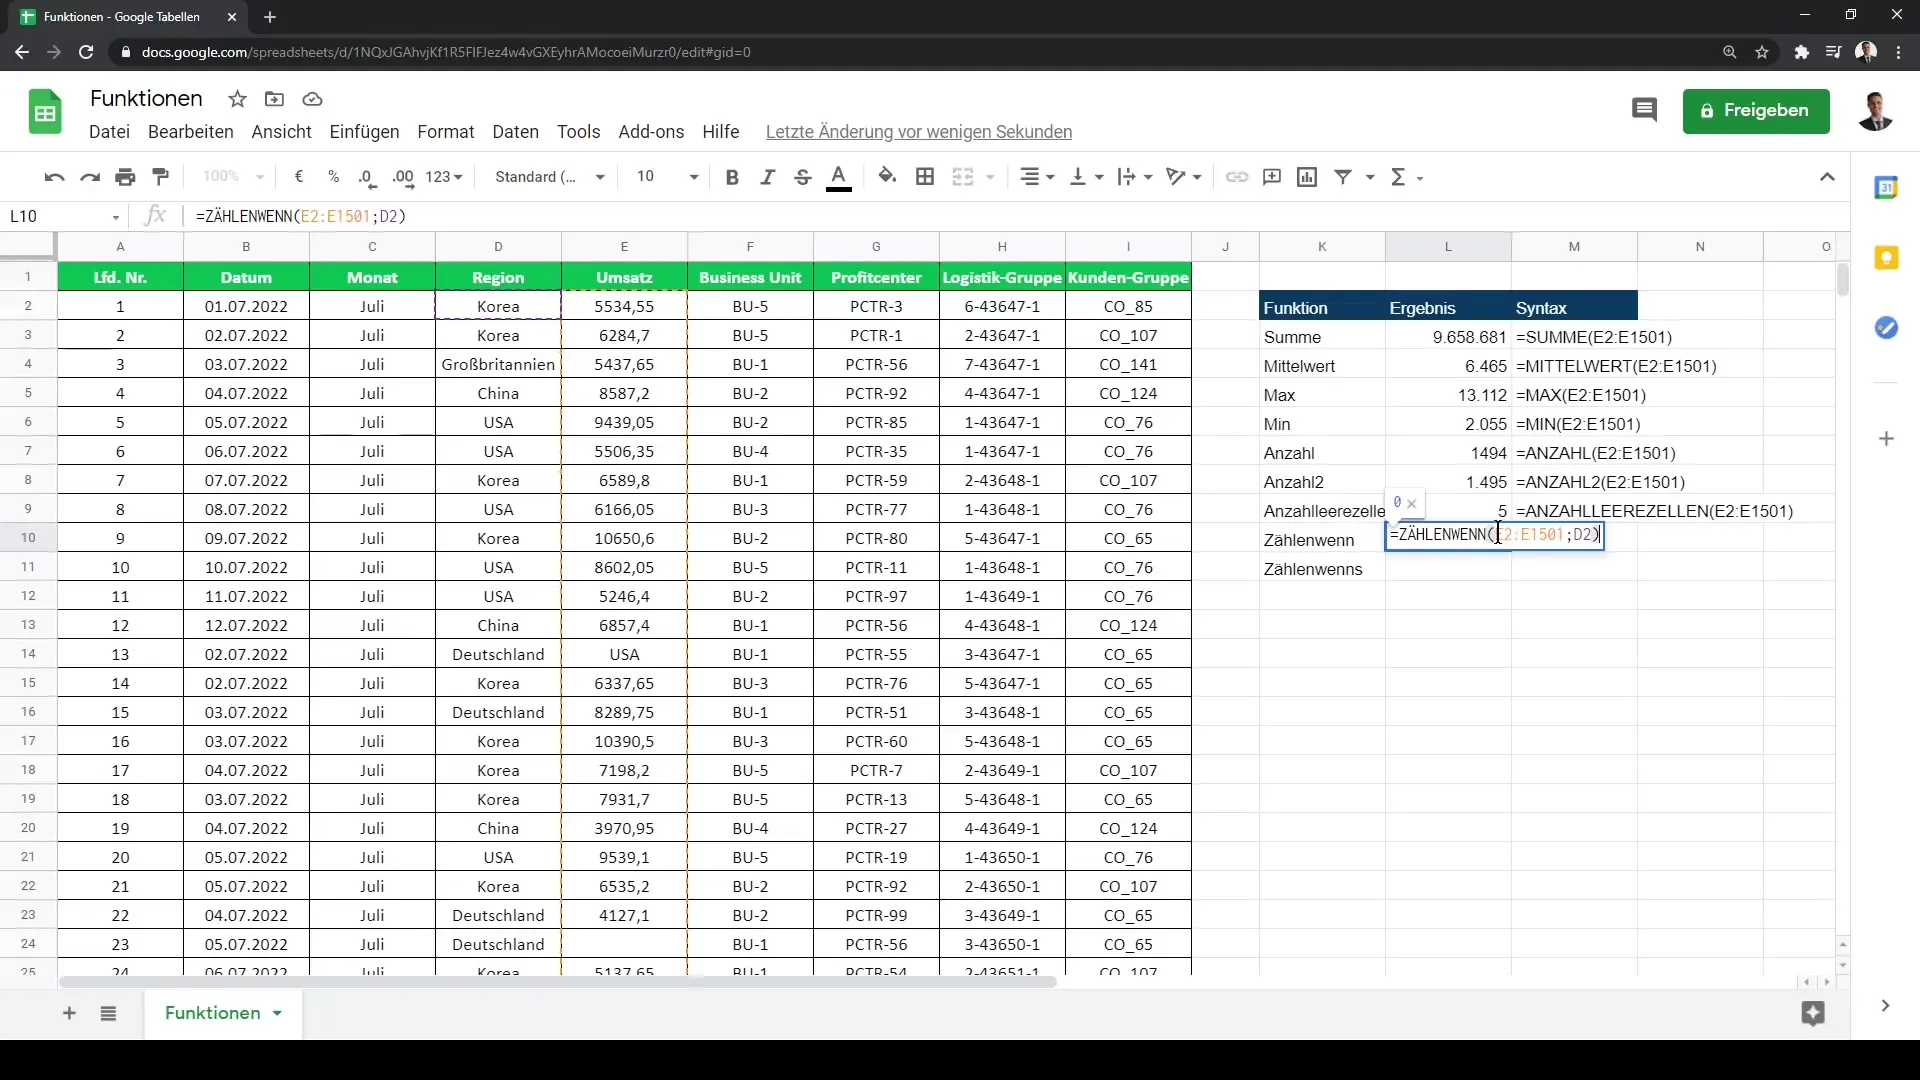
Another important aspect is filter functions, such as the COUNTIF(...) function. This is particularly useful when you want to count only specific criteria.
Suppose you want to determine the number of sales in a specific region, for example, Korea. With the function, you select the entire range and then define your criterion.
Step 6: Conditional counting and Complex conditions
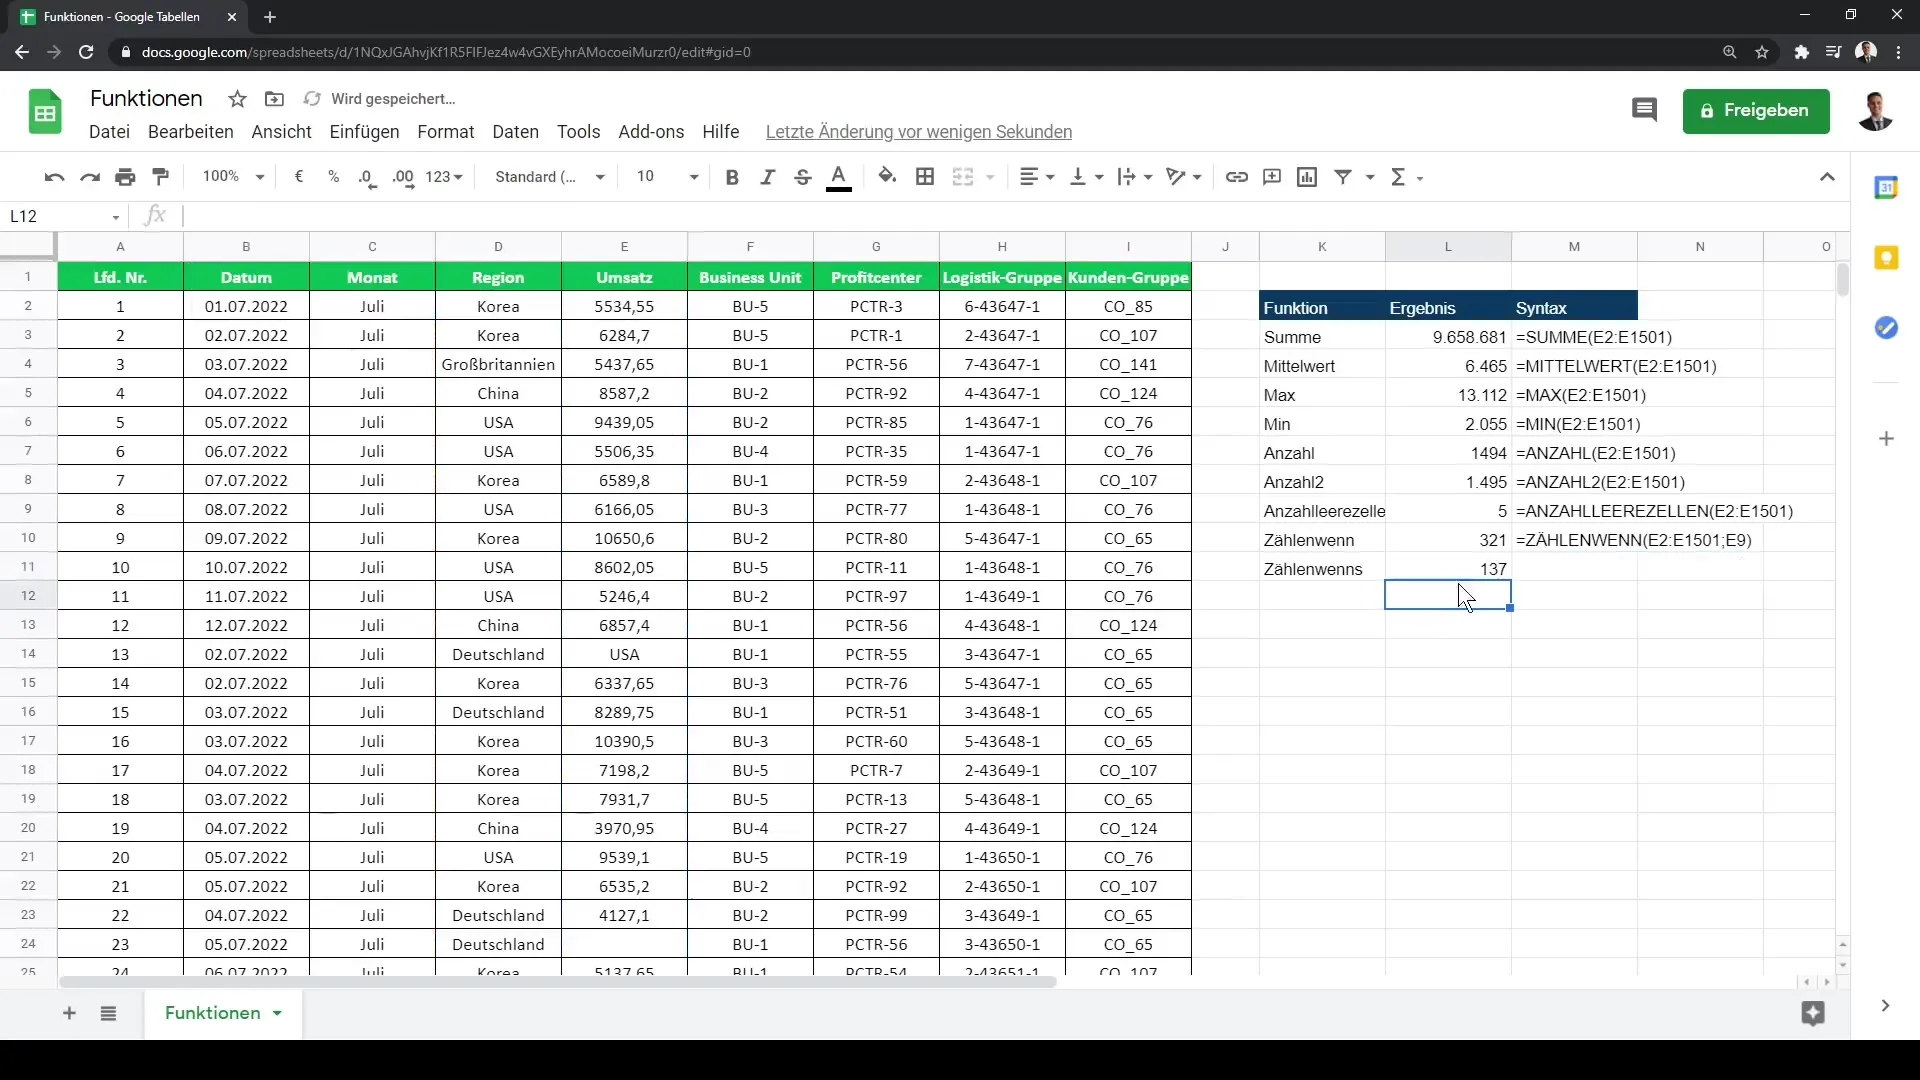
If you have multiple conditions, you can use the COUNTIFS(...) function to perform even more specific analyses. For example, you can select people living in a specific country whose revenues exceed a certain threshold.
Step 7: Using Shortcut Options
Finally, I want to remind you that you don't always have to enter the exact cell addresses. For example, if you want to select all cells in a column, you can simply use D:D and E:E to reference the entire column. This way, your formula will automatically stay up to date as new data is added.
Summary
In this tutorial, you have learned how to efficiently use Google Sheets by applying basic functions and useful shortcuts. The precise selection of functions and cell ranges, as well as the use of aggregate functions and filter-based functions, are crucial for quick and effective data analysis.
Frequently Asked Questions
How do I start a function in Google Sheets?You begin entering with the equal sign = followed by the function.
How do I select the cell range for a function?You can use the mouse or the Ctrl + Shift + ↓ shortcut to quickly select the range.
What is the difference between COUNT(...) and COUNTA(...)?COUNT(...) counts only numerical values, while COUNTA(...) counts all non-empty cells.
How can I use filter functions?You can use COUNTIF(...) or COUNTIFS(...) to count data based on specific criteria.
Can I reference entire columns?Yes, you can use D:D for the entire column D, which makes it easier to use.
