Note: The tutorial "Optimize mask and paint water droplets" is a text version of the accompanying video training by Marco Kolditz. The texts may therefore also have a colloquial style.
Step 1
Now the unsightly hairs on the mask should be removed. To do this, go to the "Mask" folder, click on the top layer and create a new layer. Rename it "Remove hair". On this layer, areas of the skin are duplicated or cloned and these then cover the hair to be seen. To do this, zoom into the image and select the repair brush (not the area repair brush!).
Select Normal as the mode and pick up the current layer and the layer below it. This means that there is nothing on the current layer anyway, so only the content of the layer below is used, i.e. that of the mask. Using the brush and a size that suits you, pick up an area, for example by holding down the Alt key, press on the area, let go and paint over a hair. That hair is gone. Do this with all the hairs and keep changing the point where you pick up the color so that the same copied area is not used again and again.
You can work your way through the entire mask in this way. Of course, you can also take your time here..webp?tutkfid=66314)
The nice thing about this variant is that you are not working destructively and can remove changes at any time.
If you get a little over the edge, undo it again. It is best to zoom in closer to the edges and make the brush smaller so that you can work more precisely.
If you wanted to work directly on the "Mask" layer, you would basically either have to rasterize it into a normal layer - and then it would no longer be a Smart Object - or you could duplicate the layer as a rasterized layer and then work with the Area Repair Brush, for example. Then you would no longer have to record anything with the Alt key, but would simply paint over the hair and it would be corrected. But if you don't want to work destructively on a separate layer, then the repair brush is the first choice.
The result looks really great.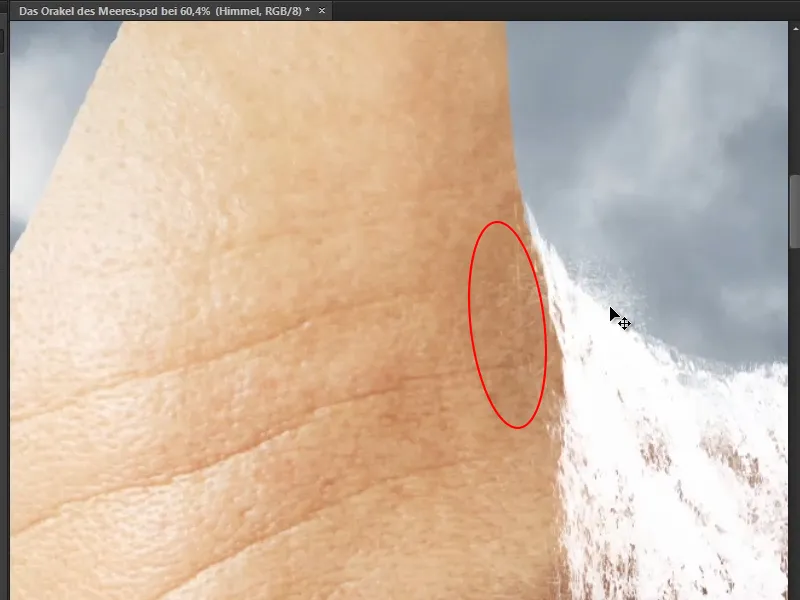
Marco deliberately left the very fine white hairs as they look a bit like the splashes from the waterfall.
Step 2
The next step is really tough. As it is very time-consuming to paint water droplets individually into a picture, Marco created a graphic style here in Photoshop some time ago that makes it very easy to paint water. This graphic style is included in the tutorial - so you can start using it straight away.
Now create a new group and rename it "Water Drops". Put a new layer in there, which you also call "Water drops". And these drops of water will also be the ones that slide down your forehead.
Use a normal brush at 100% hardness and black foreground color, but the color doesn't matter. You can then adjust the size as you need it. Now paint along the contour of the mask. Of course, this is not water yet, but the basis for it. Now paint what will later become drops.
Of course, you always have to look at the surface and how the water could actually run along it. So paint along the surface. The water will probably collect a little in a crease in the forehead, for example, so let it flow a little to the side (1), then it will continue to flow downwards and remain in the next crease until it reaches the final drop (2). Some drops also flow into others (3).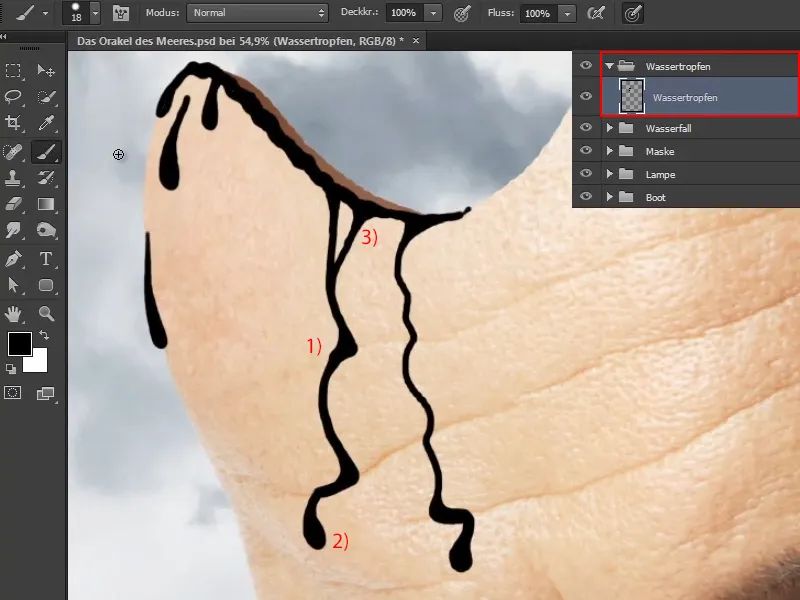
Step 3
And now you turn it into water.
Click on Window>Styles. If you have not yet imported Marco's style, click on the small list icon at the top right and select the preset manager ...
There you will see all the styles already installed. Click on Load ... and load the style that Marco has included in this tutorial into your Photoshop.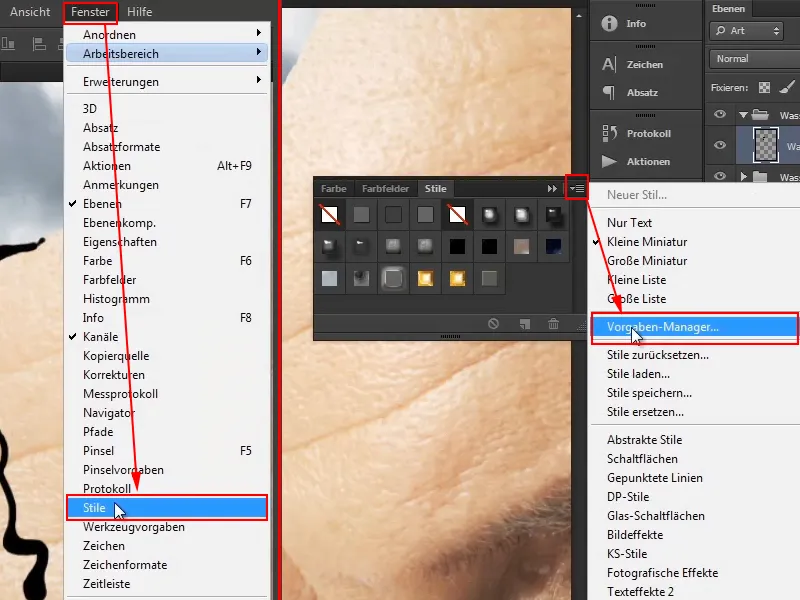
Then select the water effect.
The result doesn't look very spectacular yet, but the reason for this is that effects don't necessarily scale well. If you create such an effect yourself on a small image, this does not mean that the effect will work the same on a large image.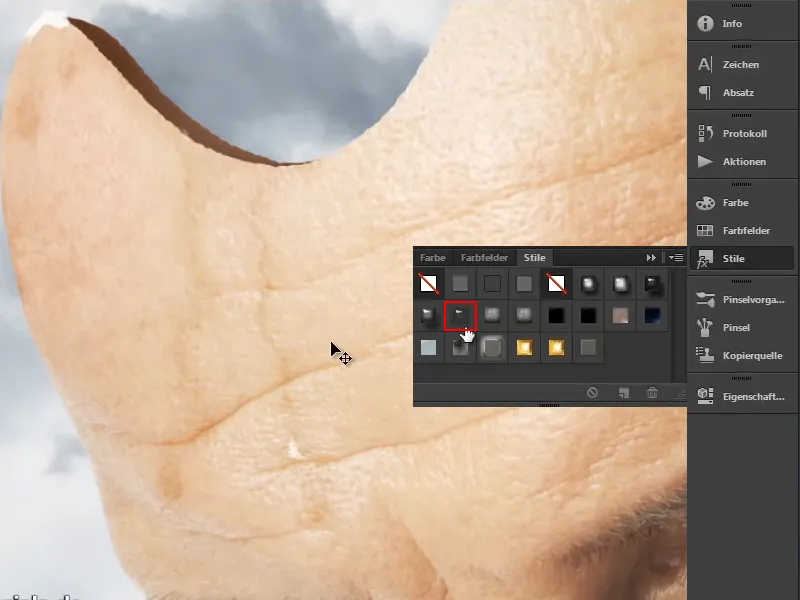
Step 4
All the effects that Marco has set are now listed under the "Water droplets" layer. If you can't see them, first click on the small arrow symbol on the far right to expand the list.
Right-click on Effects to go to Scale effects ... and then this little dialog box will pop up. It's often enough to expand the bar by clicking on the arrow and dragging the slider a little to the left. At 20, it looks really good - like water.
Confirm with OK.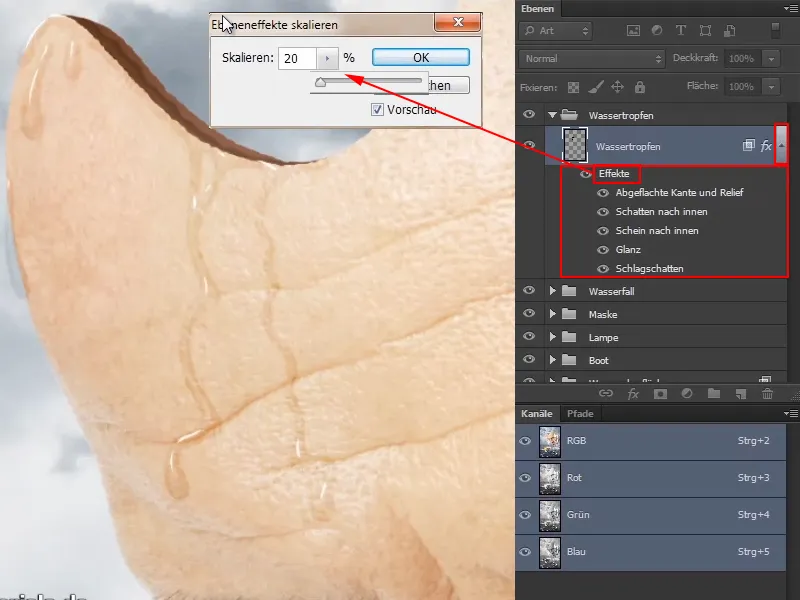
Step 5
You can now paint in more water droplets at any time and of course it looks really fresh. This is also really great for food photography, for example, if you have an apple and you put a drop of water on it or on some vegetables, then of course it looks really fresh. Of course, this also works for cocktail glasses, ice cream, whatever.
In this way, you can now let the water run down everywhere along the mask. You can also make it a bit more flat if you color it in. Go along the mask and you will immediately see the glossy effect. In some places a little more than in others, of course, but that's also the case in reality. You can see less in the shadow than in the light.
Now get the mask really wet, as if it had just come out of the sea. You can take your time again and do it exactly as you like.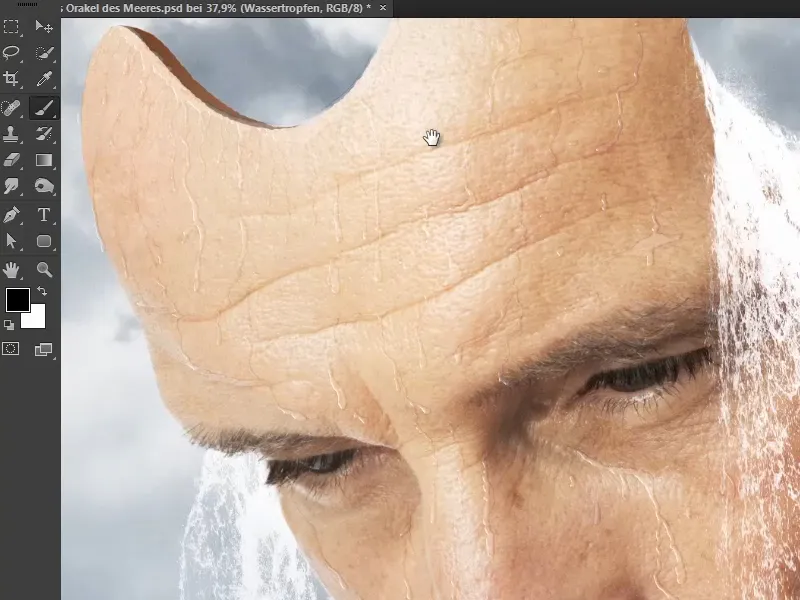
The water runs down the forehead and Marco has also taken a look at the wrinkles. It runs down the nose to the tip of the nose and under the eye to the mouth.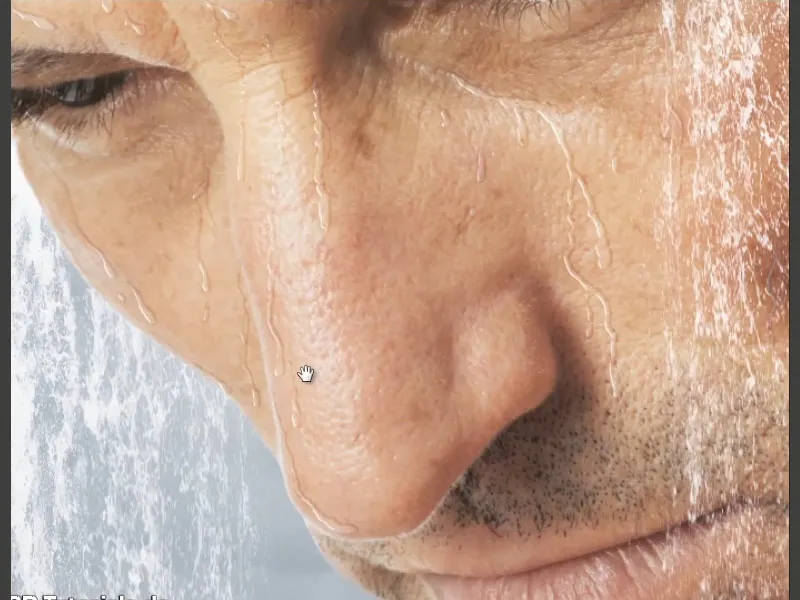
As a result, the face now looks much wetter than before.
Finally, Marco has also put all the water droplets into a "water" group and that concludes the chapter on water and water droplets.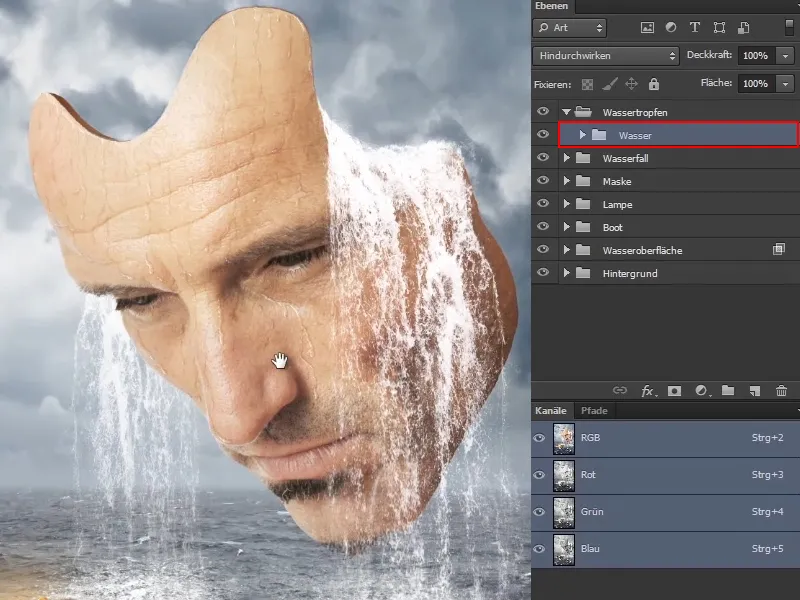
The next part of this tutorial series will focus on the lighting mood in the image.
