Here is an overview of the individual chapters:
Part 1 - Photographing "models
Part 2 - The sensible (!) equipment
Part 3 - Finding suitable models
Part 4 - Finding a location
Part 5 - Developing image ideas
Part 6 - Image composition tips
Part 7 - Styling tips
Part 8 - Skillfully lighting models
Part 9 - Efficient teamwork
Part 10 - Posing tips
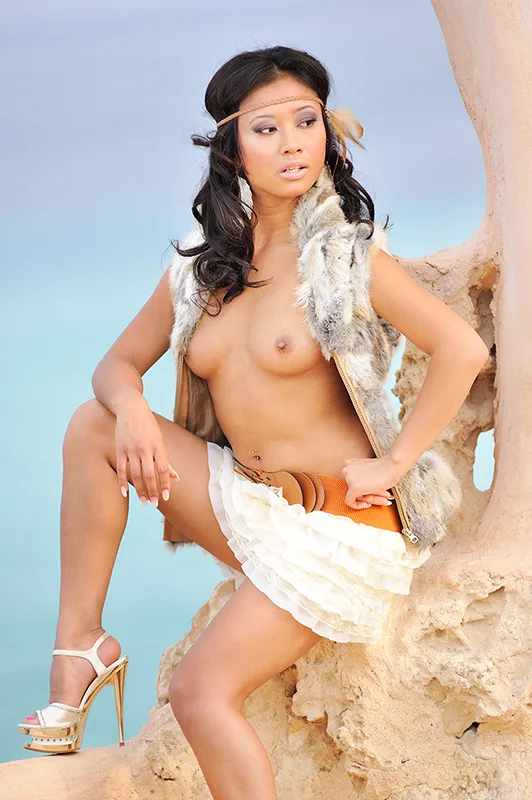
Figure 10.1: Arms and legs (and knees and elbows) should not point directly into the camera; this makes them look small and stubby (or in the case of knees and elbows: bulky and unattractive). Similarly, they should never be fully extended; this looks stiff, awkward and unflattering. It is better to always keep your arms and legs (slightly) bent. Tips like these will help your model to strike beautiful and photogenic poses on her own. Nikon D3S with 2.8/300mm Nikkor. 1/800 second, Blender 4, ISO 500.
(Photo © 2011: Jens Brüggemann - www.jensbrueggemann.de)
If I explain to a model, for example, that the image effect of almost all poses is significantly greater if a certain amount of body tension is built up (because the model then appears much more present), then they understand this and can implement it accordingly when posing.
Or when I explain to a model that the leg on which all the weight is placed looks thicker than the other leg, which has no weight to bear. And that it is therefore better to hold the leg that is not carrying any body weight closer to the camera (than the other, which looks fatter).
Models understand such explanations and will endeavor in future to pose in such a way that it looks as advantageous as possible.
Figure 10.2: It is often the stretched poses with a straight, pushed-through back that look best. Beginner models have no way of knowing this, which is why such tips from the photographer help the model to do a better job. Modeling is more strenuous than most people think. Regular short breaks are therefore important so that the model doesn't get tired and, if possible, can hold out for shoots that last the whole day. Nikon D3 with 2.8/24-70mm Nikkor with a focal length of 24mm. 1/125 second, Blender 22, ISO 200.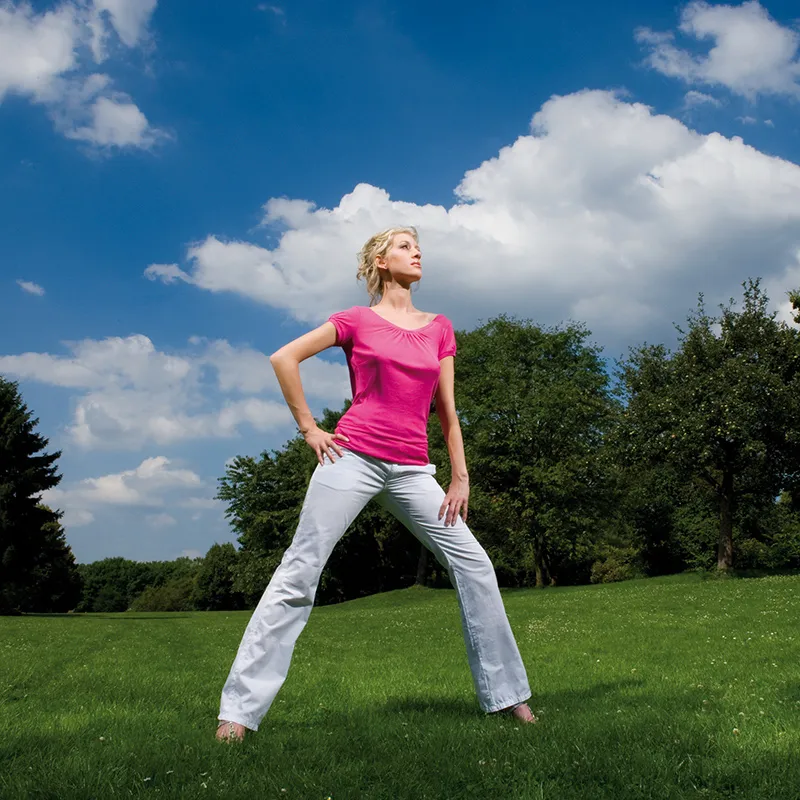
(Photo © 2010: Jens Brüggemann - www.jensbrueggemann.de)
10.1 Giving free space
Sometimes it is better to give the model a lot of freedom and just "let them do it"! The photographer will then only intervene to make corrections. With this approach, it is important that the model is constantly moving (preferably to upbeat music) and changing poses fluidly.
The most common mistake made by models using this approach is that as soon as a new pose is struck, the model waits for the photographer to press the shutter button. However, this is counterproductive and would take the elegance out of the movements and make them look choppy. It is therefore better to tell the model to move all the time (to the music) and only press the shutter occasionally.
Figure 10.3: If you take photos in this way, you will ensure that the model only adopts poses that look natural (and not stiff and predetermined). However, you should be aware that the photographer can only make a few corrections in this way and that the instructions must be given very quickly. Nikon D4 with 1.4/50mm Nikkor. 1/160 second, Blender 7.1, ISO 100.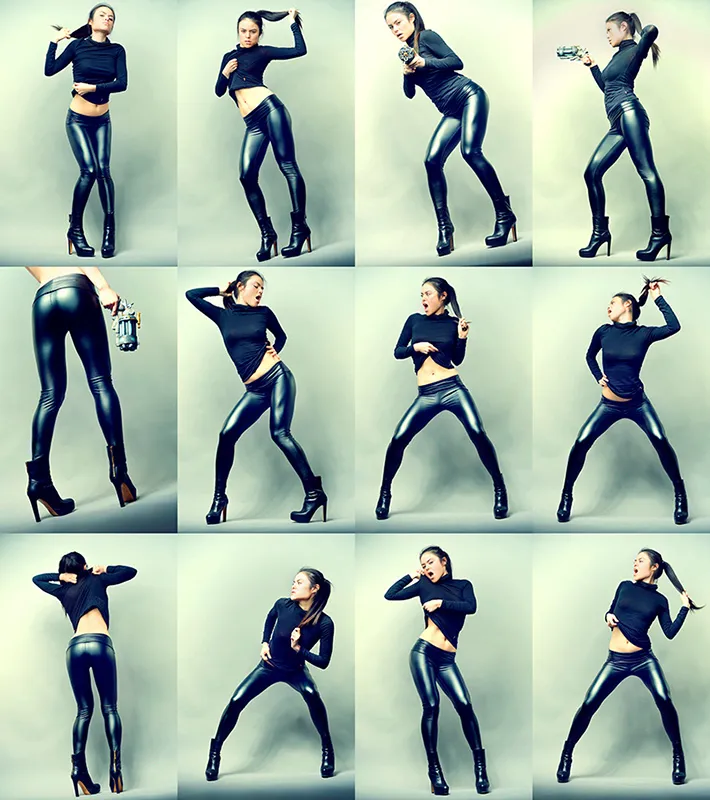
(Photo © 2013: Jens Brüggemann - www.jensbrueggemann.de)
10.2 Optically lengthen legs
I have photographed many great models who were "only" 1.65m tall, for example. And yet they were beautiful, graceful and had great charisma. Models don't always have to be exactly the right size for photo shoots. What is more important is photogenicity, i.e. presence in the photos.
However, the models who are under 1.70 m tall would all like to be taller. That's why they are usually quite enthusiastic about the possibility of looking taller with the help of a wide-angle lens.
If you photograph a standing model from a low pose, the legs are optically stretched. This is due to the distortion of the wide-angle focal lengths. The prerequisite is that the photographer holds the camera tilted upwards from below.
Since not only the legs but also (because they are closest to the bottom edge of the image) the feet (or shoes) are distorted, the photographer must be careful not to exaggerate this effect.
Figure 10.4: I was also lying at the model's feet in this photo. Due to the "discreet" wide-angle focal length of "only" 32mm, the effect of the optical leg extension is clearly visible, but not so disturbing that the feet look disproportionately large. Nikon D3 with 2.8/24-70mm Nikkor at a focal length of 32mm. 1/160 second, Blender 8, ISO 200.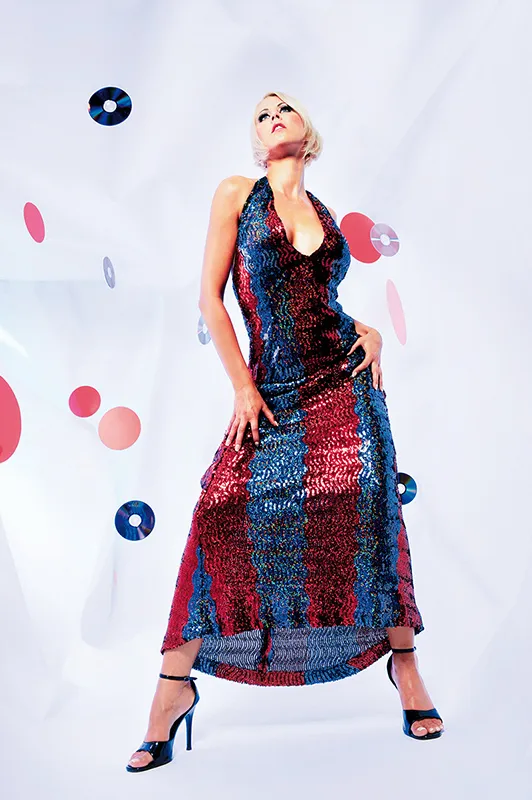
(Photo © 2009: Jens Brüggemann - www.jensbrueggemann.de)
Figure 10.5: The effect can be intensified by using a narrower image format than usual. This model was at best 1.66m tall. Thanks to the wide angle and low perspective and the cropping tool, it looks almost "huge". Nikon D3S with 2.8/24-70mm Nikkor at a focal length of 34mm. 1/160 second, Blender 4, ISO 2500.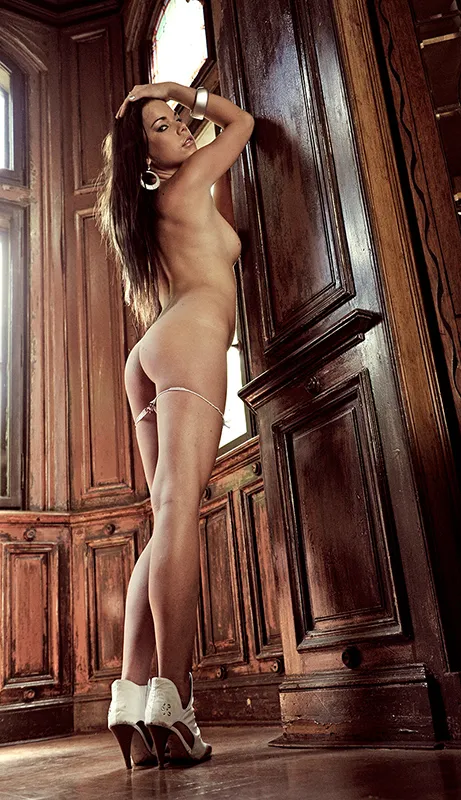
(Photo © 2010: Jens Brüggemann - www.jensbrueggemann.de)
10.3 Photographing less slender models
Some models are a little fatter than usual. However, I don't think that's a bad thing, because if the proportions are right, it can look very good!
However, if you want to photograph such models slimmer than they are, you should make sure that the poses are always very elongated. Many male photographers are familiar with the beer belly effect: if you want to pull in your stomach, you won't just achieve this by tensing your abdominal muscles. They also take a deep breath, which raises the ribcage, and stretch the spine, which adds a few centimetres to the overall appearance (and makes you look slimmer).
Another trick is to work with clothing that hides any problem areas. For example, female models can work with a mid-length skirt instead of hot pants (if the model has problems with her thighs).
The optical lengthening of the legs described above can also work wonders and make models look much slimmer.
Figure 10.6: Poses that are as elongated as possible make even models who are not quite so slim look attractive. Nikon D3X with 2.8/14-24mm Nikkor with 14mm focal length used. 1/250 second, Blender 20, ISO 100.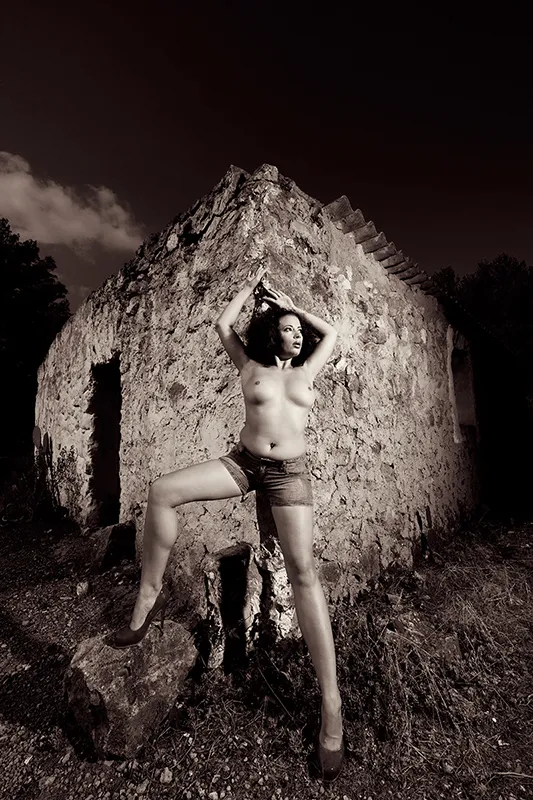
(Photo © 2011: Jens Brüggemann - www.jensbrueggemann.de)
10.4 Photographing breasts and buttocks beautifully
In nude and erotic photography, the main focus in many shots is on taking beautiful pictures of breasts (for female models) and buttocks (for male and female models alike).
According to the general ideal of beauty, the bottom looks more attractive if it is photographed with a crisp round shape. It therefore has to be stretched out, which is quite strenuous and causes back pain.
Even with models who complain about their buttocks supposedly being too big, it is photographically more advantageous to stretch them out and make them round. This costs such models a lot of effort, but the alternative would be to pull in the buttocks muscles, which creates dents and looks misshapen (and therefore unattractive).
So: even a large bottom looks more advantageous in photos if it is stretched out! This applies equally to male and female models.
Figure 10.7: In this photo, you can see very clearly what it takes to push through the back so that the bottom sticks out nicely and looks crisp and plump. Most (beginner) models make the mistake of bending their upper body forward to stick out their bottom. But it looks better if the upper body is kept upright. Although this is much more strenuous, motivated models are happy to accept this for more beautiful photos. Nikon D3S with 2.8/24-70mm Nikkor at a focal length of 36mm. 1/160 second, Blender 4.5, ISO 2500.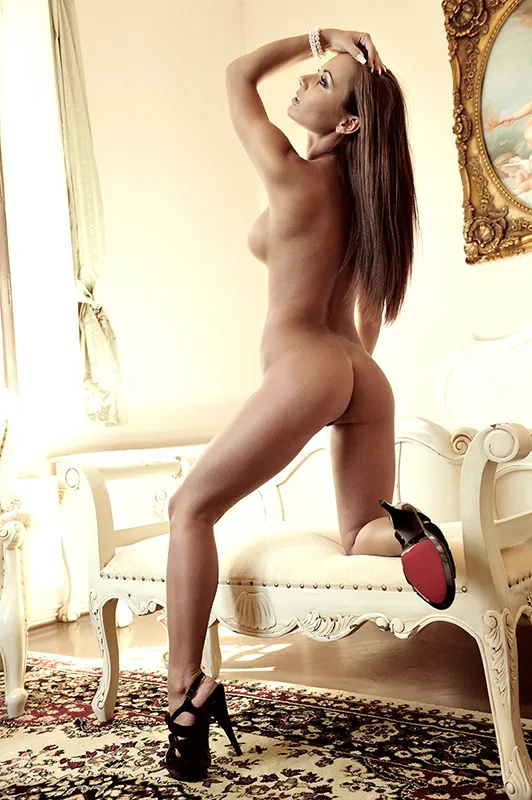
(Photo © 2010: Jens Brüggemann - www.jensbrueggemann.de)
Figure 10.8: Even when lying down, the buttocks can be stretched out as described above. The best way to find out how strenuous this is is to try it out yourself lying down. This will also give you a better understanding of the models' performance. And learn why photographers should be very quick when taking such pictures. Nikon D3X with 2.8/70-200mm Nikkor at a focal length of 145mm. 1/160 second, Blender 22, ISO 100.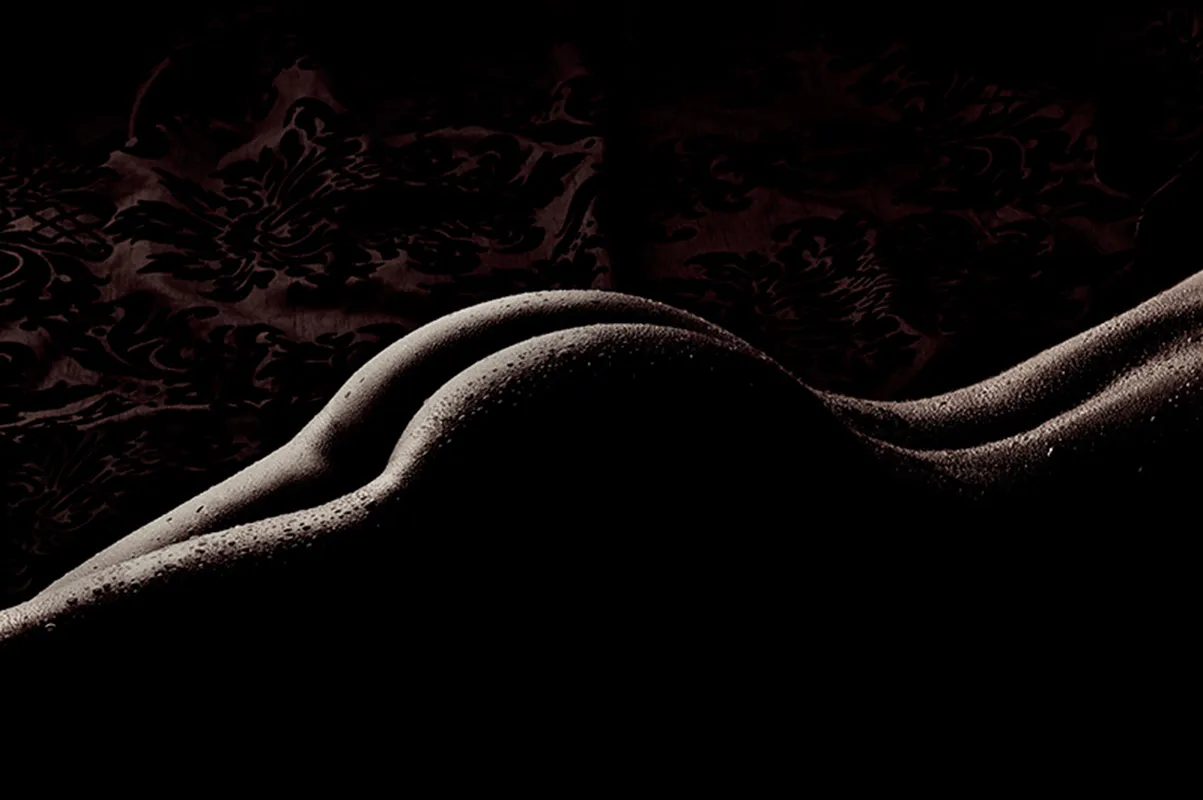
(Photo © 2012: Jens Brüggemann - www.jensbrueggemann.de)
Many models have problems with the size of their breasts. I usually can't understand this, because it's not the size that matters, but the shape. Even comparatively small breasts look very nice if the shape is right and they don't sag.
Even quite large breasts are often considered too small by their owners, which I also don't understand at all. This seems to be more of a psychological problem for many women. (I know from many conversations with men that large breasts may catch the eye unintentionally, but they are not preferred by the vast majority of men. This is especially true for breasts with silicone implants).
In photographs, breasts often look more advantageous if the arms are held up when posing and sagging is thus avoided.
Figure 10.9: If the arms are hanging down, the breasts of female models do not always look nice and firm. It is then advisable to hold the arms up (for example at the head). This lifts the breasts attractively. Nikon D3S with 2.8/105mm Micro Nikkor. 1/80 second, Blender 5.6, ISO 200.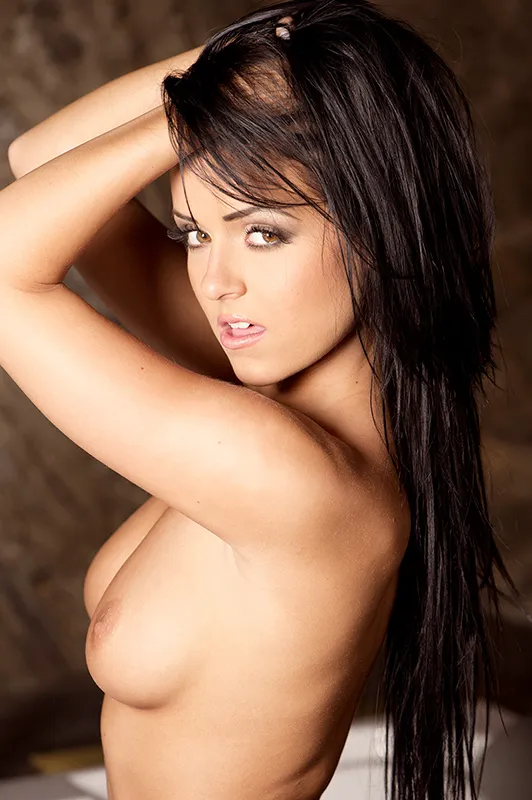
(Photo © 2010: Jens Brüggemann - www.jensbrueggemann.de)
Figure 10.10: When lying down, even large breasts often look flat. So if you are photographing a model who has complexes due to the size of her breasts, you should not photograph her lying down. Or have them hold their hands or a cloth (or underwear) in front of them. Nikon D3S with 2.8/24-70mm Nikkor with a focal length of 55mm. 1/125 second, Blender 5, ISO 200.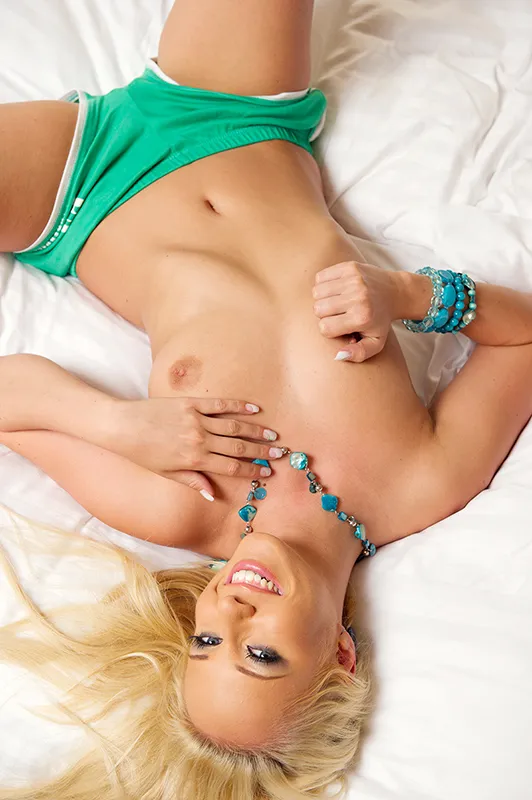
(Photo © 2010: Jens Brüggemann - www.jensbrueggemann.de)
Figure 10.11: Even though I personally don't like silicone breasts at all, they have advantages (from a photographic point of view) over natural breasts when lying down: they don't collapse.
(However, the "connoisseur" can see immediately that they cannot be natural breasts ...). Nikon D3S with 2.8/105mm micro Nikkor. 1/160 second, Blender 4, ISO 250.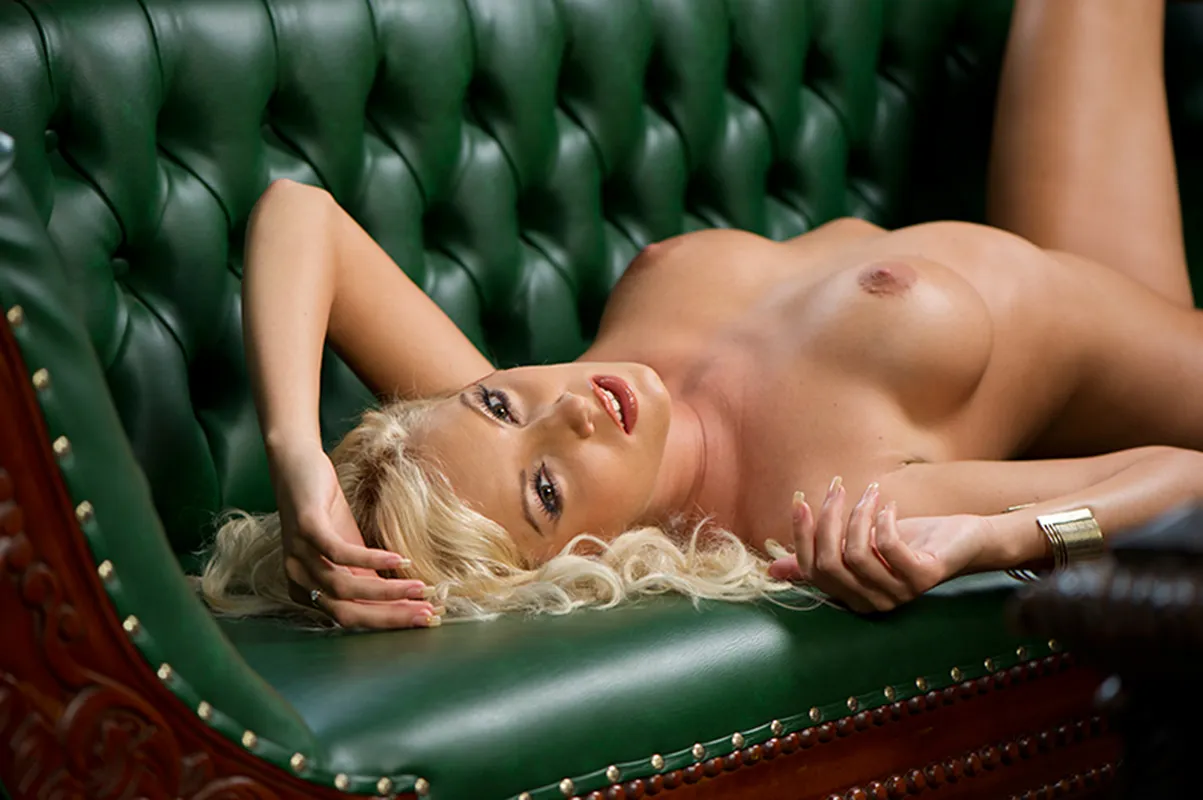
(Photo © 2010: Jens Brüggemann - www.jensbrueggemann.de)
10.5 Cool and unusual poses
The following applies to model poses: What probably looks pretty stupid in real life usually comes across as pretty "cool", "casual" and expressive in the photos!
In this respect, modeling is similar to theater: it's the big gestures and exaggerated poses that count. You should therefore give your model the advice - if it suits the content of the picture - to act as exaggeratedly as possible. (The same also applies to facial expressions). Then your photos will look professional and modern.
If you are photographing against a simple (studio) background with virtually no props, this advice should be taken into account even more, because then the model is the center of attention and nothing distracts.
Figure 10.12: Some models, like Agnes here, have modeling in their blood. They have a feeling, almost automatically, for which postures are effective and photogenic. As a photographer, you only need to correct minor details, if at all. However, if Agnes were standing like this in the queue at the checkout at the bakery, I probably wouldn't have approached her, but would have given her a wide berth ... ;-)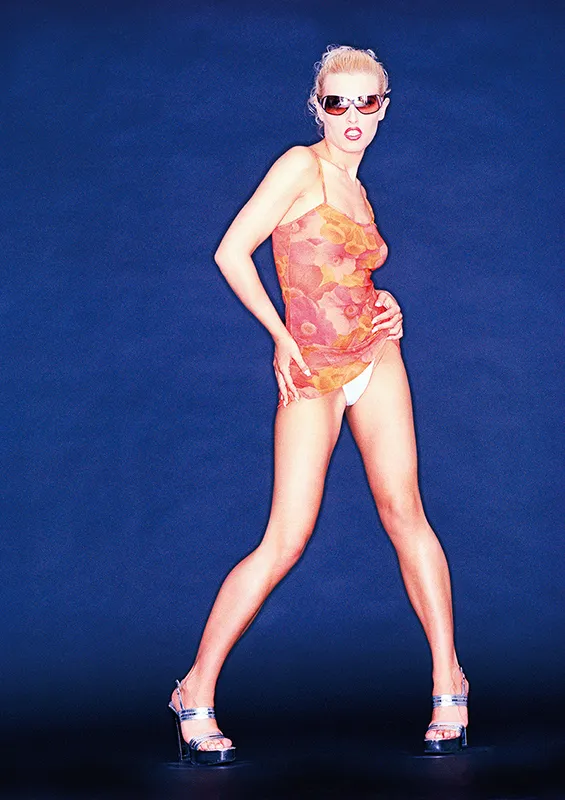
(Photo © 2006: Jens Brüggemann - www.jensbrueggemann.de)
Figure 10.13: The more theatrical, the better! Model poses can be fancy and exaggerated. This looks more effective (and therefore usually better) in the photos than "normal" postures. Nikon D3X with 2.8/24-70mm Nikkor at a focal length of 24mm. 1/80 second, Blender 22, ISO 100.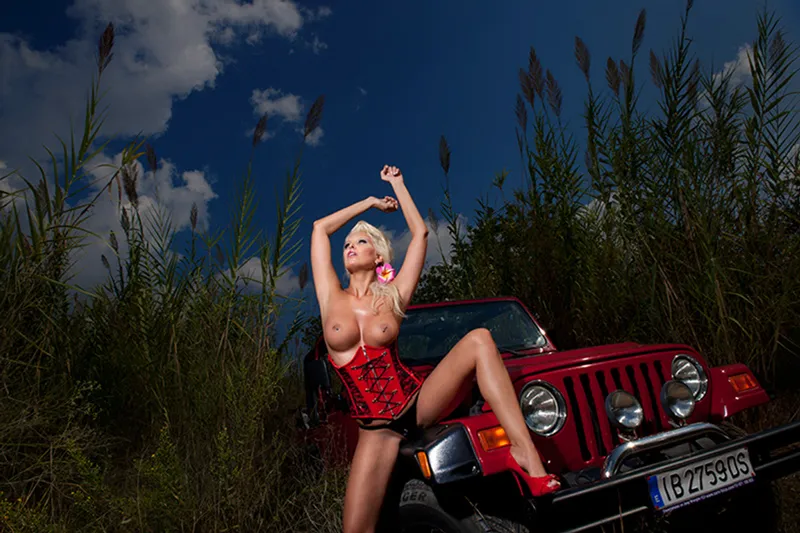
(Photo © 2011: Jens Brüggemann - www.jensbrueggemann.de)
Figure 10.14: Even completely exaggerated poses are suitable for photos. After all, anyone can do boring; so don't impose restrictions on yourself! I always tell my models: the crazier - the better! And such photo shoots are also more fun than normal ones that have been done 1000 times before. Nikon D3 with 2.8/24-70mm Nikkor with a focal length of 26mm. 1/125 second, Blender 4.5, ISO 200.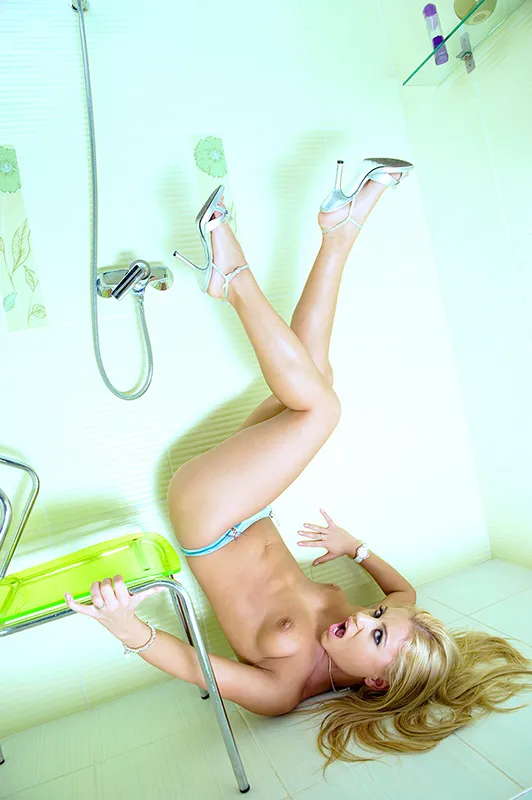
(Photo © 2010: Jens Brüggemann - www.jensbrueggemann.de)
10.6 Several models in front of the camera at the same time
The more models are in front of the camera (at the same time), the more difficult it is for the photographer to direct them all according to the picture idea. And it is even more difficult to instruct the models to strike the perfect poses (or to correct the poses struck according to the photographer's ideas). This becomes disproportionately more difficult with each additional model.
Figure 10.15: If two or more models appear in the photos, it becomes more difficult for us photographers to give instructions. It is then important that you direct the models quickly, loudly and clearly and, above all, precisely. Then they will listen attentively and stay focused, which is particularly important for photos of several people.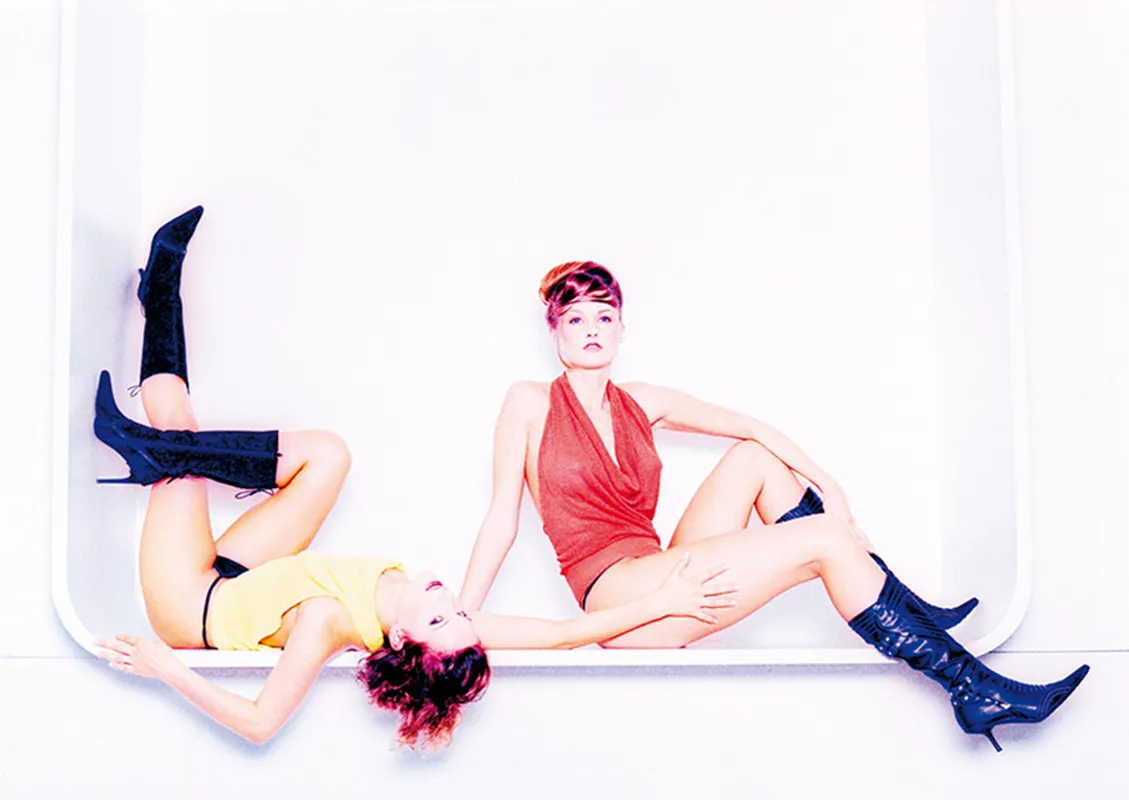
(Photo © 2008: Jens Brüggemann - www.jensbrueggemann.de)
Figure 10.16: It is easier if one of the models is in the foreground and the other in the background serves as staffage (decorative accessories). If the person in the background is slightly out of focus, the viewer's eyes will be drawn to the model in front, but the pose should be just right. Nikon D3X with 2.8/105mm Nikkor. 1/250 second, Blender 3.5, ISO 100.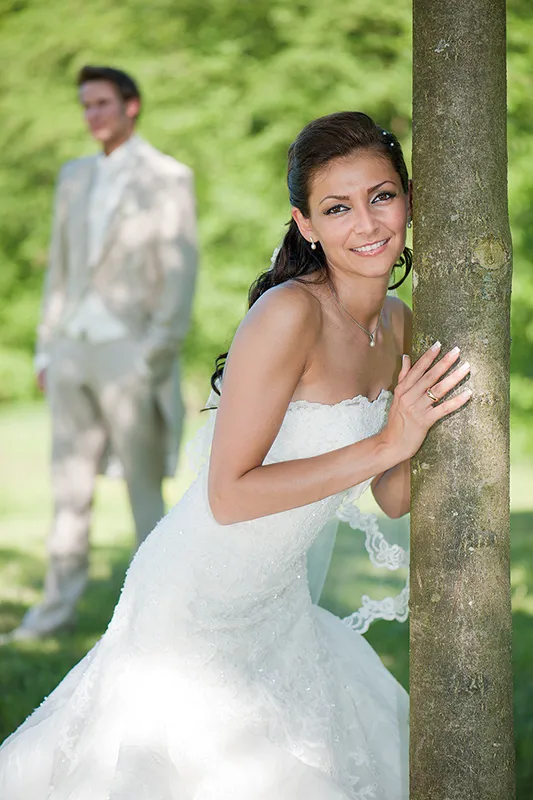
(Photo © 2010: Jens Brüggemann - www.jensbrueggemann.de)
Figure 10.17: The more models are photographed at the same time, the more difficult it is to give them all individual direction. Even the postures cannot be corrected individually without changing something in the other models. We humans are not born with the ability to keep still, and that doesn't just apply to children. It is then easier to give the models more freedom or, for example, to give everyone just one simple picture idea, which is then implemented together. The photo is a snapshot from one of my Ibiza workshops, which take place every year in May.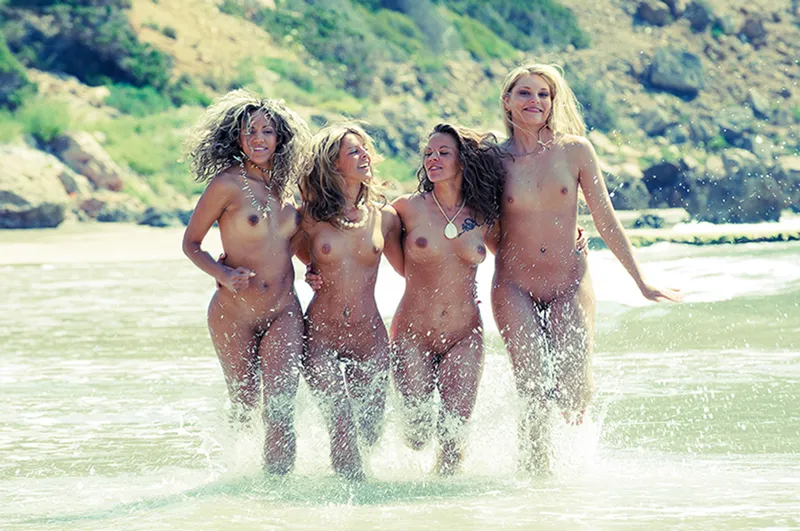
(Photo © 2008: Jens Brüggemann - www.jensbrueggemann.de)
Epilogue
You can only learn photography by taking photos. In this tutorial series, I have given you a few tips that will certainly be helpful for successful model photography. But now it's time to put what you've "learned" into practice so that, firstly, it stays in your head for the long term and, secondly, you can take really great, extraordinary model photos. After all, you can only take photos when you have great photos to show for it; theory alone does not make a master.
When you take photos in the future, always look at the results on your monitor afterwards. Think about what you did wrong. And get annoyed about the silly mistakes. But even these will help you, because you will learn from them in the end! (The more stupid the mistake, the more likely it is that you will never make it again!)
But also give yourself a mental pat on the back when you take a particularly nice photo! This is also part of developing yourself further. Being annoyed about your mistakes, but also being proud of your learning progress.
I wish you "good light" at all times and great, committed models!
Jens Brüggemann
